How to set up a new camera
From charging the battery to image quality settings, here's everything you need to know
The best camera deals, reviews, product advice, and unmissable photography news, direct to your inbox!
You are now subscribed
Your newsletter sign-up was successful
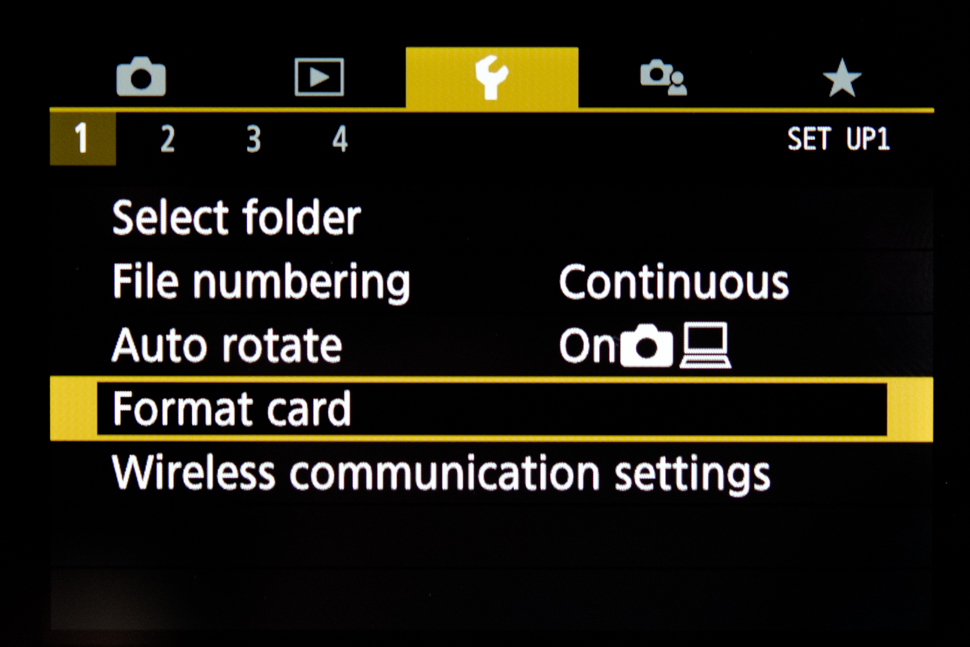
6. Format the memory card

If your camera hasn't already asked you to format the memory card, now is a good time to do this.
This is effectively a handshake between your camera and the memory card, and it will make sure that your card has all the right folders used to store all images and videos.
This will also clear away any information on the memory card itself. If you do have anything here, make sure that it's saved somewhere else (assuming you want to keep it).
If you get an error message at some point when doing this, it’s possible that the small tab on the memory card that was discussed in Step 2 has moved down. This prevents your camera from recording any images to, or deleting any images from, the card.
If you get such a message, remove the card from the camera and check this, moving the tab back up if you need to, before gently re-inserting it. If the error persist, you may need to use a different memory card.
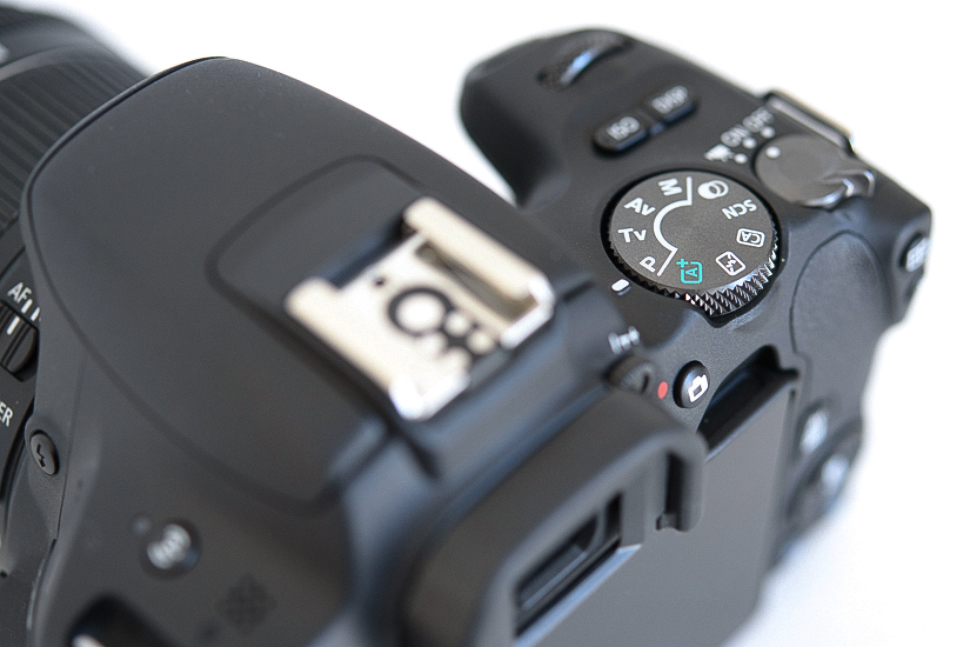
7. Turn the mode dial to the right setting

Now find your camera’s mode dial. This is the small wheel that’s usually found on the top of the camera, which bears letters such as P and M, and often icons too.
The best camera deals, reviews, product advice, and unmissable photography news, direct to your inbox!
Some cameras don't have these mode dials, and some have them inside the menu system, but most cameras that accept different lenses should have a physical dial somewhere on their body.
If you’re a complete beginner and want the camera to do all the work, you can set this to Auto (or ‘A’ if Auto isn’t there, but not ‘Av’). If you want to take a little more control, switch it to the P setting, which stands for Program. This gives you a few more options over your camera's settings and image quality compared with the Auto setting.
Feeling confident? If you want to shoot in one of the other modes, turn to these now. Av (or something just A) stands for Aperture Priority, and this lets you control the aperture of your lens. Tv (or S) stands for Shutter Priority, and this lets you control the shutter speed. M stands for Manual, and this lets you control both. Don't feel you need to use any of these yet – you can move onto these once you've got to grips with everything else.
8. Select image quality and size

It's likely that your camera's screen is sensitive to touch, much like a smartphone or tablet display. This can be used to set the focusing point and zoom into images, but if it's not working at default you may need to enable this through the menu system. Alternatively, there may be a small icon of a hand or finger on your camera's display, which may provide quick access to this option.
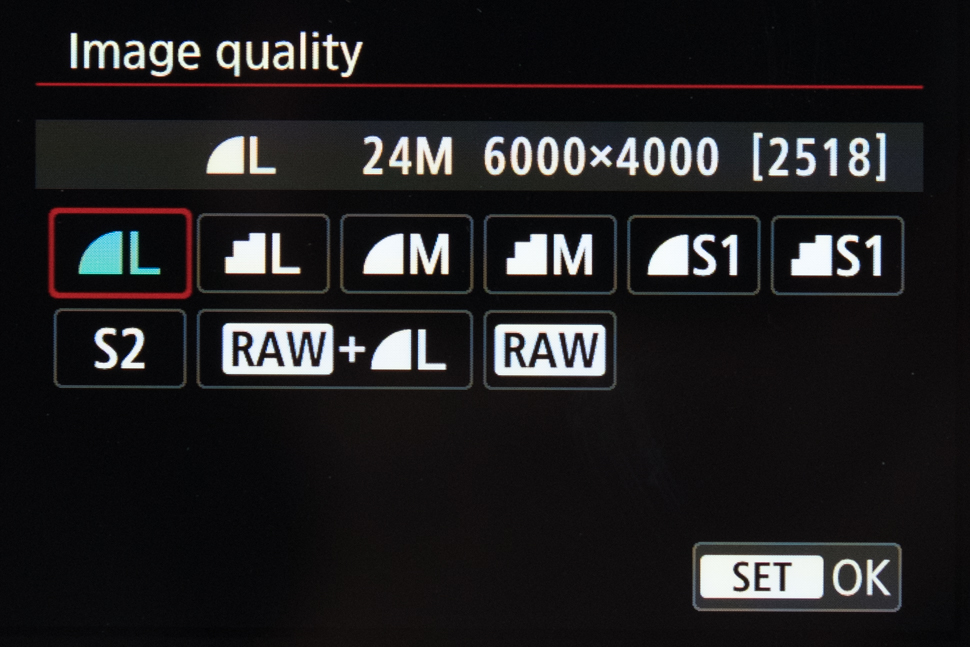
Now select the image quality and size of your images. The terminology might be different on your camera, but there will generally be three things for you to decide at this point.
The first is whether you will capture images in Raw or JPEG formats. If you’re unsure, stick to JPEG, as this will give you images you can use straight away.
Raw files are great once you get a little more confident, but don’t feel like you need to use these just yet. If it doesn't say JPEG anywhere (such as in the above example), the JPEG options will generally just be any option that isn't marked Raw.
The next thing is the size. Your camera may have options marked Large, Medium or Small, or just L, M and S. As a general rule, you should go for the Large option, as this will give you plenty of freedom with regards to what you can do with your images later.
Finally, there’s the quality. This lets you choose the level of compression applied to images, and you should really go for the best-quality option here. You won't be able to fit as many images onto your card as the lower-quality settings, but there’s no point in spending a lot of money on a camera if you’re not going to get the best out of it!
Pick the highest-quality option, usually marked Extra Fine, Fine or Best. On Canon cameras, this is the icon with smooth quarter circle, rather than the one with stepped edges, and this will usually be bundled with the Large, Medium or Small size option in one setting. On the Canon camera in the image above, we’ve gone for the L option and the smooth edges. This will give us the best quality and size for JPEGs.
9. Select the right metering, white balance and ISO settings

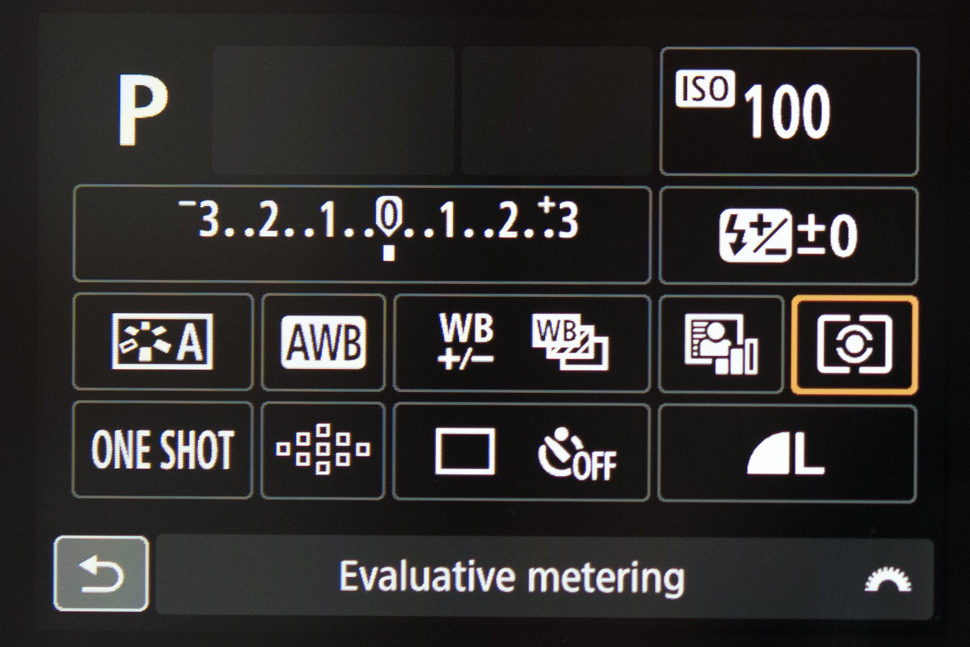
Most cameras are designed with screens that round up commonly used options, ones that you may want to change as you're shooting. On some cameras this pops up when you press a button marked Q. On others, it's an Fn or Info button. Either way, it’s here where things like metering, white balance and ISO are often found.
Make sure your metering option is set to the default setting, usually called Evaluative or Matrix. This will ensure that everyday scenes come out with the right balance between darker parts and lighter parts, so that your images don't look too dark or washed out.
The next step is to set your white balance to Auto. White balance tries to make sure that colours and neutral areas are reproduced accurately, and with no warm or cool colour casts.
Most cameras do a reasonably good job to get this right on the Auto setting, but remember where this is as you may want to change to a different setting if things don't look right (particularly under artificial lights such as fluorescent bulbs).
Finally, find the ISO setting. If you’re out shooting on a sunny day, you may want to keep this to ISO 100 or ISO 200. This will help you to get nice, clean images. When shooting indoors, or when it’s a little darker outside, you may need to use a higher ISO setting in order to keep your images sharp. If you’re unsure, pop it to Auto and the camera will work out what’s best.
And that's it!
The former editor of Digital Camera World, "Matt G" has spent the bulk of his career working in or reporting on the photographic industry. For two and a half years he worked in the trade side of the business with Jessops and Wex, serving as content marketing manager for the latter.
Switching streams he also spent five years as a journalist, where he served as technical writer and technical editor for What Digital Camera before joining DCW, taking on assignments as a freelance writer and photographer in his own right. He currently works for SmartFrame, a specialist in image-streaming technology and protection.

