
The best camera deals, reviews, product advice, and unmissable photography news, direct to your inbox!
You are now subscribed
Your newsletter sign-up was successful
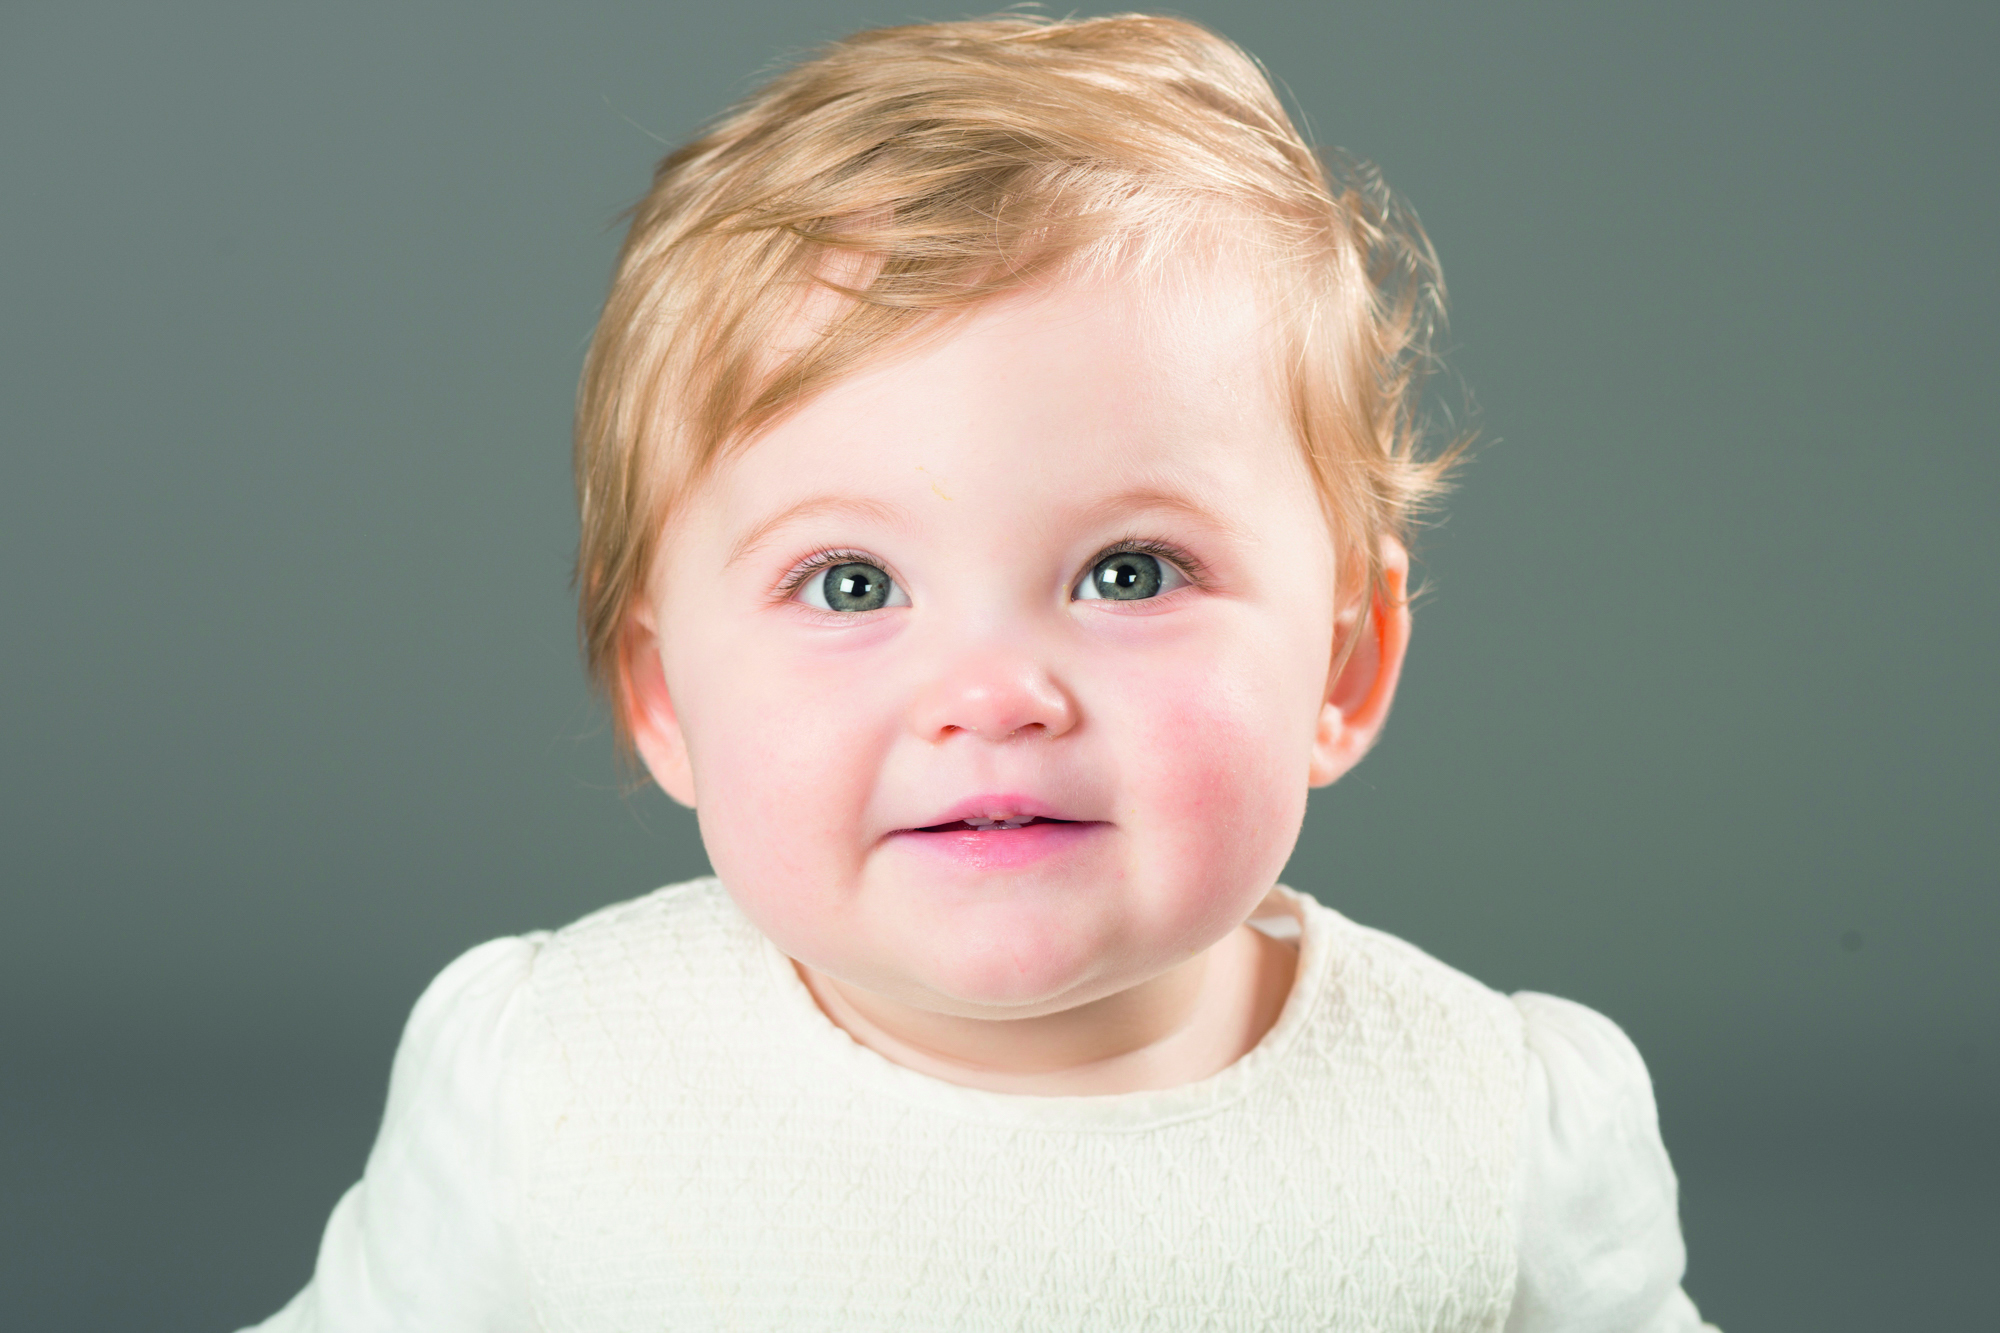
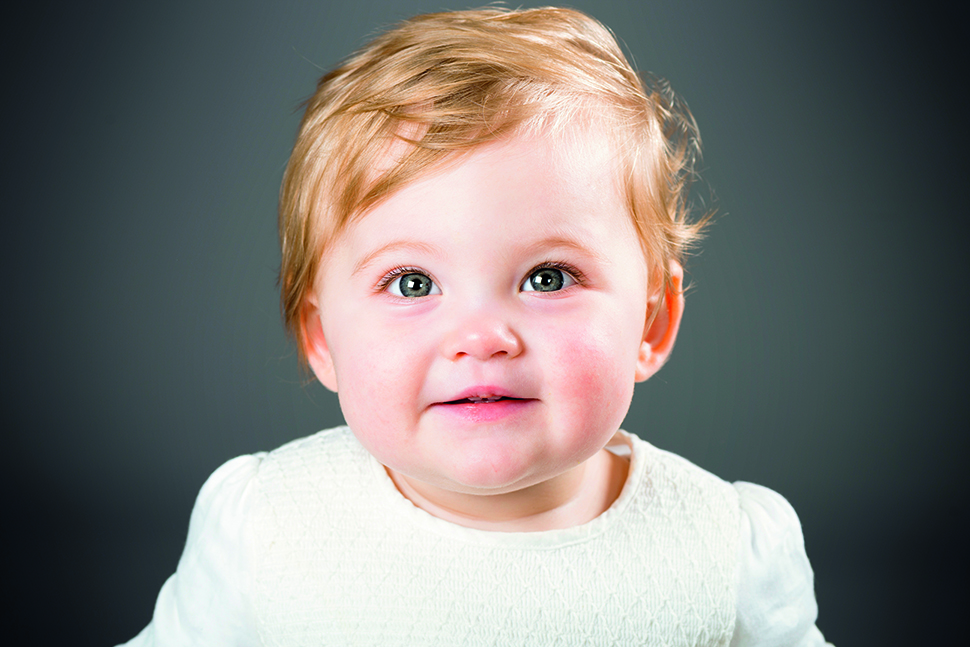
In this tutorial, we’ll explain a few key portrait edits. Most, if not all of these techniques can be used on every portrait you shoot.
The mission: Boost your portraits with Photoshop Elements
Time: 15 minutes
Skill level: Beginner
Kit needed: Photoshop Elements
We’ll begin here with a quick tidy over the face to tone down any funky marks. With little ones like this we’re more likely to find bogeys and food than pimples and wrinkles, but the same principles apply whatever the age of our subject.
Once done, we’ll add a vignette to the edges of the photo. It’s an effect that works well with portraits; by darkening the edges we draw the eye inwards, towards the more important areas, which in this case is the face.
Article continues belowRead more: Three lenses every portrait photographer should consider
We’ll also make a few selective enhancements to the eyes, first to lighten them slightly and add contrast, then to sharpen the lashes. With any portrait, it’s worth spending time to perfect the eyes as they’re usually the first thing the viewer looks at.
Read more: How to capture a driver's portrait
Each edit we make here sits on it’s own layer in the Layers Panel. This leaves the door open to go back and tweak something later, which is helpful with portraits as there’s always an initial temptation to be over-zealous with enhancements. By working non-destructively like this, we can go back and tone things down later for natural results.
The best camera deals, reviews, product advice, and unmissable photography news, direct to your inbox!
• Get more photoshoot ideas
Before
After
Here's how to brush up your portraits in six simple steps.
Step-by-step guide: Portrait editing tips
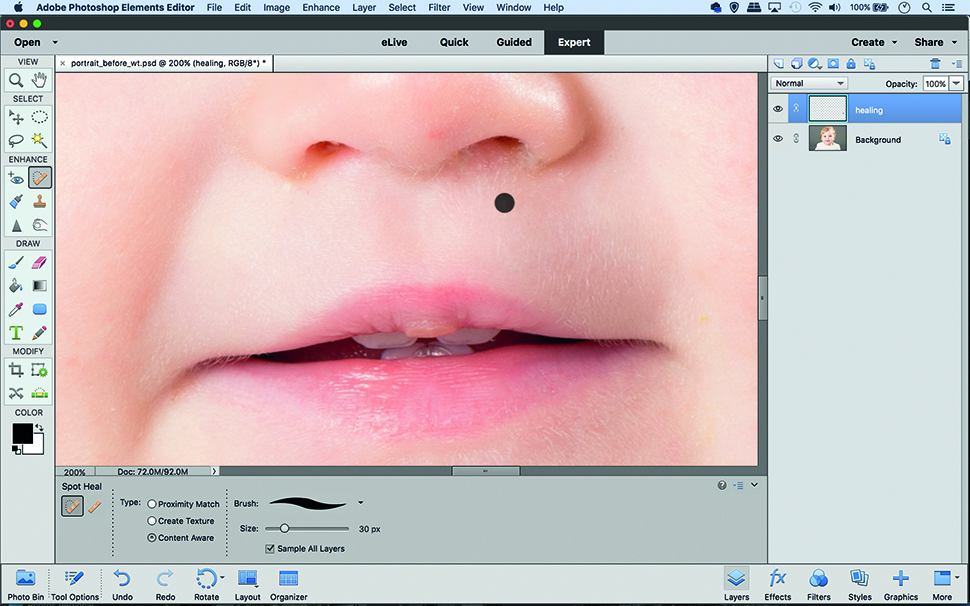
1. Tidy up the face
Open the portrait and click Expert mode at the top of the Elements display. Use the Spot Healing Brush tool and check ‘Sample All Layers’ in the tool options at the bottom. Go to the Layers Panel and click the New Layer. Paint with the tool to remove marks and spots.
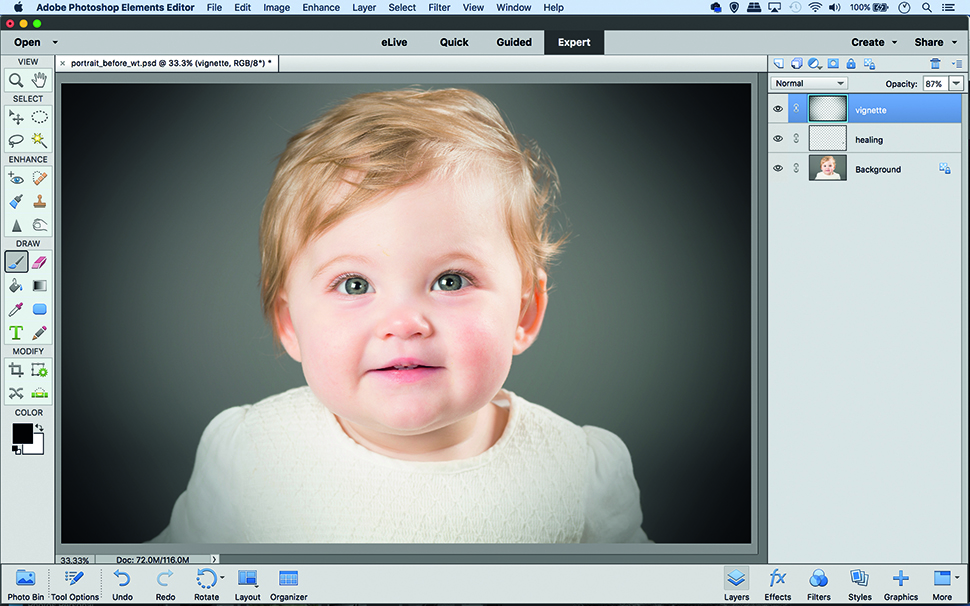
2. Make a vignette
Make a new layer then grab the Elliptical Marquee tool. Hold Alt and drag a circular selection from the centre. Go to Select>Inverse, then Edit>Fill Selection and click Use: Black. Hit Cmd/Ctrl+D to deselect. Go to Filter>Blur>Gaussian Blur – use lots to blur the edges.
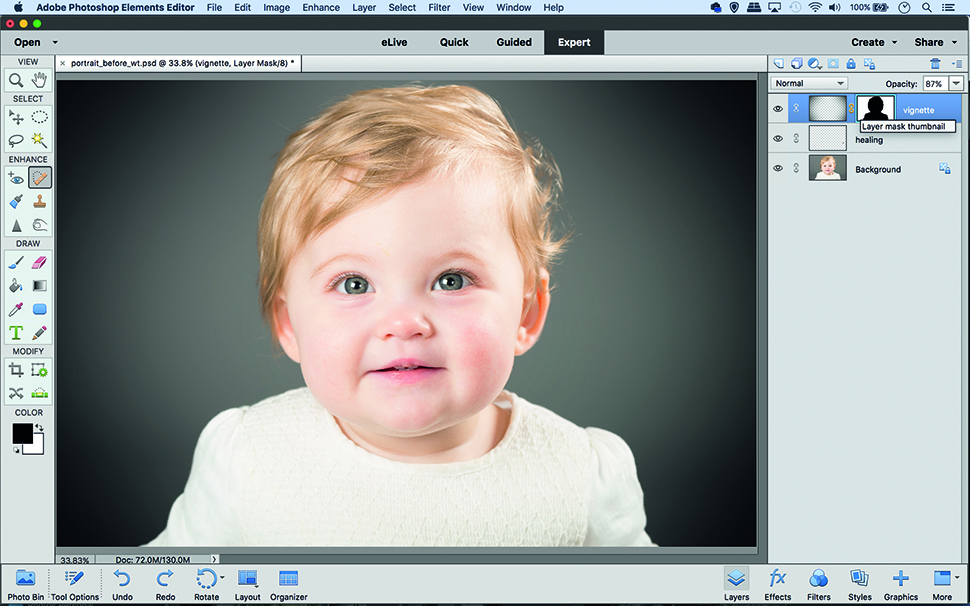
3. Add a mask
Highlight the bottom layer and grab the Magic Wand tool. Shift-click over the background to select it. Click the Refine Edge button in the tool options. Increase Radius to improve the edge then hit OK. Highlight the top layer then click the Add Layer Mask icon.
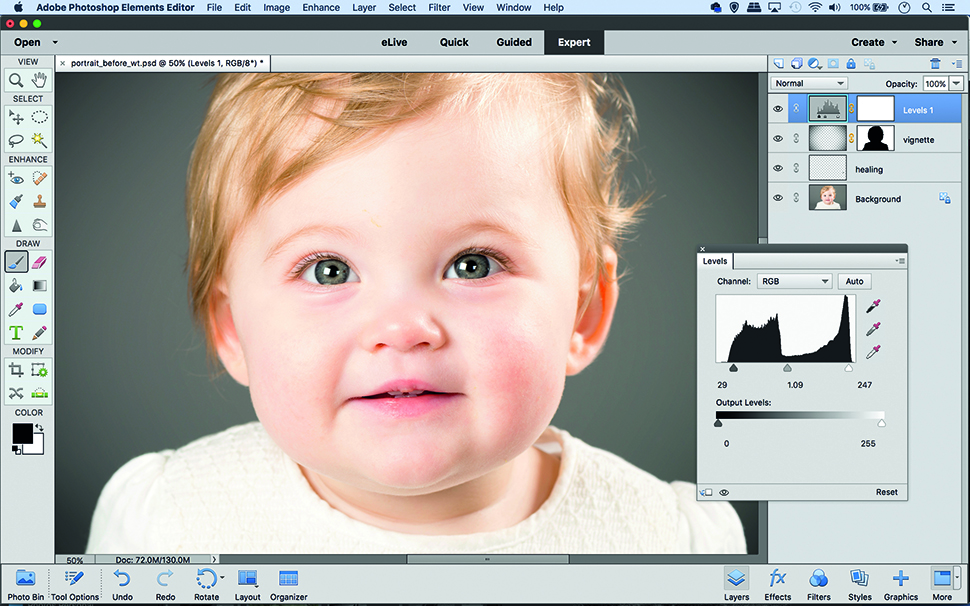
4. Boost the tones
Click the Create Adjustment Layer icon in the Layers Panel and choose Levels. Drag the black and white points inwards to up contrast and use Midpoint slider to fix brightness. Next click Create Adjustment Layer and choose Hue/Saturation. Up Saturation to +8.
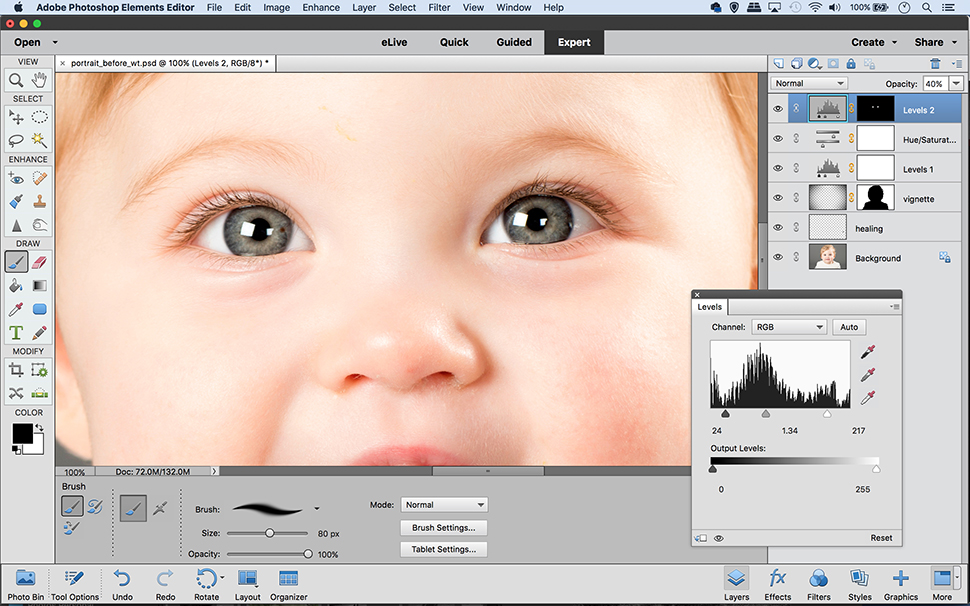
5. Enhance the eyes
Zoom in close to the eyes. Add another Levels layer and drag the points inwards to increase contrast, while judging its effects. Next, hit Cmd/Ctrl+I to invert the layer’s mask, then grab the Brush tool and paint with white over the eyes to reveal it’s effect.
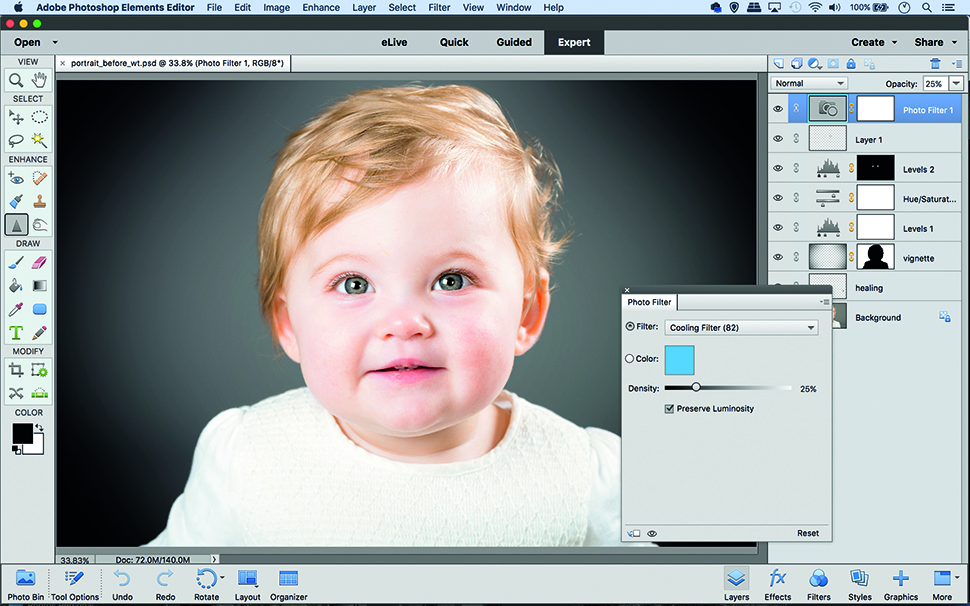
6. Sharpen the lashes
Make a new layer and grab the Sharpen tool. Check ‘Sample All Layers’ then paint the lashes to sharpen them. Finally, we’ll cool the tones. Click the Create Adjustment Layer icon and choose Photo Filter. Add a Cooling filter (82), and drop the opacity to 25%.
Quick tip
There’s no need for skin smoothing with our rosy-cheeked youngster here, but for more mature subjects a little smoothing can be very flattering. Here’s a method that produces natural results.
Begin by duplicating your background layer then go to the Blend Mode settings in the Layers Panel and choose Overlay. Next go to Filter>Other High Pass. Set Radius to about 4 and hit OK. Press Cmd/Ctrl+I. Finally, hold Alt and click the Add Mask icon in the Layers Panel to add a full black mask, then paint with white to reveal the softening effect over the skin.
Read more: 10 top tips for shooting portraits
PhotoPlus: The Canon Magazine is the world’s only 100% Canon-focused title on the newsstand. Launched in 2007, for 14 years it has delivered news, reviews, buying guides, features, inspirational projects and tutorials on cameras, lenses, tripods, gimbals, filters, lighting and all manner of photography equipment.
Aimed squarely at enthusiast photographers who use the Canon DSLR or mirrorless camera systems, all content is tailored to Canon users – so everything from techniques to product tests are tailored to those using the EOS camera system.
Editor Peter Travers brings 14 years of experience as both a journalist and professional photographer, with Technique Editor Dan Mold shoring up the magazine with his 6 years of expertise.

