How to make a cinemagraph
Whether you use Photoshop or a dedicated cinemagraph app, our tutorial shows you how it's done
In terms of what you can do with your images, cinemagraphs are the new kid on the block.
If you haven’t seen one yet, make sure to check out the examples found over the following pages, or have a look on Instagram or Facebook where they are widely used. There's a debate whether these are moving images, videos or GIFs; I can definitely tell you that these are GIFs.
The technique of creating these quirky but interesting shots requires the skills of both photographs and video to make them come to life. In this article I will go through how you can make a cinemagraph of your own that will no doubt confuse some people but wow others.
Article continues belowDefinition: What is a cinemagraph?
So what is a cinemagraph? Well, in a nutshell, it’s a still image with some kind of moving element within it. Like this:
This is the cinemagraph I'll be showing you how to make on the following page.
Ideally, the moving part has motion that starts and ends at the same place, which means you can loop the GIF for as long as you like.
For example, it could be a never-ending wisp of steam coming off a hot cup of coffee, or the flame of a candle flickering.
The best camera deals, reviews, product advice, and unmissable photography news, direct to your inbox!
The best thing to do for this technique is to keep things simple: don’t overcomplicate what you’re shooting as you’ll regret it when it comes to editing.
Equipment
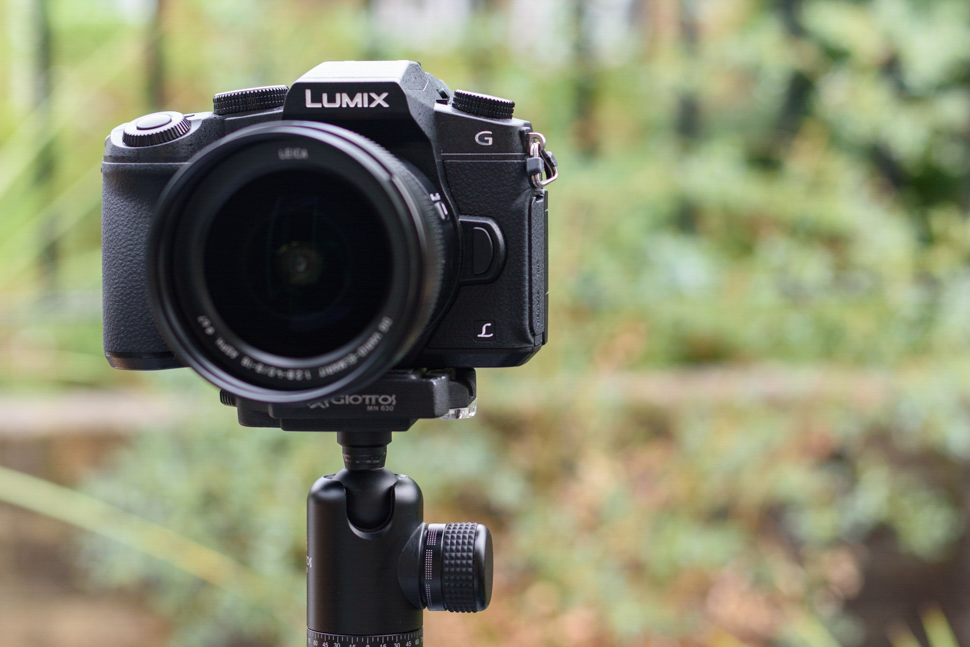
The great thing about creating cinemagraphs is that you don’t need the newest and fanciest camera. All you need is a camera that records video and a good tripod.
Some of best cinemagraphs I’ve seen were created on an iPhone, and these were edited on the same smartphone using an app made by Flixel. I’ll go into this in more detail later on.
Capturing your subject
Once you’ve found something you would like to film and turn into a cinemagraph, set up your camera on a tripod and get your composition right.
I set up my shots just like any other video I would record, as this is what you now need to do.
I record the motion for around 10-15 seconds, and if I can get a start point and end point during the shot that are exactly the same, this makes things easier for creating an endless loop later on.
How to create a cinemagraph using Photoshop
There are multiple ways to edit a cinemagraph, but for most people, the easiest method would be to use Adobe Photoshop – software they likely already use.
Before I bring the clip into Photoshop, I will take it into Premiere Pro to edit and grade the shot to my liking, but you may not need to do this depending on how you've captured it. The following step-by-step process assumes you're starting with a clip that needs no grading.
Step 1
The first thing you need to do is to open the video in Photoshop, a process that will automatically change the layout for the purpose of editing video.
You then want to find start and end points in the clip that are very similar to each other, as you want to have an infinite loop.
You can do this by either dragging each side of clip to make it smaller or by using the scissor icon to cut the clip.
Step 2
Just above the video timeline to the right-hand-side, you should see a small icon that will open up a menu of options when clicked. Click that and make sure 'Loop Playback' is checked – this will show you how the clip will look when played continuously.
Step 3
Now, in the panel on the right-hand-side of the screen, drag the group that contains that layer (not just the layer itself) down to the 'Create a new layer' icon.
Step 4
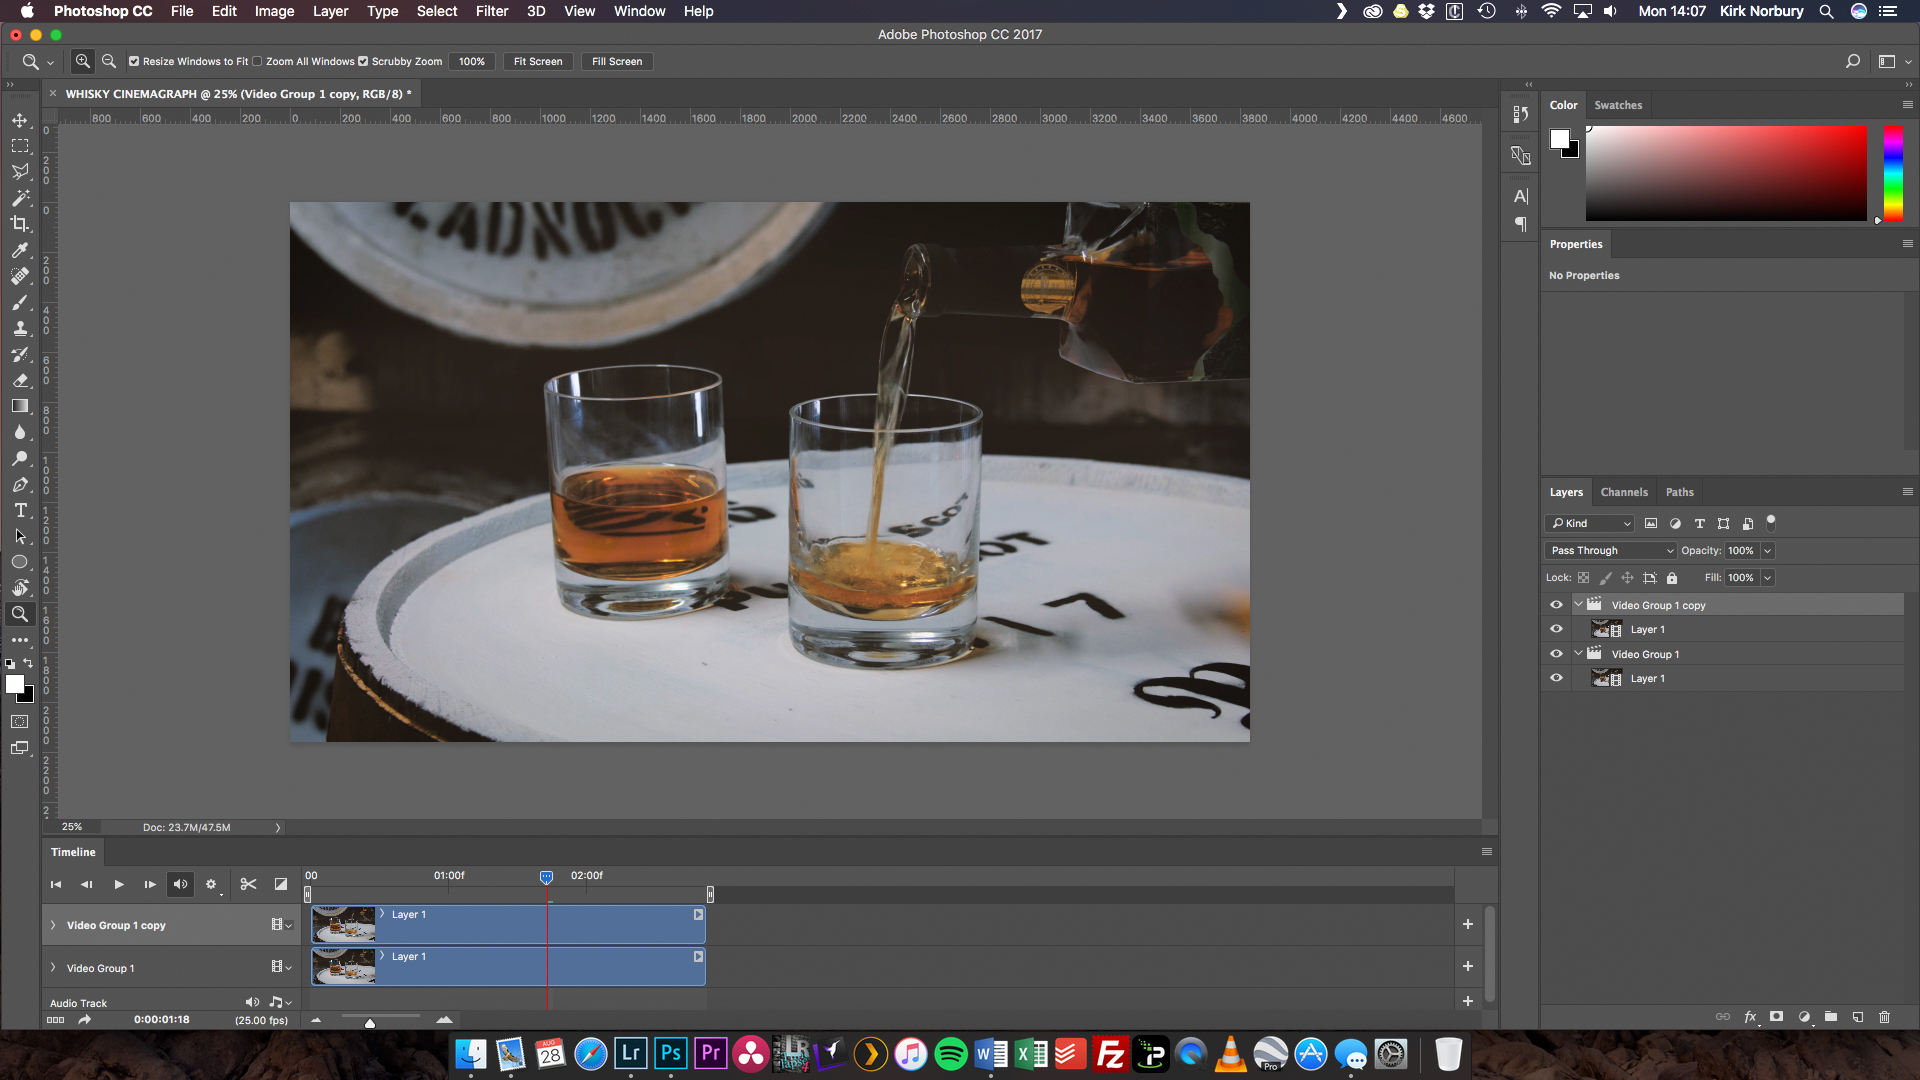
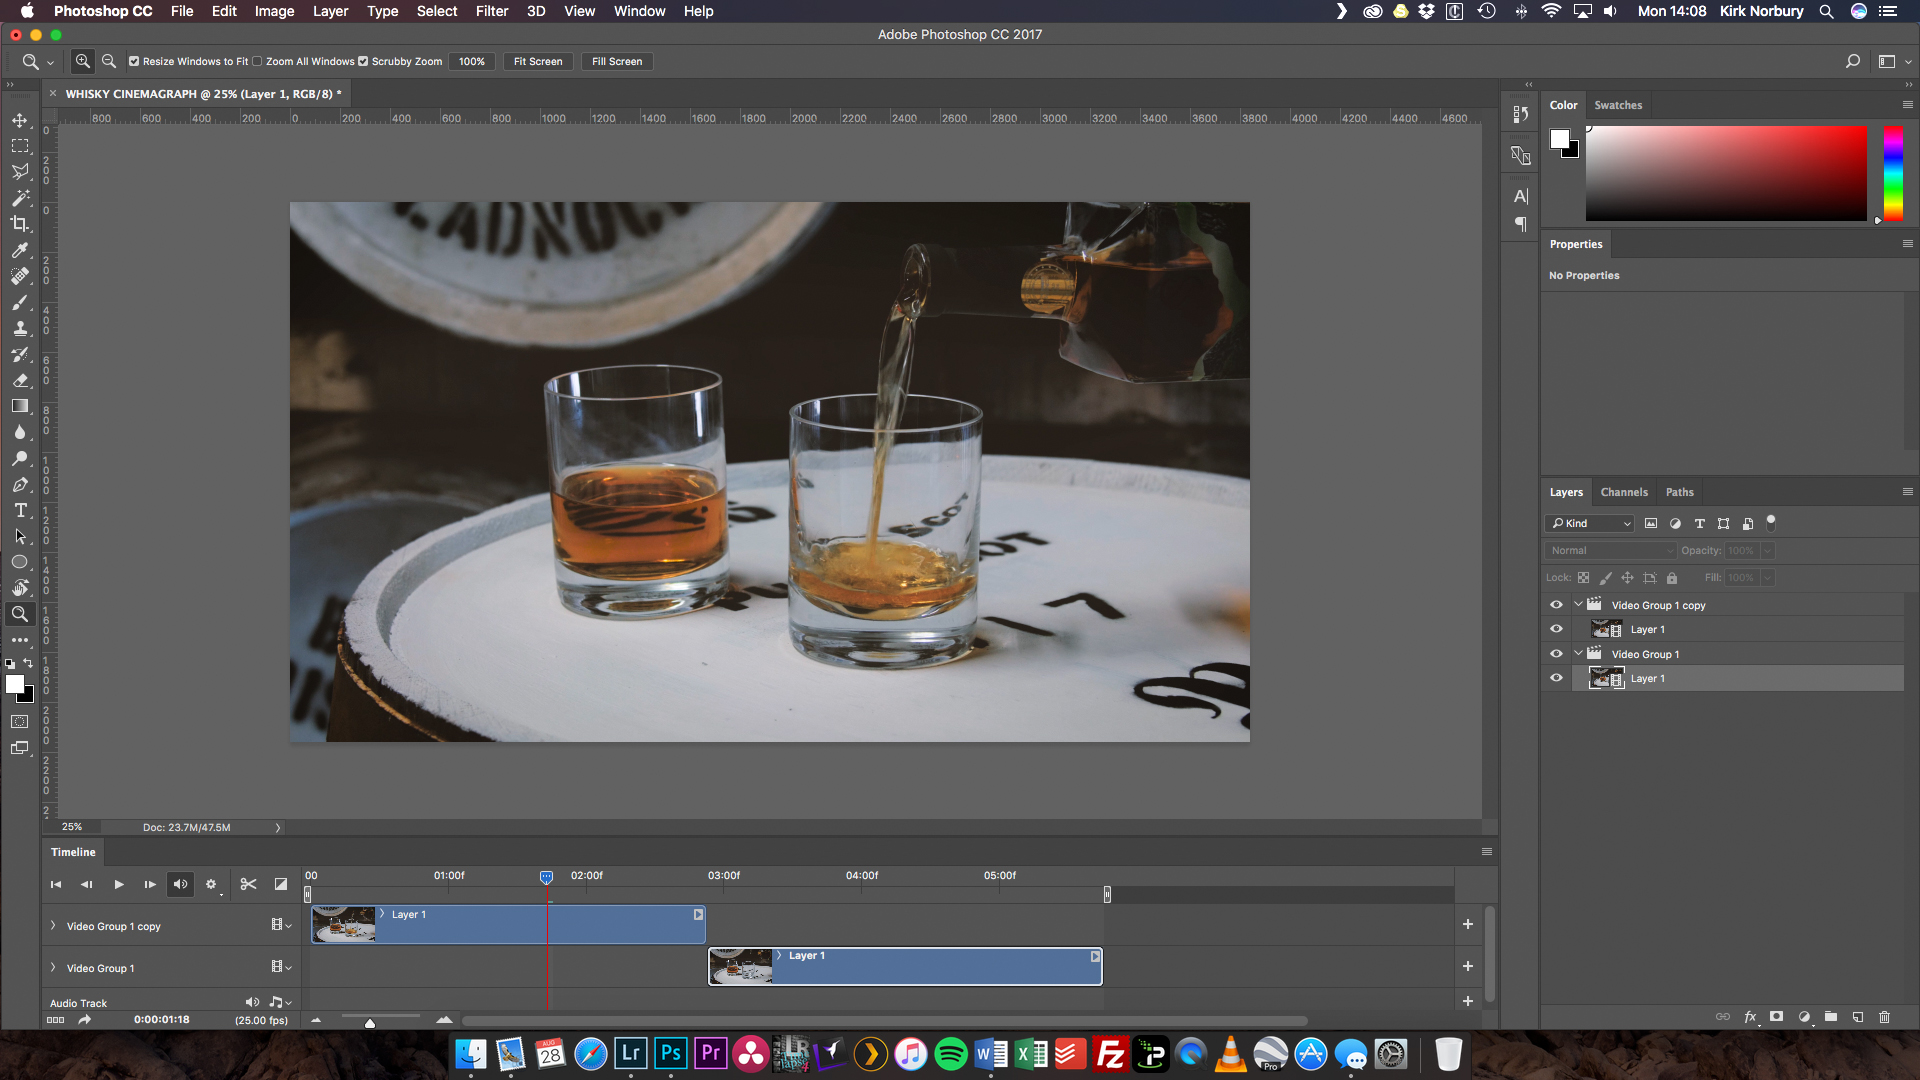
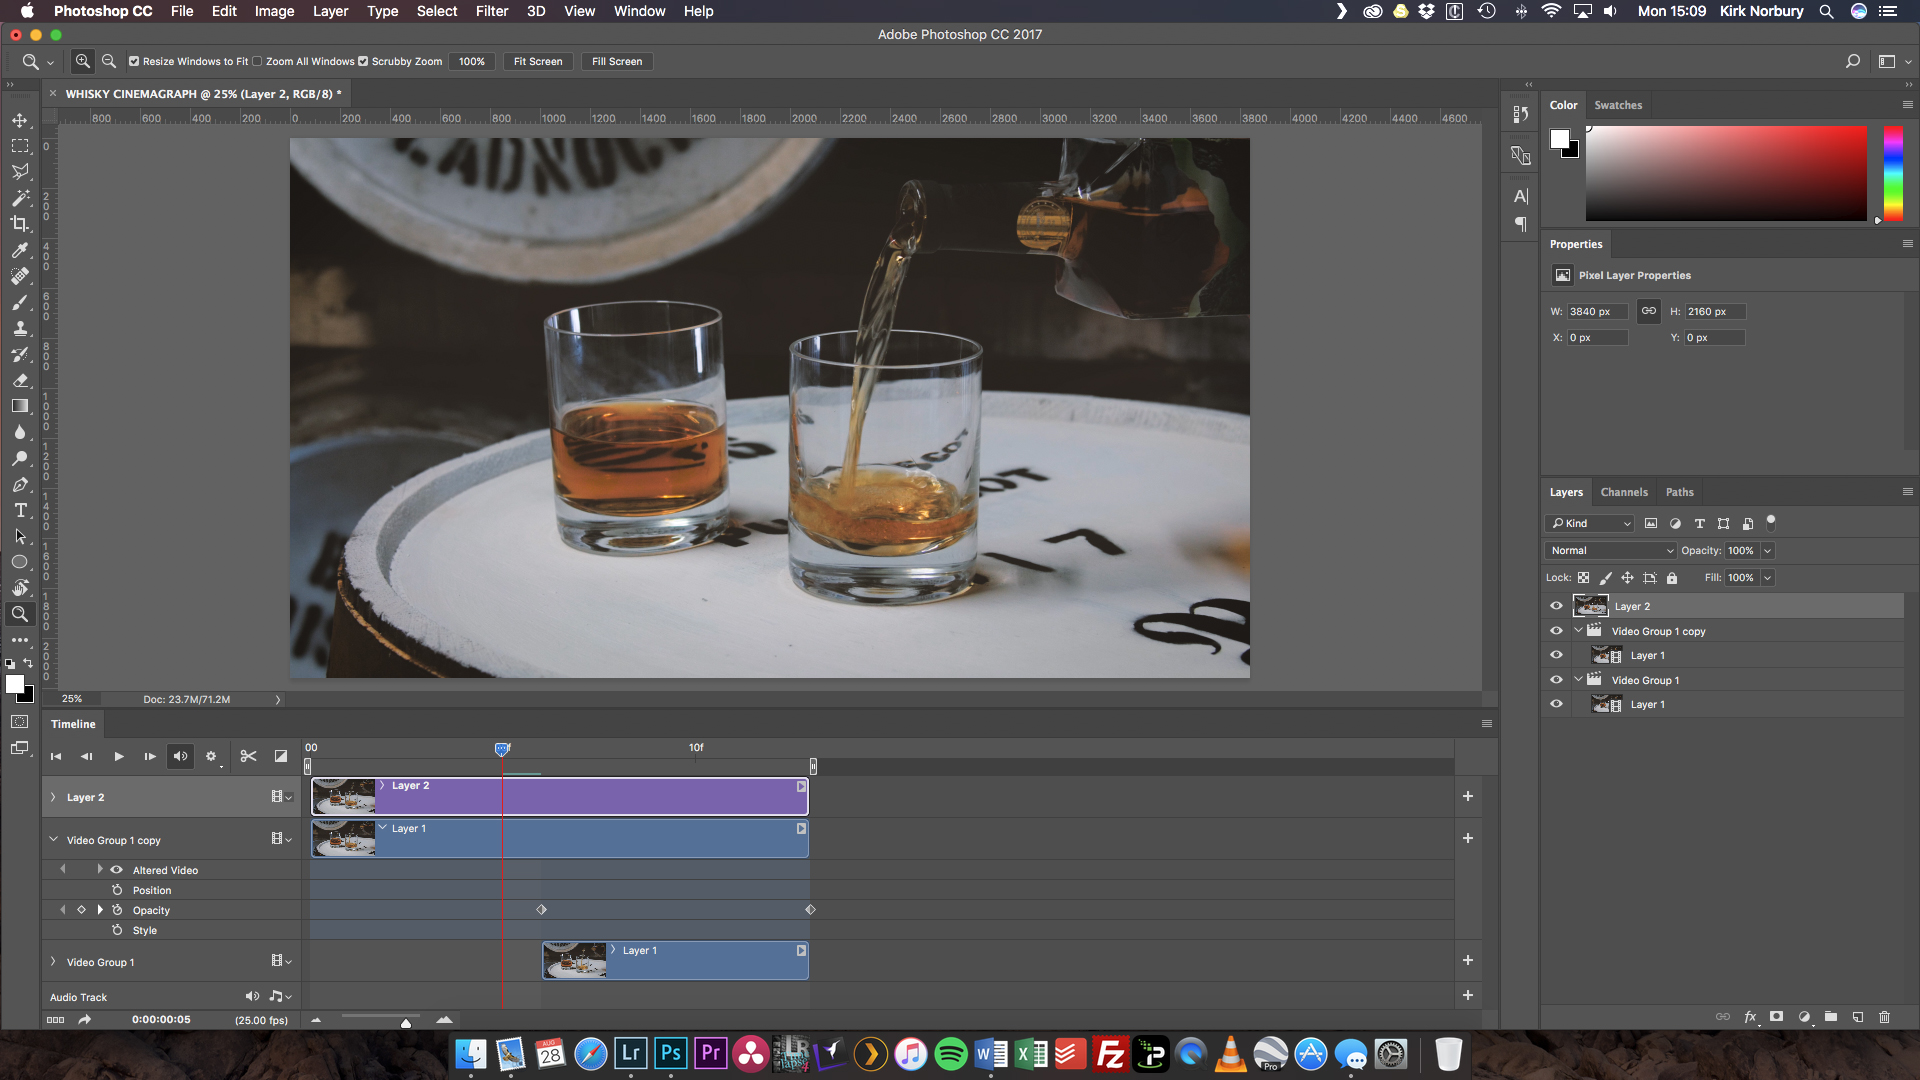
There will now be two clips on the same timeline that’ll be exactly the same. Drag the bottom clip to right to where the top clip ends so that one follows the other (see below).
Step 5
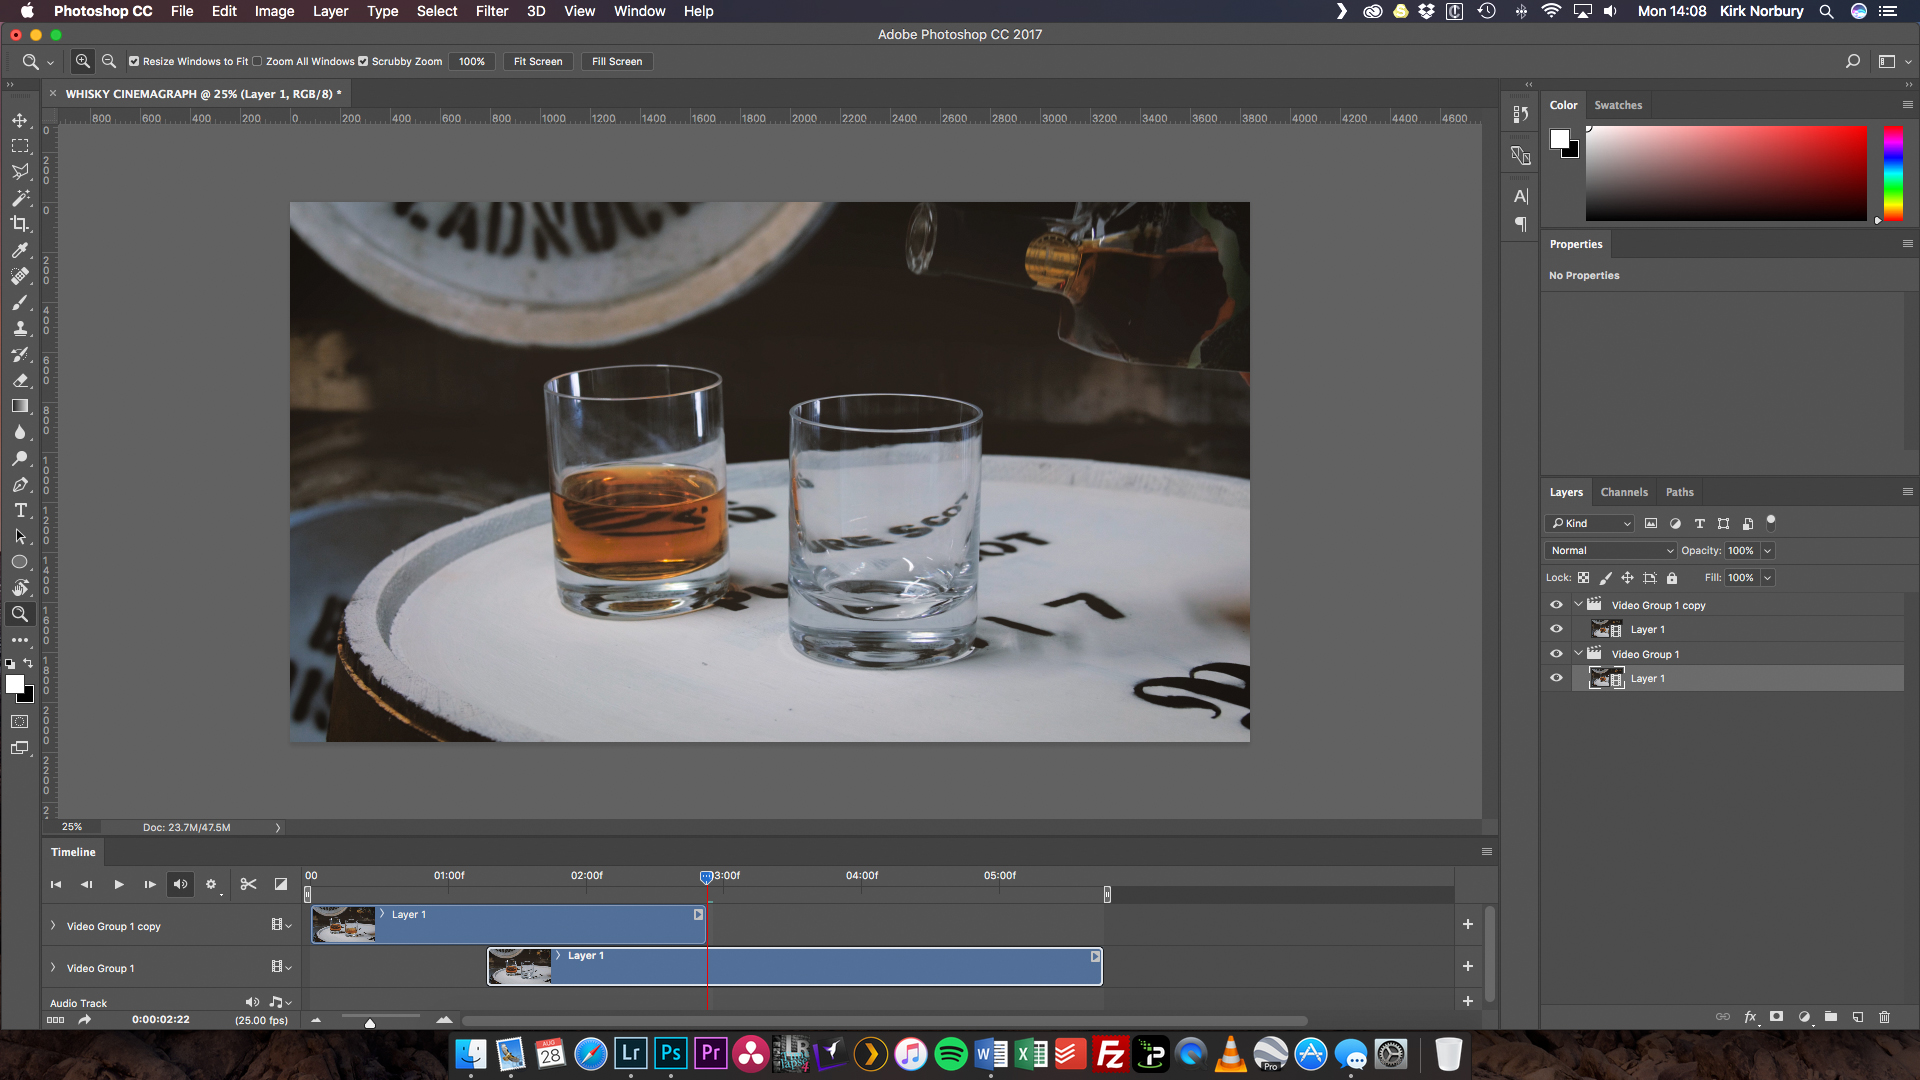
Place the Play Head (the line you use to scrub through the clip) where the two clips meet by moving the blue marker across.
Select the bottom clip, before clicking and dragging it from the left side, which will then expand it. Pull it about half way underneath the top clip. Then, click and drag the right side of the clip until it meets the play head at the end of the top clip. I know this sounds confusing but it will mean the start and end of the clip will be the same by blending the two together.
Step 6
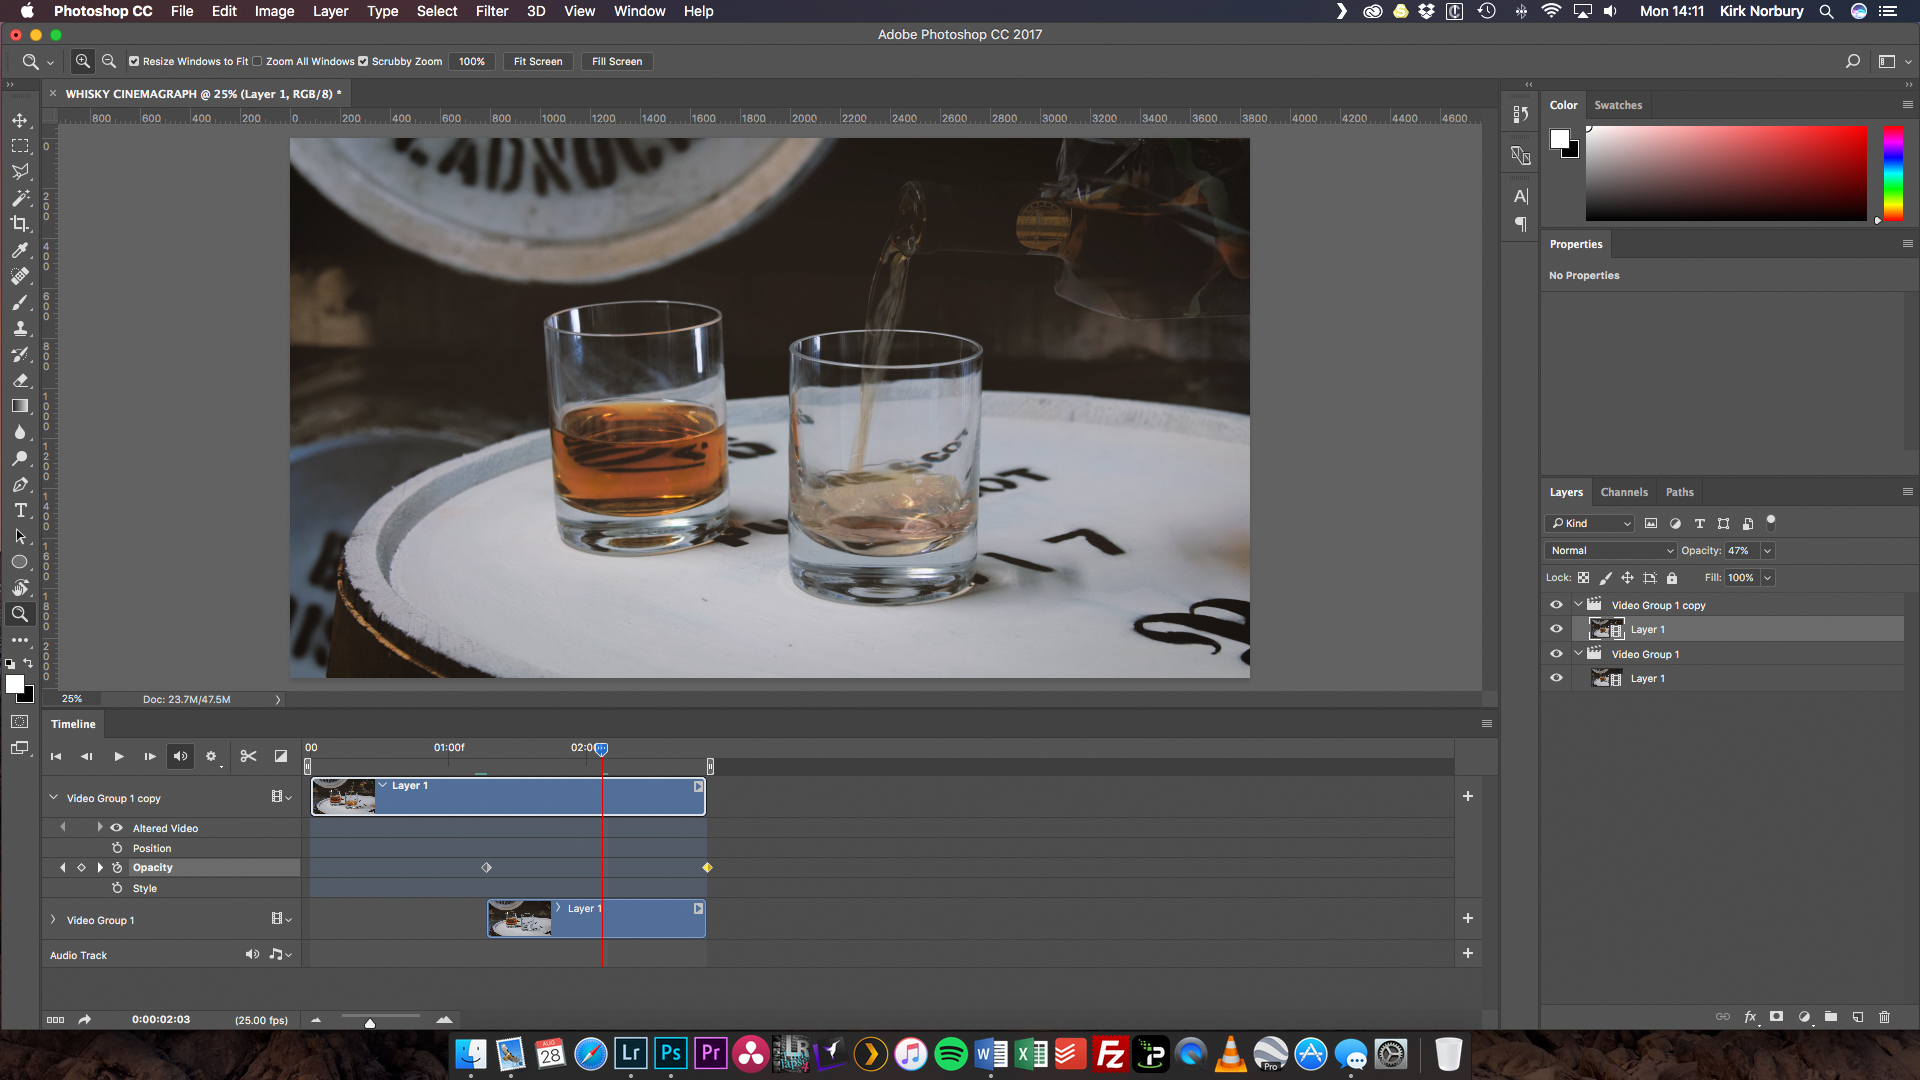
Now we need to blend the two clips together. On the timeline, next to the top clip's name, you will see a little arrow. Once you click this, four adjustment options will drop down.
Step 7
Drag the Play Head to where the bottom clip starts. Click the stopwatch button by Opacity and this will create the first keyframe.
Step 8
Drag the Play Head again about half way along the bottom clip and add another key frame by clicking the diamond shaped button next to the stopwatch. Click onto that keyframe in the timeline (it should turn yellow) then go over to the Layers module and turn the opacity down to 0%.
Now, drag that keyframe to the very end of the clip. What this does is the first keyframe is set to 100% and when you play through the opacity will decrease to 0% resulting in showing the clip below.
Step 9
Next you want to stamp a new visible layer of the still image to be used. Move the play head to somewhere you’d like to take the still image from. Then by pressing Command + Option + Shift + E, this will create a new layer that is solid with no movement. Trim the top layer so it’s the same length as the other clips and make sure to move it to the top of all the layers.
Step 10
Now you need to turn the top layer into a Mask. Do this by selecting the layer on the right-hand-side and click the Layer Mask icon at the bottom of the Layers Module. Make sure the foreground colour is set to black.
Step 11
Now we are going to paint in the areas using the Brush tool the area in which the bottom layers will play though. So, only paint where the motion will be. I like to zoom in quite a bit to make sure I’ve painted precisely where I want the motion to be. Make sure to paint with black to reveal the layers underneath.
Step 12
Zoom out and play the clip to see how it works. If you’re not happy with the mask go in add or erase bits by changing the brush colour to white.
Step 13
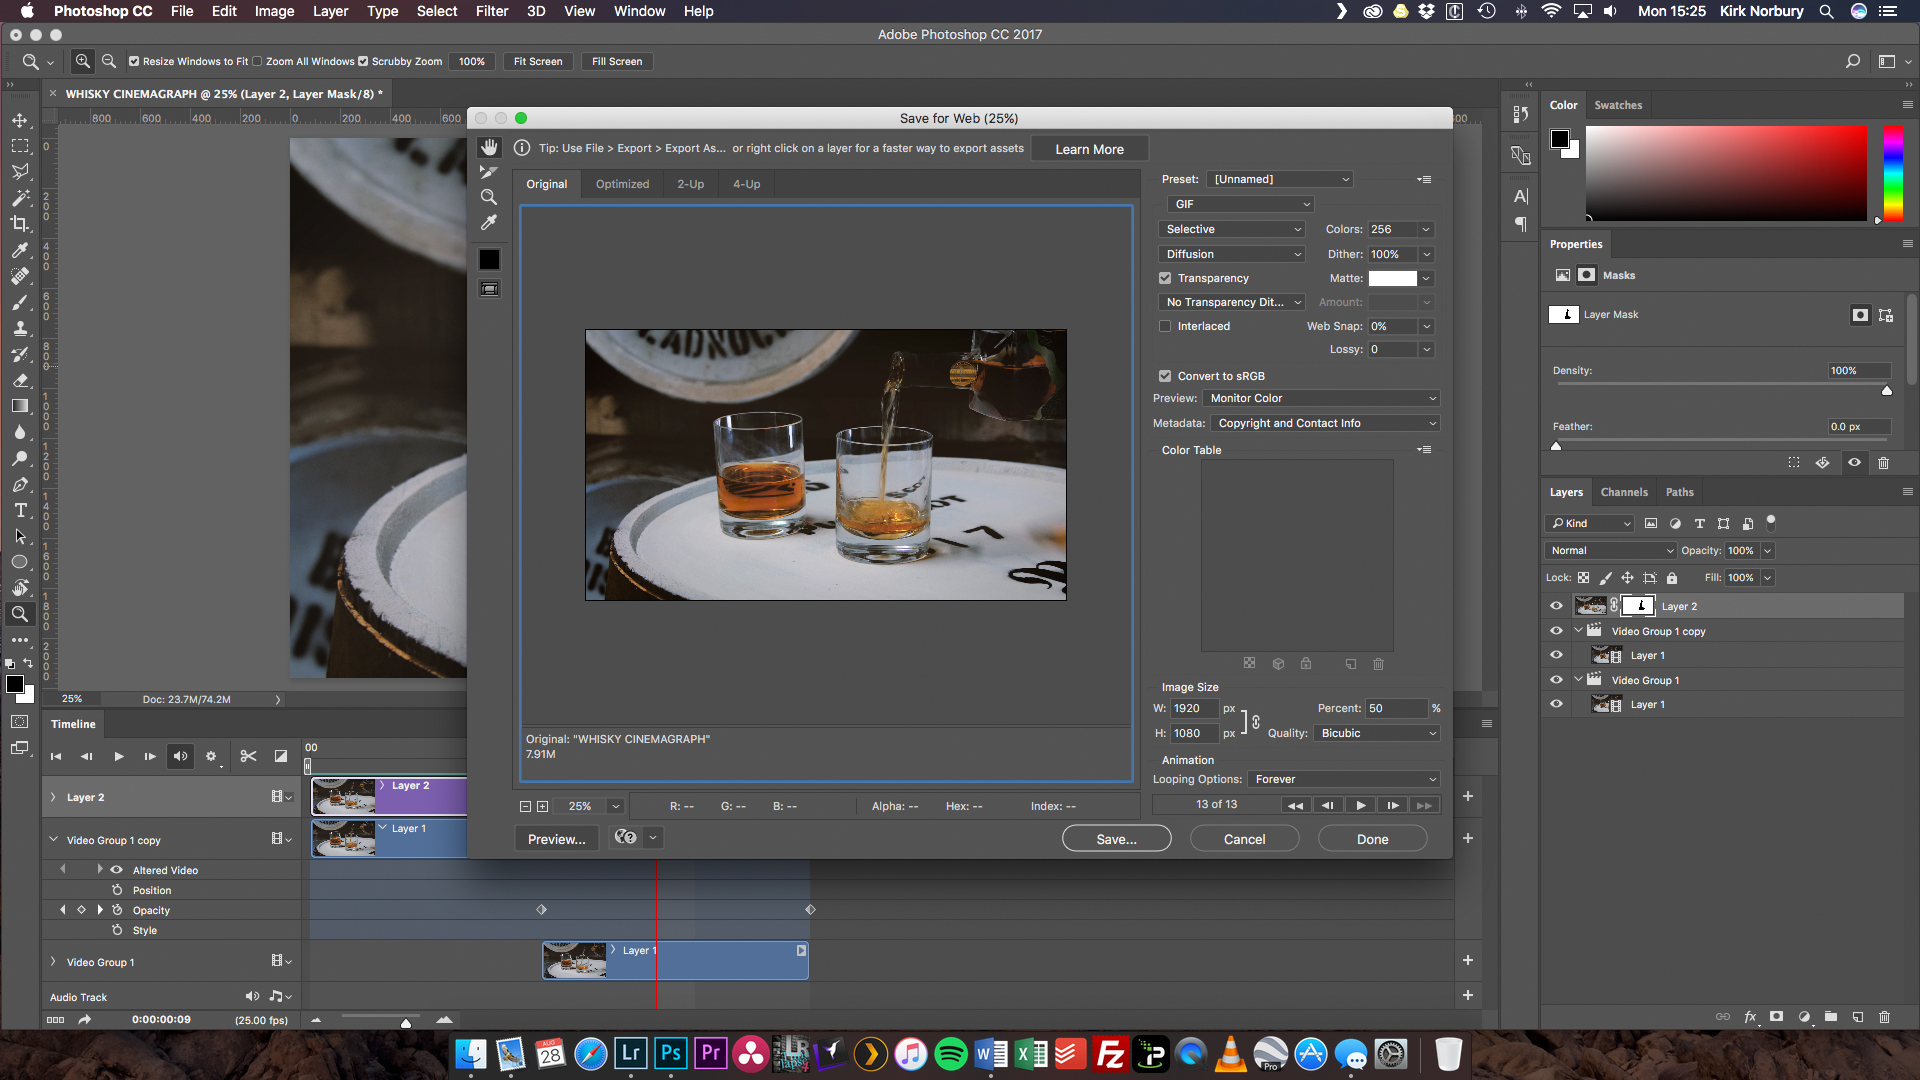
Now you can export your file. Go to File>Export>Save For Web. On the top right you want to make sure the type of file is set to GIF as it is sometimes set to PNG automatically. Make sure Looping Option is set to Forever, click Save and you’re all done!
It may feel like there are a lot of steps to putting a cinemagraph together using Photoshop but once you’ve got used to the method and follow this guide it becomes very easy.
How to make a cinemagraph using Cinemagraph Pro
Cinemagraph Pro is a piece of software available only for Mac & iOS devices, and it also allows you to easily create cinemagraphs. If you prefer to use this over Photoshop, follow the step-by-step guide below.
Cinemagraph Pro for Mac users
Step 1
The process of making your clip is exactly the same as the method mentioned earlier.
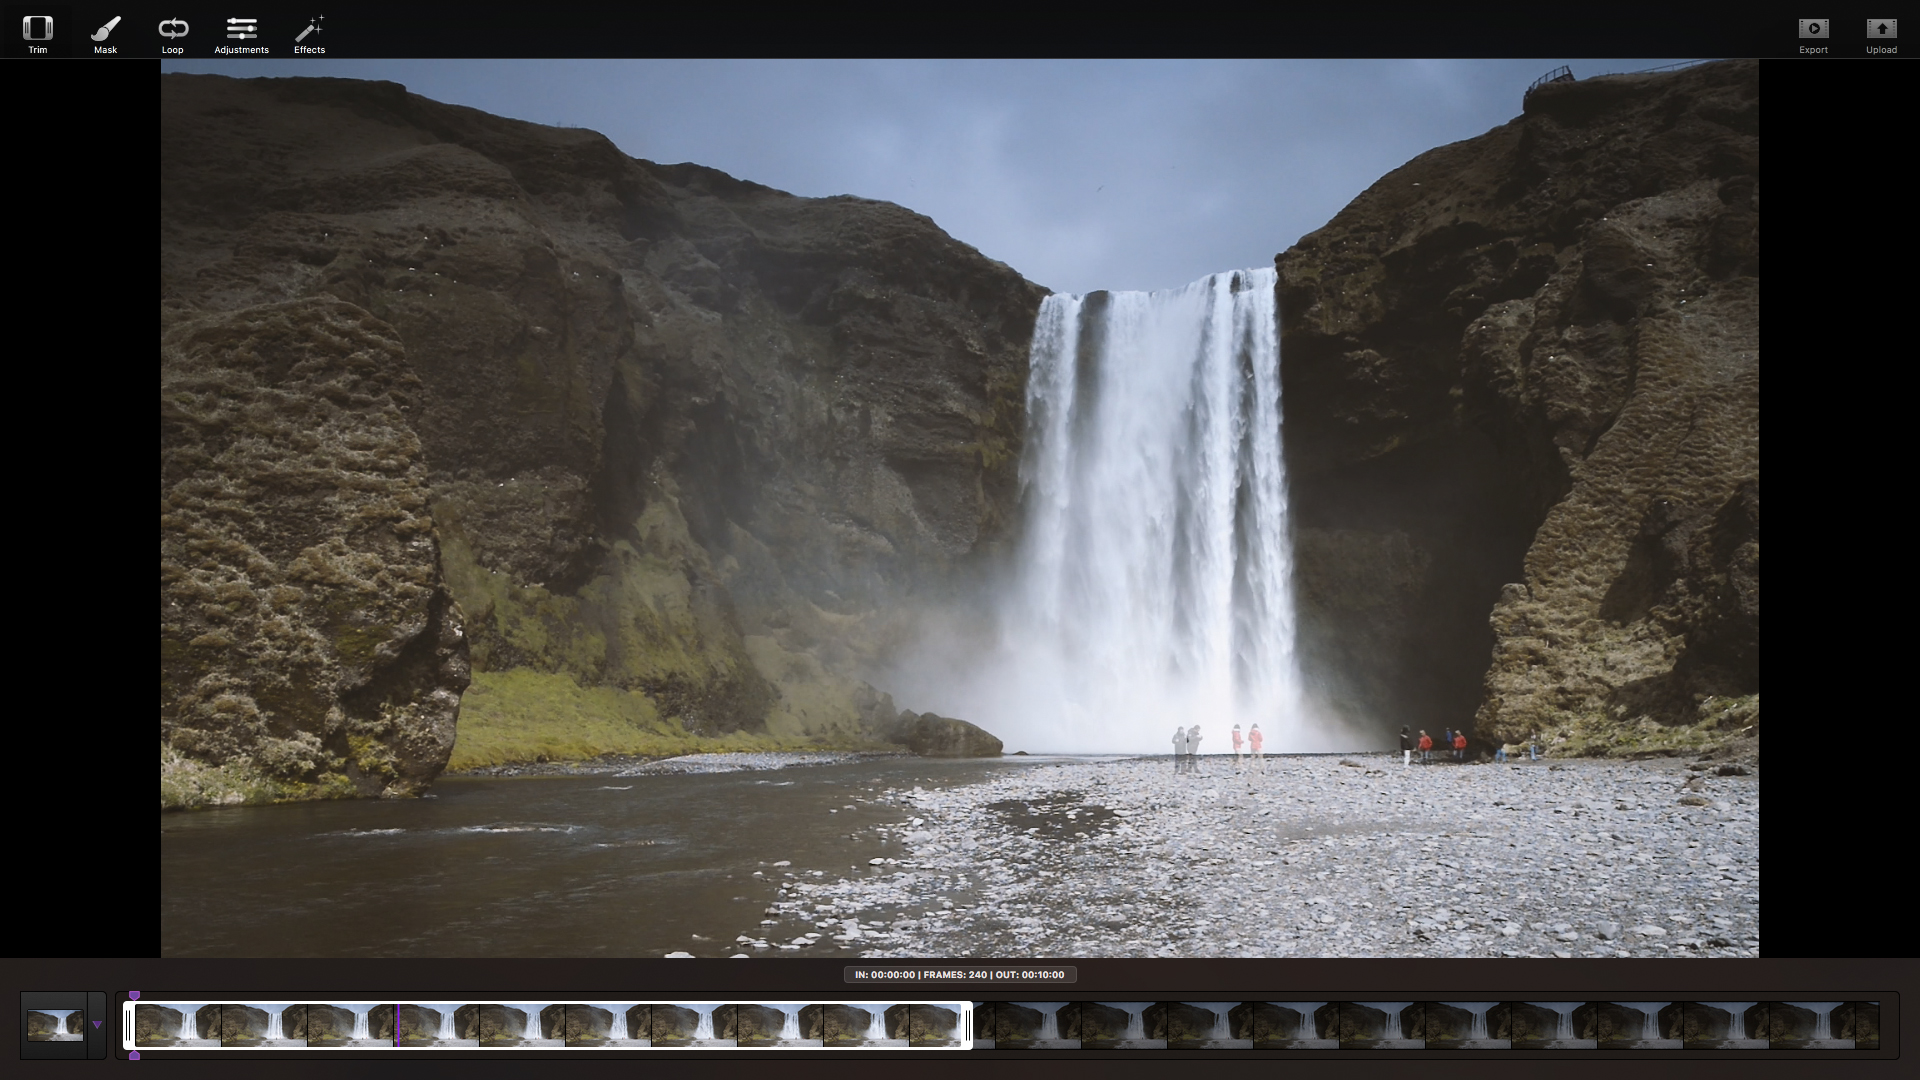
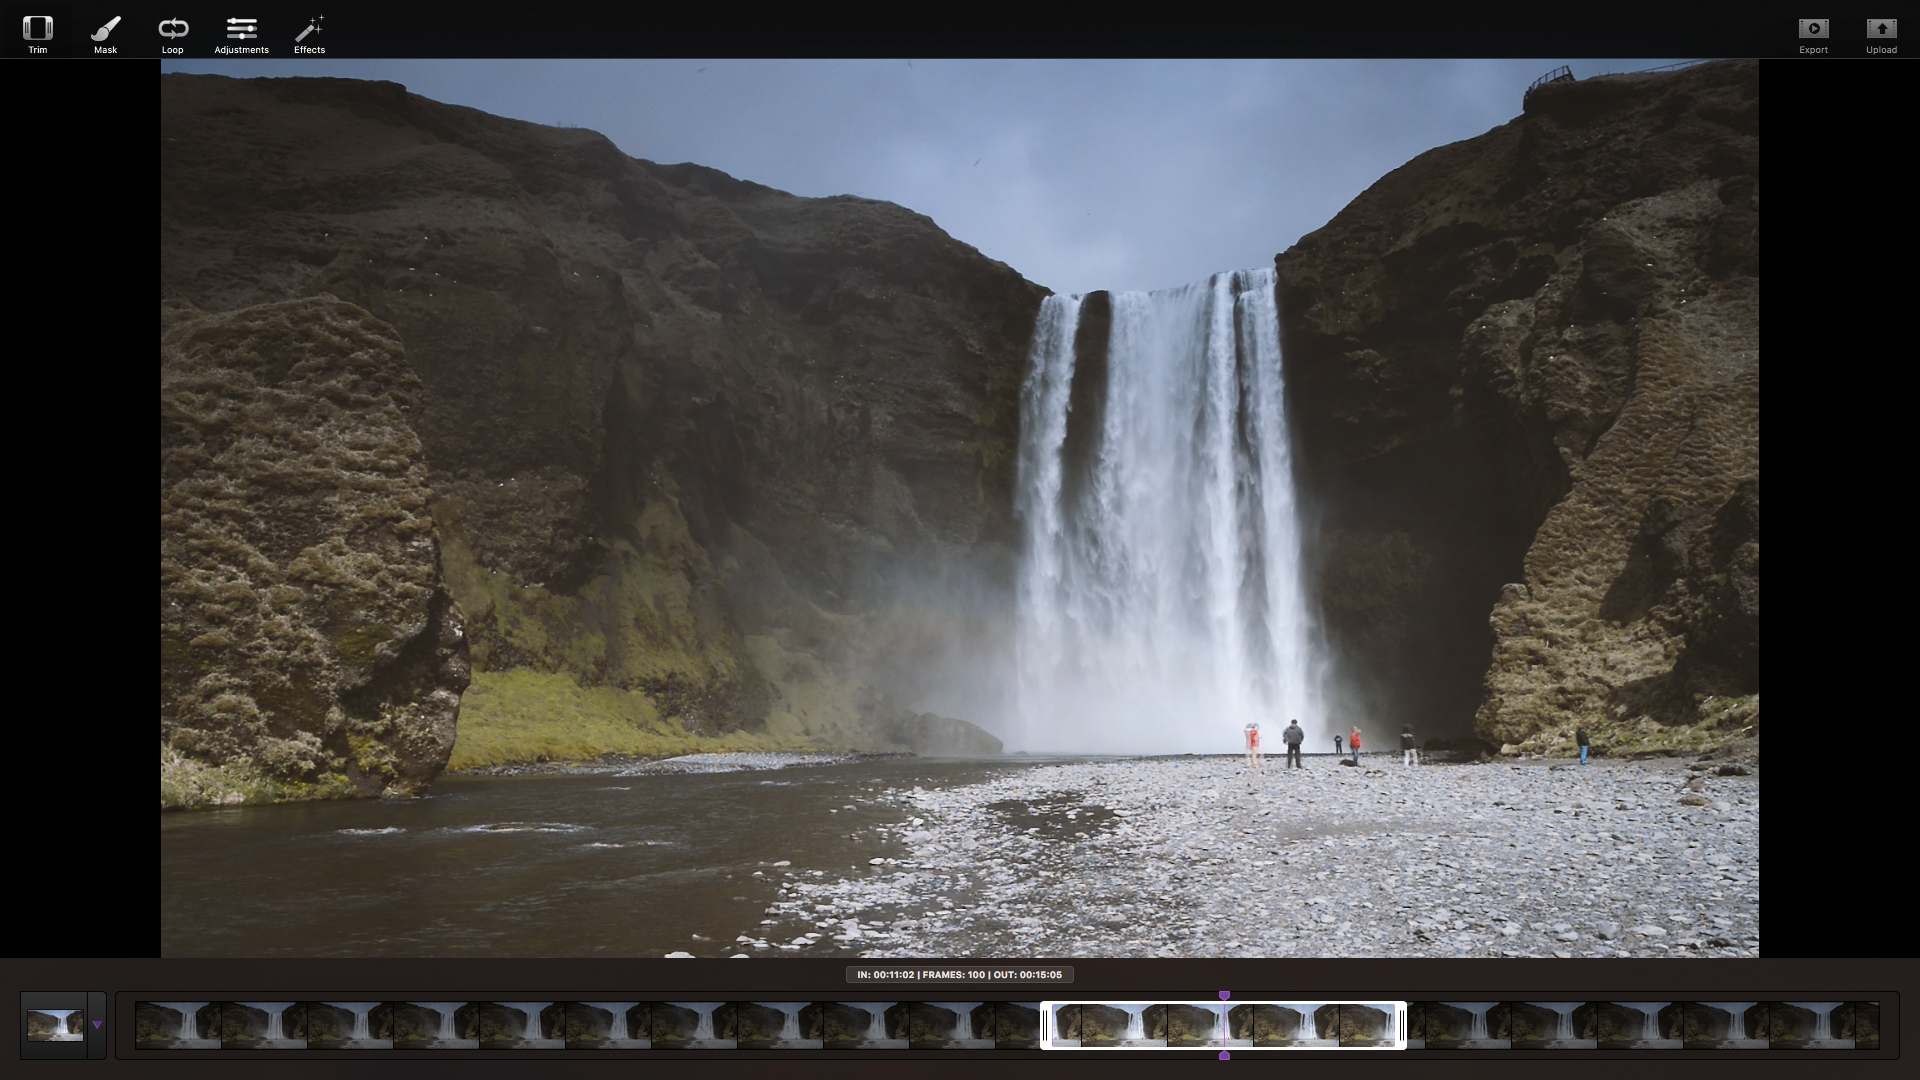
Once you have your video clip you will need to open it in the software. Cinemagraph Pro will automatically select a still image and overlay it over a short clip of the video. You’ll be able to see if there is much movement from the start to the end. If you’re not happy with the placement you can easily move the purple line and the selected area to a preferred place.
Step 2
Trim the clip down so it’s a lot shorter than the original to save on file space and time. As with the previous technique, it will be looping continuously.
Step 3
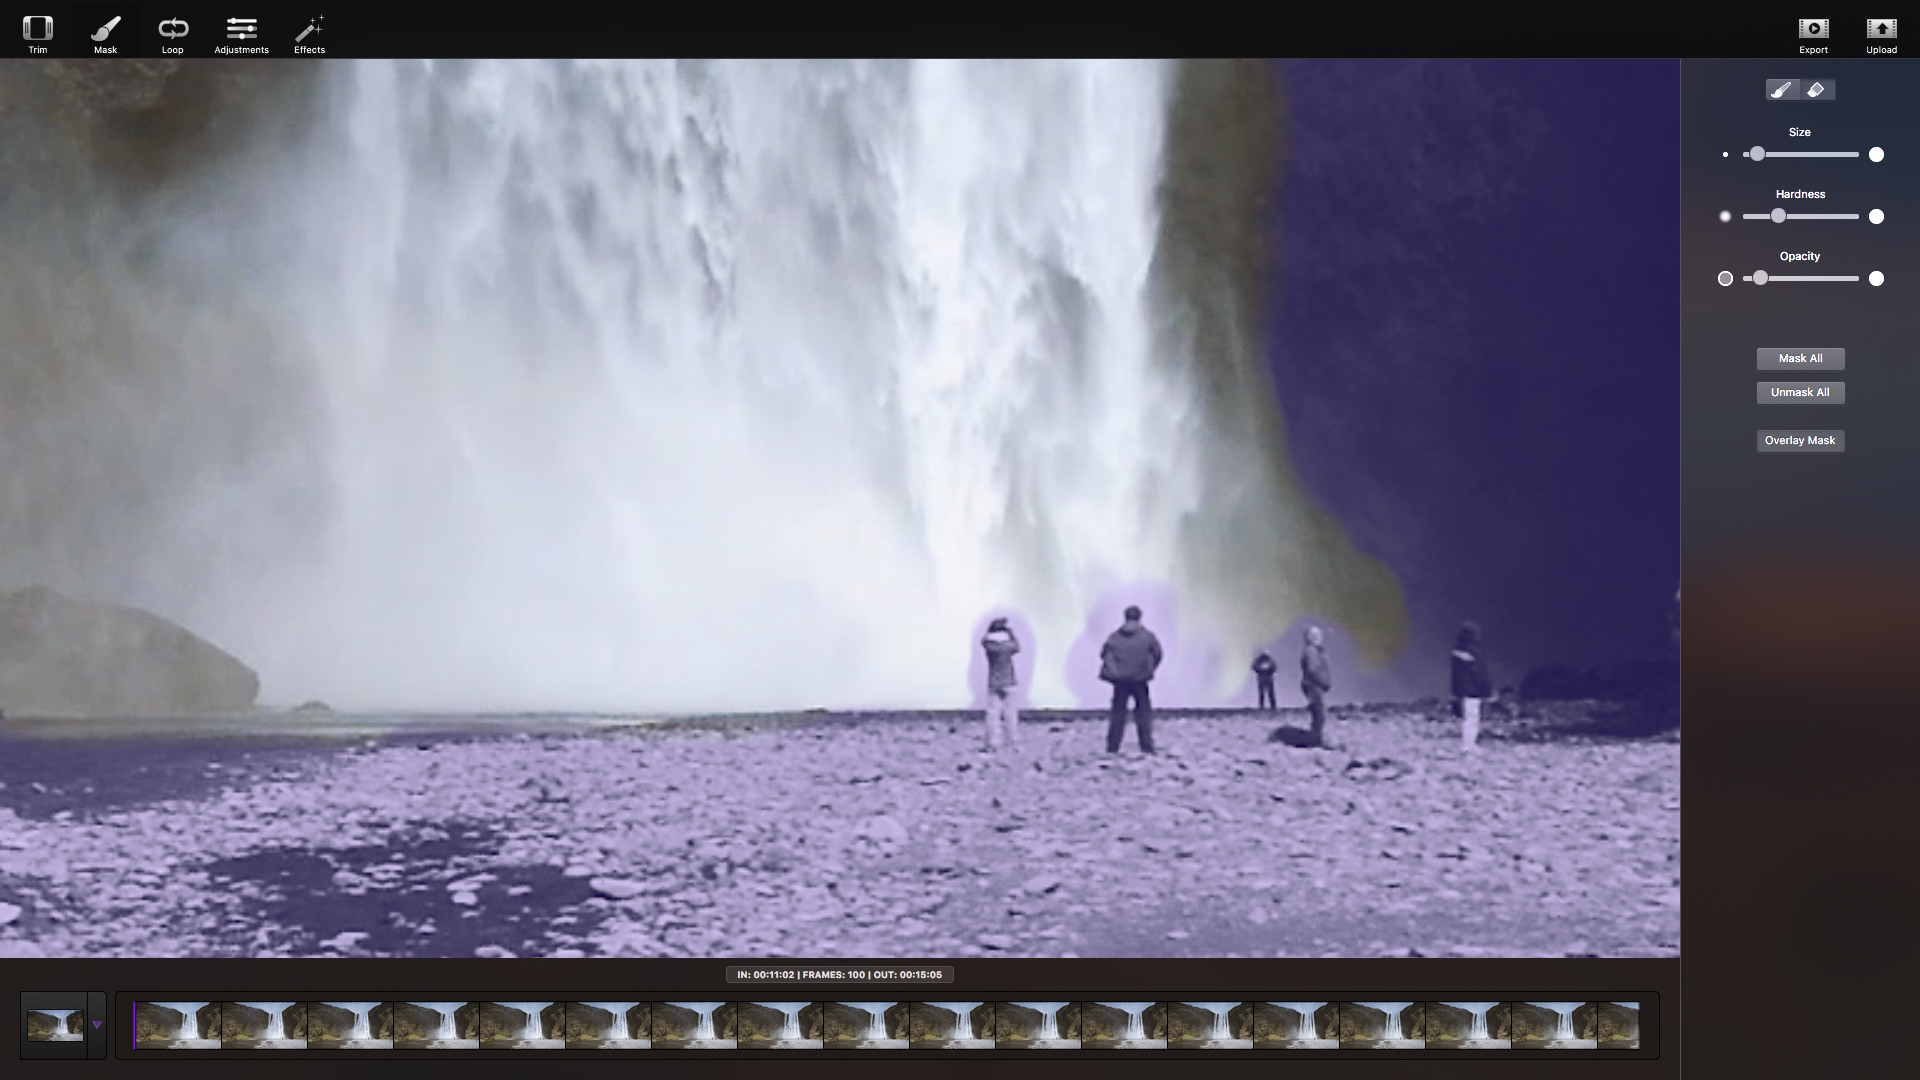
Now we need to mask out the areas where you don’t want any movement to happen, and this is very similar to using the Mask tools in Photoshop.
I find it’s best to do a rough mask first just so you can see the movement of the video layer and then zoom in by pressing the Command and +/- keys to refine the edges so that there isn’t an obvious difference between the two.
Step 4
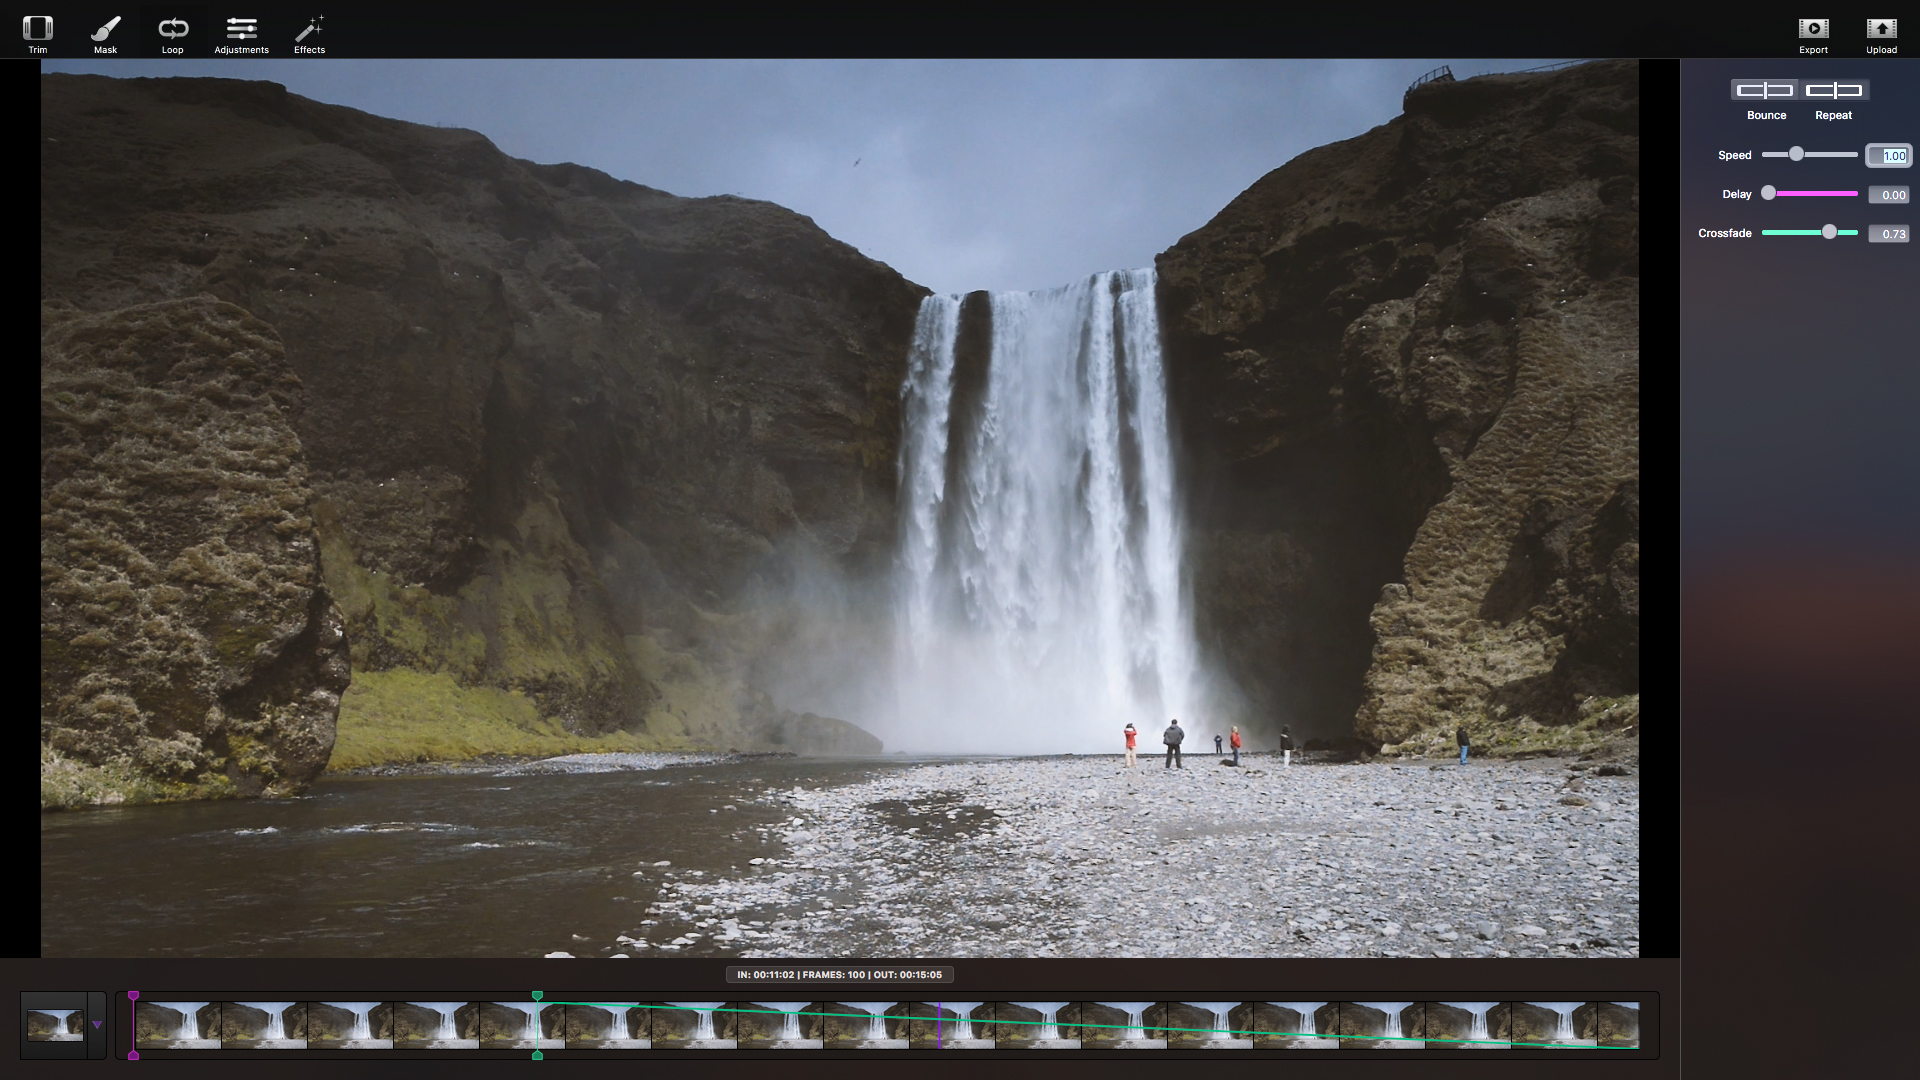
The next panel is Loop; here you can set how you want the GIF to play. Repeat is the same as the looping style we did in Photoshop and will just keep playing the clip until the end of time. Bounce is quite interesting; when the clip ends it will then play it backwards and then start again. Very similar to the Boomerang option currently found in Instagram.
Step 5
In the Loop panel you can also play around with the speed, delay and also the crossfade. Crossfade is great for hiding the jump between the end of the clip and the start, and using this will give the illusion of an endless loop.
Step 6
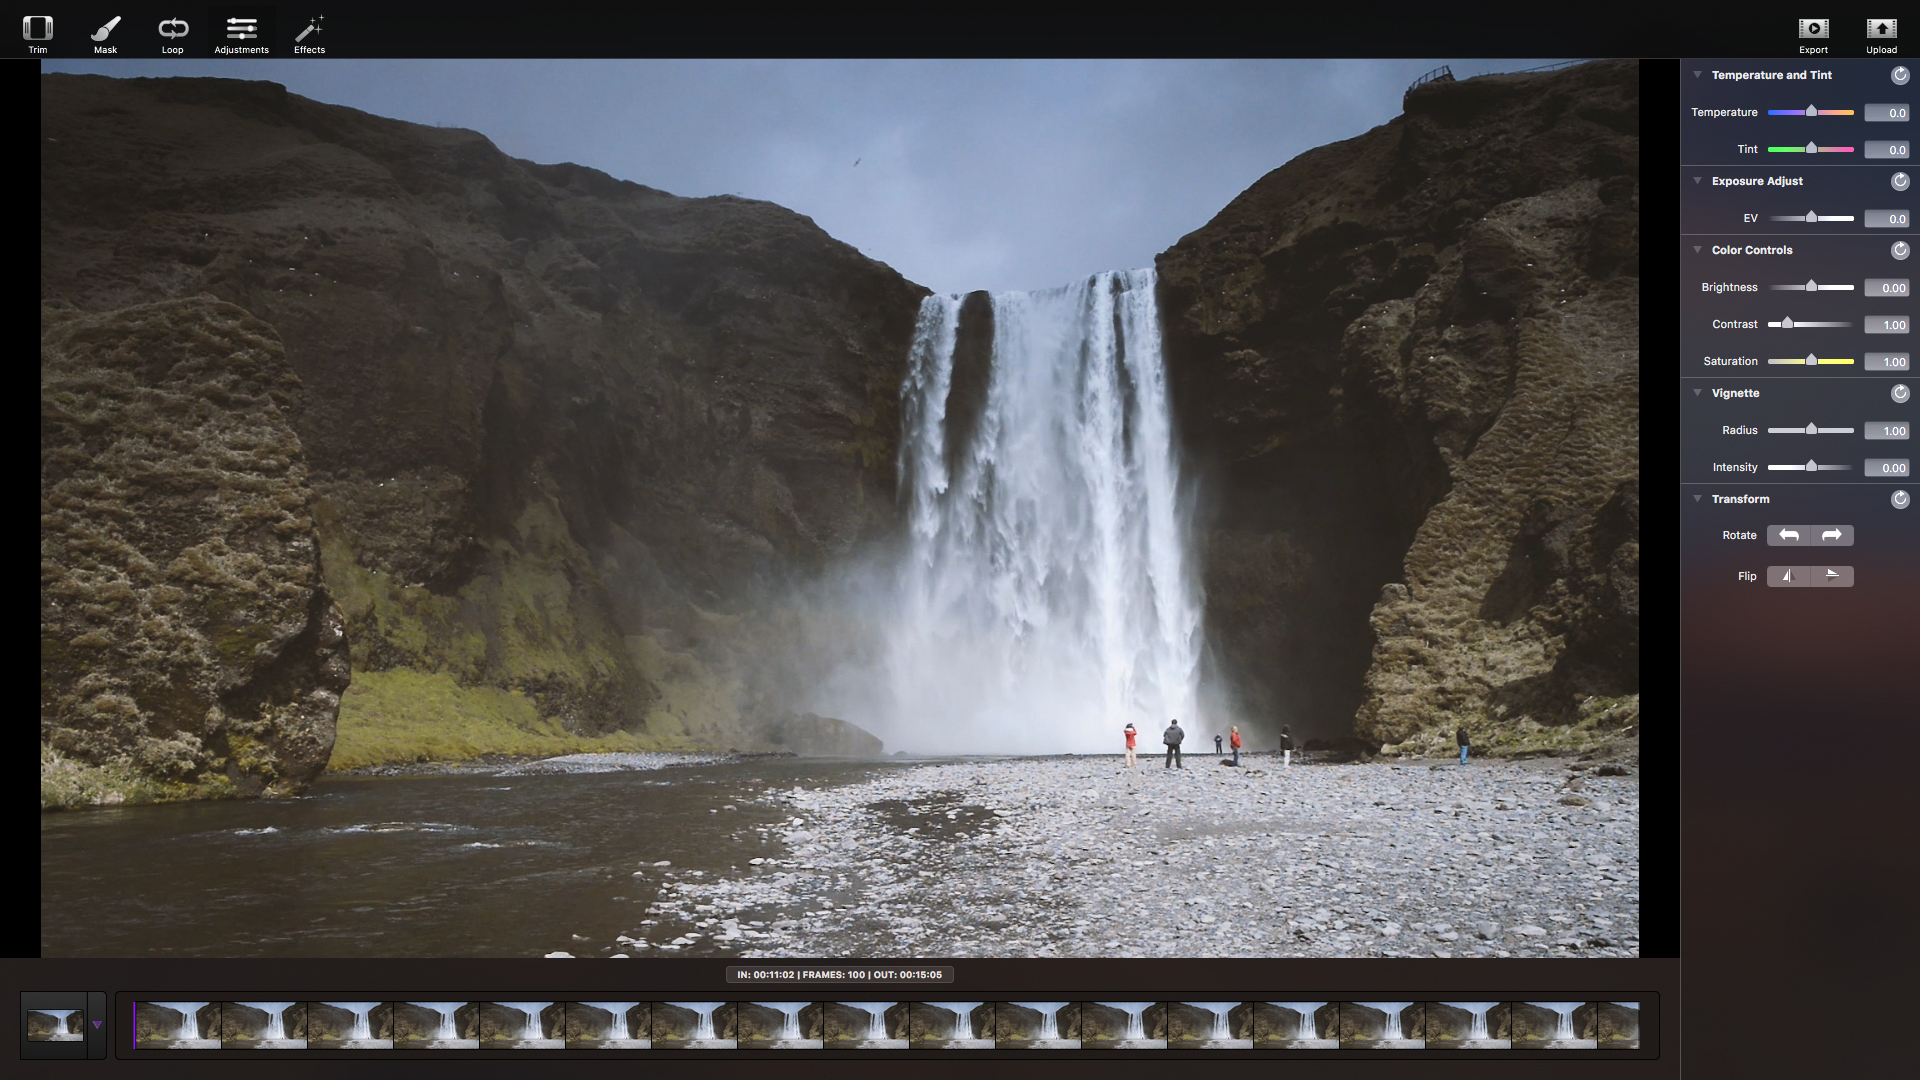
Next up is the Adjustments panel. Unless you already edited the video before you brought it into Cinemagraph Pro (which I would recommend) this is where you can use sliders to edit your clip to your desired look.
Step 7
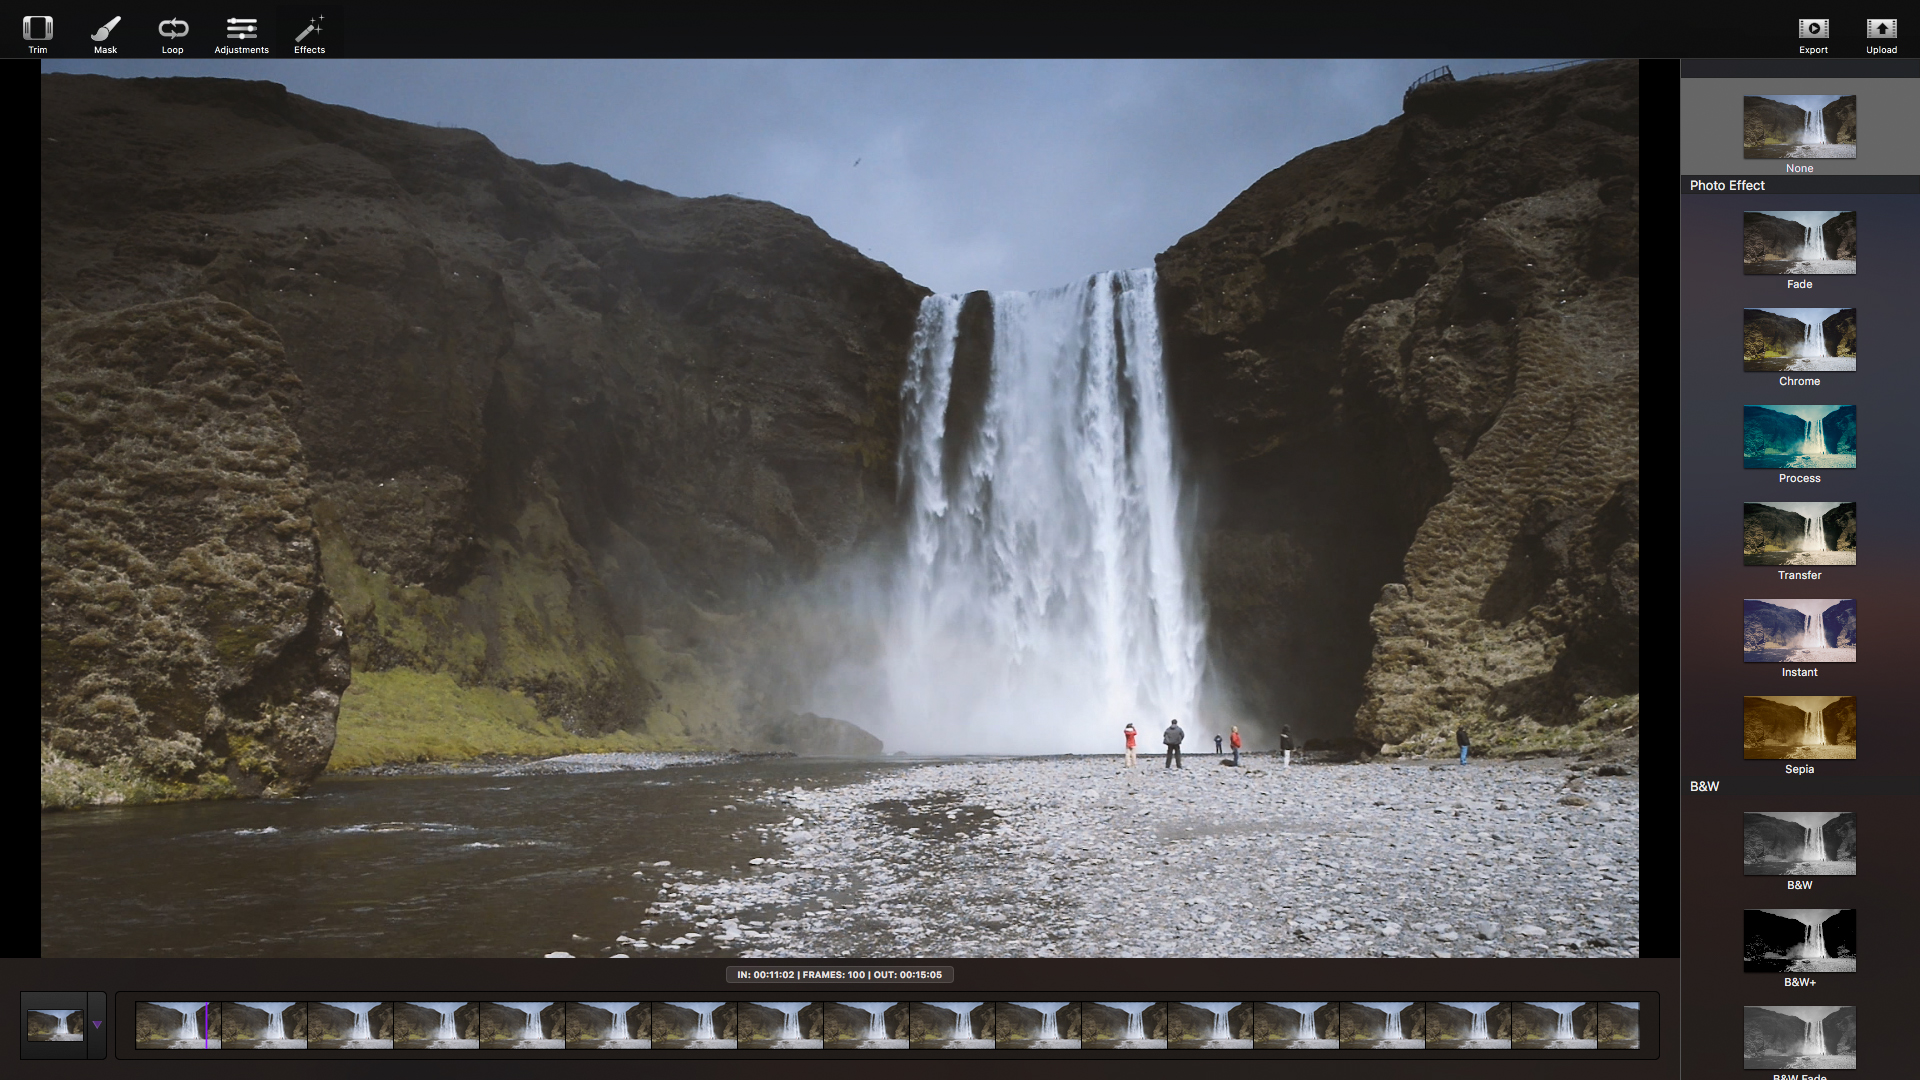
After this you’ll be taken to the Effects panel, which I never touch due to the pre-edit I give my clips. Still, if you like, you can use this to add an Instagram-esque filter to your cinemagraph.
Step 8
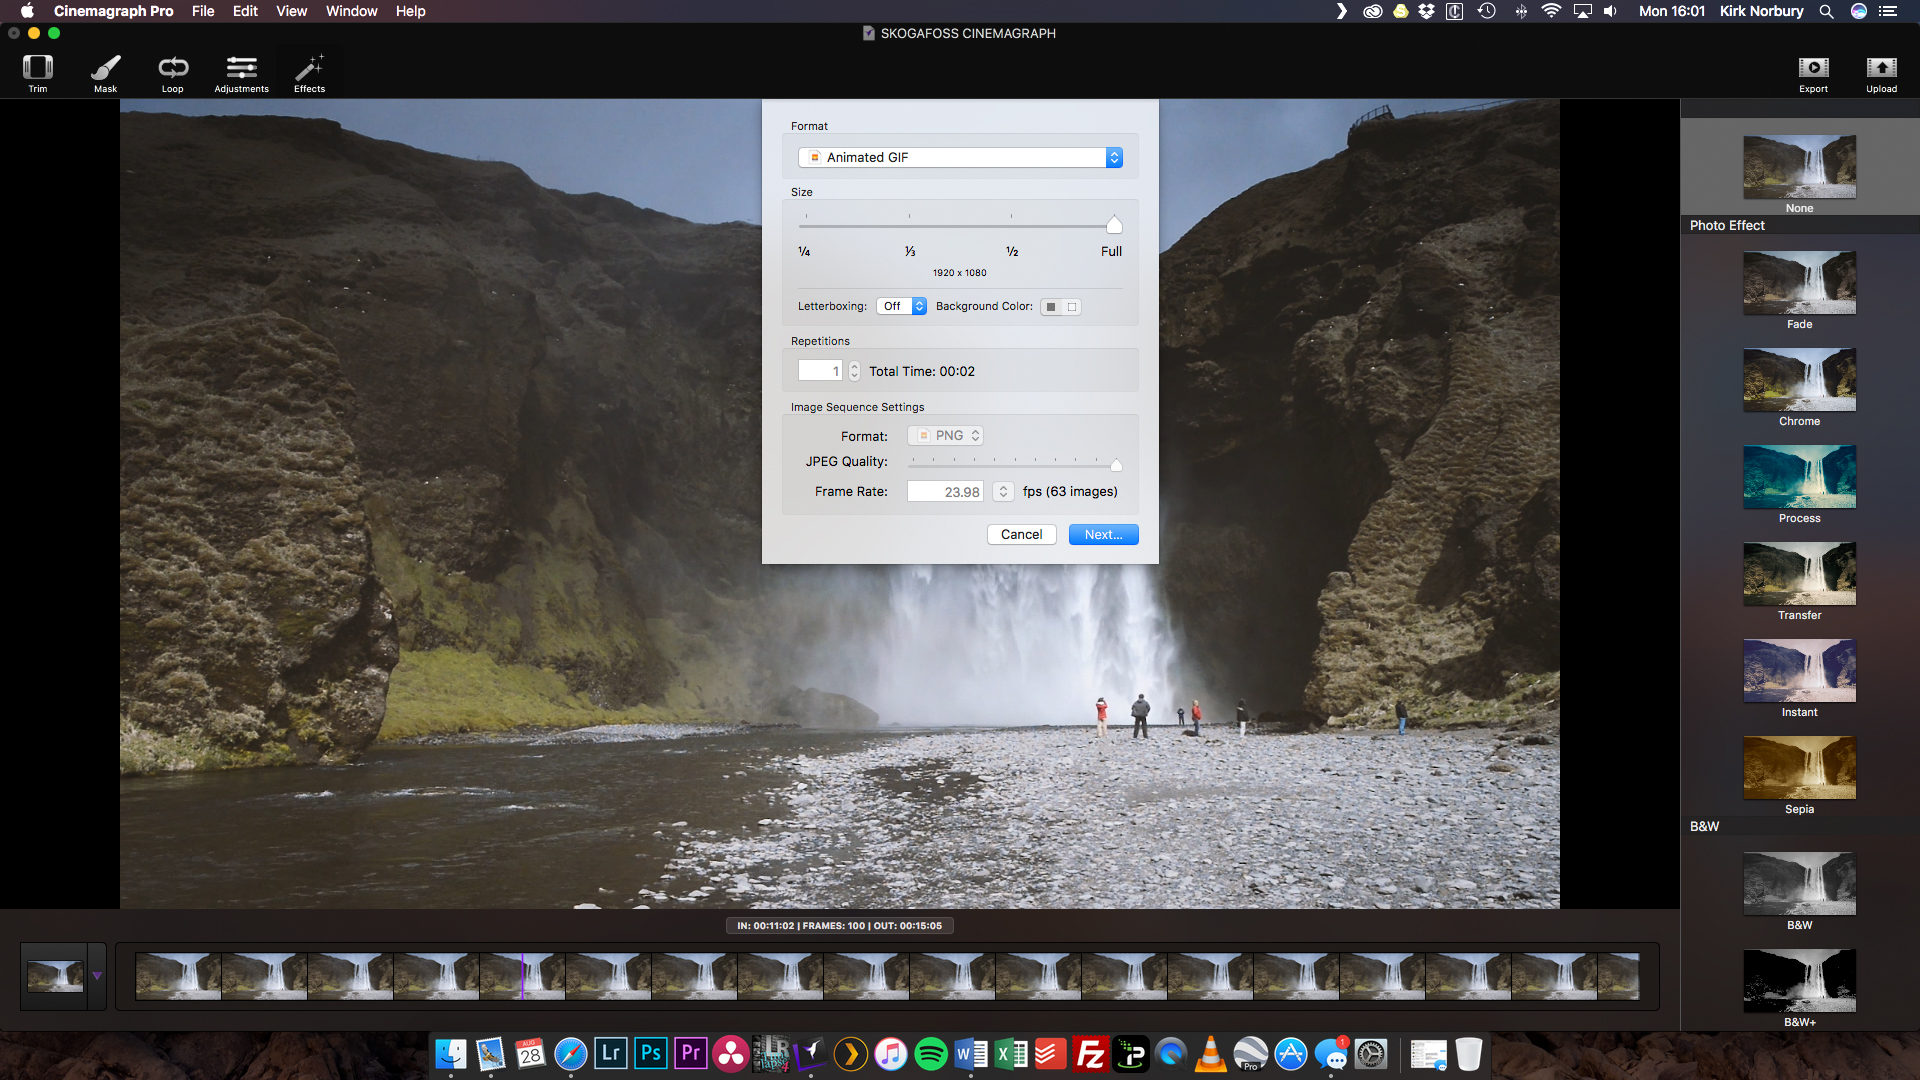
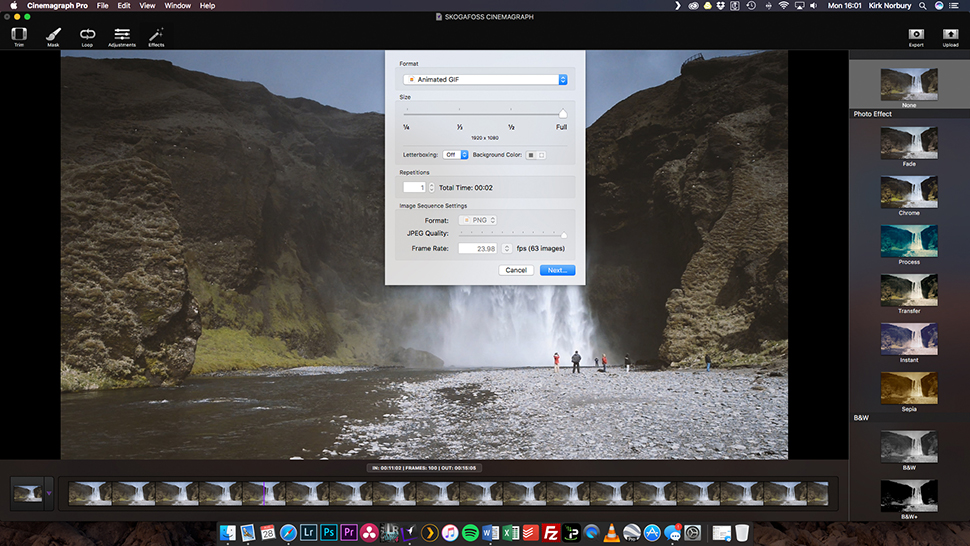
Now it’s time to export your clip. After clicking the Export icon, a dialog box will pop up with different options depending on where you would like to post the clip.
For most places a GIF file will work great but some social media platforms don’t accept this file type so it would be best to export this as an H.264 video file with around 20-30 repetitions.
Also, uploading to Flixel is great option as the quality of the file is a lot better than the GIF file, and you can then share or embed this file anywhere you want.
Here is the finished result.
Cinemagraph Pro for iOS users
Using this software on your iPhone or iPad is basically the same as the process I described above. The only difference here is that you can create the original video in the app itself and start editing it immediately. It’s a great way to quickly test to see if shots would work or if you want to shoot with your phone or tablet rather than carrying around a heavy camera.
Final thoughts
Cinemagraphs are a great new feature to the world of photography, and they seem to be getting more popular. Just remember to keep your shots as simple as possible when you get started. Once you get used to the editing process, you can be more experimental.
The Cinemagraph Pro apps come with free trials, but they are ultimately paid-for services. As such, if you're just getting started and you already use Photoshop, I would highly recommend trying this first.
Read more: Crash course: Adobe Lightroom for complete beginners
