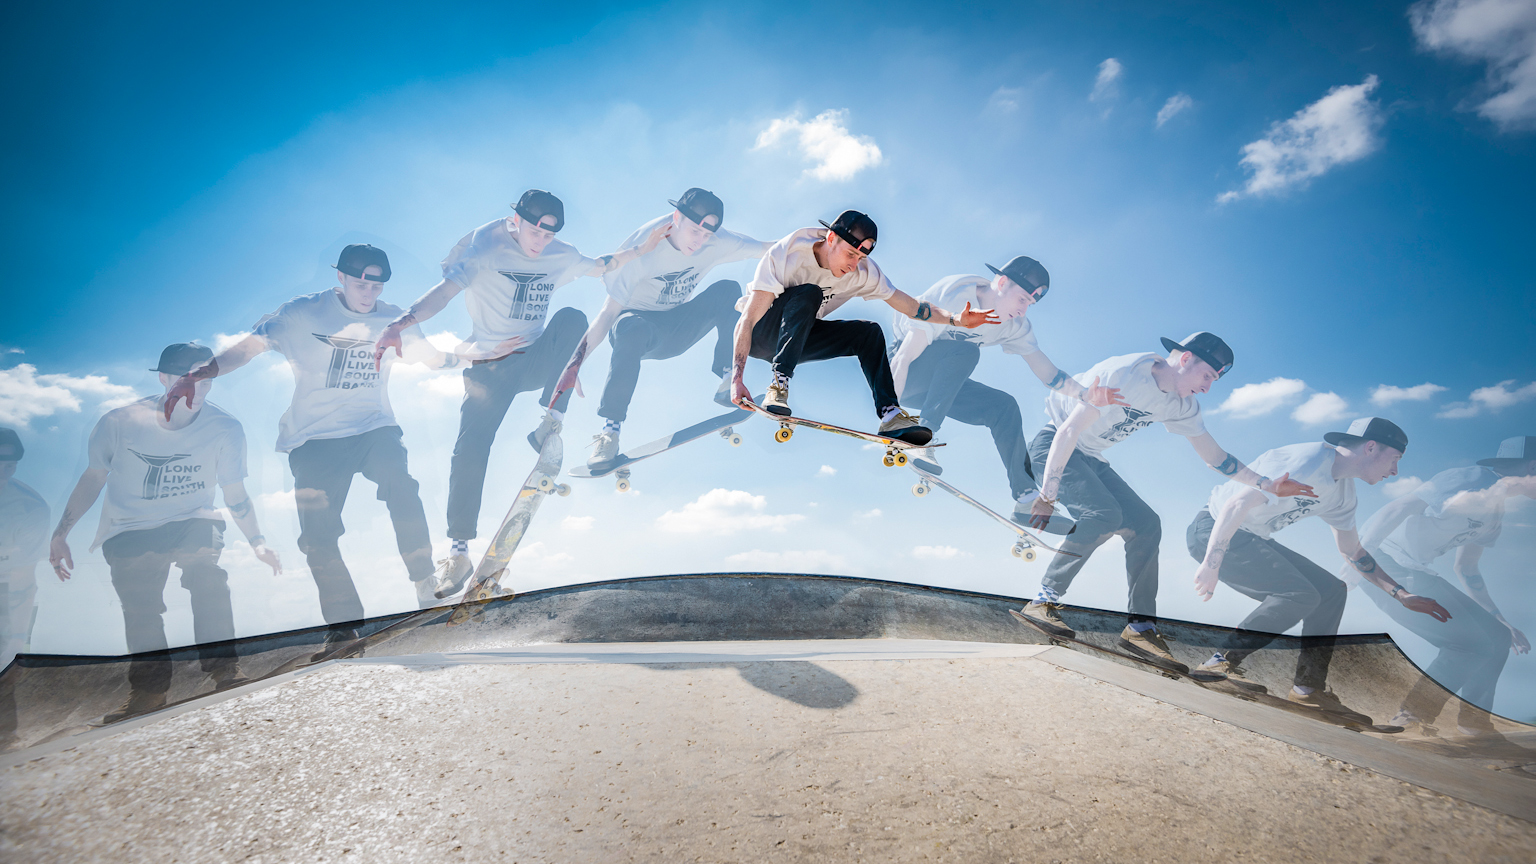
As much as it’s about skill, perseverance and downright nerve, skateboarding is also about creativity – which is something we photographers can relate to.
Both pursuits rely on a combination of imagination and technique – just as a skater adopts the right line and strives for perfect execution, a photographer chooses the camera angle and considers the best way to capture the moment. Perhaps this is why the best skate photography has a visual poetry to it that most other action sports can’t match. Or maybe it’s simply because the motion of a talented skateboarder in full flow is so visually appealing.
Create a sequence photograph to capture a moment of action.
Time needed One hour
Skill level Intermediate
Kit needed Tripod, cable release (optional), reflector (optional)
This is especially true when we combine several frames for a sequence photograph like this one. Photographers have always wrestled with the challenge of conveying a sense of motion within a still image. There are plenty of tricks of the trade – motion blur, rear-curtain flash, panning blur, stroboscopic flash. But one technique in particular is ideal for skate photography.
As a flick through any skateboarding magazine is likely to point out, sequence photography is a striking way to show a skateboarder in action.
The technique involves capturing several rapid-fire shots, then stitching them together to display the subject in multiple positions throughout the frame. Naturally, there’s a smattering of Photoshop magic involved in this, but, as with all the best digital tricks, the real skill first takes place in-camera.
In this project we’ll explain how it’s done, by first getting set up for high-speed photography, then by piecing everything together for the final action-packed composite.
On location: Capture an action sequence
Steady camera
The best camera deals, reviews, product advice, and unmissable photography news, direct to your inbox!
Our photos all need to be in perfect alignment as it’ll make the frames easier to blend in Photoshop. So we need a tripod to keep the camera still. A remote release is also useful, as it means we don’t have to touch the camera during the sequence.
Use a reflector
On a bright sunny day like this a reflector will help to bounce a bit of light back into the shadows on the subject. Check with them beforehand to make sure it’s not too blinding – we don’t want it to cause a wipe out at a crucial moment!
Pre-focus on the spot
Fast-moving subjects can be a challenge for autofocus. If we know where the subject is going to be, then we can ask them to stand in the crucial spot beforehand so we can pre-focus. Then we switch to manual focus to lock it in place.
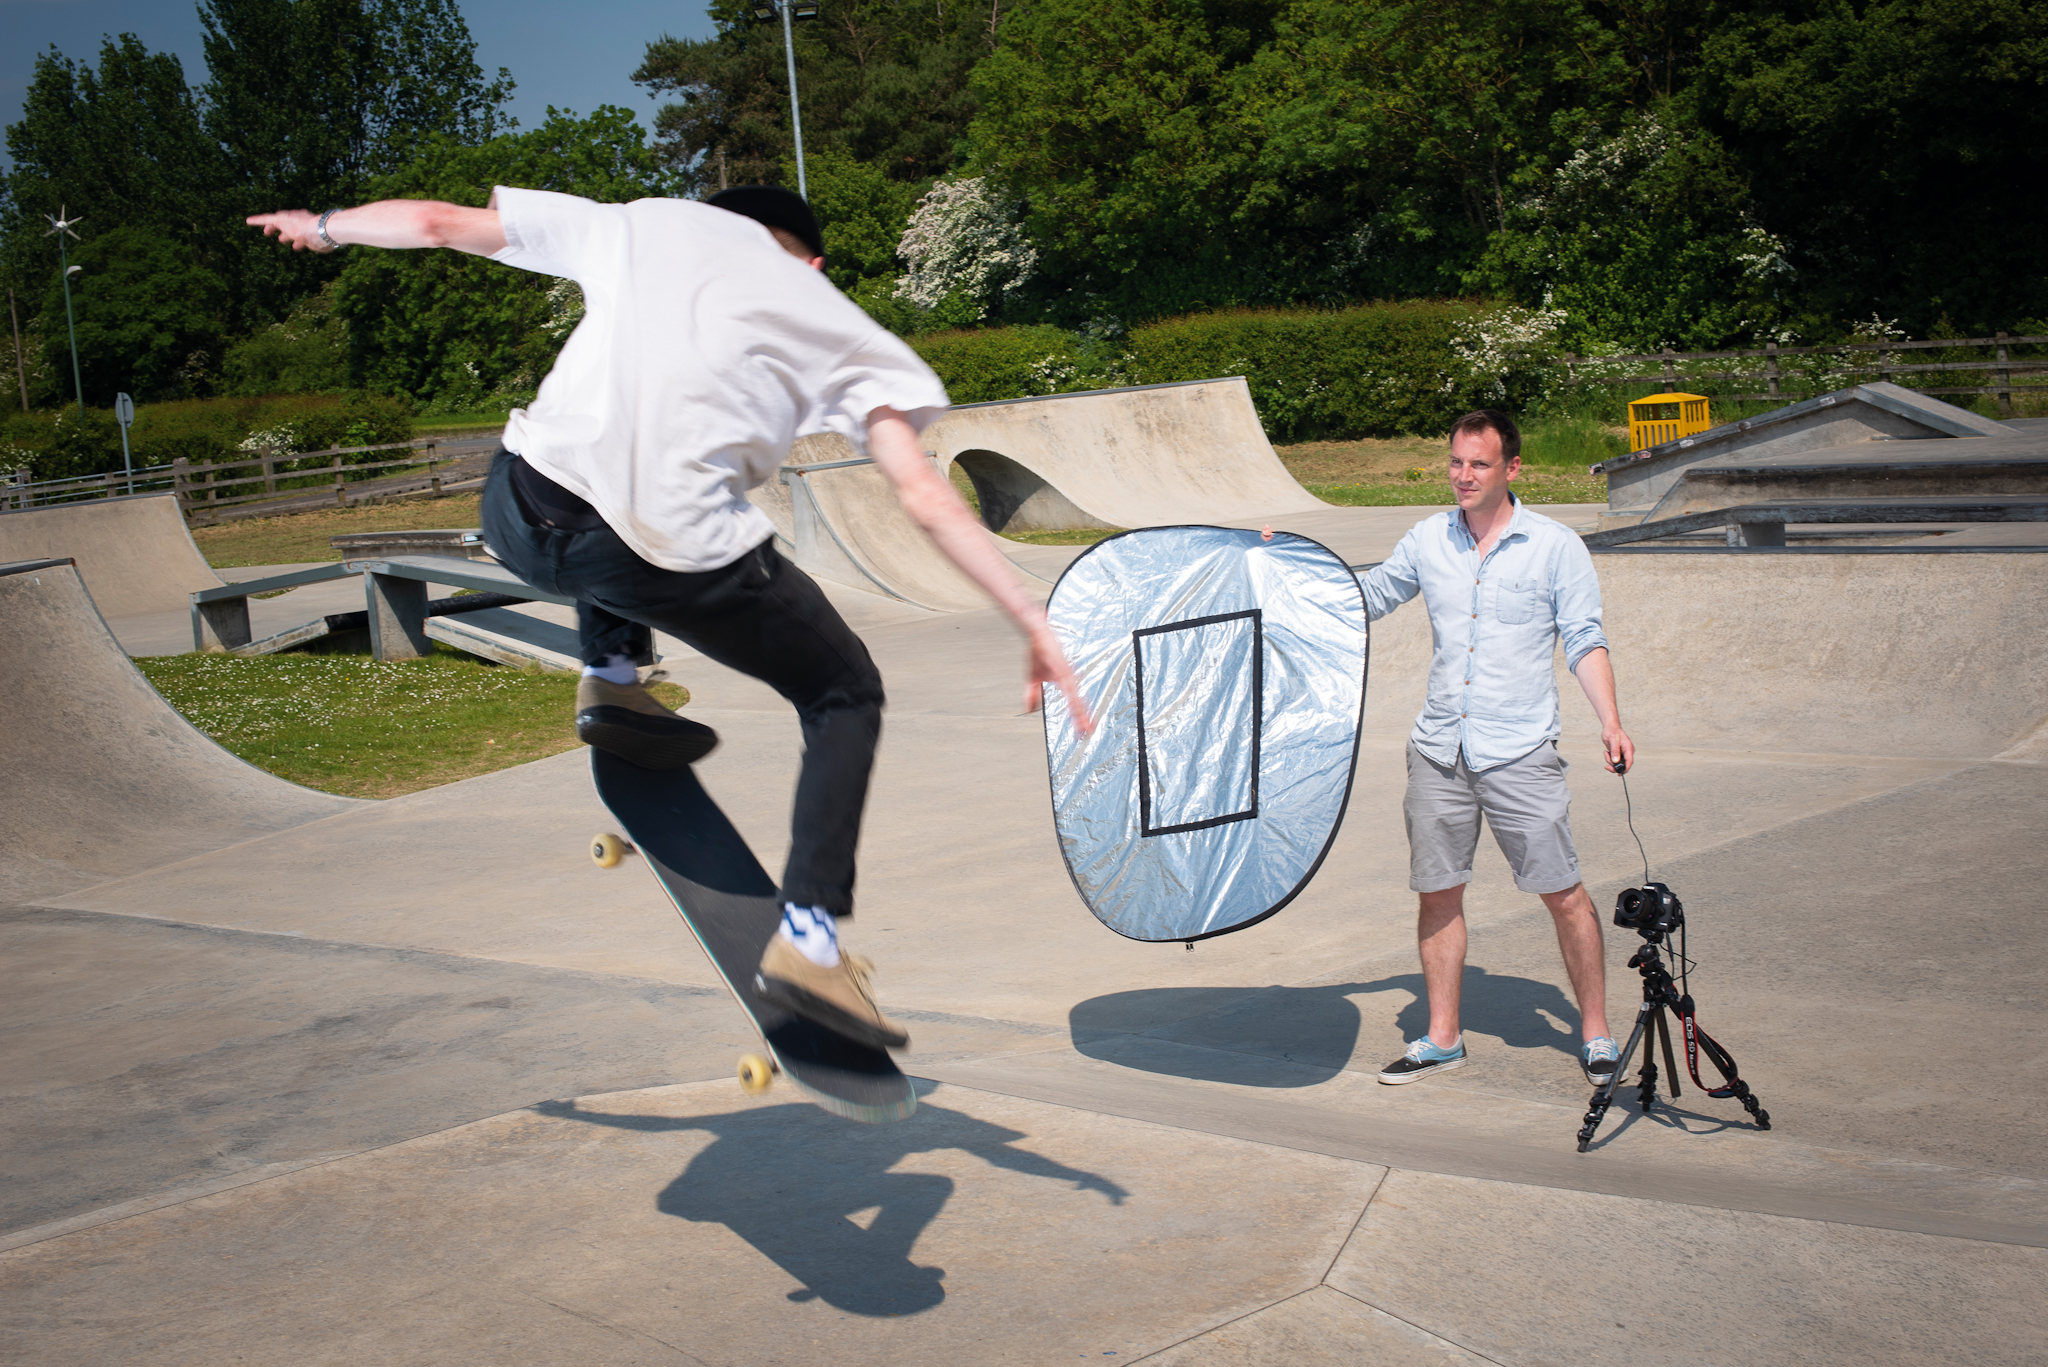
Shoot from side-on
Try to visualise how the subject will look when in multiple positions throughout the frame. A side-on view of the action is usually best as there’s less overlap between shots. Compose loosely to give yourself extra space if necessary.
Remember that there’s always a danger with this type of action photography that the skater may wipe out. This could be painful not only for them, but also for you and your gear. Even if they don’t go flying, their board might. So watch the trick a few times to work out the best position for the camera and, if you have a wireless release, consider firing the shutter remotely.
Use a low camera angle
A low camera angle will help to emphasise the height of jumps and air time. It also lets us minimise the amount of ground in the frame and enables us to frame the subject against the expanse of clear blue sky for a simple, vibrant backdrop.
Show the story
A sequence photo is like a short story and like all the best stories it should have a beginning, middle and end. Frame up so that you can see where your subject is coming from, what they’re going to go over, and where they will land.
Step-by-step: Set up your camera for action
Whether you want to shoot a skater or any kind of action sequence, here’s how to get set up.
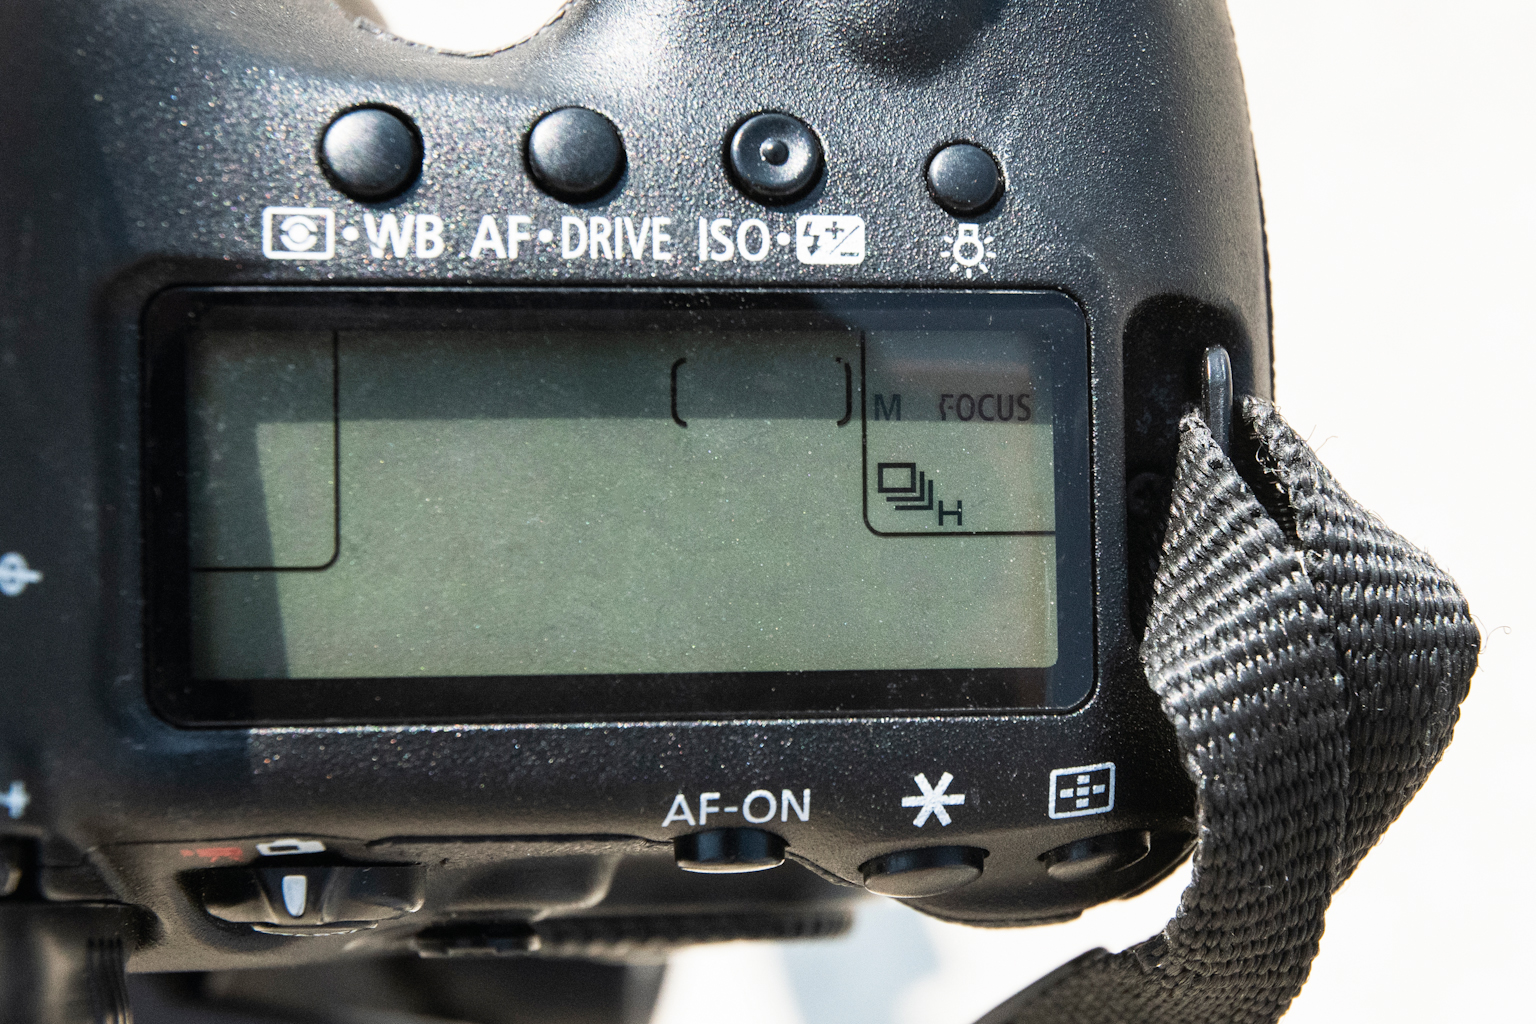
1. High-speed shooting
A high drive rate is essential for this kind of technique. The Canon EOS 5D Mark III we used is capable of a speedy six frames per second. We simply set it to High Speed Continuous mode, then held down the shutter button or our remote release for rapid-fire shots.
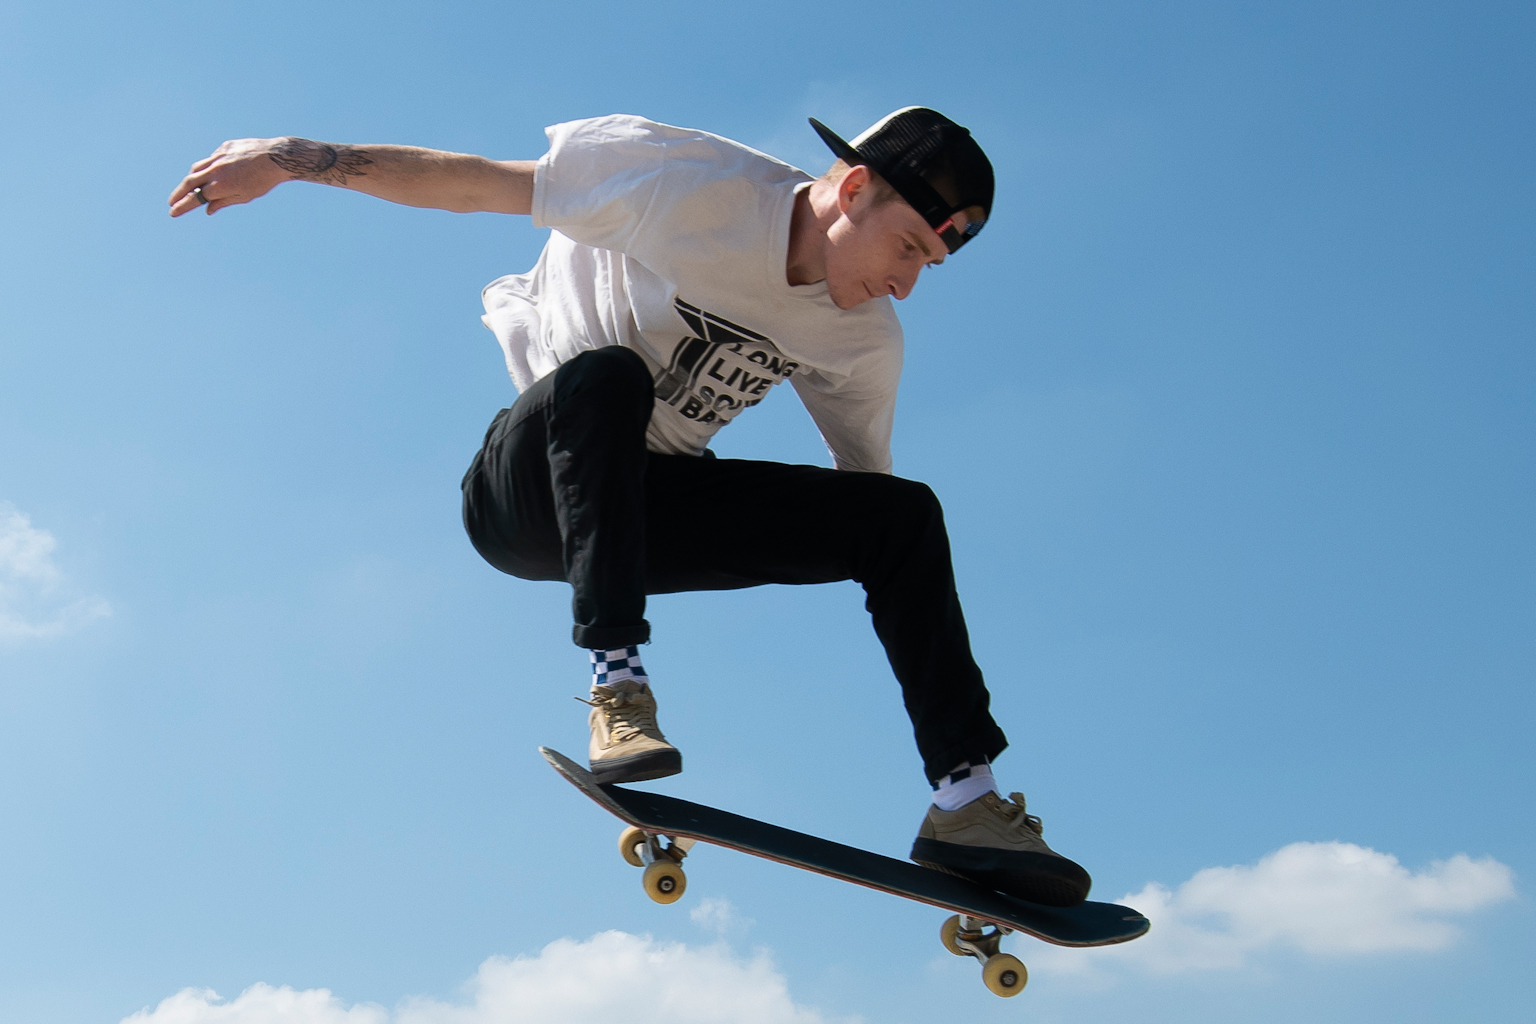
2. Fast shutter speed
Moving subjects, especially those that are travelling side-on to the camera, require a fast shutter speed to freeze the action and prevent blur. The right speed will depends on the action, but for this skater 1/500sec would be the bare minimum.
3. Consistent exposure
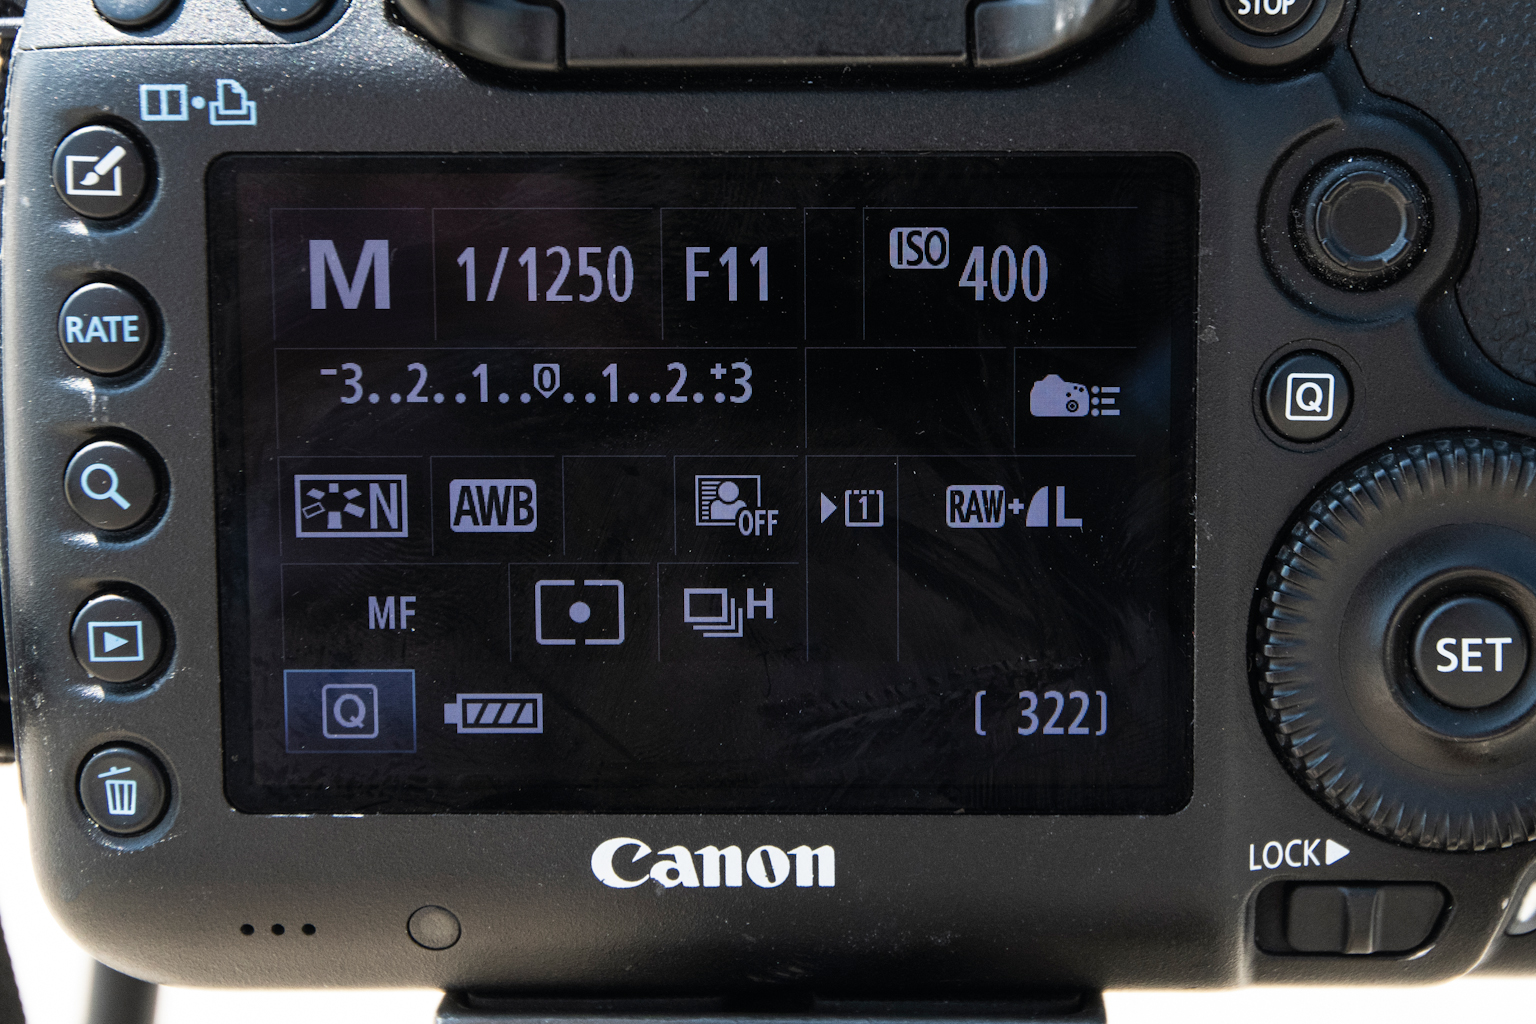
Consistency is vital for our set of photos. We set it to Manual mode with a shutter speed of 1/1250sec, an aperture of f/11 and ISO 400. If you’re not comfortable using Manual mode, try Shutter Priority. The crucial thing is to keep that shutter speed high.
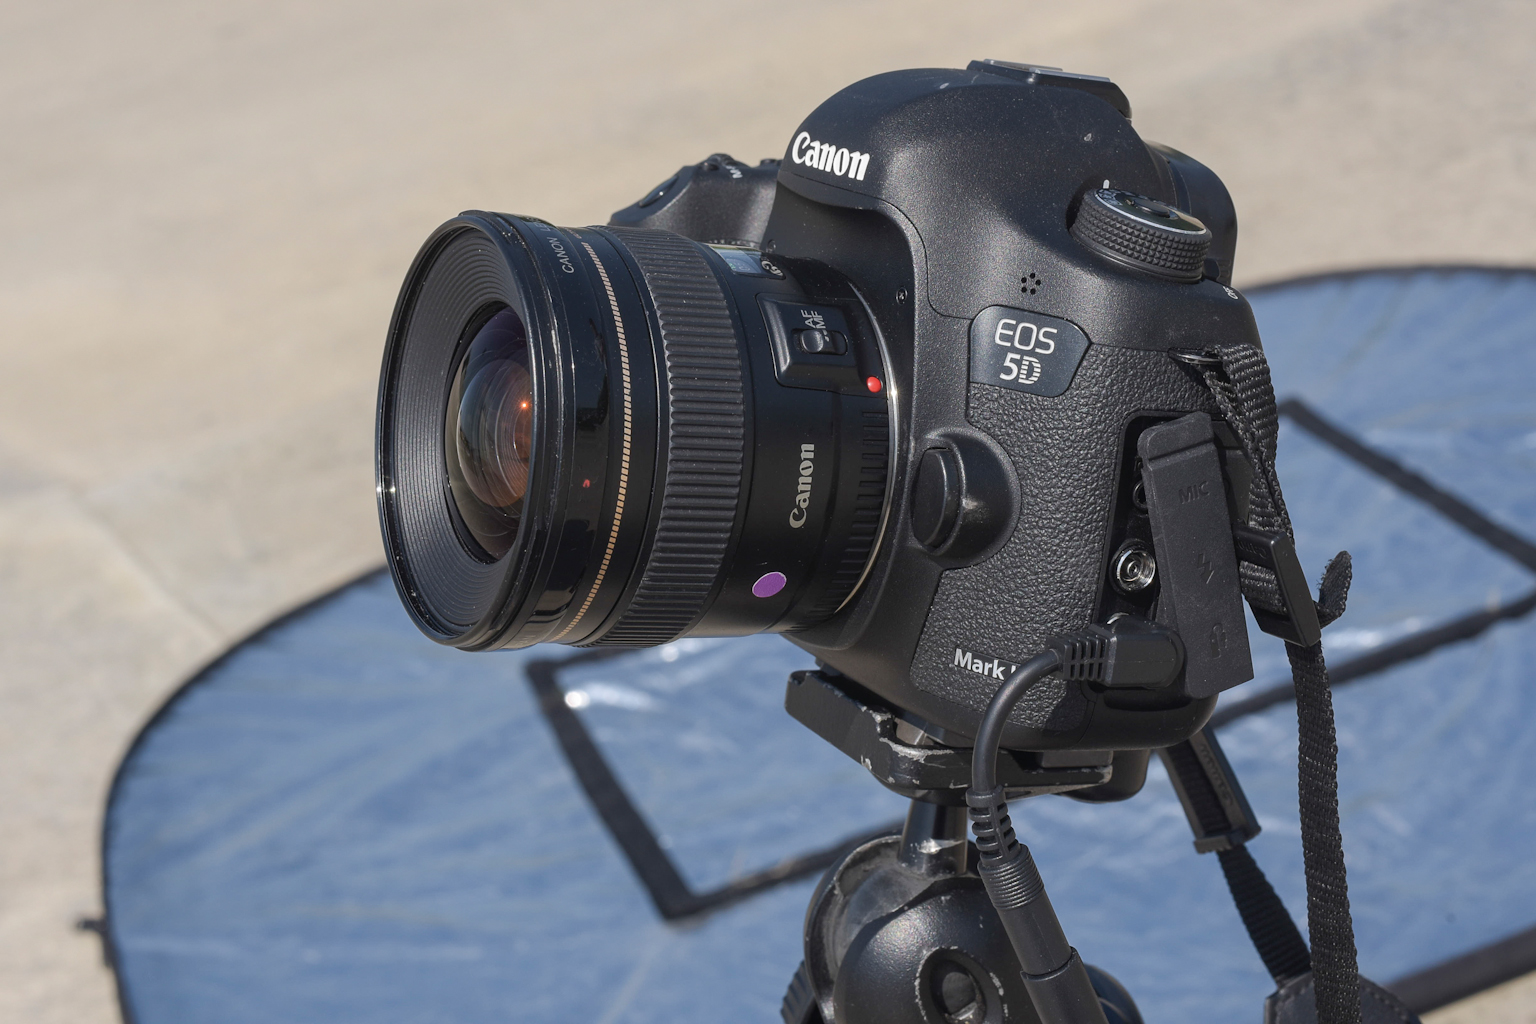
4. Control depth of field
Even if we pre-focus on the spot our subject is going to pass through, there’s a slim possibility that the focus point won’t be 100% be spot-on. A mid-range aperture like f/11 gives us a slight safety net by expanding the depth of field.
Simplify your frame
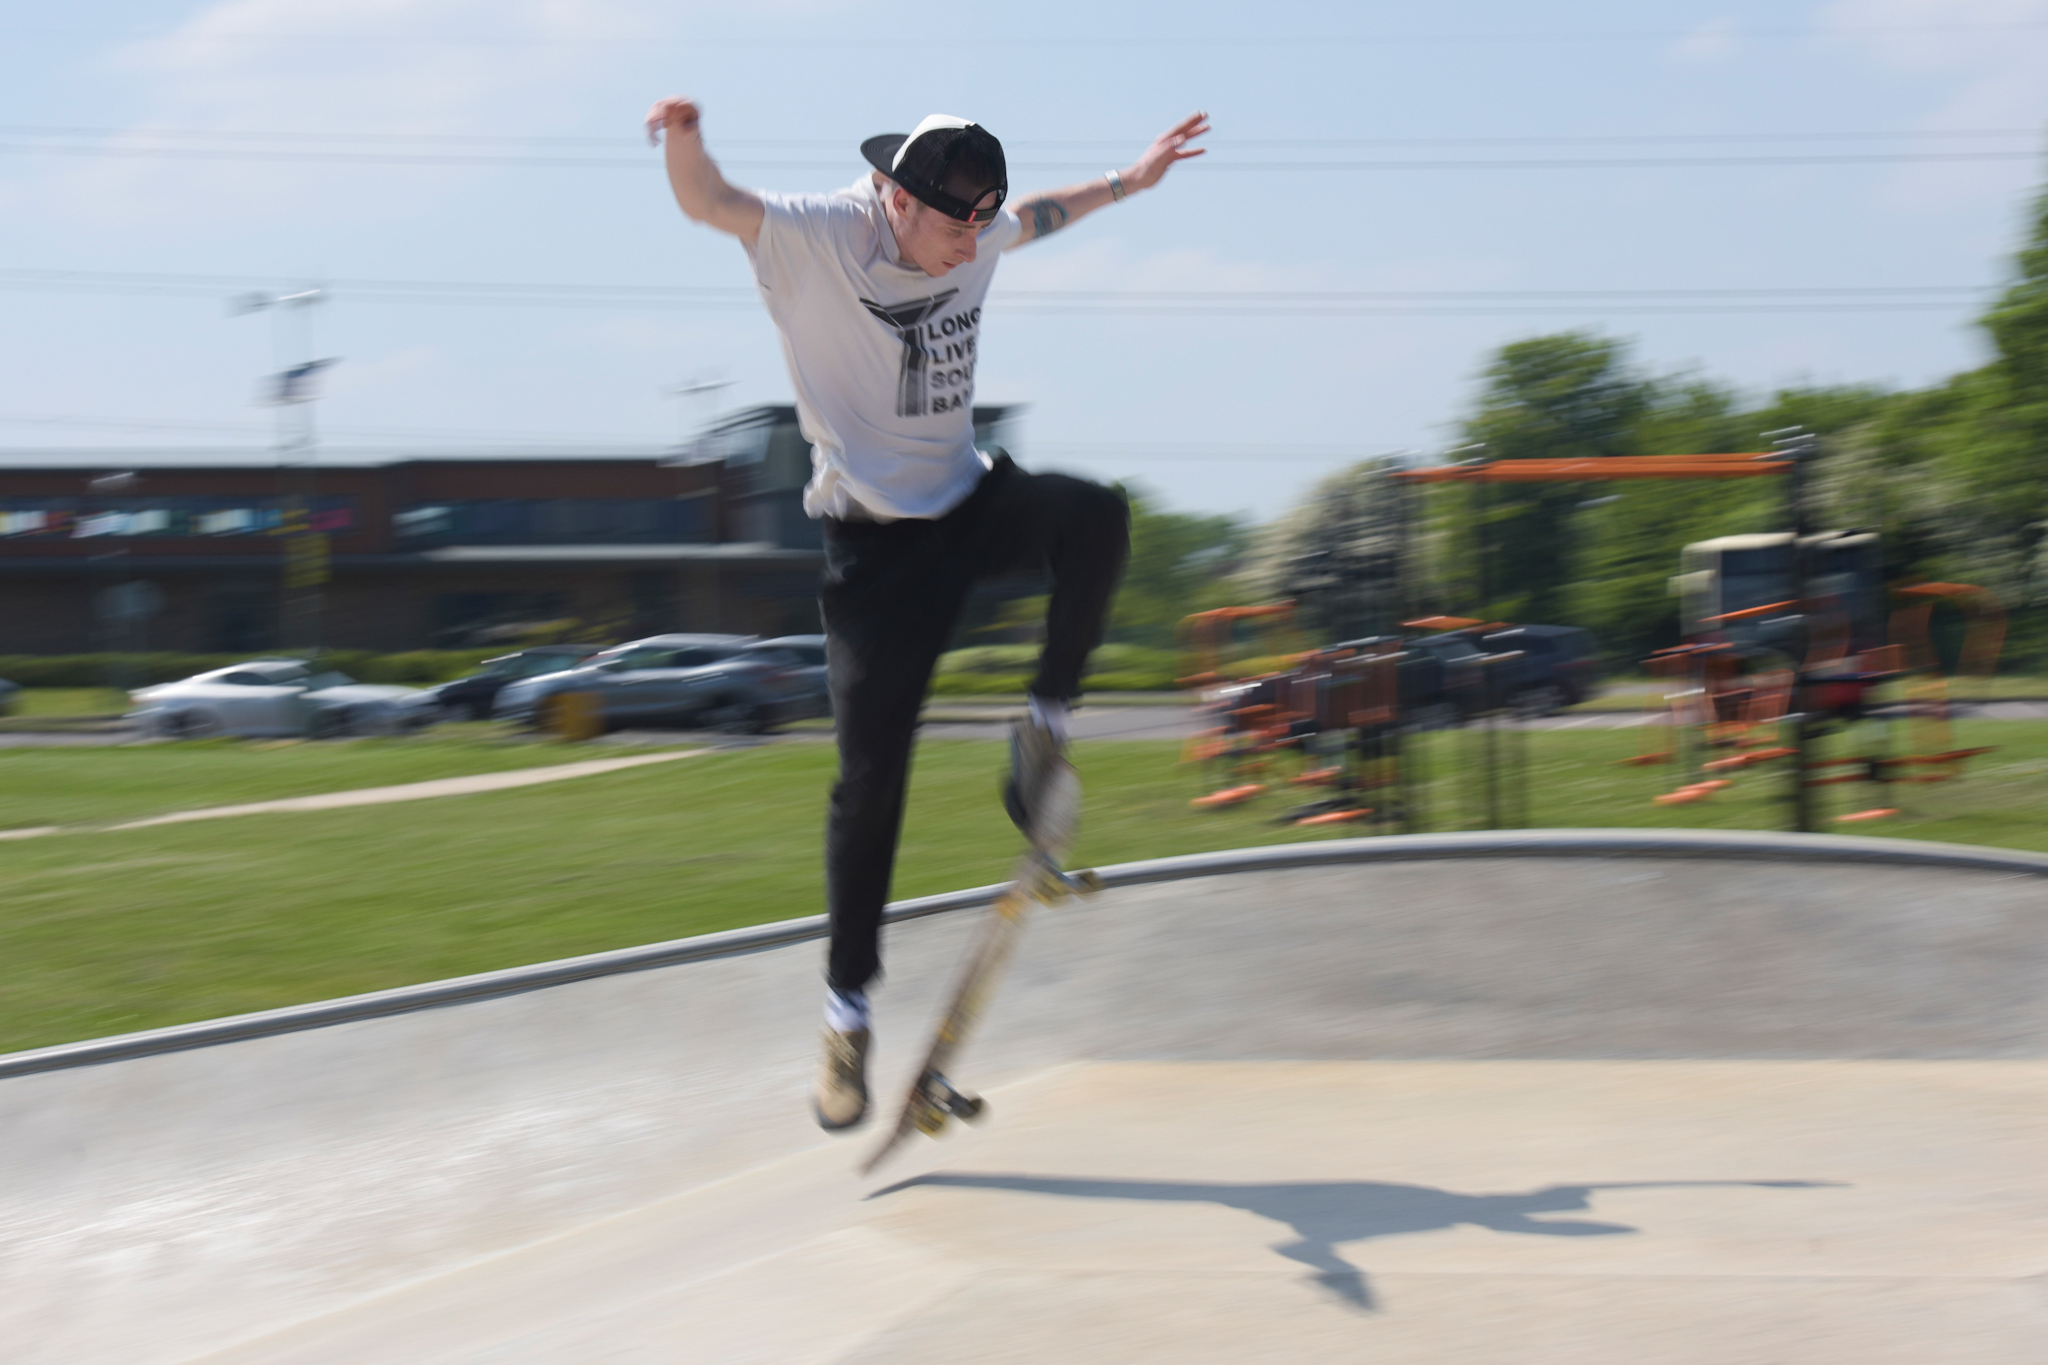
Don’t let your sequence photographs become cluttered – keep it simple. An abundance of background detail like this (taken from a slightly higher camera angle) can look very busy once we combine our ‘clones’. So follow the age old rule – keep it simple. A plain backdrop or expanse of sky will help to keep the focus on your subject. The combination of a wide-angle lens – we used a 20mm for our main shot – and a low angle will help to emphasise the height of jumps. However, for other tricks a longer lens may be a better choice – here a 200mm lens blurs out the backdrop.
Step-by-step: How to build your sequence
Piece together your set of rapid fire action photos using simple masking skills in Photoshop.
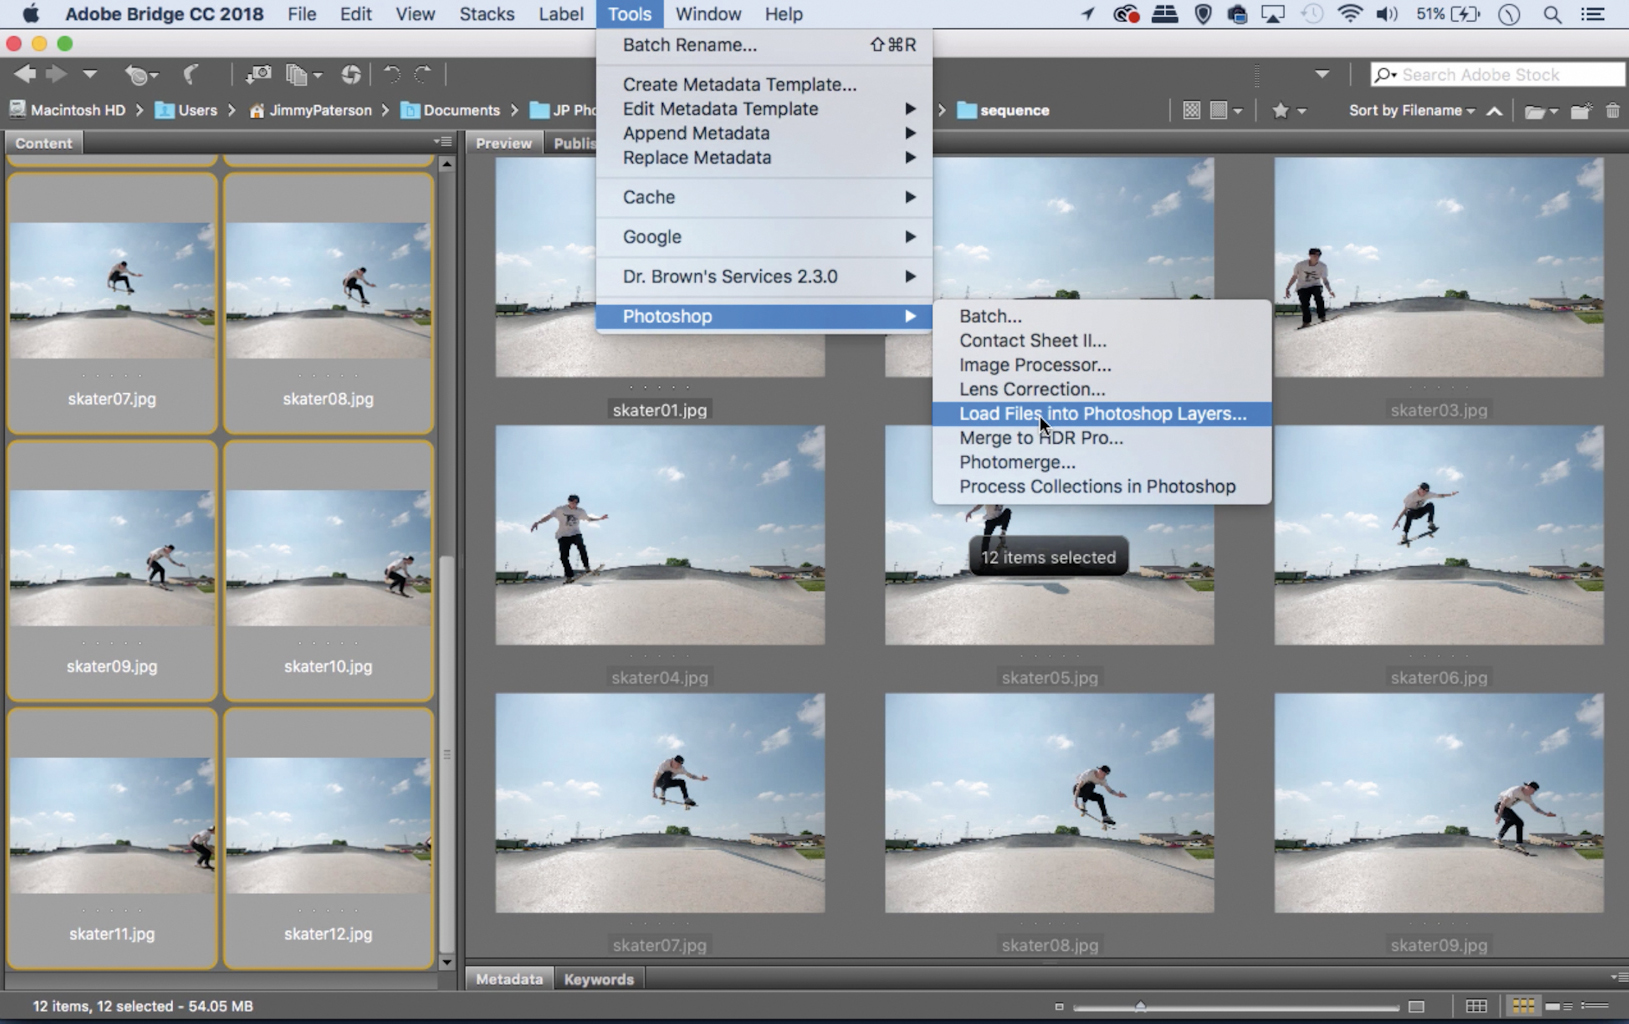
1. Open as Layers
Open Bridge and Shift-click between the first and last photo to select your sequence, then go to Tools > Photoshop>Load Files into Photoshop Layers. This’ll open them into one layered document (you can also use File>Scripts>Load Files into Stack in Photoshop).
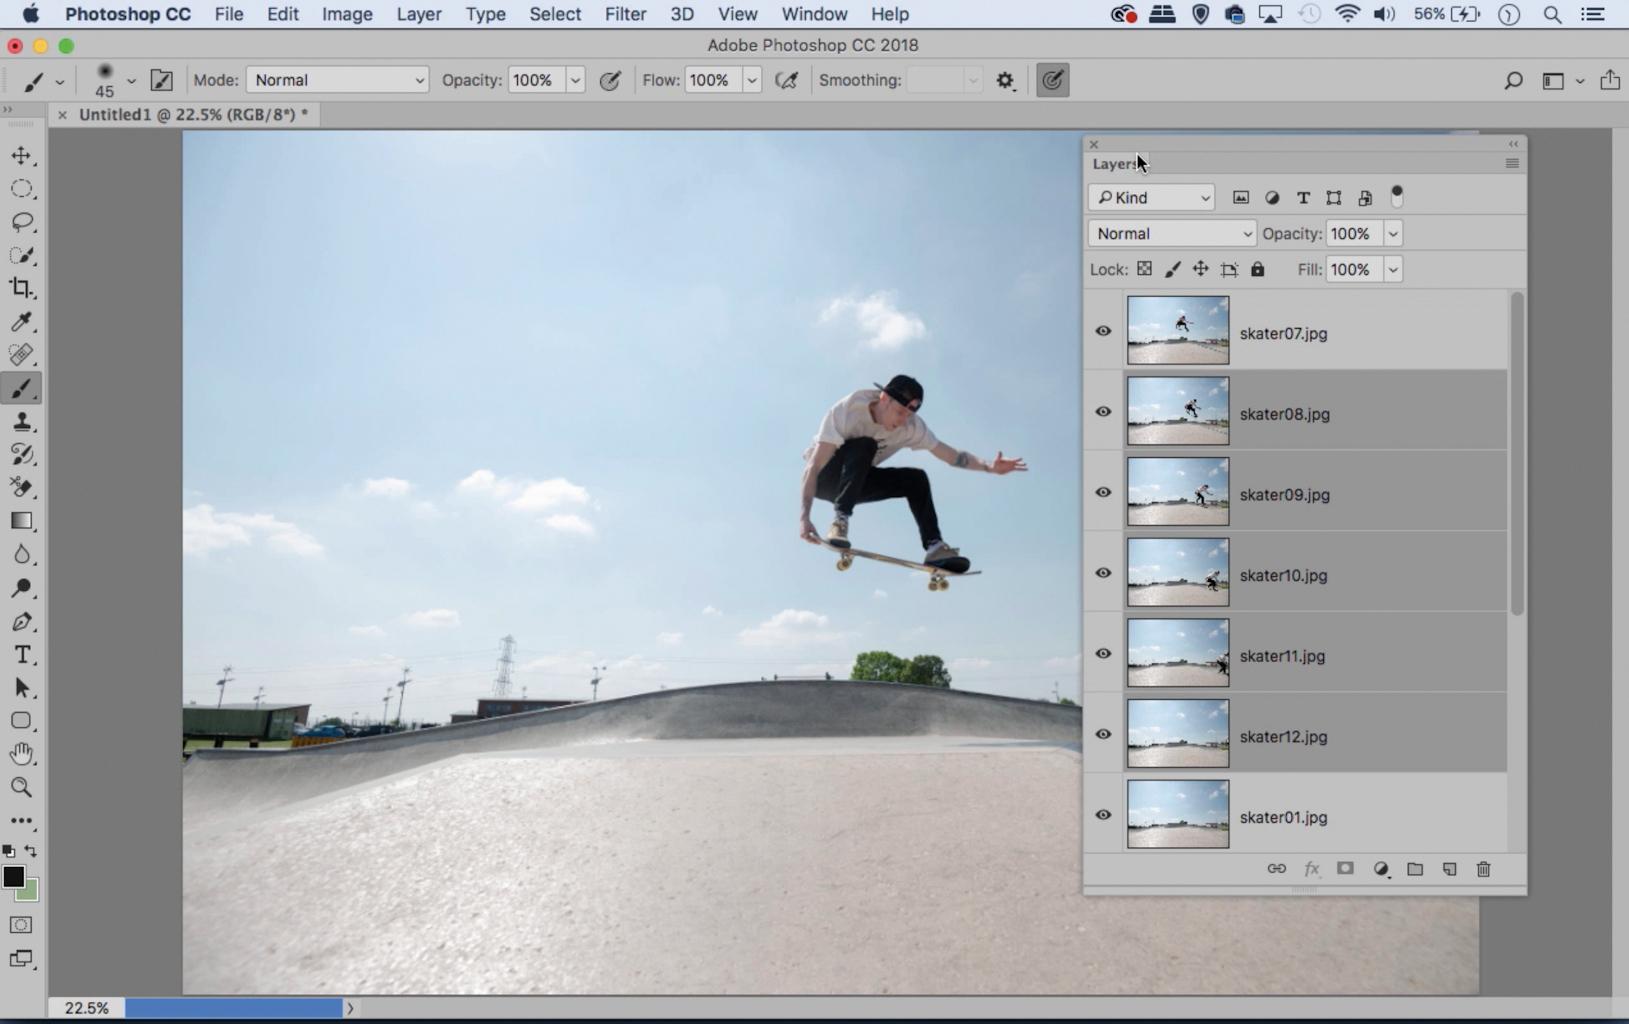
2. Change the order
Next open the Layers Panel (Window>Layers) and rearrange the layers so they overlap how you want. We’ve dragged the ‘hero’ image to the top. You can use the keyboard shortcut Cmd/Ctrl+] or [ to move layers up or down the stack.
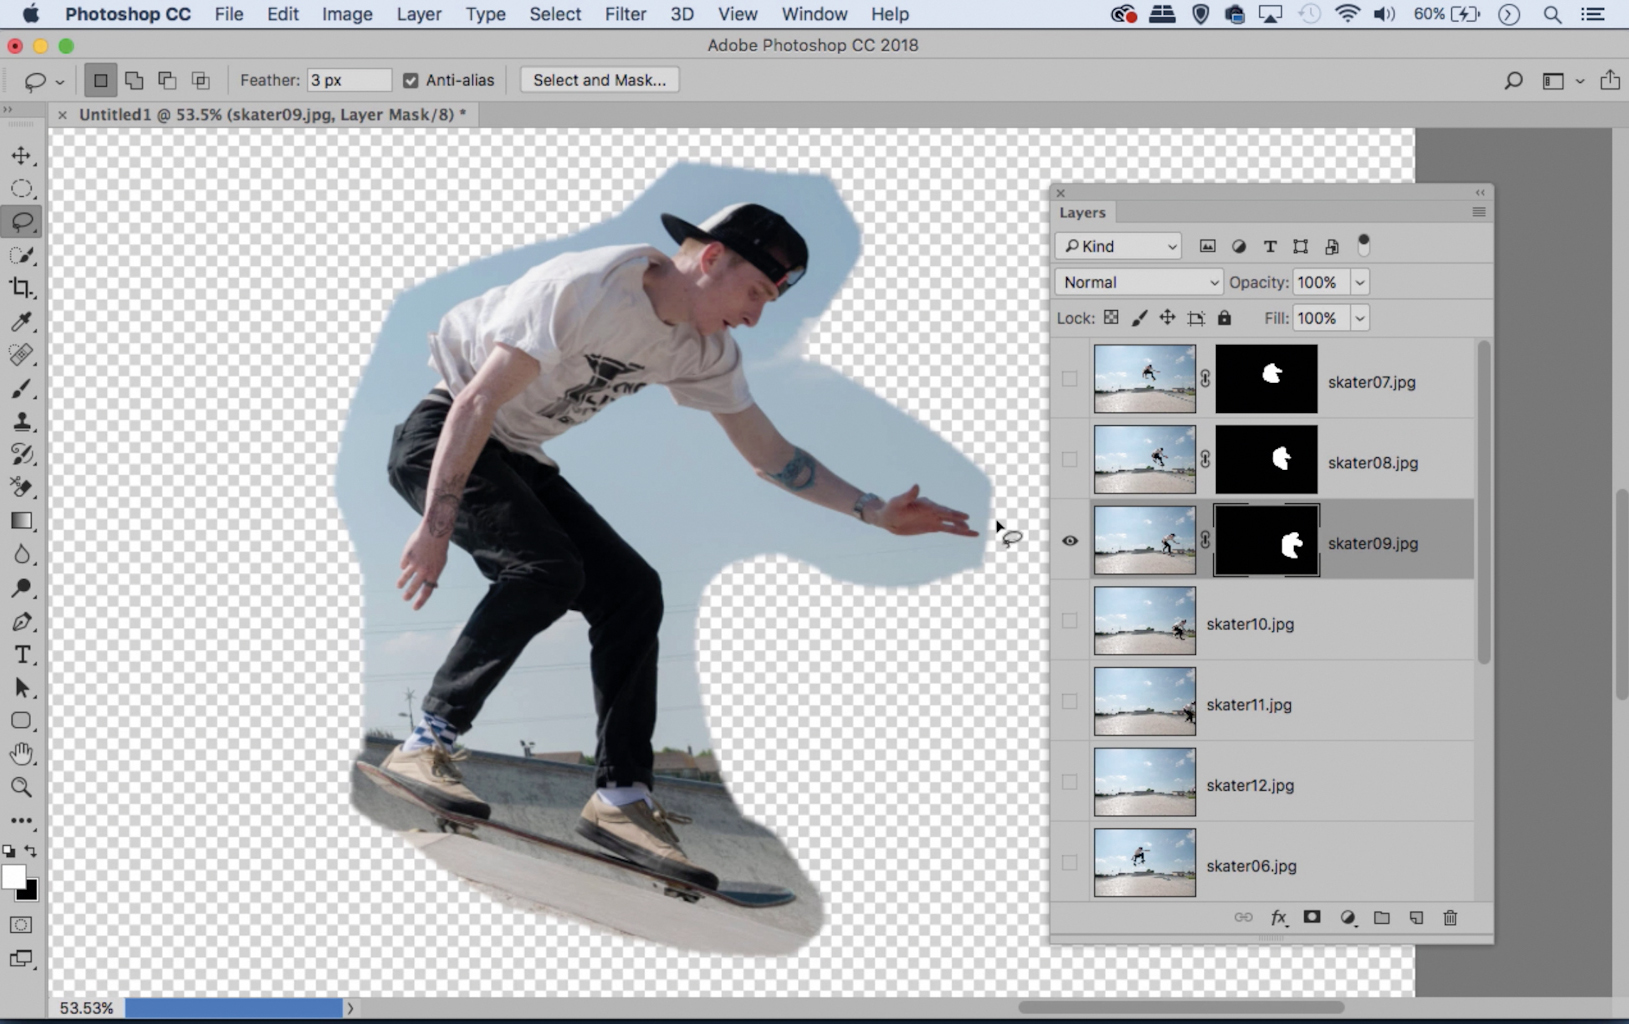
3. Make rough masks
Highlight the top layer and grab the Lasso tool. Then select the skater and click the Add Layer Mask icon in the Layers Panel. Next Alt-click the eye icon of the layer below, then select and mask again. Repeat for all but the bottom layer. Next, reveal all the layers.
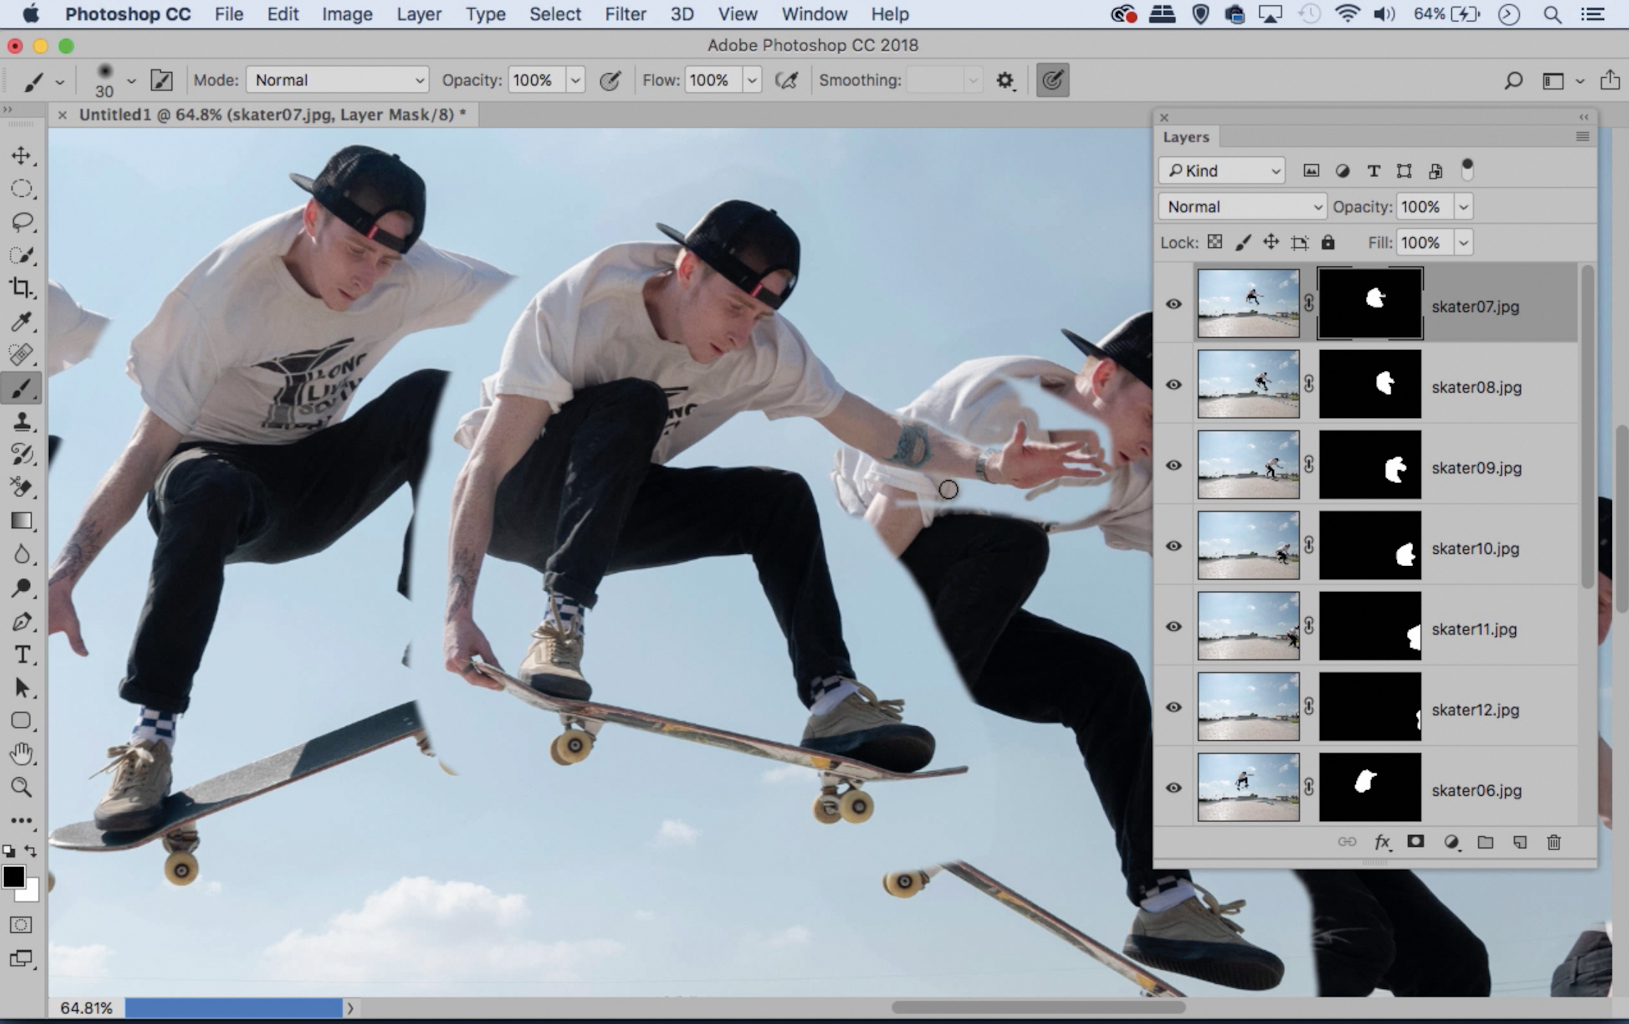
4. Tidy the overlap
Highlight the mask thumbnail on the top layer then grab the Brush tool. Paint with black to hide the edges and tidy up parts of the body that overlap the layers underneath. Then, highlight the next mask thumbnail and repeat. Carry on until all the masks are complete.
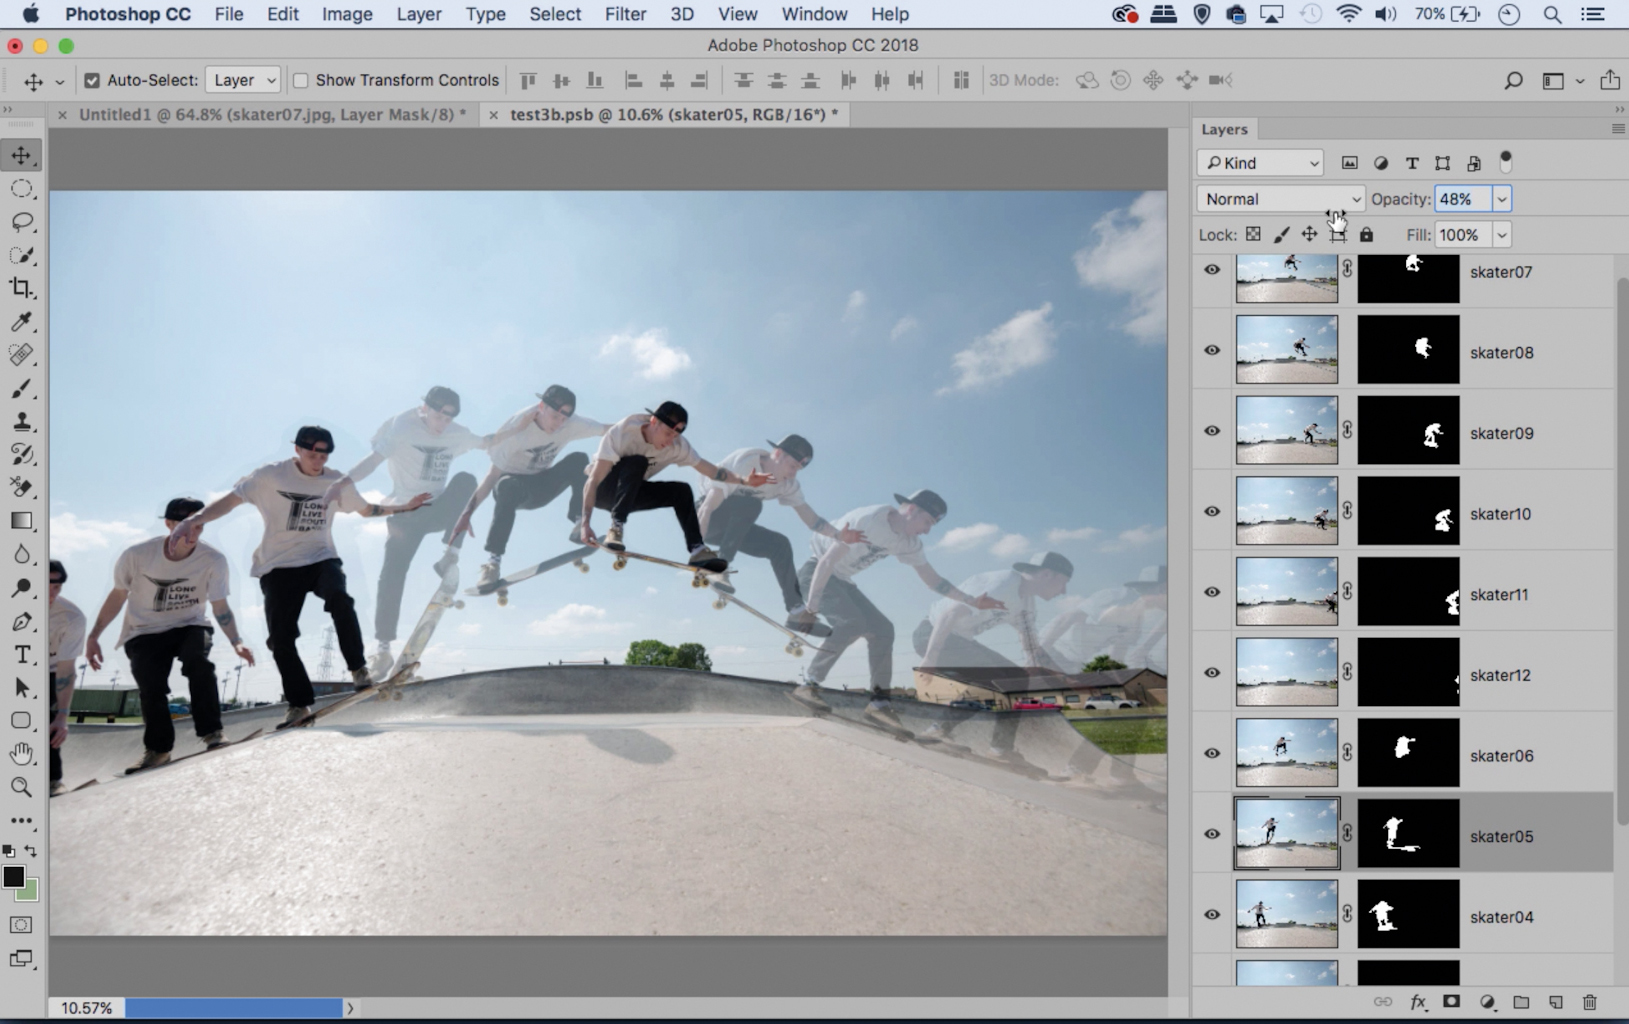
5. Add a fade effect
Once all the masks have been perfected the sequence should look seamless. At this stage, if we like, we can experiment with different opacities to create a faded look to parts of the sequence. Highlight each layer and use the layer opacity controls to fade them out.
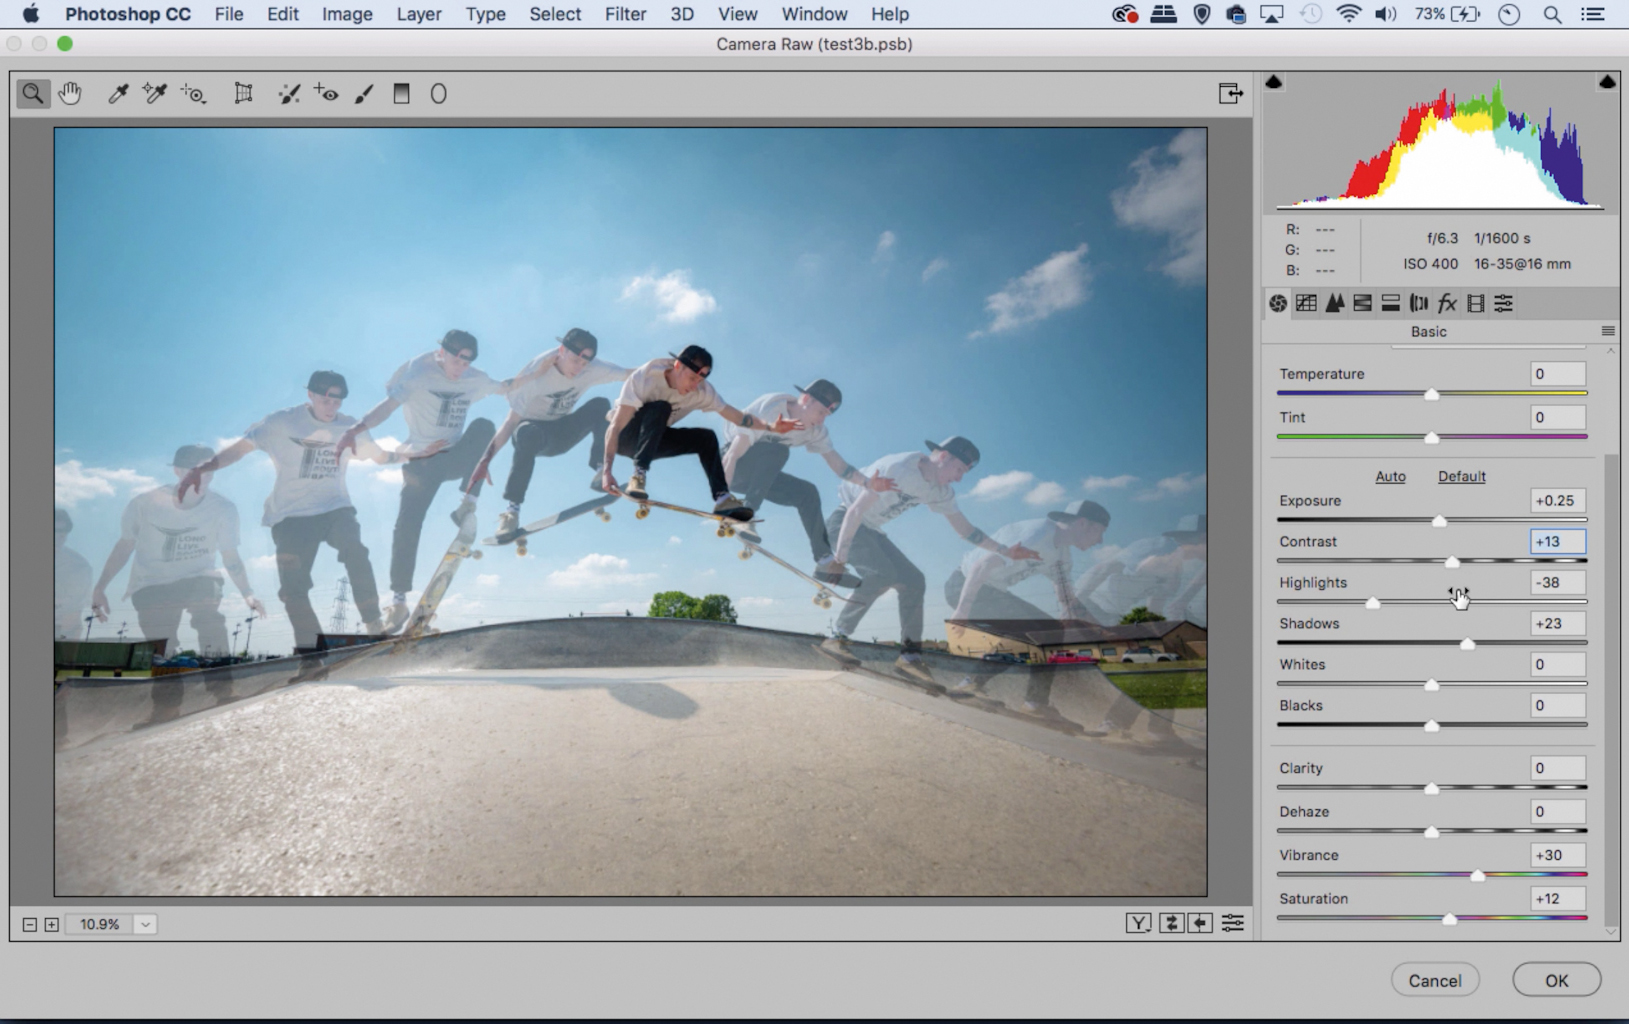
6. Finish the image
Highlight the top layer then click the Create New Layer icon. Use the shortcut Cmd/Ctrl+Shift+Alt+E to merge a new layer then finish off by adjusting this layer. We’ve boosted the colours with Filter>Camera Raw Filter and cloned out some background details.
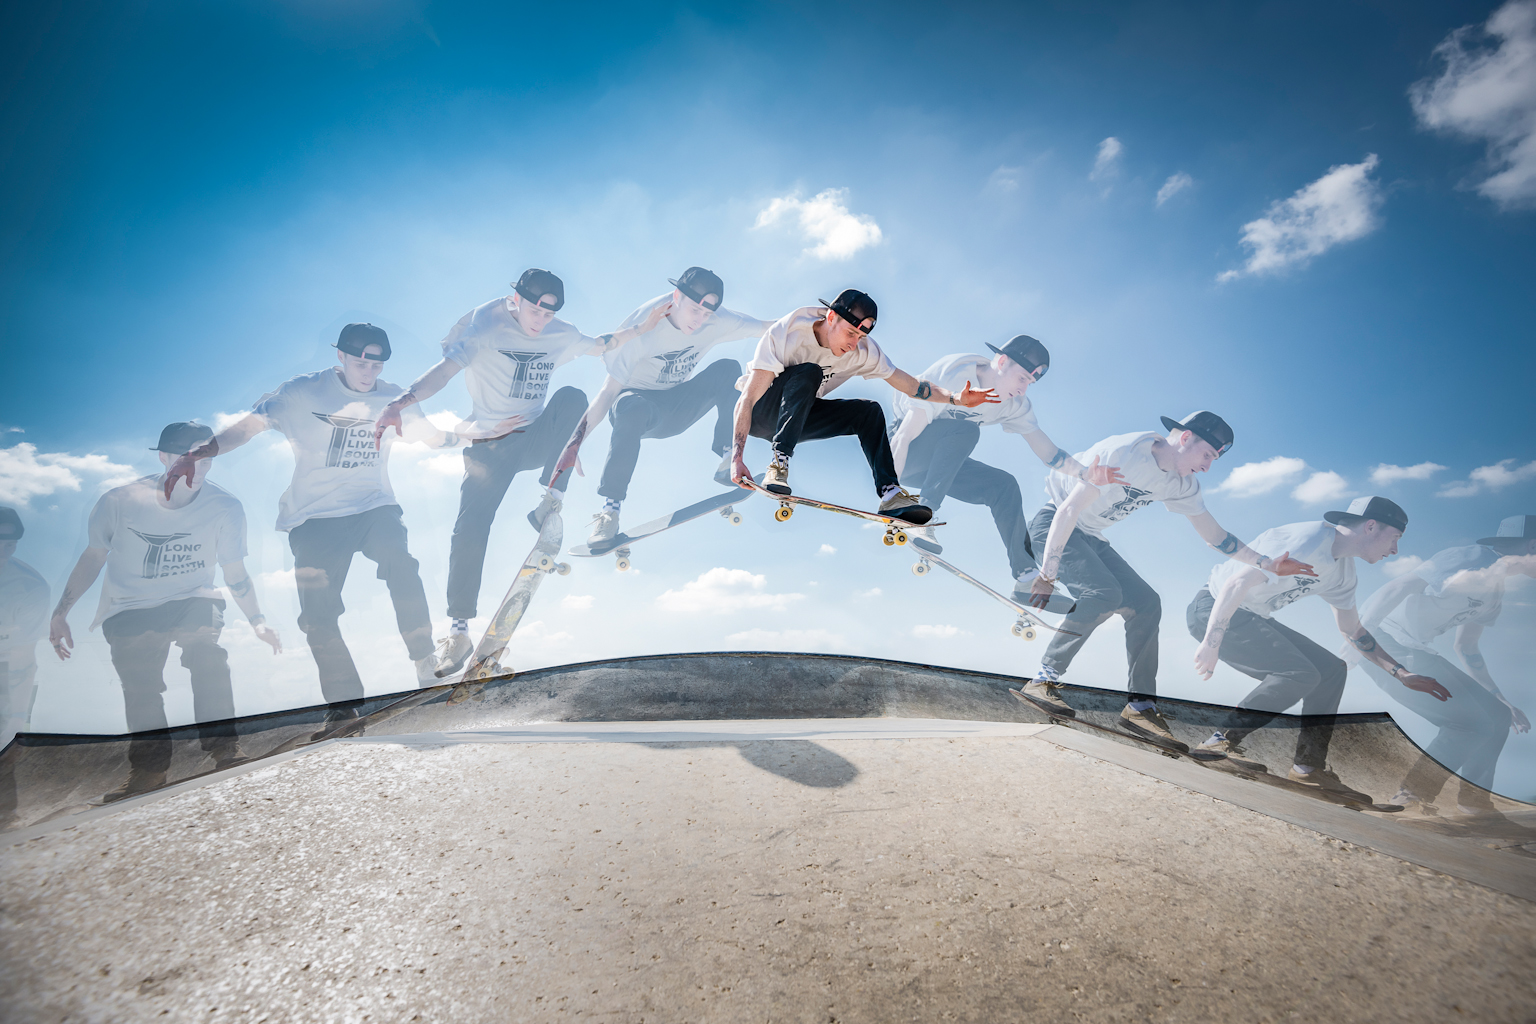
To overlap or not?
When choosing the photos for your sequence there are two approaches. You could either blend overlapping frames as we’ve done in our main image, or instead ditch the frames that overlap and instead combine the alternate frames like this. This second option is easier, as there’s no need to paint precise layer masks because each figure is easily masked. It’s an approach that many sequence photographs take. We chose the more time-consuming option with our main image so that our sequence flows from one position to the next. We also added the fading effect to draw the eye to the central position of the picture.
Read more: The 10 best action cameras right now
PhotoPlus: The Canon Magazine is the world’s only 100% Canon-focused title on the newsstand. Launched in 2007, for 14 years it has delivered news, reviews, buying guides, features, inspirational projects and tutorials on cameras, lenses, tripods, gimbals, filters, lighting and all manner of photography equipment.
Aimed squarely at enthusiast photographers who use the Canon DSLR or mirrorless camera systems, all content is tailored to Canon users – so everything from techniques to product tests are tailored to those using the EOS camera system.
Editor Peter Travers brings 14 years of experience as both a journalist and professional photographer, with Technique Editor Dan Mold shoring up the magazine with his 6 years of expertise.

