Home photography ideas: Superhero super shots using a DIY green screen!
Shoot a stunning superhero scene using a home-made green screen and an action figure!
The best camera deals, reviews, product advice, and unmissable photography news, direct to your inbox!
You are now subscribed
Your newsletter sign-up was successful
Watch video: Home photography idea – Superheroes and green screens
Here's a great photo project that you can shoot from the comfort of your living room: a superpowered superhero scene!
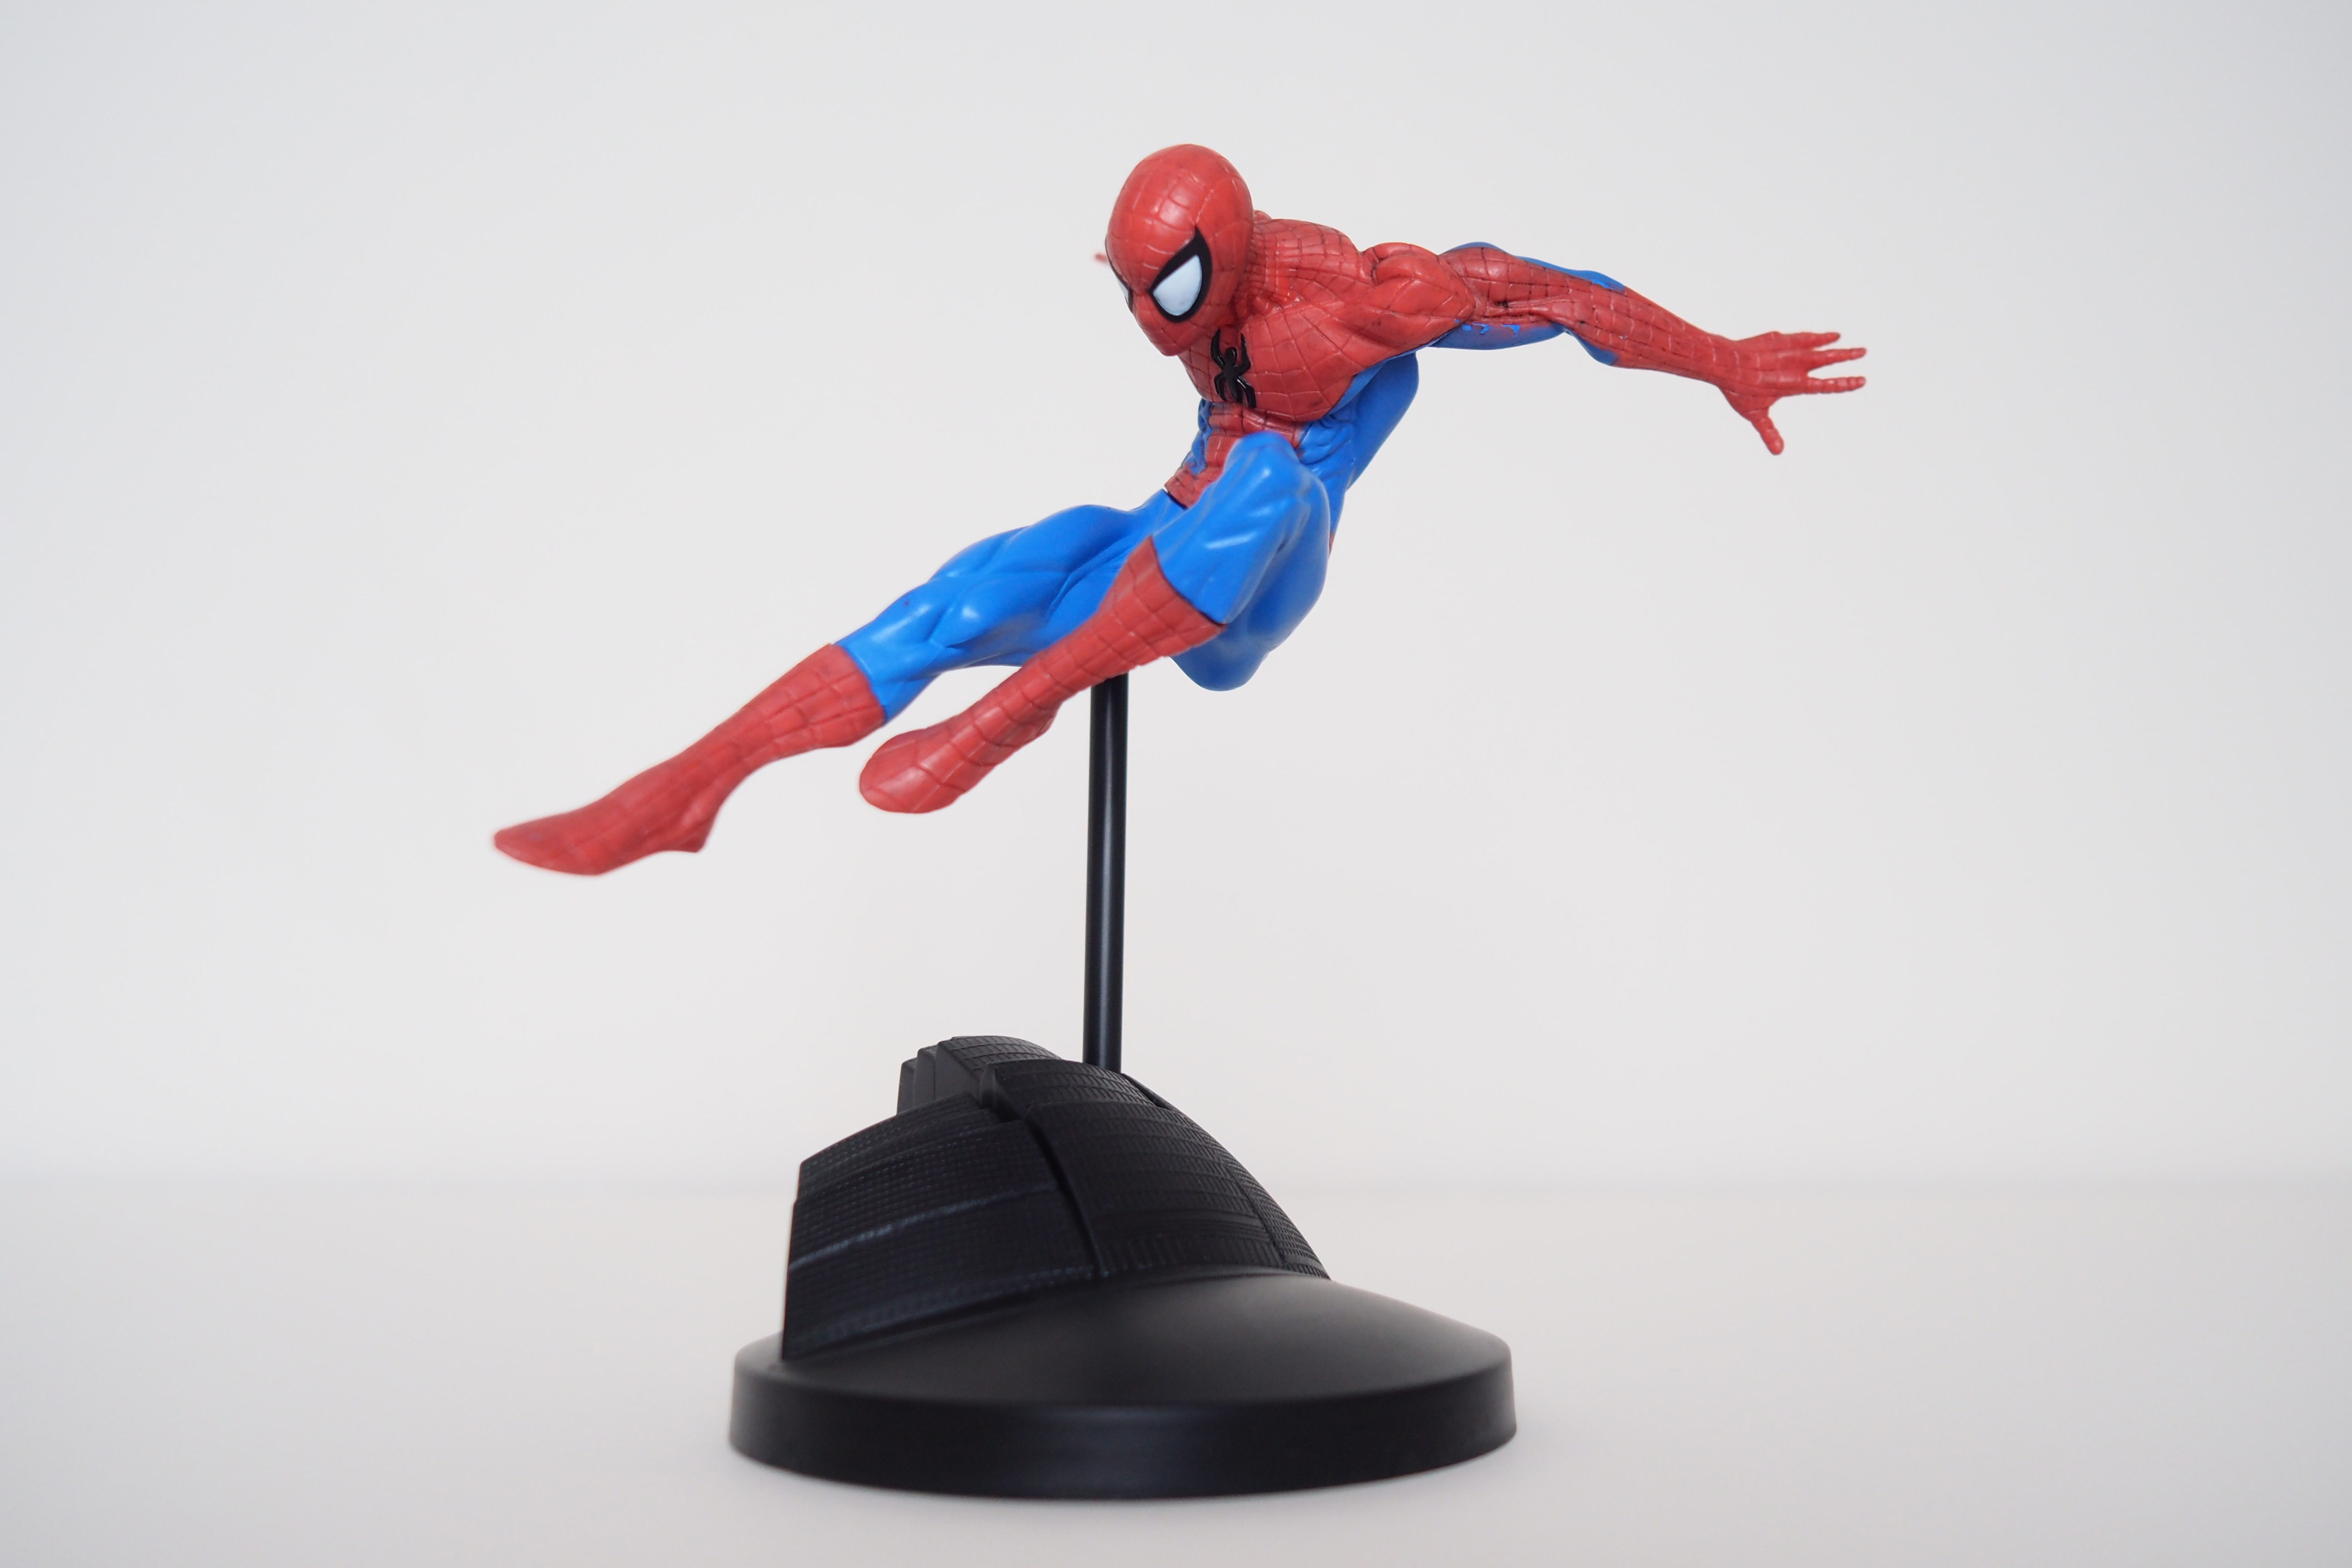
For your subject, you'll need an action figure or statuette of your chosen superhero. Your kids might have a suitable toy lying around, or the collectors among you might have a great figurine on your shelves. Flying or leaping characters work best, so we’ve gone for Spider-Man in an exciting web-slinging pose.
• Read more: Best green screen backgrounds
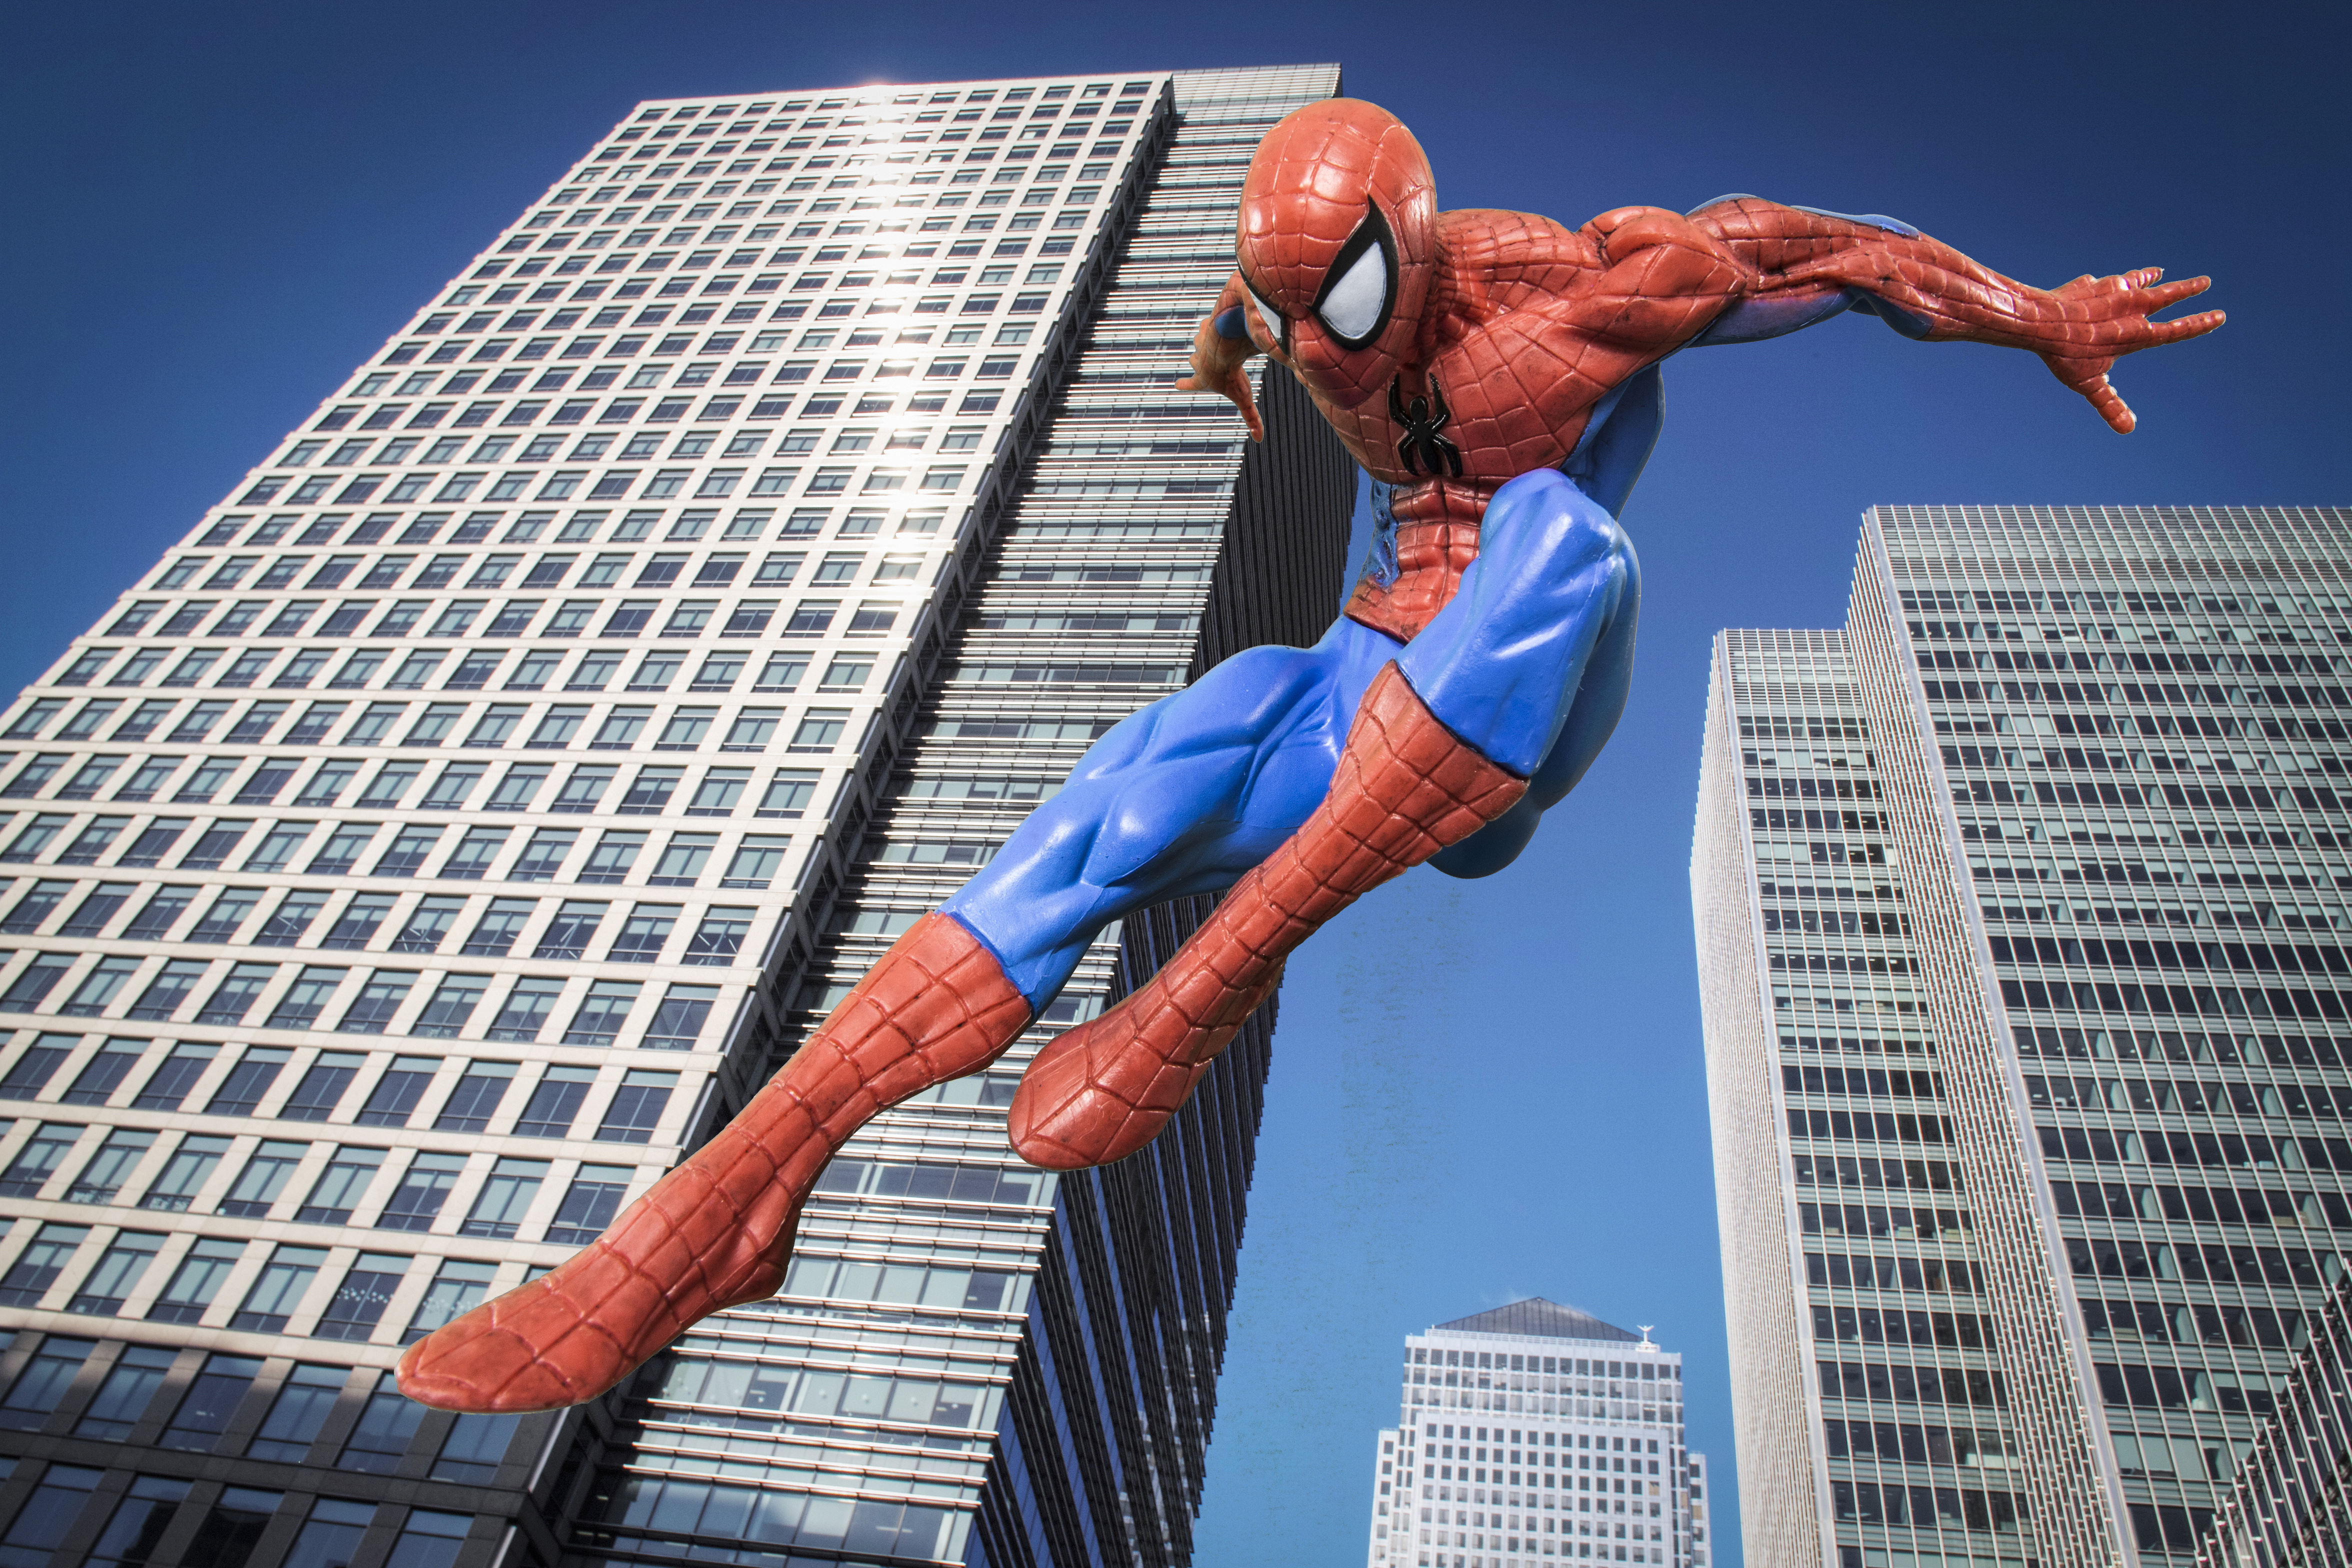
We’re going to take a shot of Spidey and then superimpose him onto a cityscape image using chroma key compositing – the technique that many people know as ‘green screen’. This enables us to replace a specific color range, namely a green backdrop, in Photoshop.
Spider-Man is a perfect subject for a green screen shot, because there’s no green anywhere on his outfit. However, if you wanted to photograph The Hulk (who is mostly green), you could do this same technique with a blue screen instead.
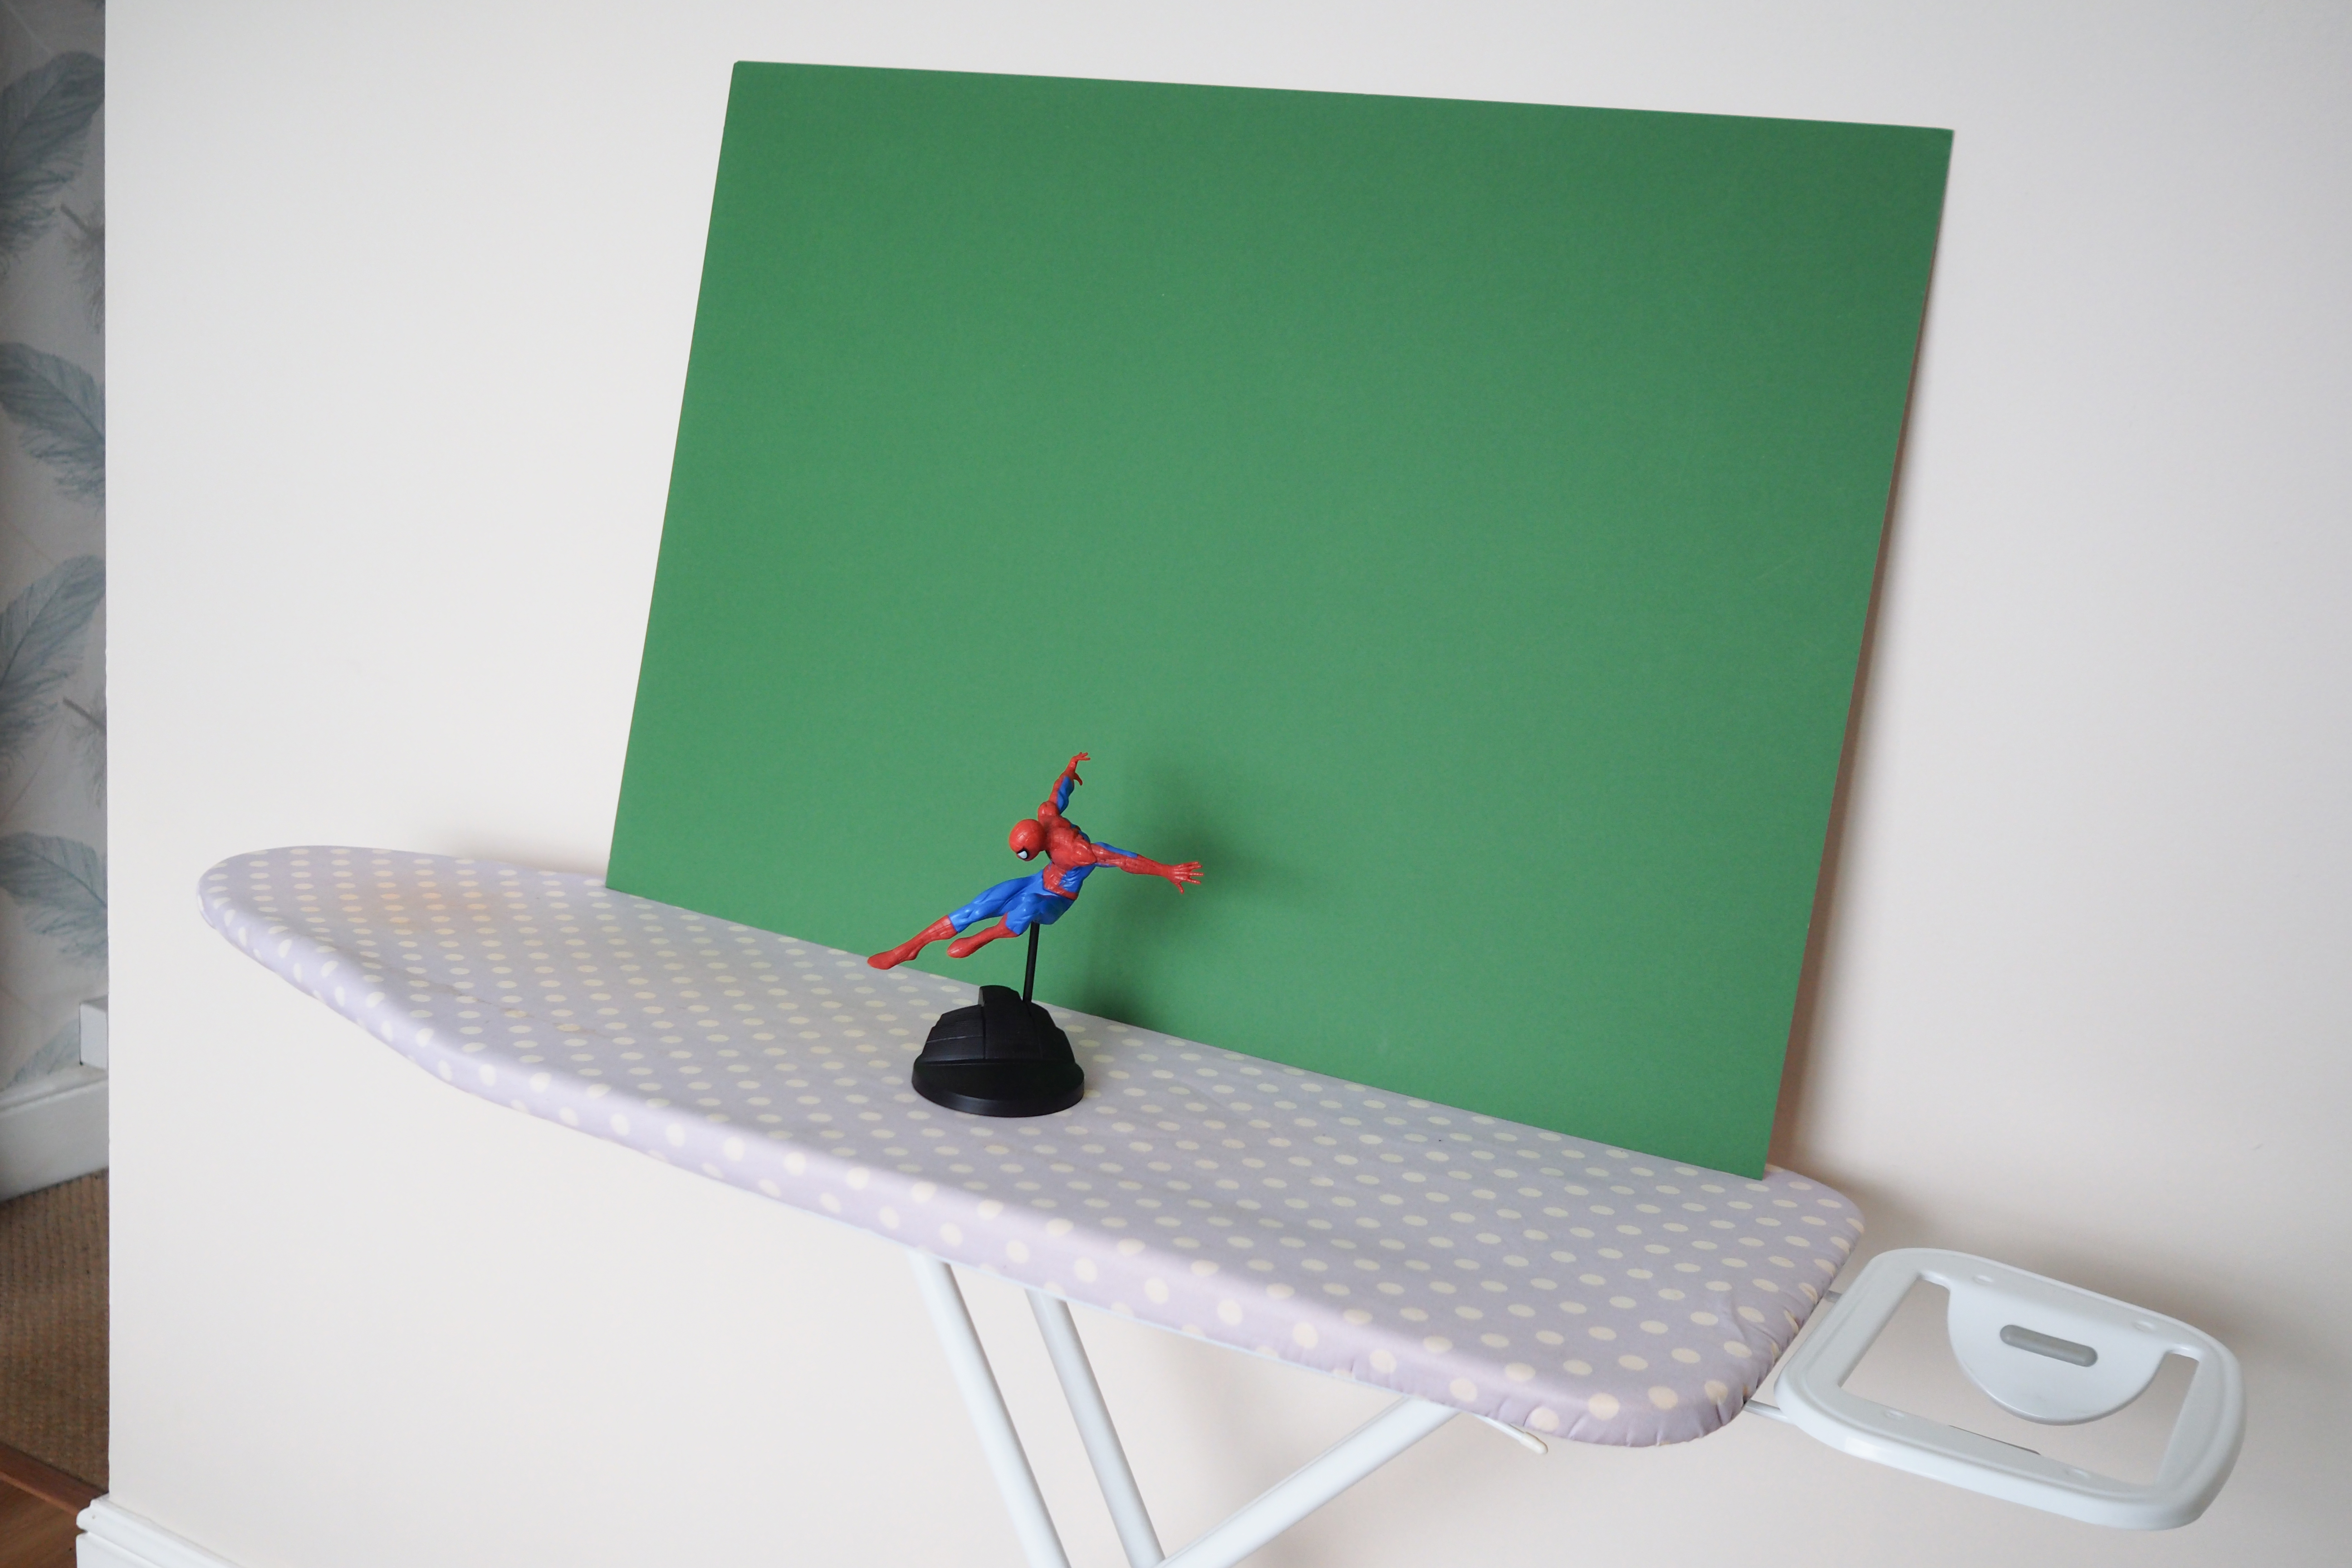
You can buy dedicated chroma key backdrops, but you can use anything that’s a bright, distinct hue of green (or blue). In this case we used a sheet of green card from a craft shop, which does the job just fine. Here's how to do it…
The best camera deals, reviews, product advice, and unmissable photography news, direct to your inbox!
Shoot your superhero
01 Find a figure
The first step is to pick an action figure or statuette of your chosen superhero. Look for poses where the character is flying or leaping, as these will make the most dynamic and exciting photos.
02 Go green
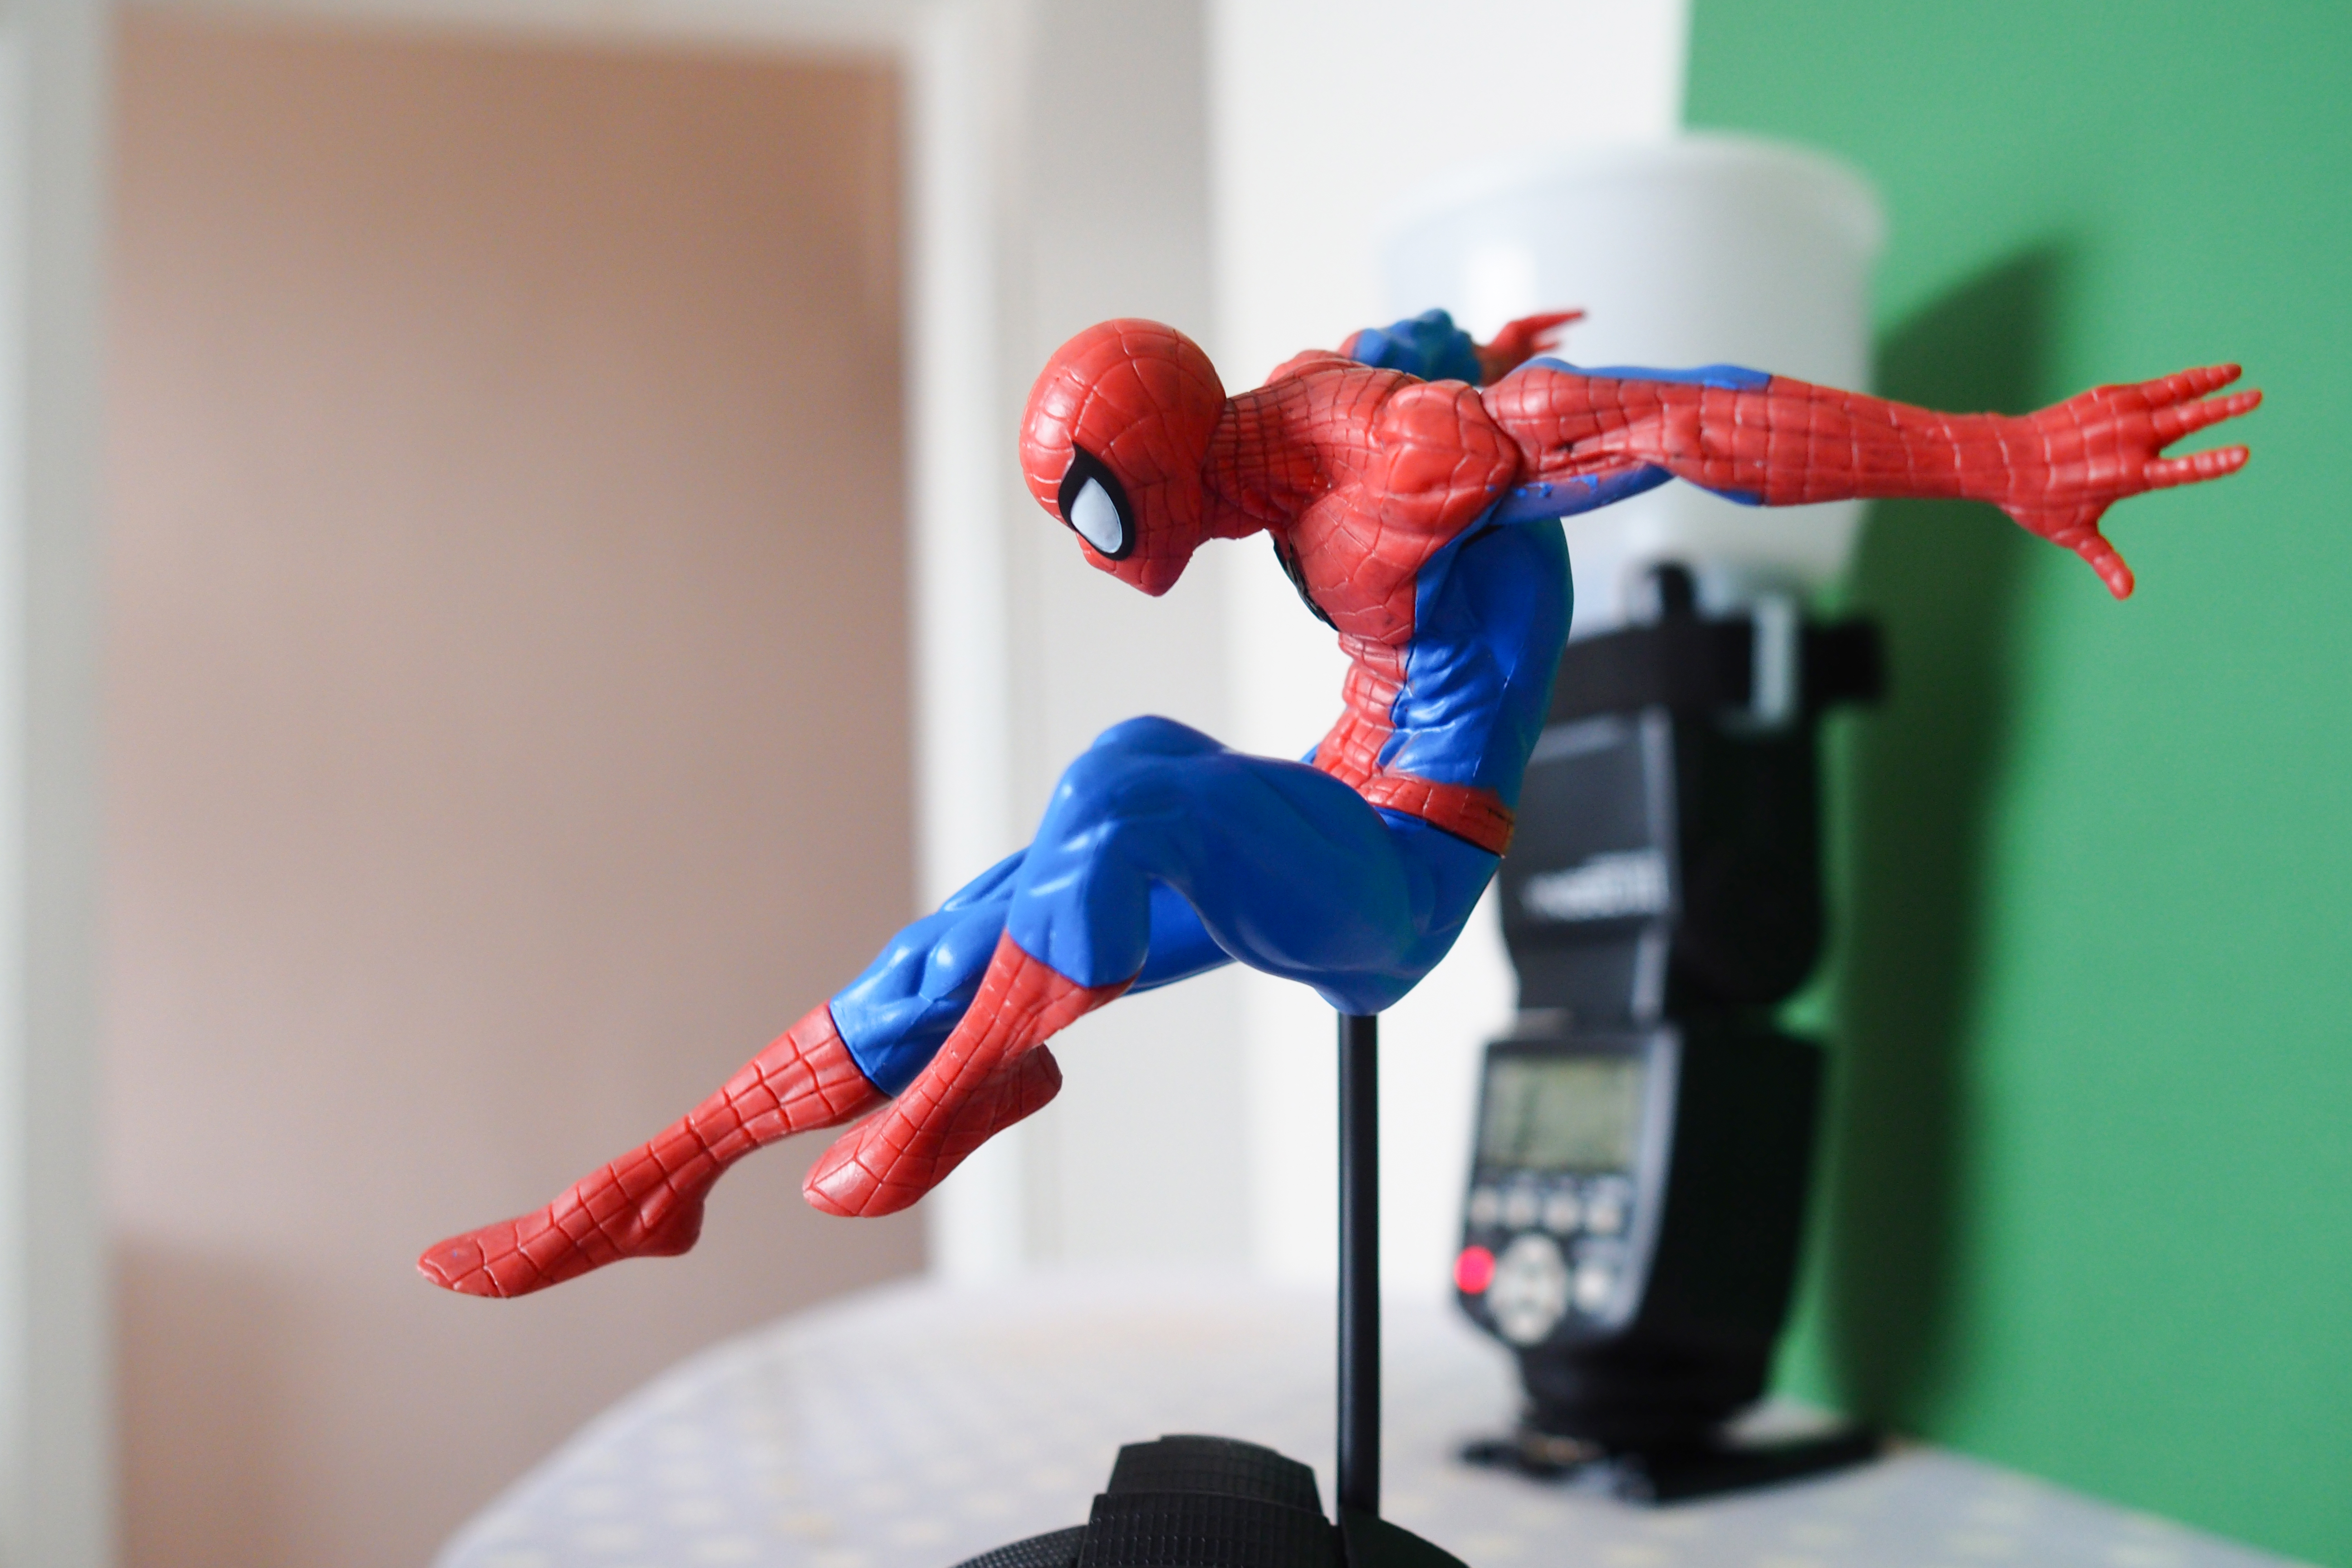
You can use a dedicated chroma key backdrop, but you can also fashion your own green screen using a sheet of green card – bigger is better, as it gives you more shooting options. We’ve set up our green screen on an ironing board, with abundant natural light coming in from the window behind us.
• Best green screen backgrounds
03 Background light
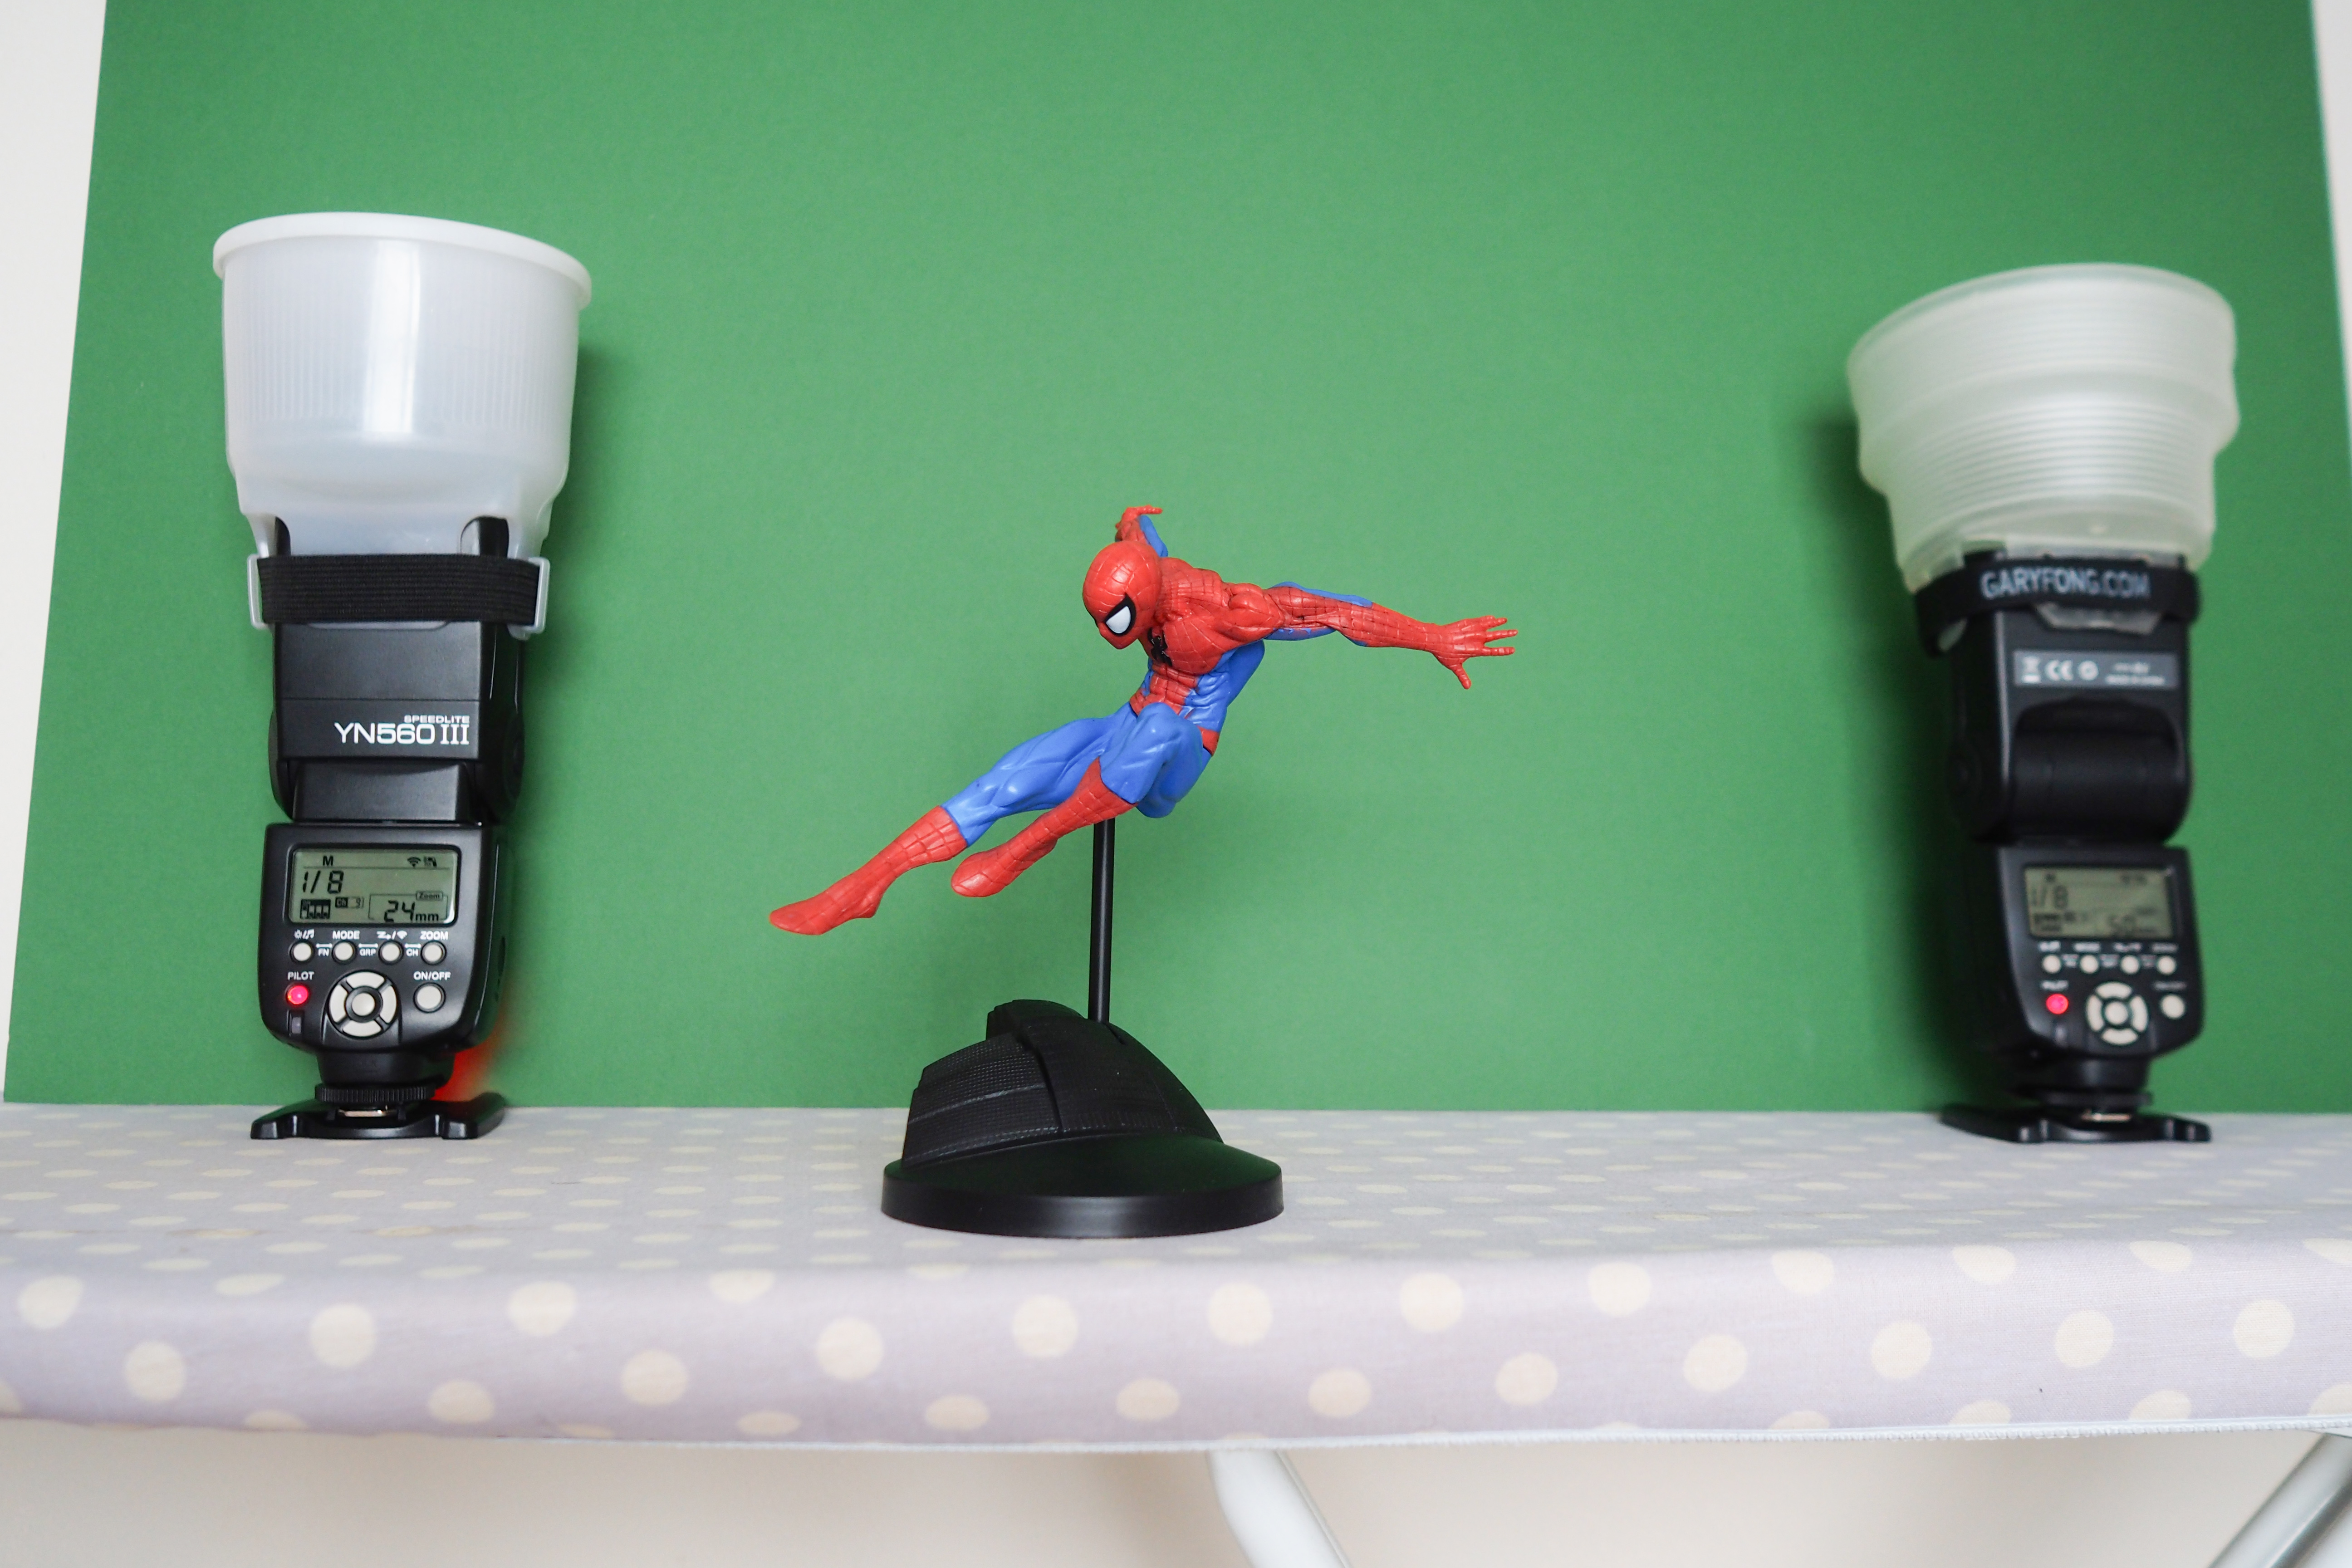
Ideally you should light your green screen, to make it as bright as possible and reduce the shadows cast by the figure, all of which makes editing easier later on. Speed lights or constant LEDs are ideal for this.
04 Key light
Again it’s best to illuminate the figure, both to make the image as crisp as possible and to add depth and dimension by casting shadows over the sculpting and detail. However, window light will suffice.
05 Go wide and stable
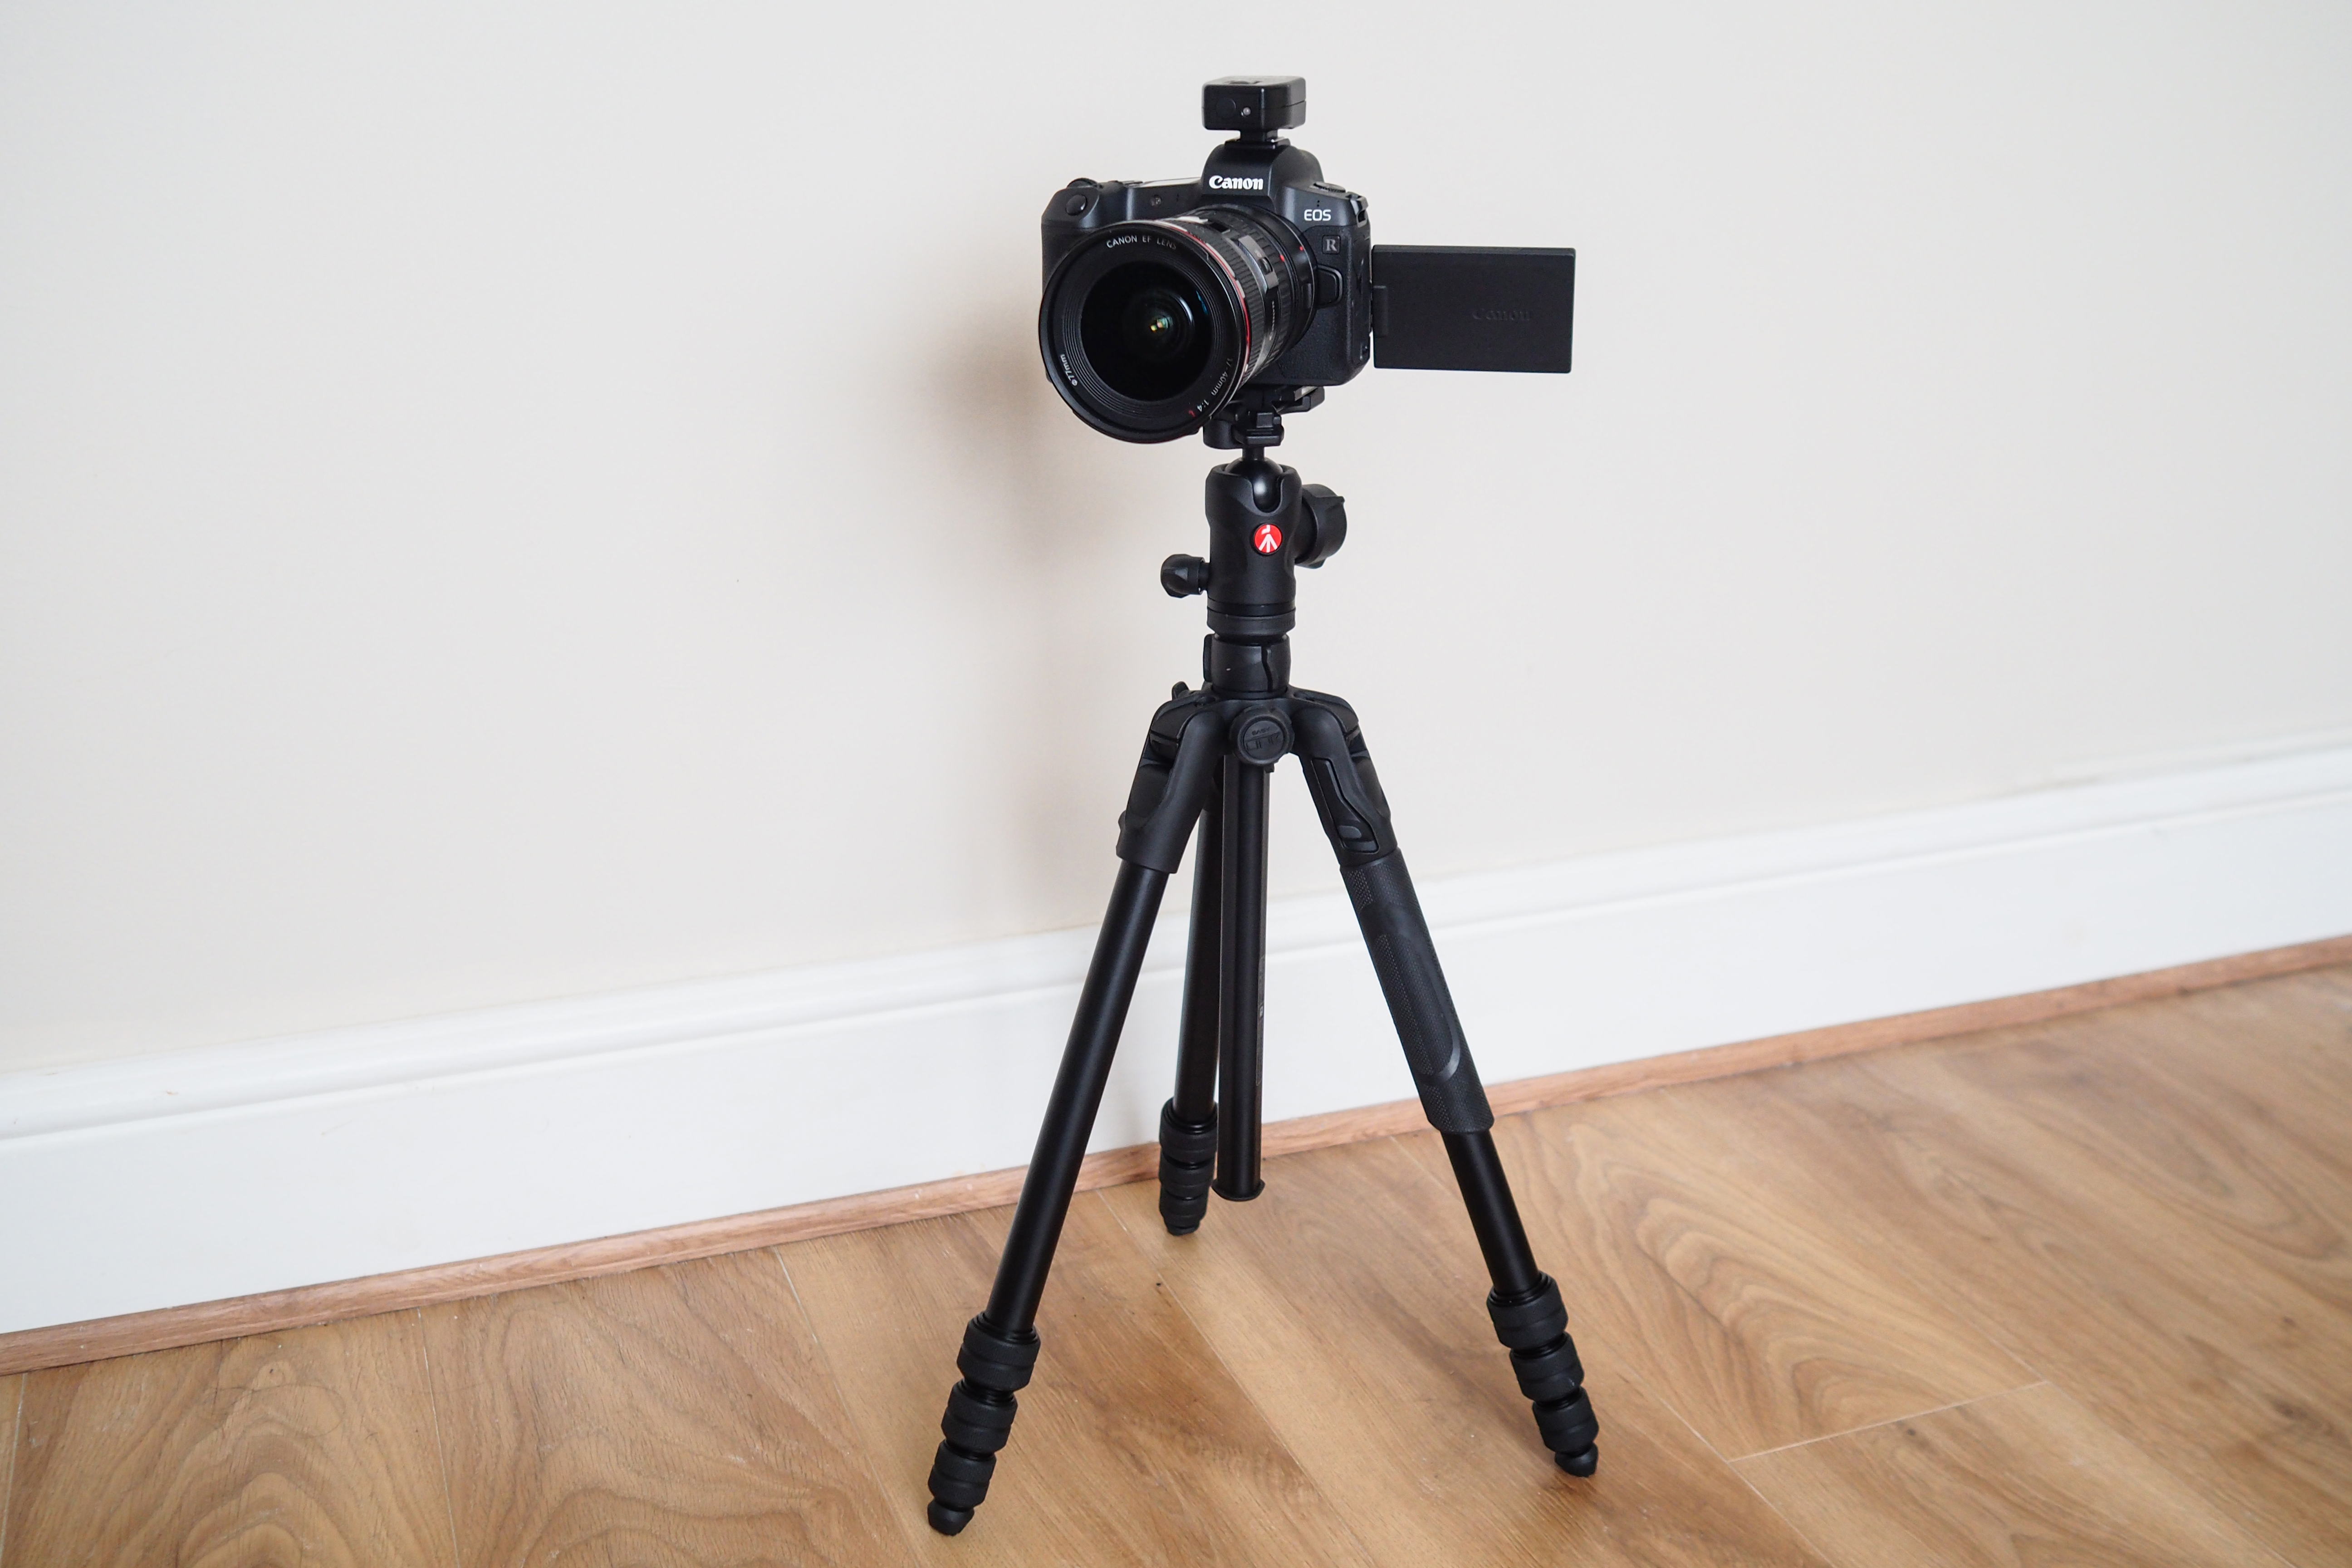
We’re shooting with a wide-angle lens, the Canon EF 17-40mm f/4L, to match the perspective of our background image. Most kit lenses should do the trick, too. You will also benefit from using a tripod, to ensure stability and precision.
06 Narrow aperture
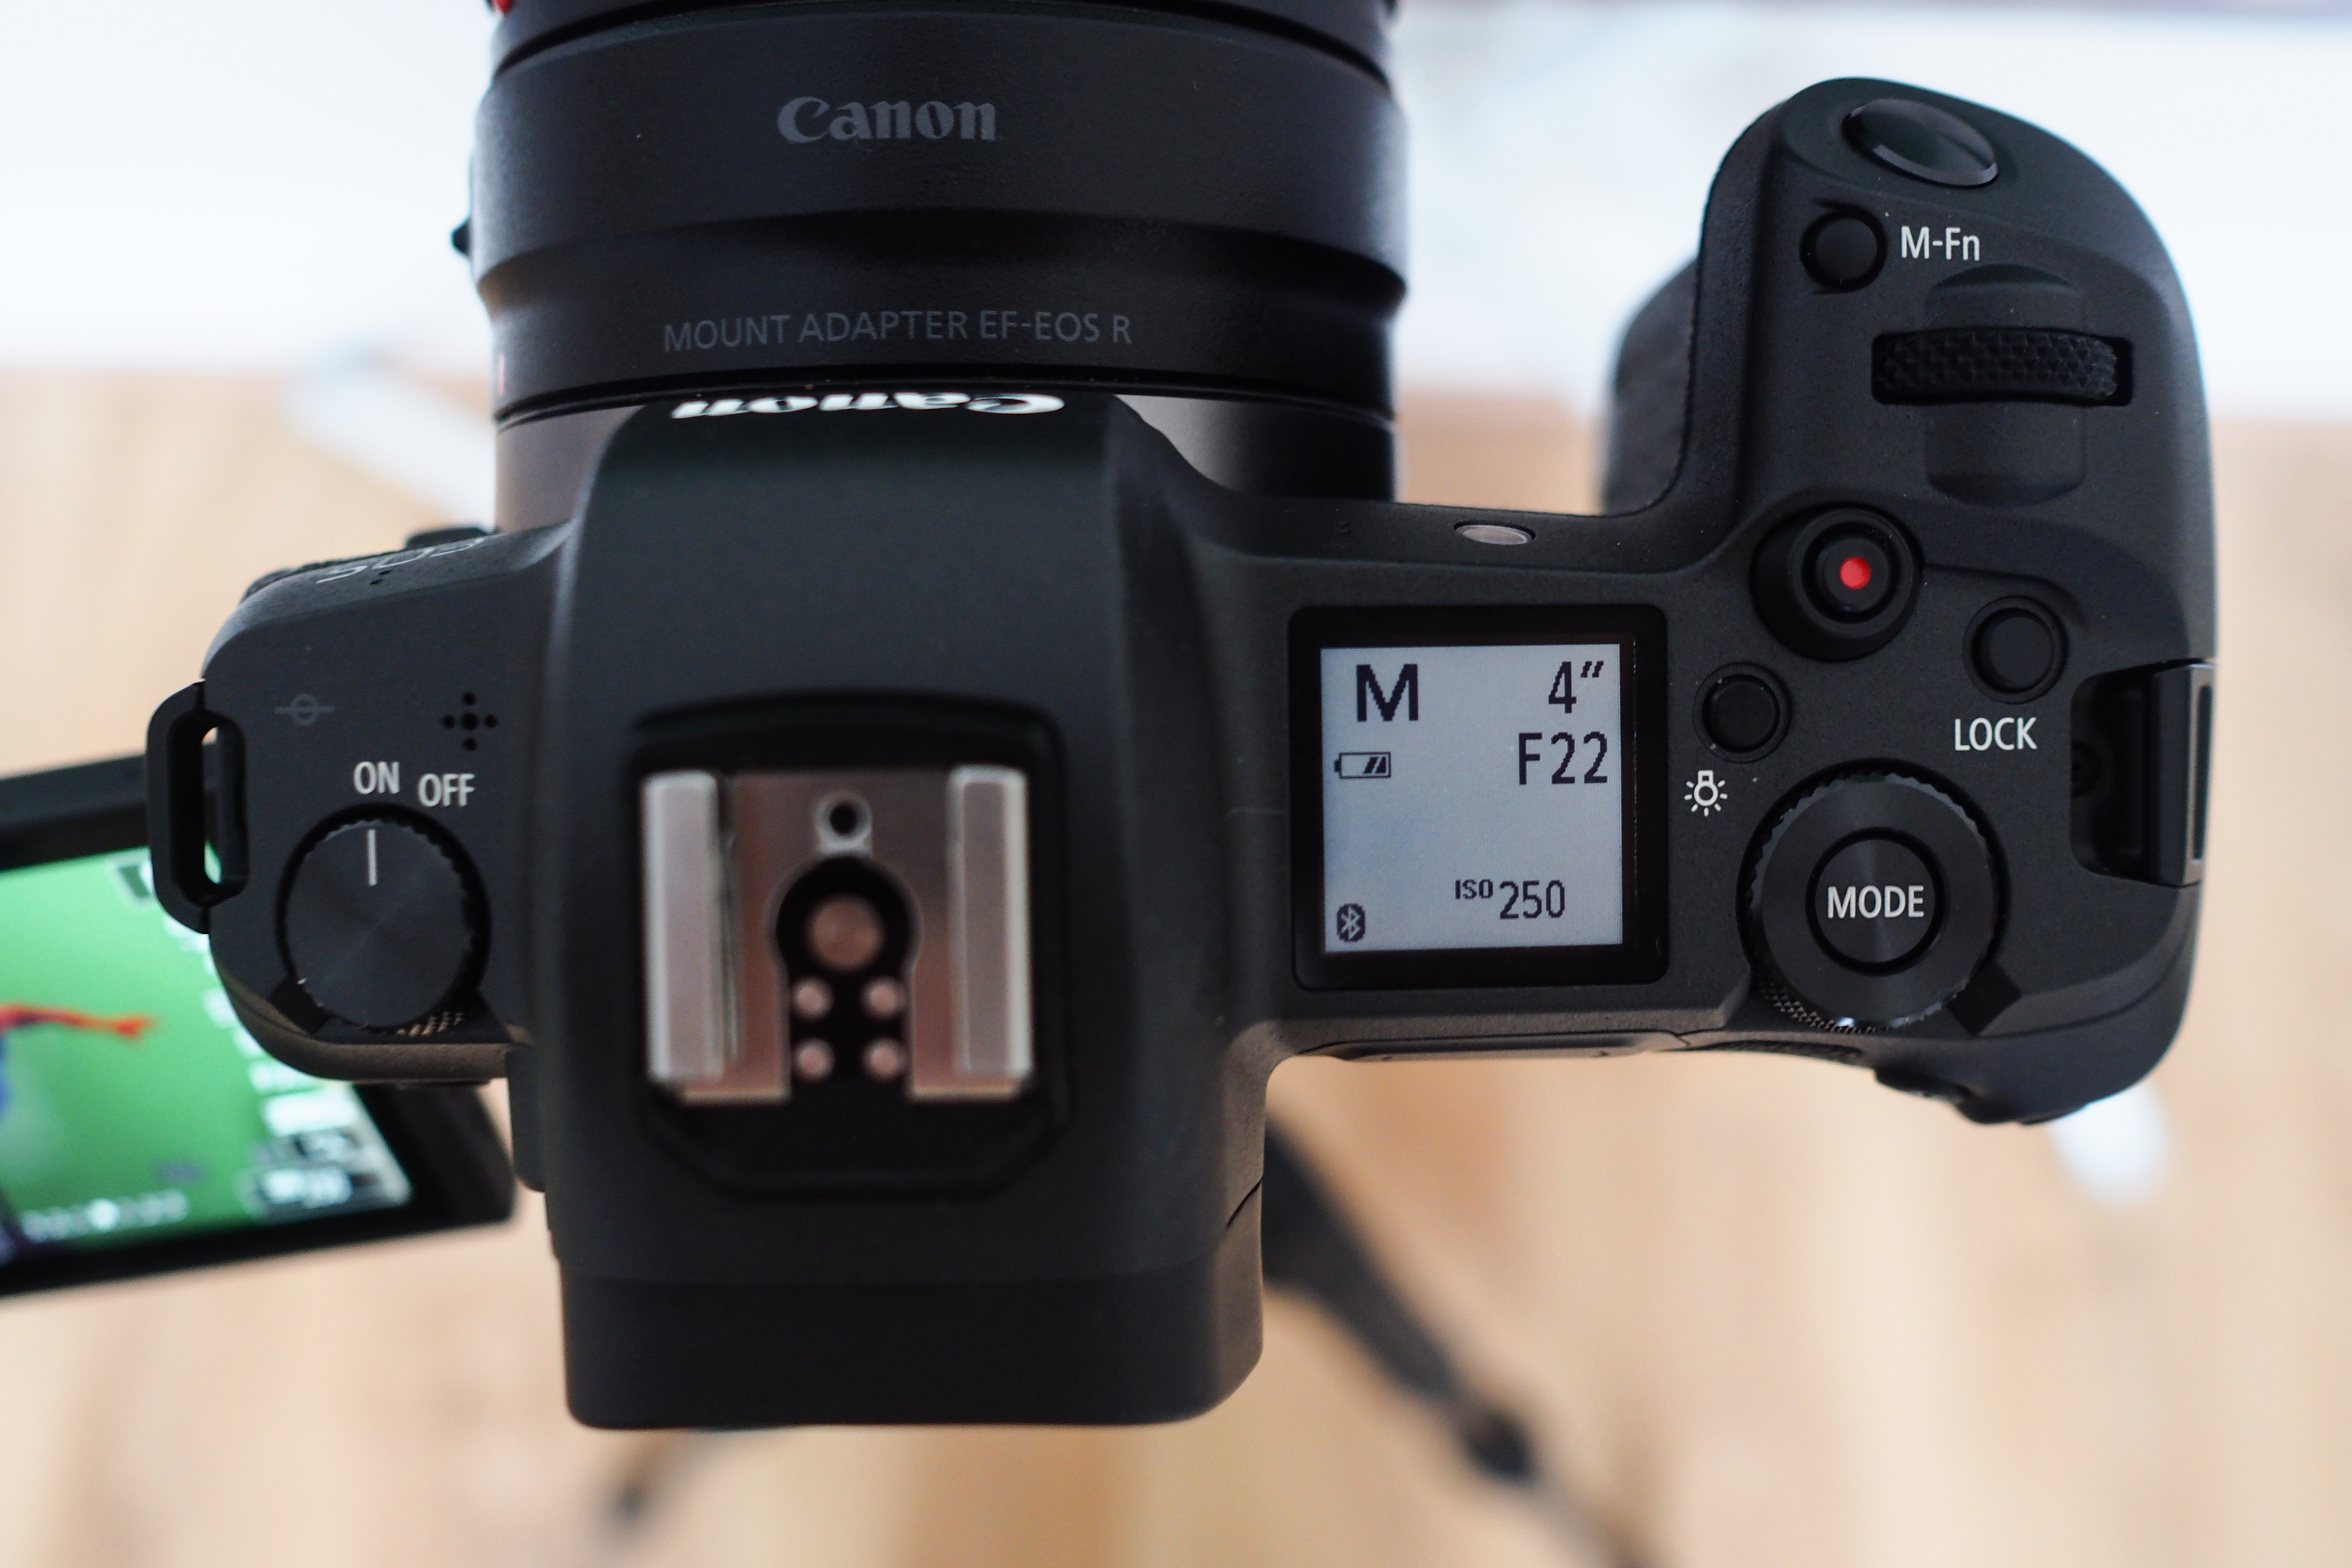
Shoot with as narrow an aperture (which means a high f-number) as possible to get as much depth of field and ensure that the whole figure is in focus. This might mean you need to use a slower shutter speed, so again the tripod is infinitely helpful.
Superpowered post-processing
07 Clean the green
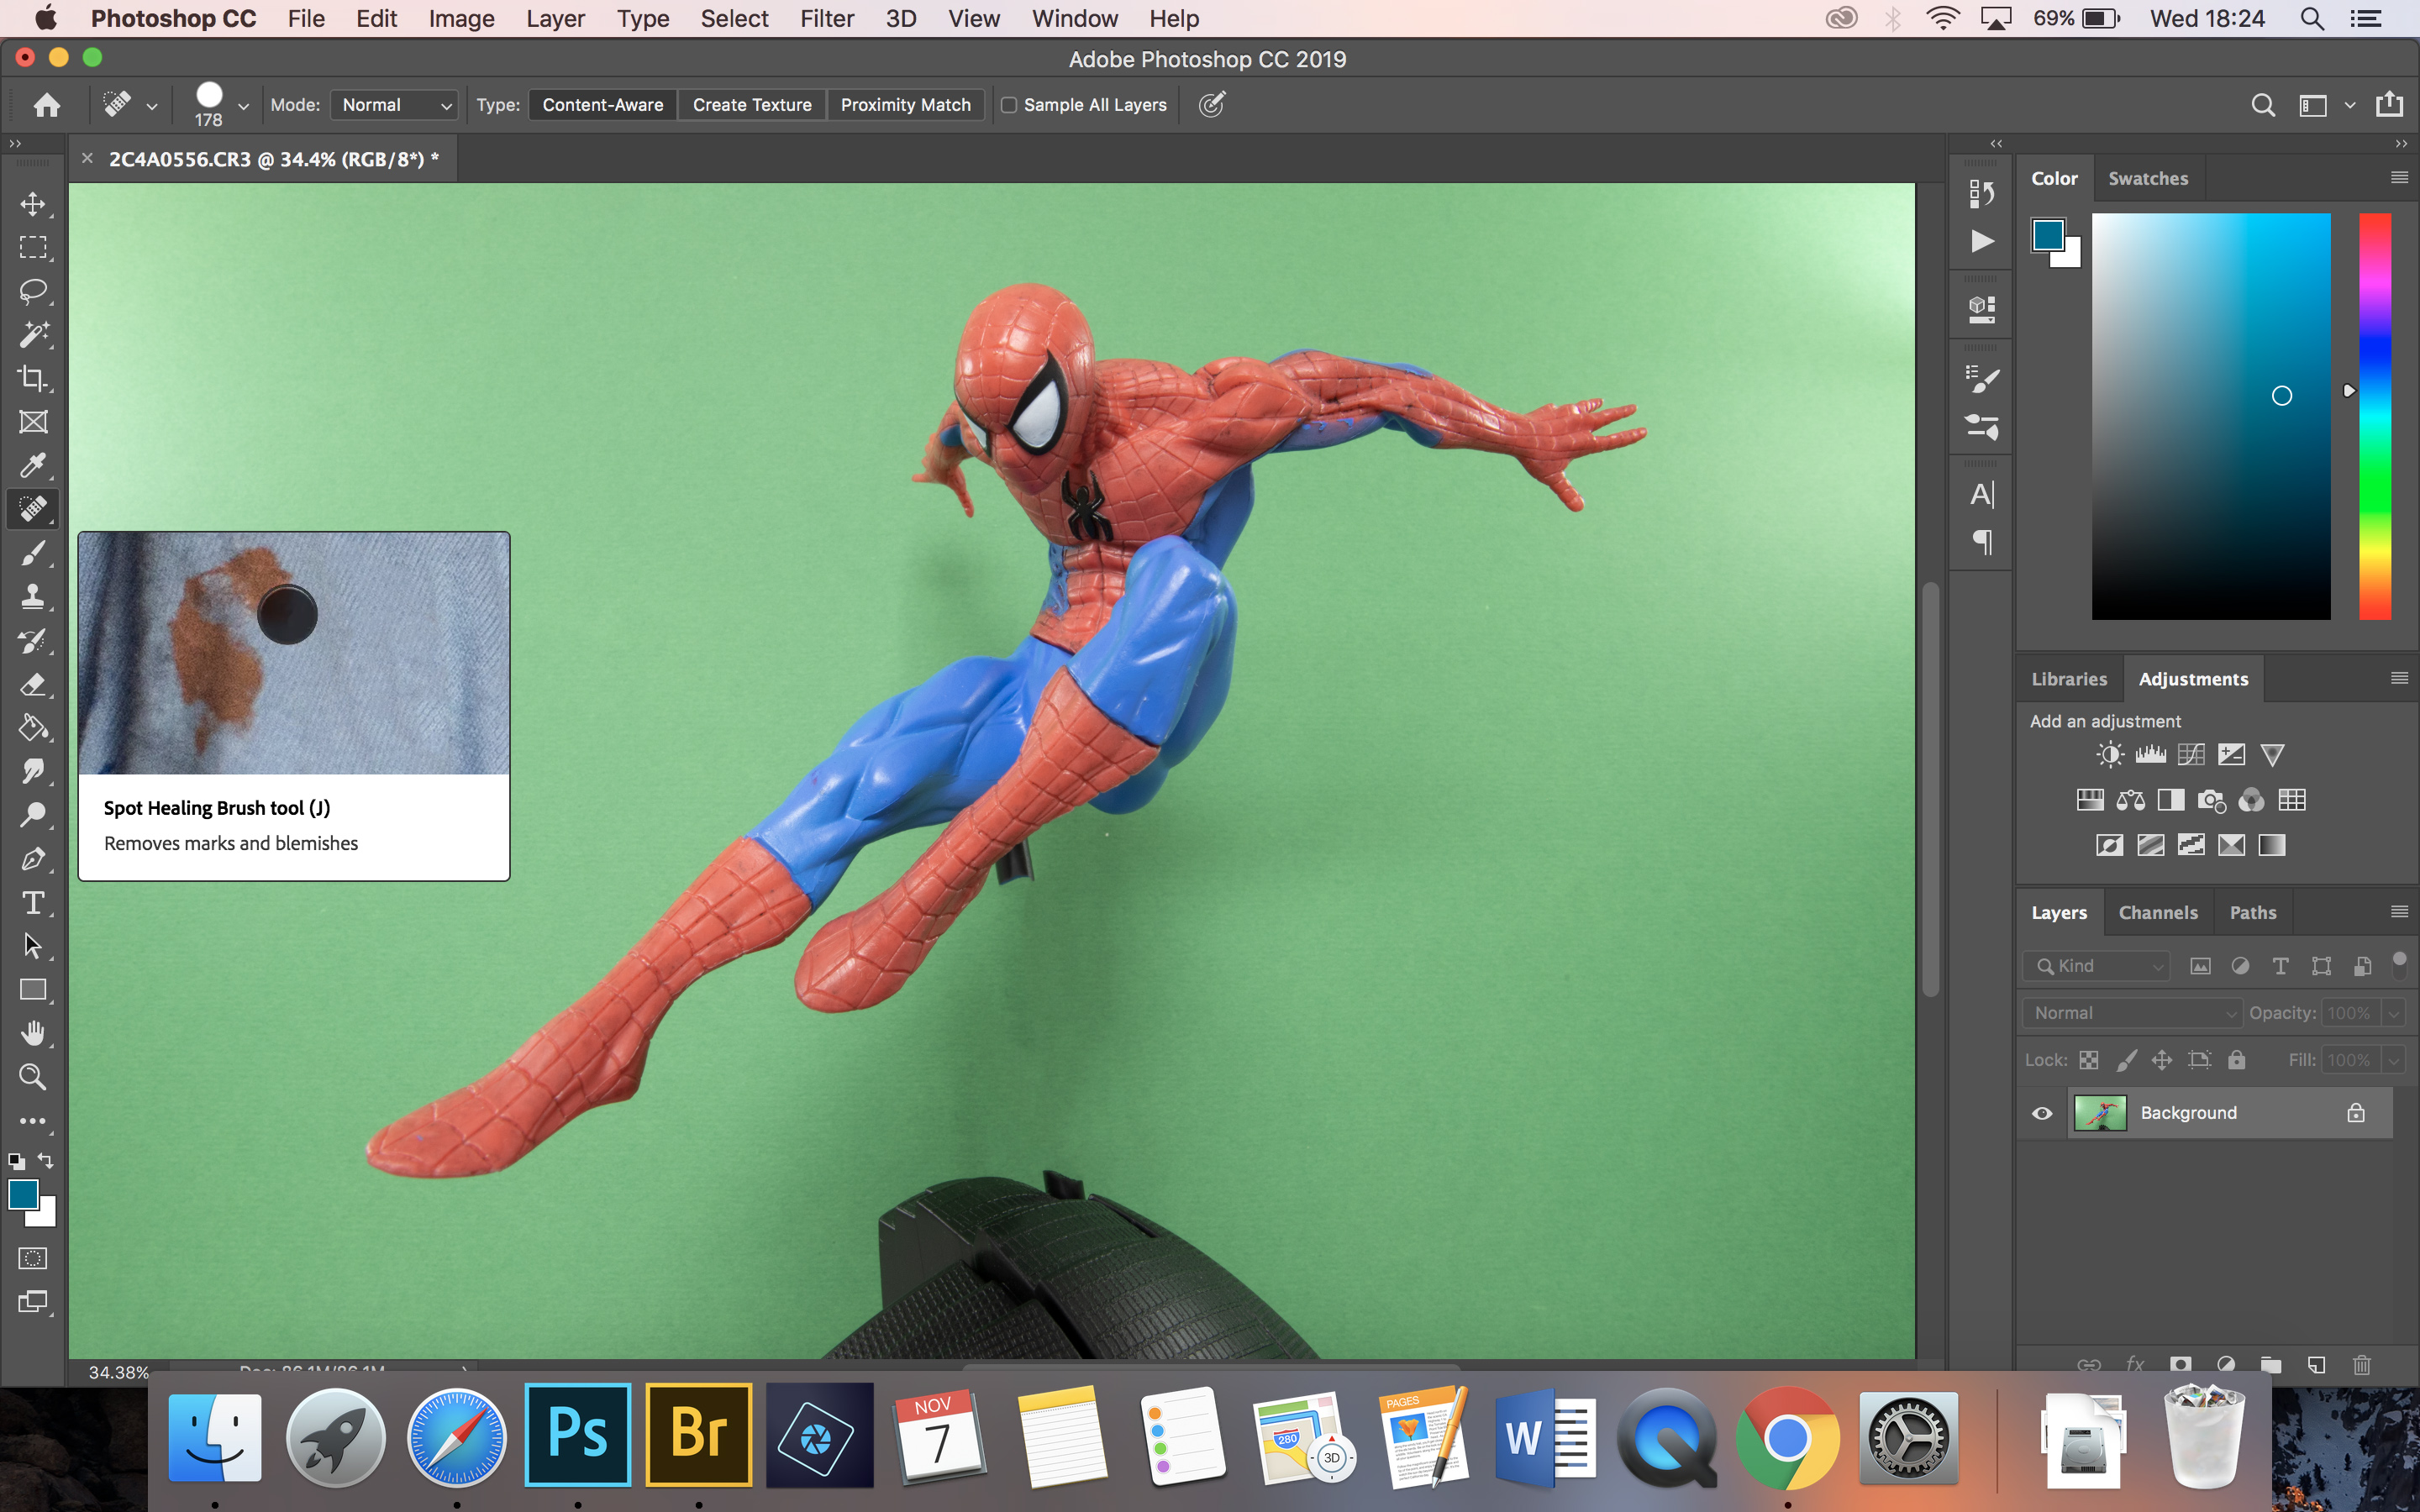
We're using Photoshop, but other editing suites offer similar tools. Use the Spot Healing Brush and Clone Stamp to paint out anything unwanted, such as the polearm holding your figure in place, shadows, or areas behind the background that your green screen didn’t quite cover.
02 Color range
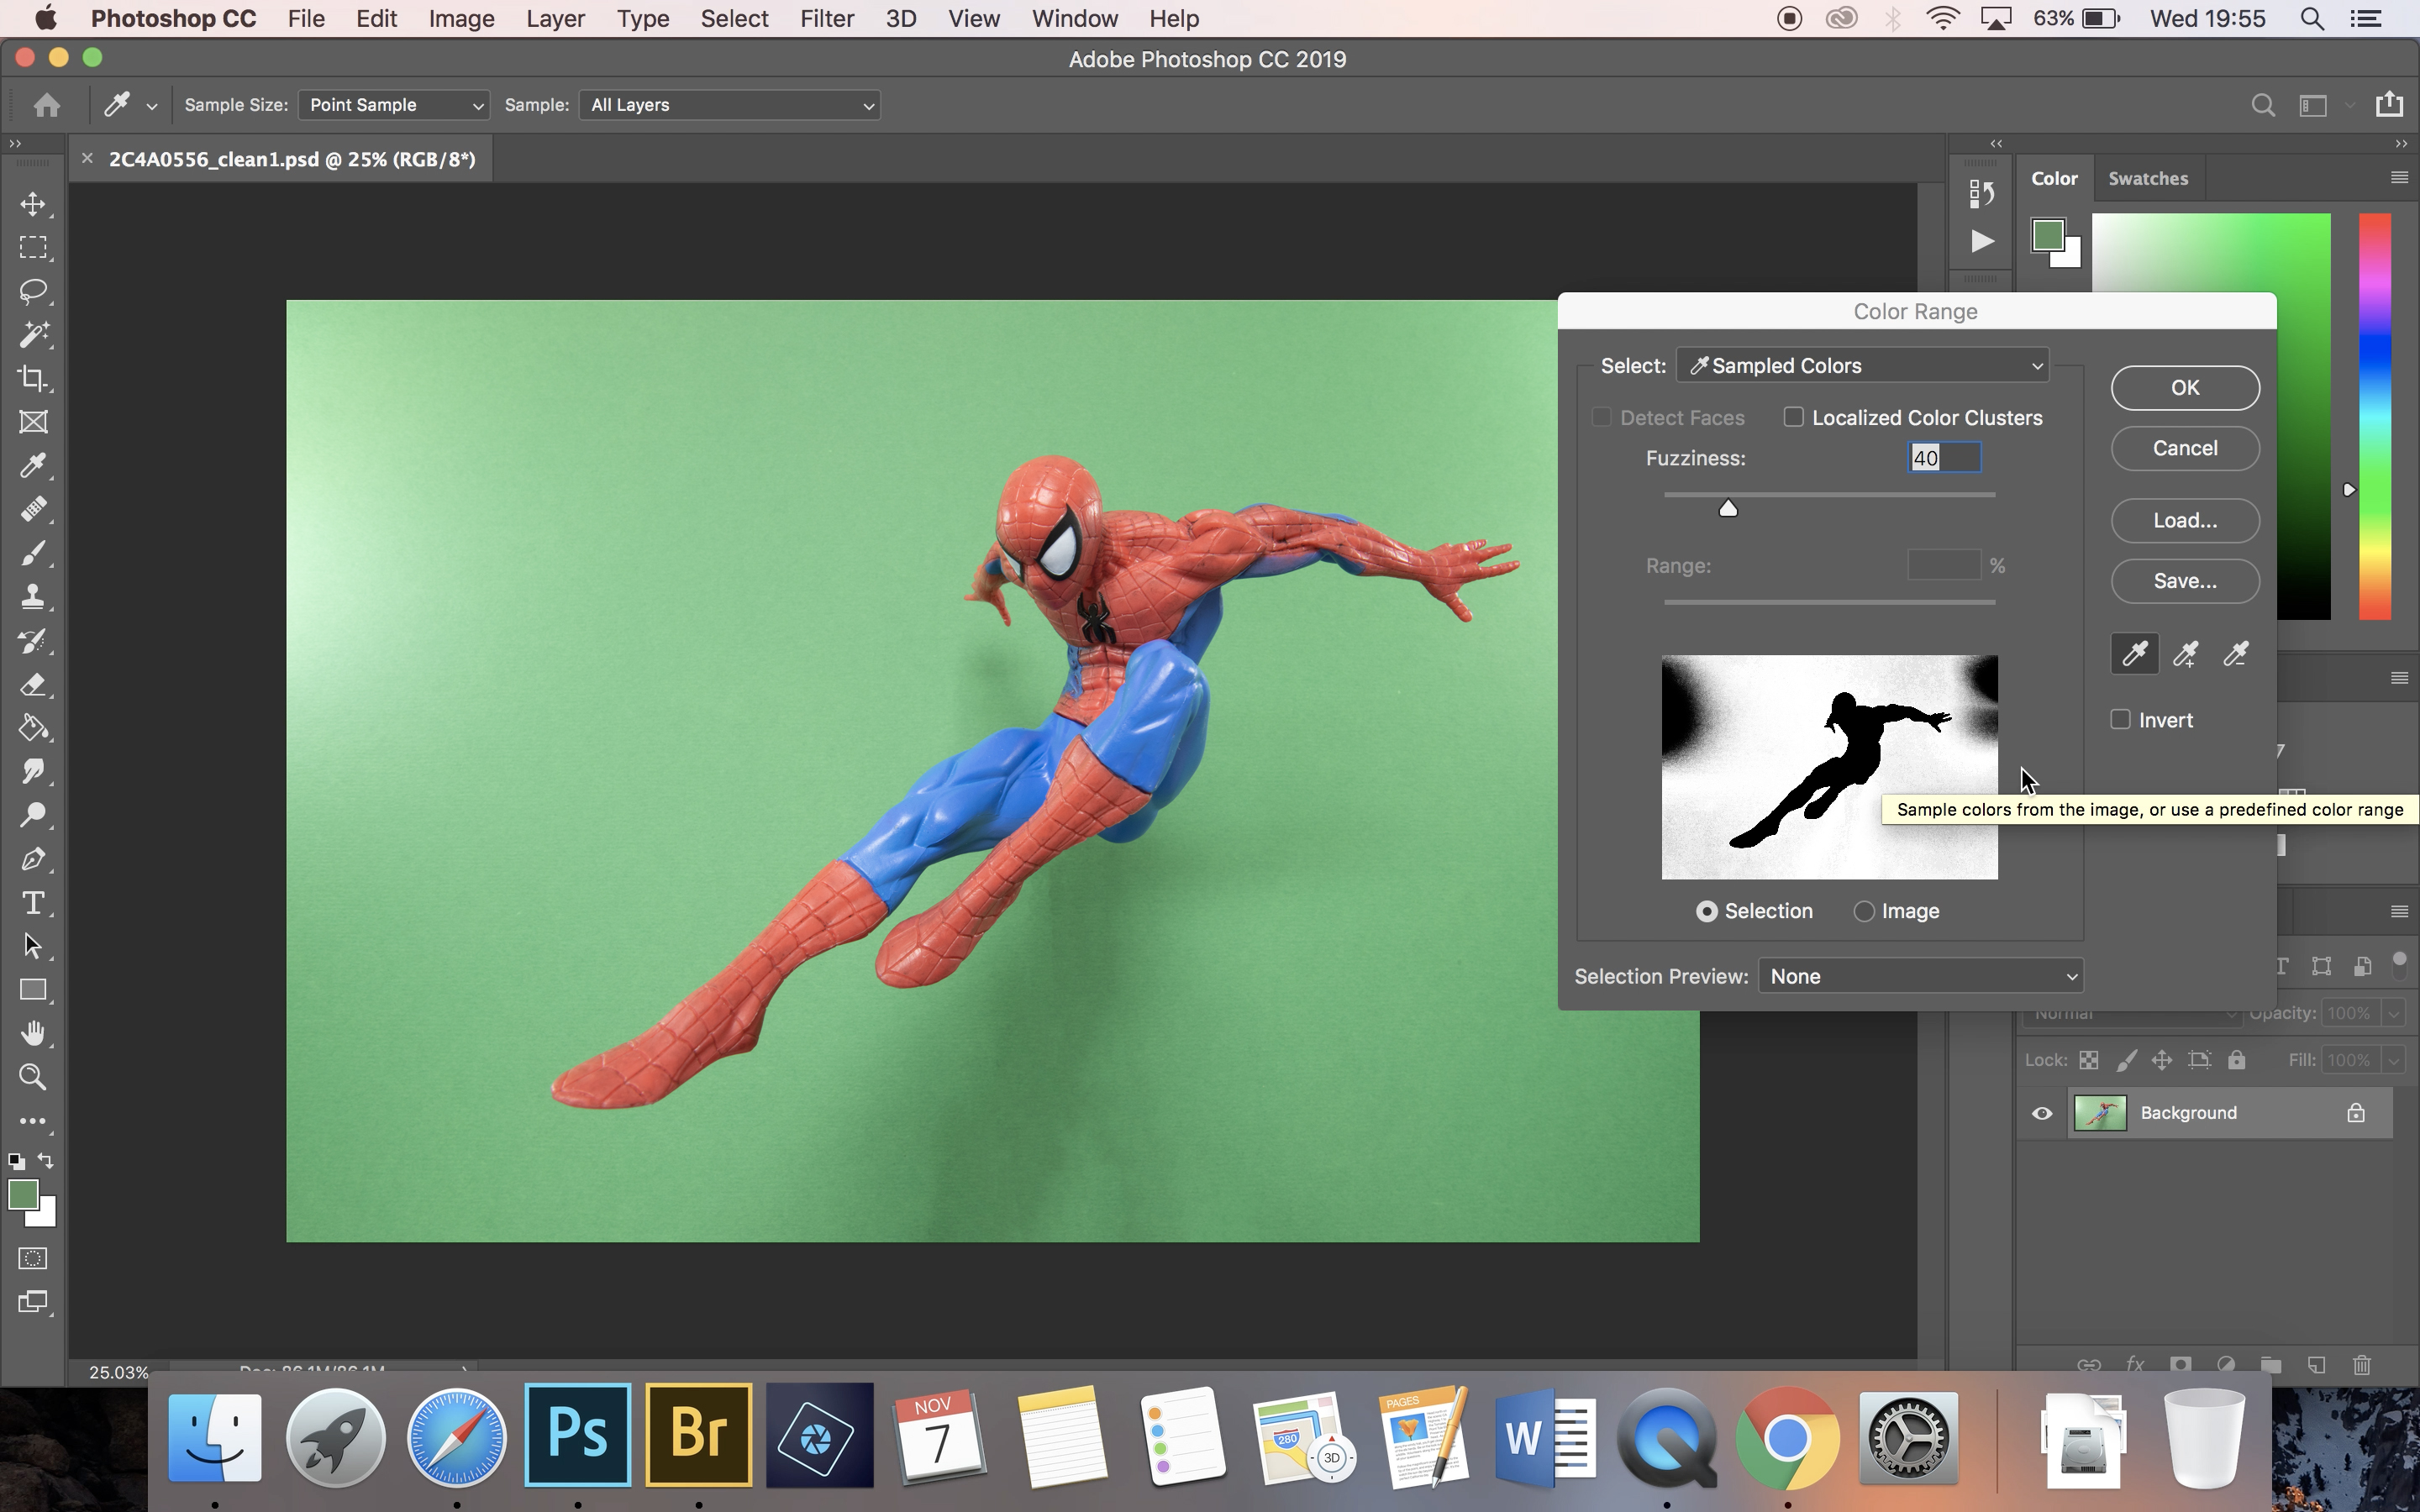
From the drop-down menu, click Select>Color Range and choose Select: Sampled Colors. Now use the eyedropper to click on and select all the green hues until the silhouette of your figure is fully masked in the panel.
03 Spidey selection
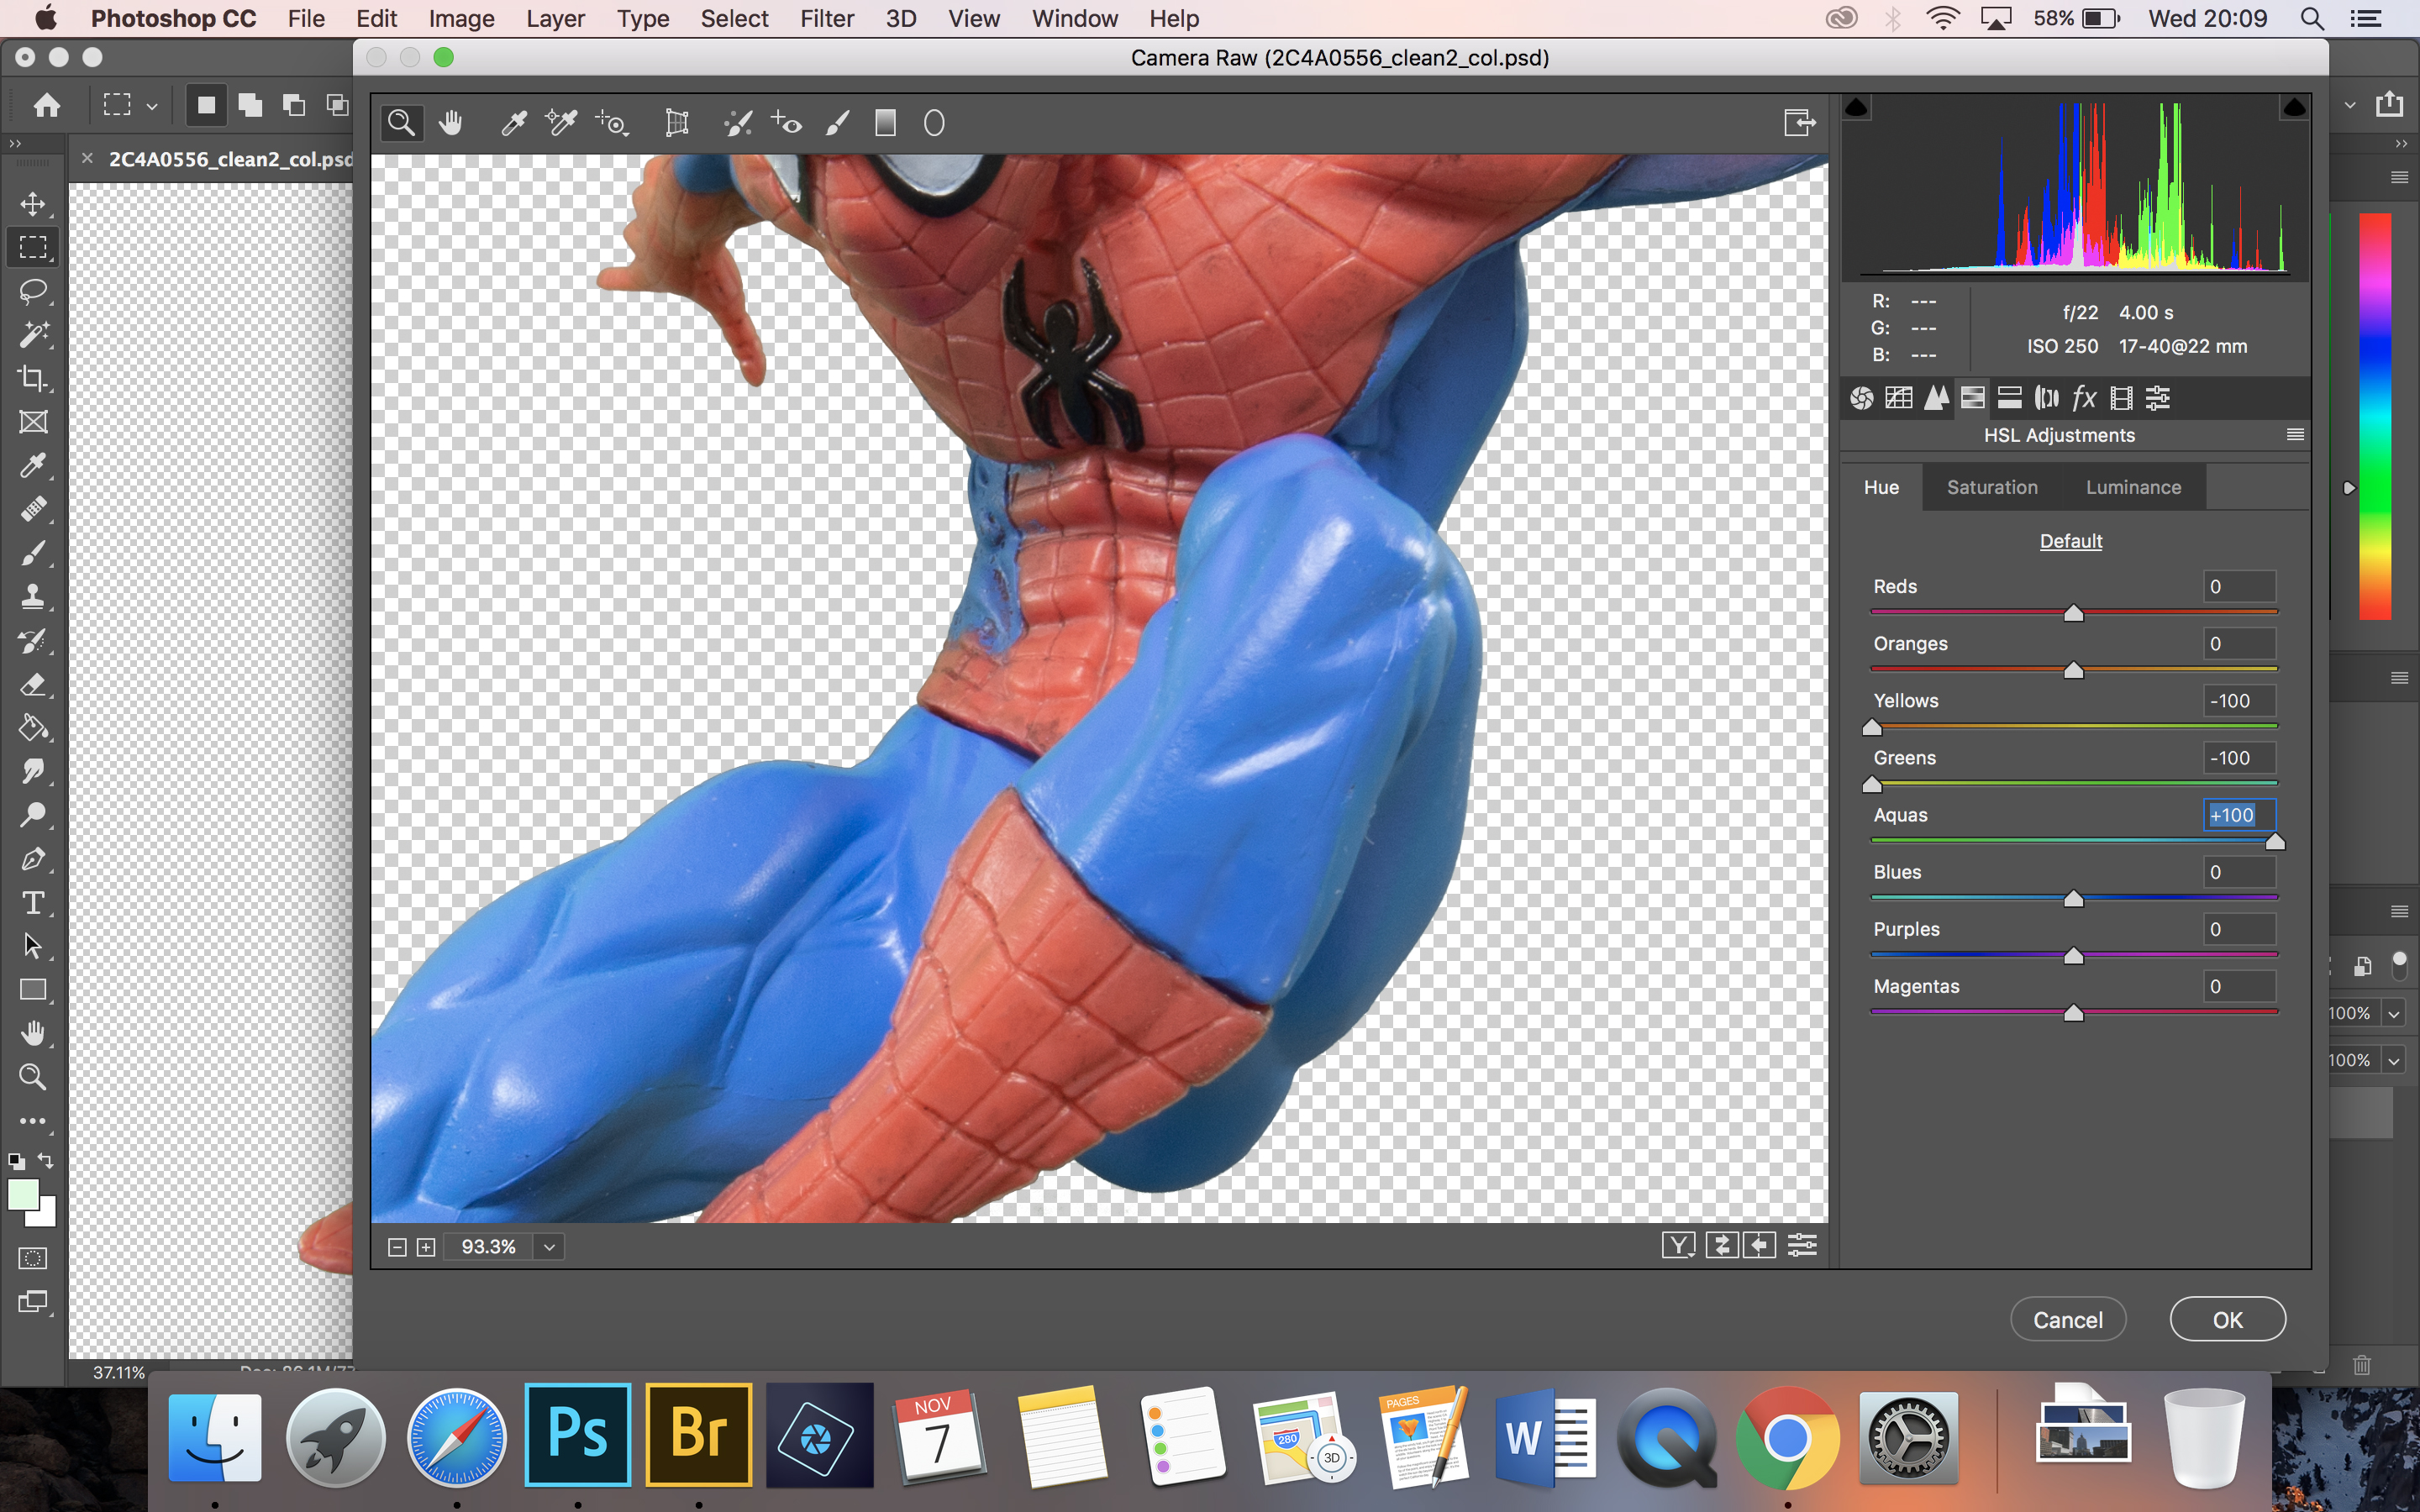
With your figure selected, click the padlock in the layers panel and then press delete to remove the green. In Filter>Camera Raw Filter, adjust the yellow and green HSL Adjustments sliders to delete any leftover greens.
04 Replace the background
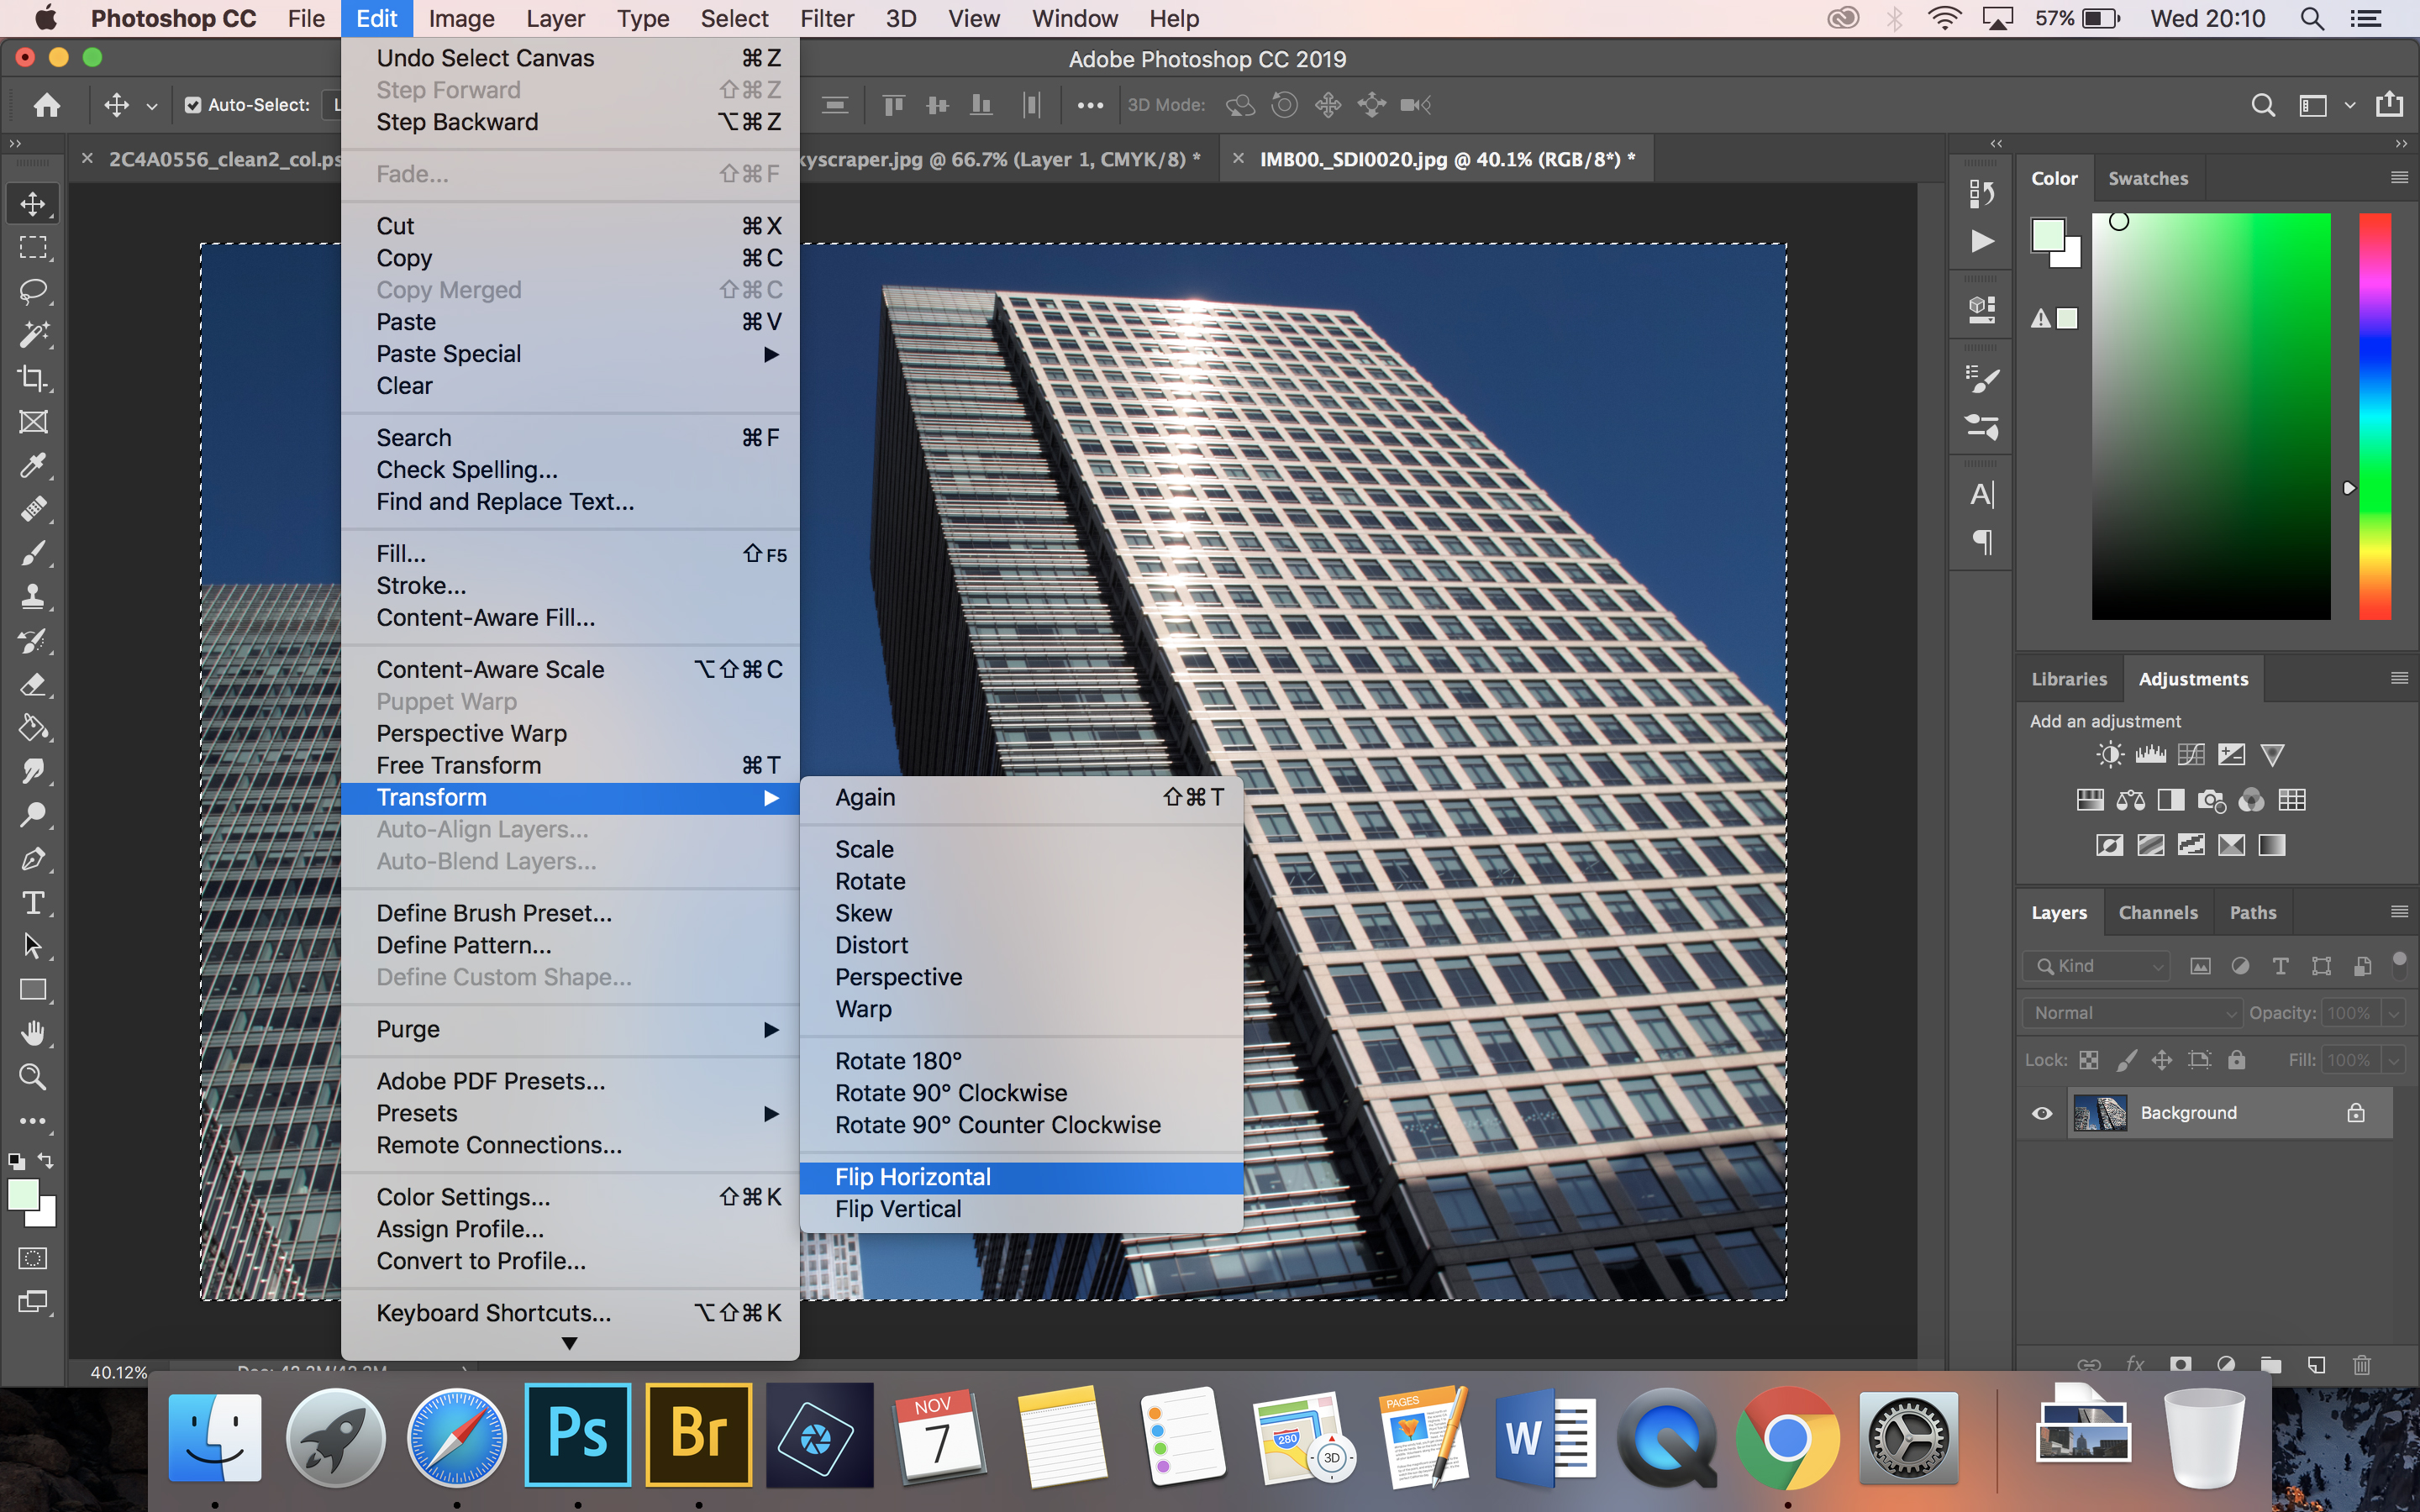
Source a suitable image that you want to use for your background. Our shot of skyscrapers doesn’t quite fit the composition we used for our Spidey image, so we’re going to flip the background horizontally (Select All, Edit>Transform) and we'll also brighten it up a bit.
05 Paste your superhero
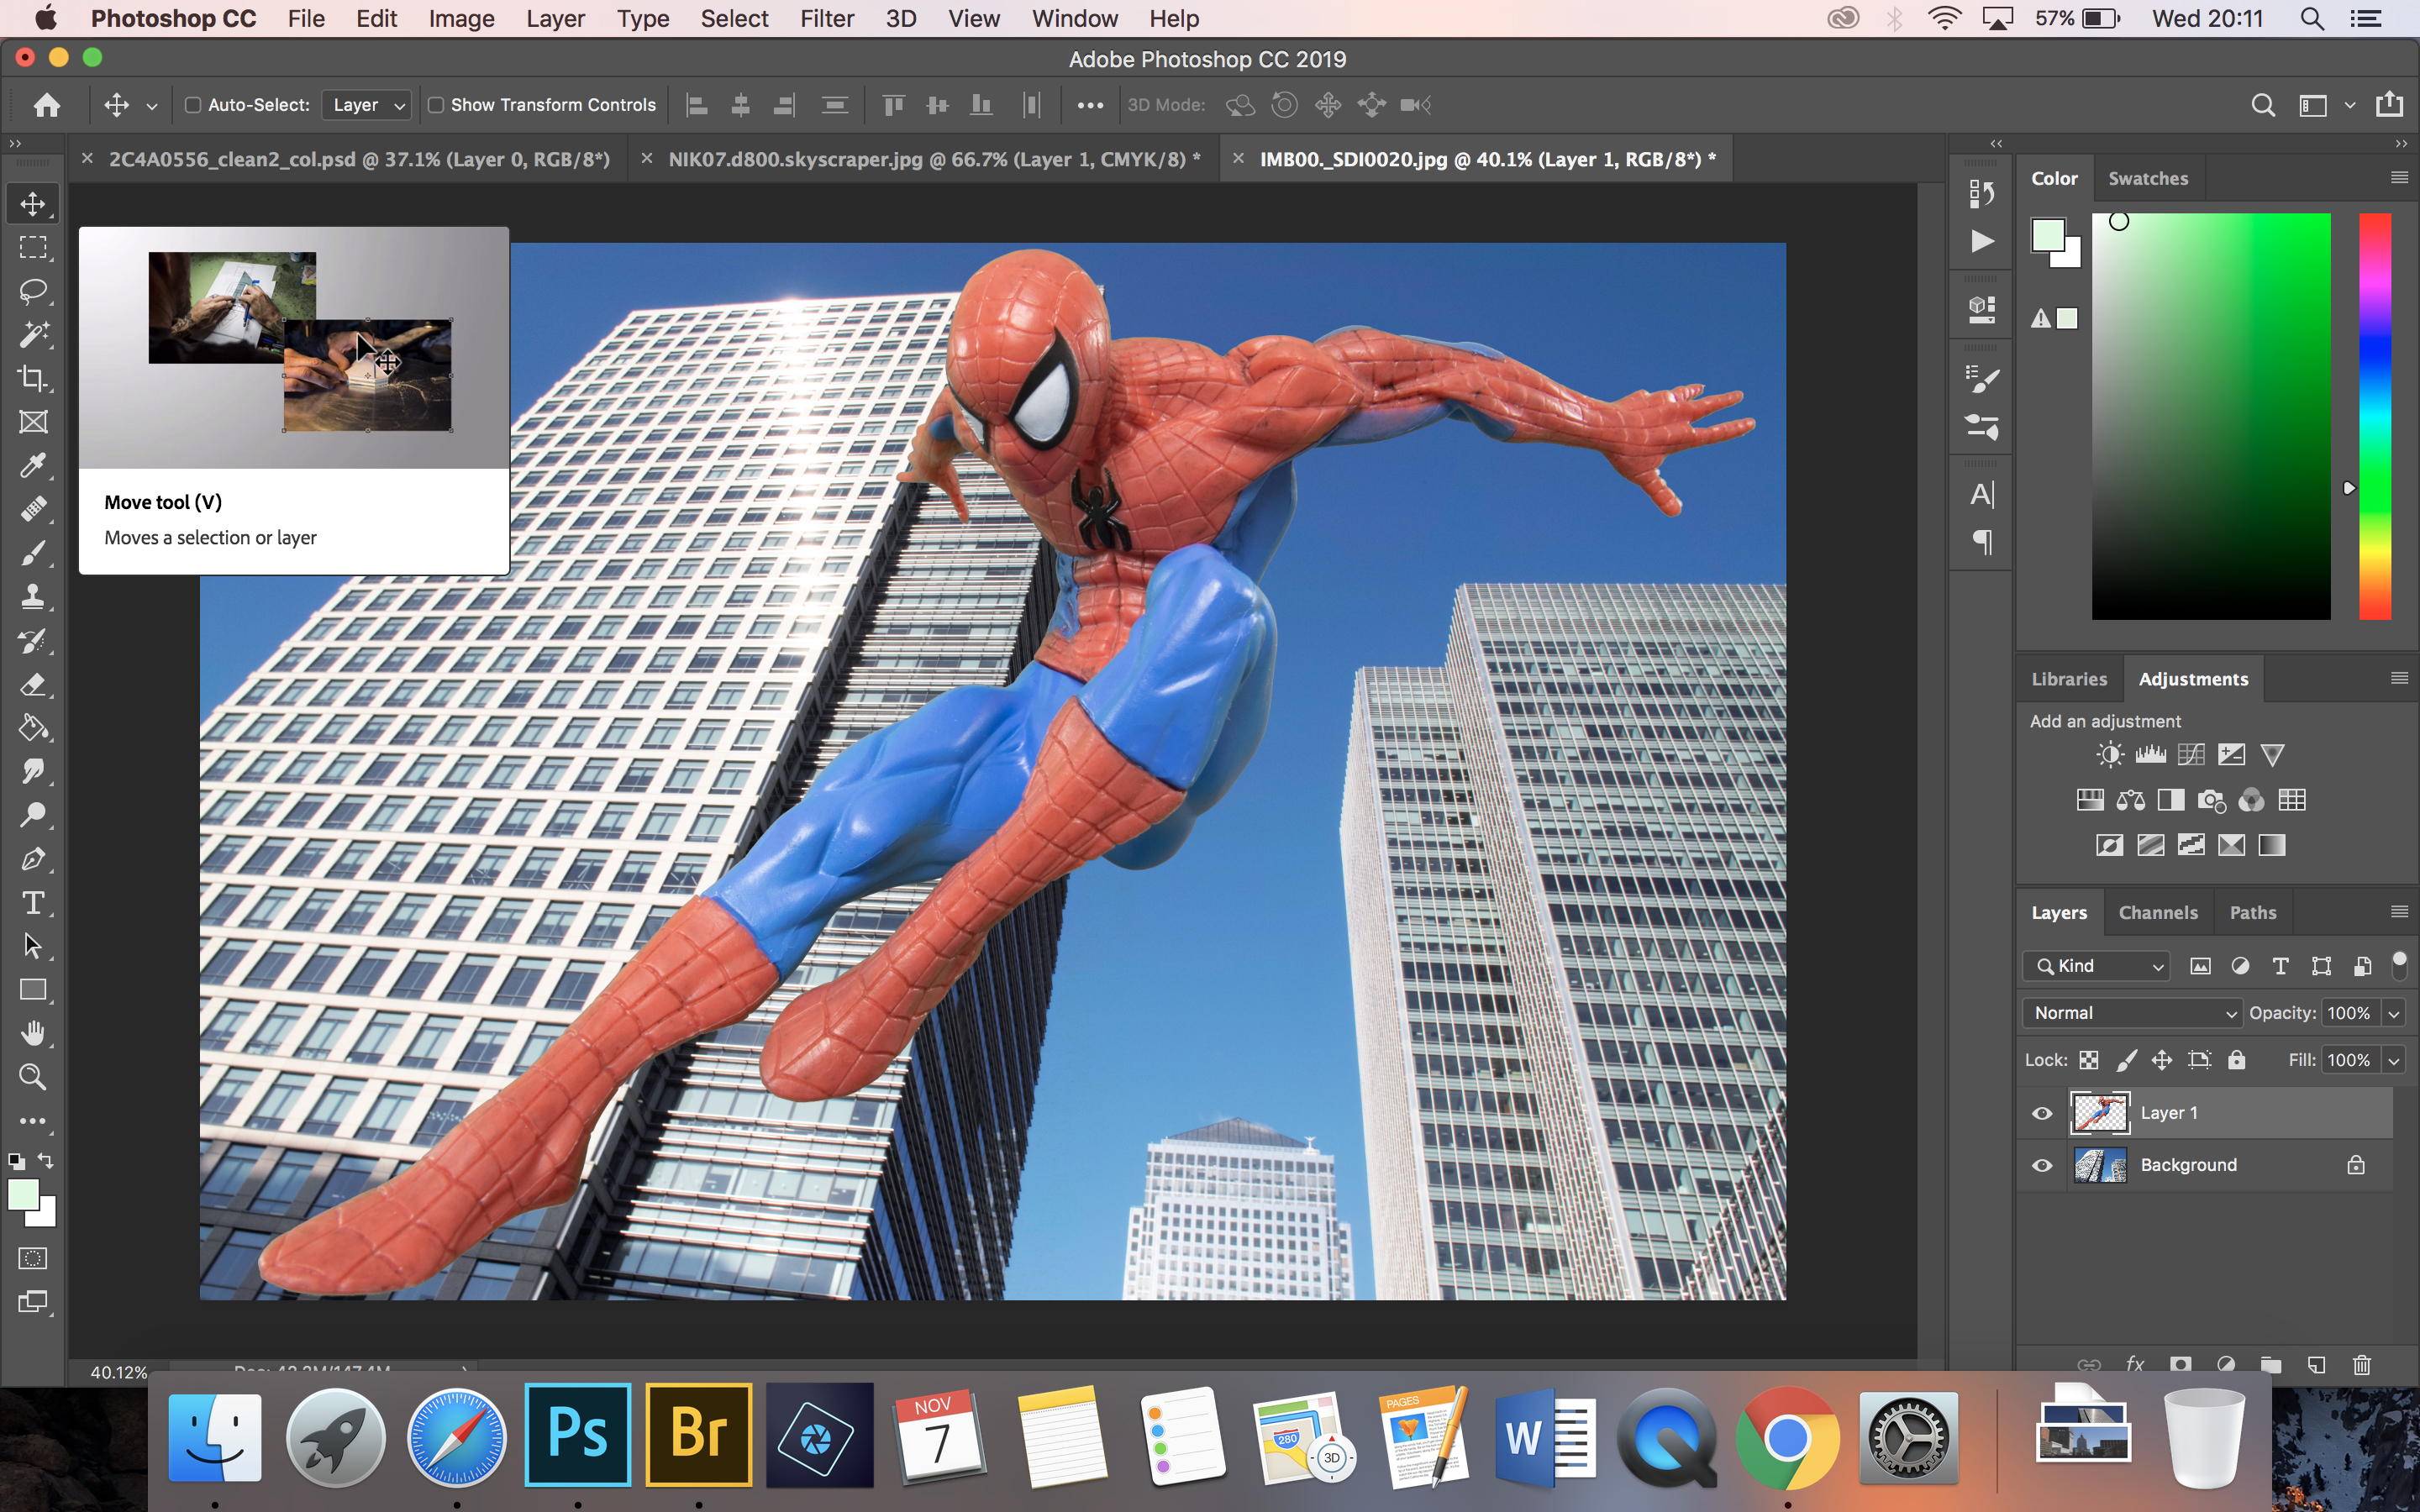
Go back to your superhero shot and Select All, then copy it. Now return to your background and paste it in, then use the Move tool and scale the image to put it in the right position.
06 Add some punch
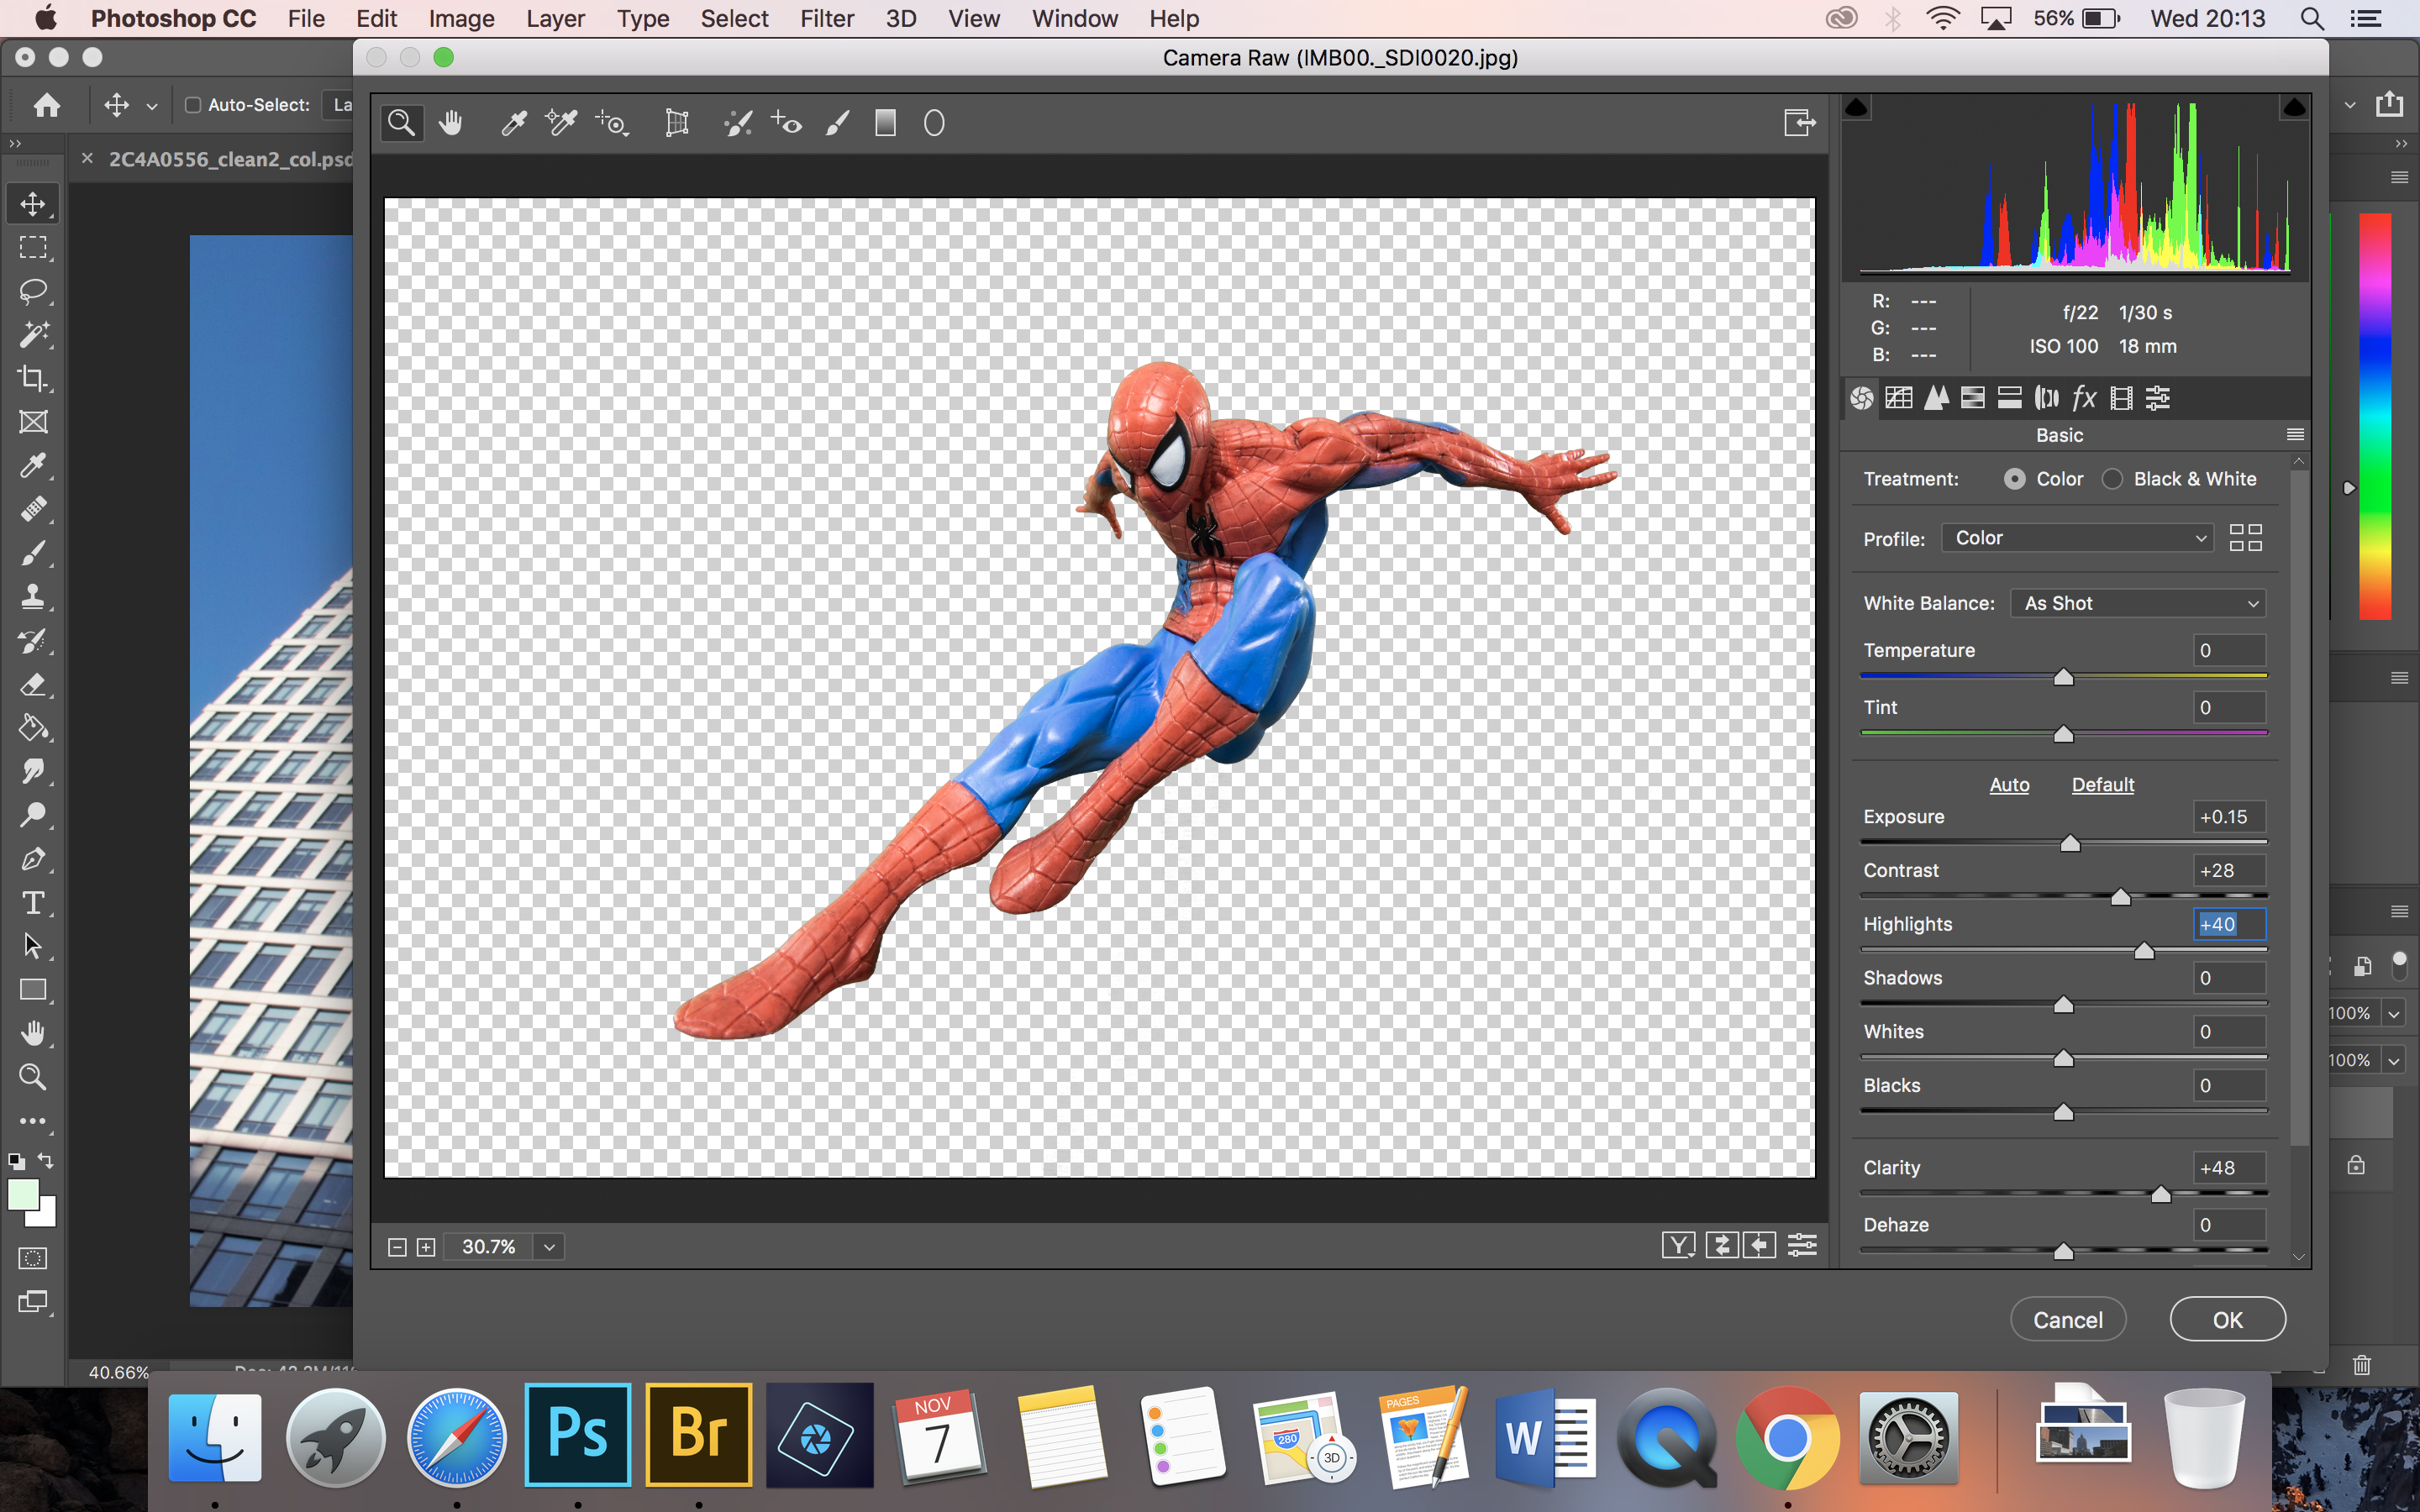
To make your hero “pop” a bit more, open Camera Raw Filter and boost the clarity and contrast sliders to exaggerate the shadows and detail in the sculpting. Now flatten your image and – POW! – you've got a stunning superhero shot.
Read more:
Stuck at home: 11 fantastic photo projects to try indoors during the COVID-19 crisis
215 photography tips, video tutorials and techniques to take photos of anything
Best video conferencing app: hang out with your camera club from home

James has 25 years experience as a journalist, serving as the head of Digital Camera World for 7 of them. He started working in the photography industry in 2014, product testing and shooting ad campaigns for Olympus, as well as clients like Aston Martin Racing, Elinchrom and L'Oréal. An Olympus / OM System, Canon and Hasselblad shooter, he has a wealth of knowledge on cameras of all makes – and he loves instant cameras, too.
