Colour editing essentials: post process for complex colour palettes
Adjust the colour in your images to achieve impactful yet natural results
The best camera deals, reviews, product advice, and unmissable photography news, direct to your inbox!
You are now subscribed
Your newsletter sign-up was successful
Post processing of digital images is an essential step in creating stunning colours. In fact the ability to shoot and edit RAW files is central to the flexibility of digital photography for colour creation - having the option to choose the white balance at any time after the shoot is something which photographers of the film age could only have dreamed of.
Intent is an important consideration though and early on in the editing process you have to decide what style of image you are going for. It is very easy to over-edit your shots, even as an experienced professional. You either have to aim to maintain fully natural colours, merely adjusting the contrast slightly and minimizing colour shifts, or you must work out the best way of introducing false colours, for dramatic impact.
The work doesn’t stop there though - output is hugely important too. Translating the colours in your shot onto a printed image and uploading your images to the web are vastly different processes and need different treatments accordingly. As discussed on the previous spread, sRGB is the best profile for online viewing, but when printing your images you must take into account the viewing conditions of the environment in which the print will appear.
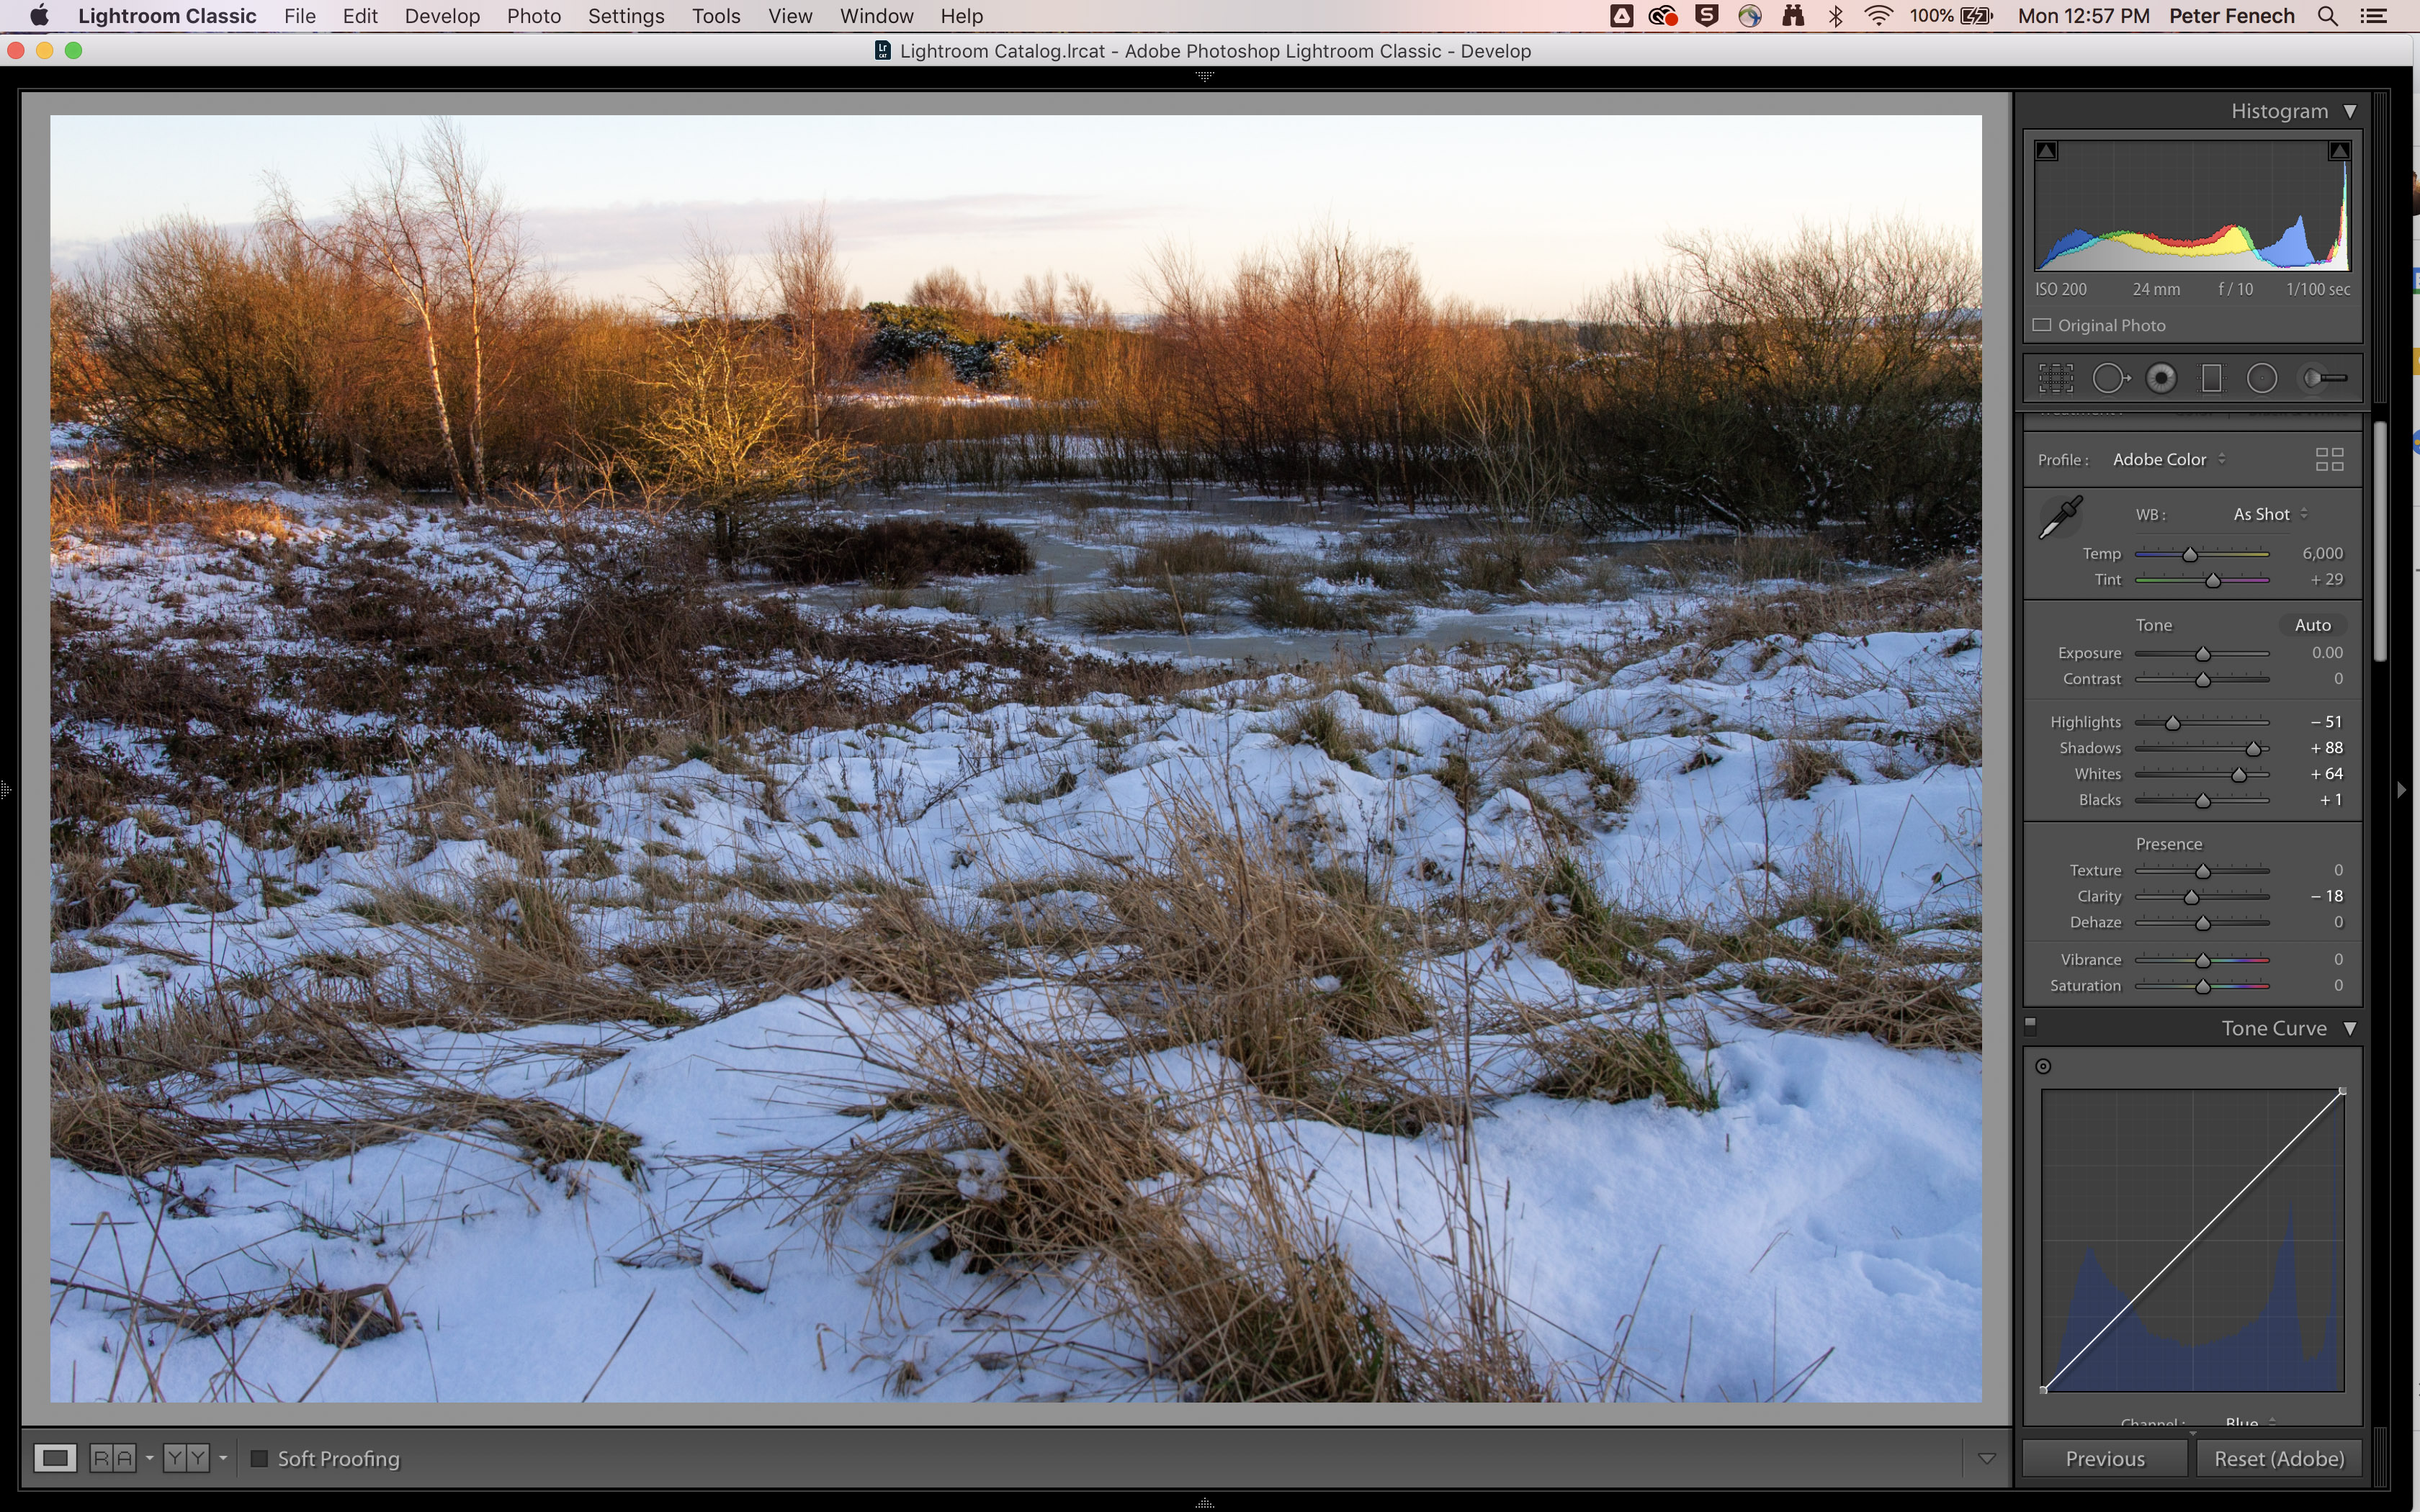
1- Basic tonal adjustments
Start by setting the Black and White points to introduce some standard contrast. Then make basic edits to the tonality of the image, pulling back the highlights and lifting the shadow areas. Once this is done any significant colour imbalances should be visible.
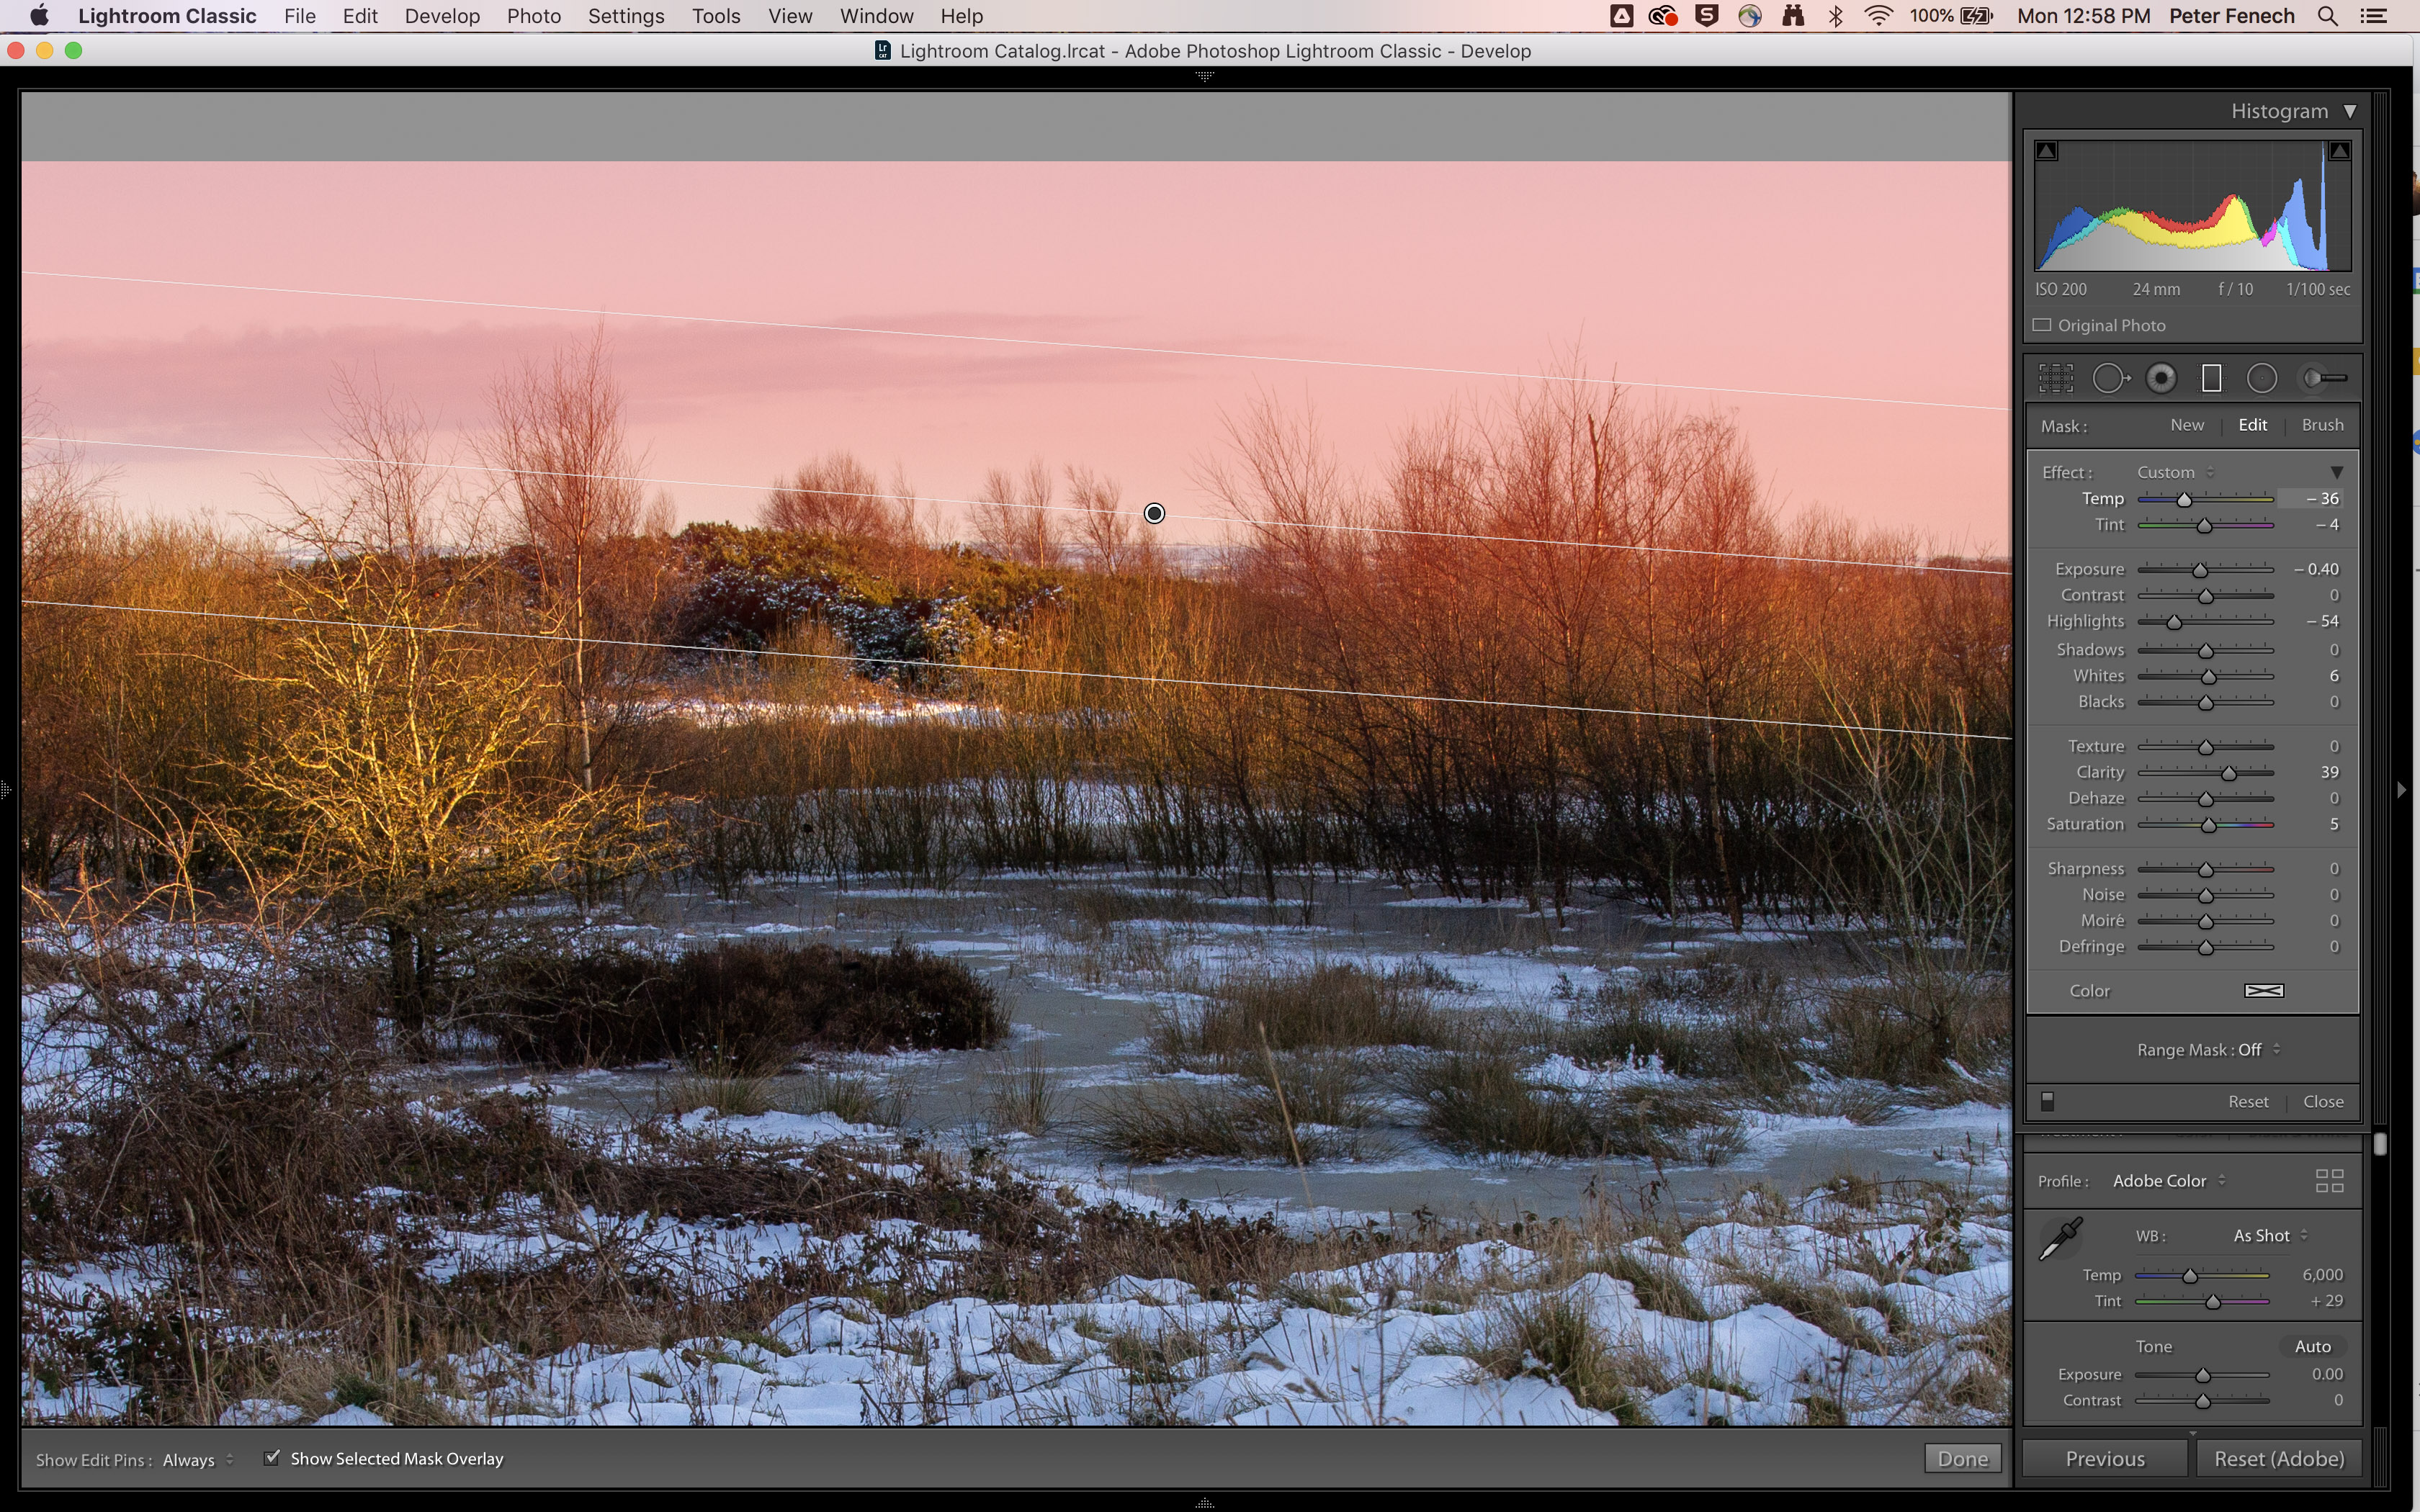
2- Sky contrast
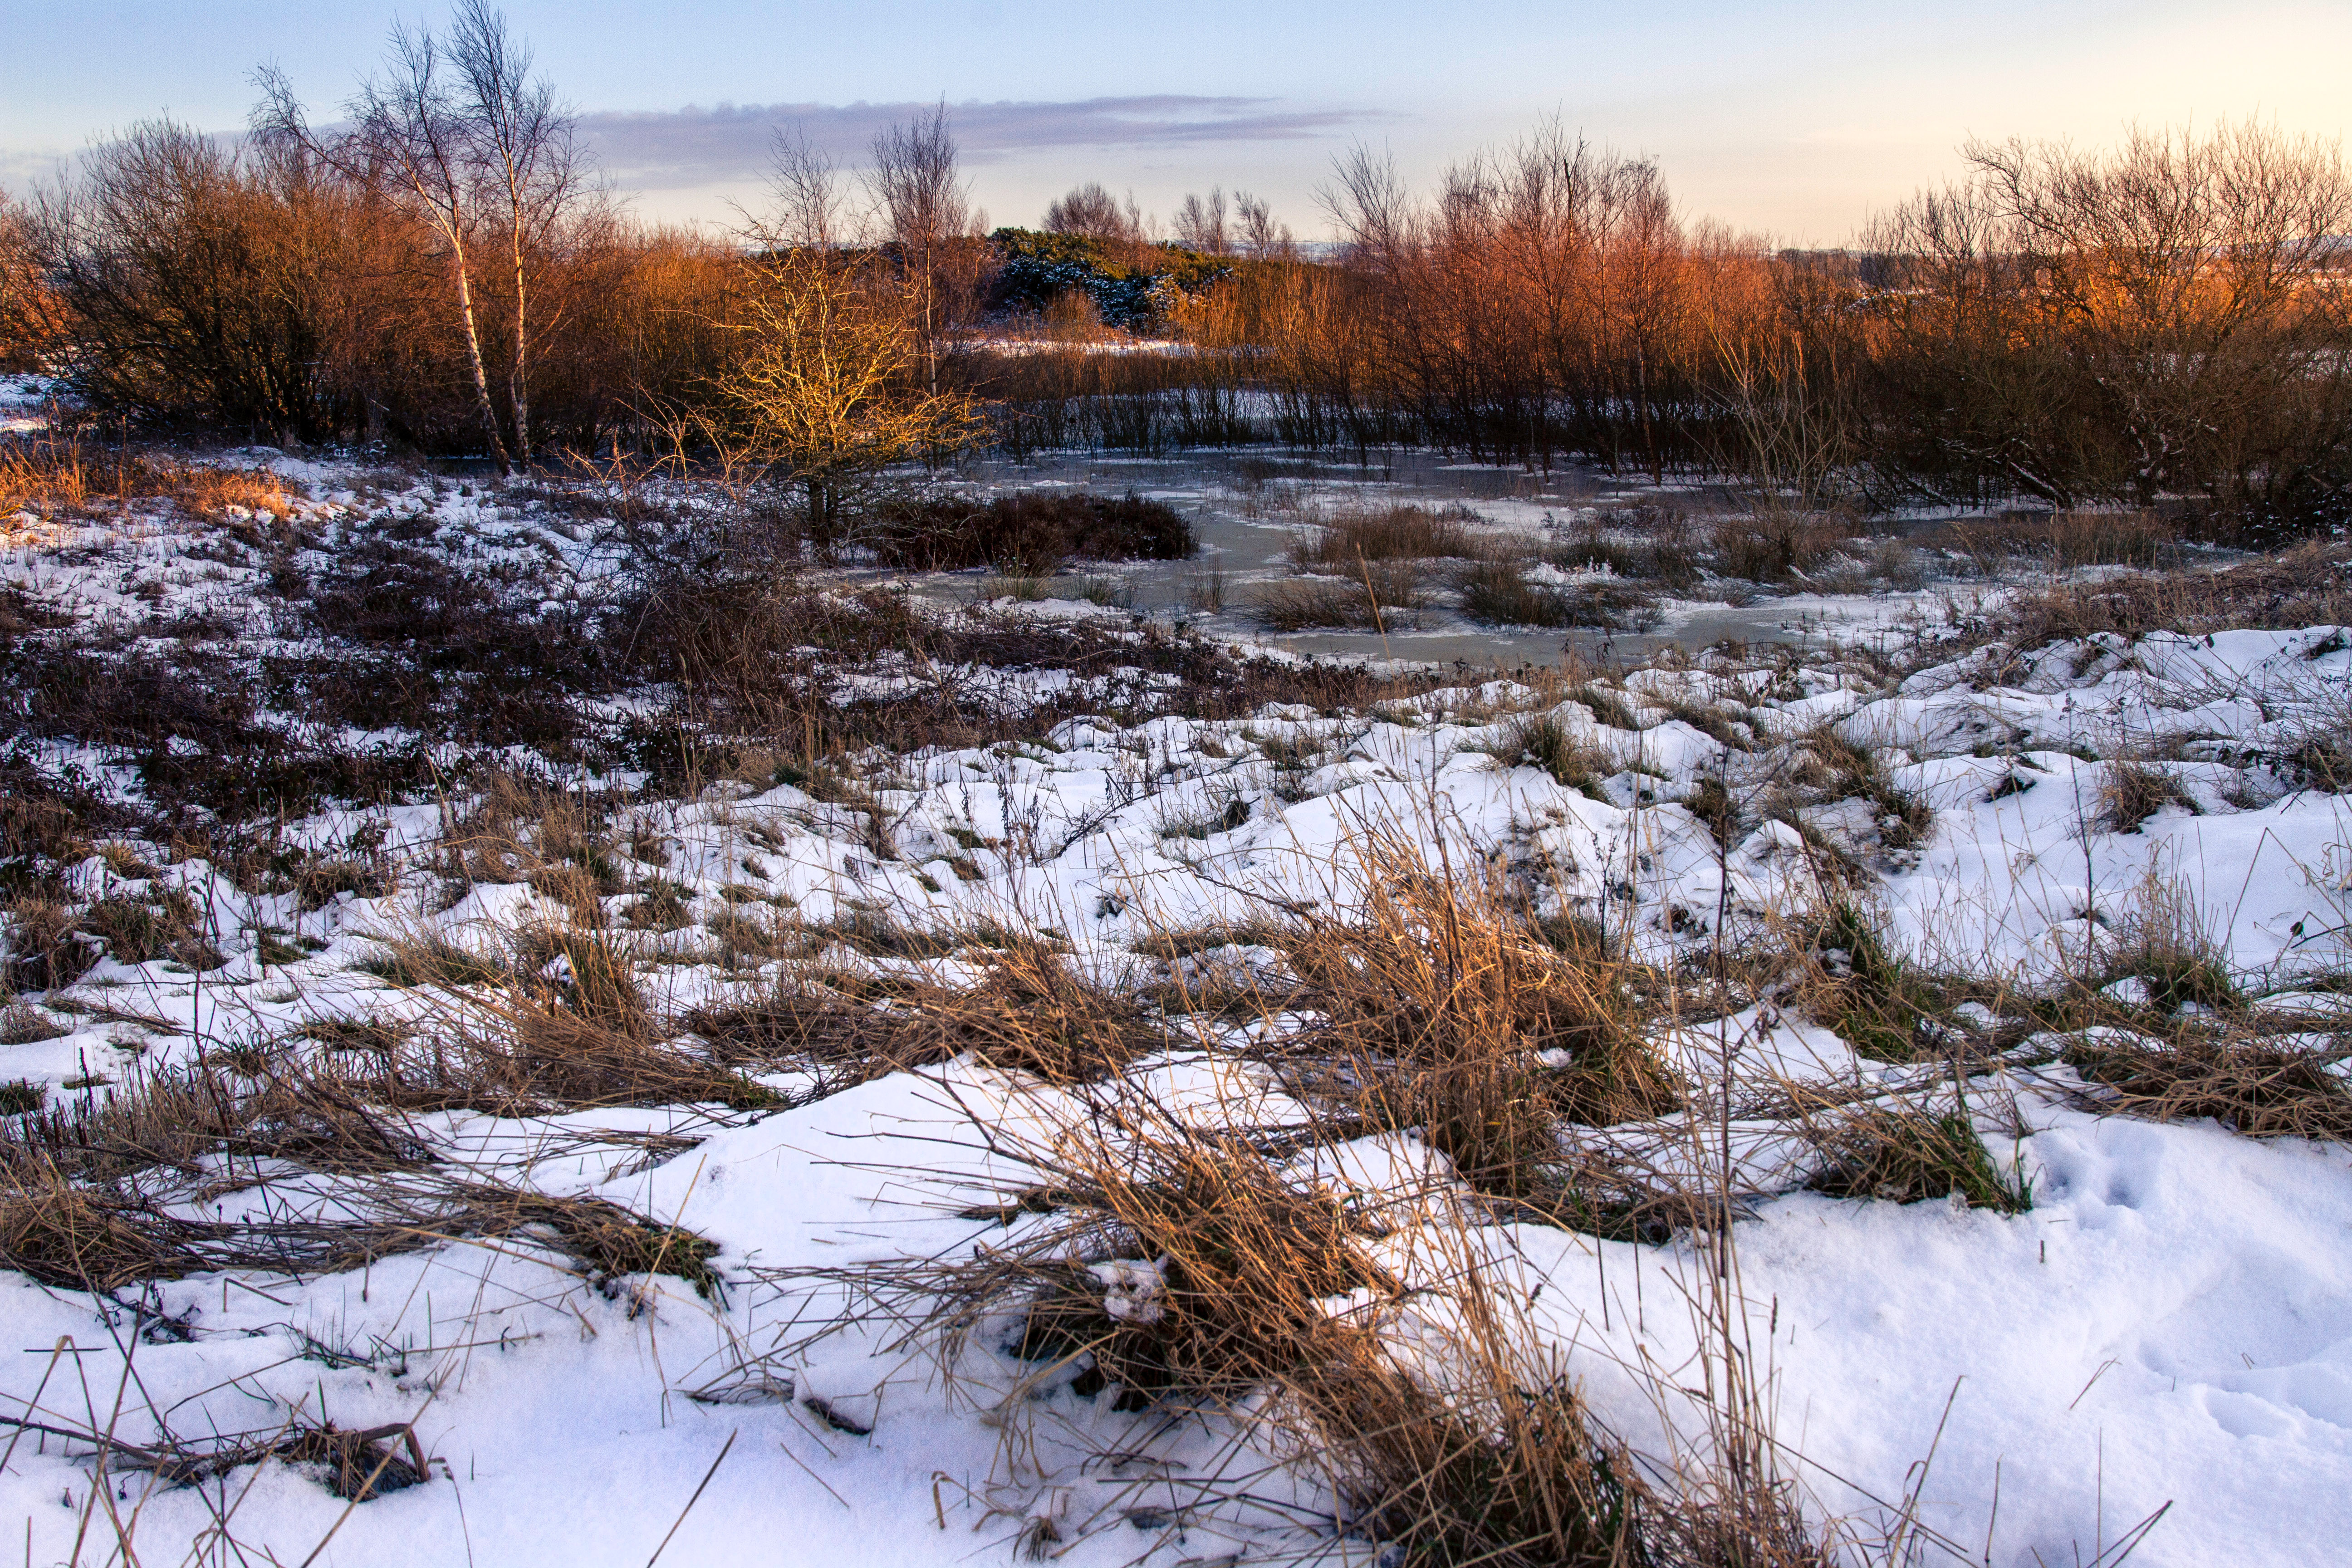
To eliminate a strong blue cast I had selected a custom WB in-camera, but this has left the sky with a uniform yellow cast. To reinstate the blue sky present in the scene a Gradient Filter with negative temperature and a little magenta was applied.
When editing it's worth bearing in mind that colours on screen are very different to those that are printed. This because we experience colours in two different ways. One is as direct light, and one is indirect reflected light. When we look at a monitor the colour is direct - called additive colour. A printed photo is indirect colour (reflected light) - called subtractive colour.
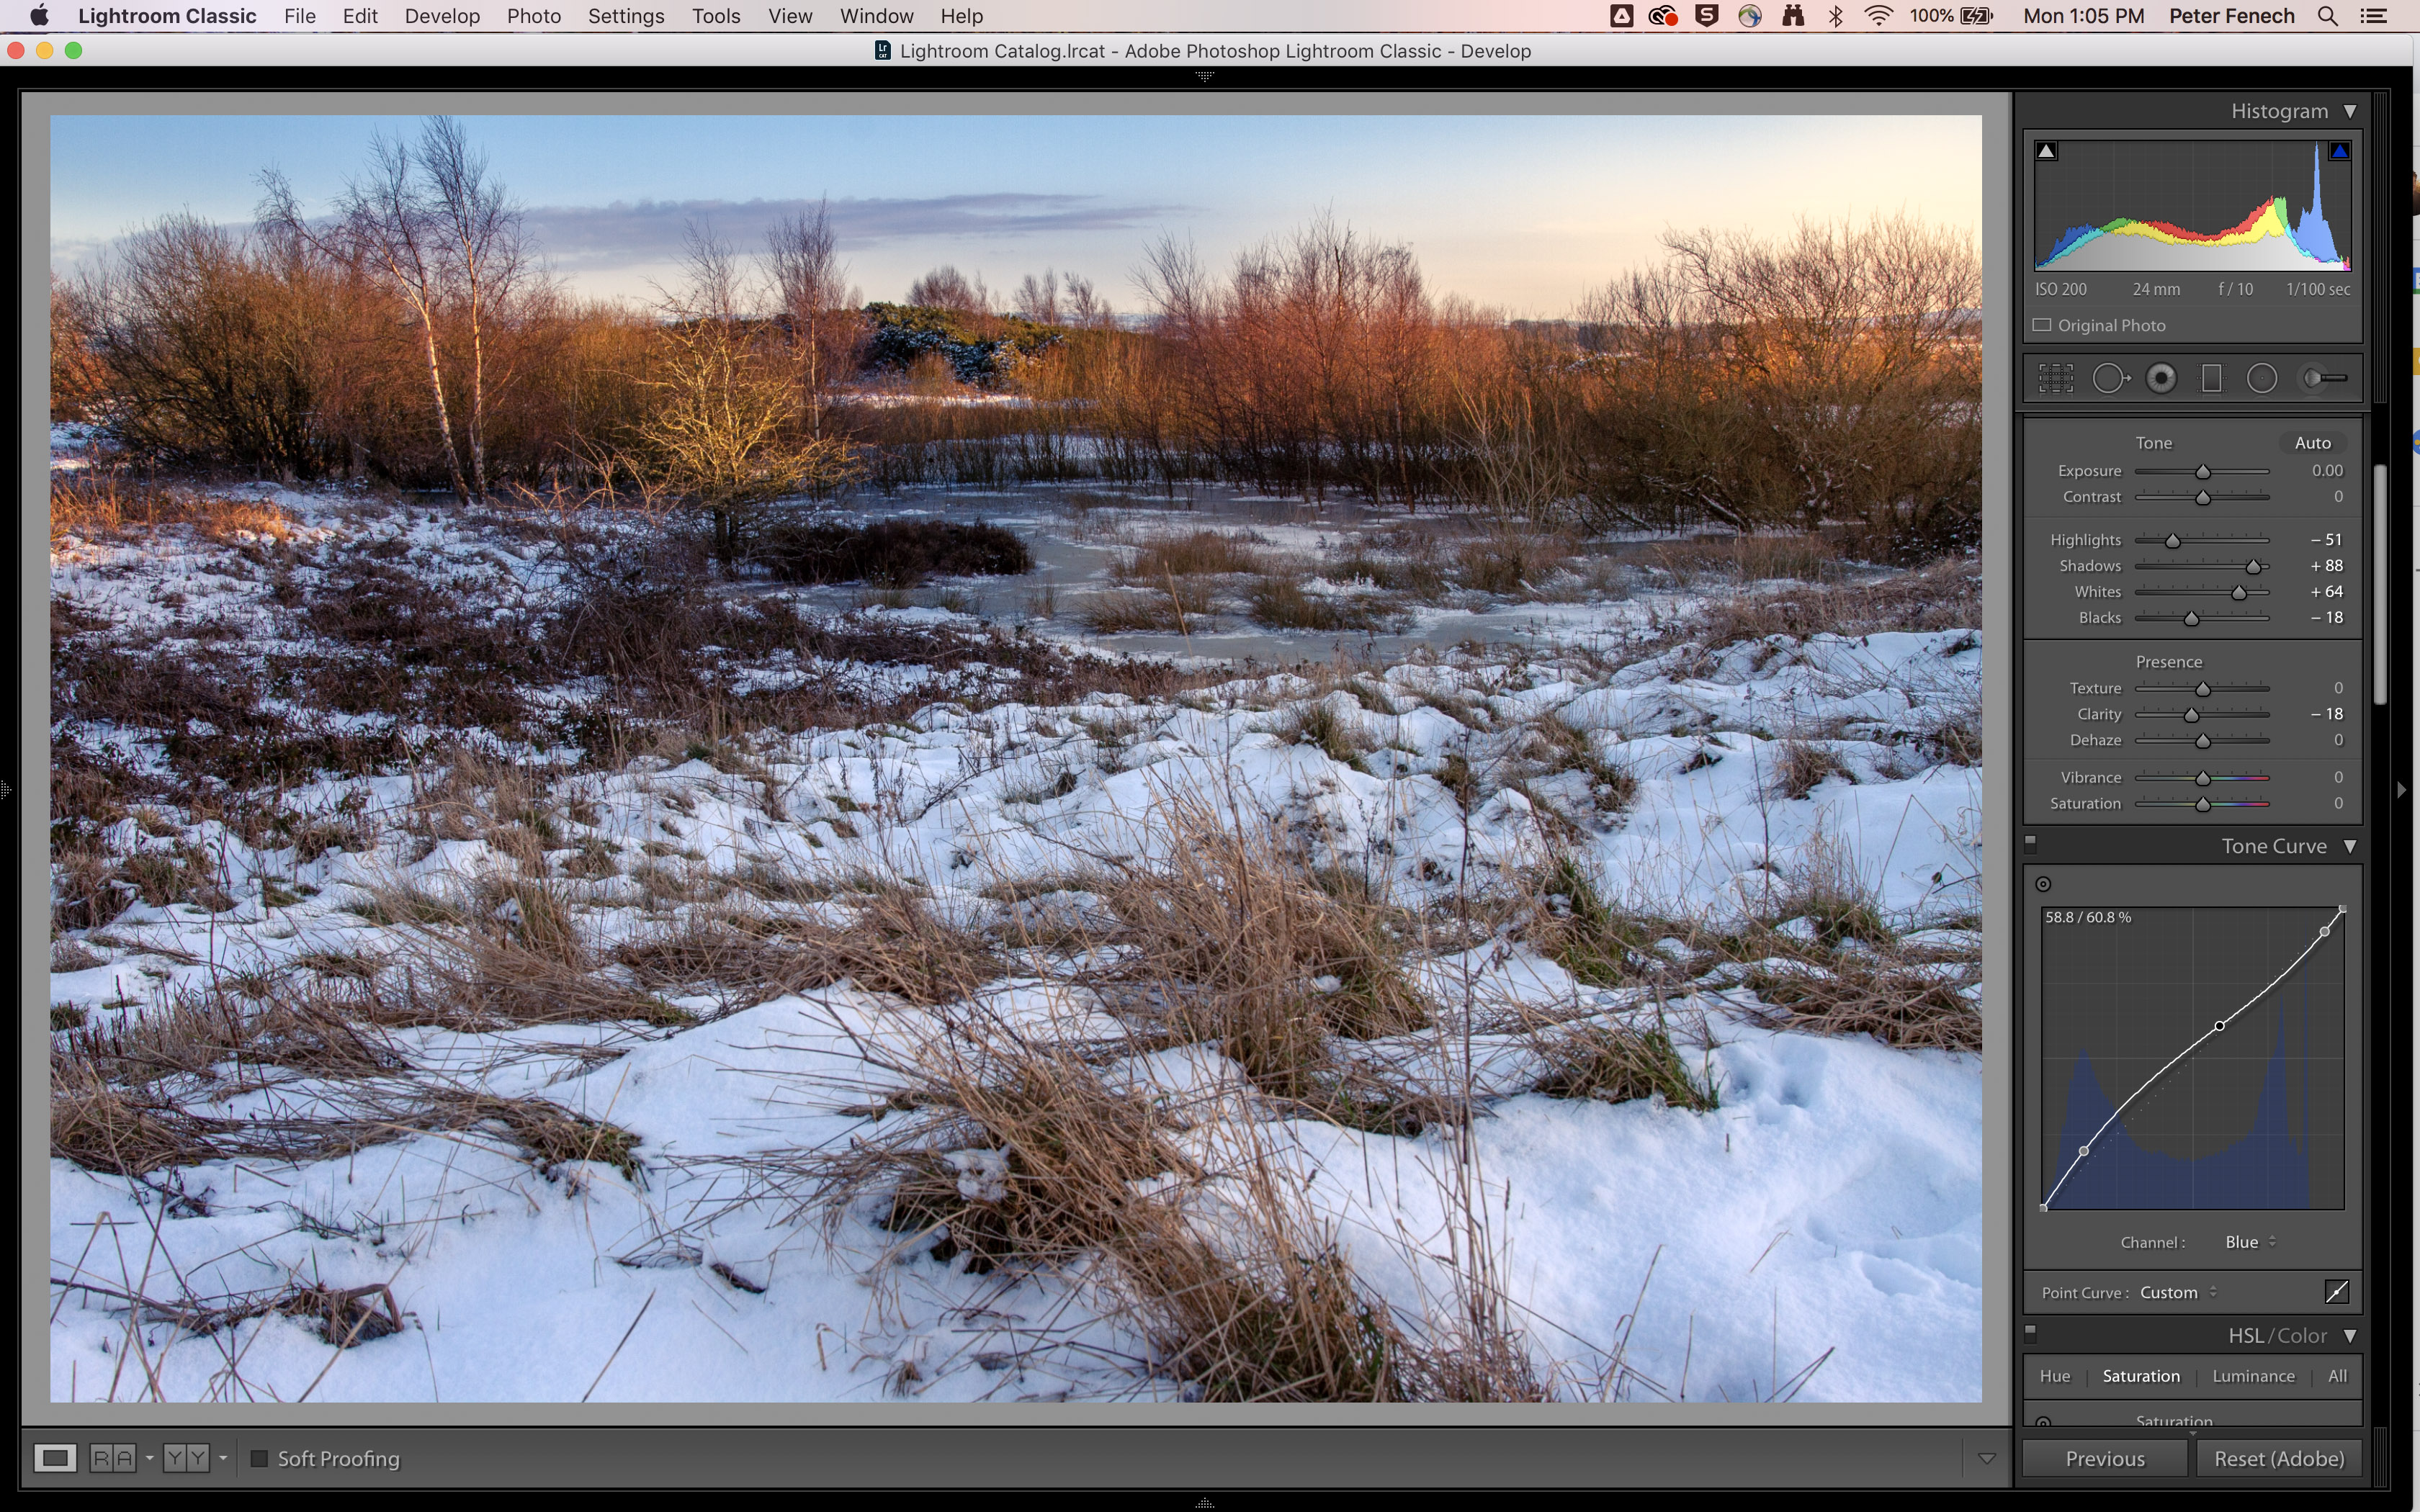
3- Add colour depth
With such low Kelvin colours in the highlights it might be nice to boost those and add blue to the shadows, for contrast. In Lightroom an S-curve was used on the Blue Channel, adding blue to the lower midtones and yellow to the highlights.
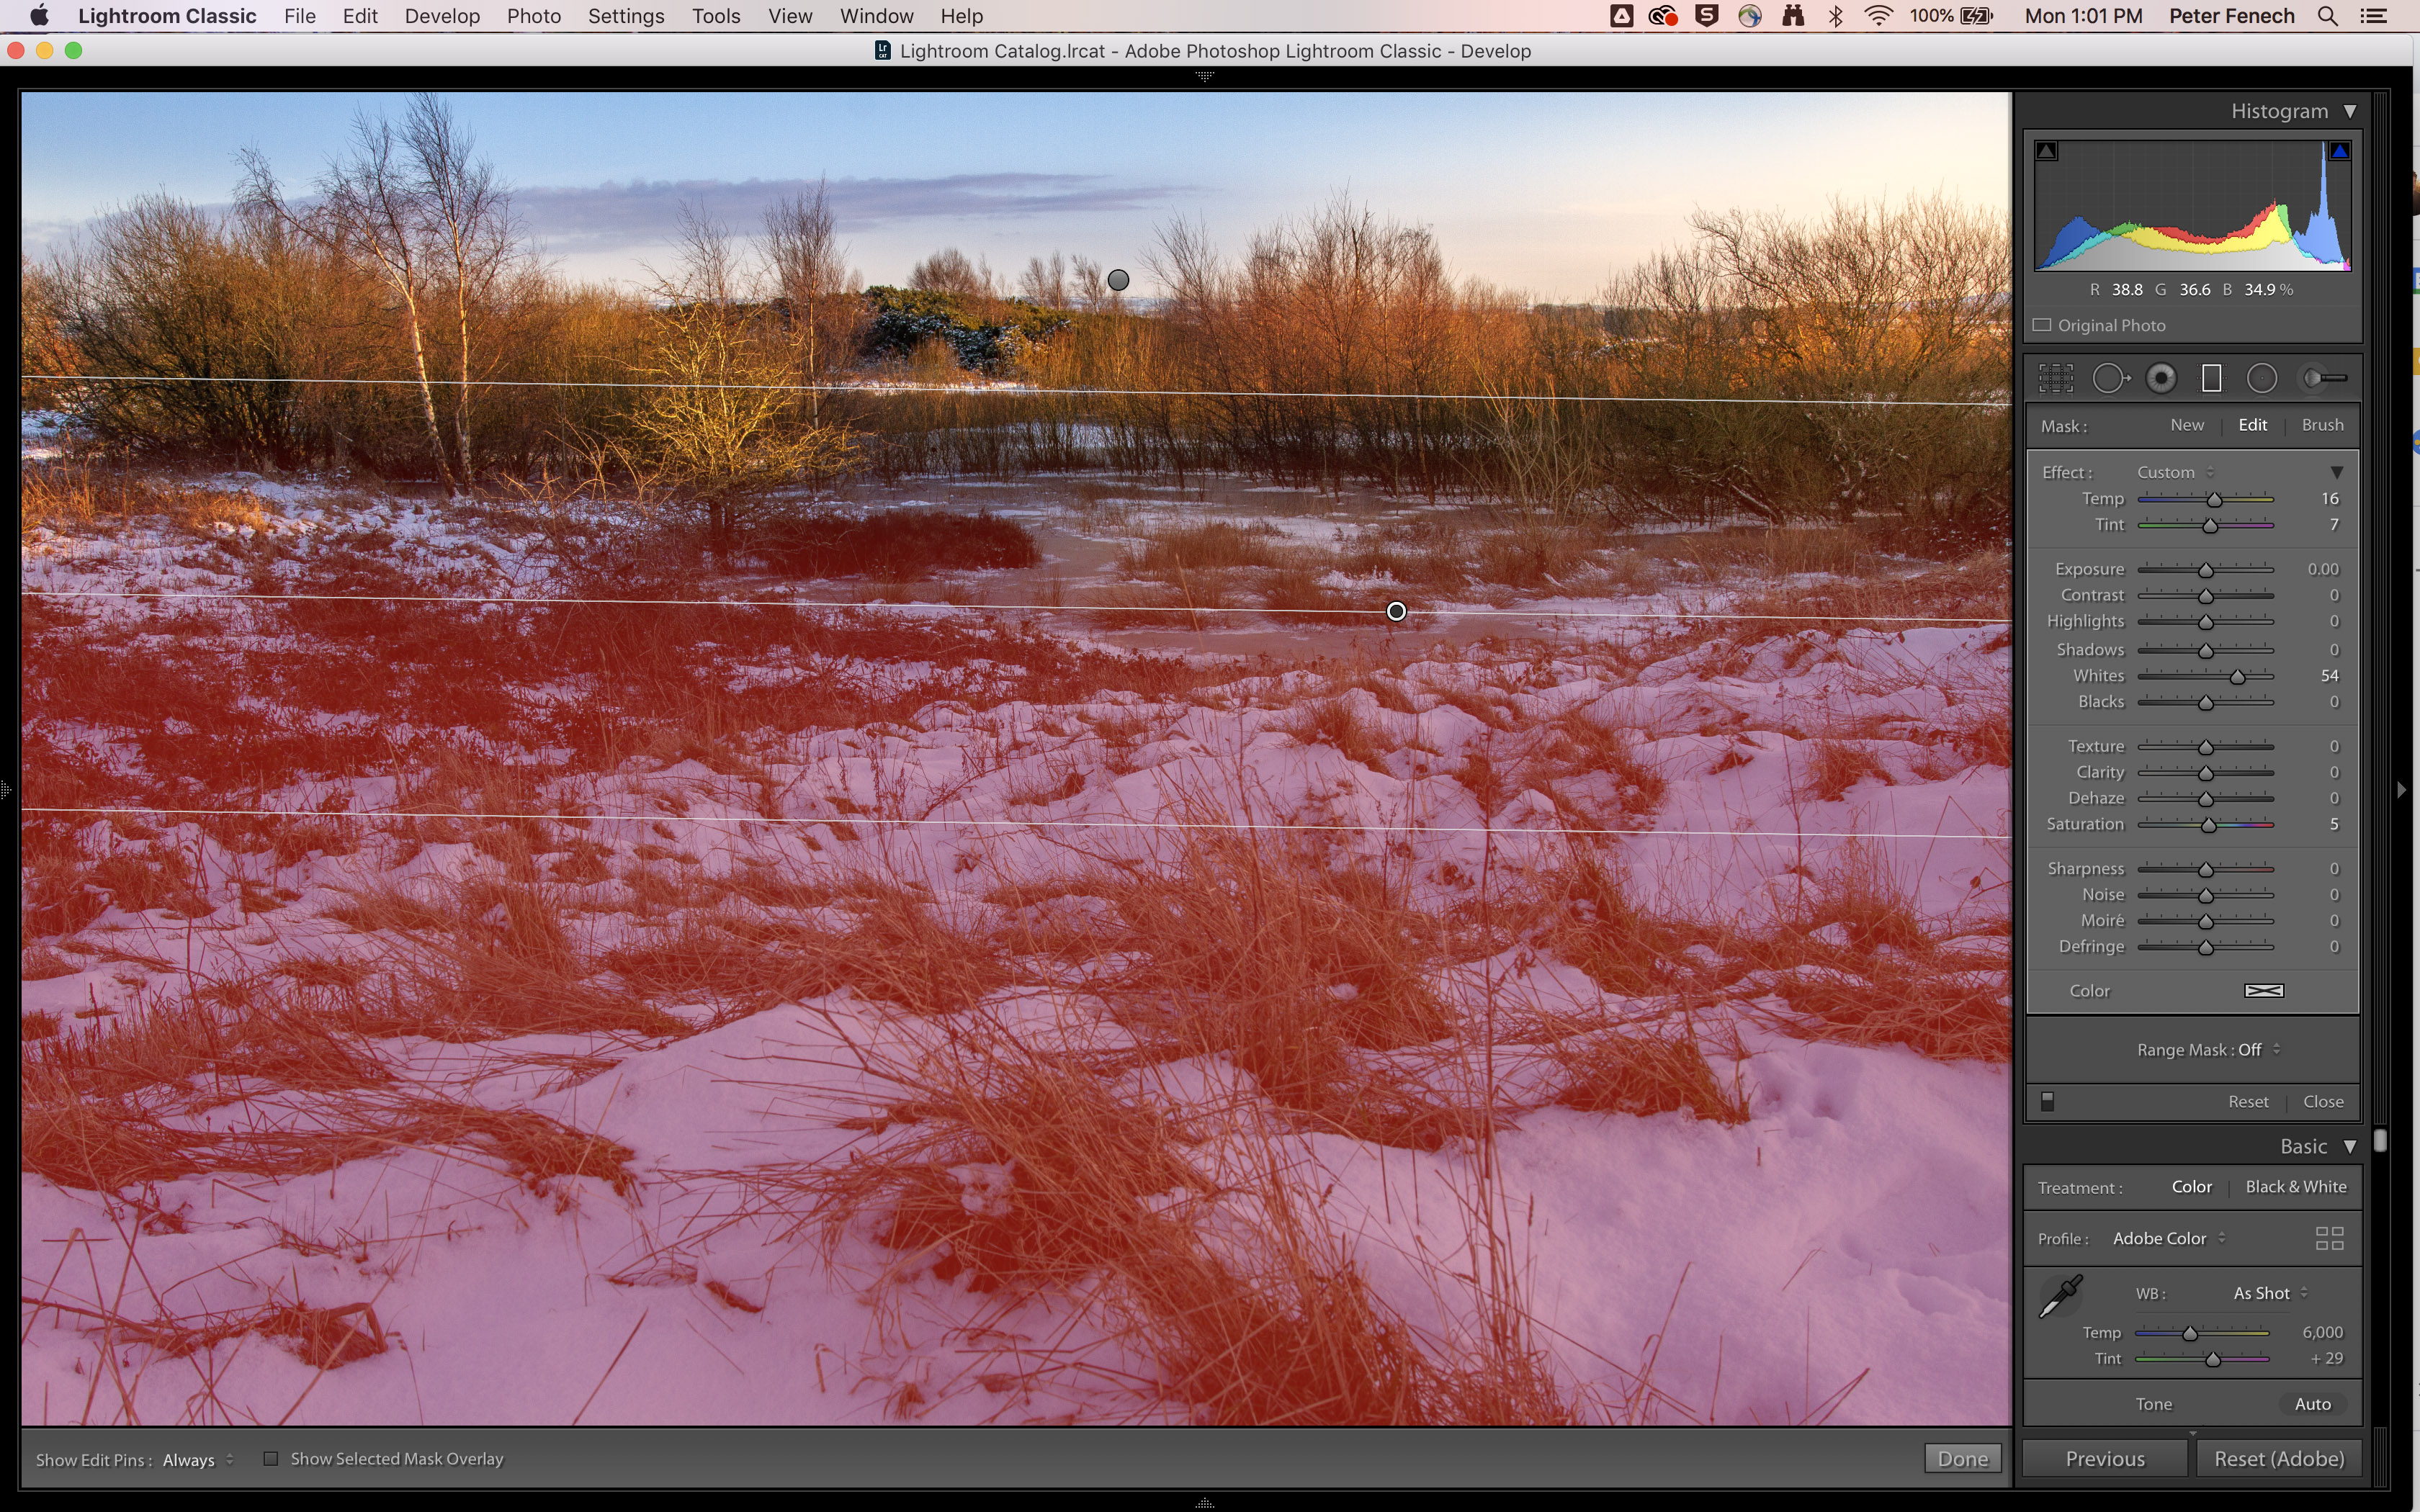
4- Neutralise casts
Be mindful of turning areas an unnatural shade of blue - due to the physical properties the snow has developed a strong blue bias in the previous step. Another Gradient was added to the foreground, to bring back the yellow of the sunlight, for a natural look.
The best camera deals, reviews, product advice, and unmissable photography news, direct to your inbox!
5- Manual toning
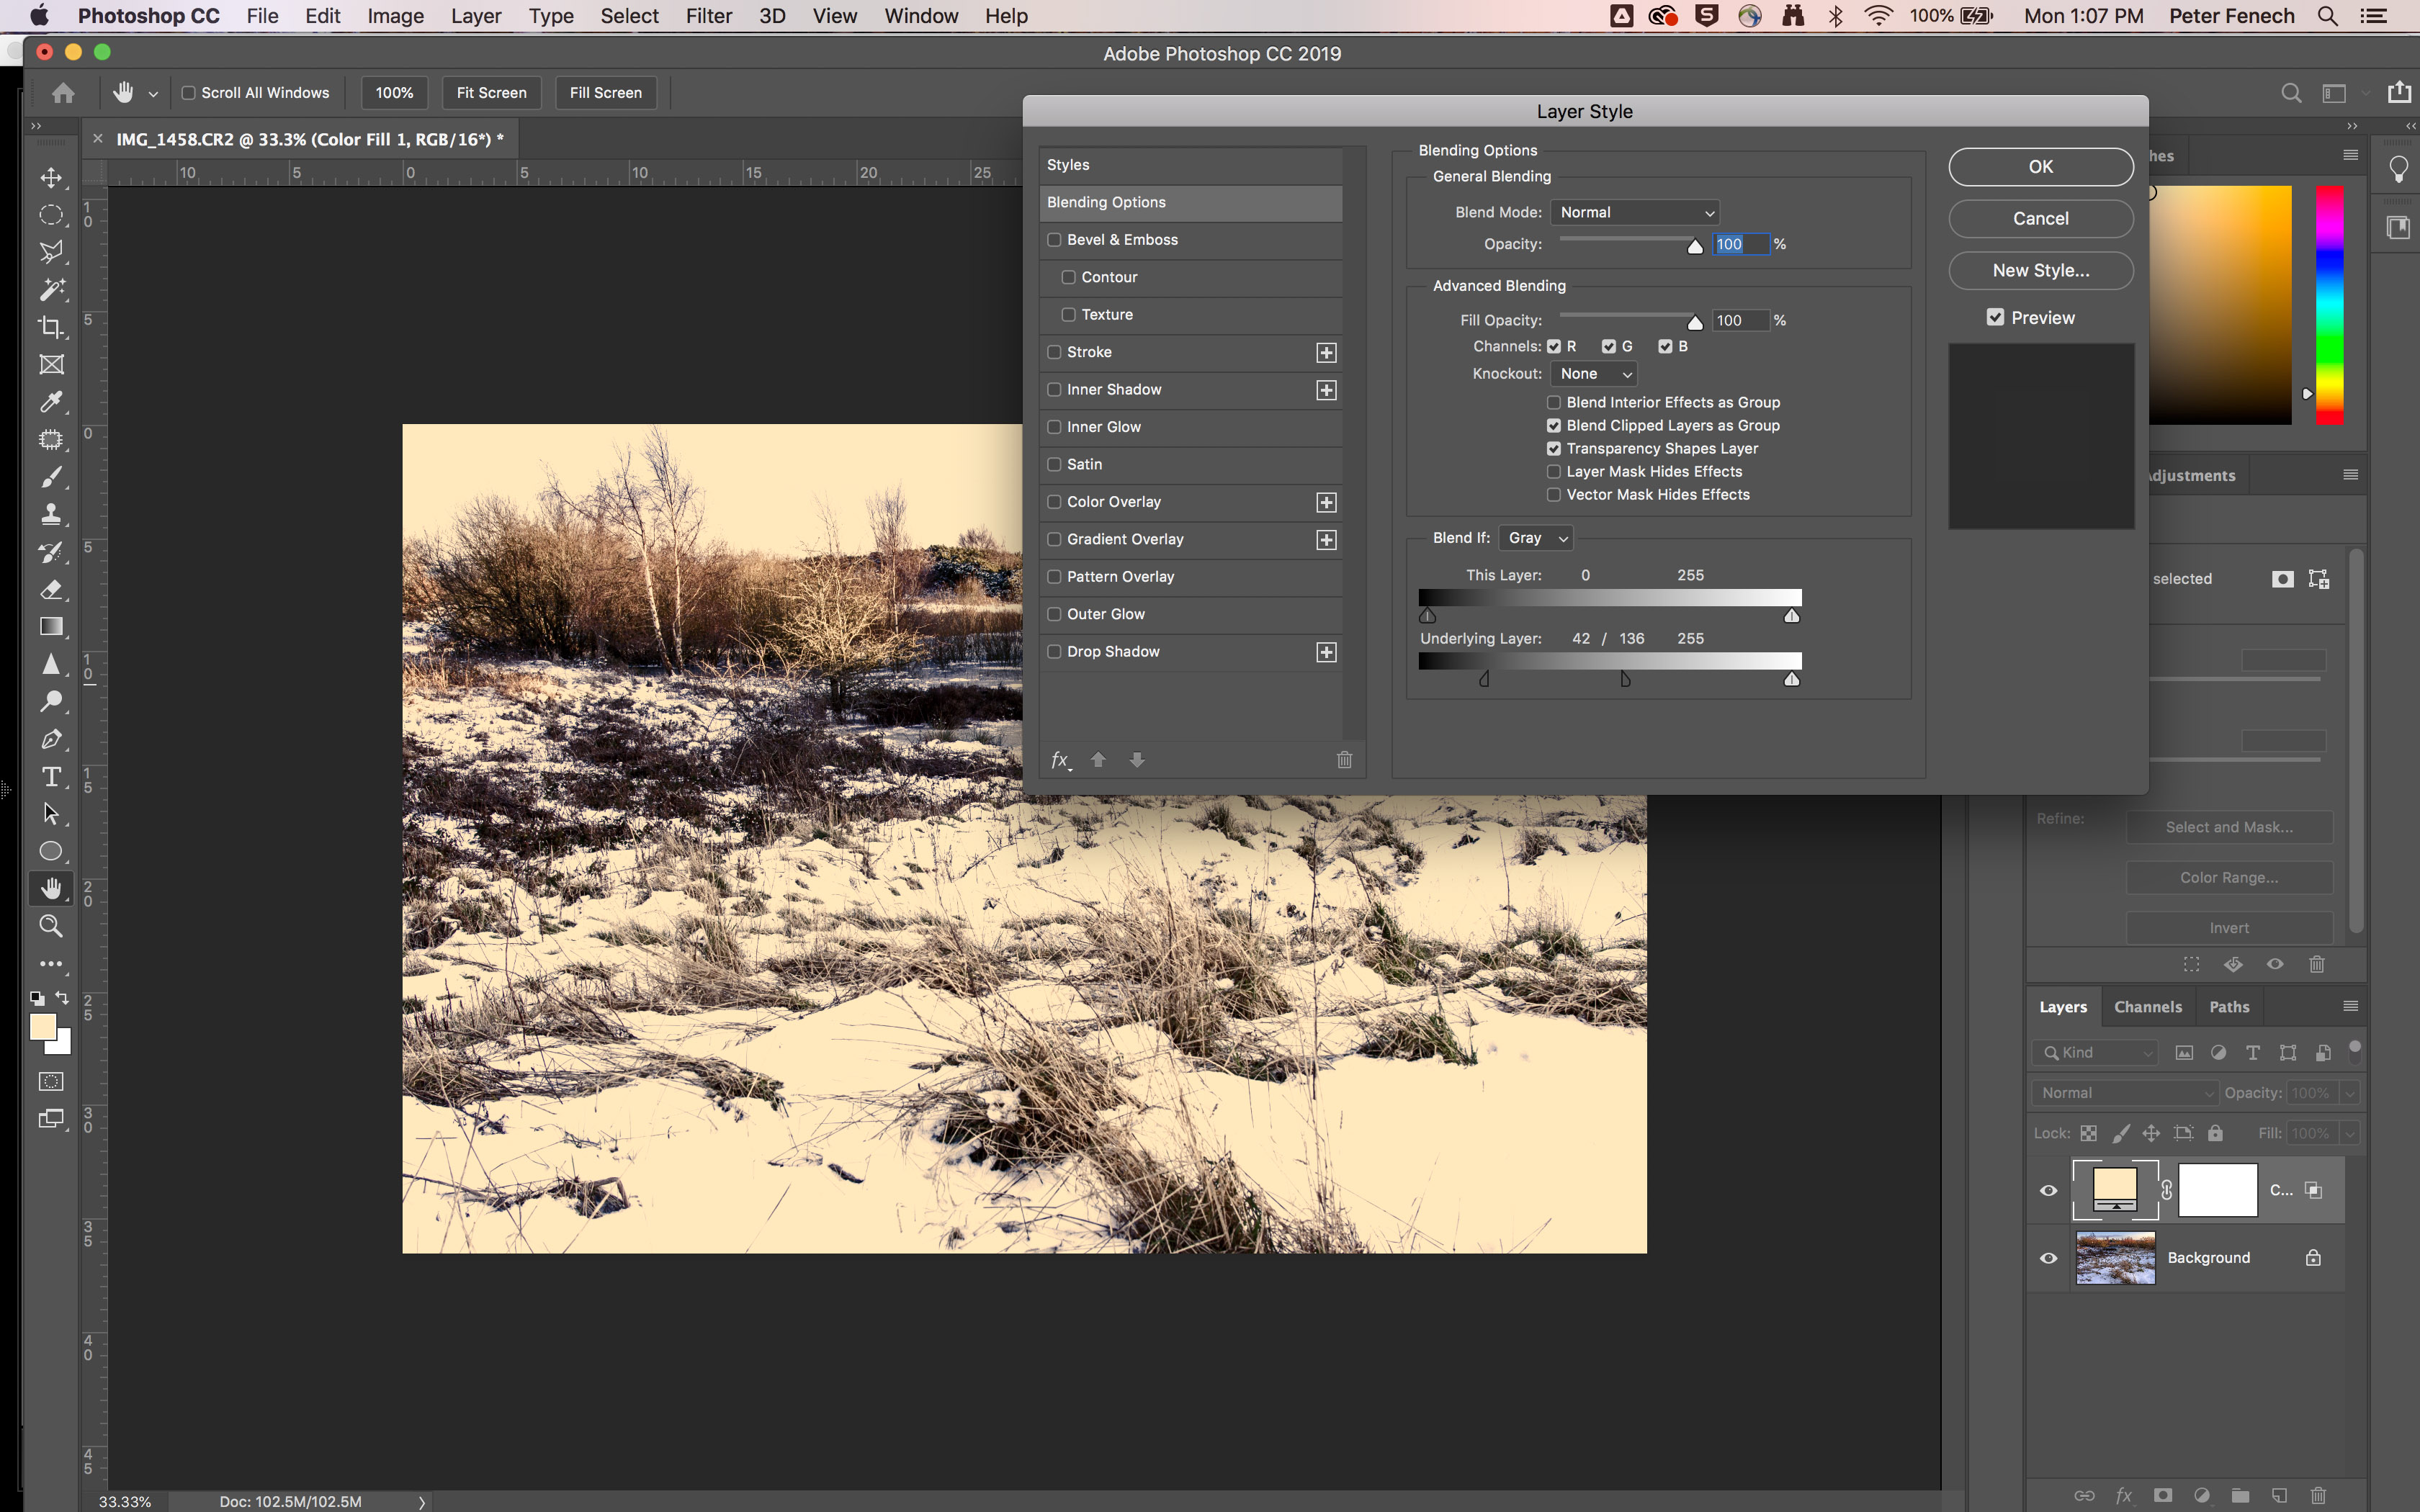
In Photoshop add a solid colour layer, double click the layer and under “Blend if” move the Shadow stop of the Underlying layer to the right for highlight toning or Highlight stop to the left for shadow toning. Hold alt (PC) or Option (Mac) to spit the stop for further targeting.
6- Precise targeting
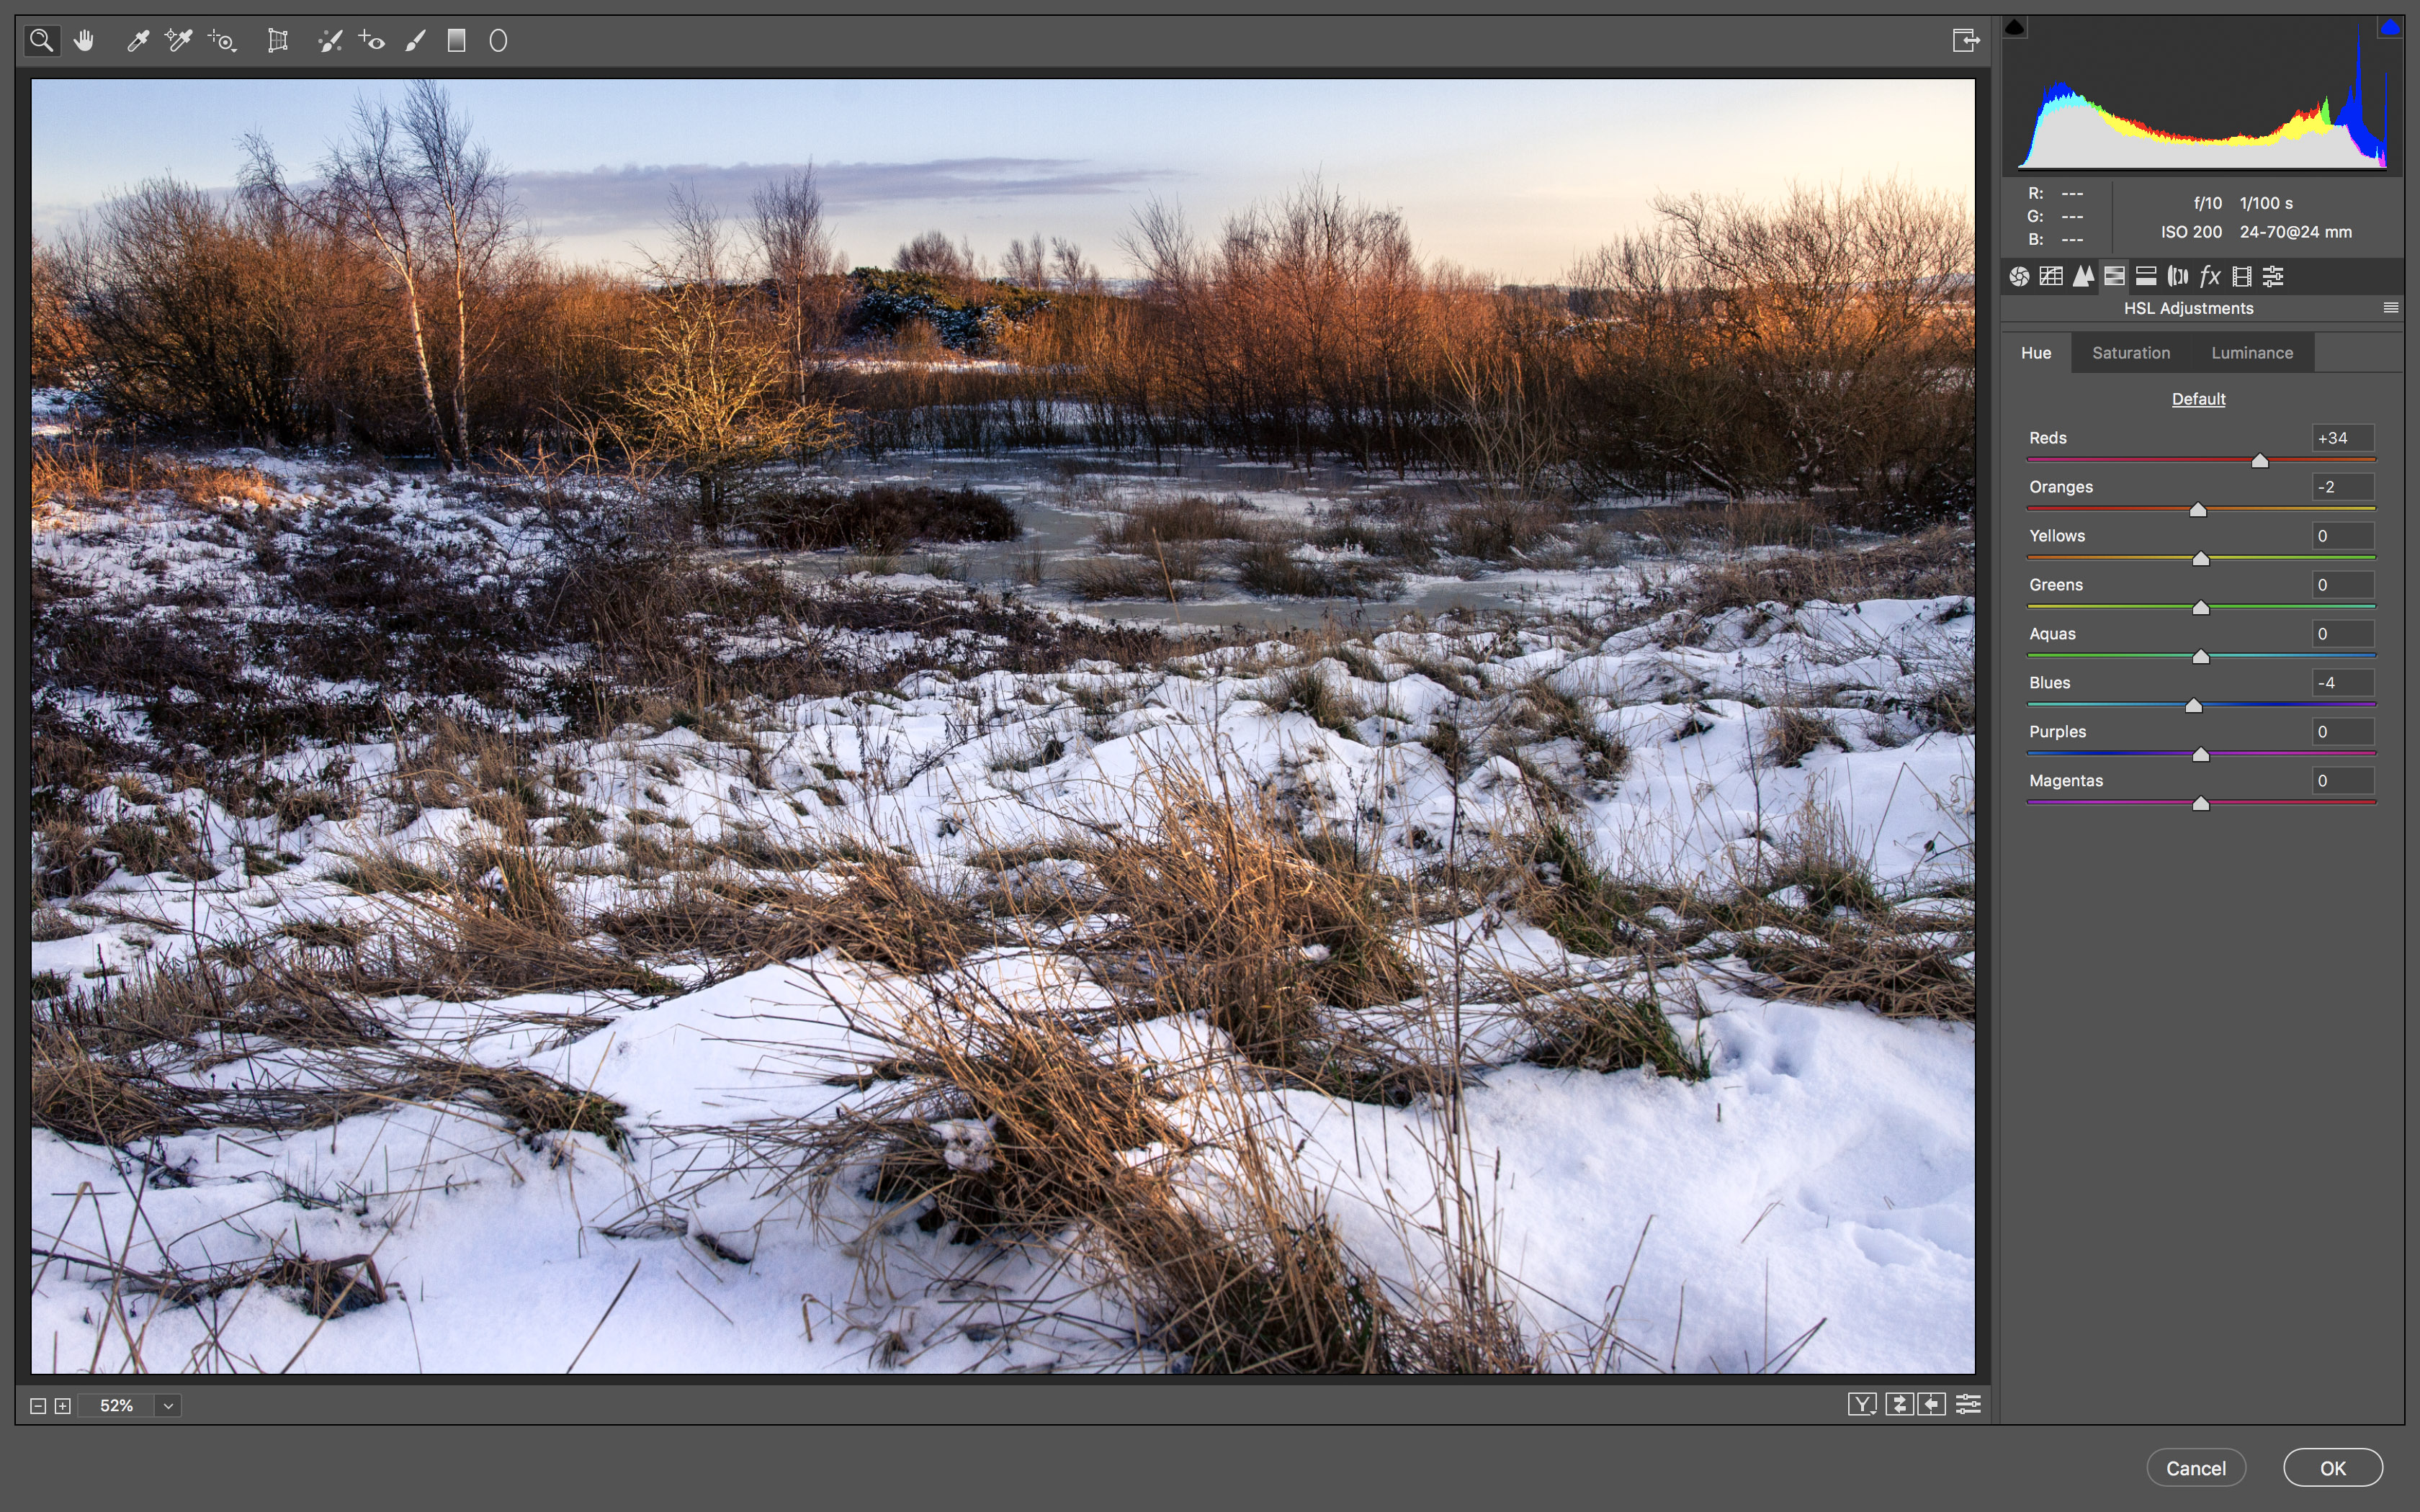
Change the Solid Layer Blend Mode to Soft Light. Duplicate the Background and go Filter > Camera Raw. Use HSL to reduce any unnatural saturation or colour shifts. Pay particular attention to the Hue of the sky blue, ensuring it isn’t too cyan or magenta.
Read more
Canon EOS R5 finally gets 1080p 120fps and C-Log 3 in firmware triple-header
Cinematographer shoots Falcon and the Winter Soldier magazine cover remotely
The best Canon EOS 70D deals in April 2021
As the Editor for Digital Photographer magazine, Peter is a specialist in camera tutorials and creative projects to help you get the most out of your camera, lens, tripod, filters, gimbal, lighting and other imaging equipment.
After cutting his teeth working in retail for camera specialists like Jessops, he has spent 11 years as a photography journalist and freelance writer – and he is a Getty Images-registered photographer, to boot.
No matter what you want to shoot, Peter can help you sharpen your skills and elevate your ability, whether it’s taking portraits, capturing landscapes, shooting architecture, creating macro and still life, photographing action… he can help you learn and improve.
