Turn photos into digital paintings with Photoshop's Mixer Brush
Transform any photograph into a unique digital painting ready to hang on the wall with Photoshop CC's Mixer Brush
The best camera deals, reviews, product advice, and unmissable photography news, direct to your inbox!
You are now subscribed
Your newsletter sign-up was successful
Watch video: Turn photos into digital paintings with Photoshop CC
This is a fun project to try out on a photo from your image library – you could pick an outdoor scene like ours, or why not try a different genre? Perhaps portraiture, still life or abstract. We’ll use the Mixer Brush Tool in Photoshop CC to give the photo the look of an impressionist painting.
If you’ve ever looked through the Photoshop Filter Gallery you’ll know that there are several filters within that can be used to create a painterly look. But they are all blunt and universal. The great thing about using the Mixer Brush Tool is that it creates painterly strokes based on the details and colors in the image. So you can tailor the effect, rather than applying a generic filter. However, this involves a bit more work.
Article continues belowWe have to push and pull the colors around with the brush to create our strokes, following along with the lines and shapes in the shot with short, sharp strokes. We can also enhance the effect with other brushes, including a free Watercolor set from Adobe.
Using several layers allows us to gradually build up the effect. Just as a painter might, we can start by using broad strokes, then go on to add finer details in later. It may take a little while to do, but it’s a relaxing and rewarding task, and makes even the most ham-fisted scrawler feel as if they are really painting.
01 Mixer brush settings
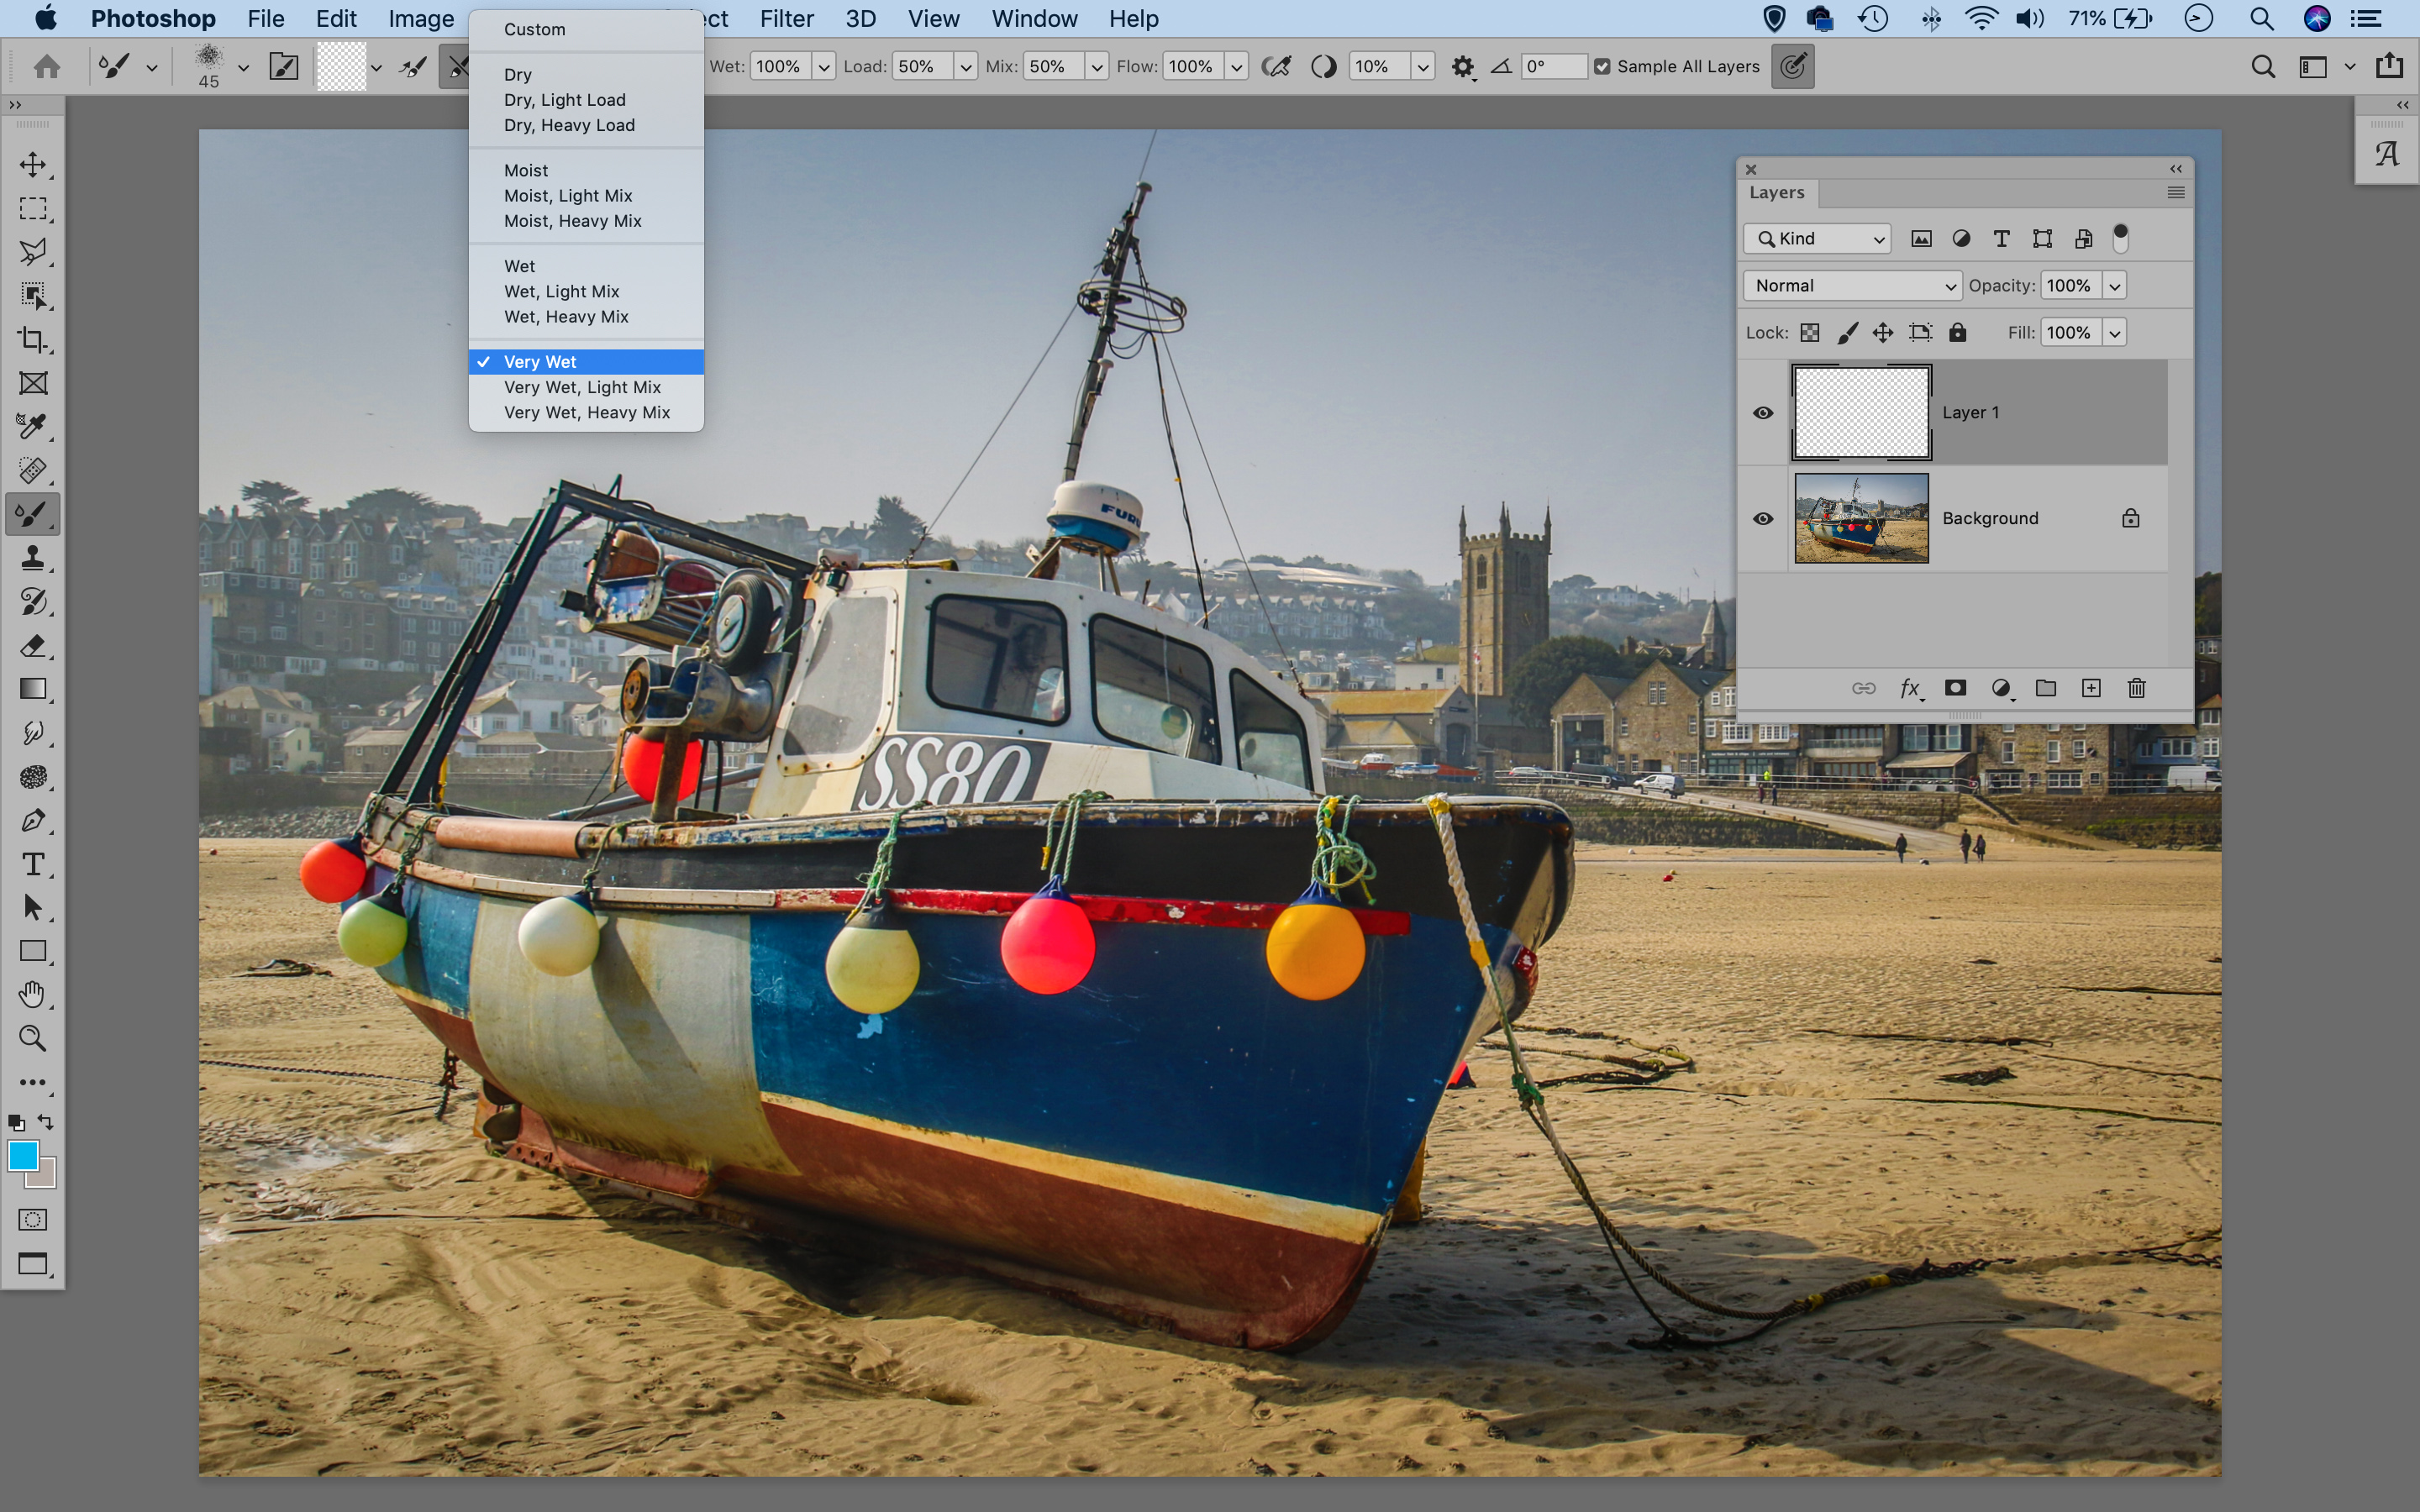
Open the Layers panel and click the new layer icon, then get the Mixer Brush Tool from the toolbox. Tick ‘Sample All Layers’ in the tool options. Click the preset dropdown and pick ‘Very Wet’. Enable the ‘Clean Brush’ icon and turn off the ‘Load Brush after each stroke’ icon.
02 Start painting
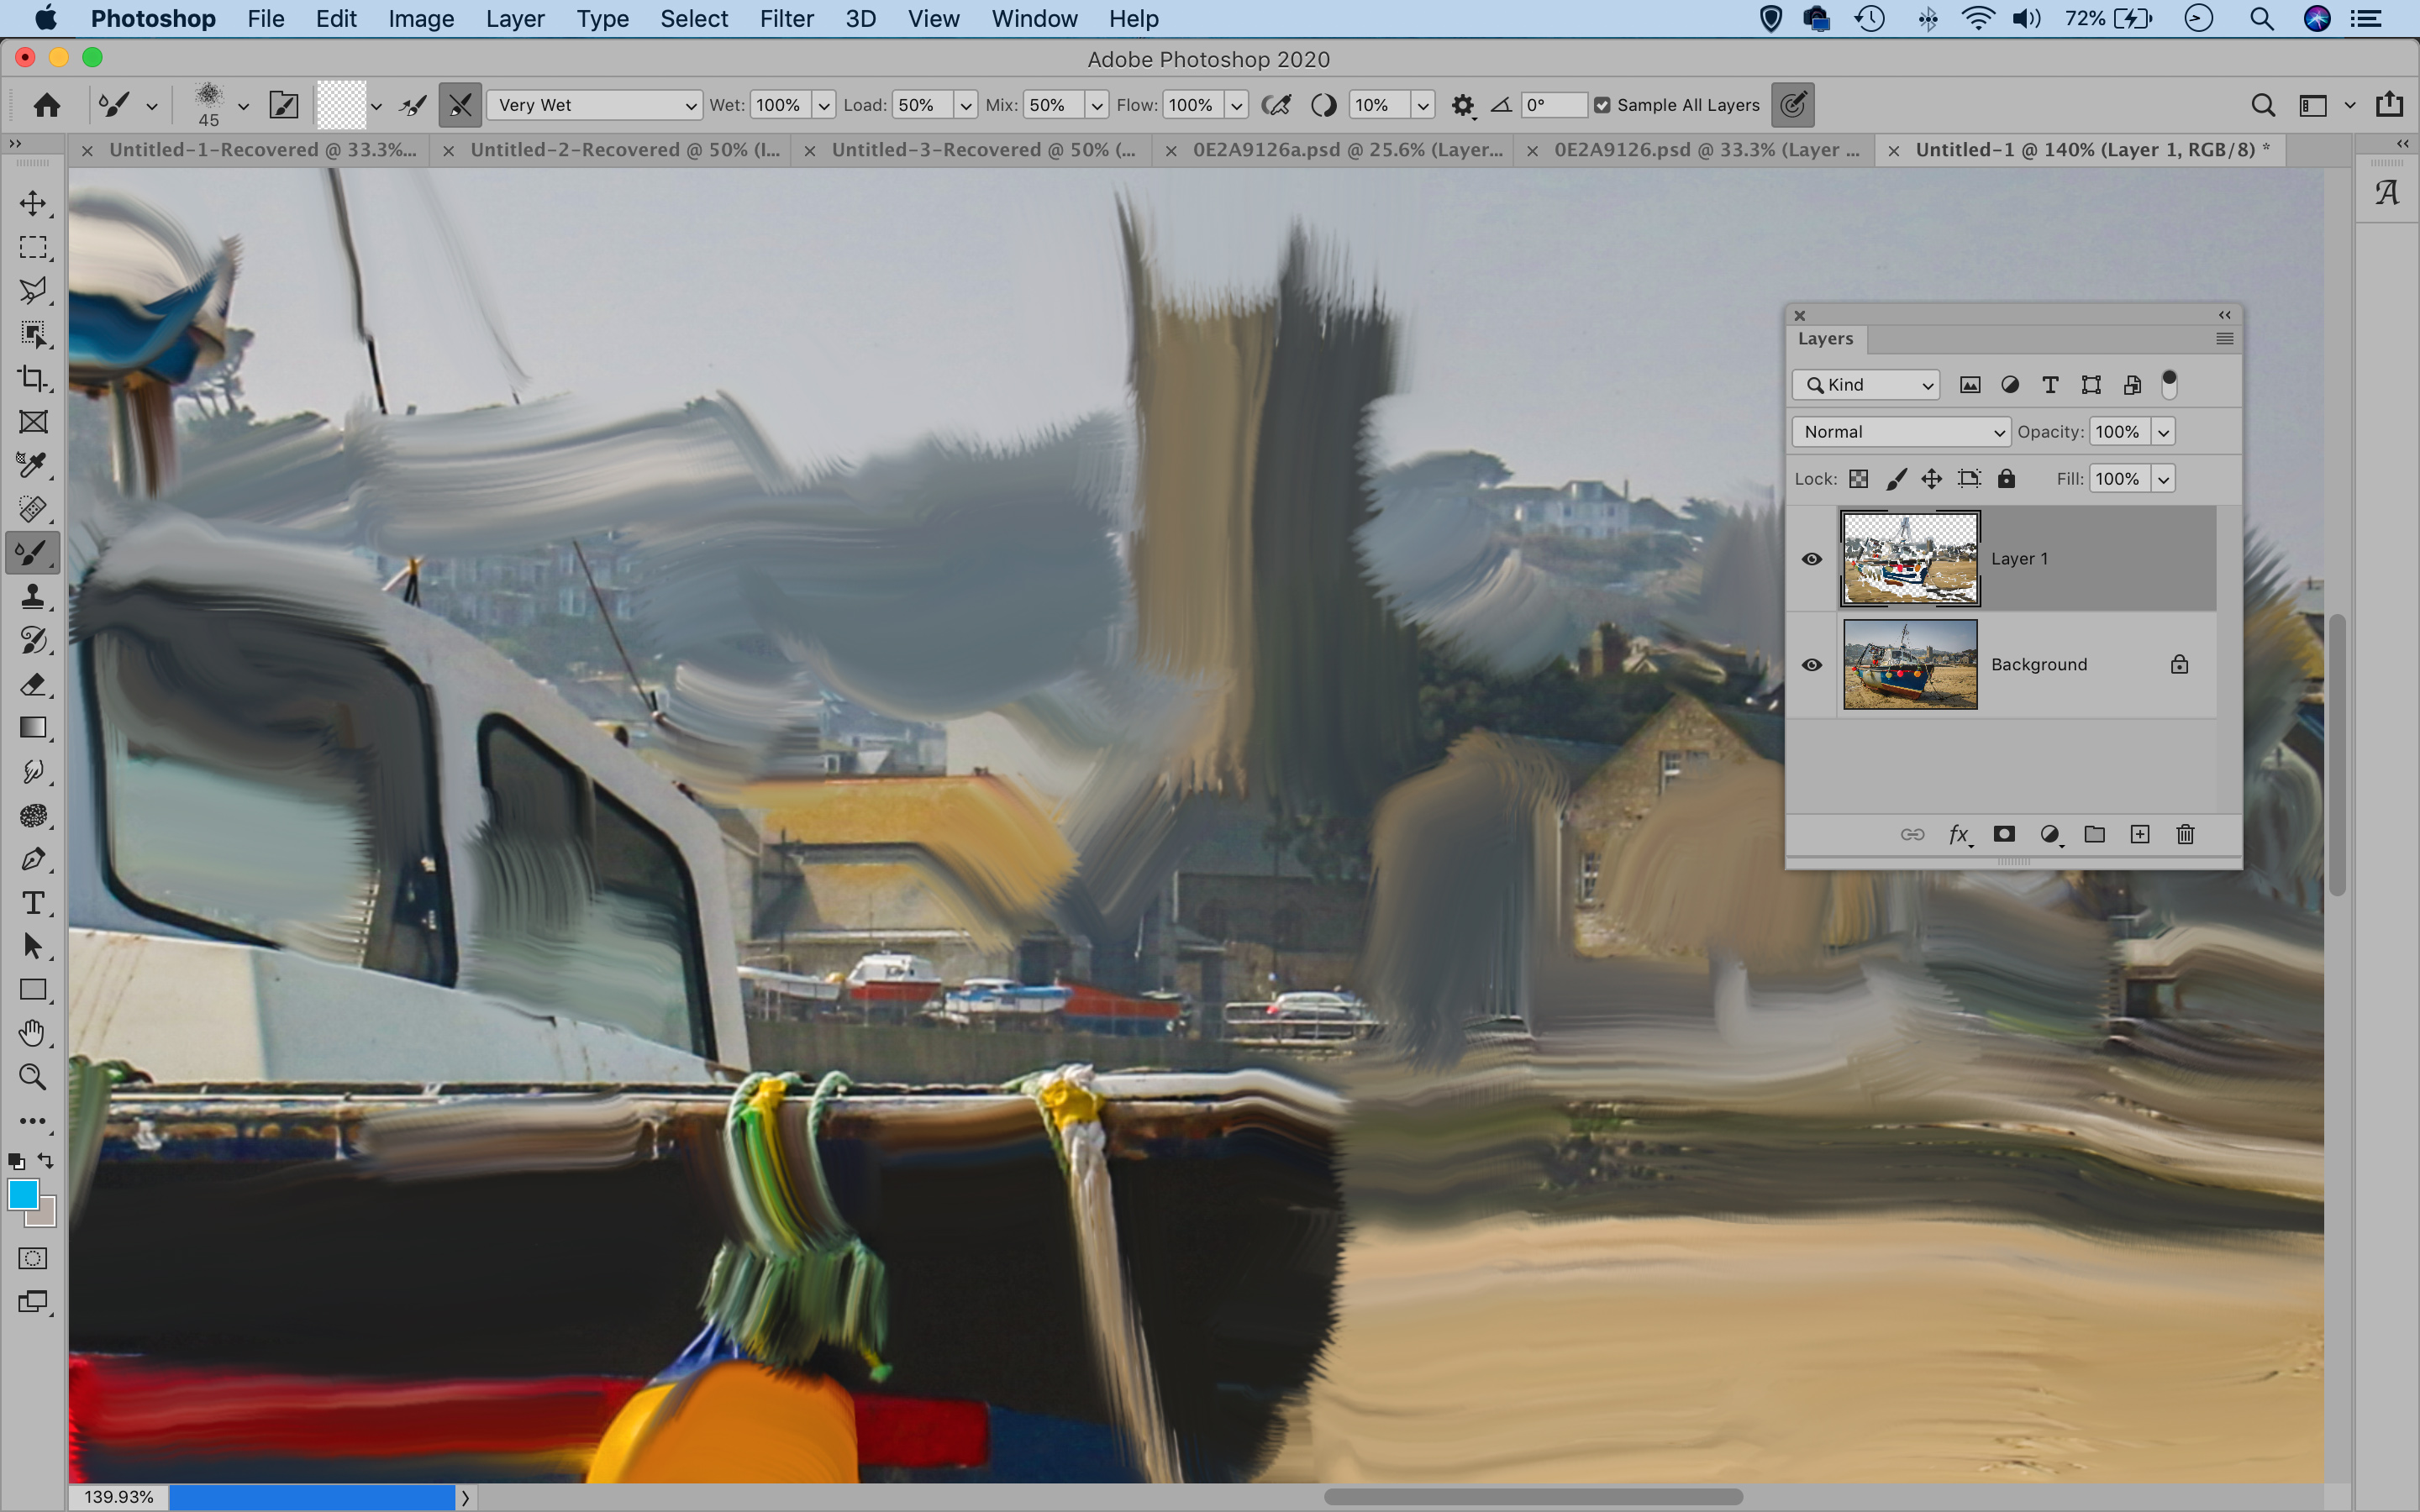
Select a rough-edged or bristle brush tip from the brush picker dropdown list and start painting on the empty layer to smudge the colors. Use short, sharp strokes to blend the colors, slowly building up the effect and following the lines and shapes in the frame.
The best camera deals, reviews, product advice, and unmissable photography news, direct to your inbox!
03 Add fine details
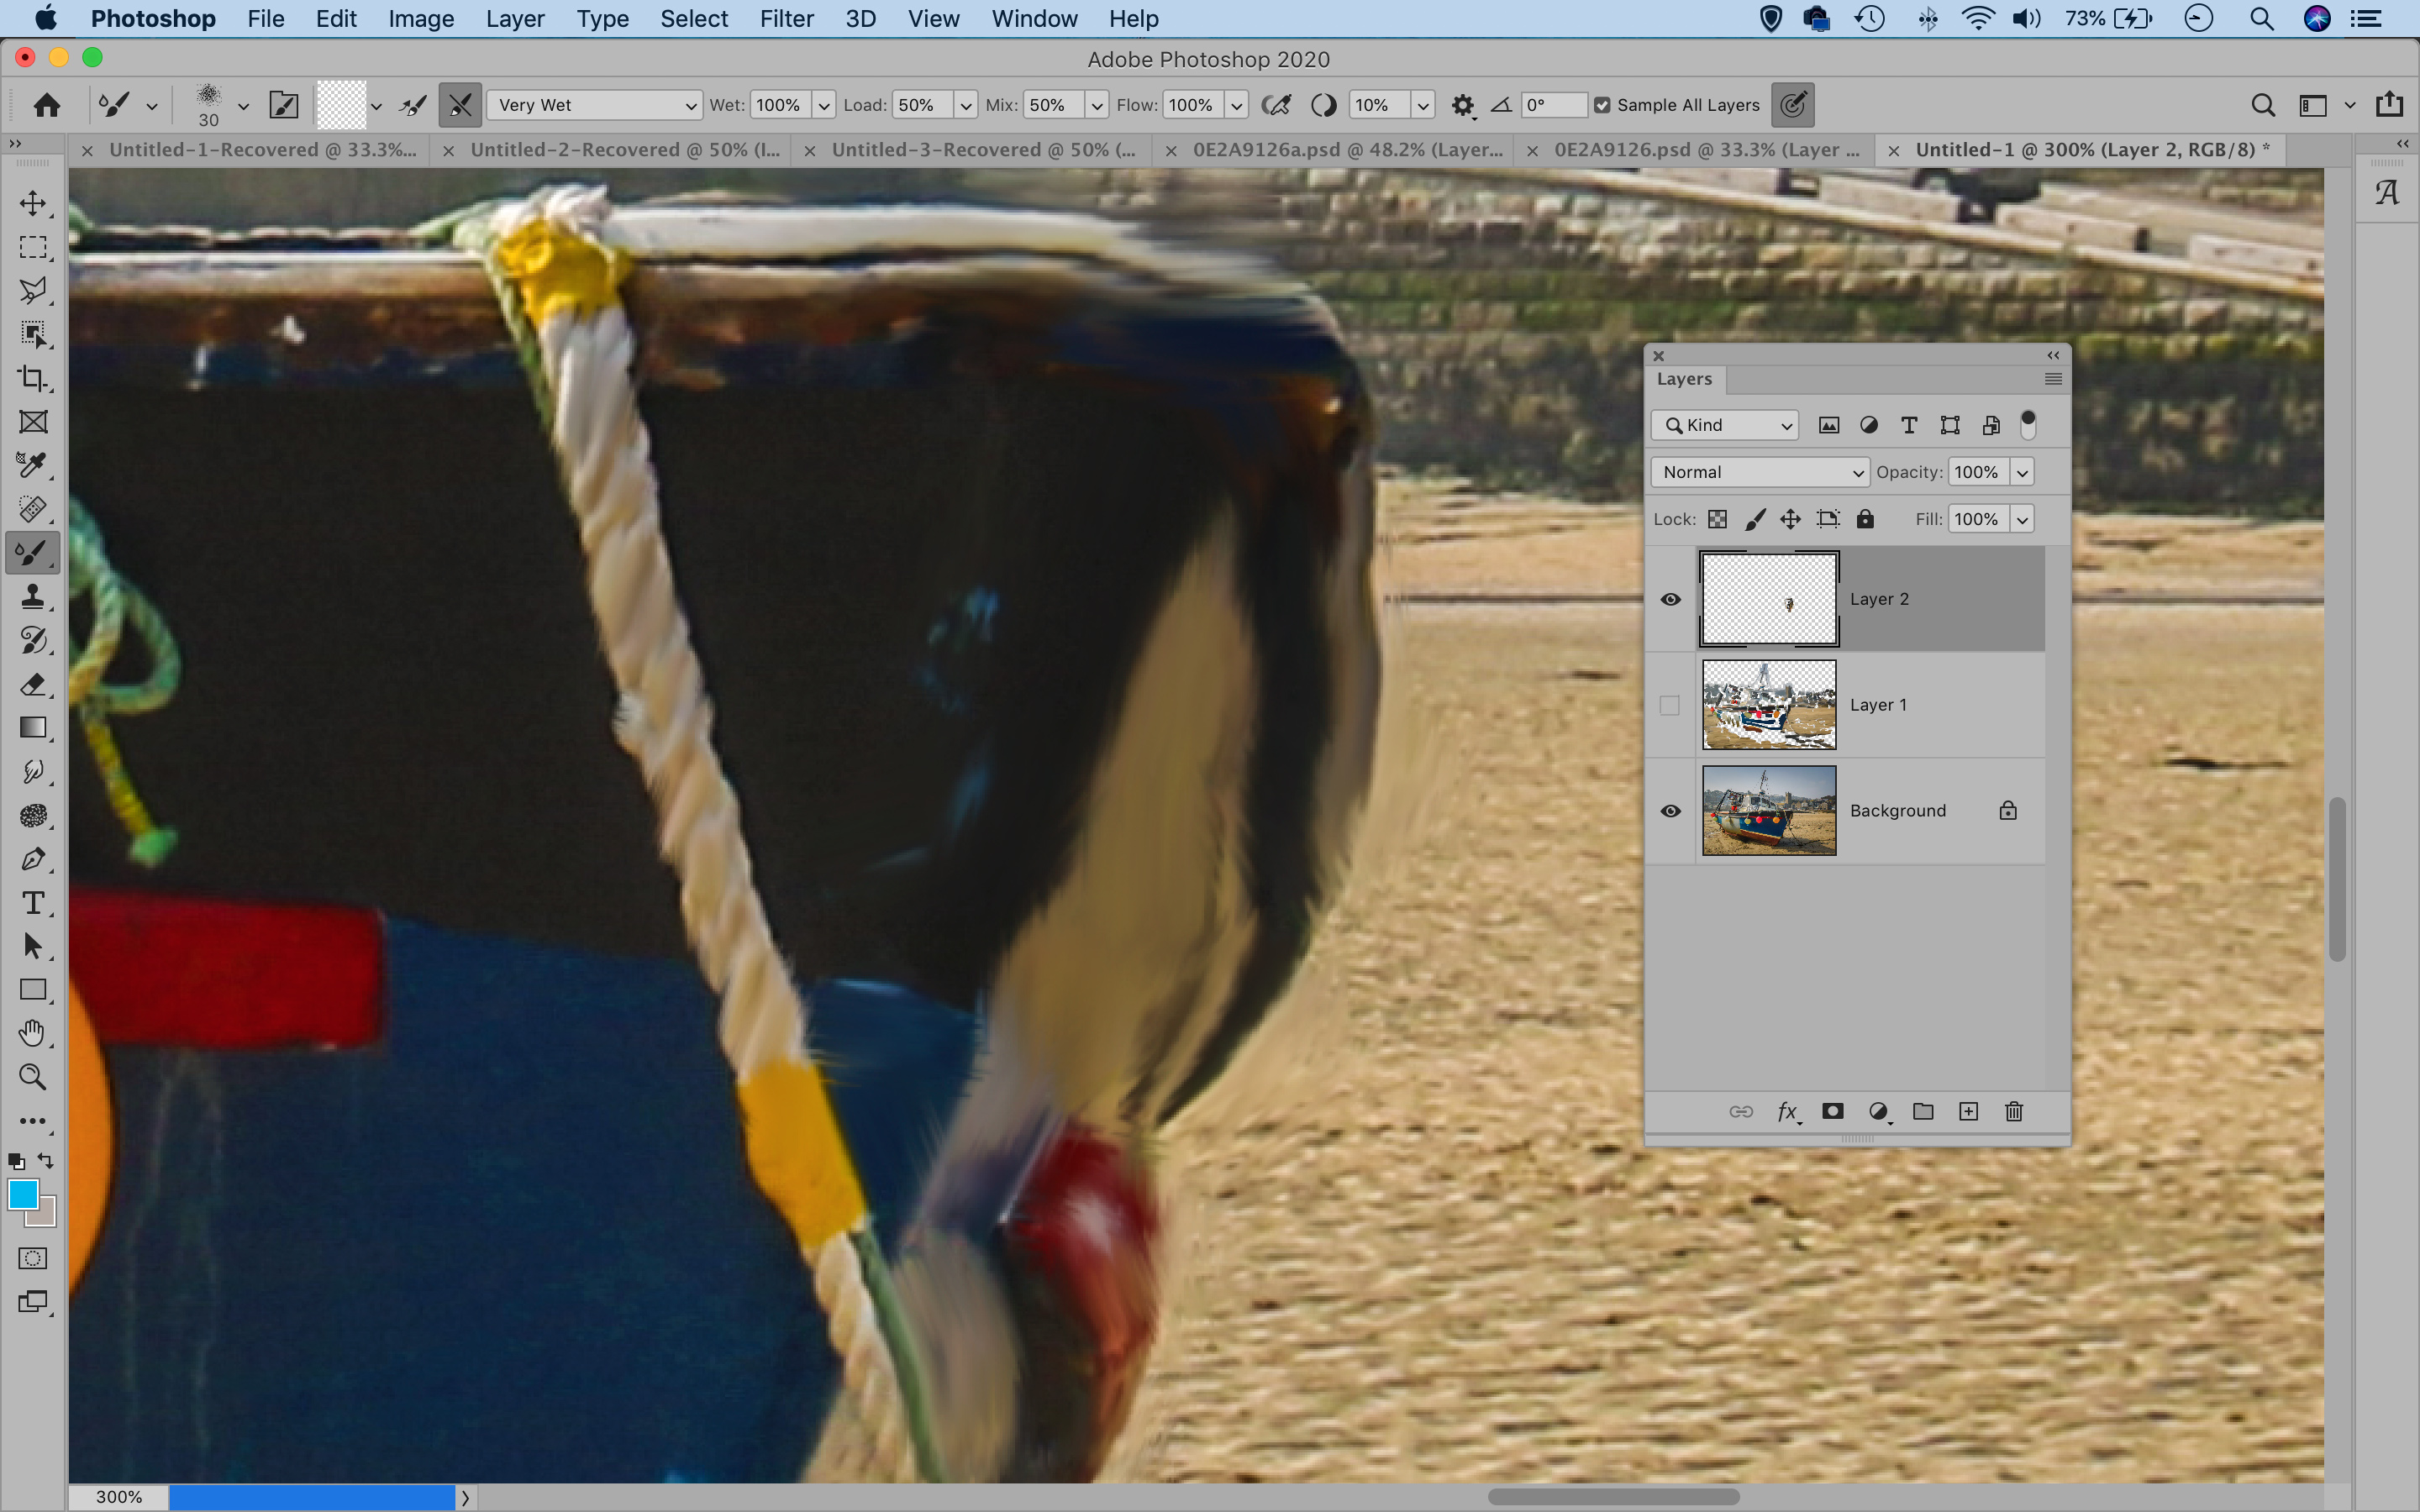
Use a large brush tip to start and block in the colors with broad strokes. Play with different types of brush tip to see which works for you. Next, hide the layer, then make a new layer and use a smaller brush to add details. Continue, like so, to build up the effect.
04 Download free Adobe brushes
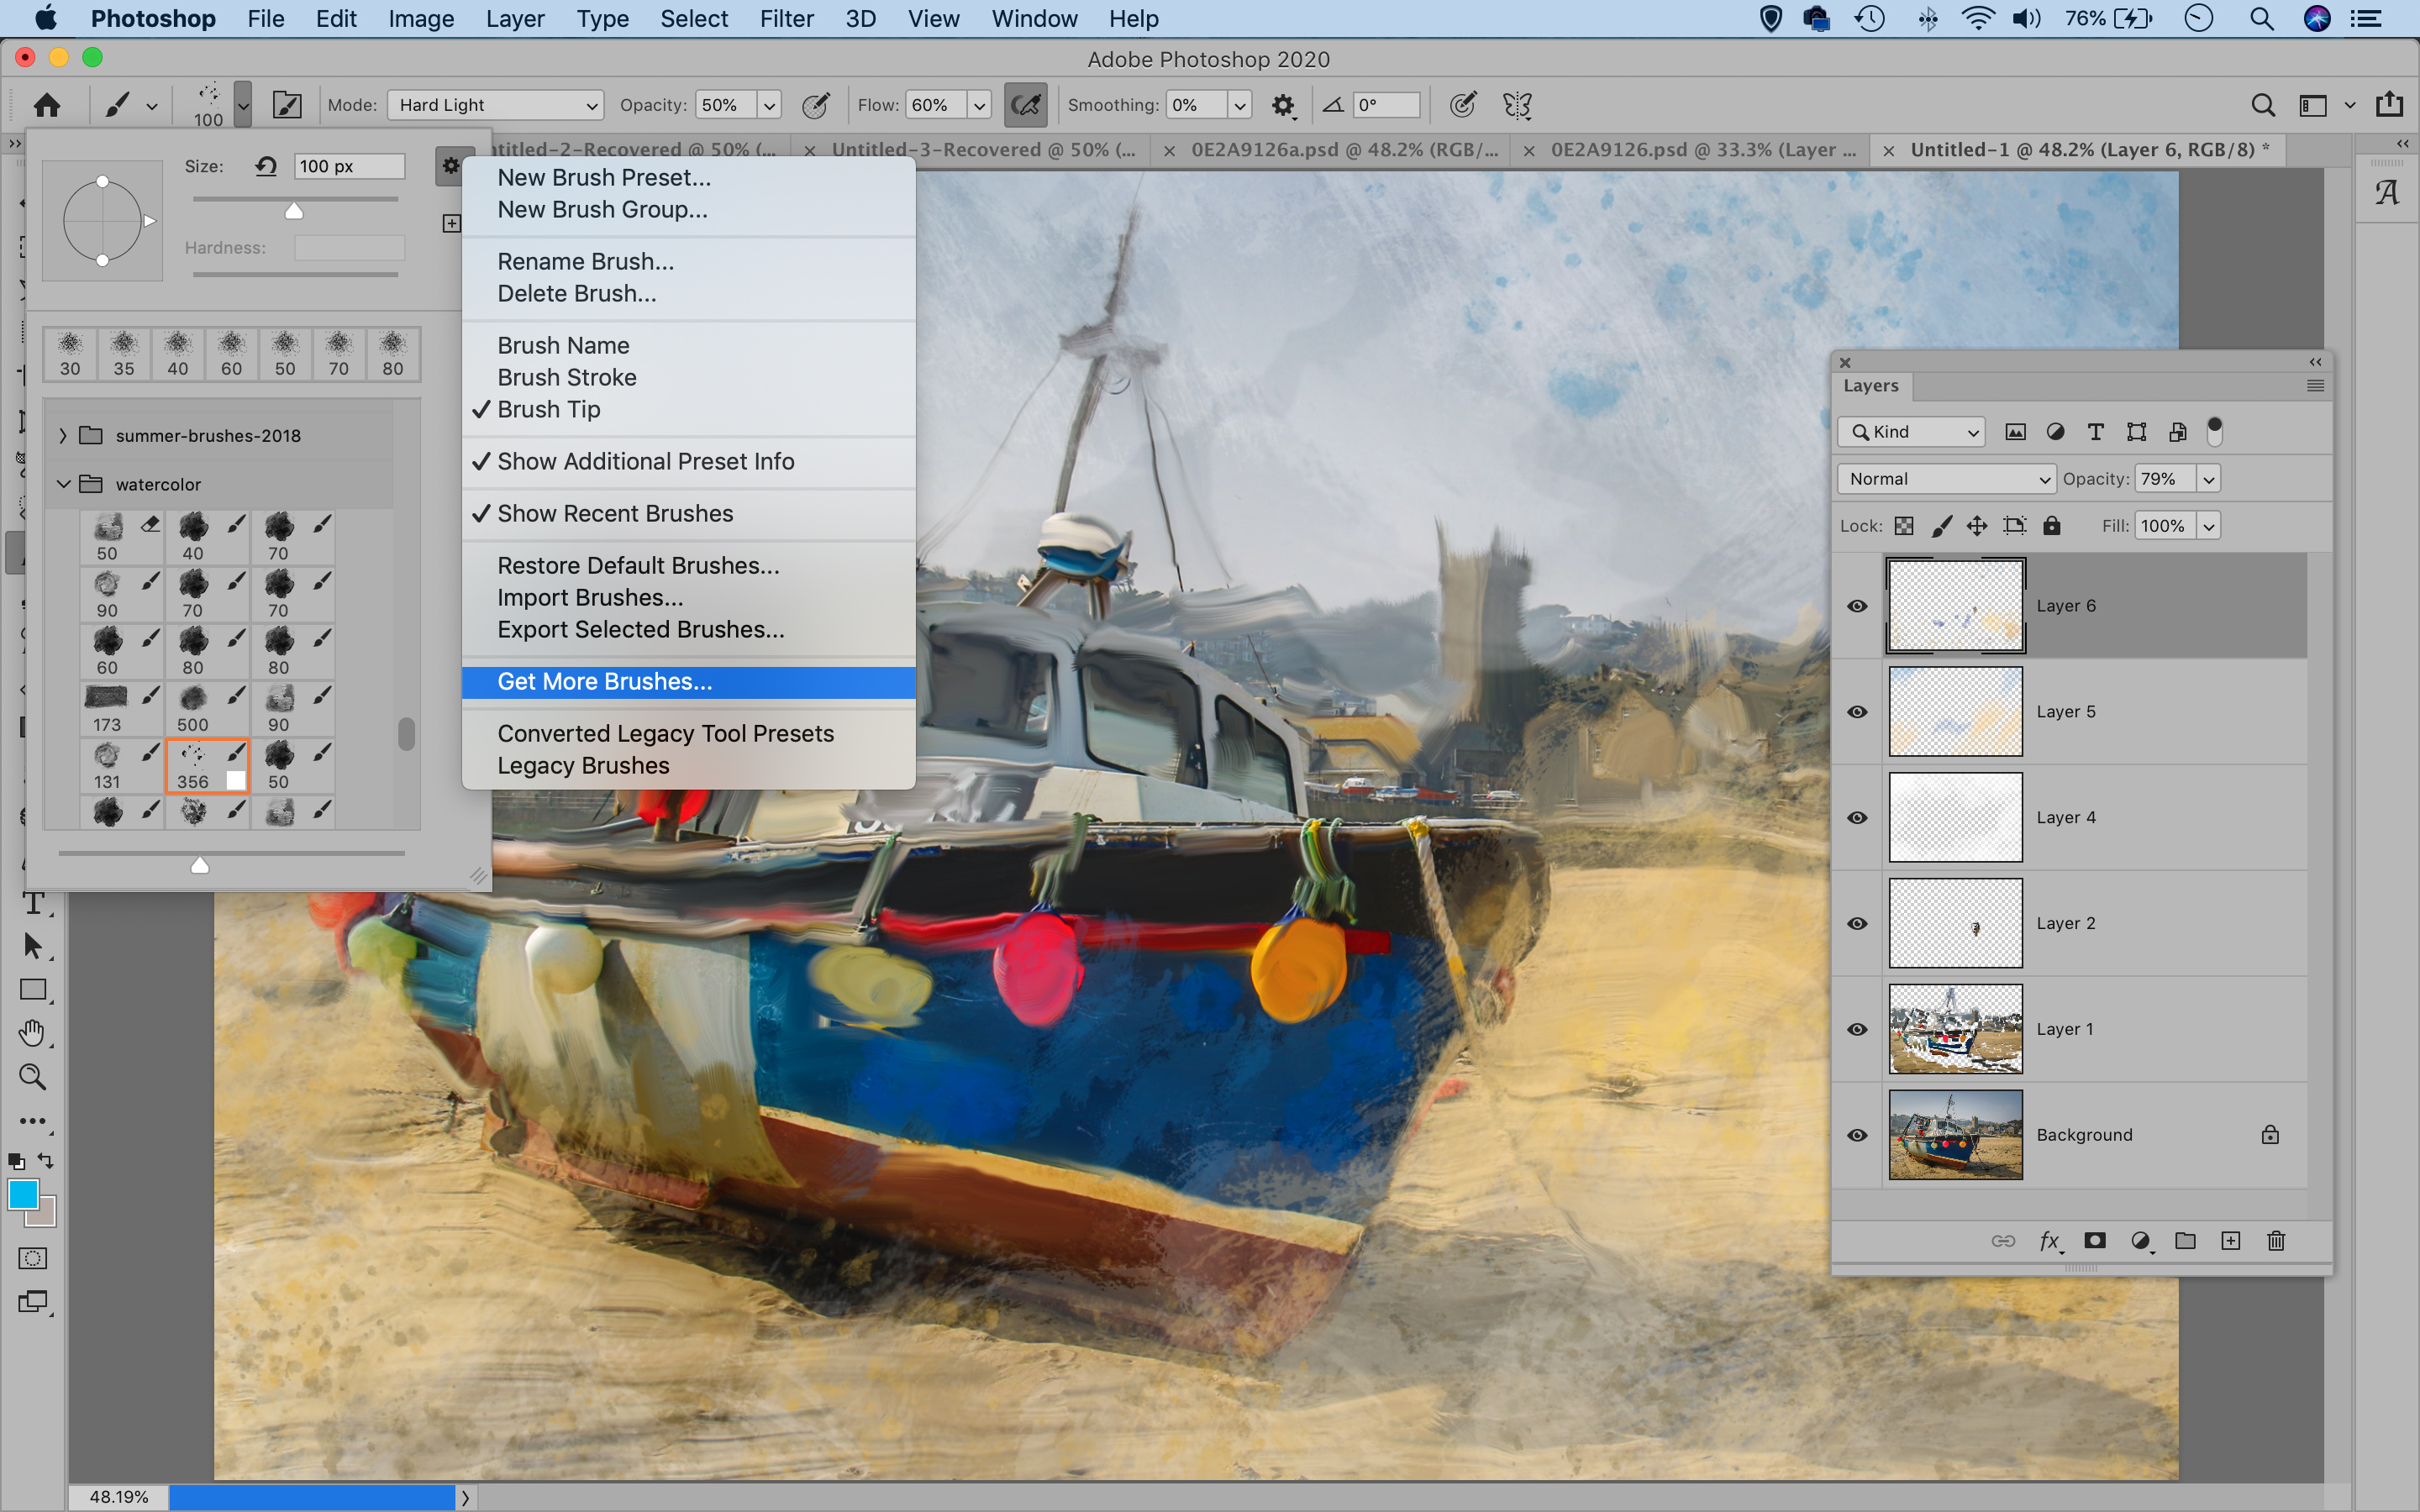
Grab the normal Brush tool and make a new layer. Open the brush picker, click the cog icon and choose ‘Get more brushes’. Download the Watercolor set from Adobe. Alt-click to sample colors from the image and paint a few splashes around the edges.
05 Enhance the colours
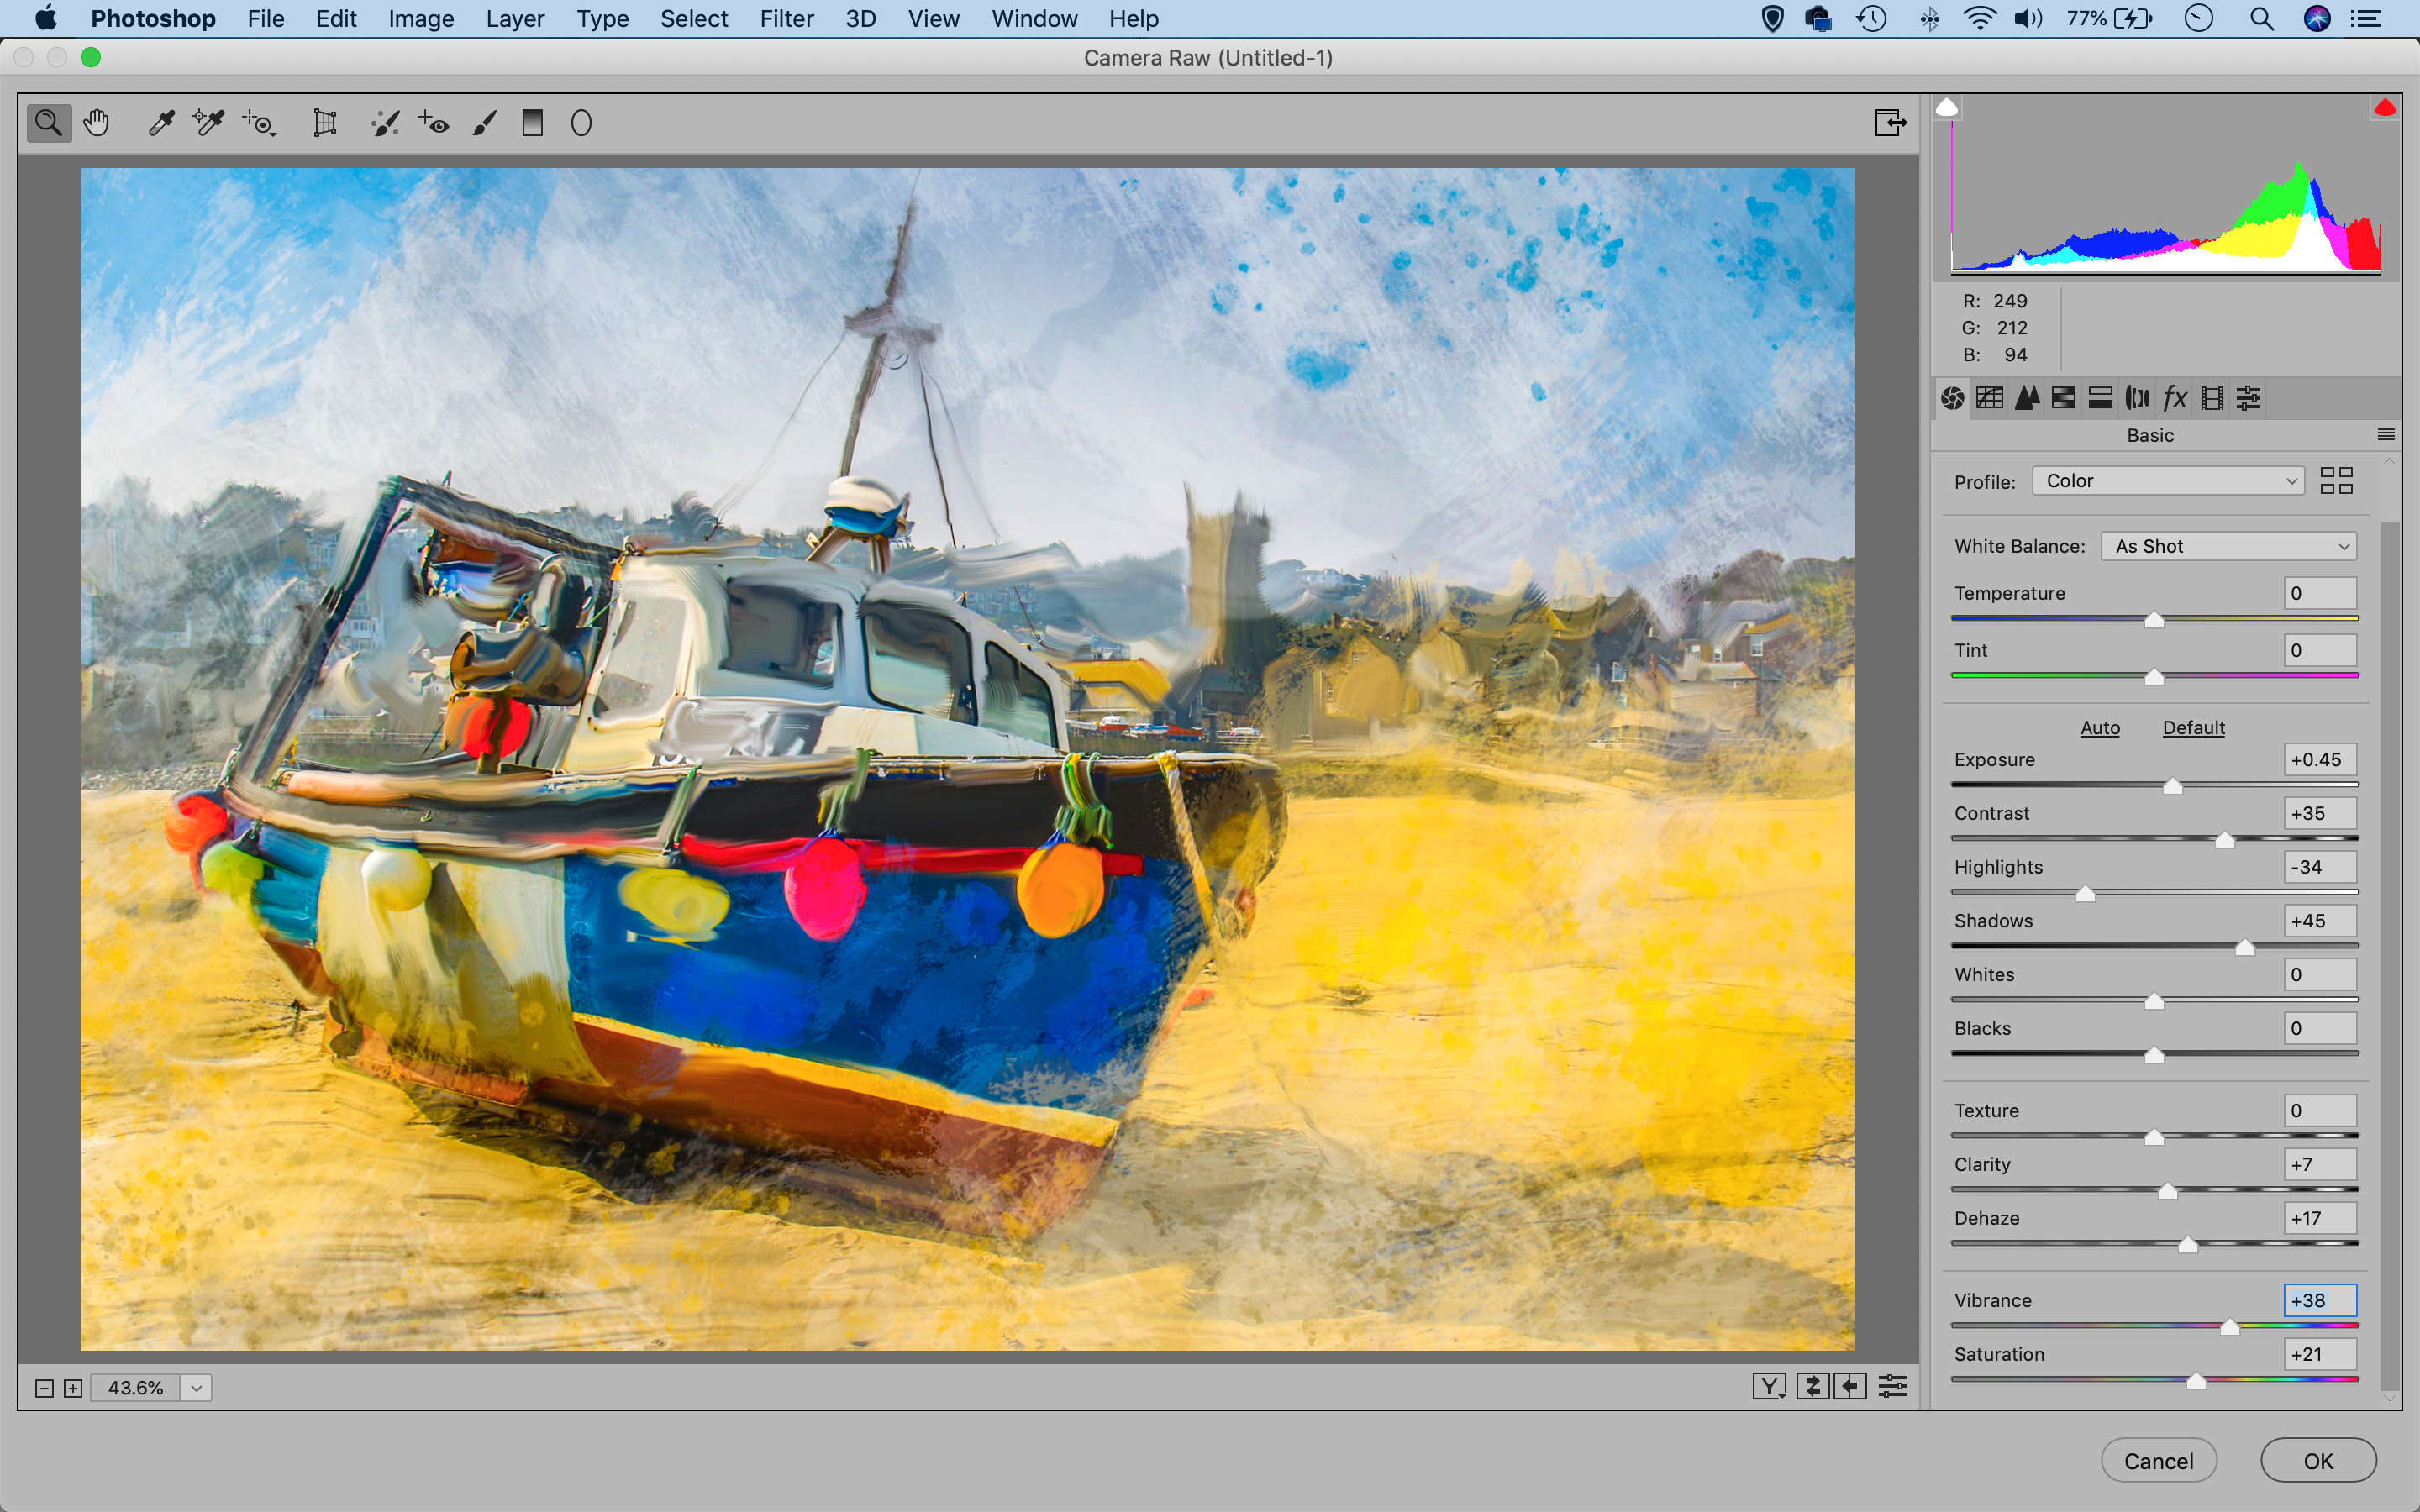
Highlight the top layer and merge a copy of all layers by pressing Cmd/Ctrl + Shift + Alt + E, then go to Filter > Camera Raw Filter. Use the tonal controls in the Camera Raw Basic panel to boost contrast and saturation then hit OK. Next duplicate the layer with Cmd/Ctrl + J.
06 Emboss the paint
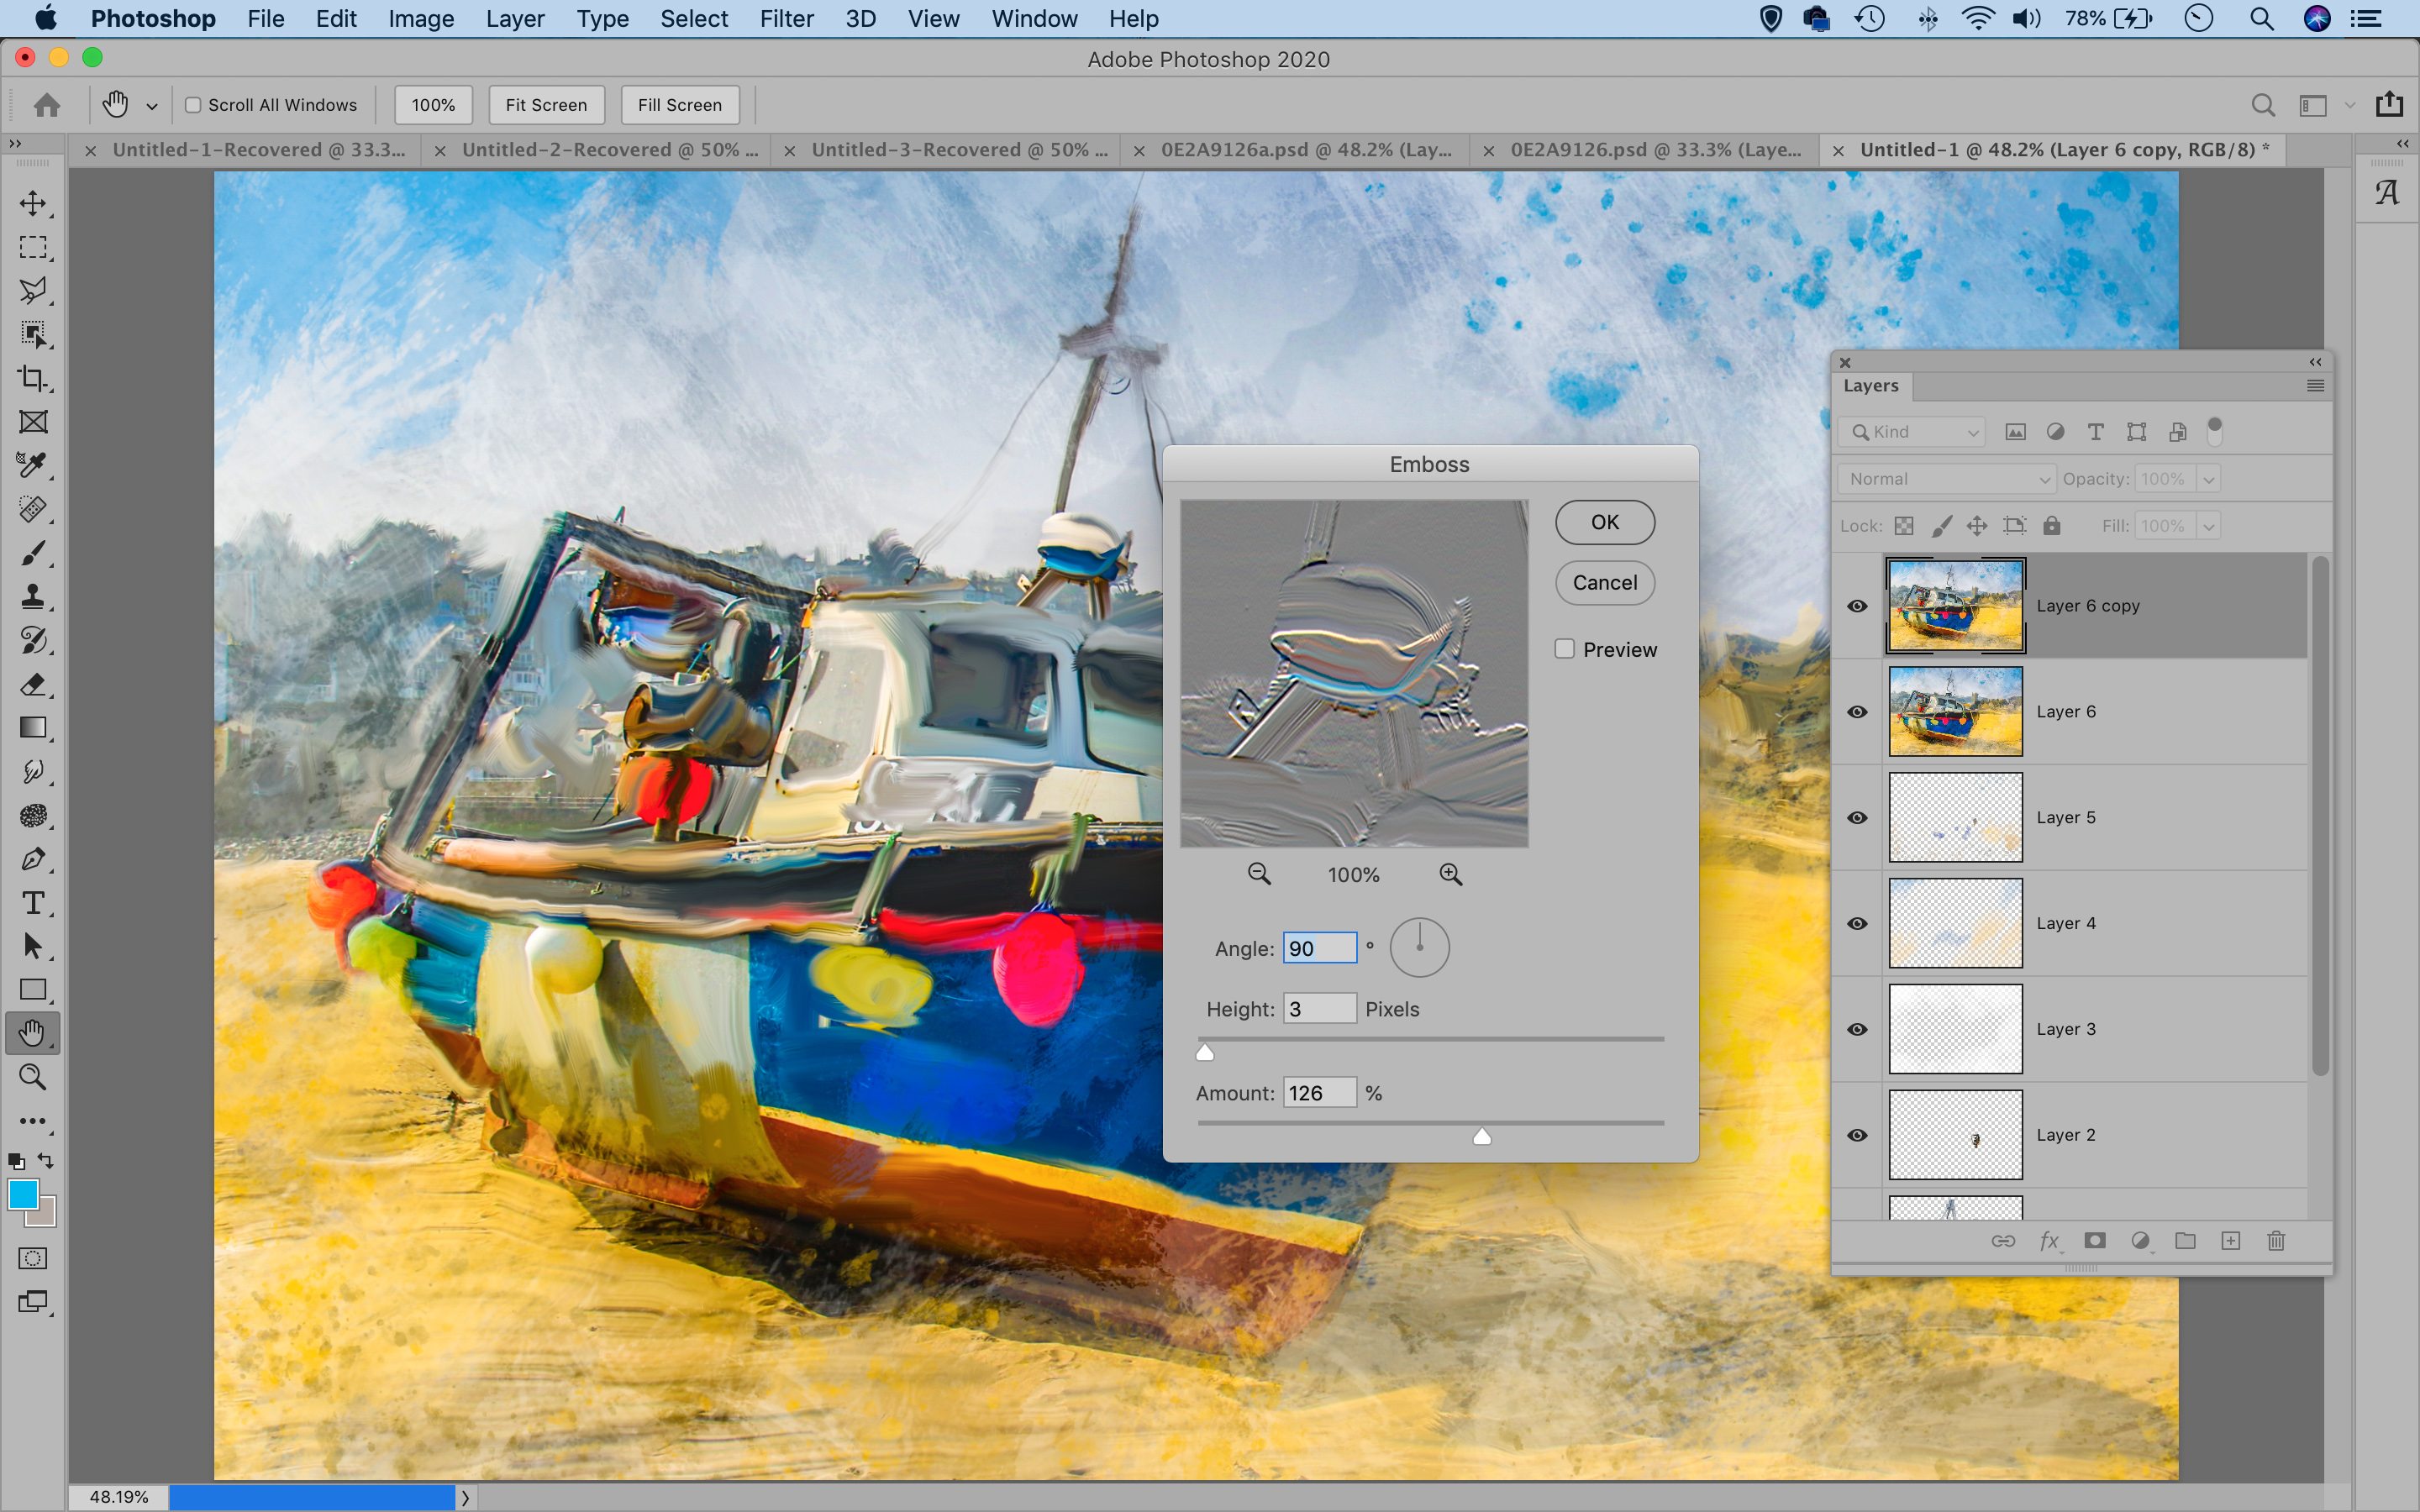
We can use a filter to give our strokes extra depth, as if the paint has been thickly applied in places. Go to Filter > Stylize > Emboss. Adjust the settings to create ridges in the image as shown. Hit OK, then go to the Layers panel and change the Blend Mode to Overlay.
PhotoPlus: The Canon Magazine is the world's only monthly newsstand title that's 100% devoted to Canon, so you can be sure the magazine is completely relevant to your system.
Read more:
100 Photoshop tips
The best photo editing software: image editors for novices through to pros
The best photo-editing laptops: top laptops for photographers
10 best online photography courses – from beginner guides to masterclasses
The lead technique writer on Digital Camera Magazine, PhotoPlus: The Canon Magazine and N-Photo: The Nikon Magazine, James is a fantastic general practice photographer with an enviable array of skills across every genre of photography.
Whether it's flash photography techniques like stroboscopic portraits, astrophotography projects like photographing the Northern Lights, or turning sound into art by making paint dance on a set of speakers, James' tutorials and projects are as creative as they are enjoyable.
He's also a wizard at the dark arts of Photoshop, Lightroom and Affinity Photo, and is capable of some genuine black magic in the digital darkroom, making him one of the leading authorities on photo editing software and techniques.
