Studio lighting can seem daunting if you’ve never tried it before. However, it’s not nearly as scary as most people think. By using a simple home studio kit, with just a couple of flash heads and a few basic accessories, you can get great results in no time at all. In fact, here's one of the best photography tips: it’s arguably easier to use a studio lighting setup than a speed light.
We’re using a two-head Elinchrom D-Lite It 2 Studio 2 Go kit, which cost about £500 ($630), but there are plenty of other options to choose from that will suit any budget. We’ll take you through some of the standard equipment you need, and show you four great lighting setups for shooting studio portraits.
While these are a great starting point, it’s best to experiment. So if you’re working in your own home studio, don’t be afraid to tweak these setups.
• Essential portrait photography tips
• Boudoir photography tips
• Newborn photography tips
• Get more photoshoot ideas
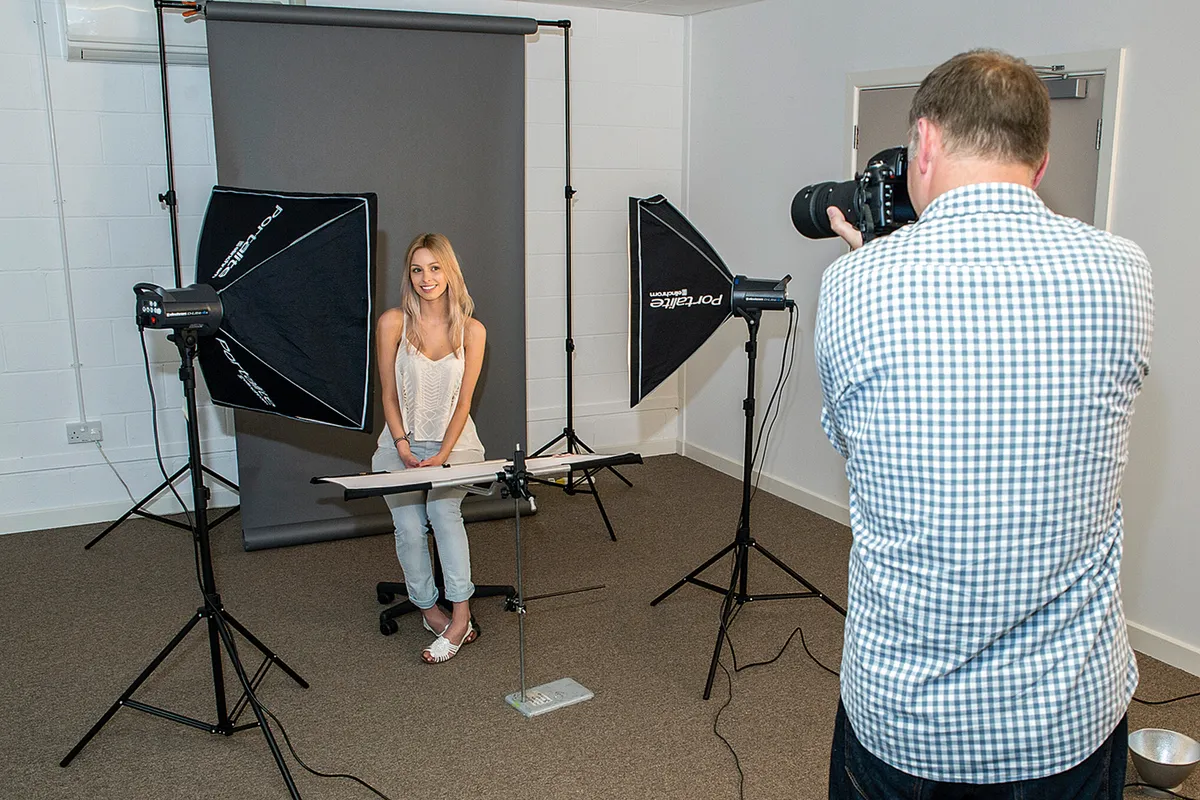
Studio setup

Light stands
Studio flash is all about positioning the light source away from the camera, so stands are crucial. They support the flash heads, which means they can be positioned at the right distance and angle to the subject.

Flash heads
Most kits have two flash heads. Along with a flash tube, there’s a modelling light. Most have a switchable ‘slave’, enabling one flash to be triggered by another, so you only need to have your camera connected to one of the heads.

Umbrella
A brolly is the most standard form of lighting accessory. The flash is directed into the brolly so the light is reflected back onto the subject. They are available in different reflective surfaces – typically white, silver or gold.

Softbox
Softboxes are slightly more sophisticated than brollies and, once you’ve worked out how to assemble these tent-like devices, they create a softer and generally more flattering light, with a more even illumination.

Snoot/honeycomb
Both of these tools help to concentrate or ‘focus’ the light. They’re ideally suited for use as backlights or for isolating a particular part of an image.

Reflector
A simple reflector can be really useful in a studio lighting setup, especially if you’re only using one light. You use it the same way you would with natural light – to bounce light back onto your subject and fill in any hard shadow areas.
Setup 1: Rembrandt

Position one flash head with a silver brolly at a 45° angle to the model at about six feet high. This creates a strong, hard, direct light from the side and above. This is called a key light. To even the lighting, position a reflector on the other side of the model to bounce the light back into the shadow side. There should be a small triangle of light on the subject’s face – this is referred to as Rembrandt lighting.
Kit needed:
• One flash head
• One reflector
• Two light stands
• The best studio lighting kits

Setup 2: Clamshell

This setup is great for beauty images as the lighting is flat and even. It’s pretty easy to achieve this effect too – all you need to do is place two softboxes on either side of your subject at the same angle and at an equal distance. Set the power so it’s the same from each light. Try using a reflector under the face – your model should easily be able to hold this. This will bounce light up and onto the face.
Kit needed
• Two flash heads
• Two 66cm softboxes
• One reflector
• Two light stands
• The best reflectors for photography
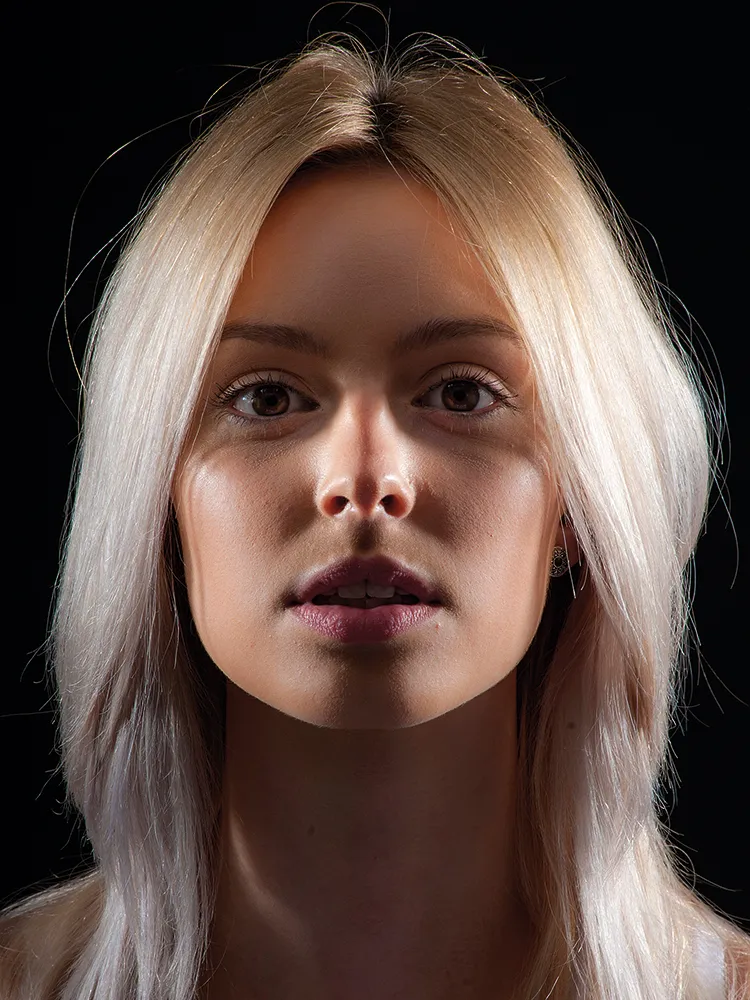
Setup 3: Backlight

To add drama, use a honeycomb or snoot accessory on one of the lights. This will narrow the beam of light. We’re going to position this behind the model, pointing back towards the camera so that it lights the back of her head. This is a great way to add drama and depth to a photo, and it also creates a sense of separation from the background. Of course, you need to make sure the backlight isn’t visible in the shot.
Kit needed:
• Two flash heads
• One 66cm softbox
• One reflector
• One honeycomb
• The best backdrops for photography

Setup 4: Rim lighting
Place both lights slightly behind the subject, pointing back towards the camera. This setup requires some tweaking and can work really well with nudes as it helps define body shape. You’ll need to watch out for lens flare, though, as the lights are pointing back towards the camera. A set of ‘barn doors’, a lens hood or a shield can help prevent this. An assistant who can hold a carefully positioned reflector is useful – this will help fill in those areas of deep shadow.
Kit needed:
• Two flash heads
• One reflector
Read more:
215 photography tips, techniques and tricks for taking pictures of anything
Headshot photography tips: how to shoot the perfect head-and-shoulders portrait
Couple photography: poses for portraits of pairs of people
Fill-in flash: tips and tricks for using a flashgun in daylight
How to use a light meter (and why not to trust the camera meter!)
Best light meters

