
Whether you’ve just got your first Canon DSLR or you’re on your third, there’s always something new to discover; some way to customize the camera that improves its handling, or a seemingly insignificant function that you didn’t know about, but actually turns out to improve the way you tackle photography. But who really has time to read the manual from start to finish? You might already have the best Canon camera, but do you know how to get the most from it?
We’ve raided the PhotoPlus archives to bring you a collection of 50 top tips and insights that’ll help you unlock the potential of your camera. Most of these tips are relevant to all models in the range, from the up to the , and have been selected because they save time or help you land that shot. From basic setup advice, to lens-craft, flash and exposure skills, there’s nuggets of know-how to help get you familiar with your camera.
Read more:
The best Canon cameras right now
The best Canon camera lenses right now
The best DSLRs in 2019
Canon EOS 5D Mark IV vs EOS 6D Mark II
Camera setup
Set your Canon up to be the best it can be with these simple yet effective tips and tricks.


1: Choose a Picture Style
Canon’s Picture Styles are different bundles of sharpness, contrast, saturation and colour tone that can be applied to your photographs.
Despite some of them sharing similar names to your camera’s Scene Modes, they’re simply effects that are applied to an image and don’t play any role in controlling other settings.
For instance, choosing the Portrait Picture Style adjusts the colour tone and reduces the sharpness to produce softer, flattering skin tones; it has no effect on exposure, focusing and drive mode.
You can tweak the Picture Styles on the camera and even cook up your own unique style recipe using Canon’s Picture Style Editor.
2: Image quality
For the best-quality images, you need to shoot Raw files, although these can take a bit longer to save to the memory card and they need processing before you can share online or print them.
For easier and quicker sharing, choose the highest-quality JPEG. You can also record Raw files and JPEGs at the same time, although this will fill a memory card faster.

3: Avoid dust
Dust on your camera’s sensor will appear as dark blobs on your pictures. To avoid dust and other particles getting into your camera, avoid changing lenses in windy conditions, and angle the camera down when you remove and fit them.
Did you know that you can fit the camera’s body cap and the lens’s rear cap together to keep their insides free of dust too?

4: Keep it clear
If everything looks a bit fuzzy through the viewfinder, it doesn’t always mean that your camera’s focusing system is on the blink. EOS DSLRs from the 200D upwards feature a diopter adjustment wheel behind the rubber eyecup.
This allows you to adjust the sharpness of the viewfinder image. It can be easier to judge the effect if you look at the display rather than the image as you make adjustments.

5: My Menu
Select one of your camera’s Creative Zone modes – M, Av, Tv or P – and you unlock more menu options, including the green My Menu tab. This lets you save a range of your frequently used settings in one place, so you can quickly access them at any time.
Your camera may allow you to save several pages of My Menu options, and change the Menu display setting so that the green tab is the automatically displayed first when you press the MENU button.

6: Reviewing images
You can change the amount of information displayed on the camera’s screen when you play your images by repeatedly tapping the INFO or DISP button.
Choose your favourite information screen (we’d go for the histogram screen) and this will be the default view when you next press the Playback button.
Also, make sure you have Auto Rotate activated in the yellow Set-up Menu, as this means you don’t have to rotate the camera to view vertical images.
7: Beep off
Make your photography less intrusive by turning off the focus confirmation and timer beeps in the red Shooting menu. The only time to leave it on is if you’re using manual focus – the camera will beep when it detects that the subject is sharp.
8: Firmware updates
Canon releases firmware – software that ensures your EOS functions correctly – which you can upload to your camera. You can check which firmware is installed on your camera in the yellow Set-up menu.
Visit the Canon website to check if there are any updates – you’ll need to download the firmware to a memory card, put this in your camera and follow the instructions on the firmware screen. Or, connect your camera to your computer and use EOS Utility to check and update the firmware.
9: SET button
By default, the SET button has no function when you’re taking pictures. You can assign a function to it in the Custom Functions menu – look for Assign SET button or Custom Controls.
The options available vary between cameras, but it can be useful to assign the depth of field preview function on those EOS bodies that lack a button. Another option is to have SET give you instant magnification when reviewing.
10: Control the camera
Tapping the Q button brings up the Quick Control screen where you’re able to adjust camera settings without having to dip into the menus.
Although you can select an option and press SET to open a separate screen for each option, save time by highlighting the function and rotating the main dial to make an adjustment.
This shortcut doesn’t work for shooting mode, Custom Controls or White Balance Shift/Bracket.
Lens skills

11: Going long
For frame-filling impact, you can’t beat the reach of a telephoto lens. A subject doesn’t just double in size when you double the focal length: it appears four times as big!
They also make background details look larger in frame, and give you more blur as they give you a shallower depth of field.
A telephoto lens used at f/4 will give a narrower band of apparent sharpness in a shot than a wide-angle lens used at the same aperture.
12: Stay sharp
If shooting without a tripod make sure the shutter speed is equivalent to the lens’s focal length: 1/200 sec for a 200mm lens.
Using an IS (Image Stabilizer) lens can help you get sharper shots at slower speeds, with the latest high-end EF telephoto lenses giving up to 4-stops of support.
So, the same 200mm lens could be used at a shutter speed of around 1/13 sec and still create sharp shots in the right hands.

13: Going wide
Lenses with short focal lengths in the region of 10-18mm (APS-C) or 16-28mm (full-frame) are capable of capturing pictures that have amazing scale and depth.
The trade-off for swallowing up so much of a scene in a single frame is that it’s harder for compositional clutter to creep into the edge of a picture.
Get into the habit of running your eye around the viewfinder before you take the shot.
14: Zoom before focus
Most zoom lenses are ‘varifocal’, which means that the focus shifts at different focal lengths.
This shift is often not noticeable when you’re using small apertures to give a large depth of field, but it can lead to soft pictures and has the potential to cause problems when you zoom while recording video.
So, try and get into the routine of always checking the focus after you’ve zoomed.
15: Lens corrections
Canon cameras come with lens correction controls that enable the effects of optical problems such as chromatic aberration, distortion and vignetting to be automatically corrected.
The number of options available varies: the EOS 2000D enables you to correct an image’s dark corners with its Peripheral illumination correction; the EOS 5D Mark IV on the other hand, has a raft of adjustments that can be switched on or off.
Each Canon camera is pre-loaded with correction data for a certain set of lenses.
16: APS-C vs full-frame
The majority of EOS cameras feature APS-C sized imaging sensors. These are smaller than the ‘full-frame’ sensors found in the likes of the EOS 6D Mark II (they’re ‘full-frame’ because the sensors are the same proportions as old-school 35mm film).
Because the APS-C sensors are smaller than full-frame, they capture a smaller area of the image that’s projected by the lens. This gives a magnification effect – often referred to as the crop factor of x1.6.
Multiple the focal length by this number to get the ‘effective’ focal length when shooting with an APS-C camera.
17: Lens hoods
To avoid stray light striking the front element of your lens and causing lens flare, fit a hood.
It will also protect the lens when you’re shooting in rain and snow. Not all lenses come with hoods, but they’re a worthwhile investment.


18: Watch out for diffraction
Although you might think that the smallest apertures available on your lens will produce sharper results, this isn’t always the case.
Lenses produce softer results at apertures such as f/22 and f/32 than they do at f/8 or f/11, so avoid using the minimum apertures unless you absolutely have to.


19: Depth of field
A lens’s focal length, the aperture that’s been selected, and the distance you focus at, all affect the depth of field – or the amount of front-to-back sharpness that’s recorded.
To reduce the depth of field and make a subject standout, use a long lens, a large aperture, and focus close.
To increase the depth of field and make more of a picture look sharply focused, use a short lens, a small aperture and focus from farther away.
20: DoF preview
The image you see in the viewfinder of an EOS DSLR is displayed at the max aperture available on the lens.
This can make it difficult to gauge the depth of field when a smaller aperture has been set on the camera.
The majority of EOS DSLRs, however, feature a depth of field (DoF) preview button near the lens mount (not the lens release). EOS cameras that don’t can have the function assigned to the SET button.
Exposure advice


21: Exposure compensation
To override the standard exposure set by the camera meter, and make an image brighter or darker, use exposure compensation.
You can only use this in Program, Aperture Priority or Shutter Priority – it doesn’t work in Manual or any of the fully automatic modes.
The scale you can see in the viewfinder, shooting menu and Quick Control screen only shows from -2/-3 to +2/+3 exposure compensation, but you can dial in up to 5-stops each way if you use the Expo.comp./AEB screen.
In fact, if you activate the camera’s Auto Exposure Bracketing (AEB) function as well, you can set up to 8-stops of compensation.


22: Aperture Priority (Av)
This exposure mode allows you to set the aperture directly, with the camera selecting an appropriate shutter speed to give what it determines is a balanced exposure.
But it doesn’t always get it right, so instead use exposure compensation to override its meter reading.
Use Av when you want to control the depth of field – when shooting portraits, landscapes or close-ups.

23: Manual exposure (M)
The main attraction of Manual exposure mode is that the camera can’t alter the exposure settings once you’ve dialled them in.
You preset the aperture and shutter speed (and ISO unless you have it set to Auto) and, as long as the lighting stays the same, so will the exposure.
It’s useful when you want to keep the subject consistently well exposed regardless of a change in background.
24: Metering
The majority of Canon EOS cameras offer four metering modes: Spot, Partial, Centre-weighted Average and Evaluative.
The latter is the default, and measures the brightness before calculating how bright or dark it needs to be.
Spot and Partial enable you to take targeted exposure readings. This is useful if you’re photographing a small-in-the-frame subject against a bright or dark background.
These two meters are fixed around the centre AF point, so use the AE Lock button to hold the exposure setting when you recompose the shot.
25: Highlight Alert
Your camera’s Highlight alert makes it quicker to see which areas of an image may be overexposed by making them blink during playback.
Some cameras have this enabled by default – others require it to be activated in the blue Playback menu.

26: RGB histogram
If colour detail is important to your picture, use your camera’s RGB histogram rather than the brightness histogram to assess the exposure.
The RGB histogram gives an indication of the intensity of the three primary colours – red, green and blue – that make up the final image.
If one of the colour histograms is ‘clipped’ on the right, it means that the colour will be over-saturated.
You can’t always tell this from the brightness histogram, as it’s closer in size and shape as the histogram for the green channel.
27: Raw headroom
The histogram (and the image) you see on the back of the camera is always based on a JPEG version of the shot – even if you shoot Raw.
Raw files hold more colour and tonal information than JPEGs, so, even if the histogram shows that the shot is overexposed or underexposed, the wider dynamic range of Raw files mean that you can rescue shots that you might otherwise have deleted.
28: Histogram
The histogram is a bar graph that gives an indication of the tonal range of a photo. There are no numbers on the horizontal scale, but it’s capable of showing 256 different brightness levels – from black (0) on the left through to white (255) on the right.
If parts of the histogram fall beyond the edges of the graph they are said to be ‘clipped’ and there will be no detail in them.
It’s preferable to underexpose to lose a little detail in the shadows rather than lose detail in the highlights.
29: Shutter priority (Tv)
If you want control over the way movement appears in your photos, choose Shutter Priority.
You can use it to preset a specific shutter speed and then get on with the job of composing your shot while the camera sets the aperture.
30: ISO
Low ISOs give you buttery-smooth shots, whereas higher settings dish up progressive amounts of noise.
But colours can also be less faithful at higher settings, as well as there being a drop-off in dynamic range (the amount of detail captured from the shadows to the highlights).
Your camera can apply noise reduction to reduce the grittiness of pictures shot at high ISOs, at the expense of some detail being lost as the camera ‘smooths’ the image.
Key DSLR settings

31: Autofocus setup
Your EOS has three AF modes: One Shot, AI Servo and AI Focus. One Shot is for stationary subjects, as once the focus has locked it stays locked.
If you’re shooting moving subjects, switch to AI Servo. Here, the camera keeps refocusing to track a moving subject.
AI Focus switches between fixed focus and tracking, according to when the camera detects movement.
Because you’re relying on the camera to decide if the subject is moving or not, the reactions of AI Focus isn’t as fast as the other dedicated AF modes.
32: Auto Lighting Optimizer
Auto Lighting Optimizer (ALO) helps control contrast and ‘open up’ darker areas to reveal detail that may have been lost.
But the effect isn’t always wanted. Although you may apply negative exposure comp or use Manual mode to create a dark image, the picture can still appear too bright with ALO active.
33: AF points
If you’re shooting in low light, or the AF system doesn’t ‘bite’ onto a focus, then your lens might focus back and forth.
Rather than relying on the camera to choose the AF point, switch to a single AF point selection and select one yourself.
The centre focus point is the most sensitive: if the subject isn’t moving, focus on them with the centre AF point and One Shot AF, then lock the focus (using the AF lock button, or by switching the lens to manual focus) and recompose the shot for the best composition.
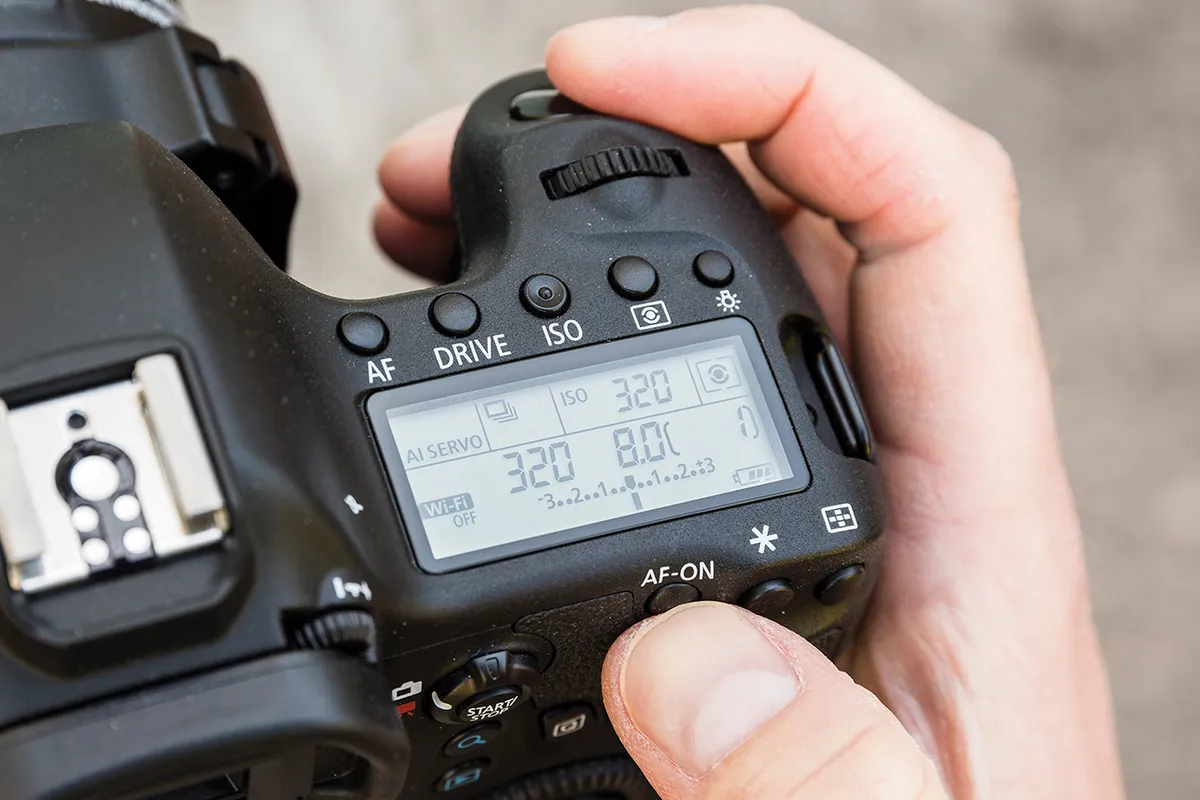
34: Back button focus
The rear AF-ON button available on some cameras duplicates the focusing and metering function of the shutter release.
Using Custom Controls you can actually customize this button so that it stops the autofocus operation.
This can be useful when you’re shooting with AI Servo AF and you don’t want the focus position to be readjusted.
Even if your camera doesn’t happen to have an AF-ON button, you can customize the AE Lock button (marked with * or the minus magnification symbol) so that it starts or stops the autofocus instead.


35: Live View for manual focus
Rather than using the viewfinder and autofocus when you’re photographing static subjects, try using the Live View display and manual focus instead.
Get your Canon securely on a tripod, then by repeatedly tapping the button with the magnifying glass icon, you can magnify the area underneath the focus point by x5 and x10, then carefully turn the lens’s focus ring until the details are pin-sharp.


36: White balance
Auto White Balance is good – particularly in mixed lighting – but it can suck some of the life out of strong colours that it sees as a colour cast: the cool blue of dusk and dawn, for instance, or the orange glow of a sunset.
Choosing a preset, setting, a Custom White Balance or dialling in a colour temperature using the K (Kelvin) option that’s available on some cameras, will avoid this. And on top of that you can preview the effect in real time on the Live View display.
37: Long exposure noise
Similar to high ISOs, long exposures can lead to noisy pictures. Your camera has a Long Exposure Noise Reduction which you’ll find in the red Shooting menu or the Custom Functions menu.
You can set it to Auto or On, both of which apply noise reduction to pictures that have exposures of one second or longer.
Be warned: the process can take the same amount of time as the original exposure and you won’t be able to take another shot until it’s done its thing. That can add up when the original exposure runs into minutes!
38: Drive mode
Whether you’re shooting active subjects or stationary ones, it’s worth taking pictures in short bursts with your camera set to its high-speed drive setting when you’re shooting handheld.
This will improve your chances of getting at least one sharp image. Not only does it give the camera more time to lock onto a moving subject if you’re tracking it using AI Servo AF, but shots in the middle of a sequence are more likely to be sharper than those at each end.
This is because it’s easy to inadvertently nudge the camera when you press and release the shutter release button.
39: Built-in flash
A pop-up flash is limited when it comes to size and power, but there is a trick to making its output go farther: increase the ISO.
It doesn’t increase the power of the flash, rather it amplifies the signal from the sensor, making it appear as if the flash is somewhat more powerful.
40: Star ratings
You can rate your images from 1 to 5 during playback. This is a great feature, enabling you to do an initial edit of your pictures while you’re still out taking them, then quickly select your best pictures at home.
These star ratings are stored in the EXIF data, so they are visible in both Digital Photo Professional, Photoshop and Lightroom.
Advanced DSLR tips
41: Fill flash
Flash isn’t just for lighting up the dark: it can reveal shadow detail in photos taken during the day.
Shooting in daylight often requires a shutter speed faster than the camera’s flash synchronisation speed.
This is the fastest shutter speed at which the flash can be used, and ranges from 1/180 sec to 1/250 sec across the EOS range.
One option is to work in Shutter Priority and set the fastest sync speed – the camera will then automatically set an aperture small enough to produce a balanced exposure.
Canon’s EX Speedlites offer a High-speed sync mode that lets you select faster shutter speeds.

42: External Speedlite control
If you have an EX Speedlite attached to your camera’s hotshoe, you can control it via your camera’s display – including group control of multiple flash units.
Look for ‘Flash control’ or ‘External Speedlite control’ in the red Shooting menu. For quick access to this screen, tap the flash button when the Speedlite’s attached.
43: Recording movies
Two aspects of movie recording that are easily confused are frame rate and shutter speed.
But while the frame rate sets the recording speed, the shutter speed determines how long each frame is exposed to light.
Fast shutter speeds can make moving objects appear well defined but ‘jittery’, while slow shutter speeds can produce smoother motion, at the risk of moving subjects appearing blurred.
The best compromise is to set a shutter speed that’s double the frame rate – so 1/60 sec for a frame rate of 30fps.
44: Unique looks
You can cook up your own unique Picture Style recipes using the Picture Style Editor software, the latest version of which can be downloaded from Canon’s website.
Picture Style Editor gives you precise control over how colours are rendered in an image, and the creative effect you come up with here can then be applied when processing your Raw files.
Or you can load it into one of the camera’s user-defined slots and use at the time of shooting.
45: Magnified view
If you take a picture during magnified view, the full image is recorded but the exposure will be locked at the area initially covered by the frame – so the shutter speed and aperture turn orange as a warning.
46: Flash sync in Av mode
With Aperture Priority mode, your camera will set a shutter speed of up to 30 seconds to suit the brightness of the scene – even when you’re using flash.
In low light, this means there’s a risk of recording a mixture of sharpness (from the flash) and blur (from the ambient exposure).
While this can give creative results, you can reduce the blur by using the ‘Flash Synchronization Speed in Av Mode’ function to set a faster sync speed. You’ll find this option in the flash menu or the Custom Functions menu.

47: Shooting at night
There will be some situations where you’ll either want or need to shoot in the dead of night, but many scenes benefit from being shot during ‘the blue hour’ – the period after sunset of before dawn when the sky is a deep blue colour.
Time it right and the meter readings for the sky and a floodlit building will be closer together, enabling you to record more detail in each in a single exposure.


48: Long exposures
Using a slow shutter speed to create a long exposure enables you to record something that the eye can’t normally see, rendering movement as a blur to add an artistic quality to your shots – such as clouds moving in the sky.
Bulb mode puts the control of the exposure time in your hands, enabling you to set exposures longer than
30 secs. Some EOS cameras have a dedicated Bulb option (B). If yours doesn’t, select Manual mode (M) and scroll through the shutter speeds until ‘bulb’ appears.
49: Ultra slow
In bright conditions, you may not be able to use a shutter speed slow enough to achieve long exposure effects.
In this case, fit a strong Neutral Density (ND) filter to the front of the lens. Support the camera on a tripod and cover the viewfinder to prevent stray light from affecting the exposure.
Most EOS DLSRs come with a rubber eyepiece cover that attaches to the camera strap to help with this.
50: Mirror lockup
Camera shake doesn’t have to register on the Richter scale to create blurred photos; even the vibrations caused by an EOS DSLR’s mirror moving up and down between shots can be the difference between a sharp ‘keeper’ and a fuzzy reject.
This is why Canon includes a Mirror lockup function in a number of its DSLRs. This can be activated in the Custom Functions menu or in the red Shooting menu of models like the 5D Mark IV.
Read more:

