Use color grading in Photoshop CC to create abstract infra-red imagery
Use the new and powerful tinting tools in Photoshop CC to color grade your images for striking results
The best camera deals, reviews, product advice, and unmissable photography news, direct to your inbox!
You are now subscribed
Your newsletter sign-up was successful
Watch video: Use the Color Grading panel in Adobe Camera Raw
The recently introduced Color Grading panel is available in Photoshop CC’s Camera Raw plugin and Lightroom, and it’s one of the most powerful toning tools on offer. Several of the other color tools in Camera Raw are geared towards correcting unwanted color shifts, but Color Grading is different.
Rather than correcting, it instead invites you to add creative color shifts of your own in order to give an image a certain look or mood. As such, Color Grading is one of the best tools to use for boosting the atmosphere of a scene.
Color Grading is a replacement for the old Split Toning panel and, like its predecessor, it enables you to add individual color tints to different parts of the tonal range of your image, based on brightness values. But while the Split Toning panel only allowed for two color tints, with Color Grading we instead choose three.
So as well as tinting shadows and highlights, we can also shift colors in the midtones (of course, if you’d rather use two colors then you can just leave the midtones untouched). Alongside the three intuitive color wheels in the Color Grading panel you’ll also find a global wheel that makes it easy to add a single color shift. What’s more, if we delve into each individual color wheel, we’ll find further options for tweaking the colors and shifting the balance between them.
Whether you decide that you want to tint a black-and-white photograph, or skew the look of a color scene, the Color Grading panel offers a fine degree of control for all kinds of color effects in your imagery.
01 Open into Adobe Camera Raw
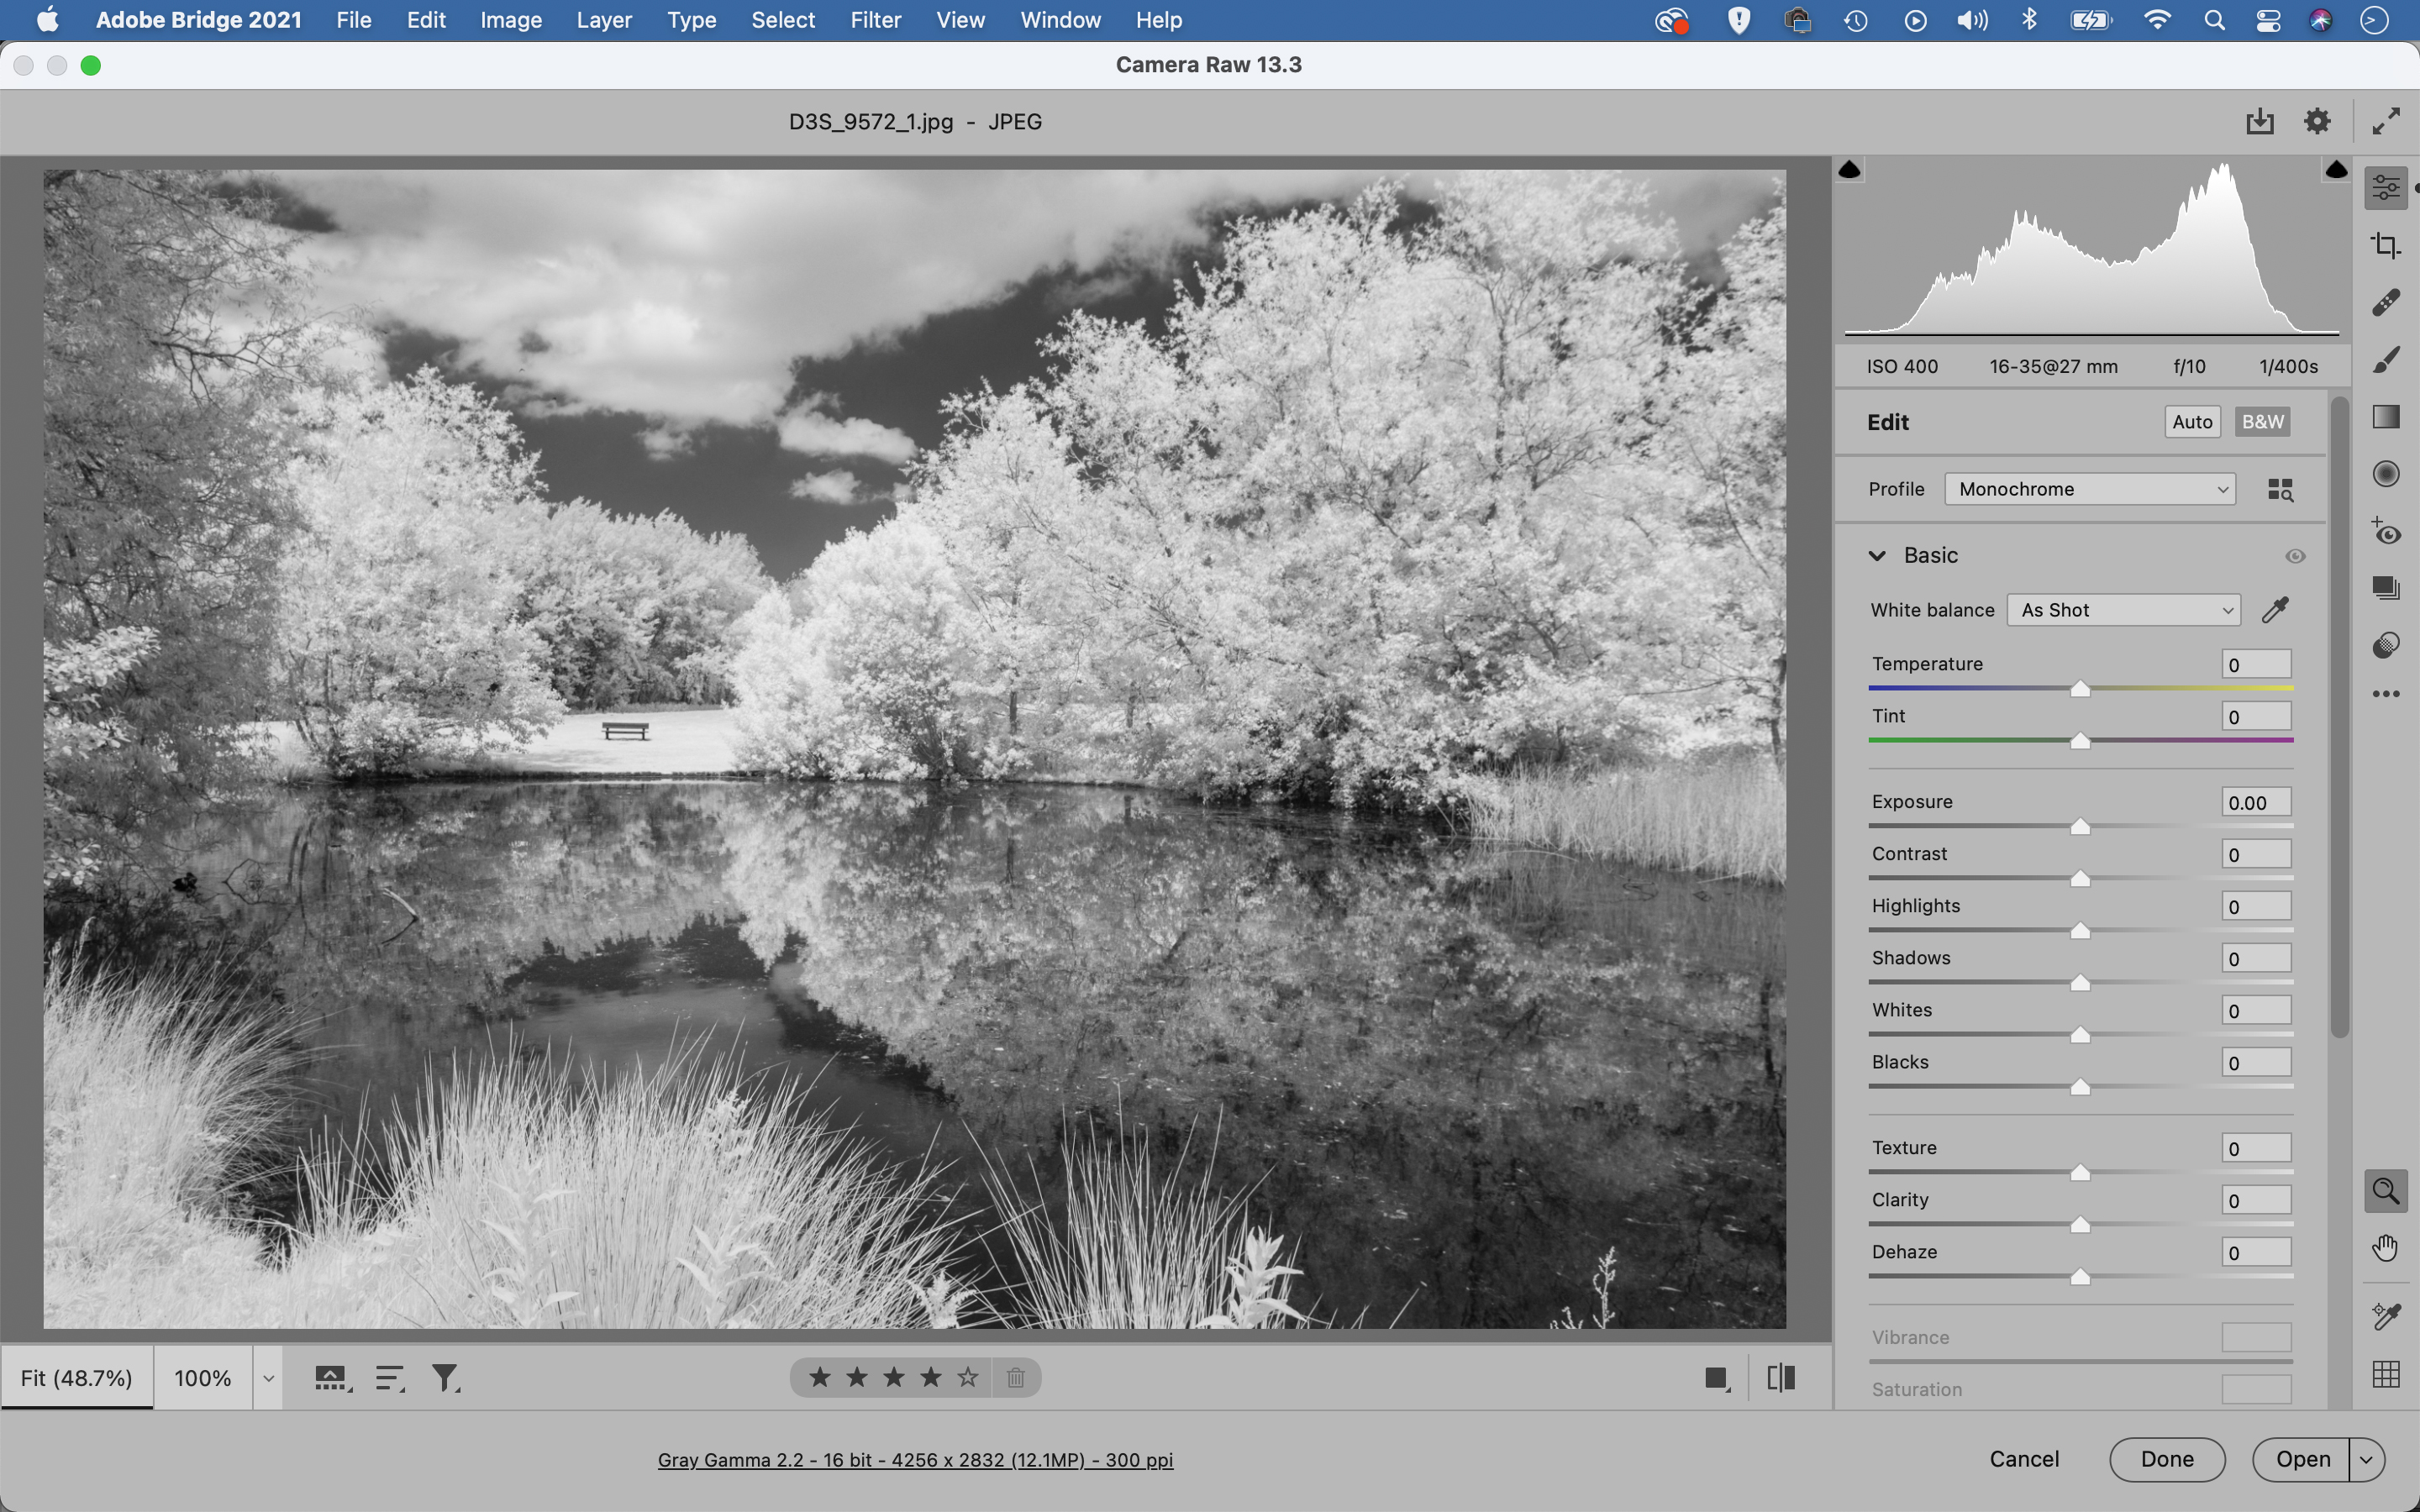
Download the start image and navigate to it in Adobe Bridge, right-click it and ‘Open in Camera Raw’ (this works for JPEGs too). Alternatively, if you’re working on an image in Photoshop you can go to Filter > Camera Raw Filter. You’ll also find an identical Color Grading panel in Lightroom’s Develop Module. Click the B&W button.
The best camera deals, reviews, product advice, and unmissable photography news, direct to your inbox!
02 Tint the shadows
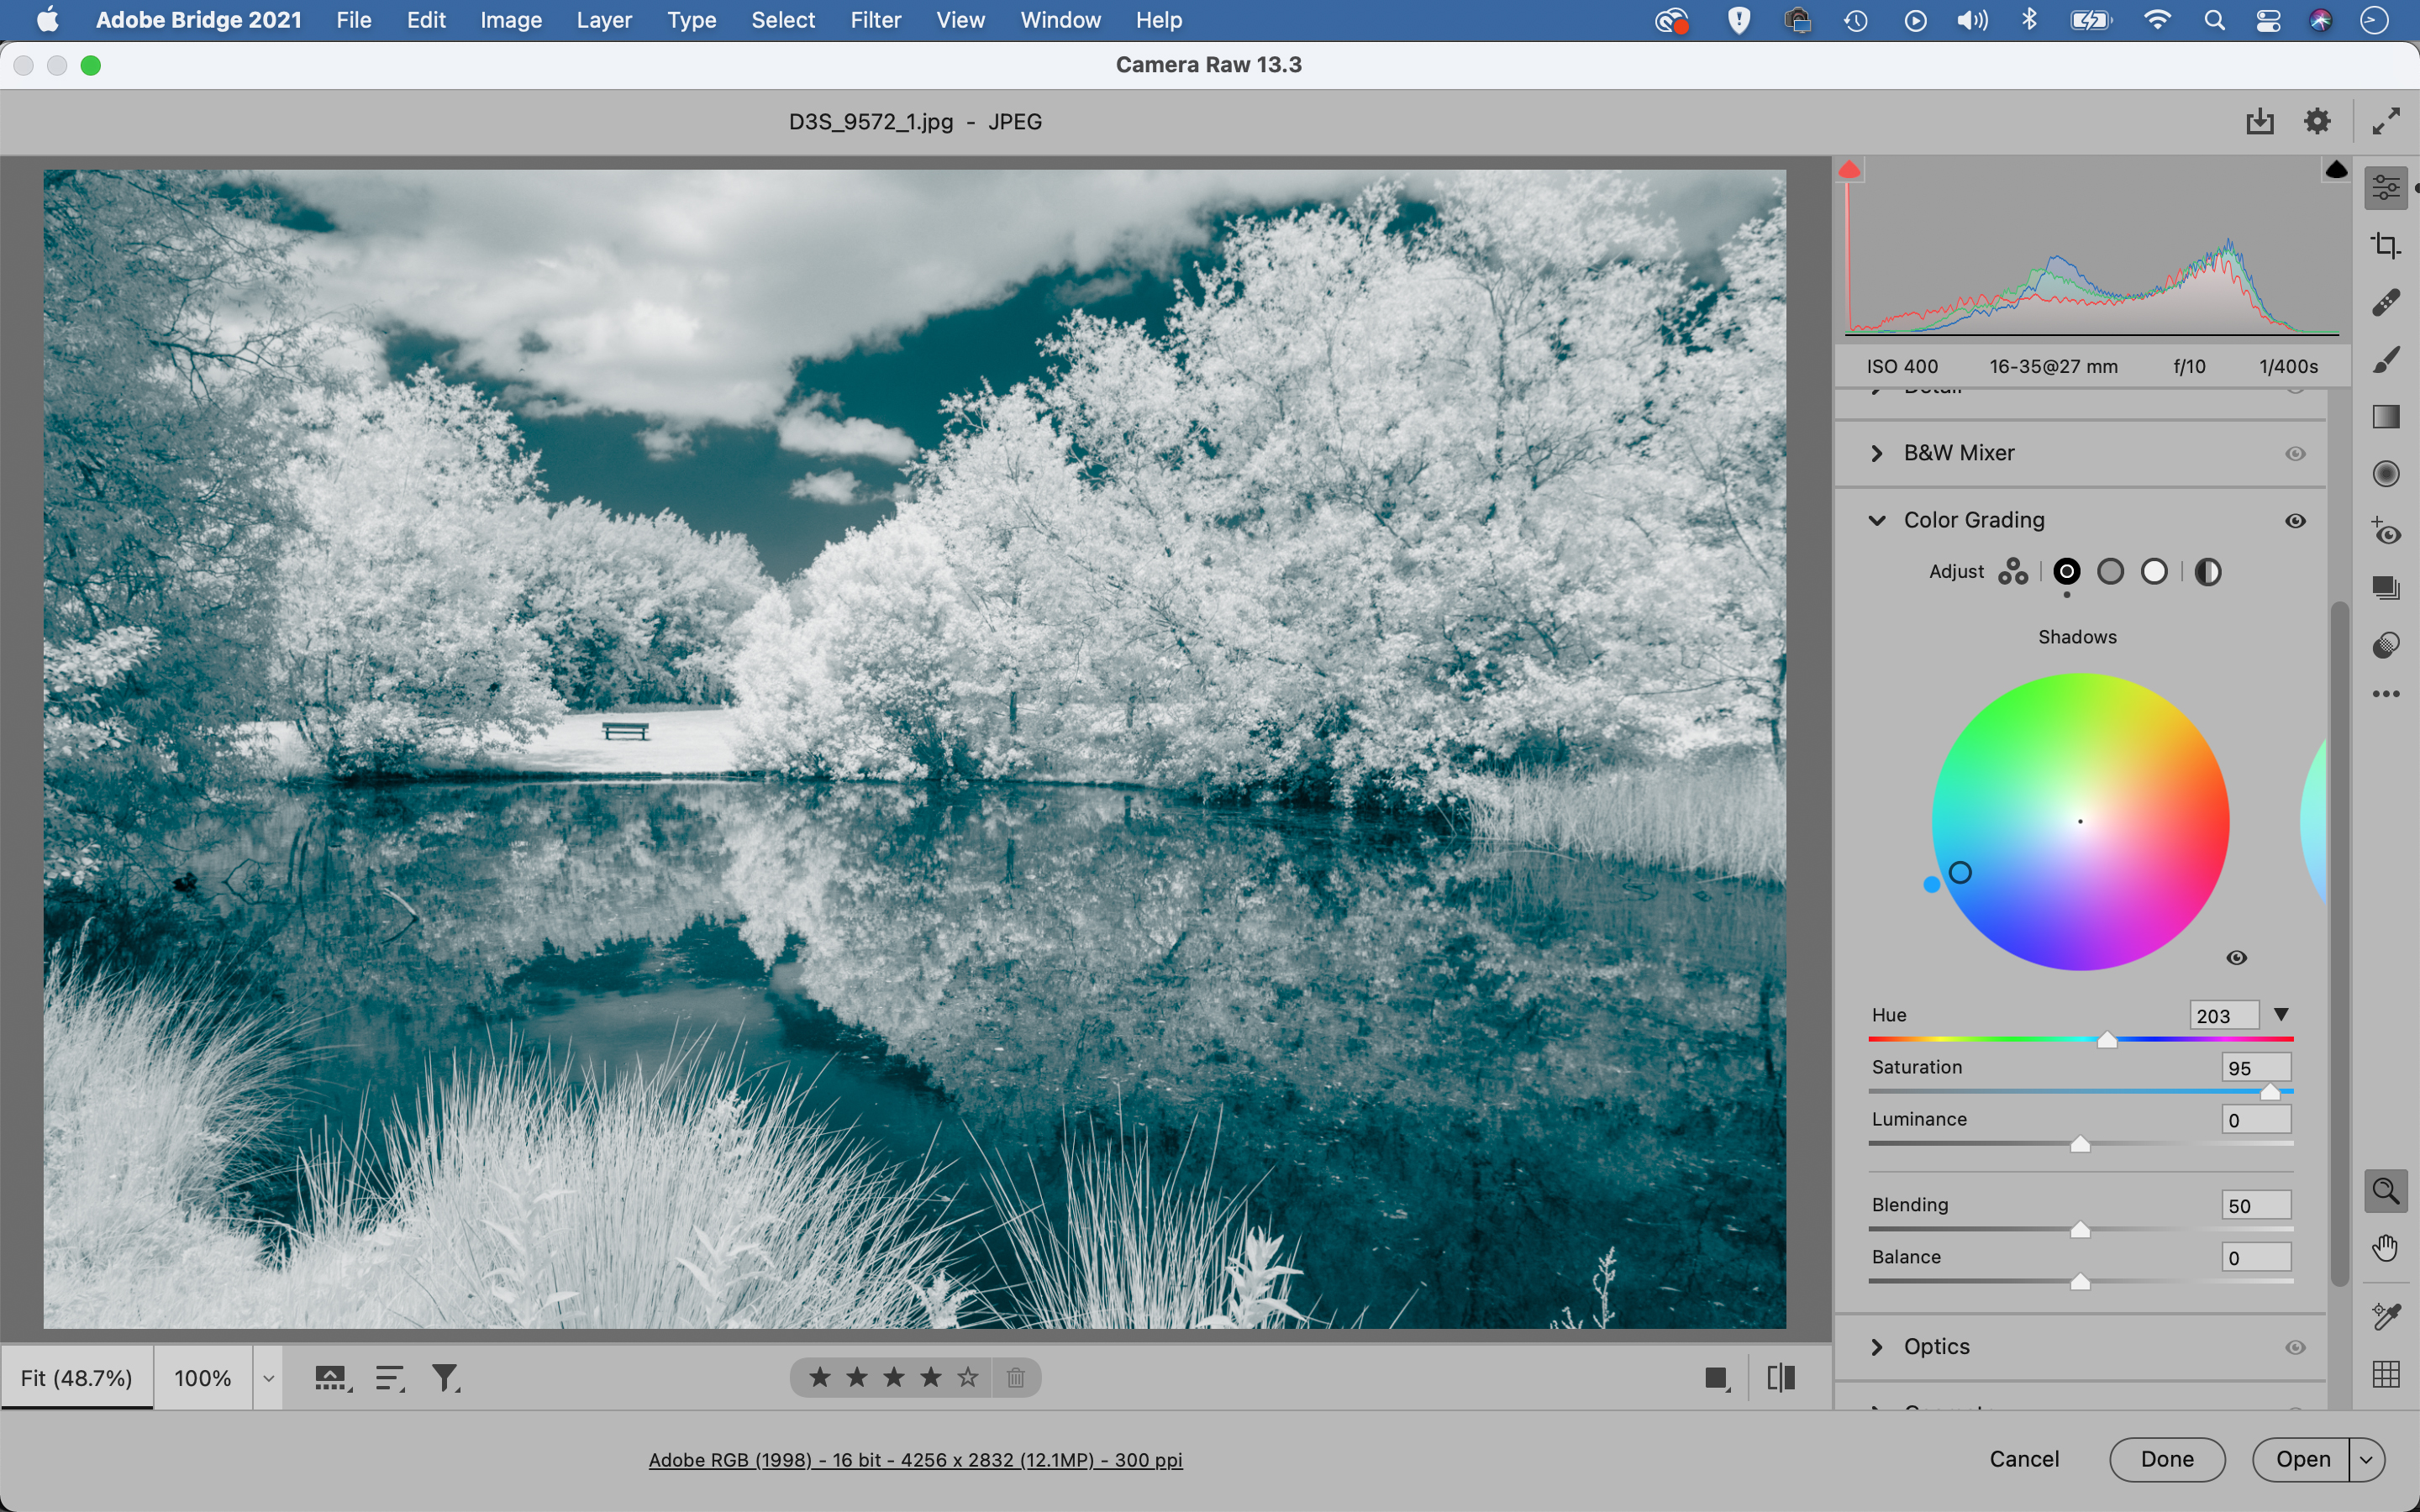
Go to the Color Grading panel. Three color wheels enabled you to tint midtones, shadows and highlights. The icons at the top left let you enlarge each wheel and give further options. It’s usually best to start with shadows, so click on the Shadow wheel. Drag the point around the wheel to choose a color for the shadows.
03 Fine-tune the saturation
After dragging the point, it becomes a bit ‘sticky.’ This is so you can fine-tune the saturation. The further out you drag from the centre, the stronger the saturation of the color. A second point will appear outside the circle that lets you adjust the color without affecting the saturation. Choose a strong blue color.
04 Midtones and highlights
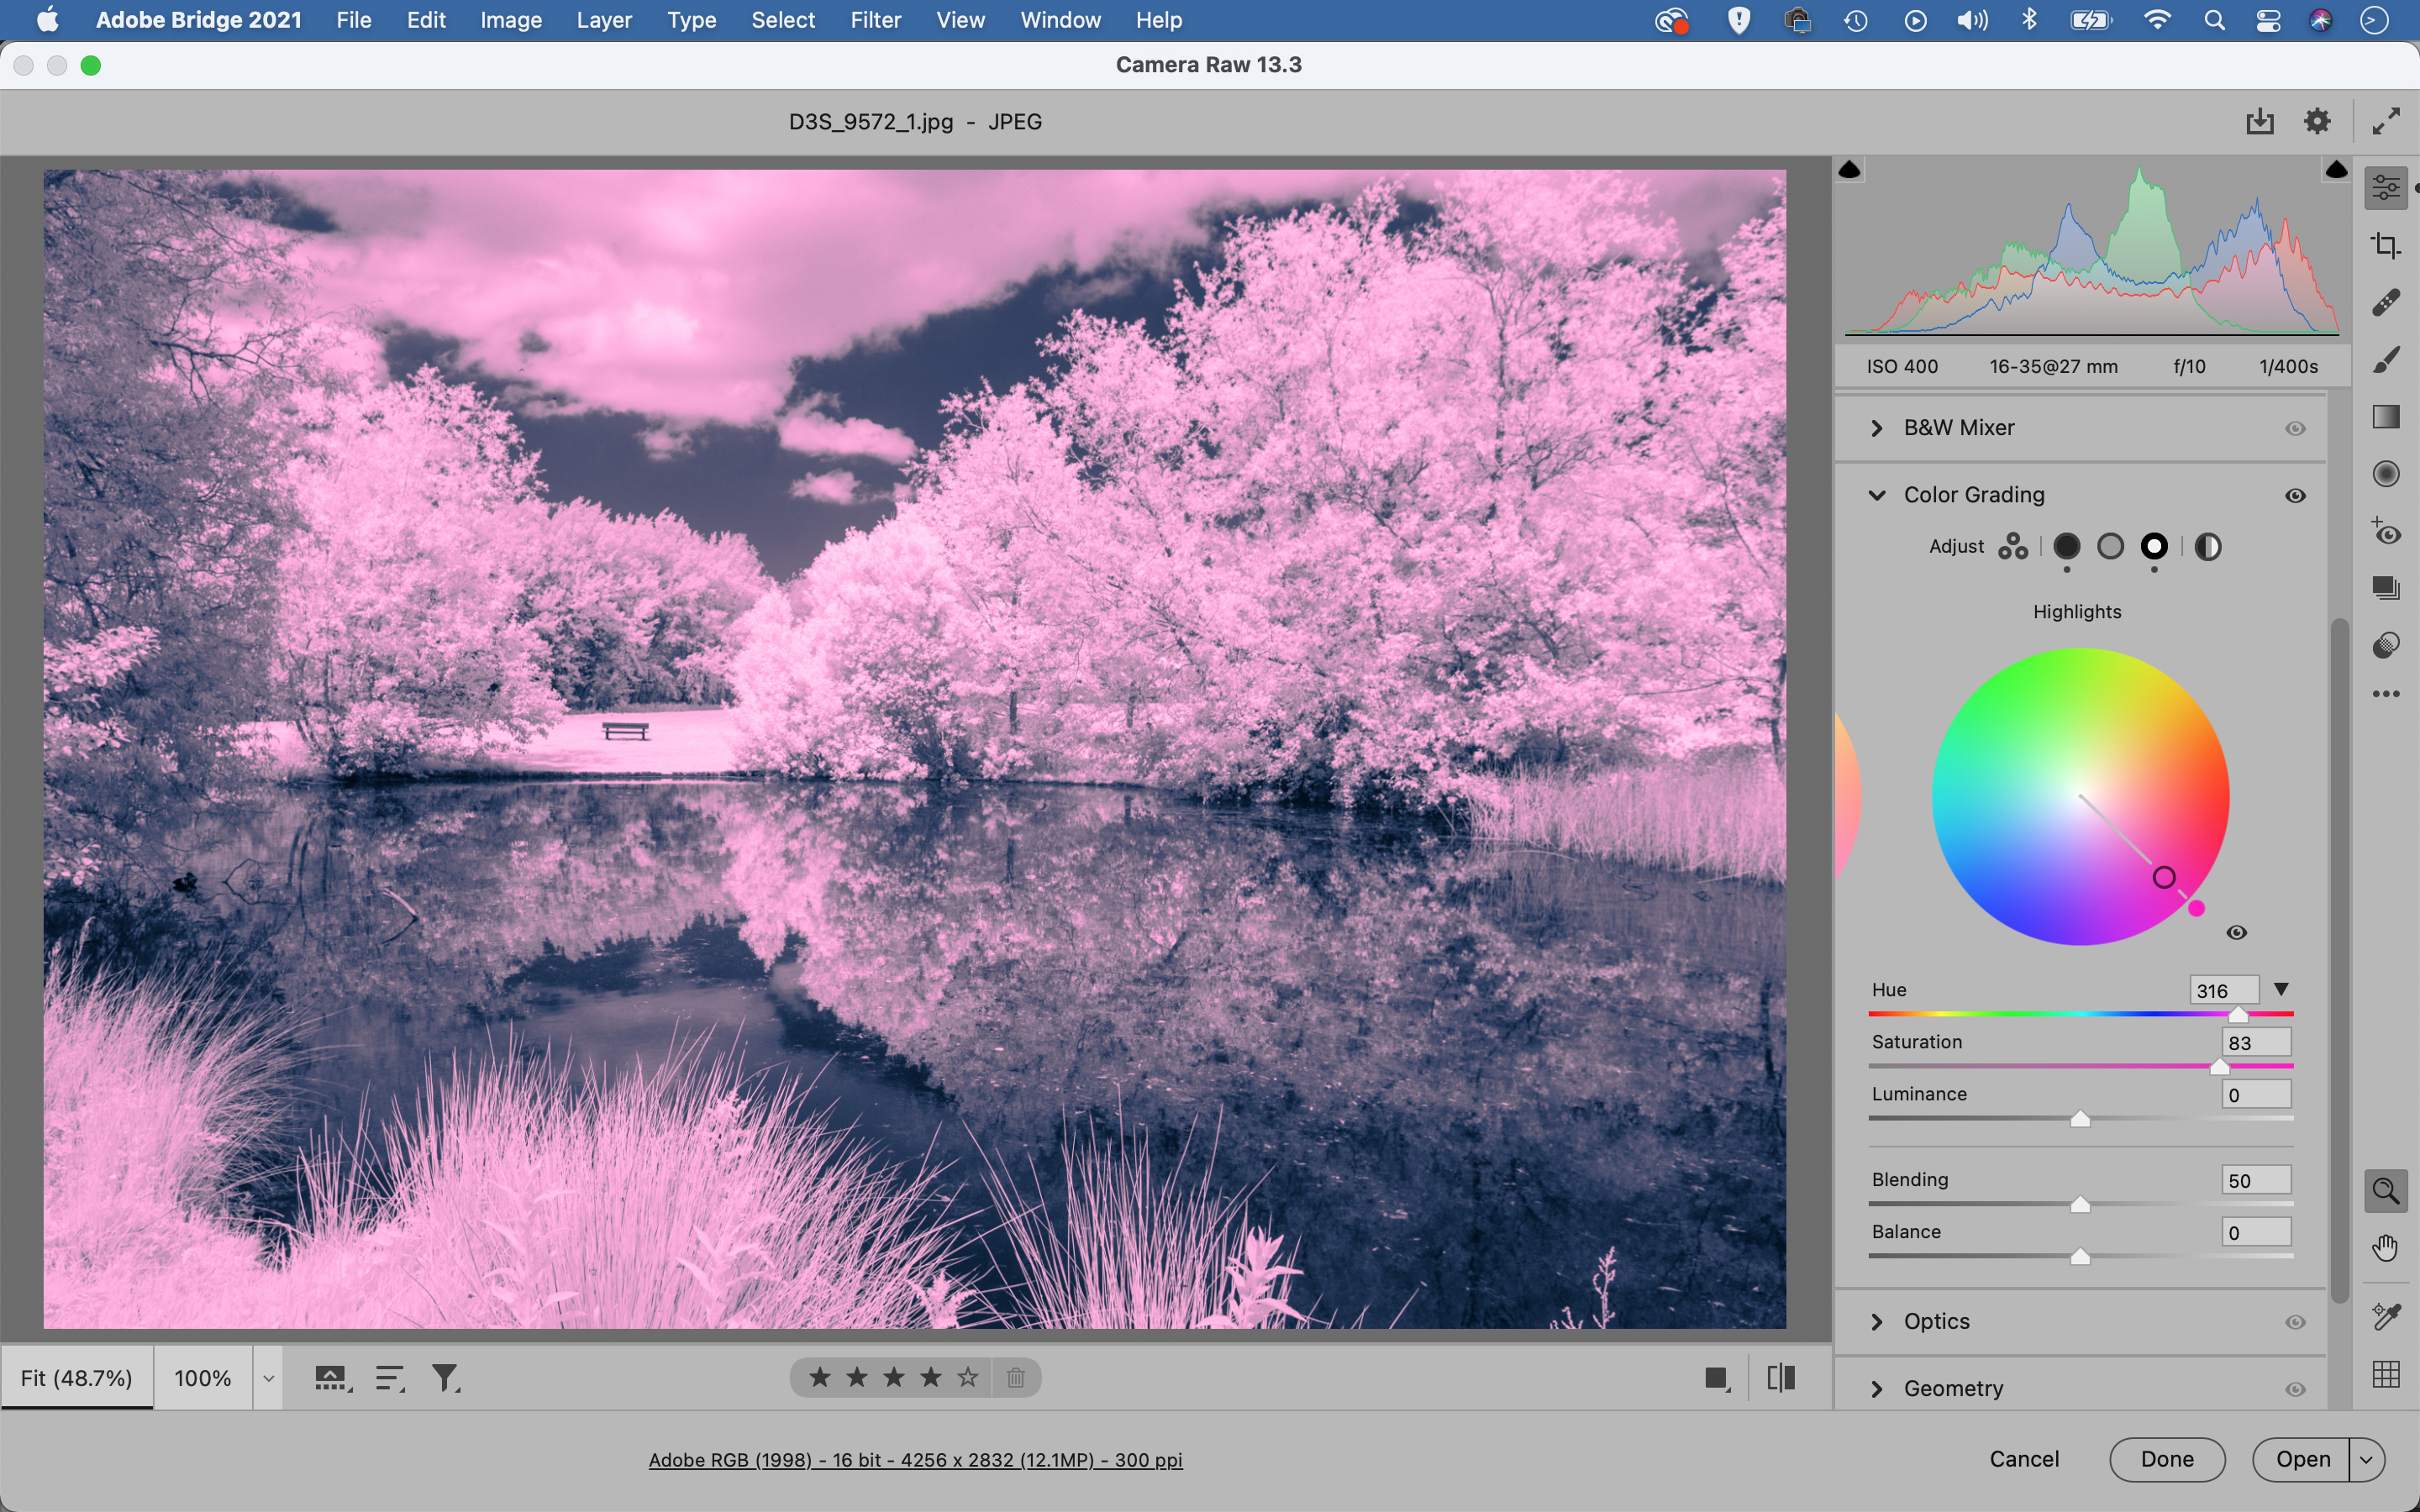
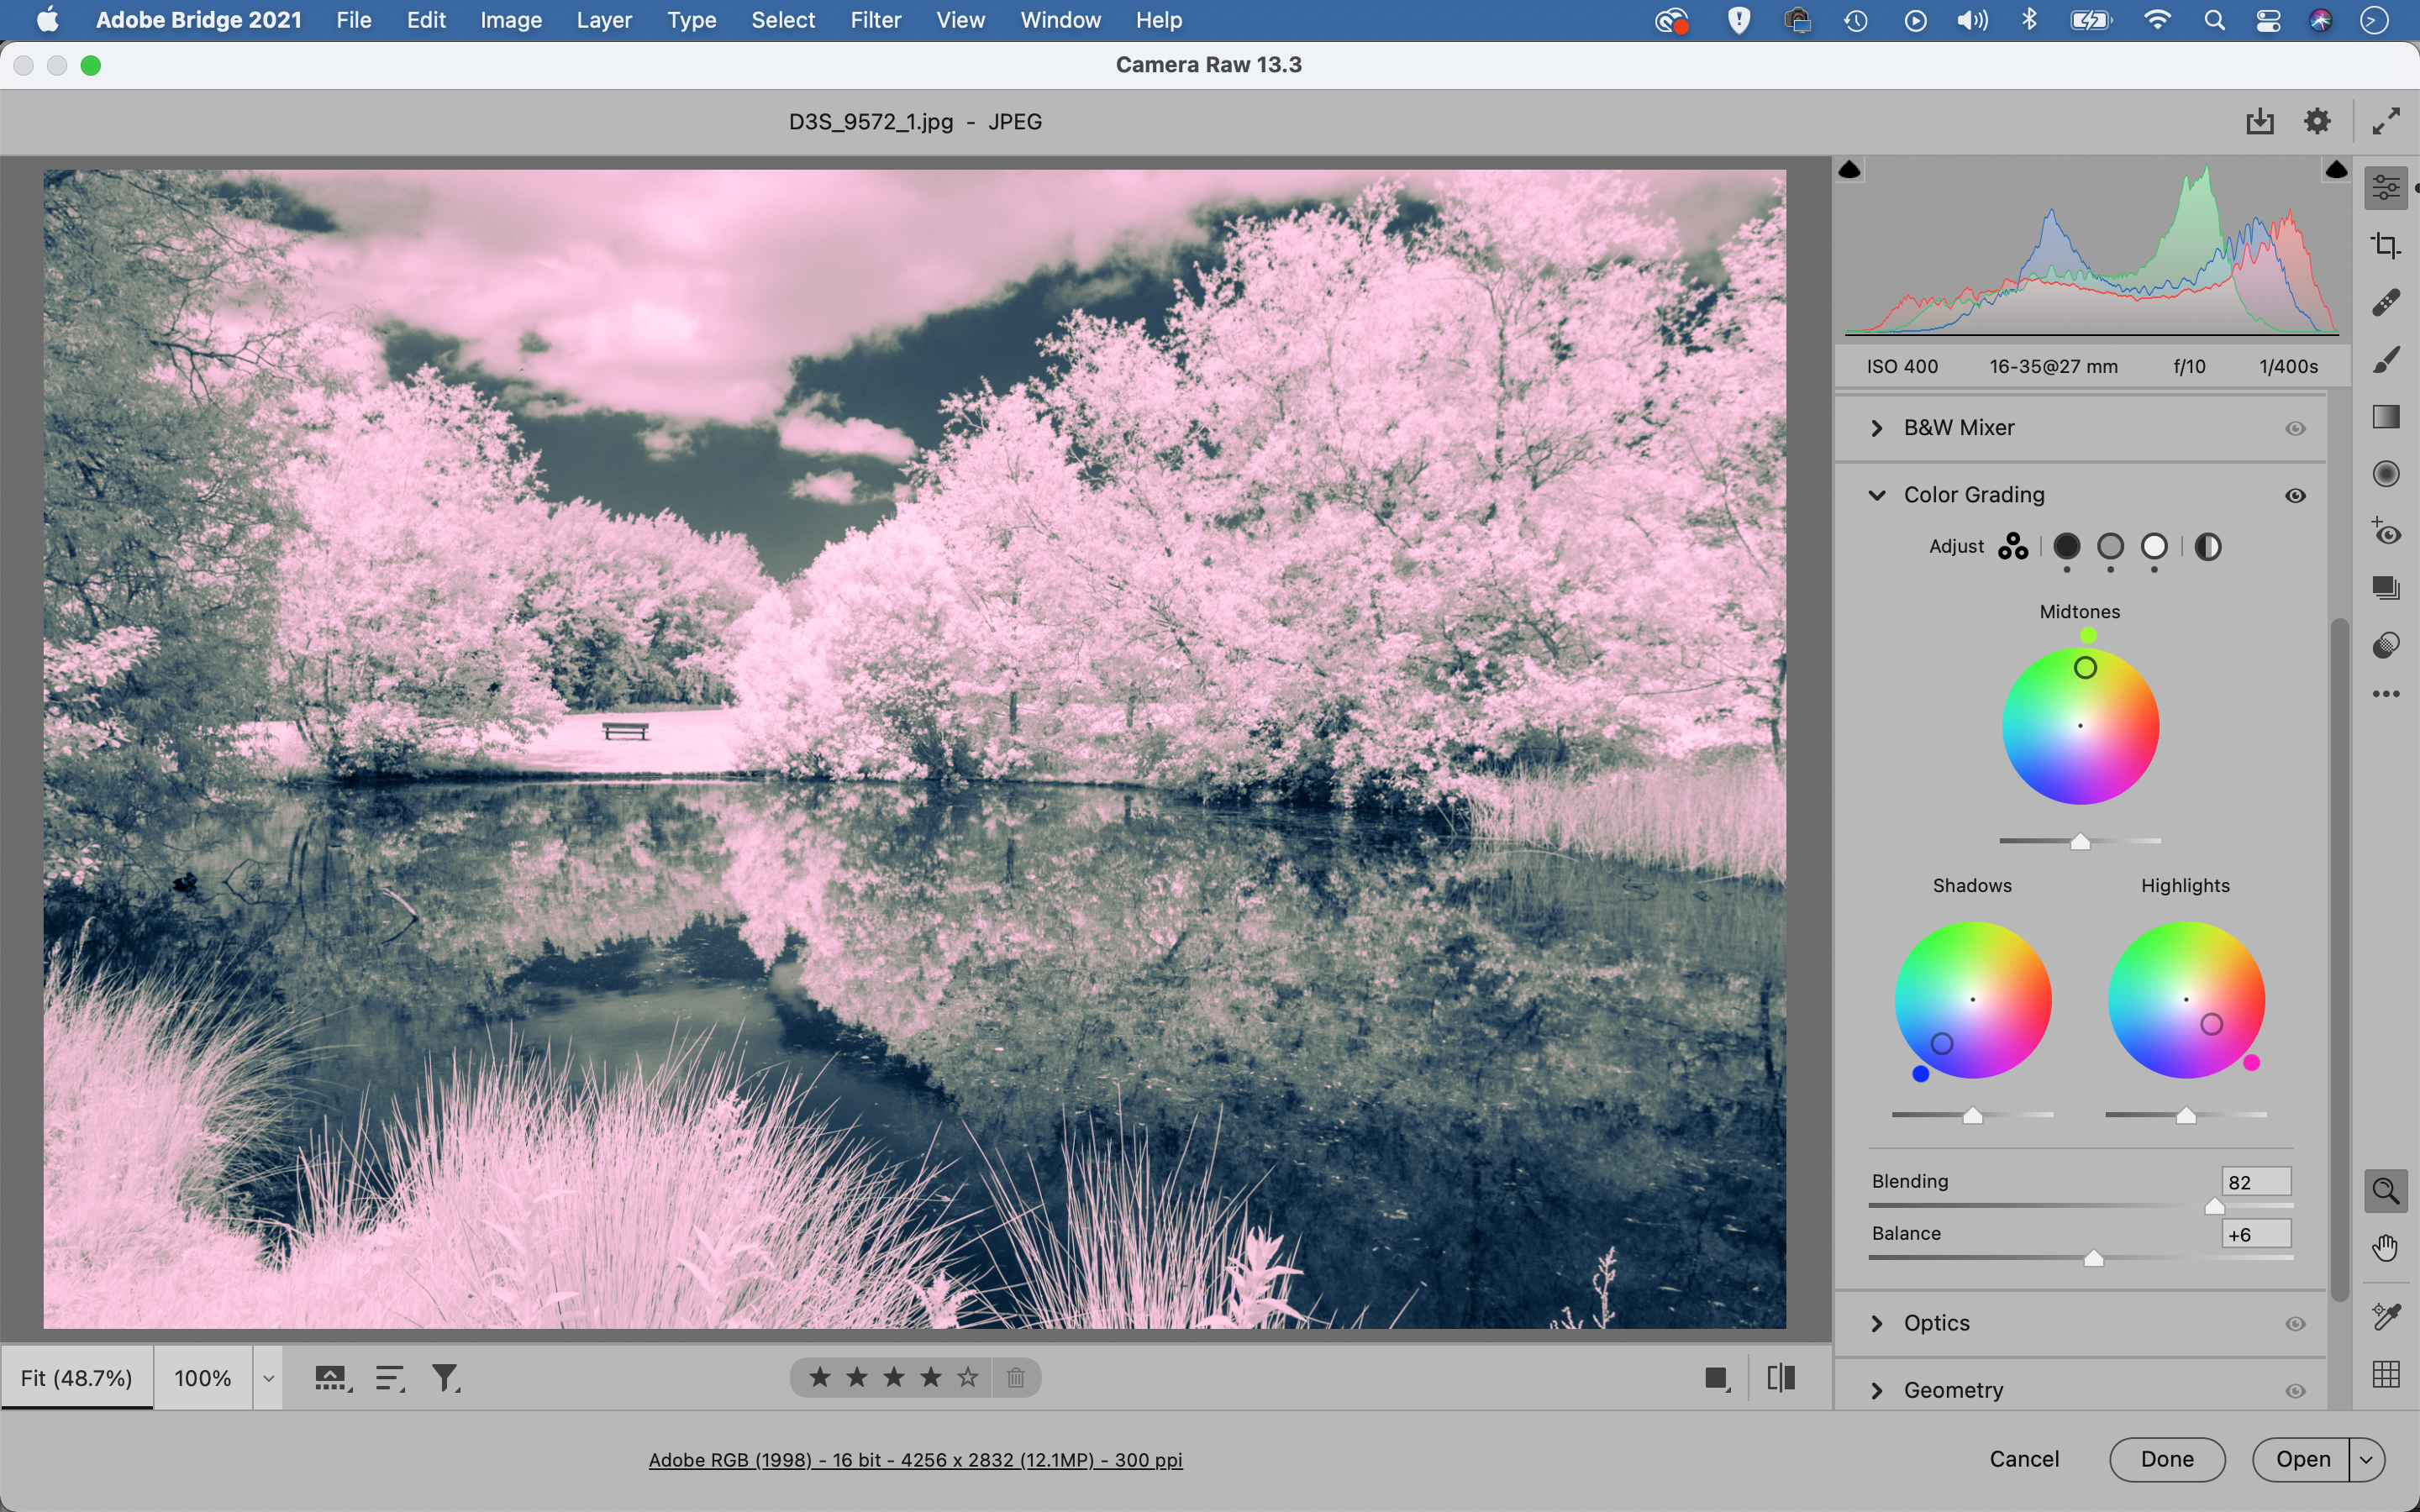
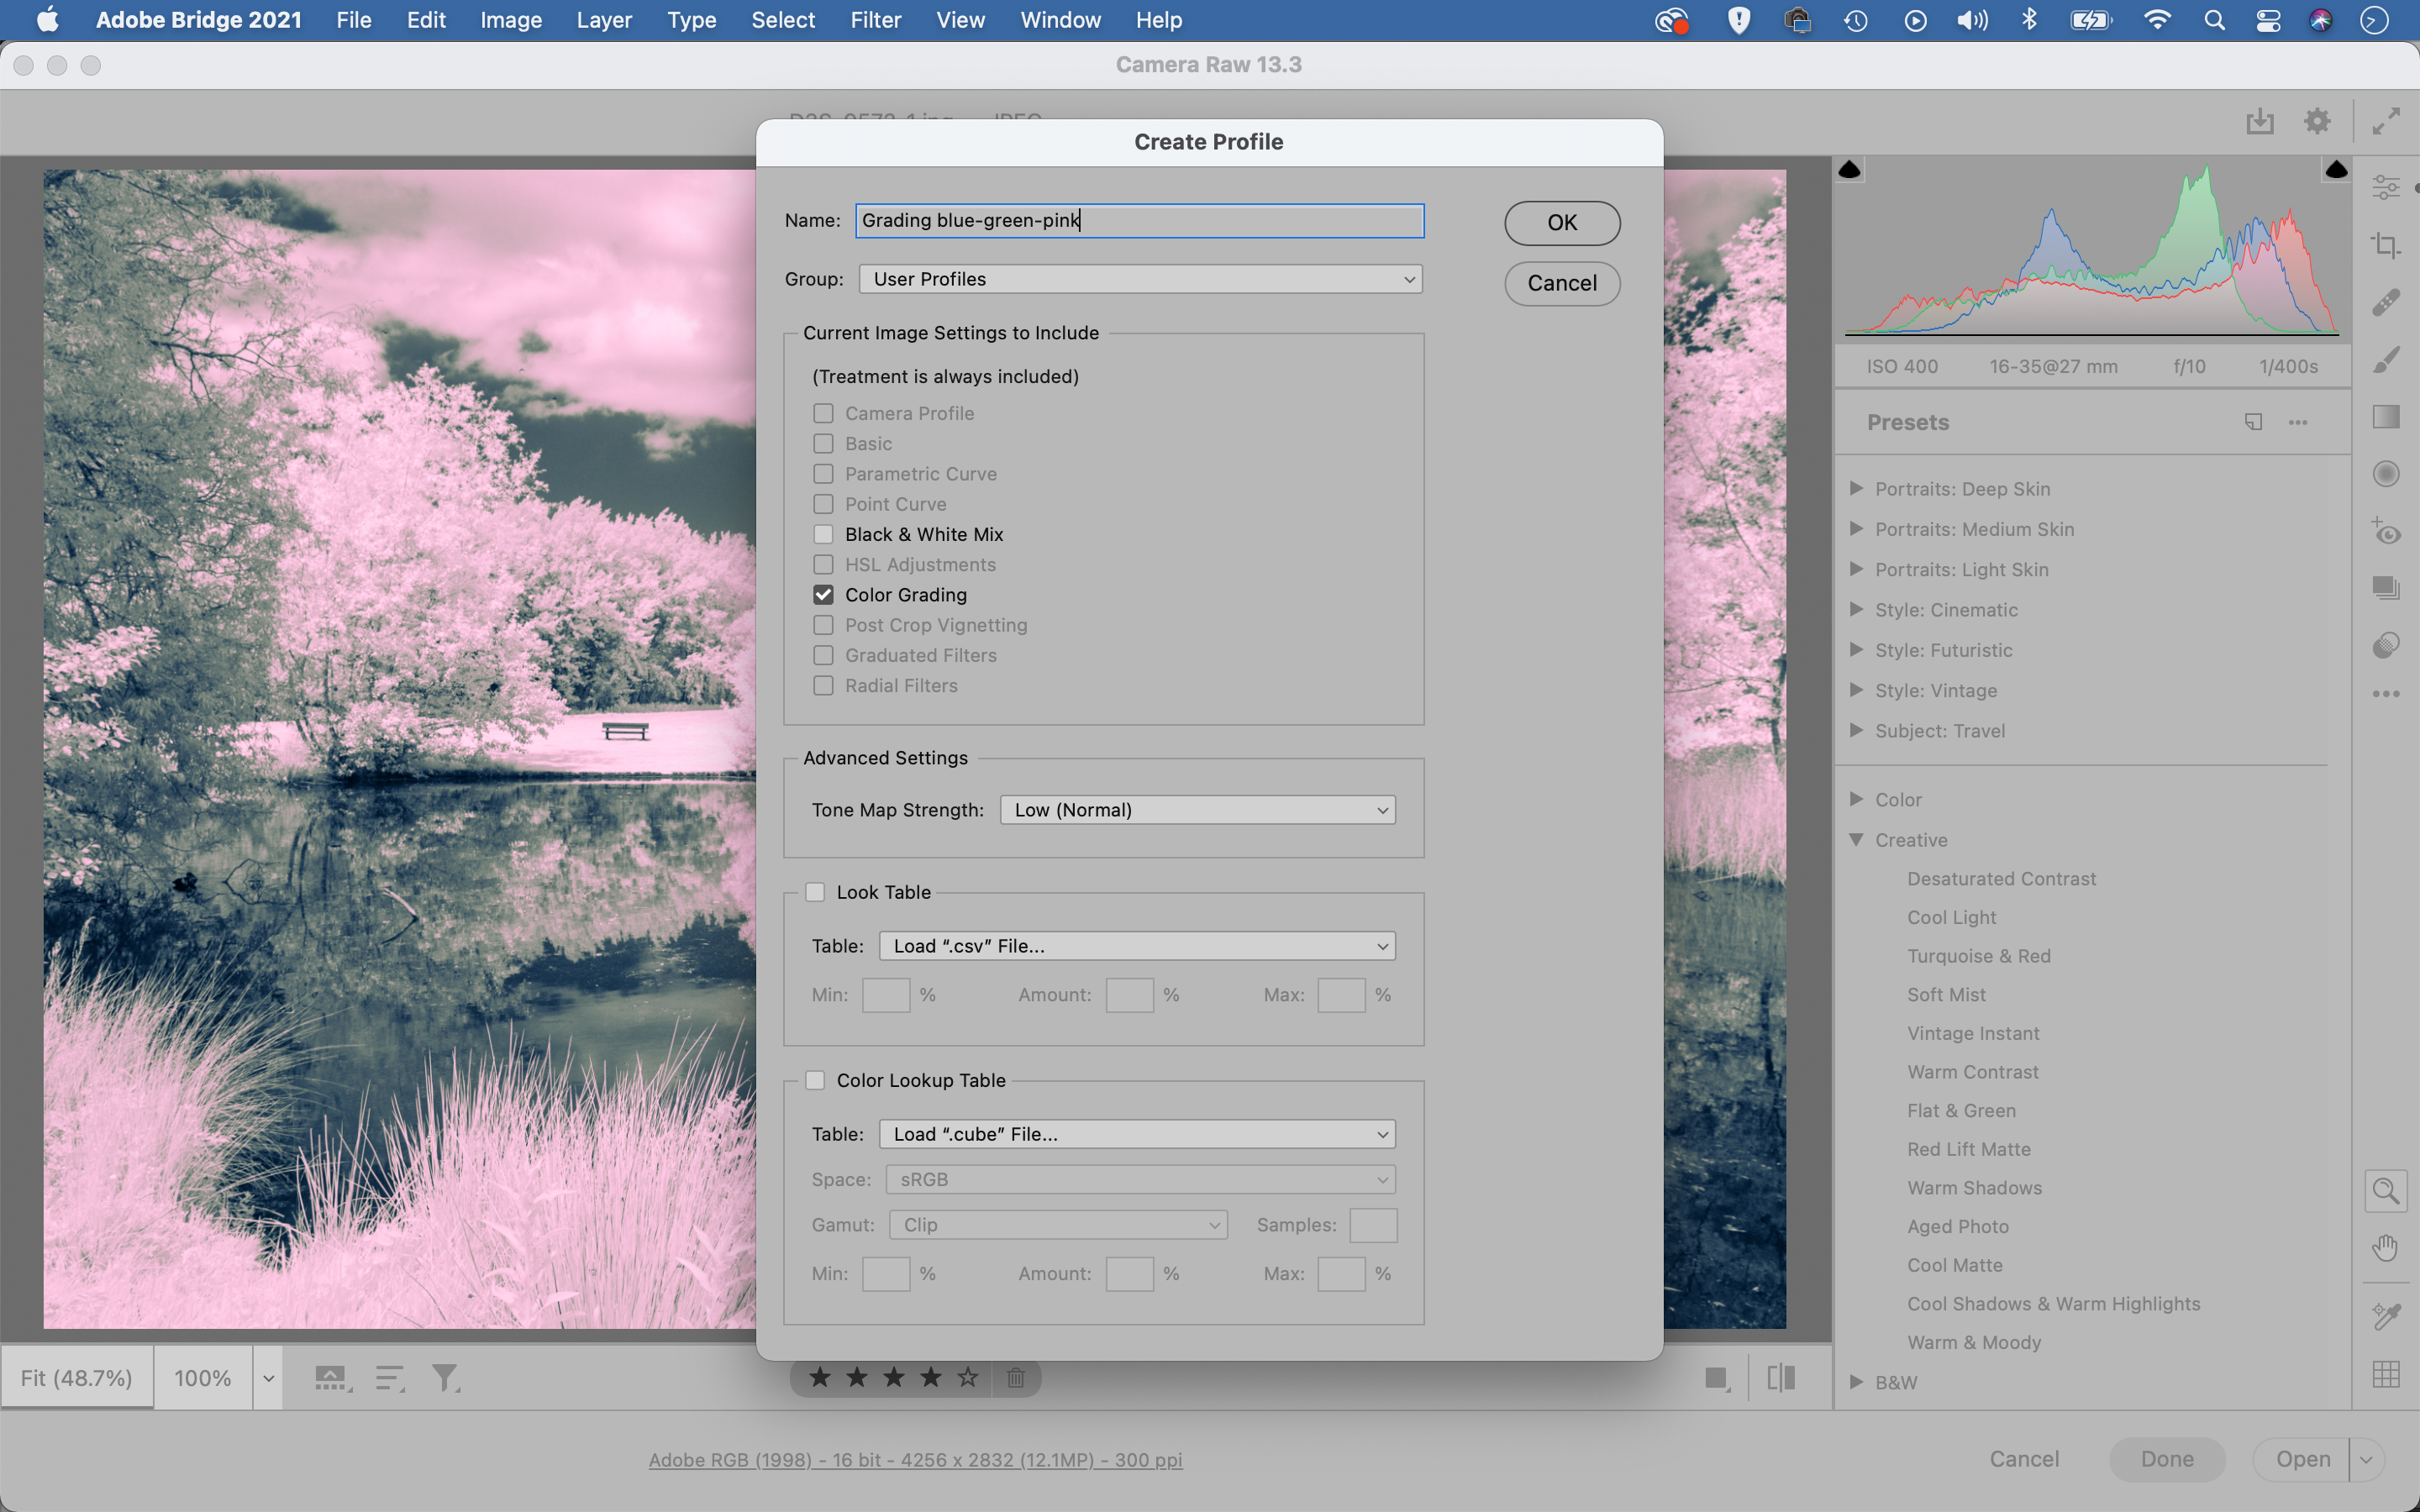
After choosing a color for the shadows, click the edge of the next wheel in the panel to switch to the midtones and the highlights. Here, we used green for the midtones and pink highlights. Of course, like all settings in Camera Raw / Lightroom we can alter the colors at any time.
05 Tweak the blending
Switch to the three wheel view. The Luminance sliders lets you alter the brightness of the color. The Blending slider affects how the three tonal ranges overlap one another. Here, a high value lets us blend the strong colors for a more muted result. Balance widens or shrinks the part of the tonal range affected.
06 Make a profile
It’s worth saving your favorite Color Grading effects as profiles, so that you can quickly add them to other images with a couple of clicks. Click the Preset icon to open the Preset panel, then hold Alt and click the New Preset icon to open the New Profile dialogue. Give your profile a name and save it.
PhotoPlus: The Canon Magazine is the world's only monthly newsstand title that's 100% devoted to Canon, so you can be sure the magazine is completely relevant to your system.
Read more:
The best photo editing software: image editors for novices through to pros
The best photo-editing laptops: top laptops for photographers
10 best online photography courses – from beginner guides to masterclasses
The lead technique writer on Digital Camera Magazine, PhotoPlus: The Canon Magazine and N-Photo: The Nikon Magazine, James is a fantastic general practice photographer with an enviable array of skills across every genre of photography.
Whether it's flash photography techniques like stroboscopic portraits, astrophotography projects like photographing the Northern Lights, or turning sound into art by making paint dance on a set of speakers, James' tutorials and projects are as creative as they are enjoyable.
He's also a wizard at the dark arts of Photoshop, Lightroom and Affinity Photo, and is capable of some genuine black magic in the digital darkroom, making him one of the leading authorities on photo editing software and techniques.
