Photoshop tutorial: Digital graduated filters enhance landscapes in seconds
Gets to grips with the Graduated Filter tool and use them to enhance landscape scenes
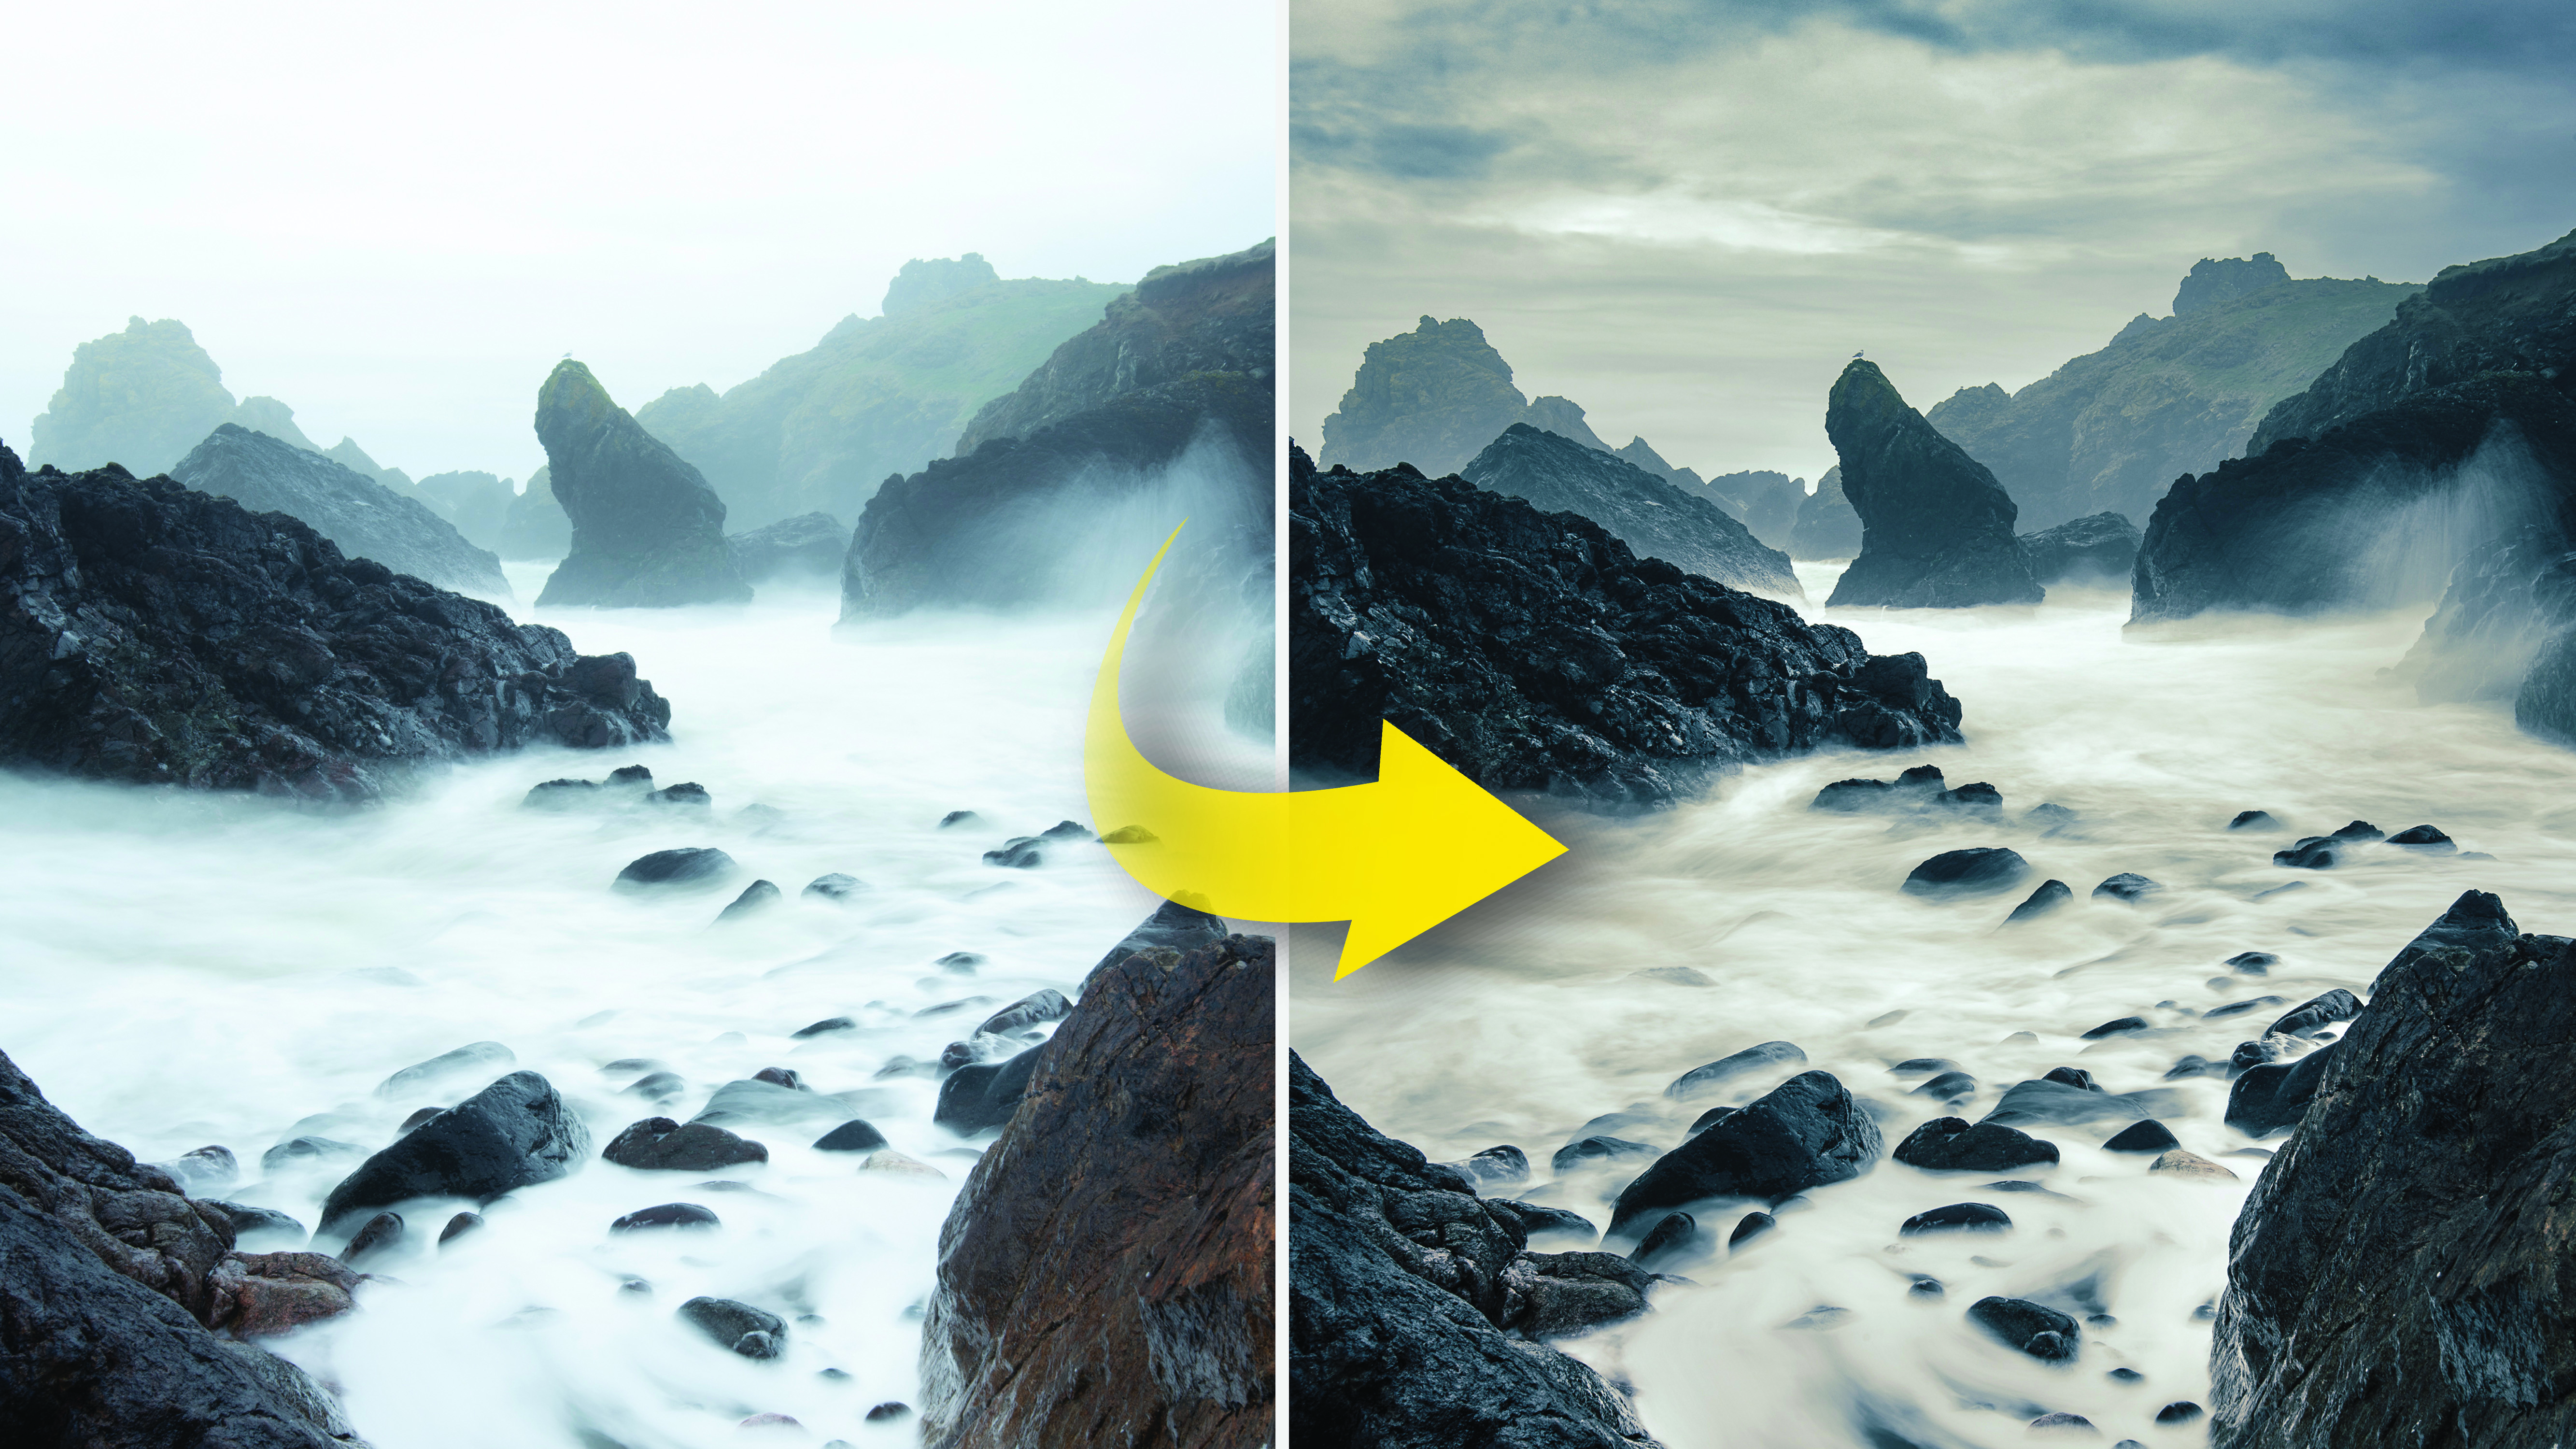
Of all the tools available in Photoshop CC’s Camera Raw plugin – or indeed in the entirety of Photoshop – the Graduated Filter is one of the most useful, especially for landscape photographs. The tool allows you to make a linear adjustment over part of your photo, creating a transitional blend of tones. Anywhere beyond the first point that is defined will be entirely affected by the tonal settings you input, with a gradual fall-off determined by the length of the line you drag.
As such, it enables you to create enhancements to areas of your photos. It’s useful for balancing a scene in which one part might be darker or brighter than another. With landscapes, this can occur when we include sky and land, as skies tend to be brighter. Achieving such a balance would involve a lens-mounted graduated neutral density filter to block some of the light from the sky. This is a good option for many scenes, but the Graduated Filter tool in Camera Raw offers more controls.
Not only can we hold back exposure, but we can also boost contrast and detail, which is ideal for boosting flat, featureless skies like this. What’s more, we have a fine degree of control over what is affected by the grad, as once applied, we can go on to target specific portions of the sky either by freehand brushing or by using intelligent tools like Range Masking. Let’s take a look at some of the features of this tool…
1. Load the tool
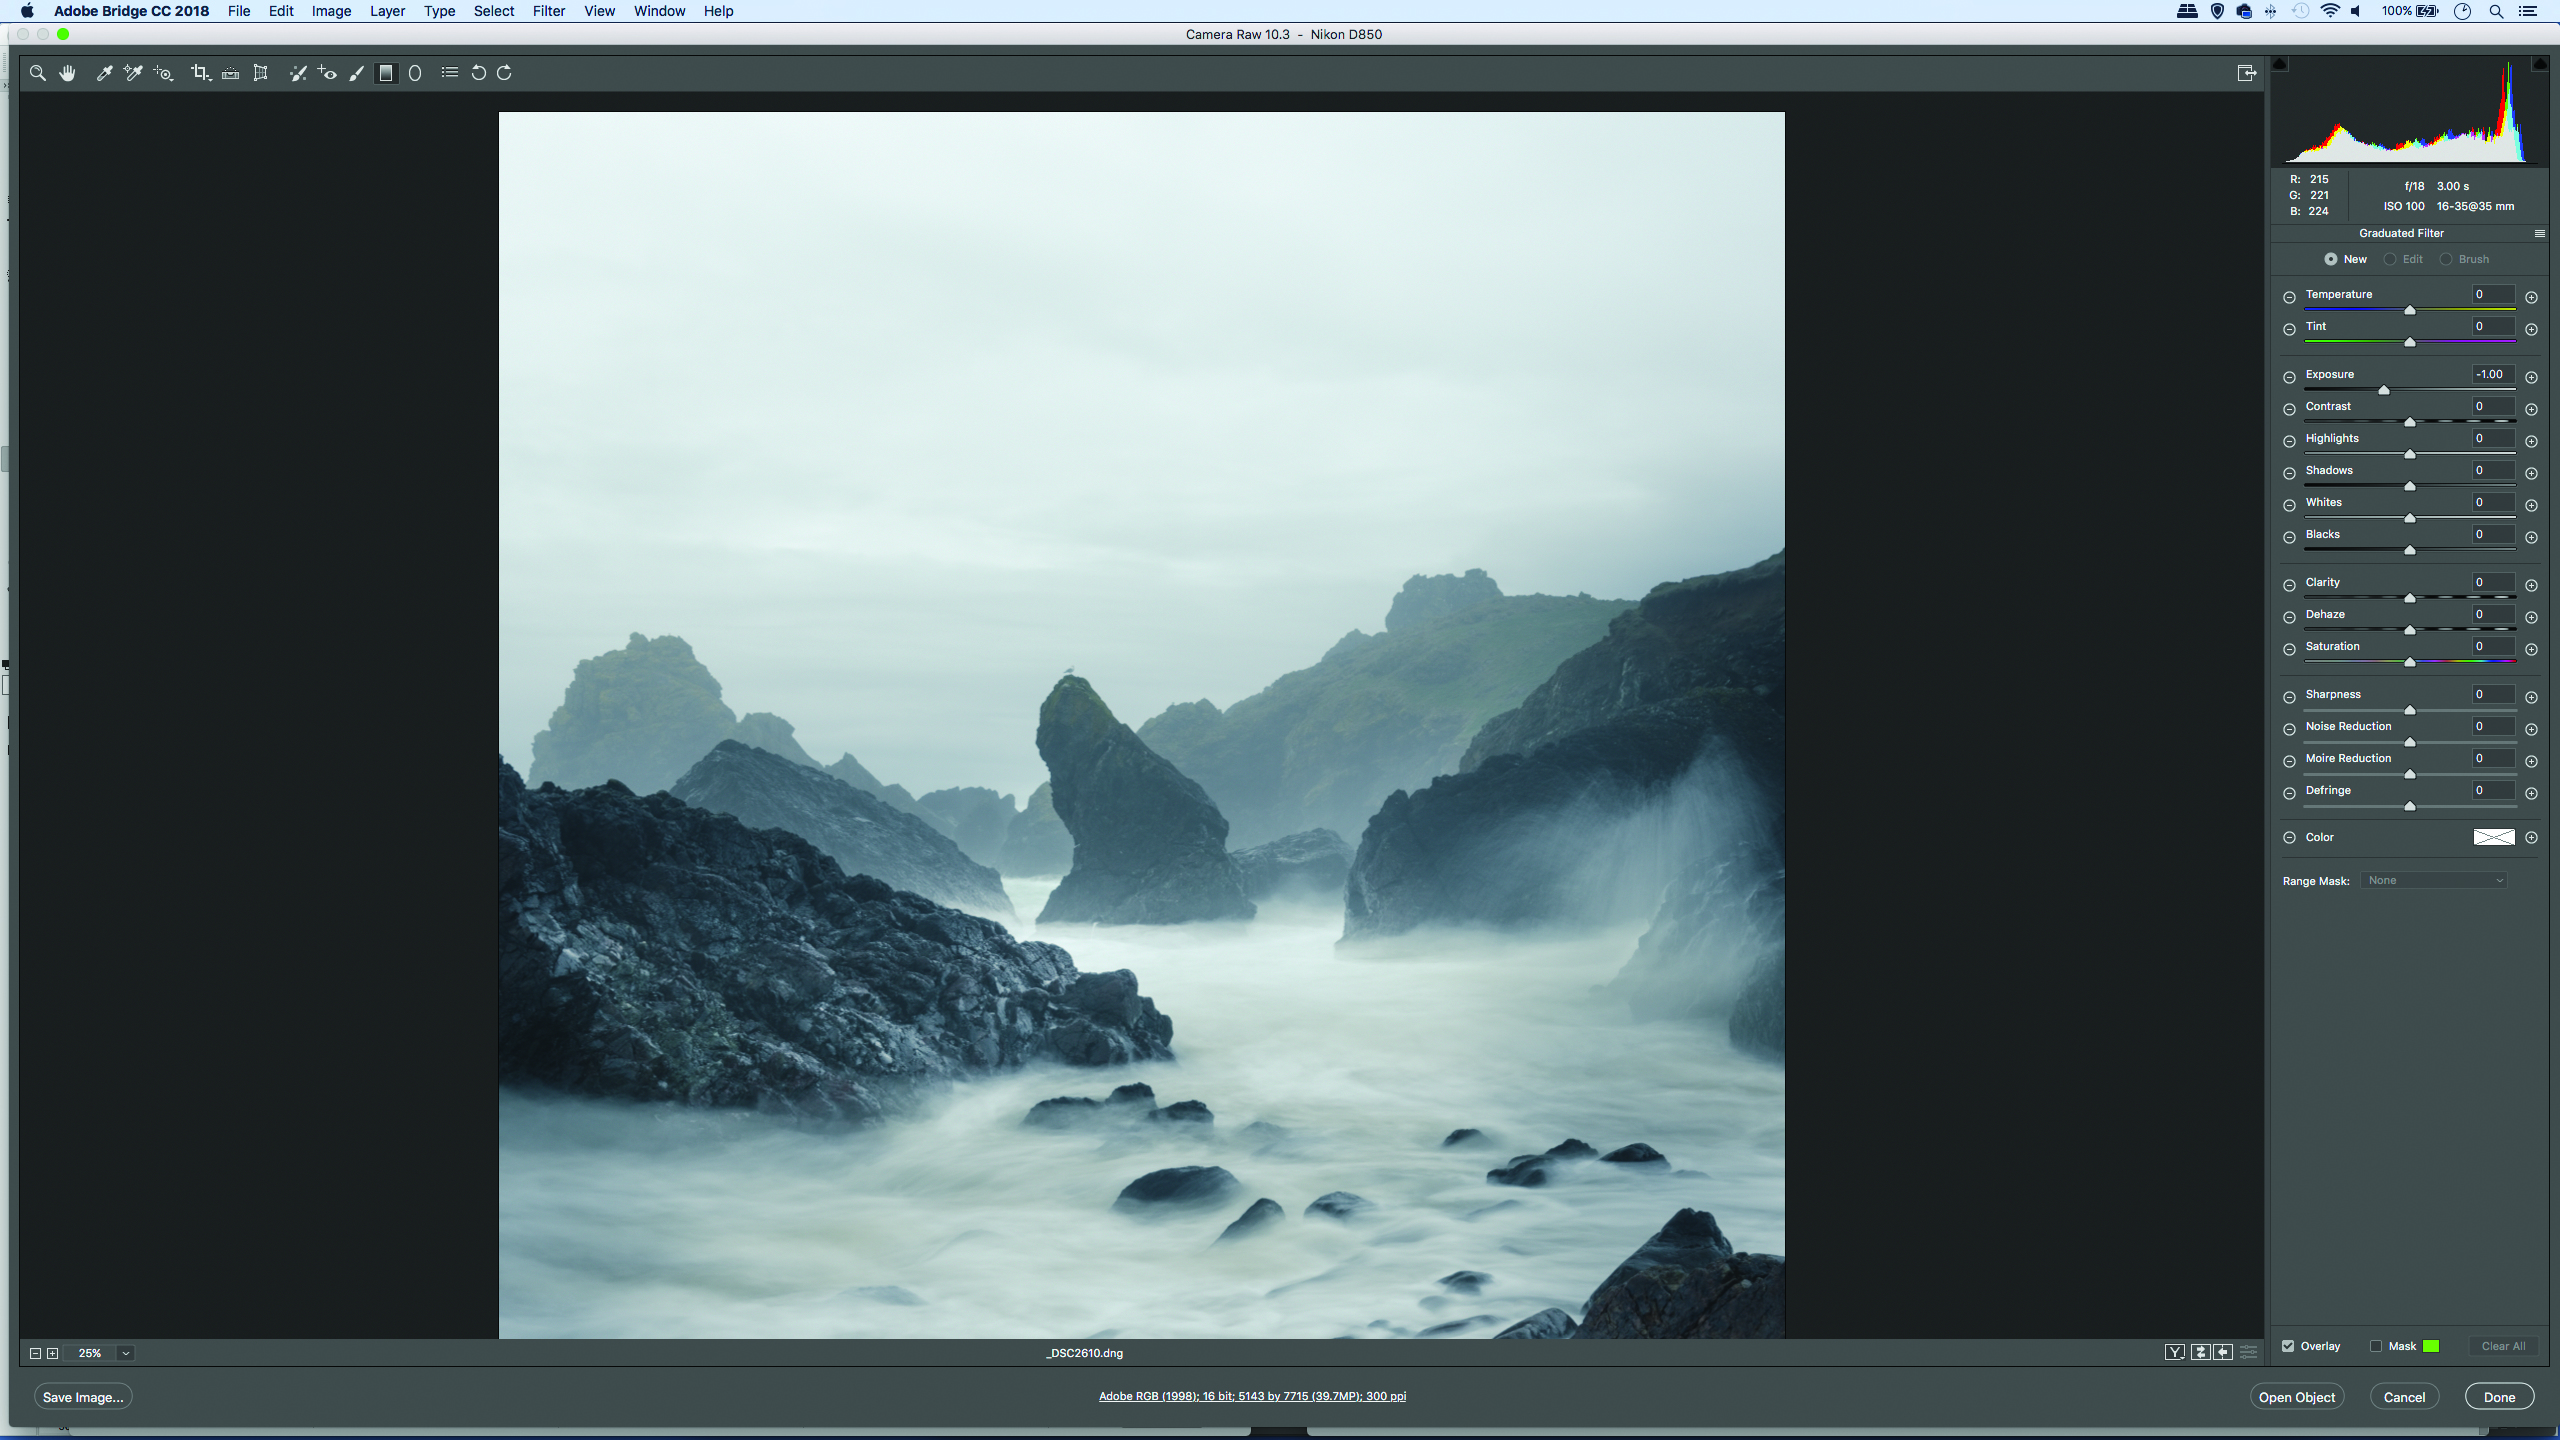
Open your landscape into Camera Raw and make initial adjustments to the tones in the Basic panel, then grab the Graduated Filter from the toolbar. Click the minus icon next to the Exposure slider on the right a few times – this loads the tool with an adjustment.
2. Drag in a grad
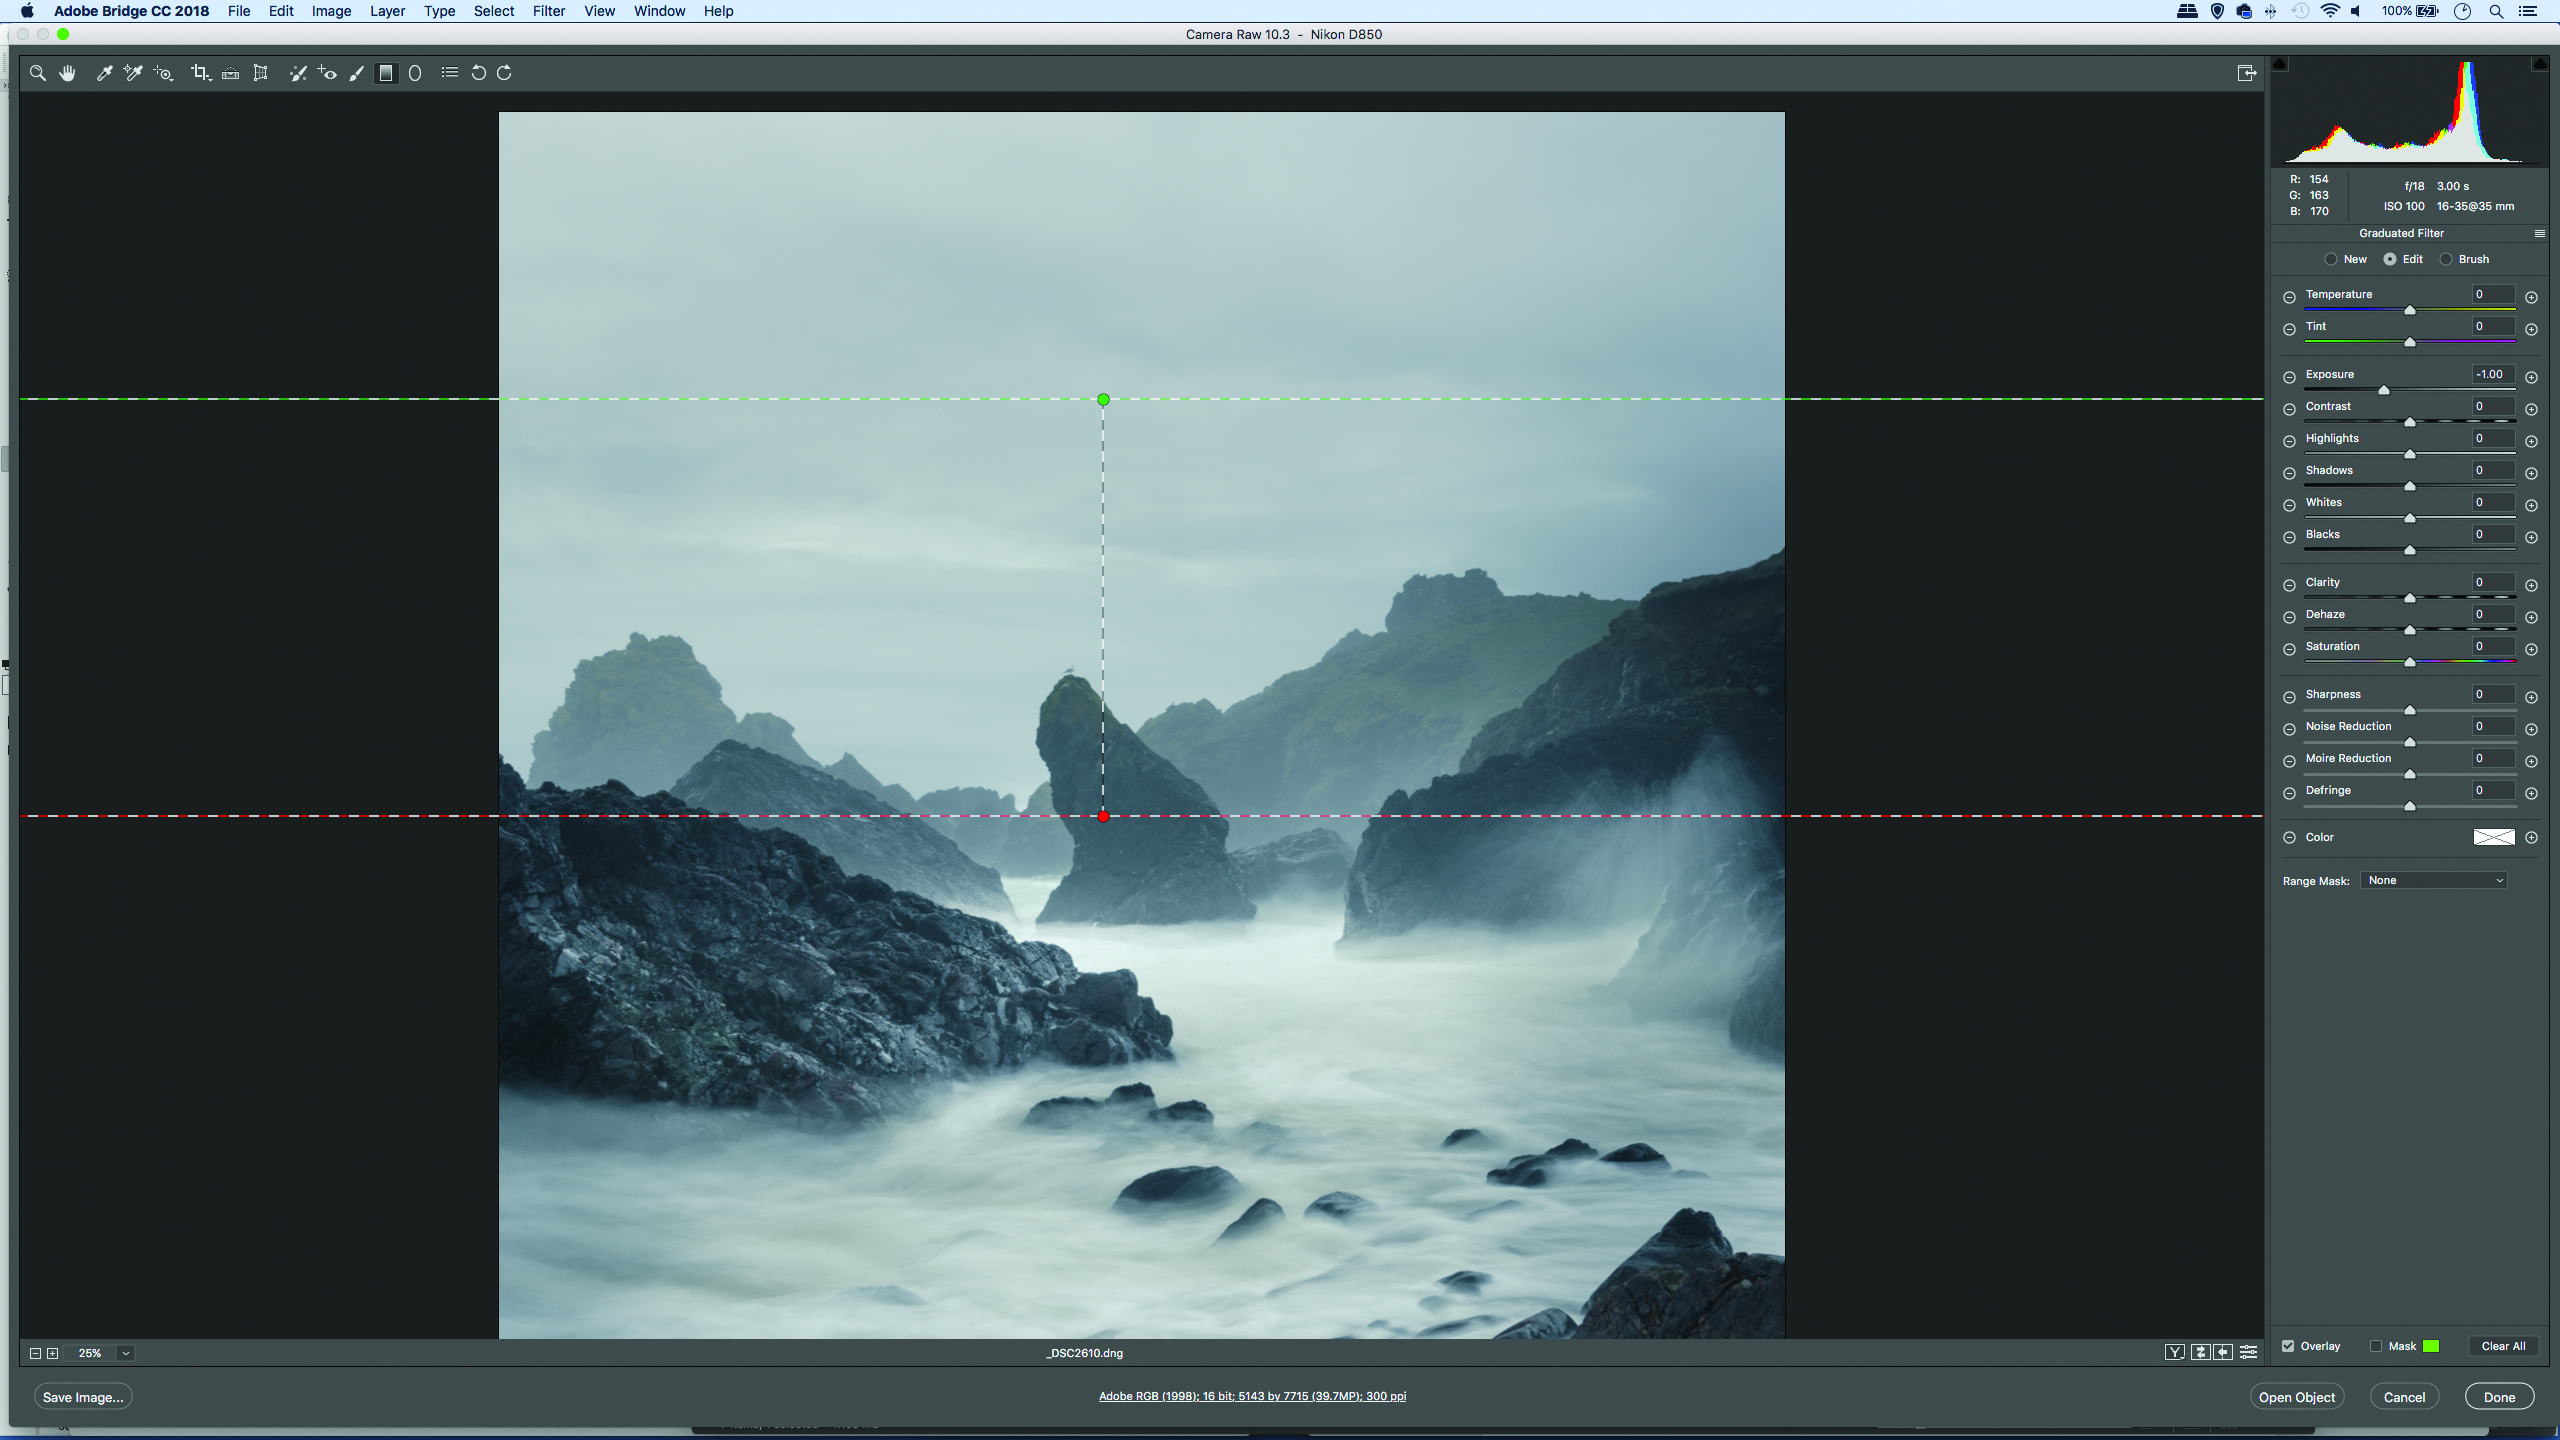
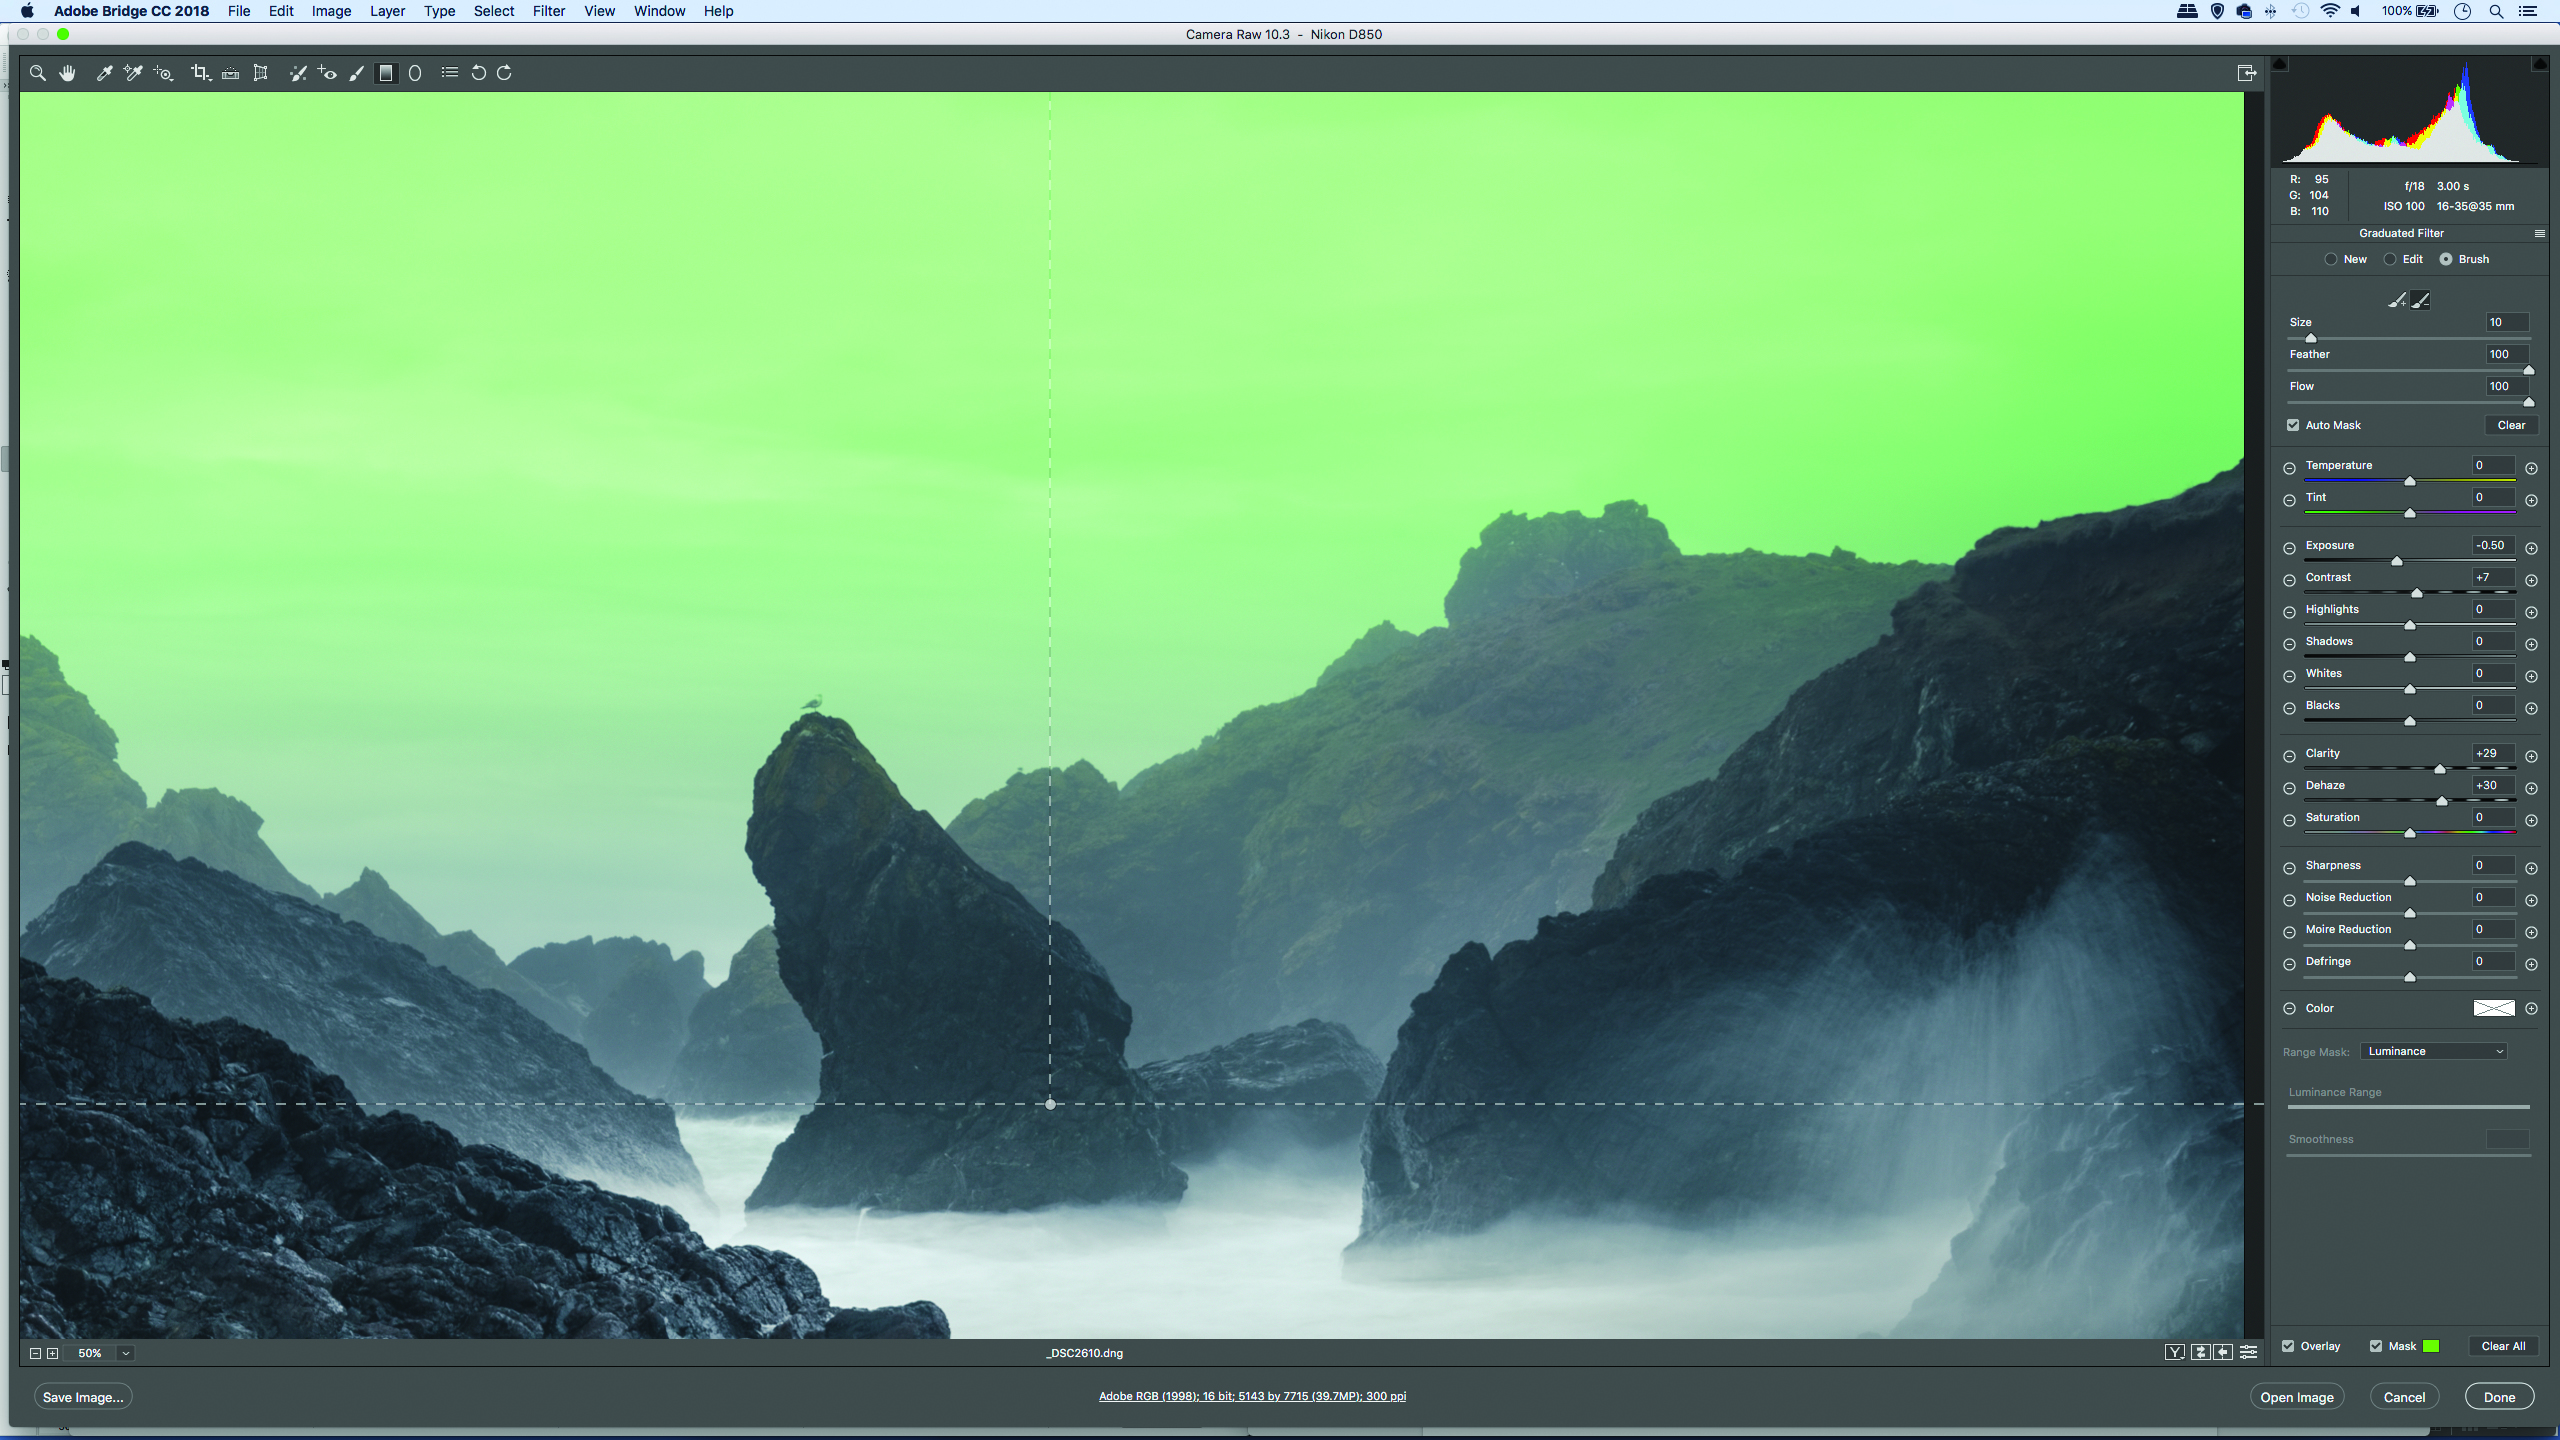
Click on the middle part of the sky and drag down towards the horizon. If you hold Shift as you drag, the lines will be perfectly horizontal. Then, you can tweak the length or angle of the lines. Hit Y at any time to toggle a mask overlay on, this shows what’s covered.
3. Tweak the tones
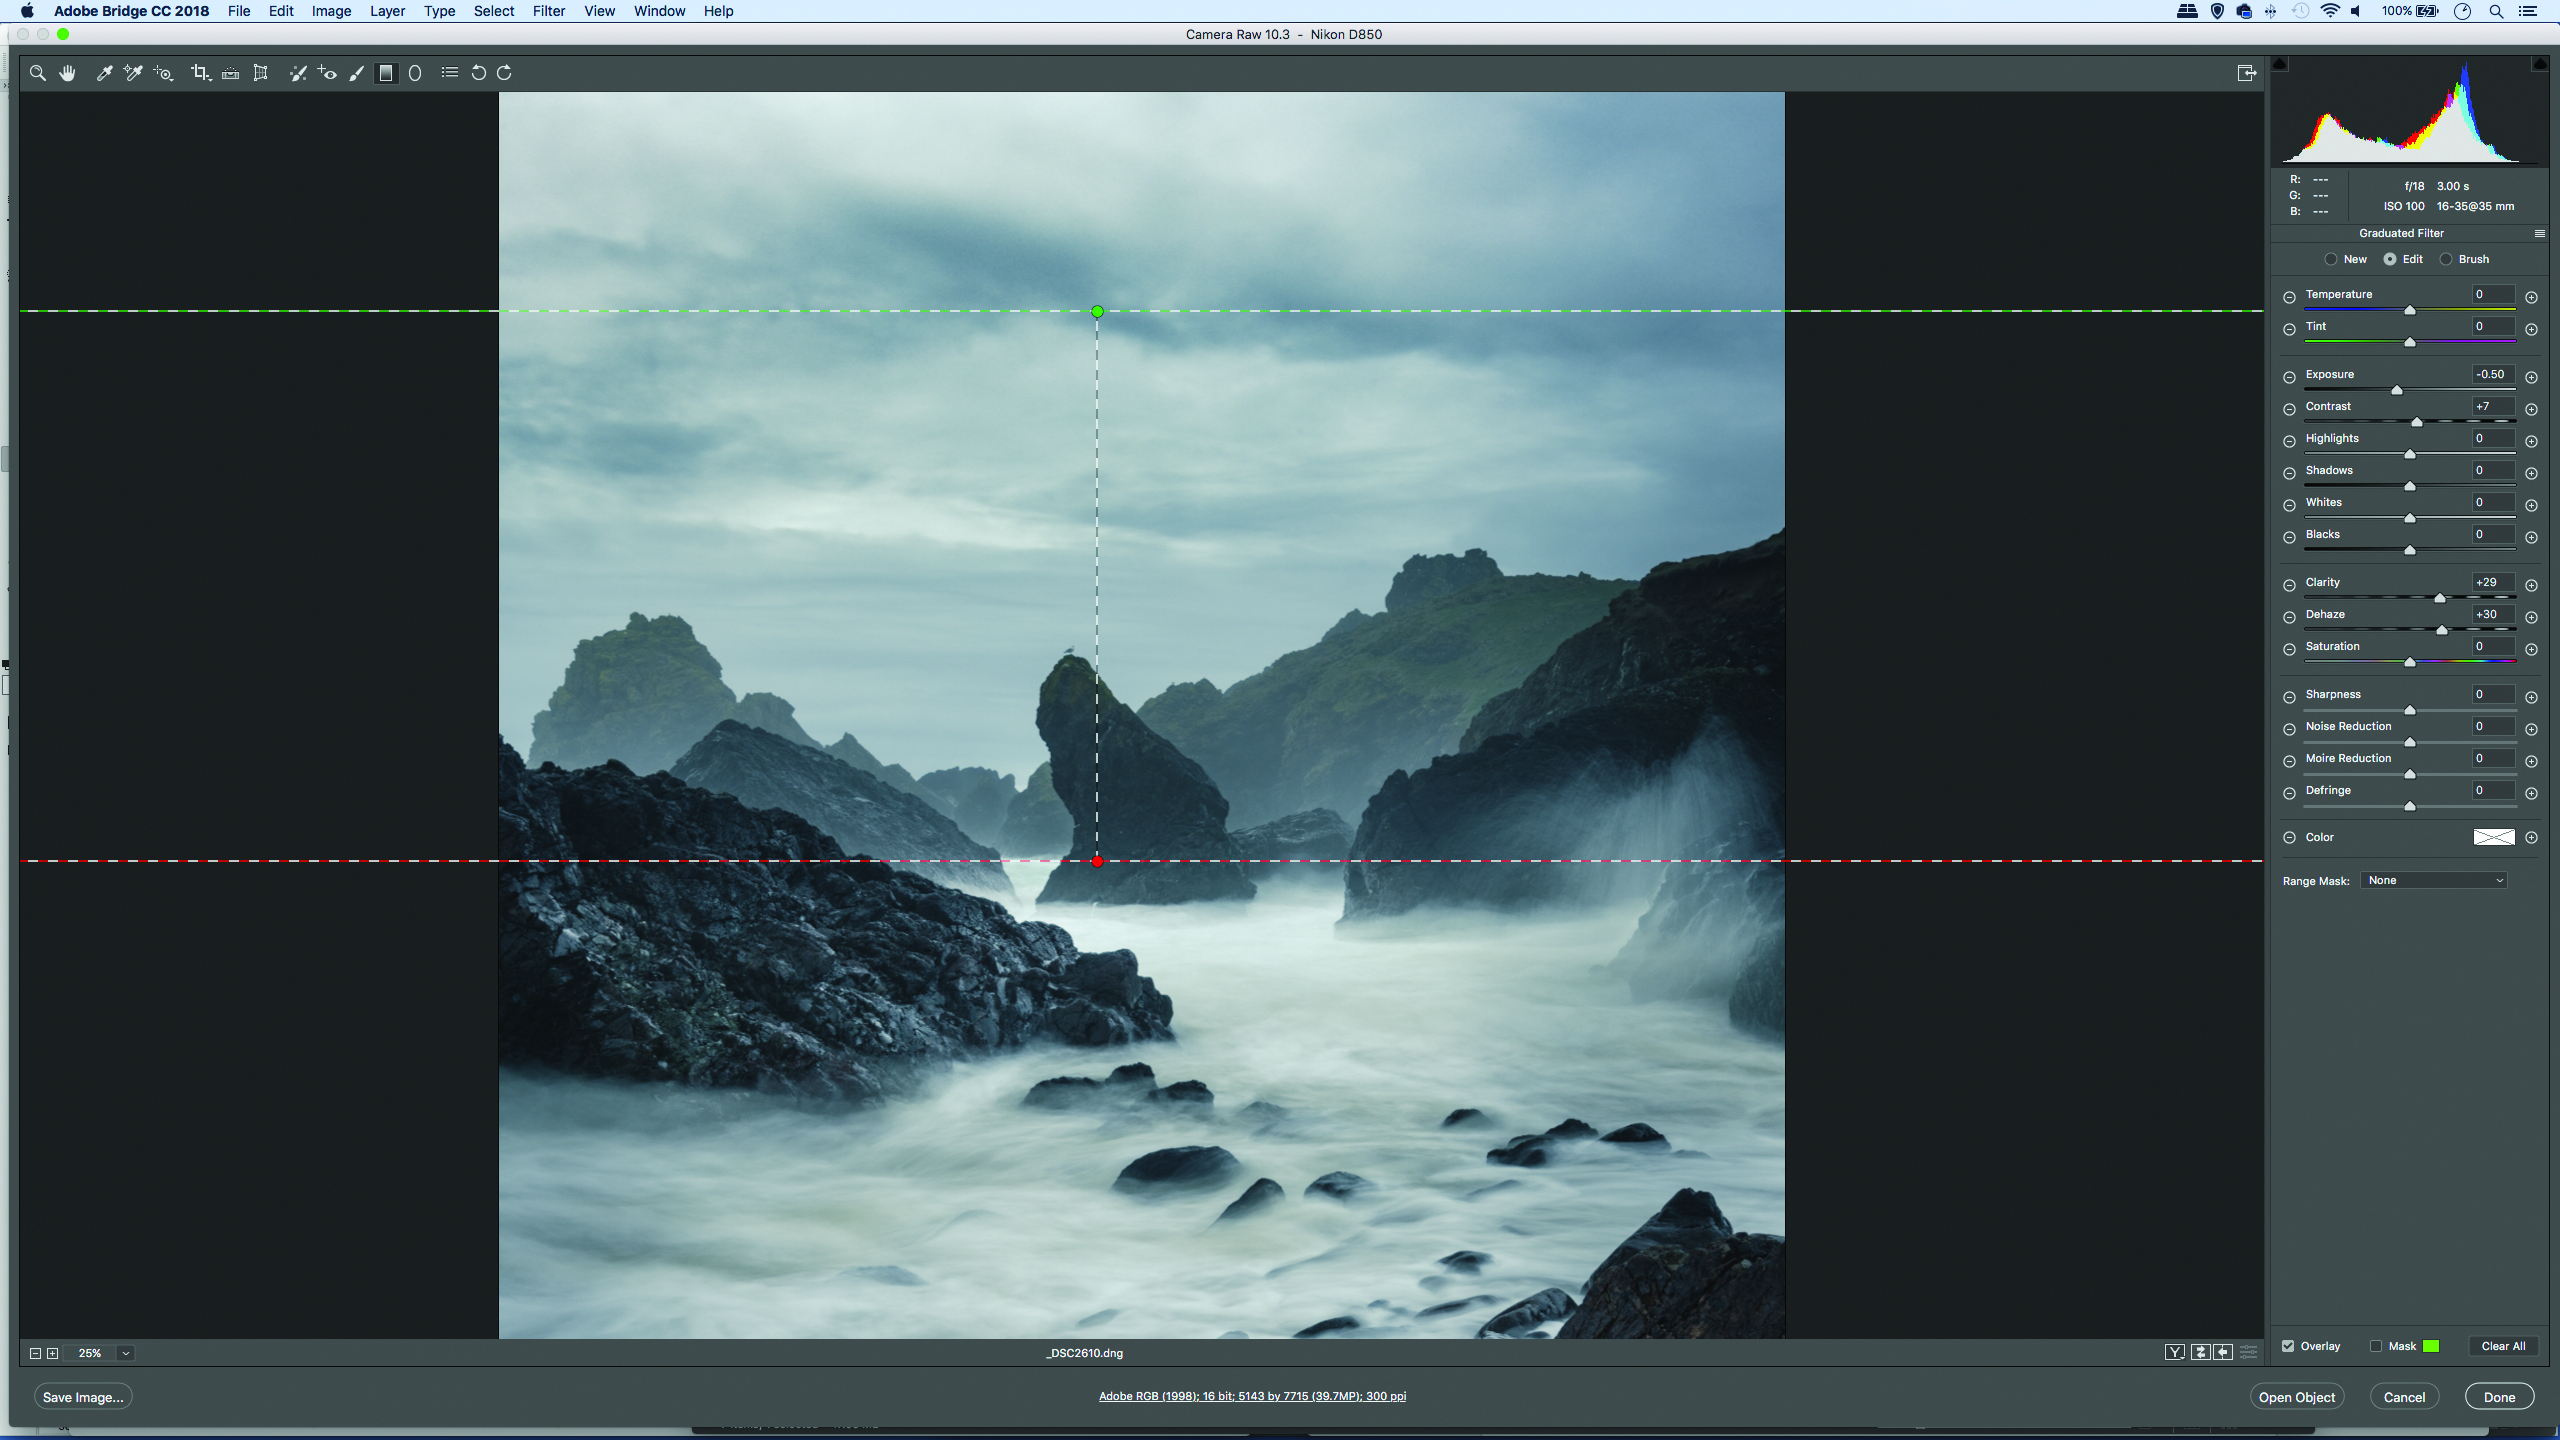
Head to the sliders on the right and alter Exposure to lighten or darken the adjustment. Next try other sliders – for dull cloudy skies like this an increase in Clarity and Dehaze can boost the details. We have Exposure -0.50, Contrast +7, Clarity +29, Dehaze +30.
4. Use Range Masking
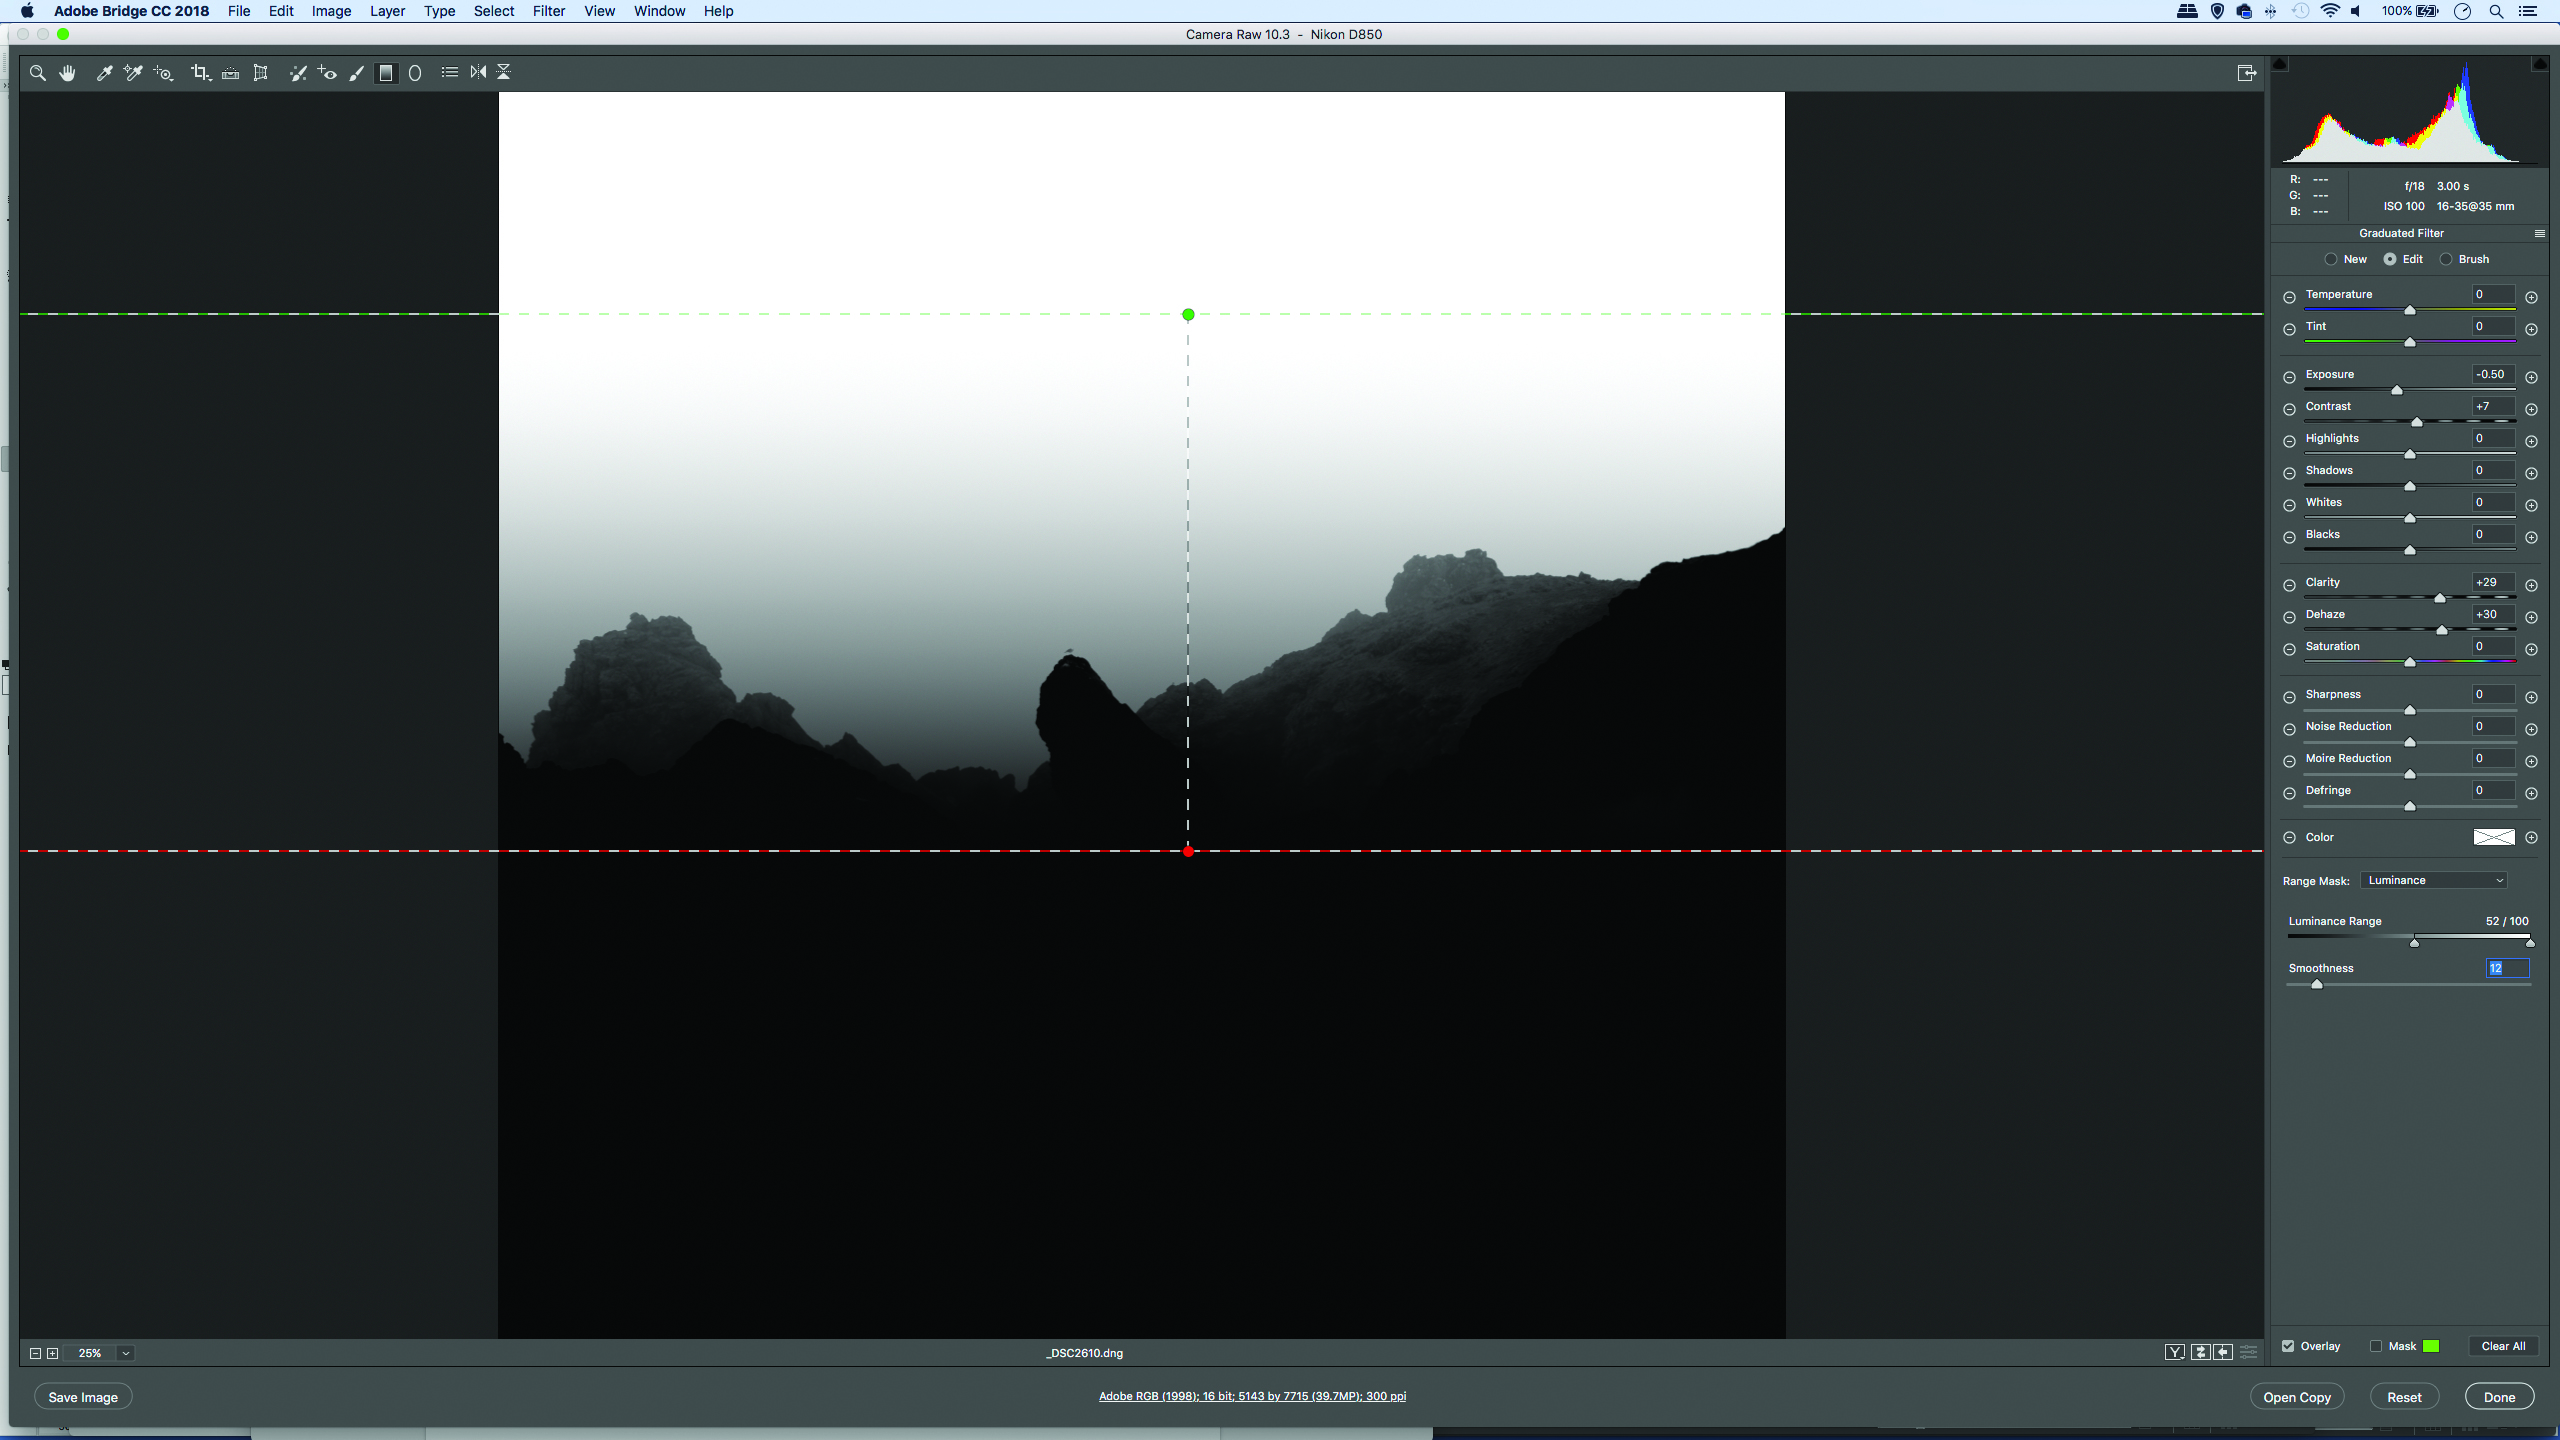
Our adjustment is darkening areas of the land we want to keep unaffected. Set Range Mask: Luminance in the settings on the right. Hold Alt and drag the black point slider across. The areas in black will be protected. Alt-drag the Smoothness slider to tune.
The best camera deals, reviews, product advice, and unmissable photography news, direct to your inbox!
5. Paint to subtract
If we need to refine what is covered by the adjustment, we can paint freehand. Click on the Brush option at top right then click the minus brush icon below. Hit Y to toggle the mask overlay on, then paint to subtract the adjustment from any areas of the land covered.
6. Add another
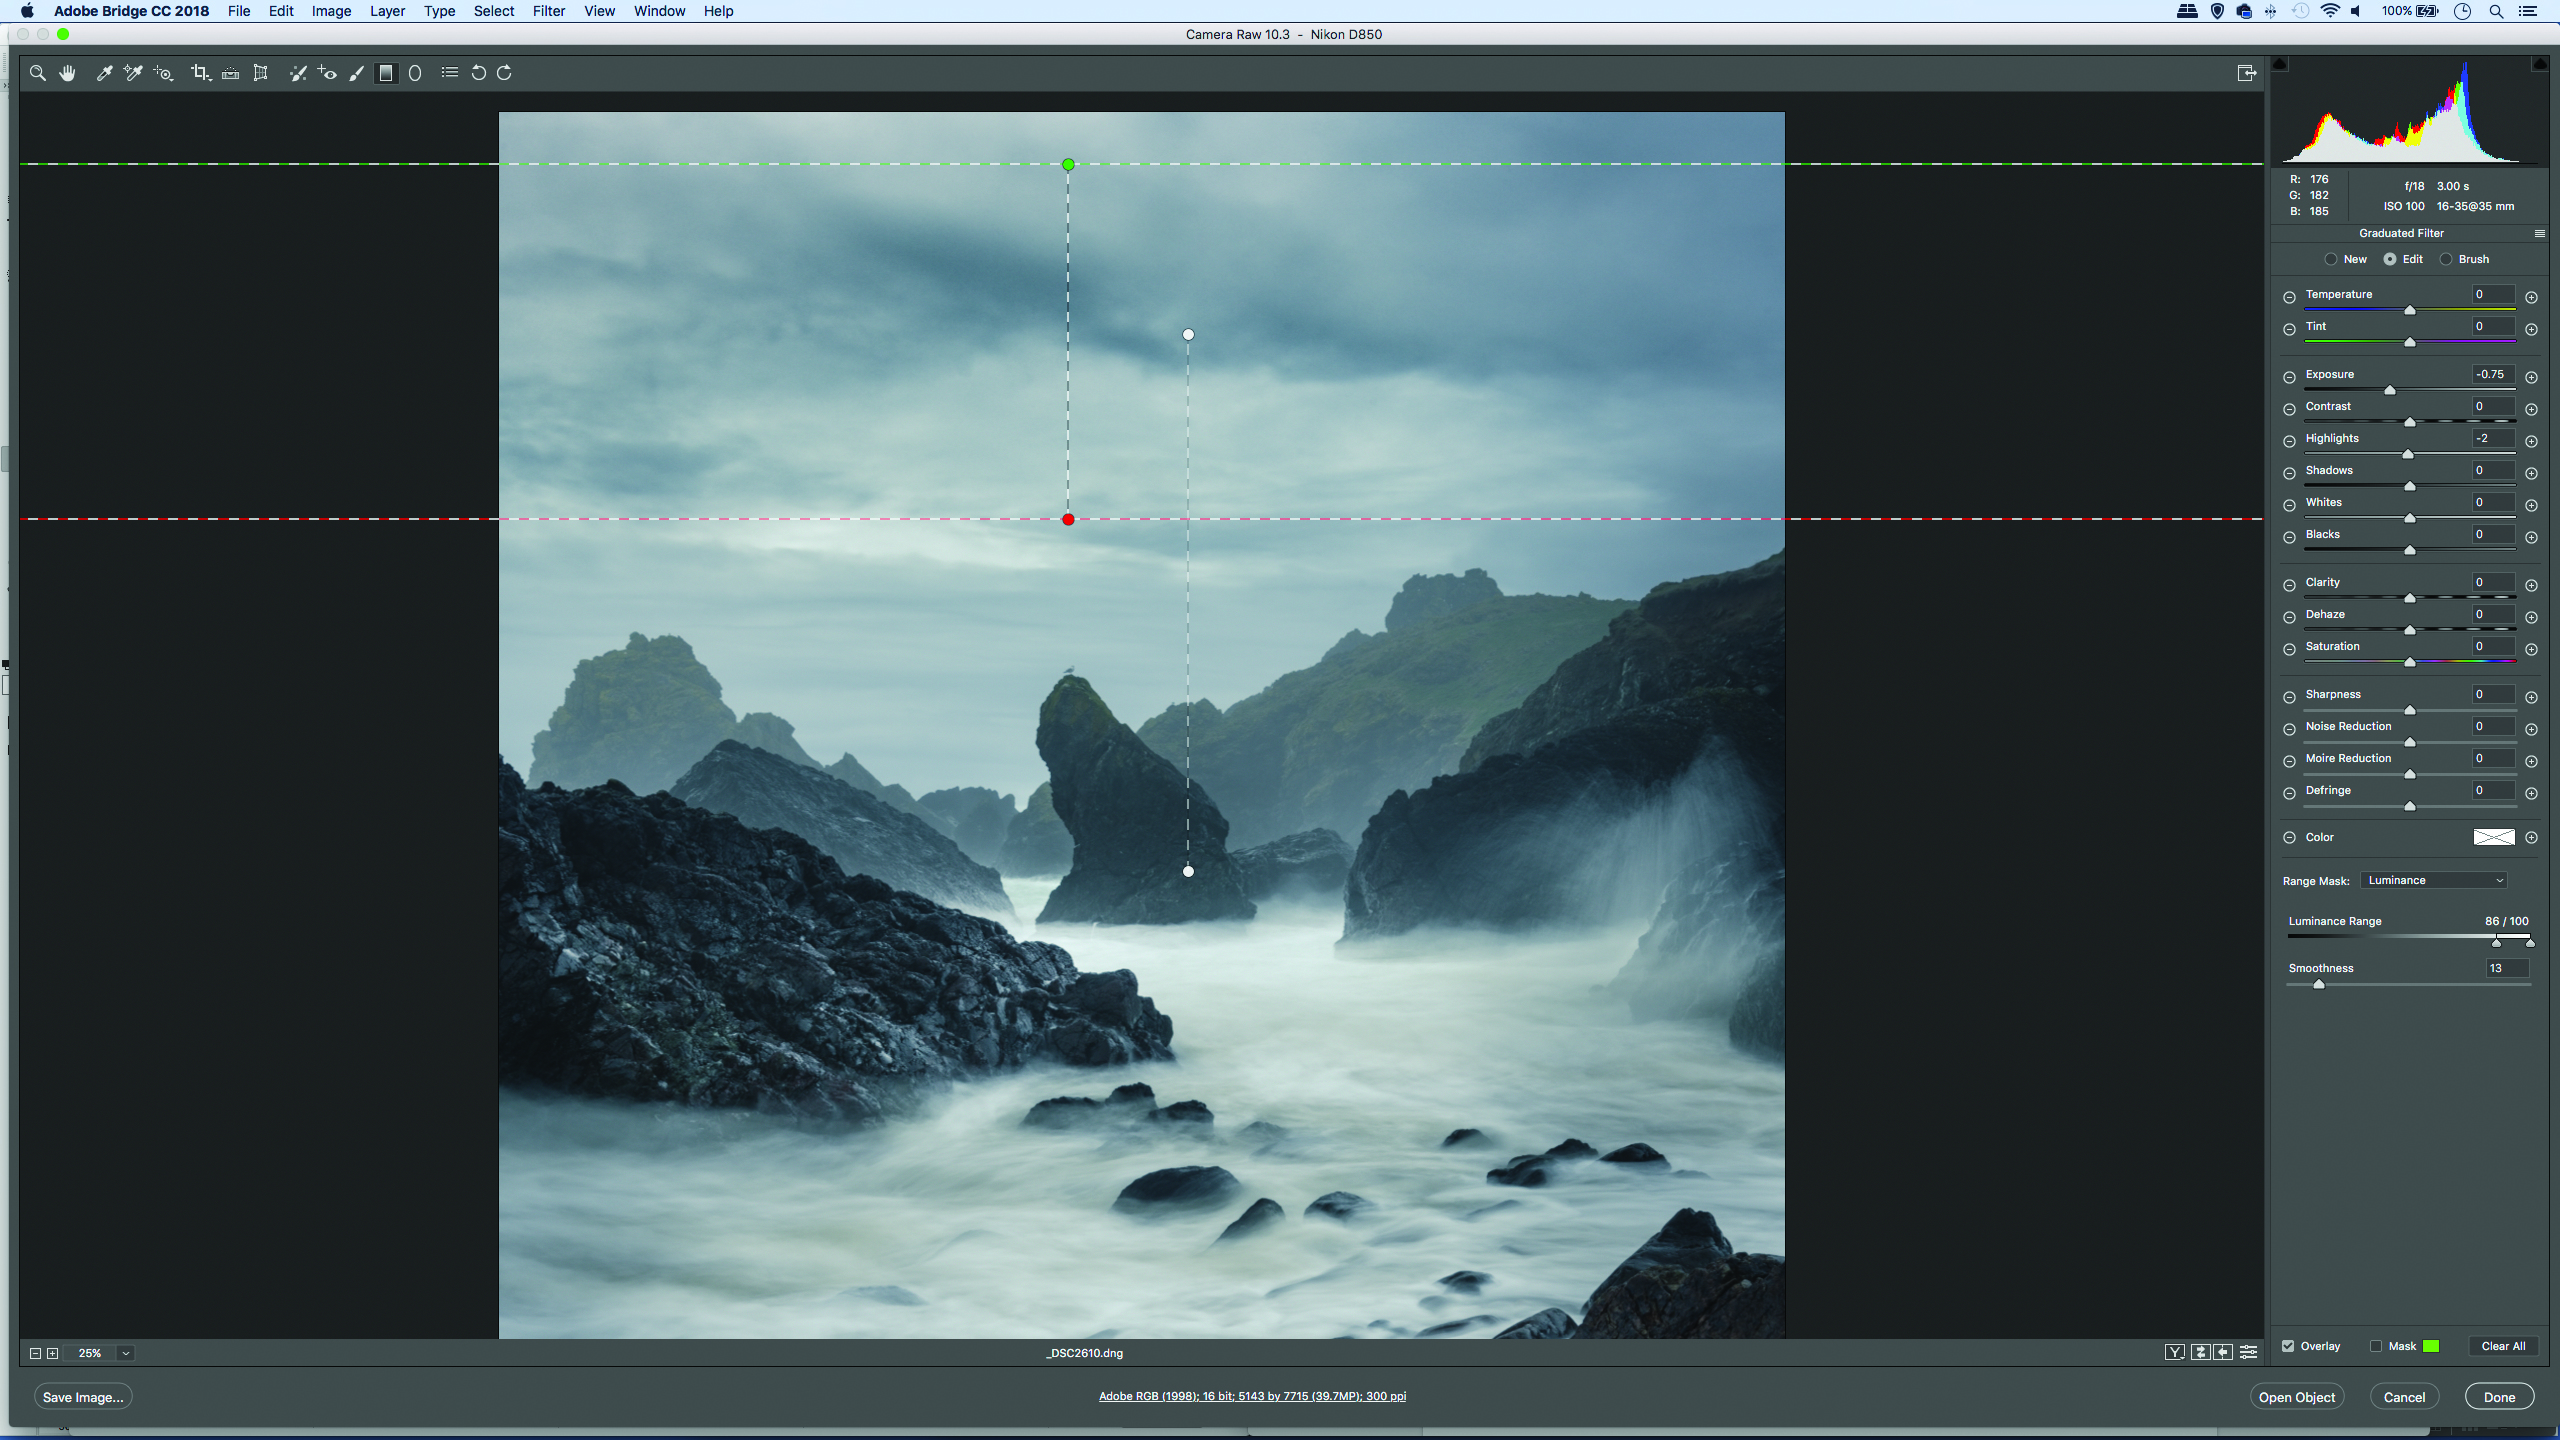
We’re free to add as many grads as we like. Often with skies a second grad nearer the top of the frame can add to the effect. Click the minus icon next to Exposure again. This resets any previous settings, allowing you drag another grad as shown.
You might also like the best photo editing software: image editors for novices through to pros. These are the 10 best online photography courses – from beginner guides to masterclasses.
The lead technique writer on Digital Camera Magazine, PhotoPlus: The Canon Magazine and N-Photo: The Nikon Magazine, James is a fantastic general practice photographer with an enviable array of skills across every genre of photography.
Whether it's flash photography techniques like stroboscopic portraits, astrophotography projects like photographing the Northern Lights, or turning sound into art by making paint dance on a set of speakers, James' tutorials and projects are as creative as they are enjoyable.
He's also a wizard at the dark arts of Photoshop, Lightroom and Affinity Photo, and is capable of some genuine black magic in the digital darkroom, making him one of the leading authorities on photo editing software and techniques.

