Lightroom hack #10: Correcting perspective corrections!
Lightroom’s automatic perspective/Transform corrections are amazing… except when they’re not. Here’s how to tweak them
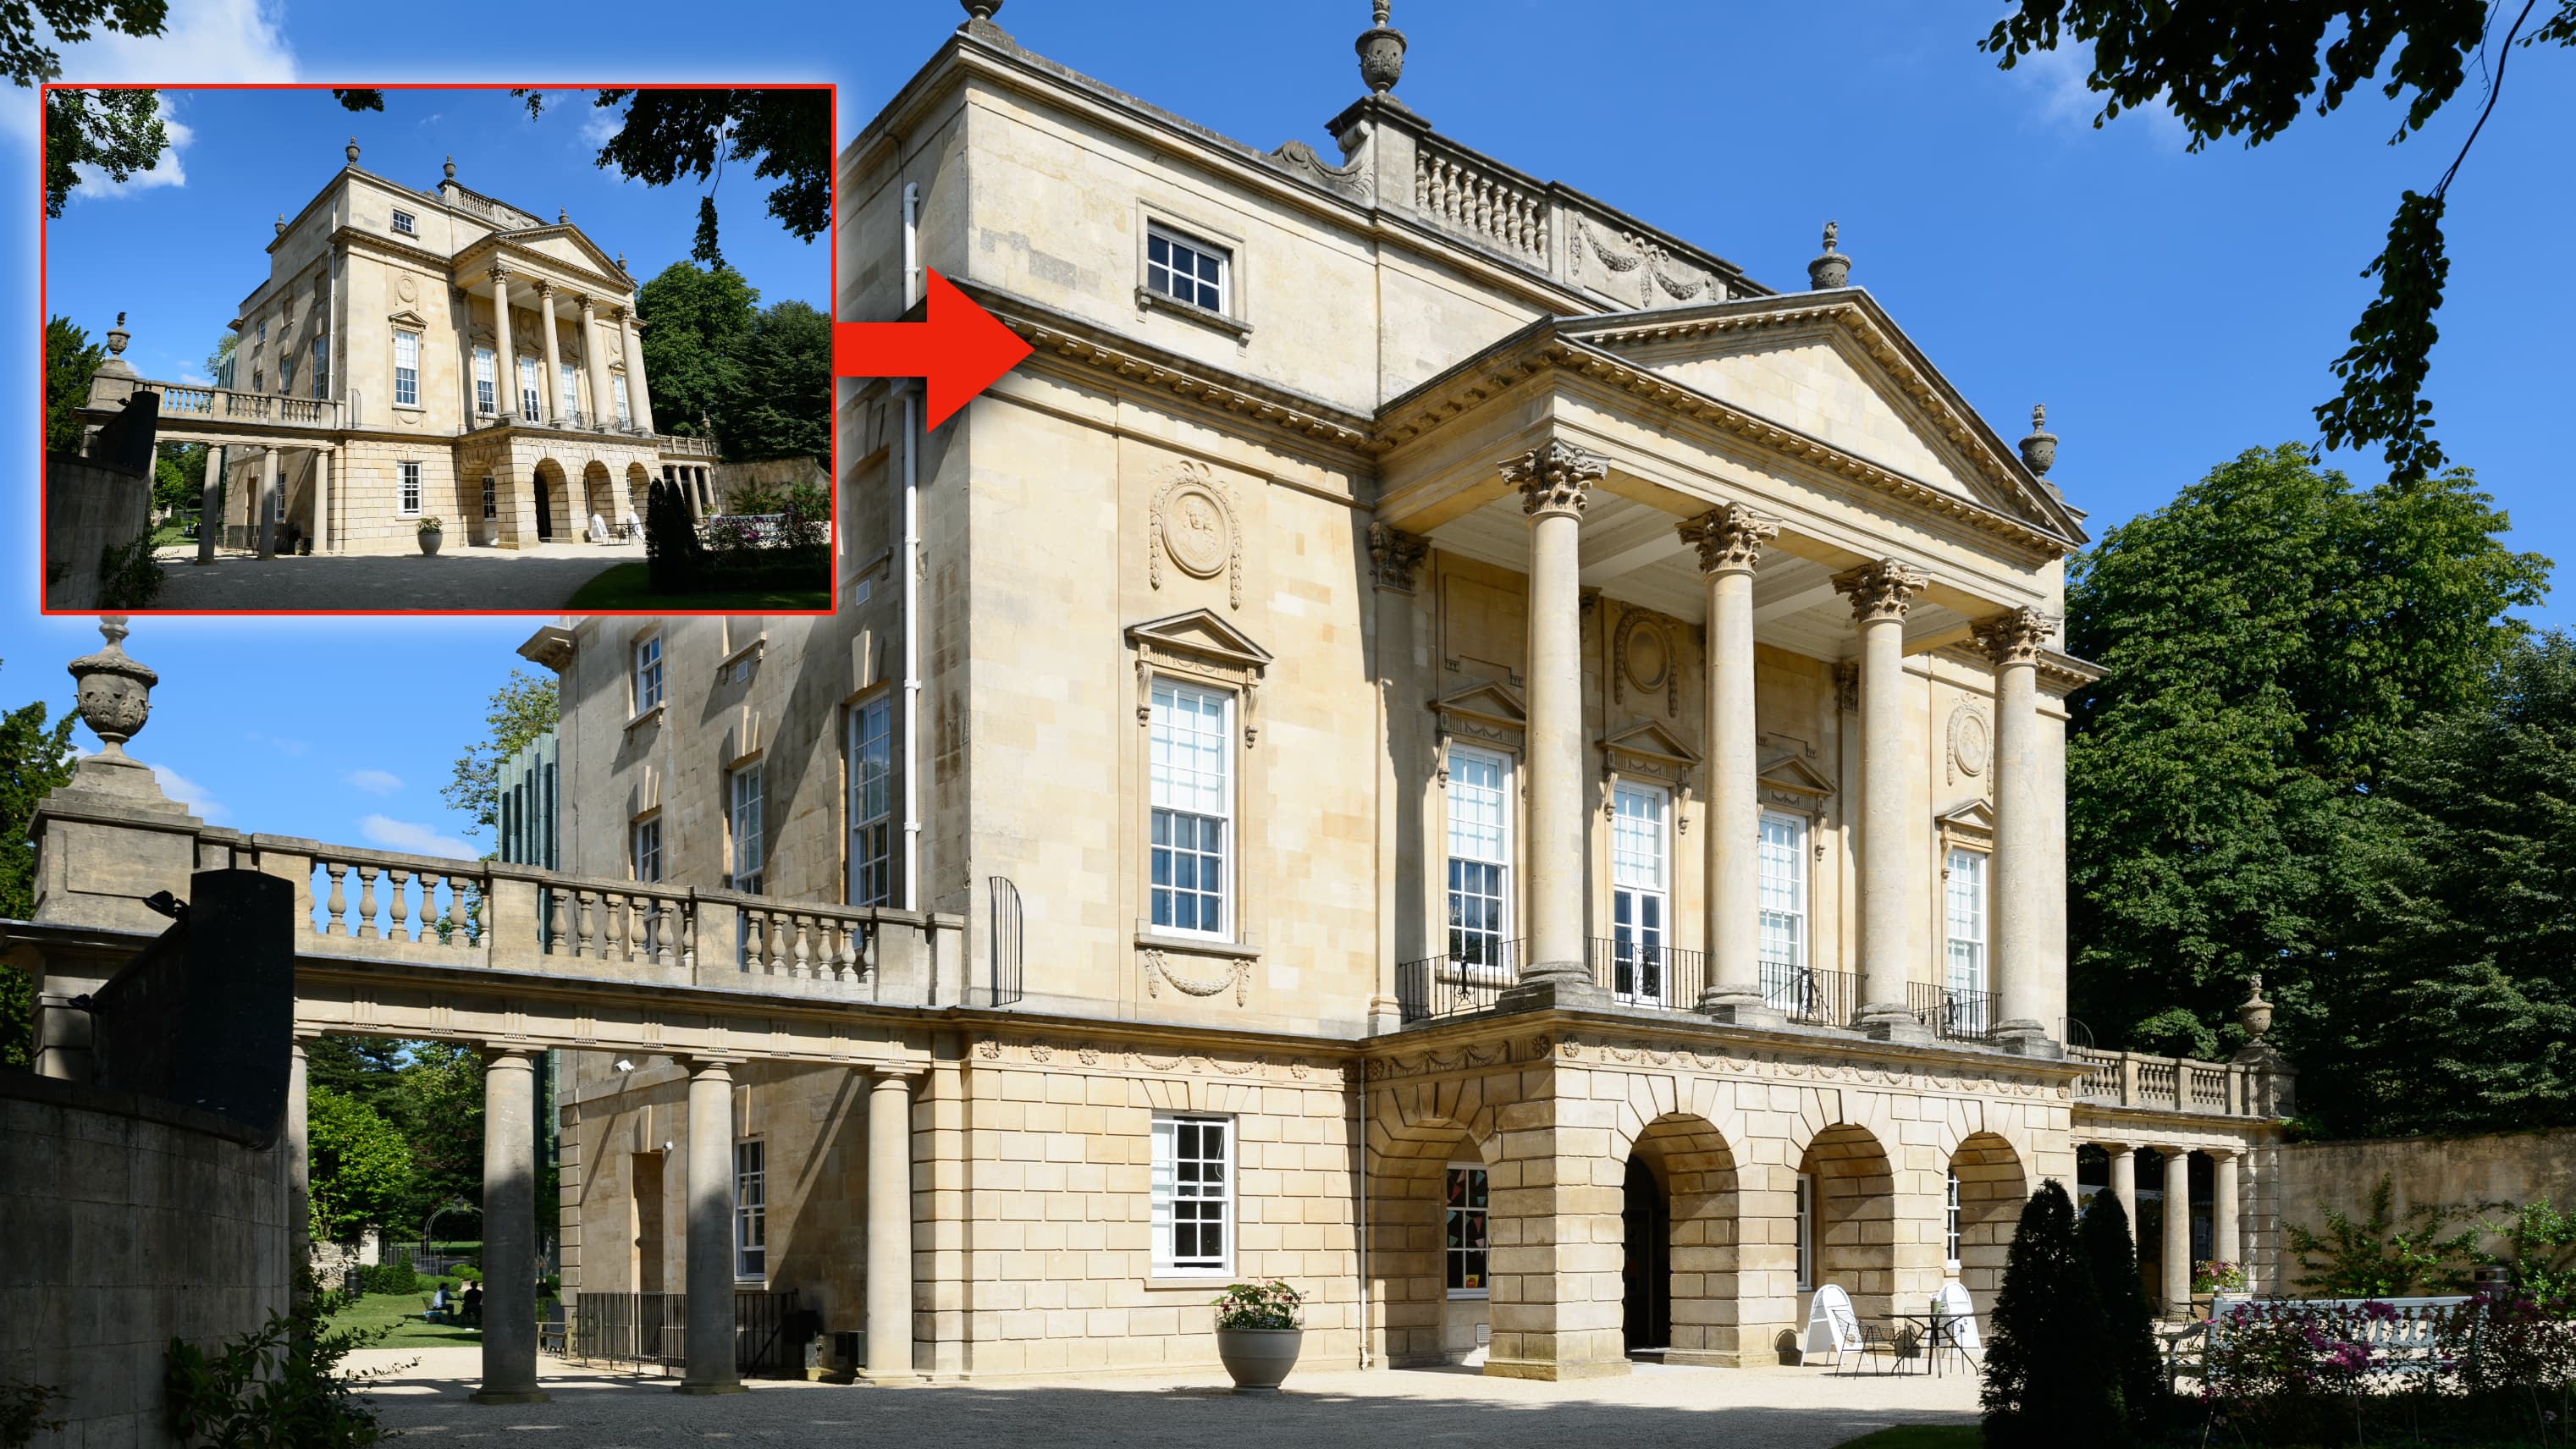
I use Lightroom’s Upright tool all the time. Converging verticals are fine if that’s what you intended as a creative effect, but usually skewed buildings just look amateurish.
We are publishing one hack a day this New Year holiday period, see our other Lightroom Hacks
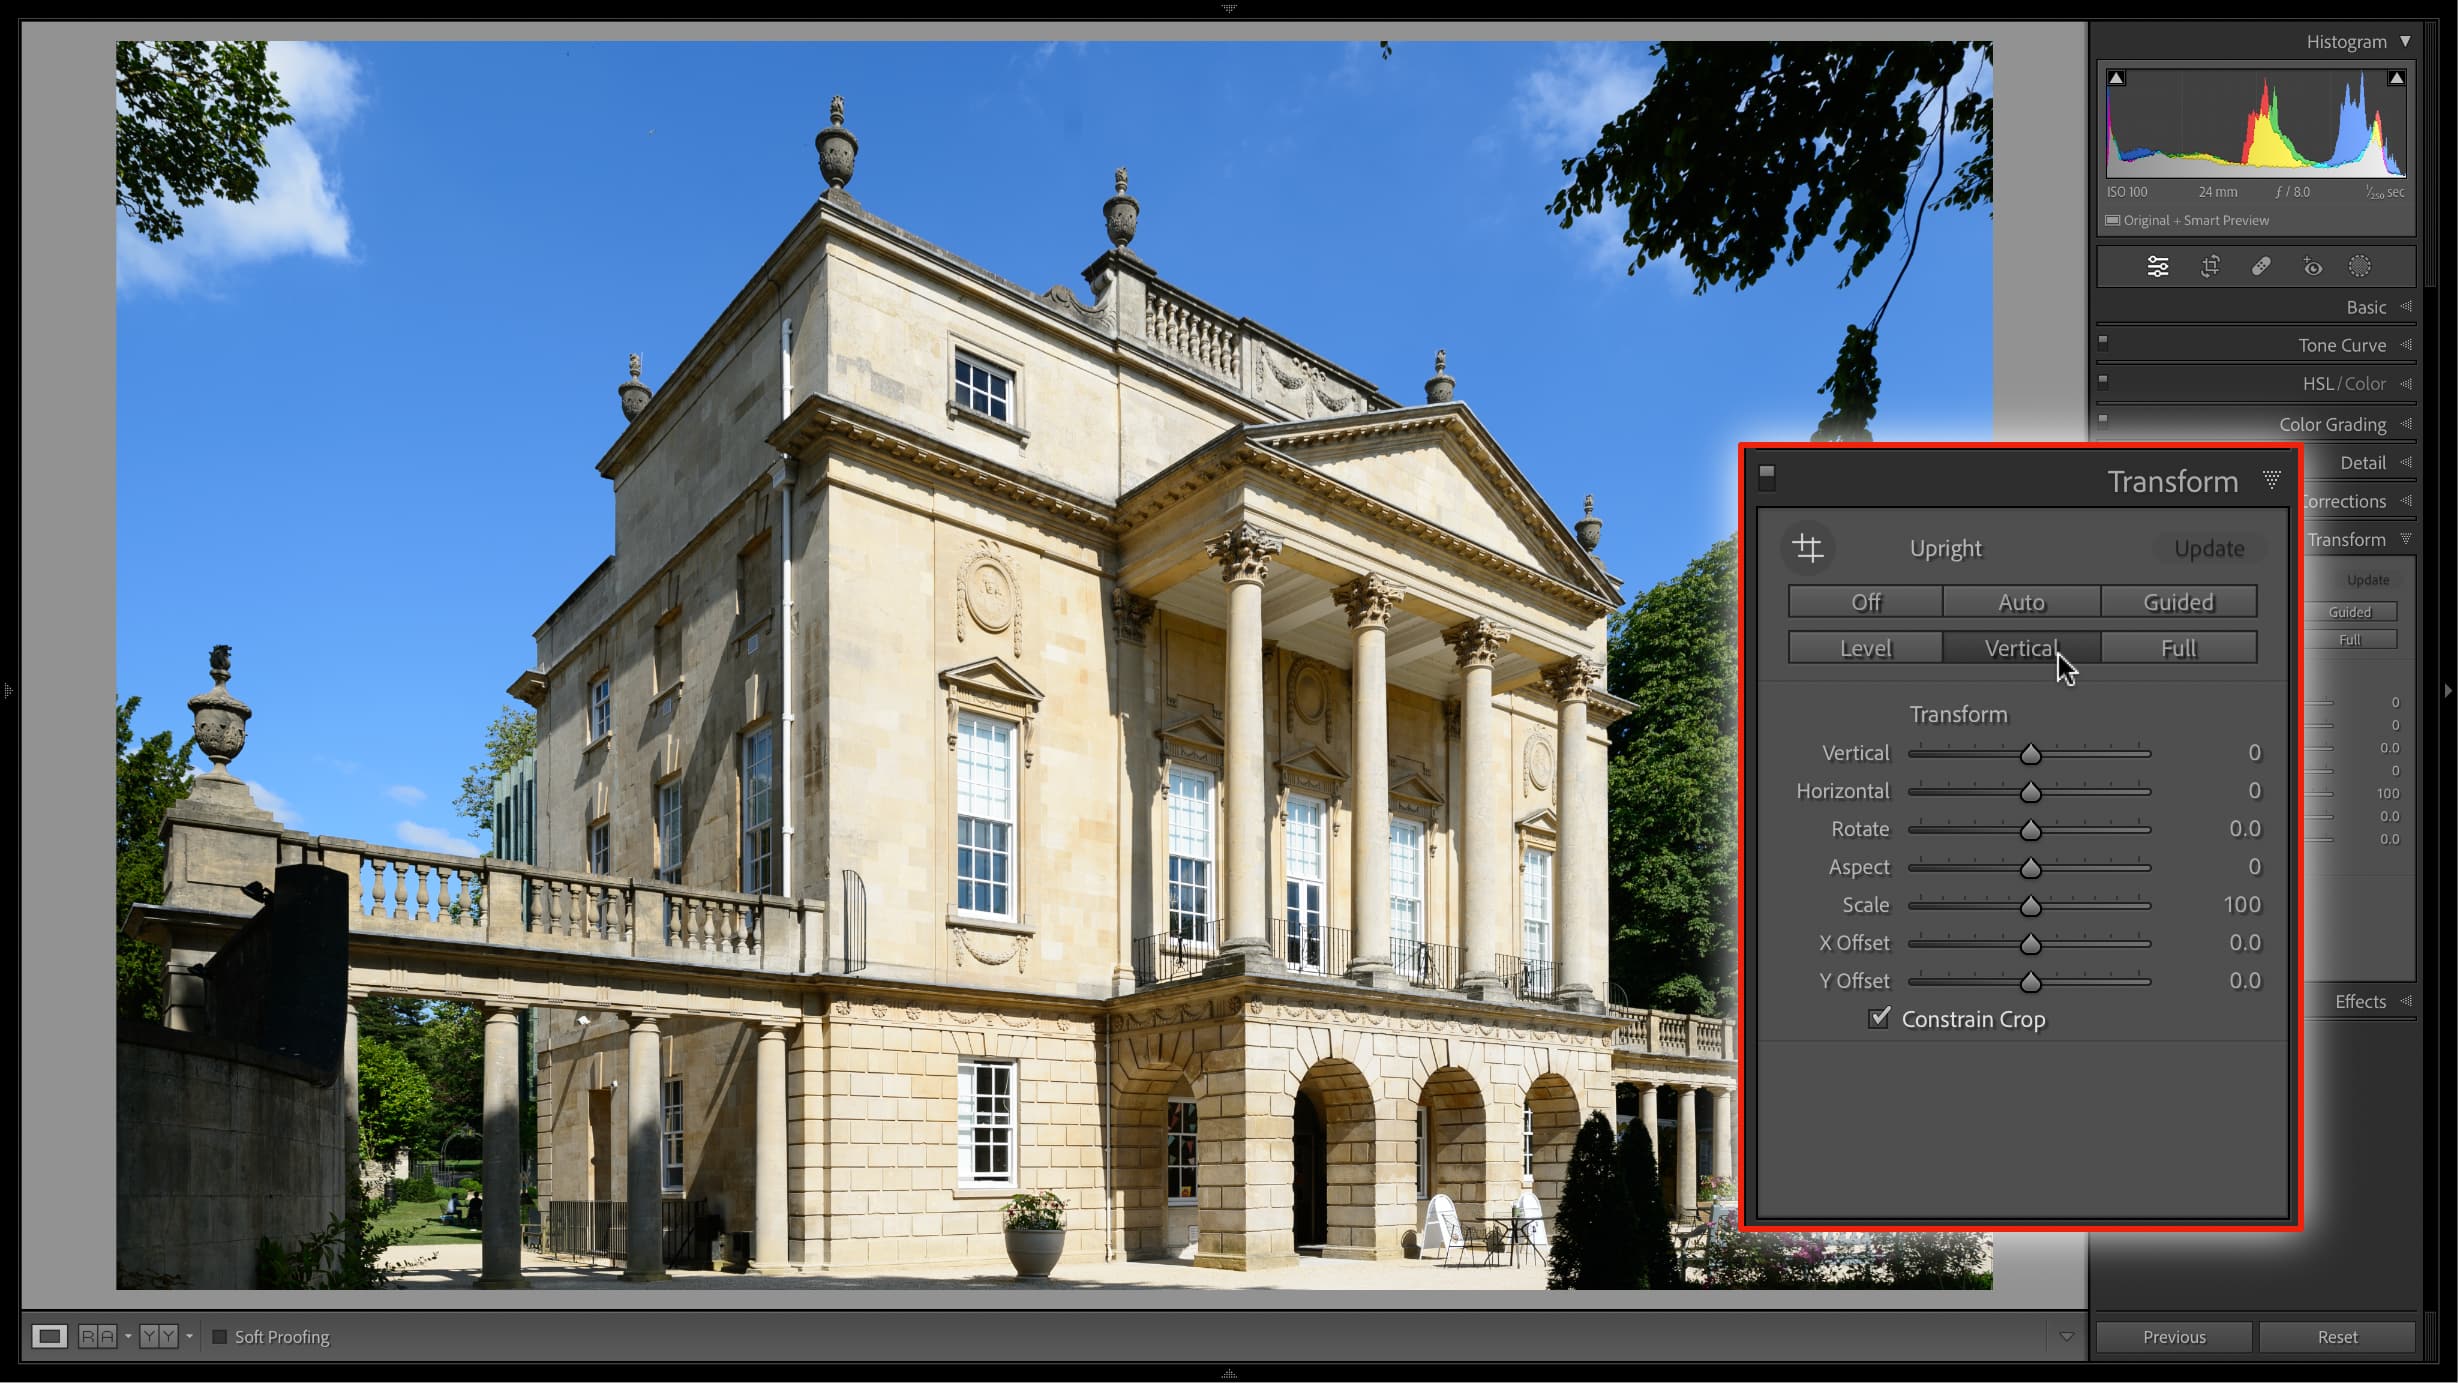
Lightroom’s Transform panel has everything you need to fix perspective issues, including converging verticals, converging horizontals or both at the same time. You can do this manually but, as often as not, Lightroom’s auto perspective adjustments are smart enough to do it for you.
But not this time. The automatic vertical correction has worked, but the building now looks artificially elongated vertically and almost ‘overcorrected’. This is one of the issues with correcting tall buildings. You almost have to leave in just a little convergence for the human eye to accept the perspective.
The other big issue is that we’ve lost a lot of the image to the perspective crop, and while this is inevitable to a degree with all digital perspective corrections, we may still be able too improve this a little.
So there’s a lot going on here, but it can all be addressed in the Transform panel.
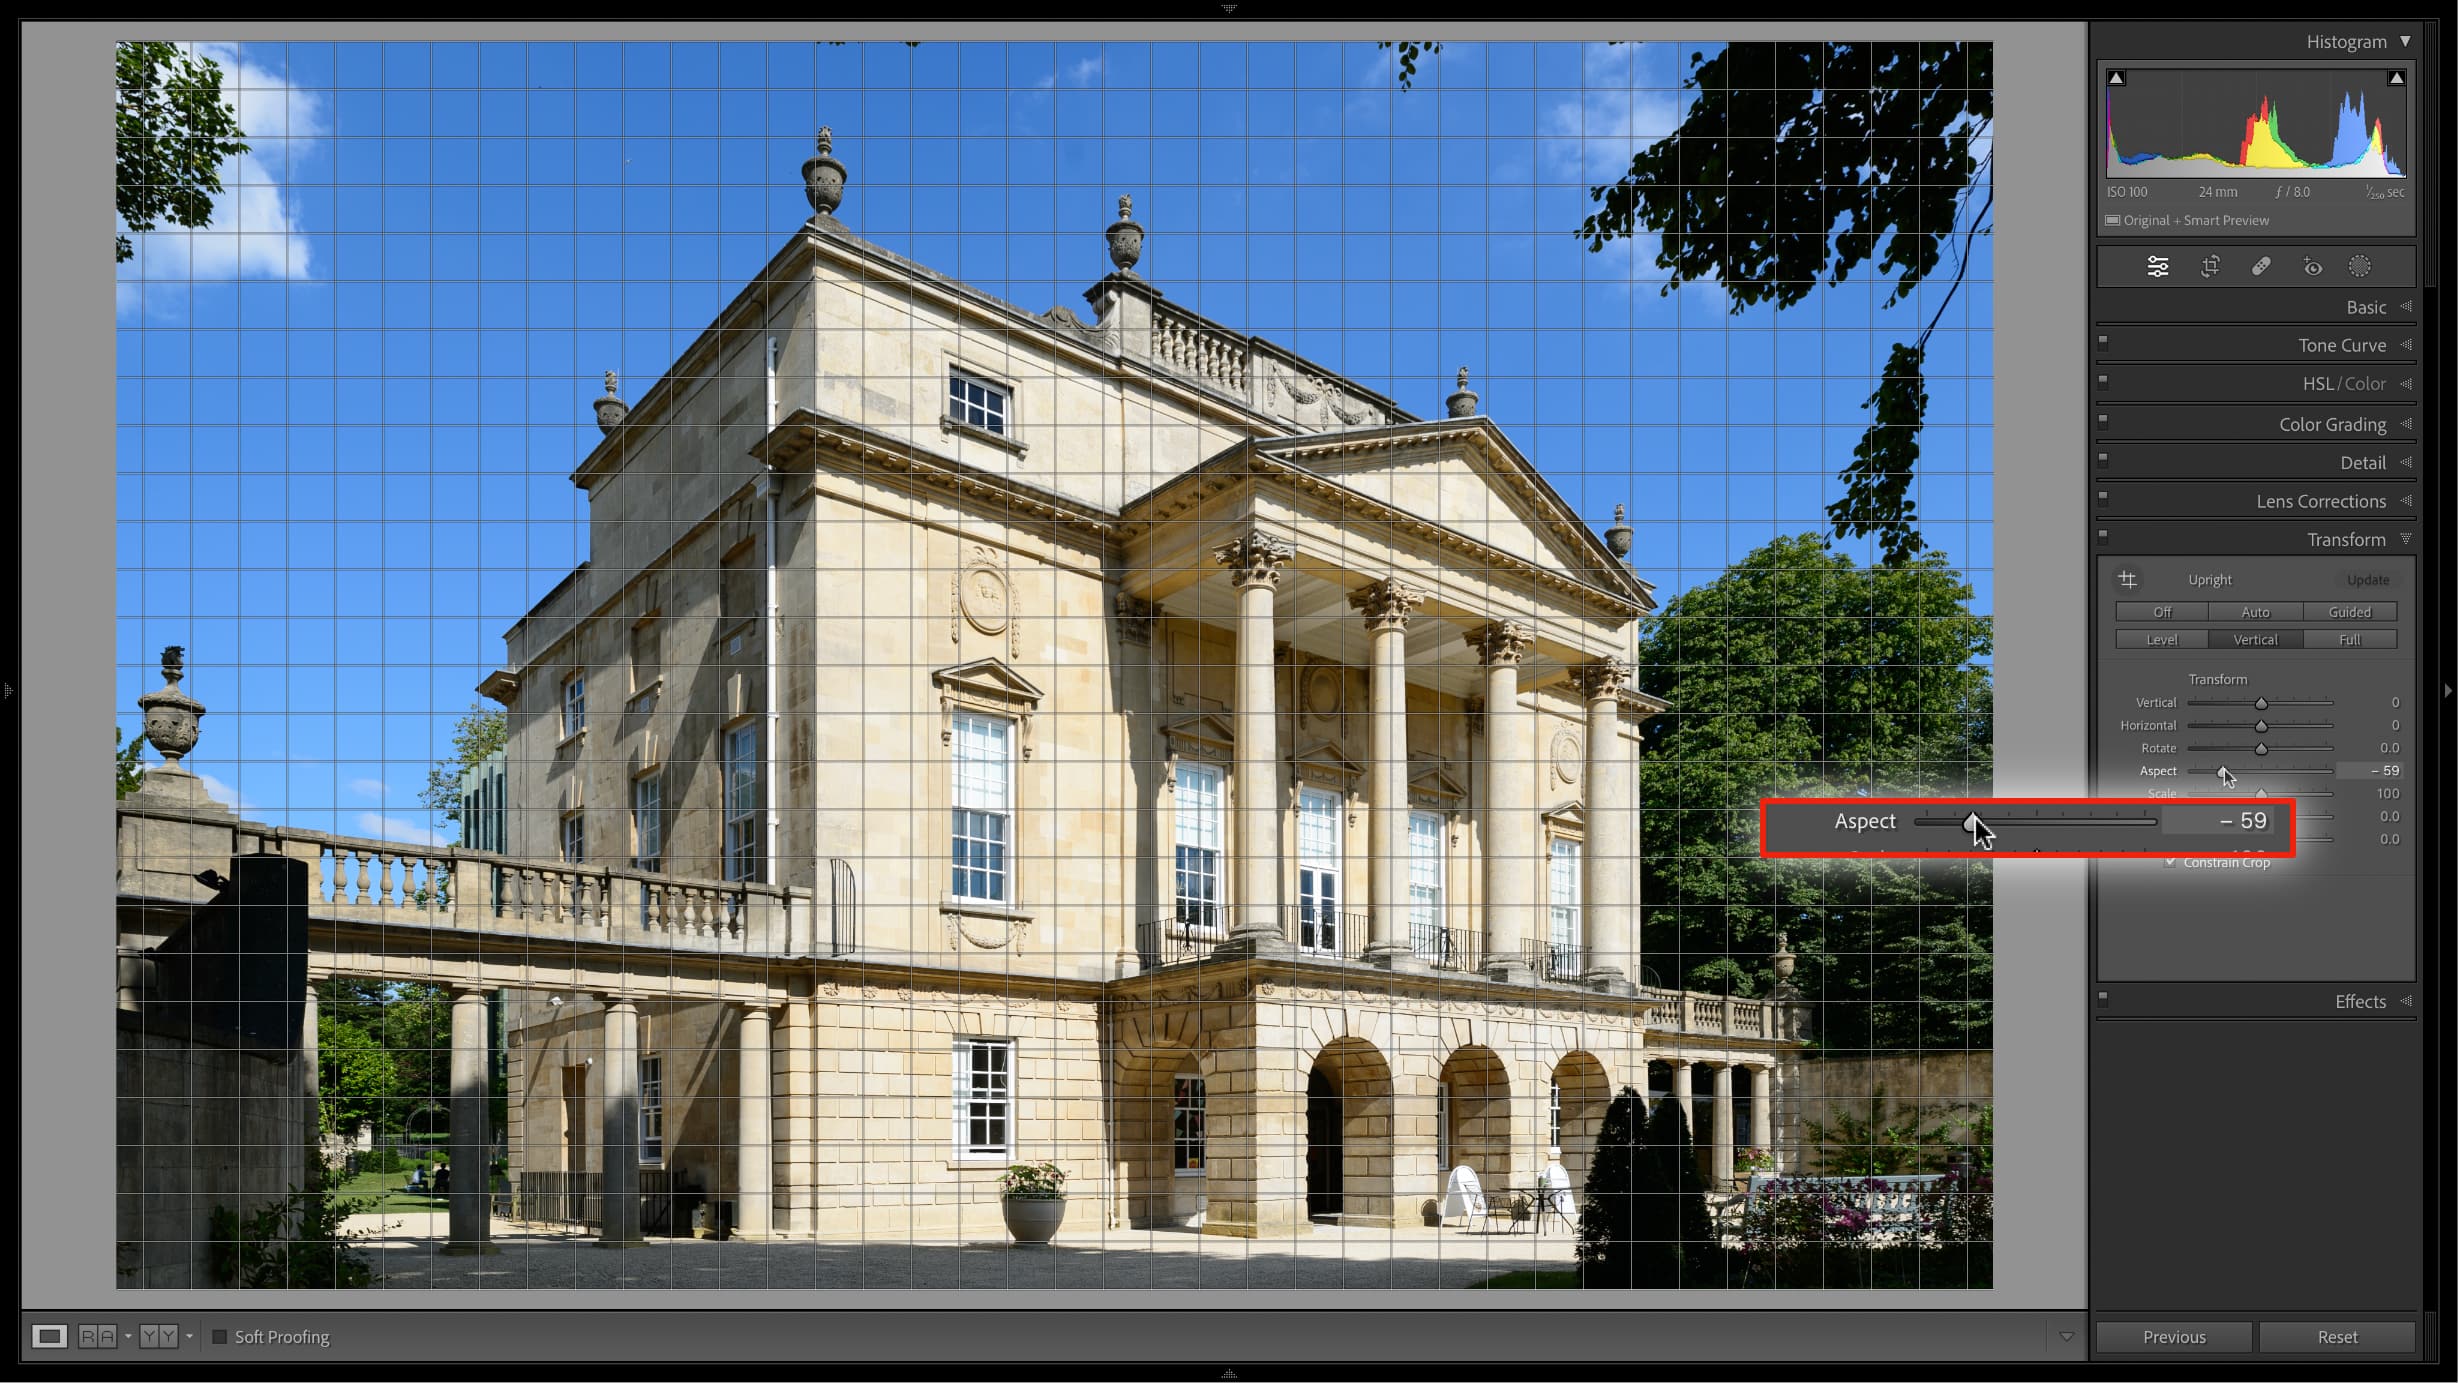
First of all, I’m not quite happy with the building’s height. I’m sure it’s technically correct but to me it just doesn’t look right. I can fix this with the Aspect slider. Reducing the Aspect value reduces the height of the building to a more natural-looking level (to me) and also helps with the rather tight crop.
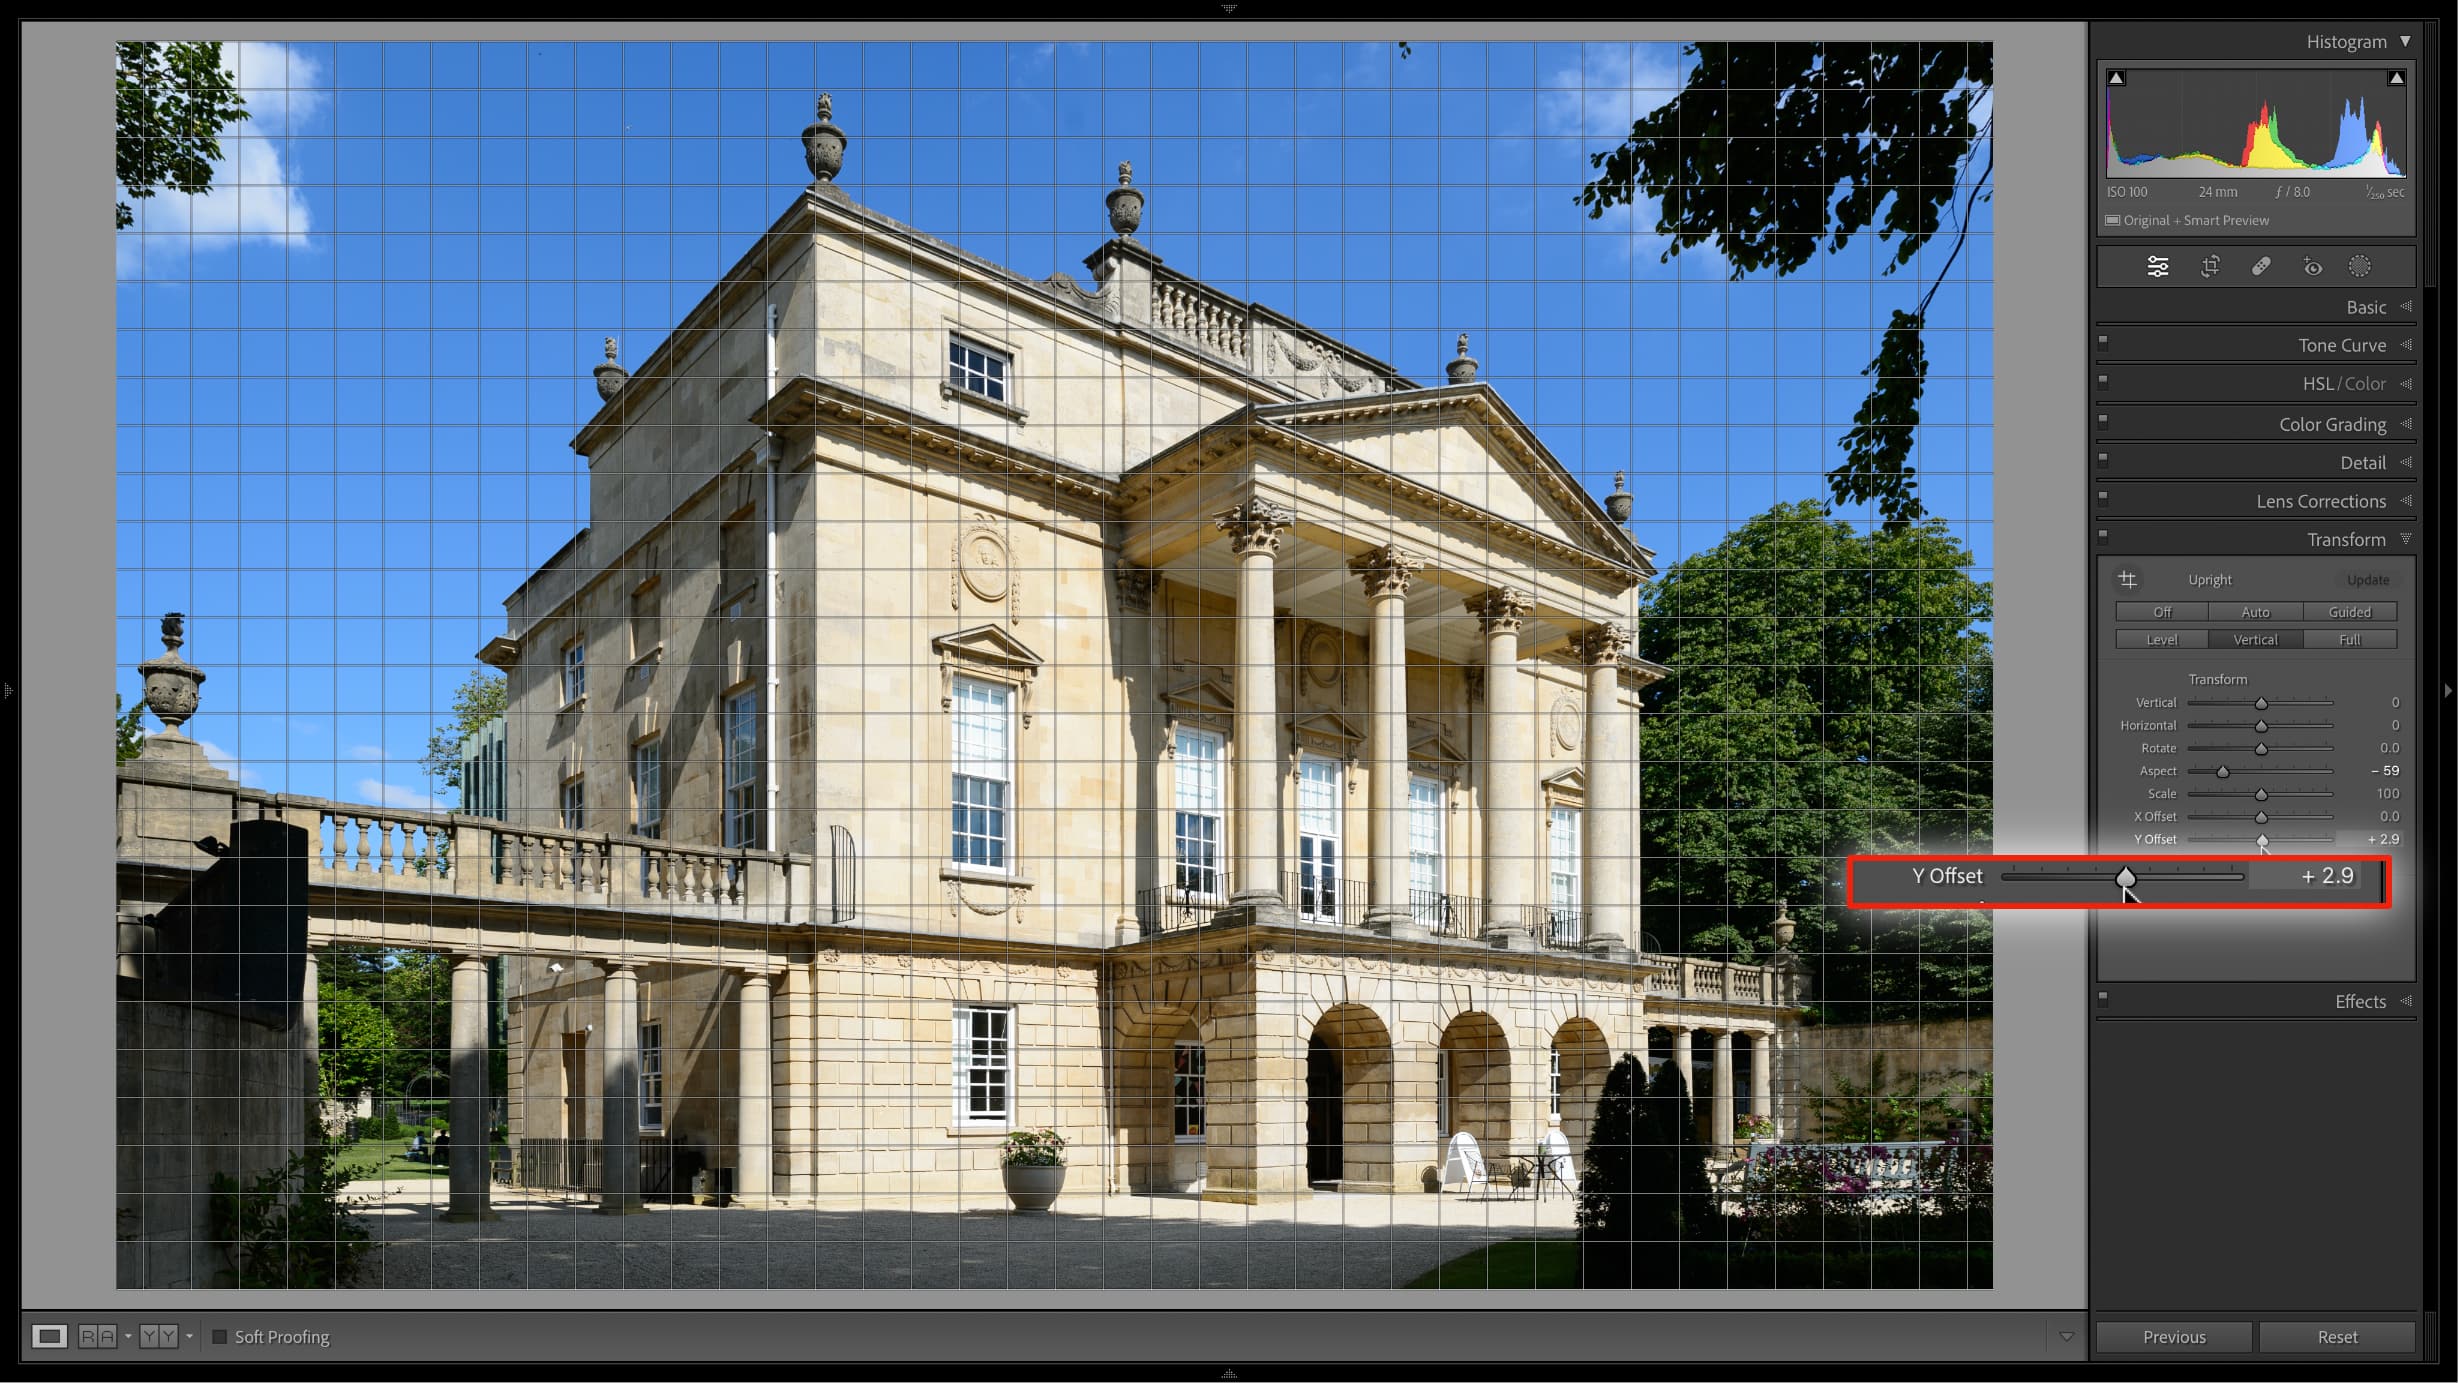
I also think the current crop is too ‘high’. I want to see more of the foreground, just to give the picture a proper ‘base’, and I can do this by adding a ‘Y offset’. This moves the building up in the frame and, while the. range of movement is limited, there’s more scope than you might expect and the Transform tool will re-crop the shot if you accidentally include any frame edges.
The best camera deals, reviews, product advice, and unmissable photography news, direct to your inbox!
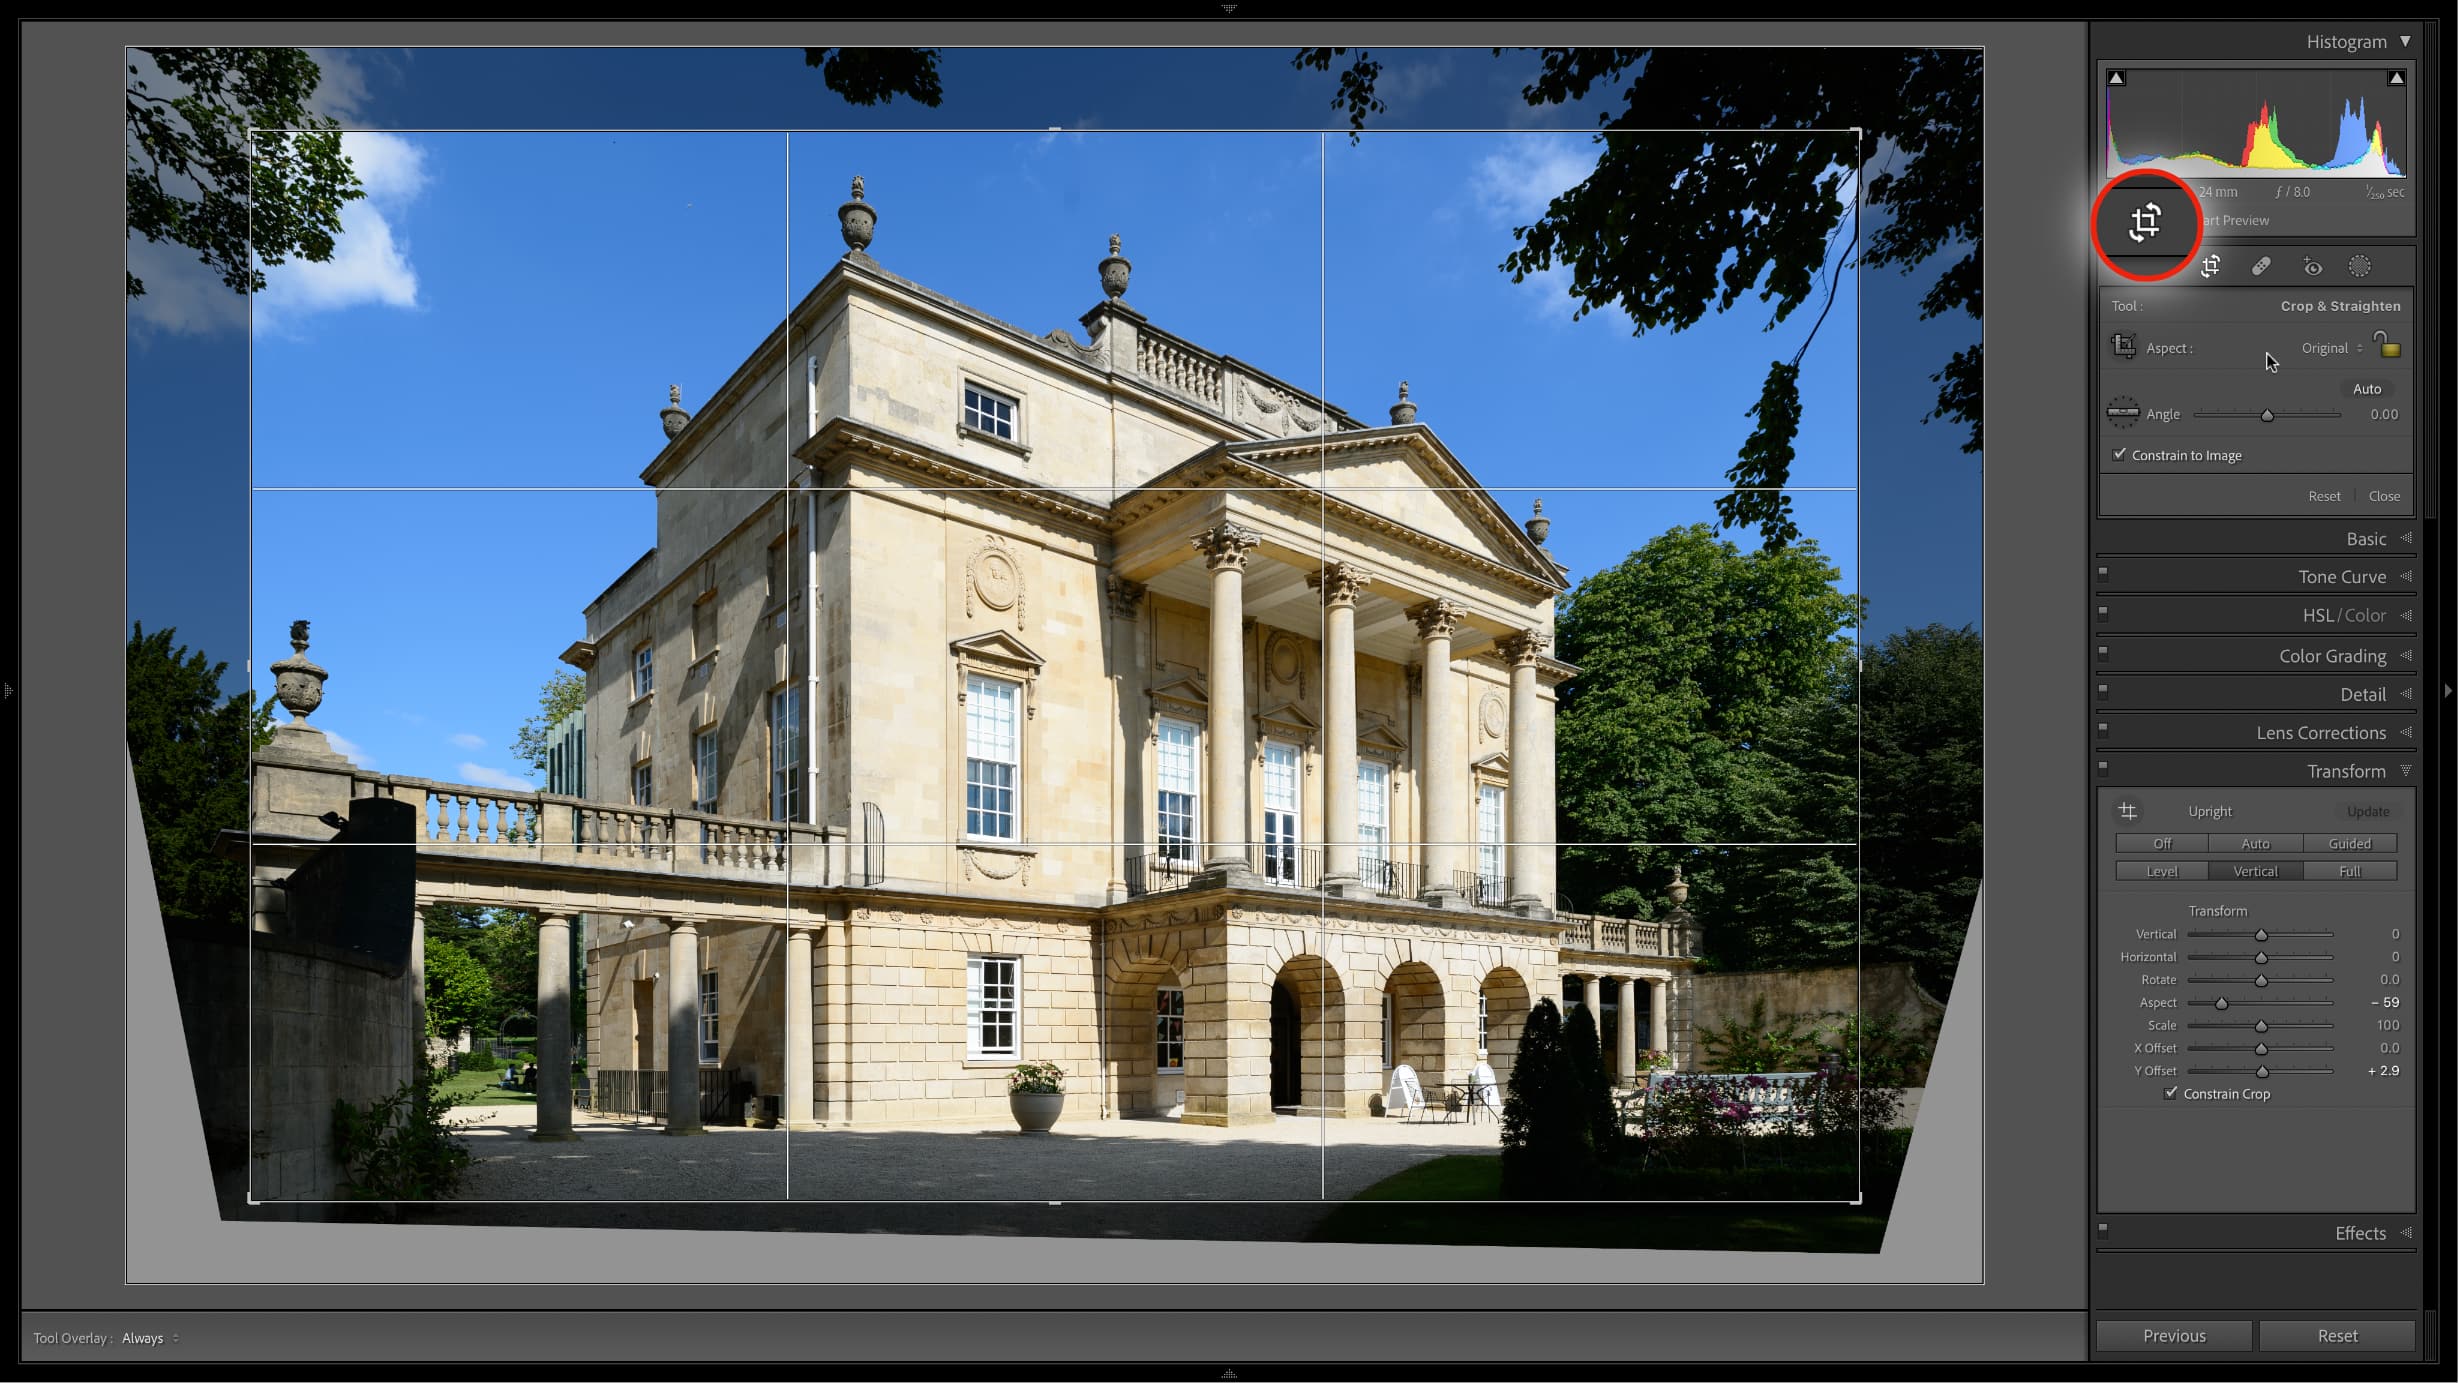
There’s one more thing to check, and that’s the image crop. Very often after perspective Transform corrections there are cropped areas of the image left unused, and that’s exactly what’s happened here. There is more of the image outside the current crop that I can include – and if you’re not constrained to a specific aspect ratio, you have even more scope for including the surroundings.
Read more:
• Best photo editing software
• Lightroom review
• Lightroom Classic review

Rod is an independent photography journalist and editor, and a long-standing Digital Camera World contributor, having previously worked as Group Reviews Editor, Head of Testing for the photography division, Technique Editor on N-Photo, and Camera Channel editor on TechRadar, as well as contributing to many other publications.
He has been writing about digital cameras since they first appeared, and before that began his career writing about film photography. He has used and reviewed practically every interchangeable lens camera launched in the past 20 years, from entry-level DSLRs to medium format cameras.
Rod has his own camera gear blog at fotovolo.com but also writes about photo-editing applications and techniques at lifeafterphotoshop.com.
