How to record everything you see on your iPhone’s screen as a movie – and it's easy!
There is a way, thanks to a 'hidden app' which you can activate via your iPhone's settings. How useful is that!
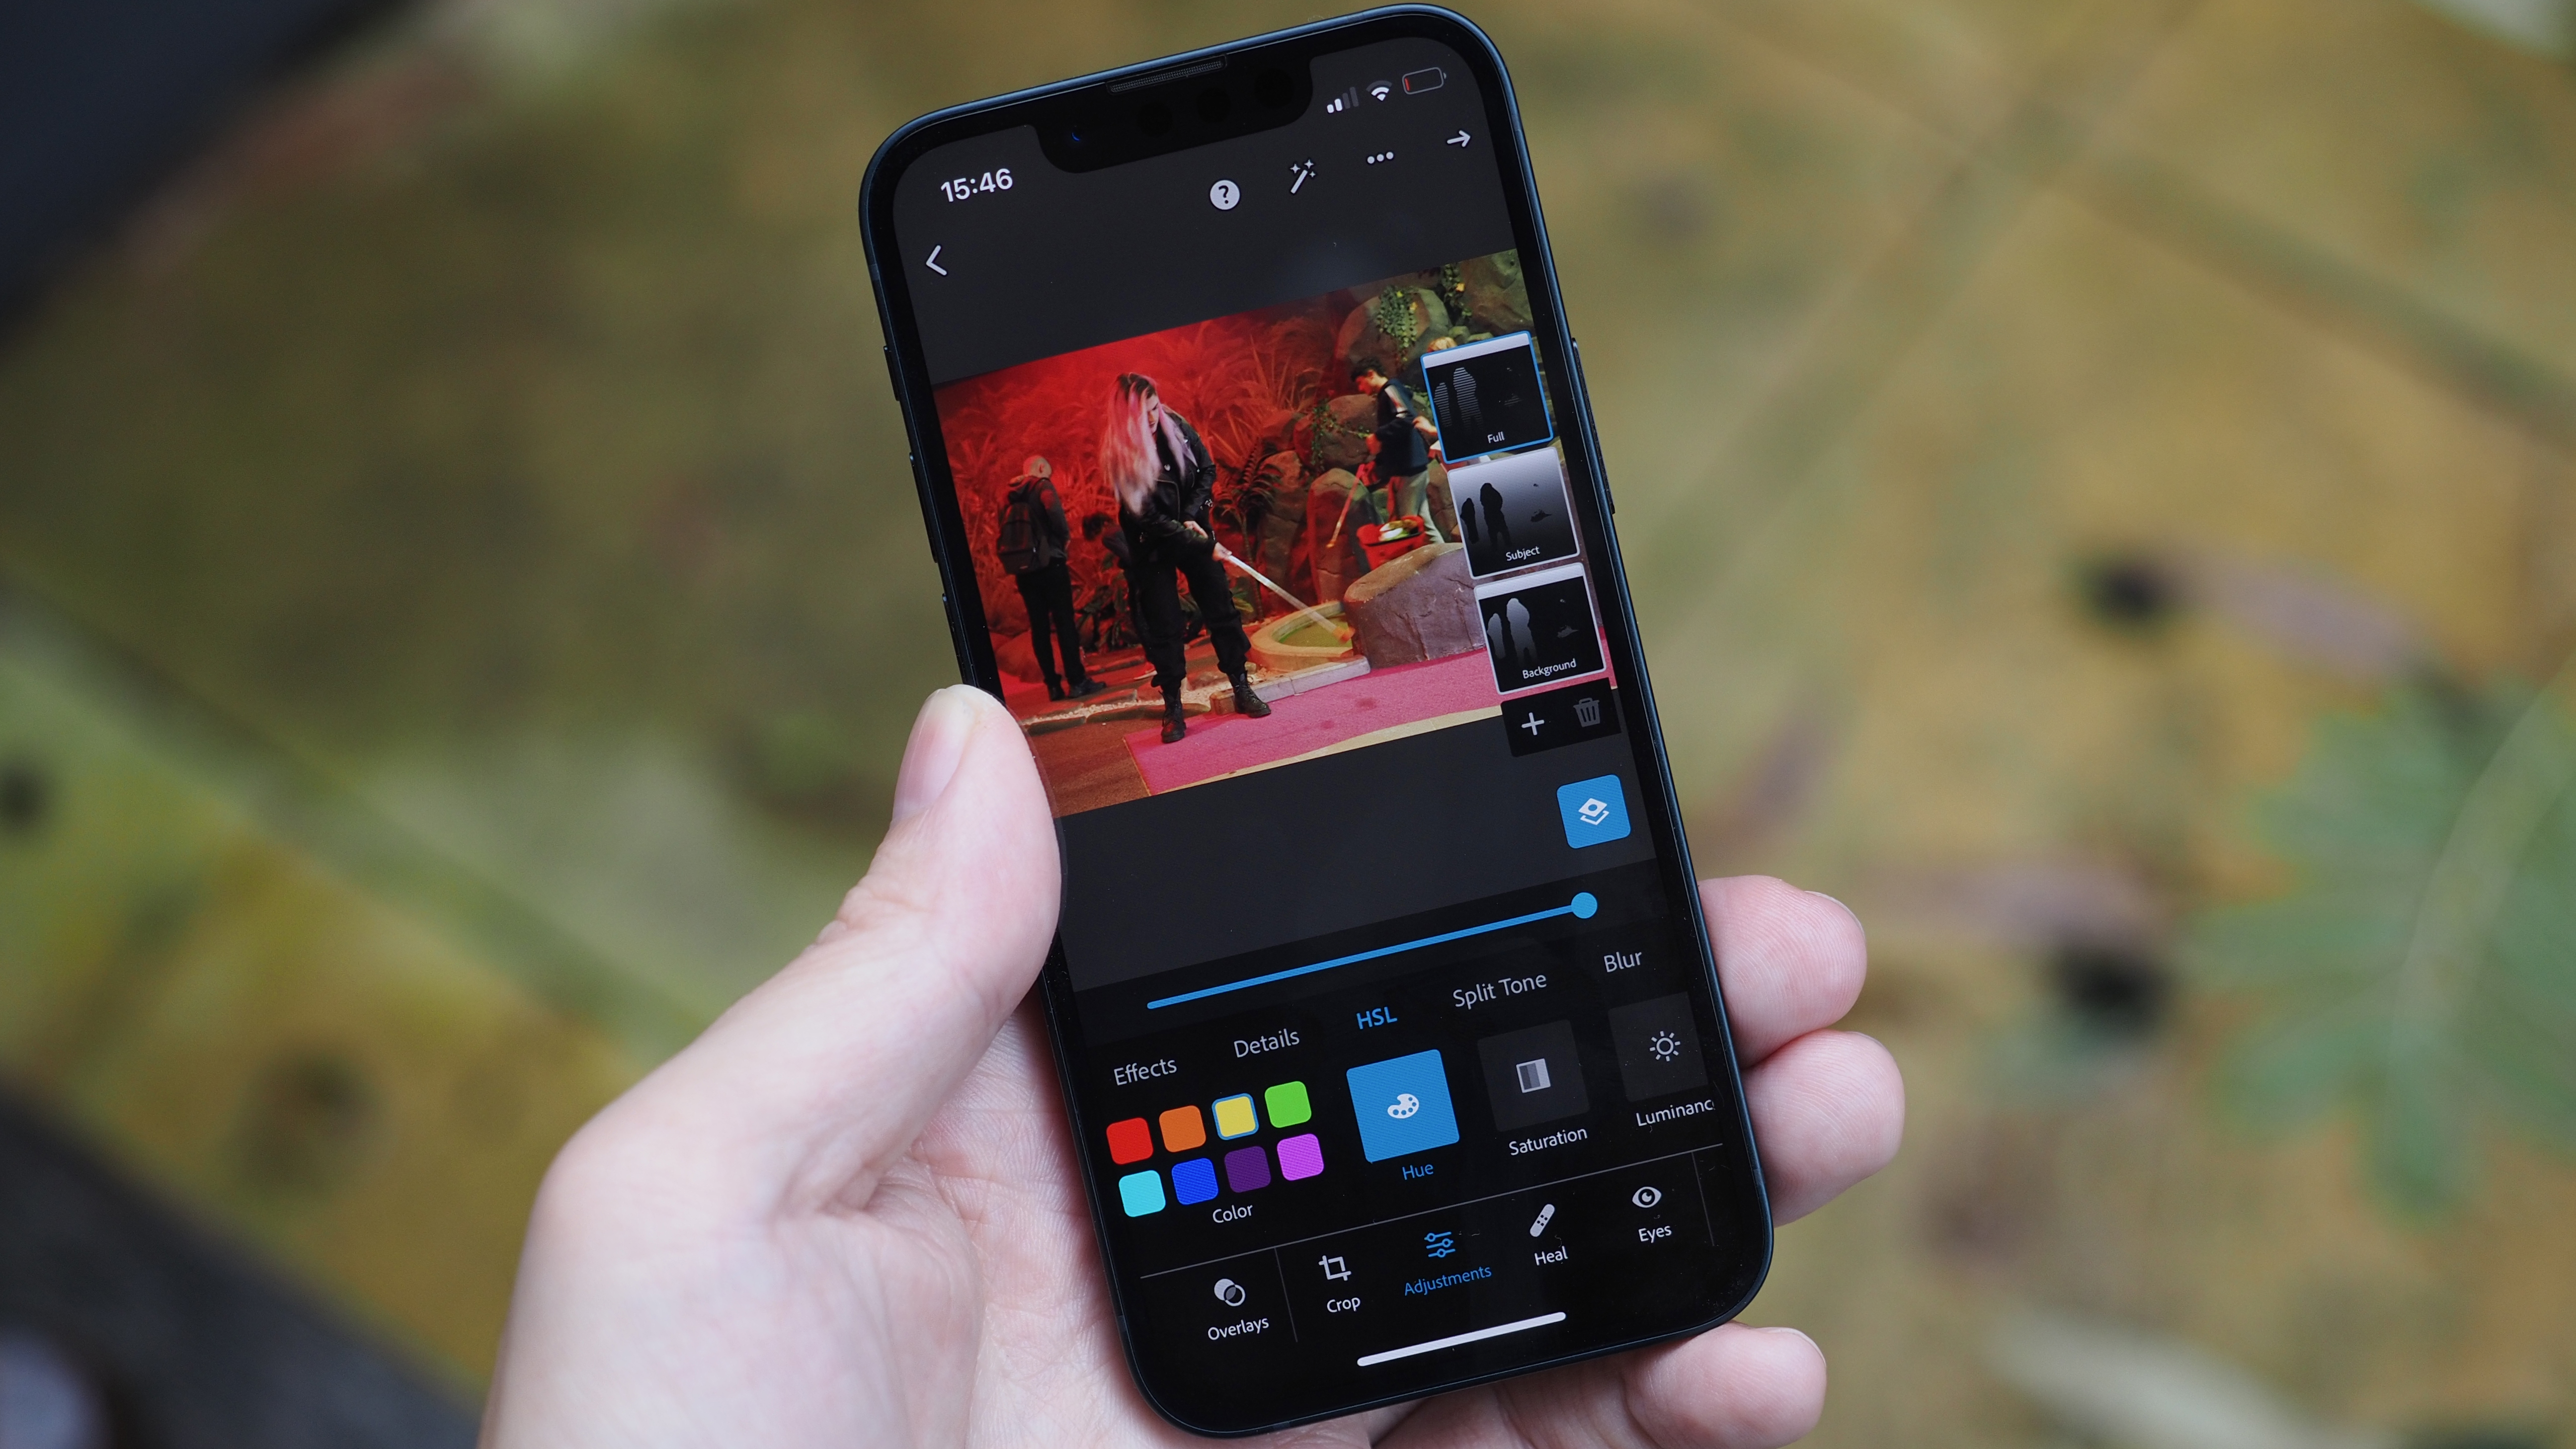
Sometimes it's really useful to be able to record what's happening on your iPhone's screen, whether you want to show other people or if you're a photography journalist who needs to show a process or an app on the iPhone.
Most of us know how to take a still snapshot of our iPhone’s screen by pressing the Side and Volume Up Buttons at the same time and then releasing them. However, you may not know that your iPhone has a dedicated Screen Recording app that records absolutely everything that you see on screen in real time, enabling you to play it all back as QuickTime movie.
This is useful if you want to demonstrate how to perform a technique with a particular app (such as using Portait mode in Photos) and then share the video to friends or family members.
Because the Screen Recording app also records audio, you can capture the banter in a FaceTime or Zoom meeting.
We’ve ringed key areas below so you can follow our step-by-step screen grabs more easily.
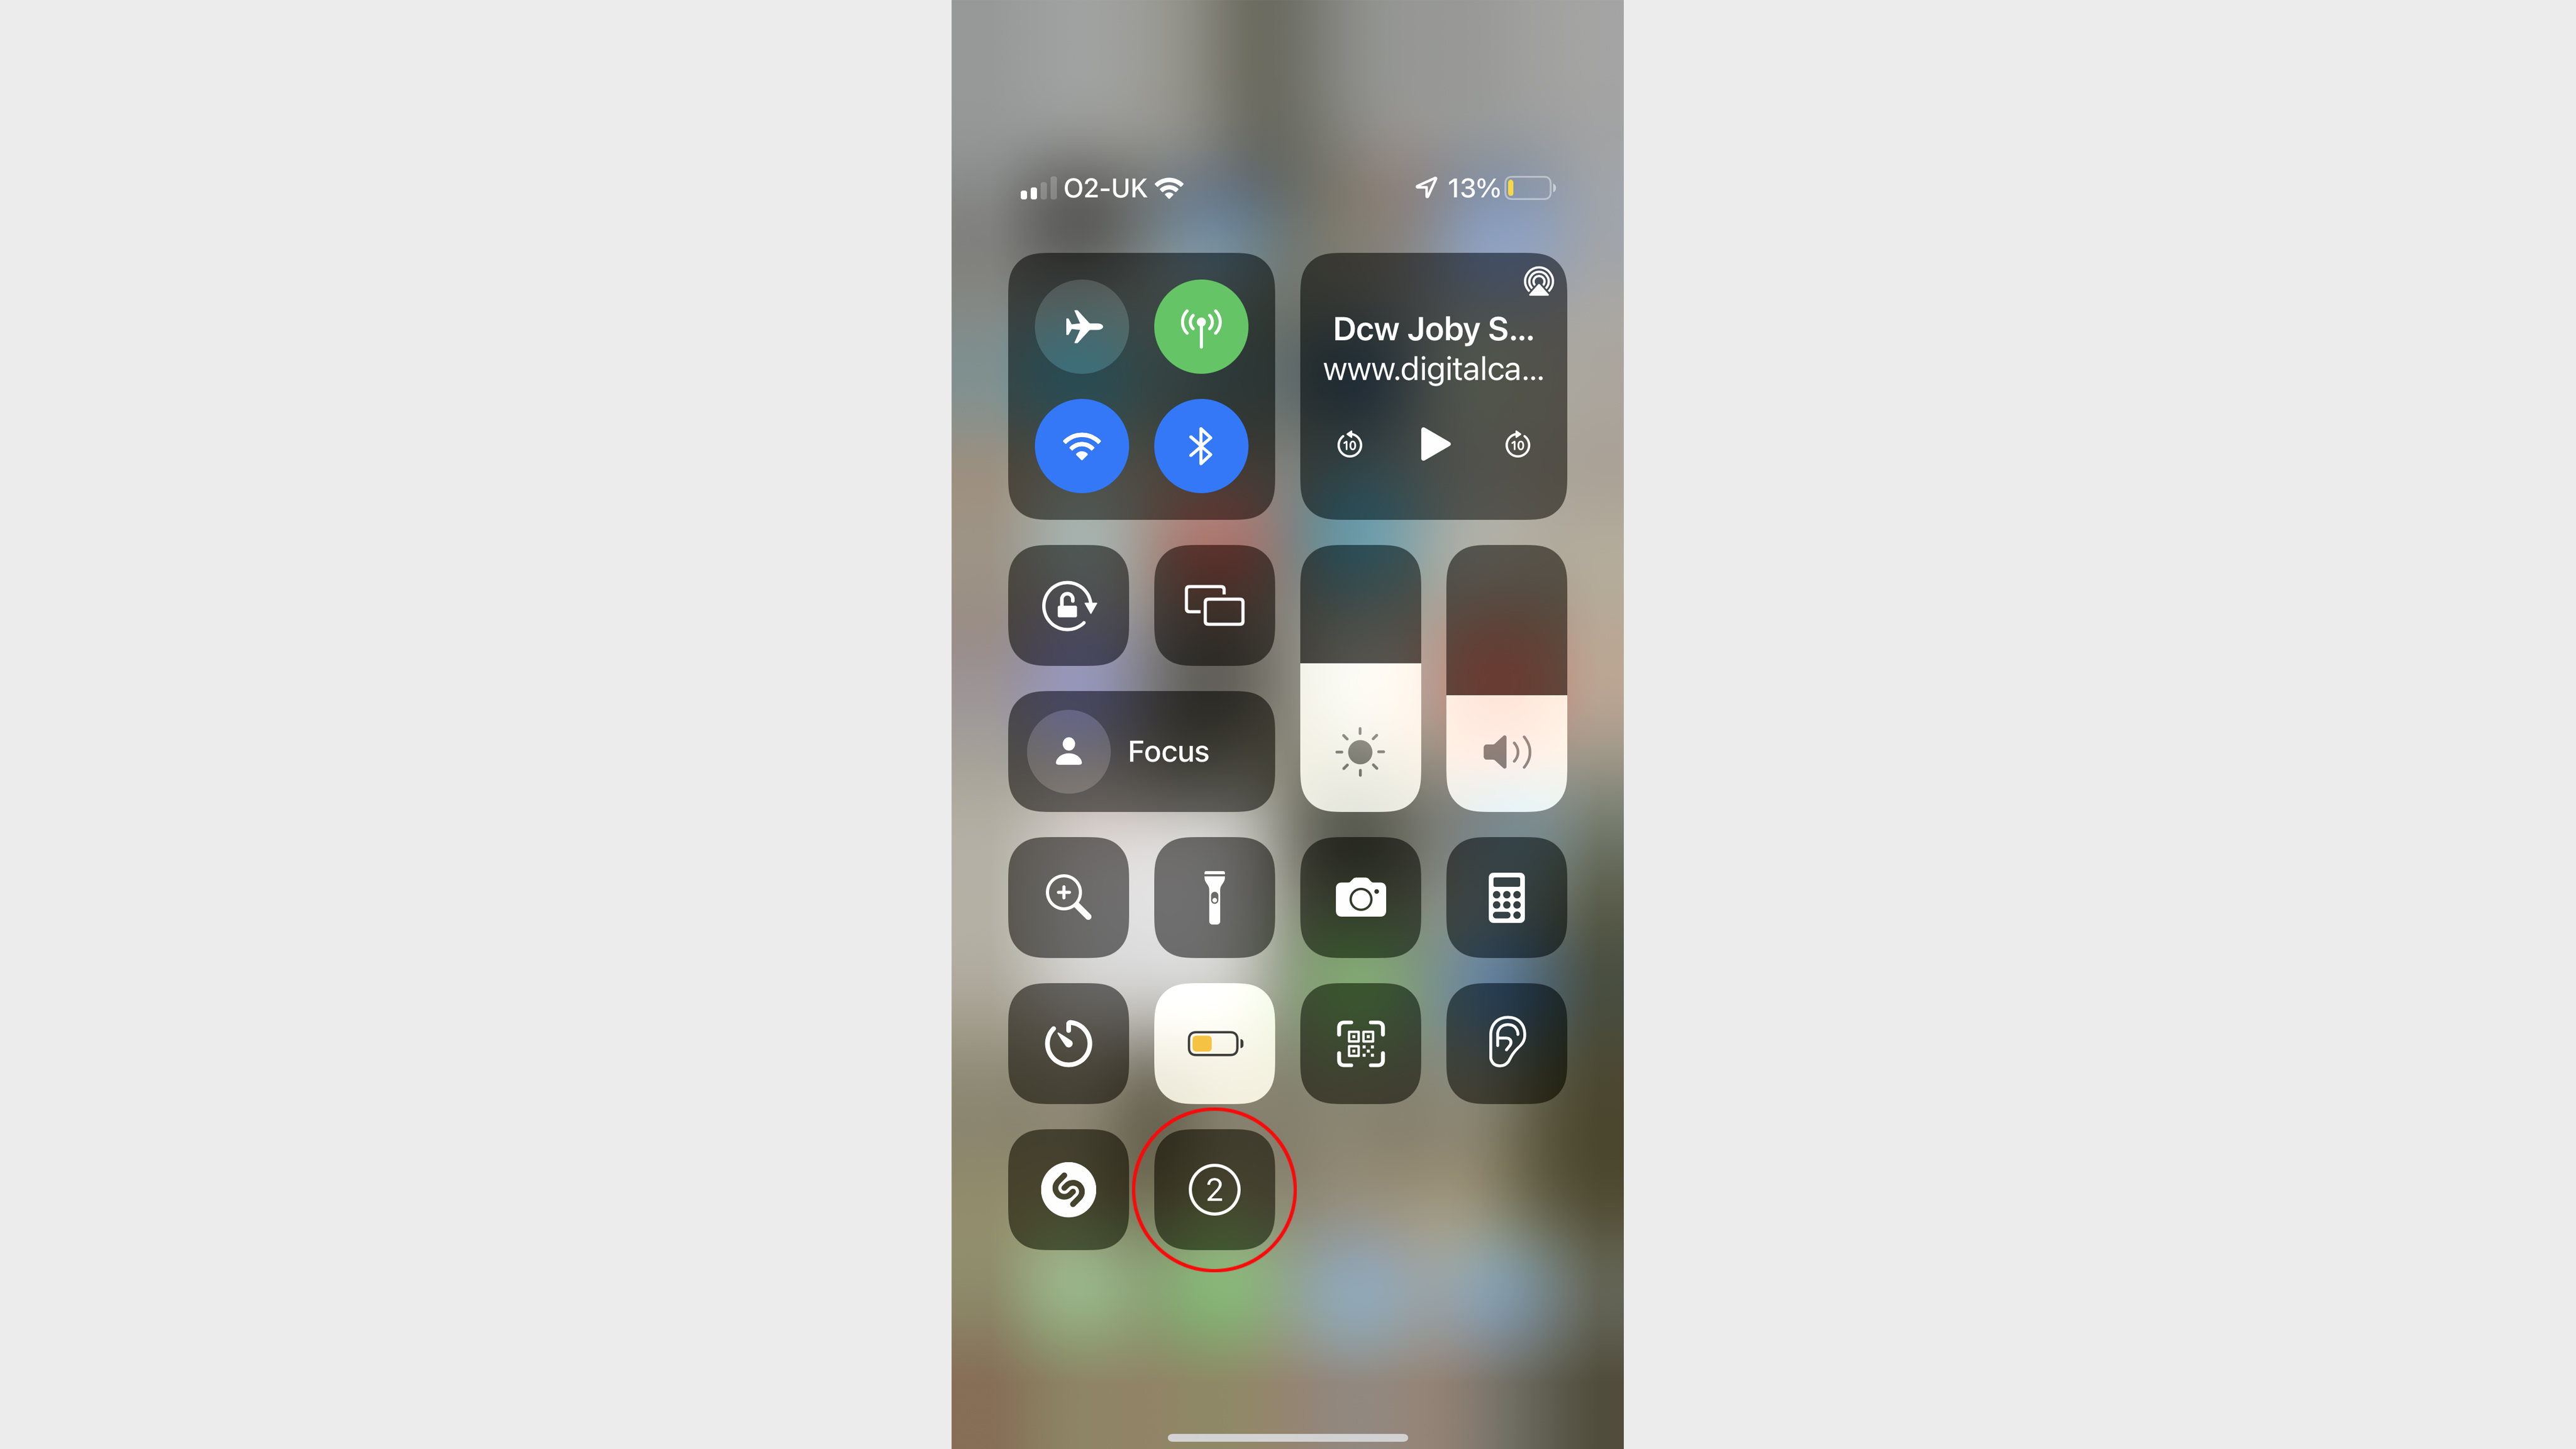
So the first thing to check is whether the screen recording function is already enabled. To do this, swipe down from the top right of your iPhone's screen to show the Control Center.
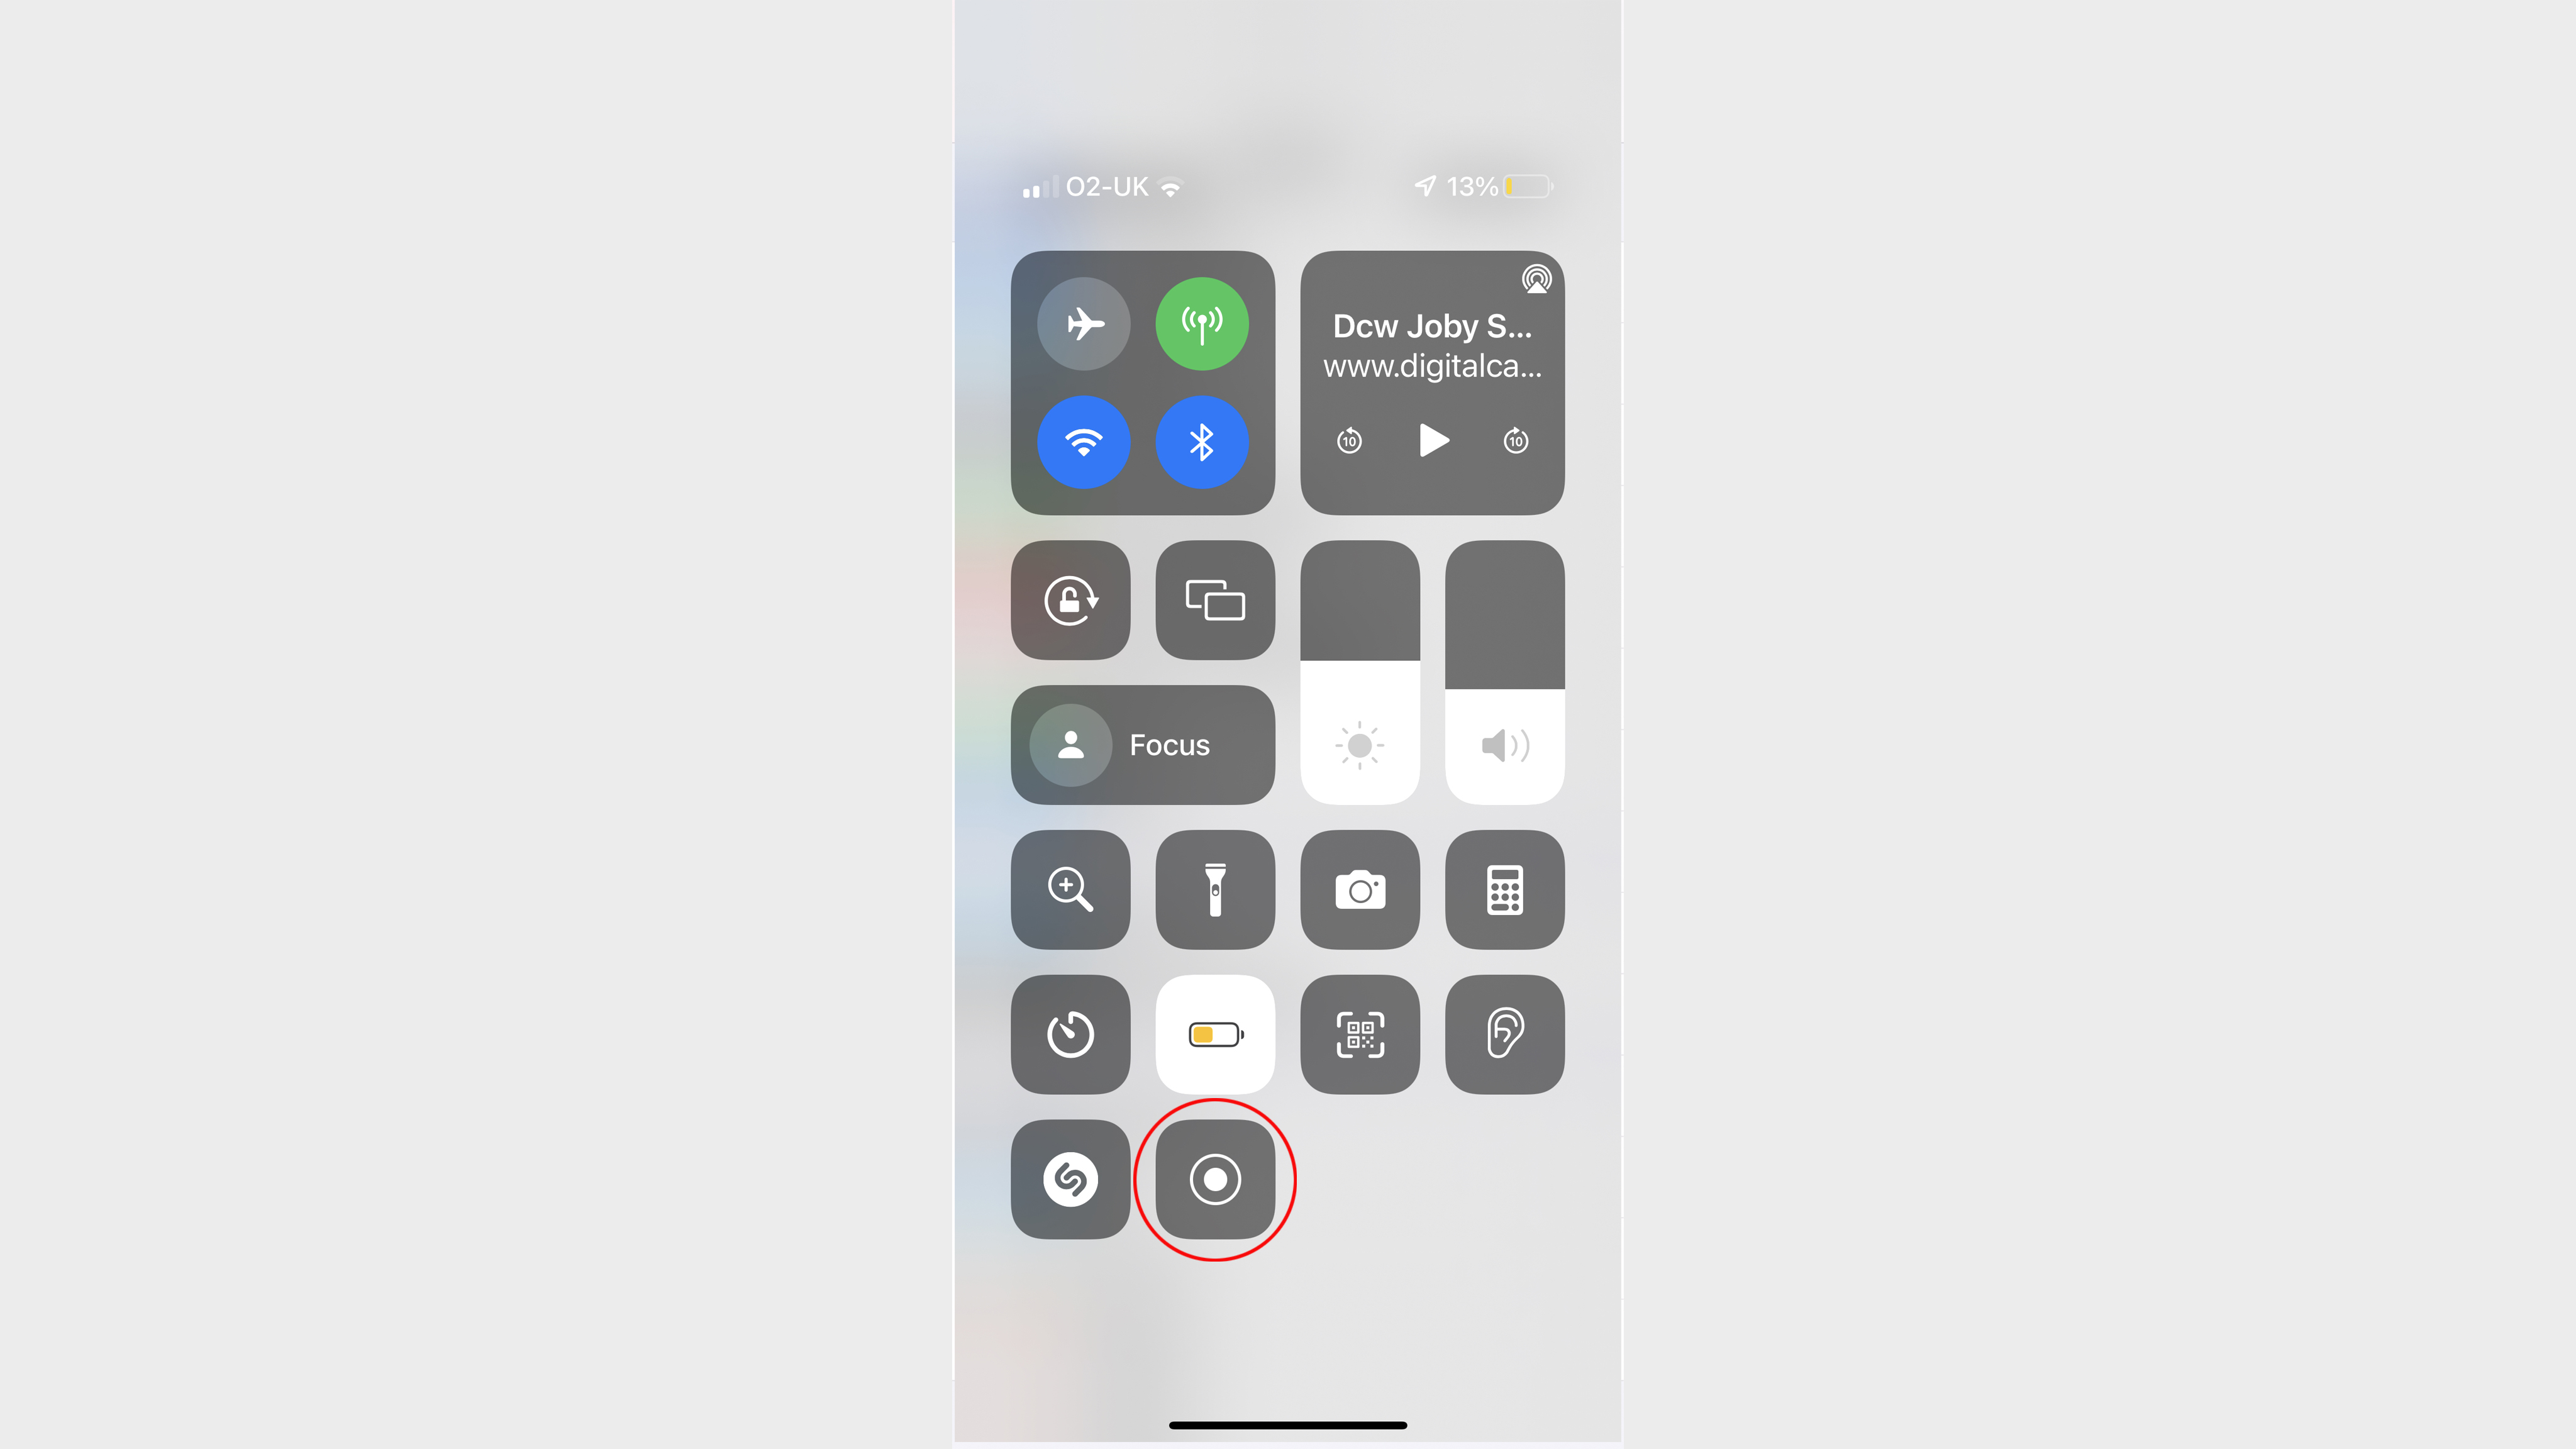
Look for the Screen Recorder app's circular icon – this looks like the generic disc-within-a-circle record icon you see on cameras and devices everywhere. If you don't see this, you need to add it, so here's how.
The best camera deals, reviews, product advice, and unmissable photography news, direct to your inbox!
How to enable iPhone screen recording
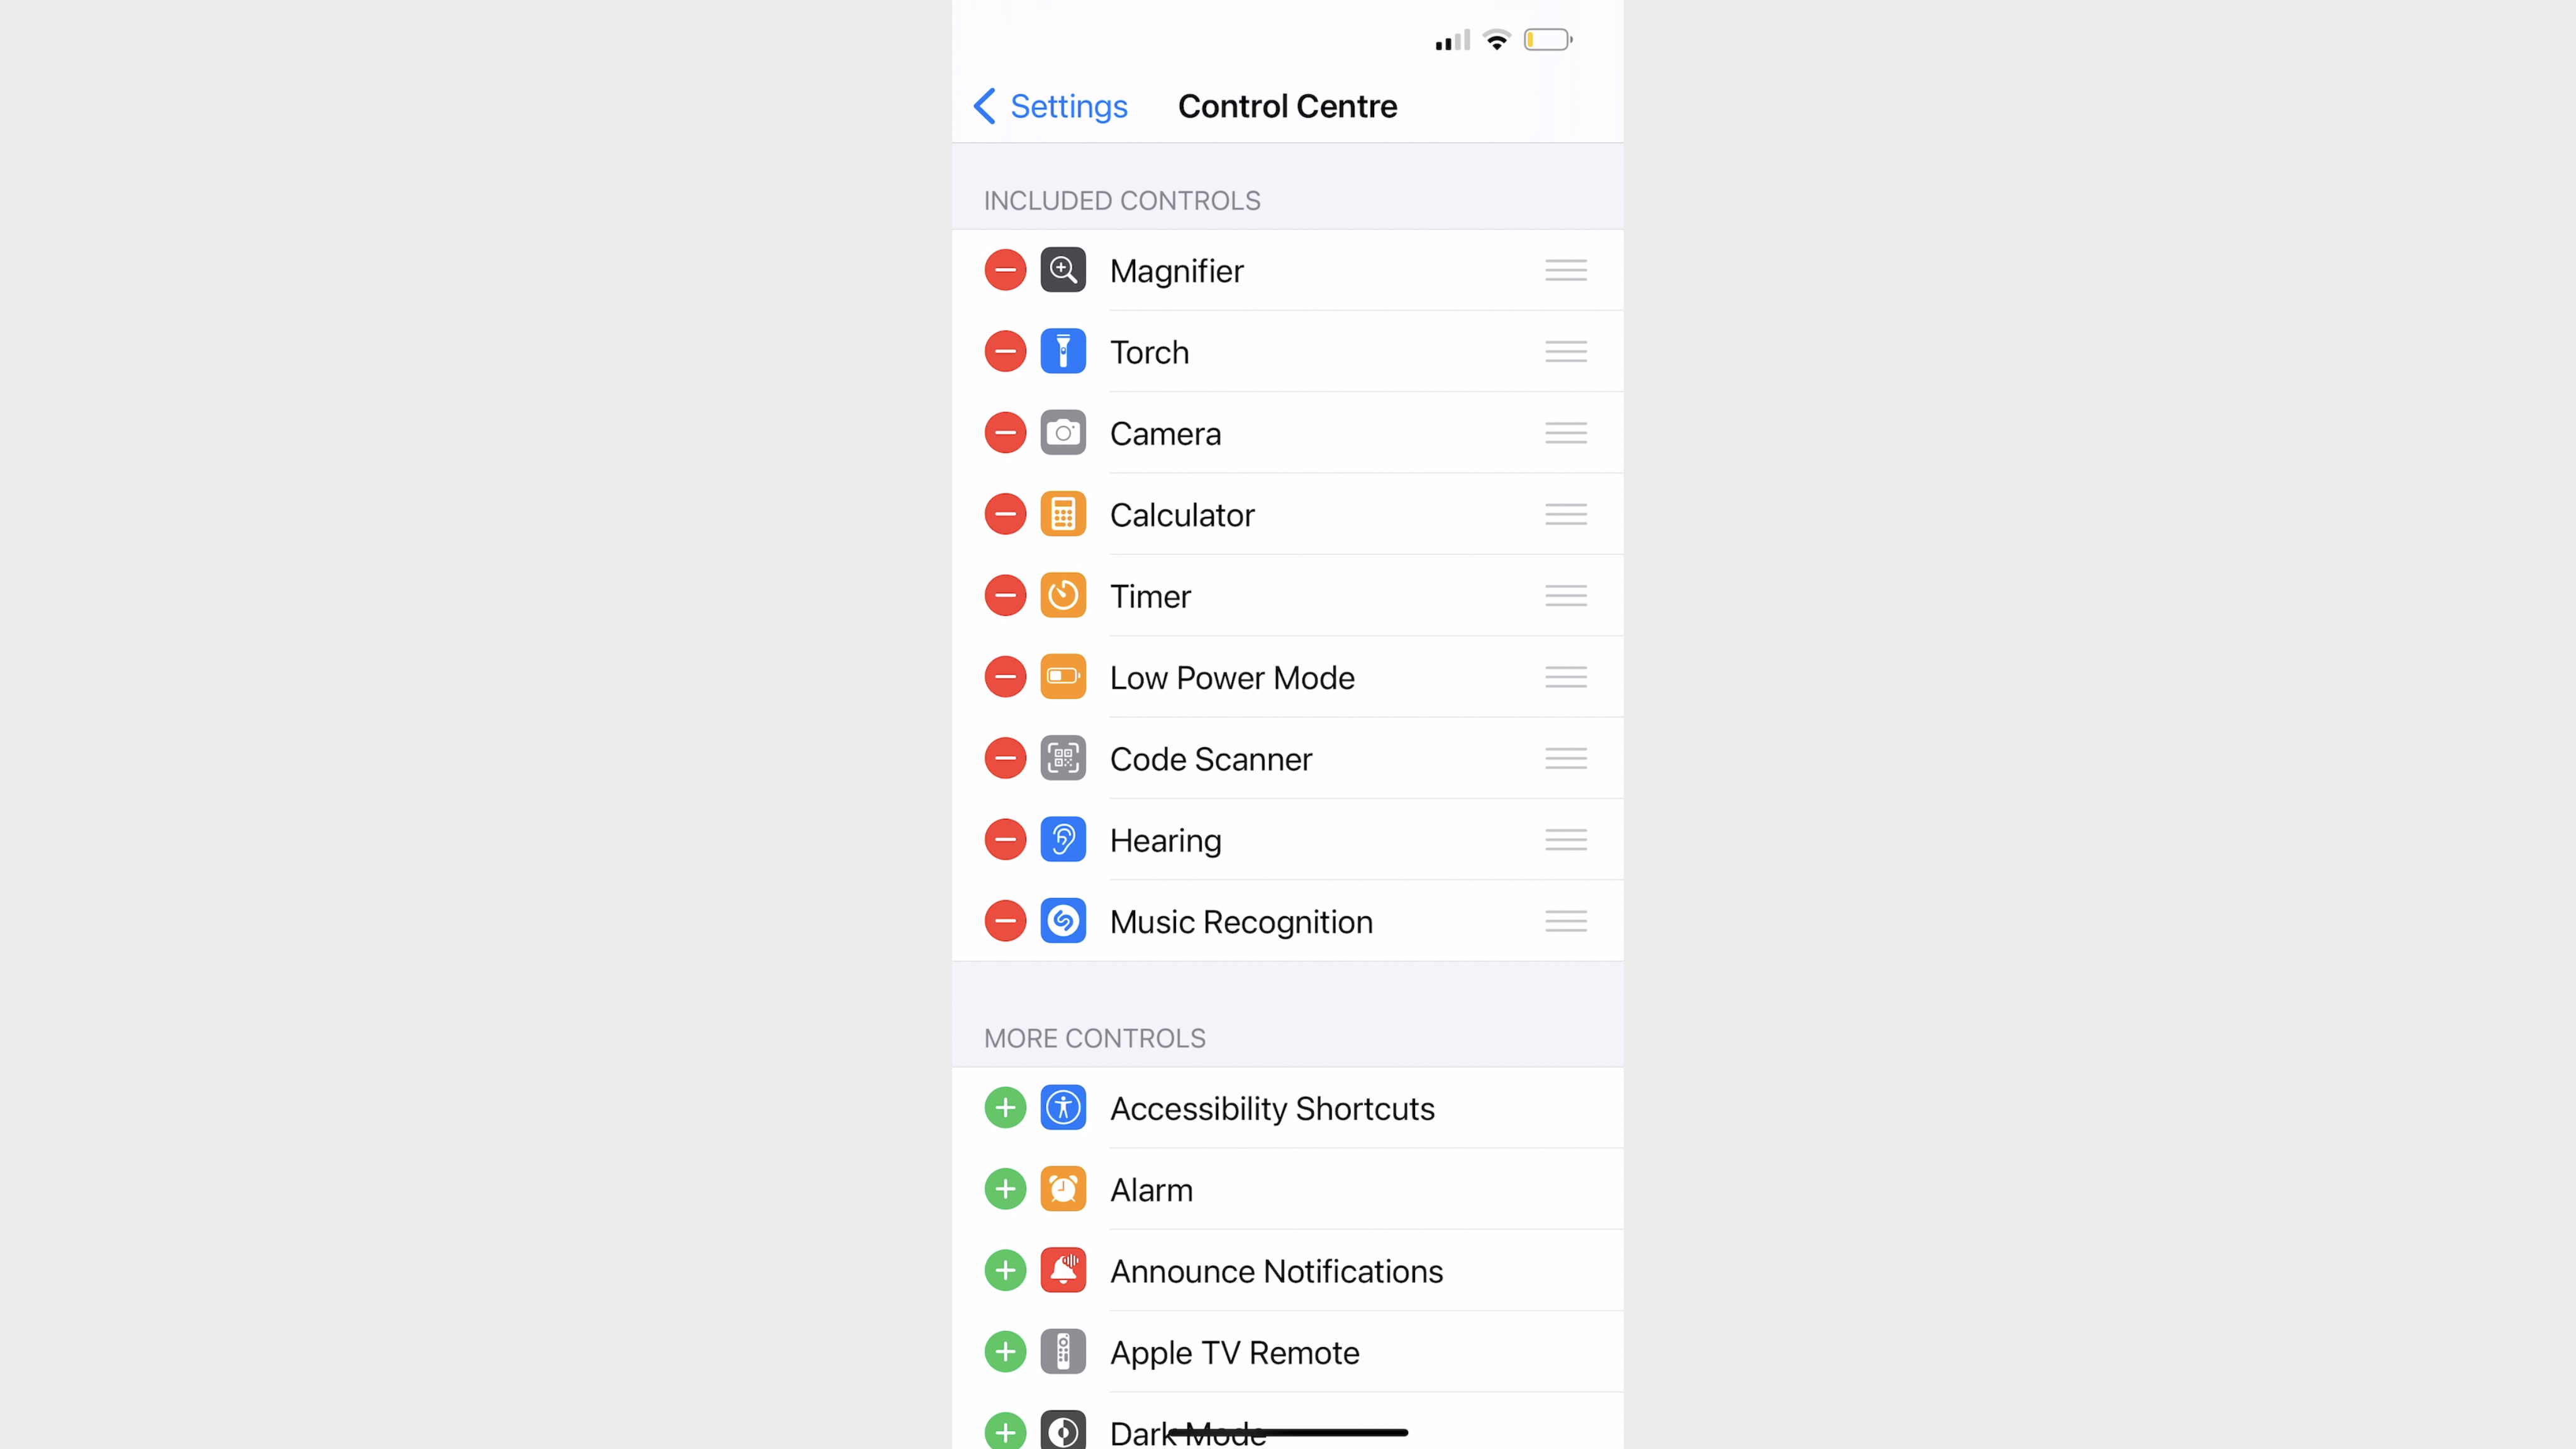
1. Go to Settings > Control Centre. In Control Centre (above) you’ll see a list of Included Controls such as Torch app (indicated by a red circular label with a - icon).
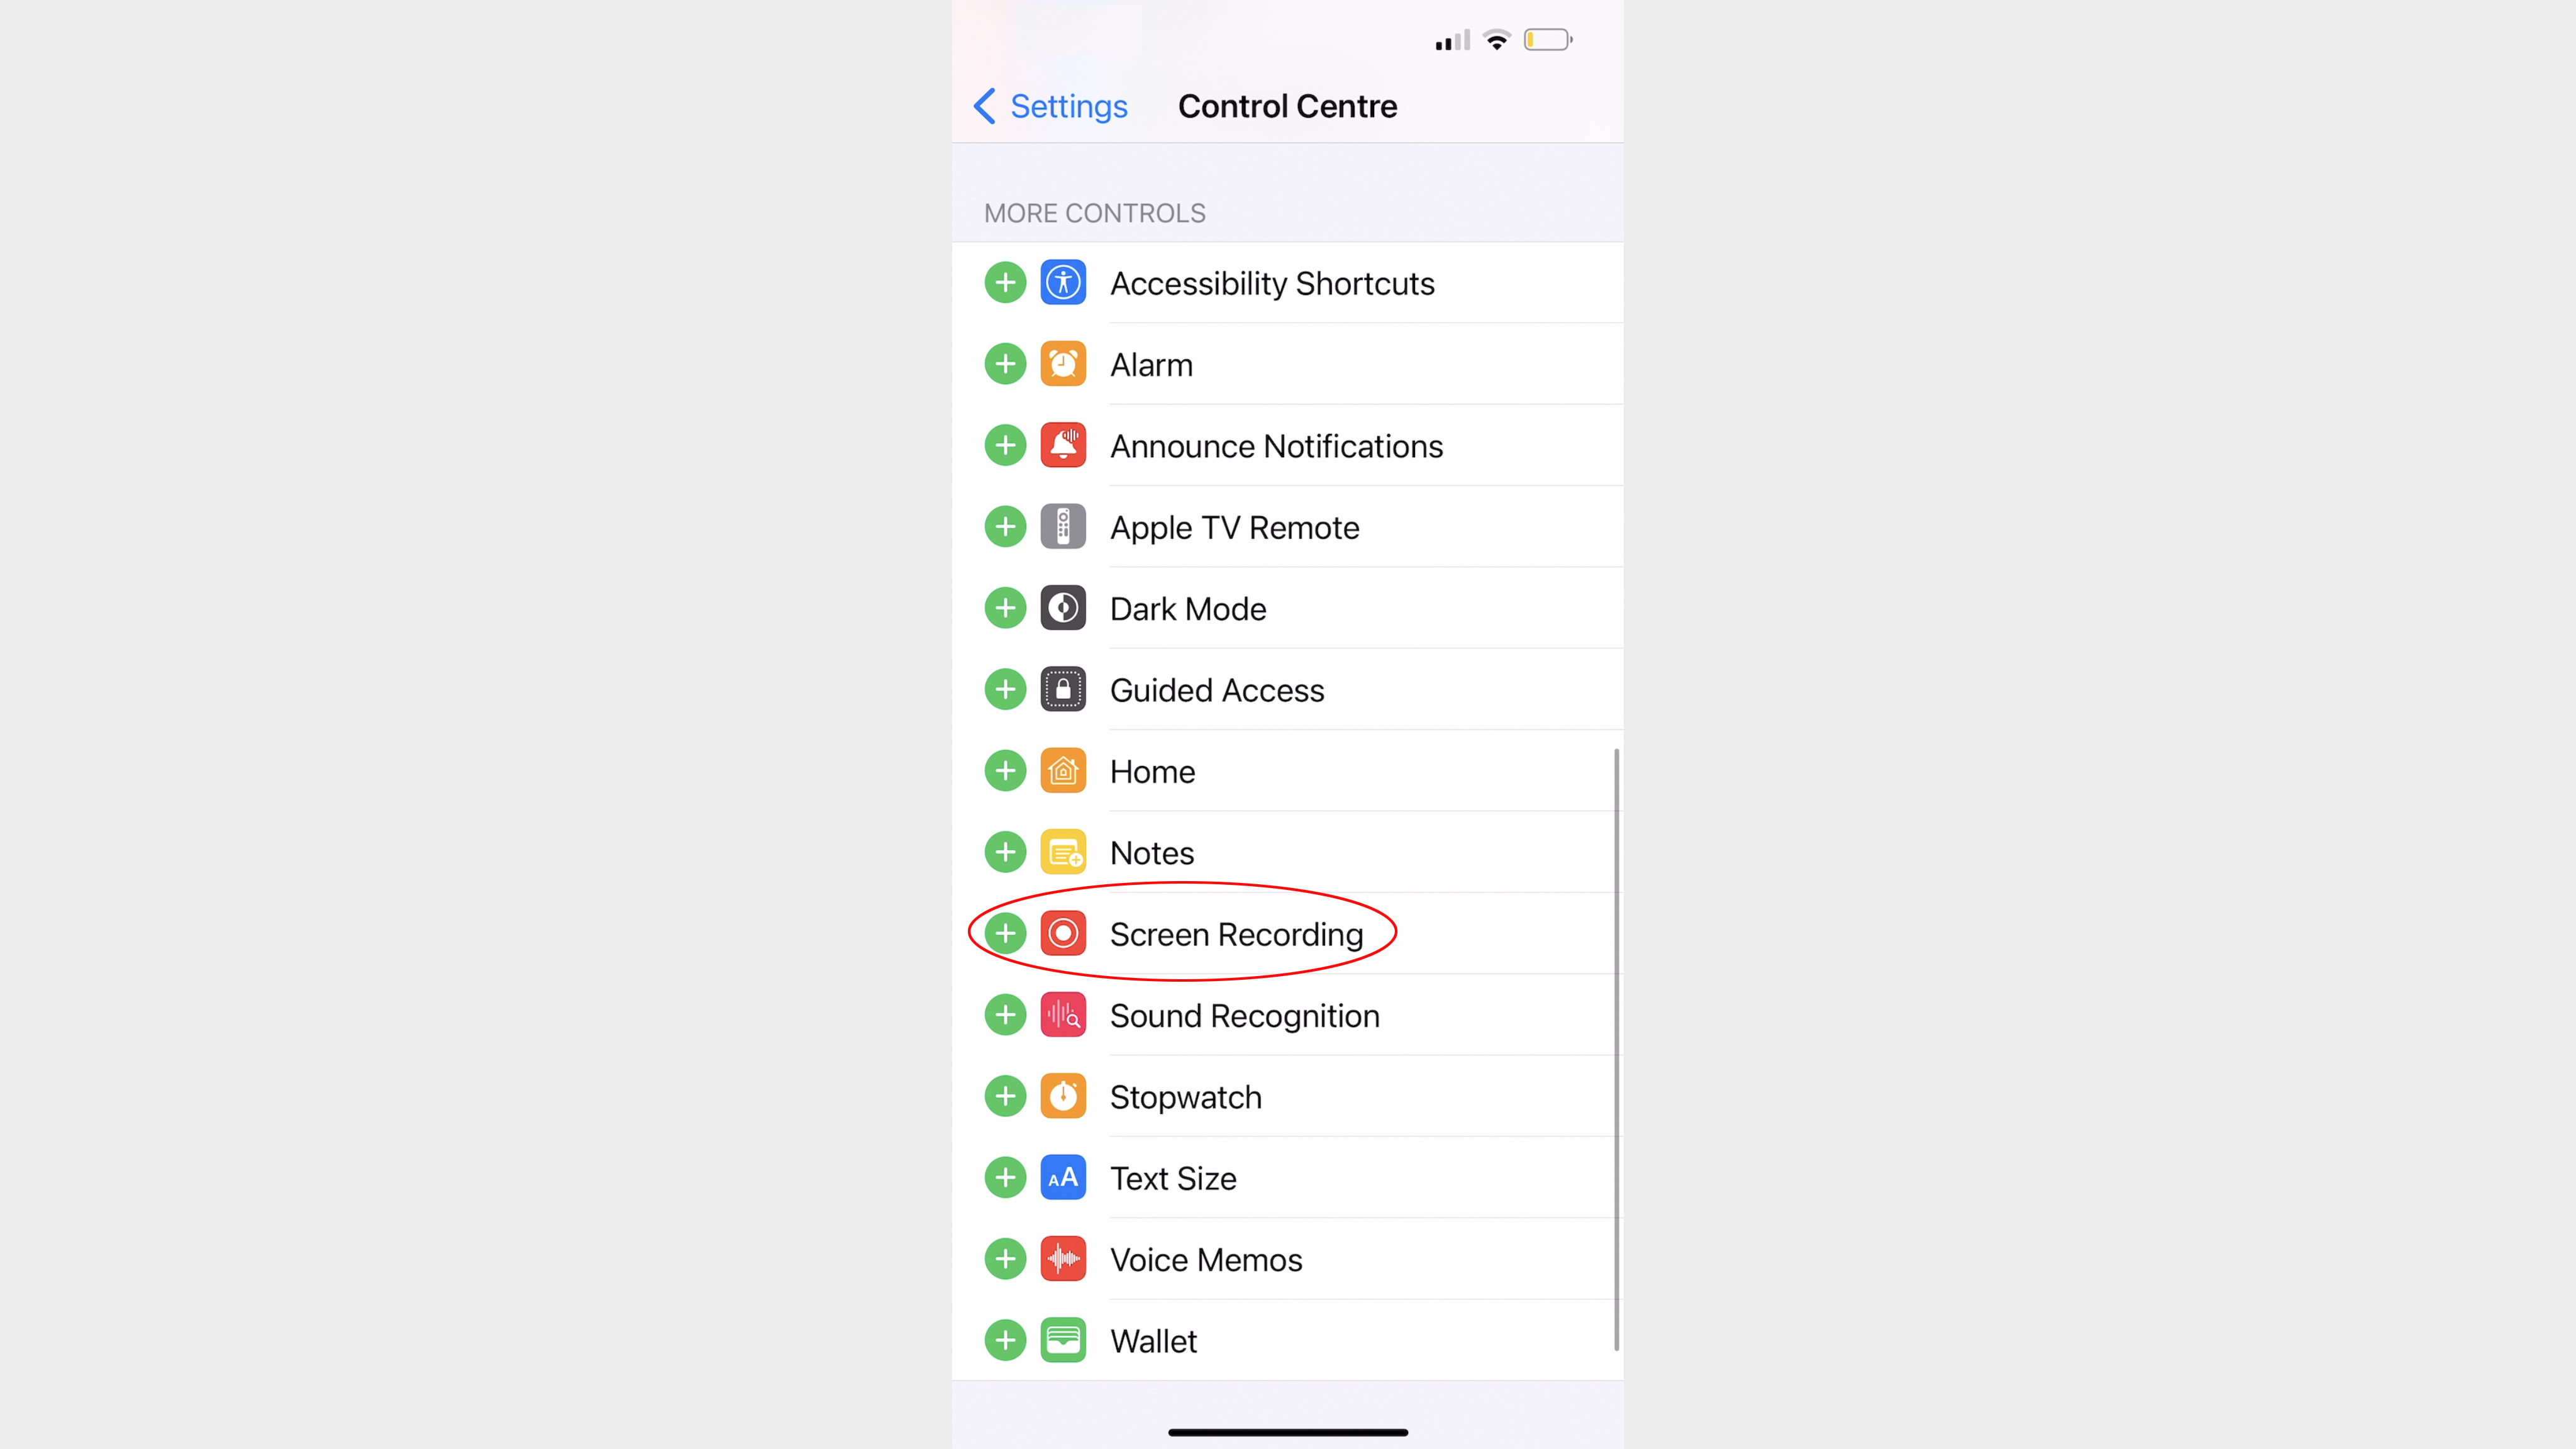
2. Scroll down to the More Controls section. Tap on the green + icon next to the Screen Recording app.
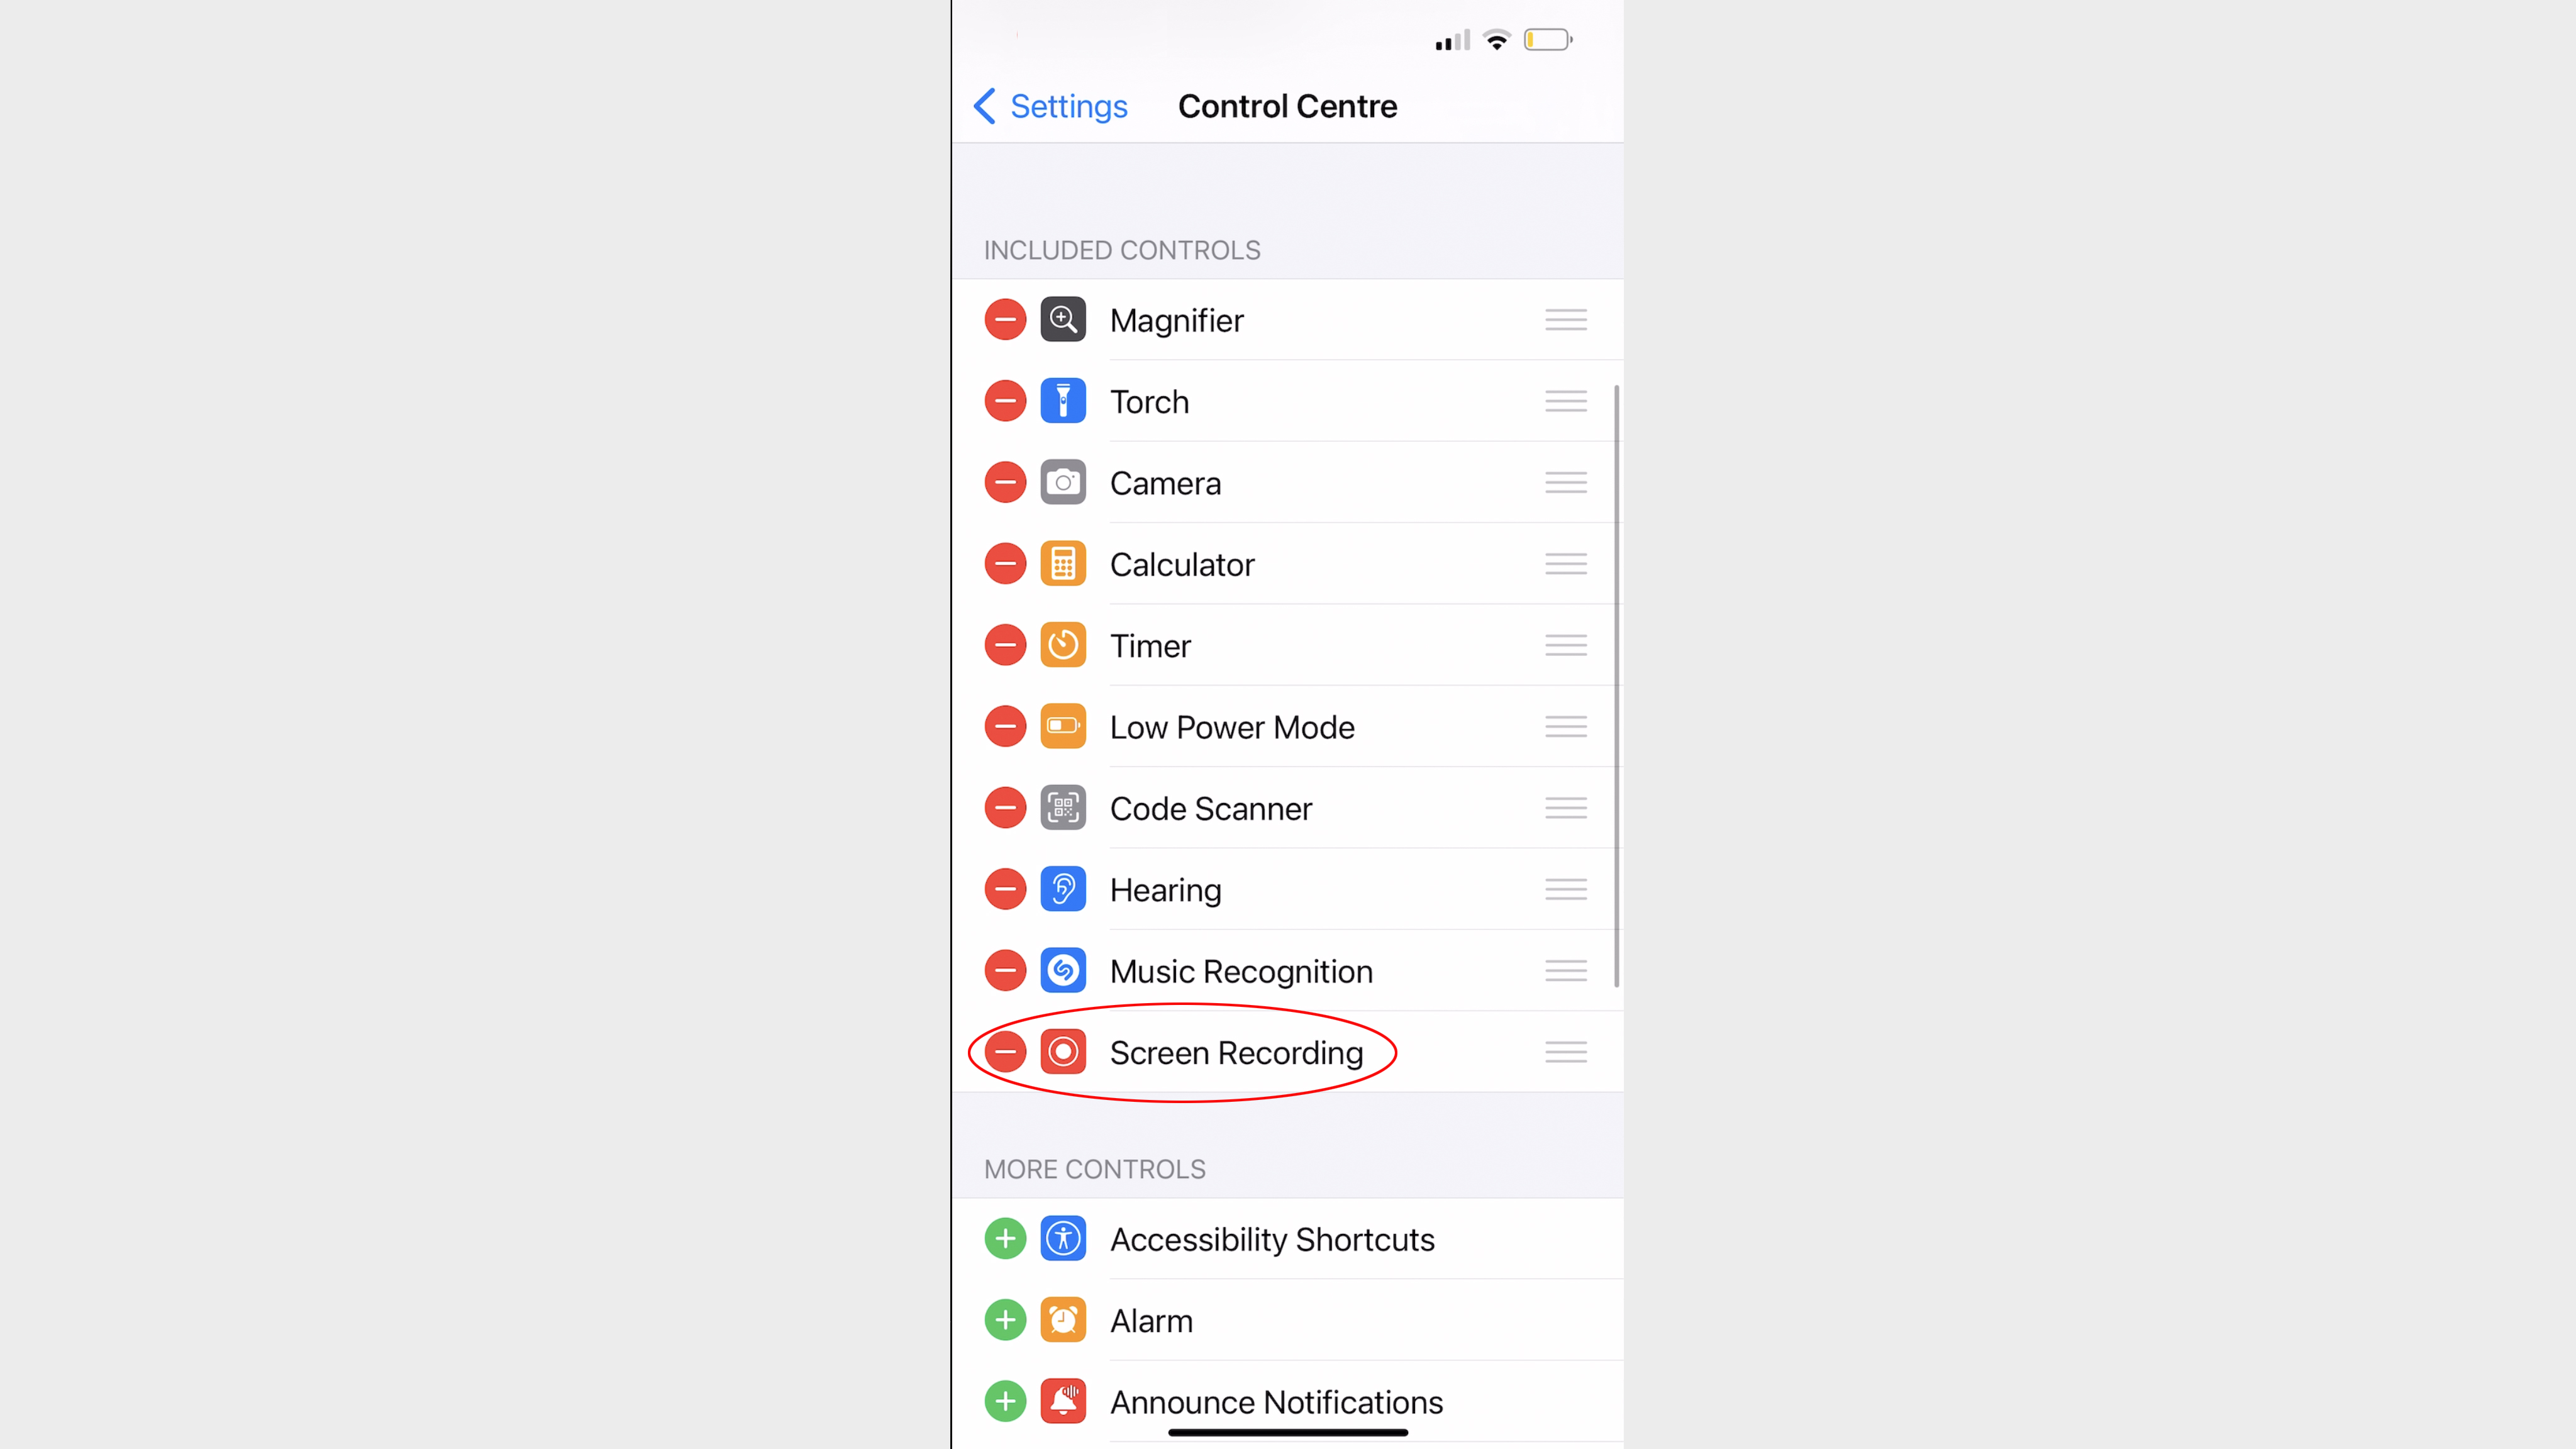
3. The Screen Recording app will now appear in the Included Controls section of the Control Centre Settings menu.
4. Swipe down from the top right to access the Control Centre. Here you’ll see the Screen Recording app’s circular icon.
How to use iPhone screen recording
5. Tap the Screen recording app’s icon. A 3-second countdown will appear.
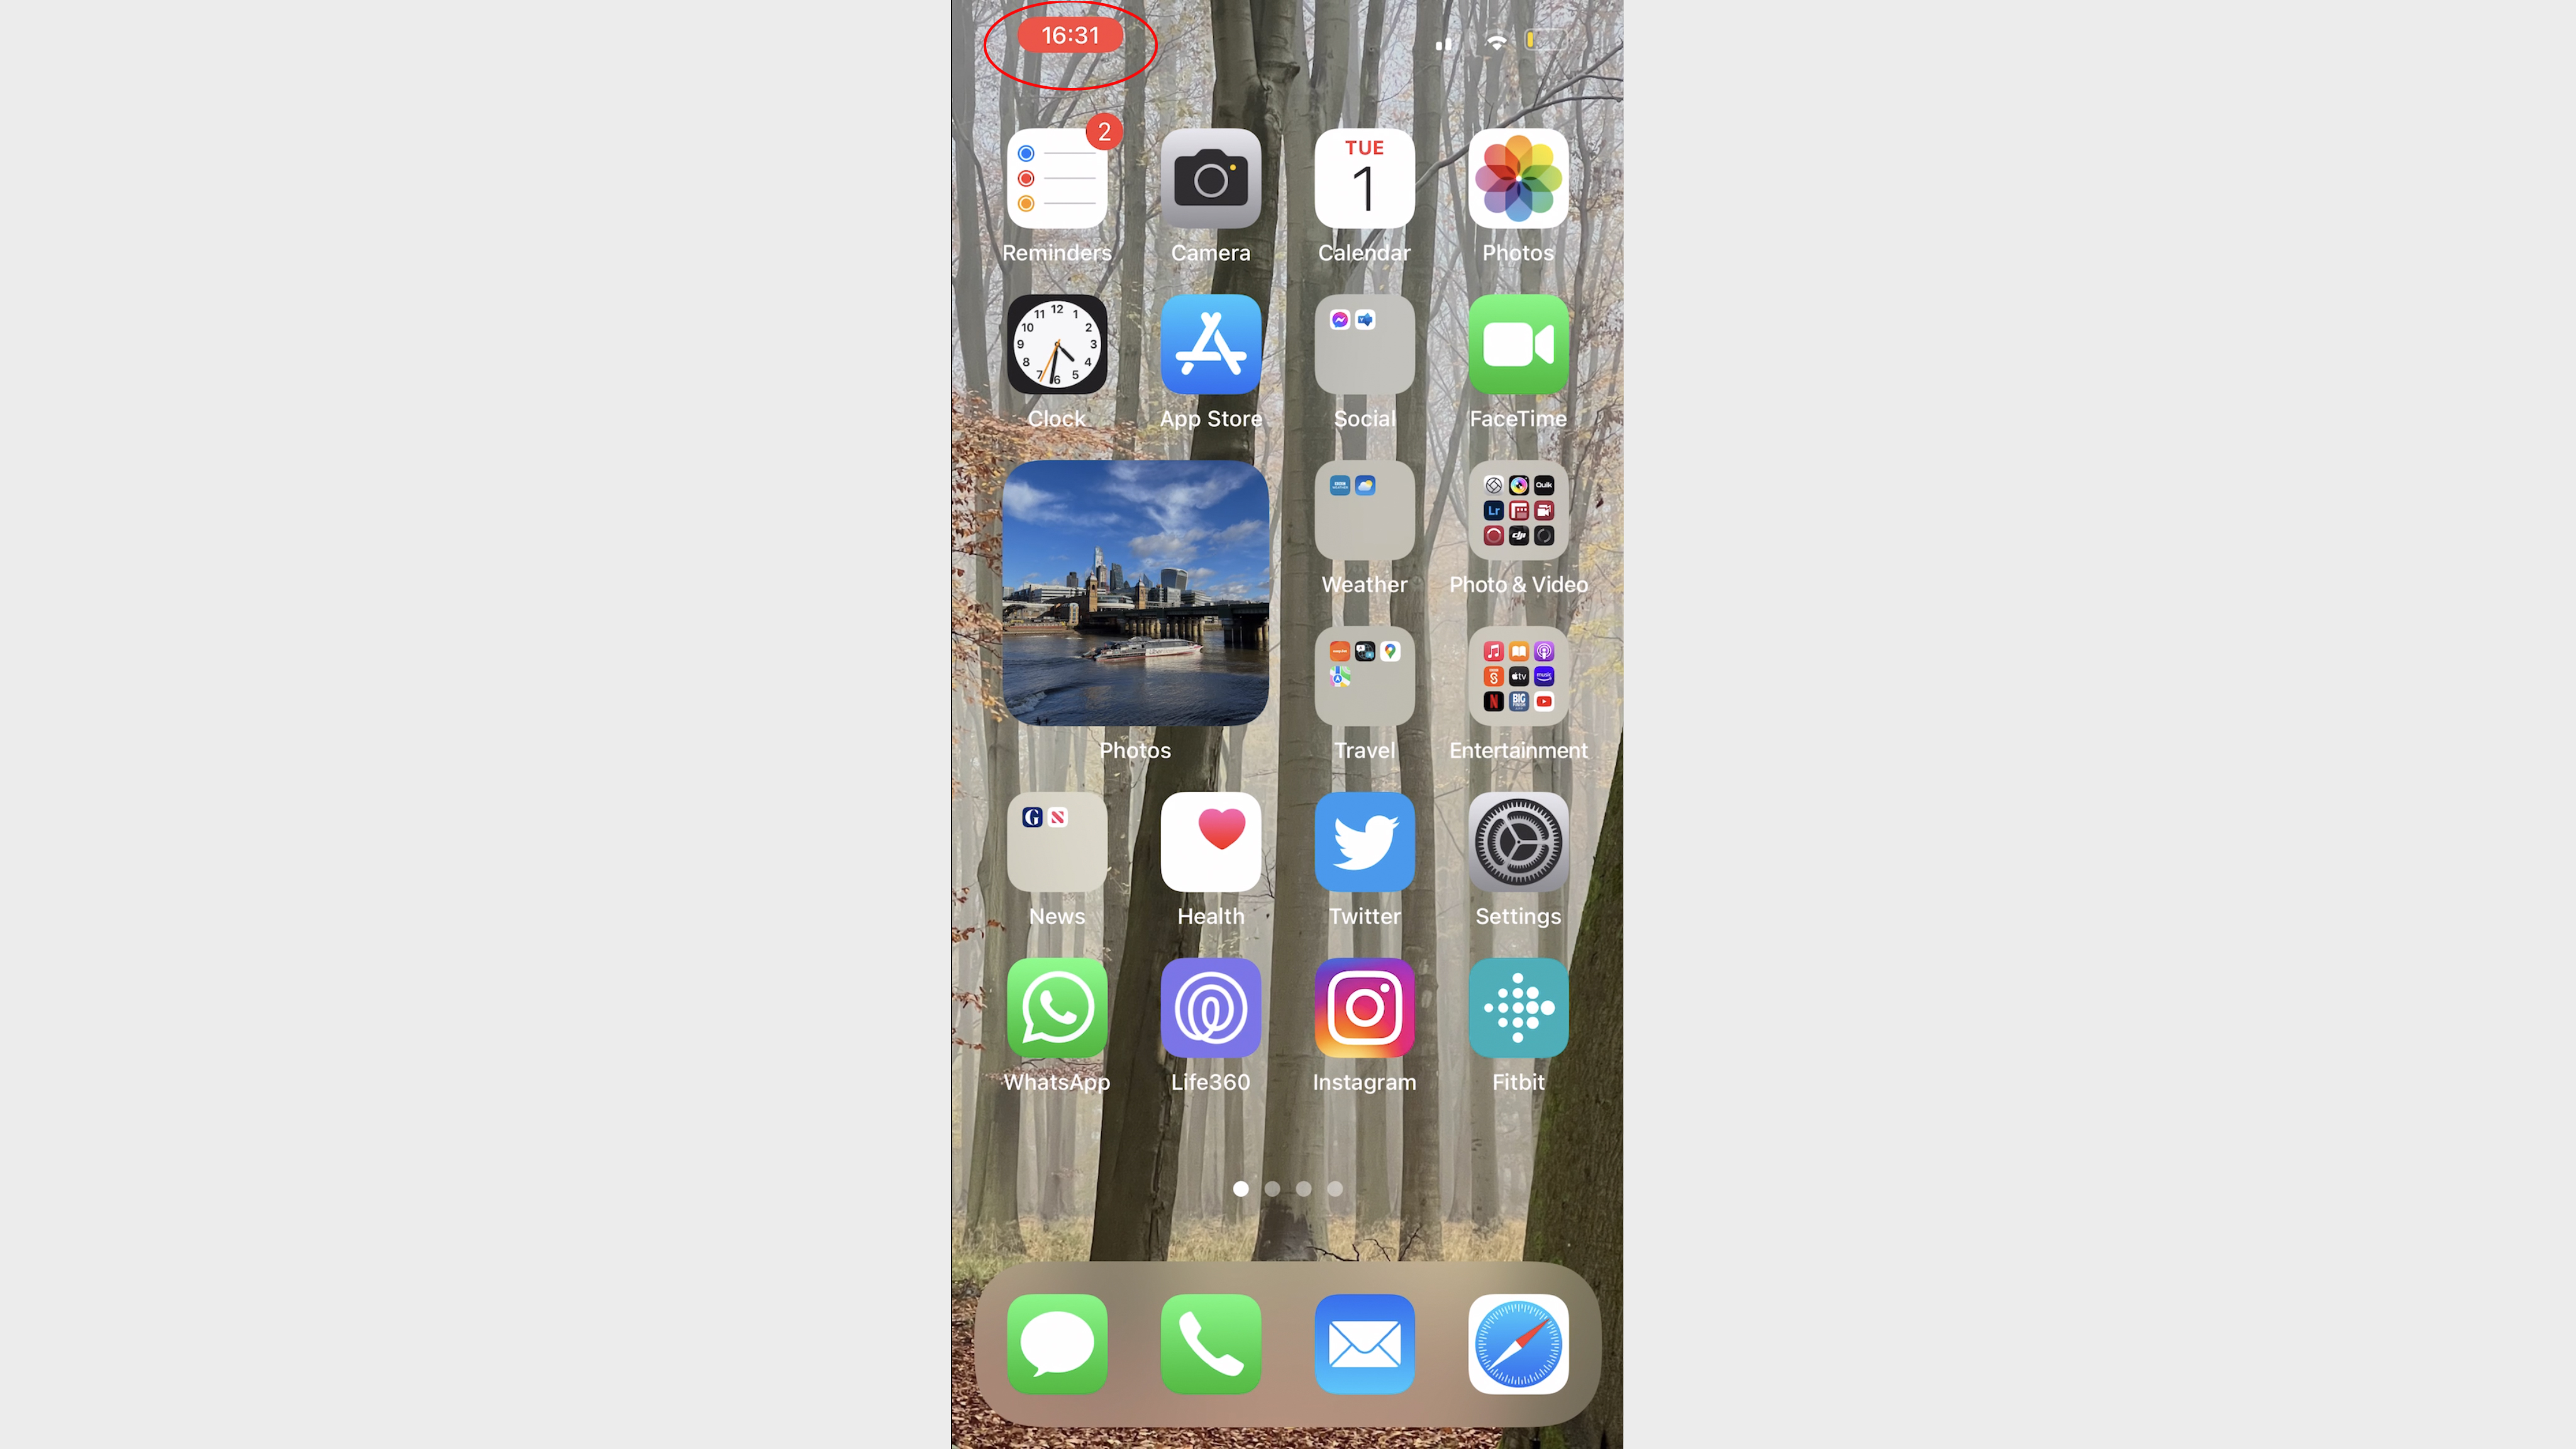
6. A red recording icon will then appear at the top left of the screen. Anything you look at onscreen is now being recorded.
7. Tap the top left recording icon to stop recording the screen.
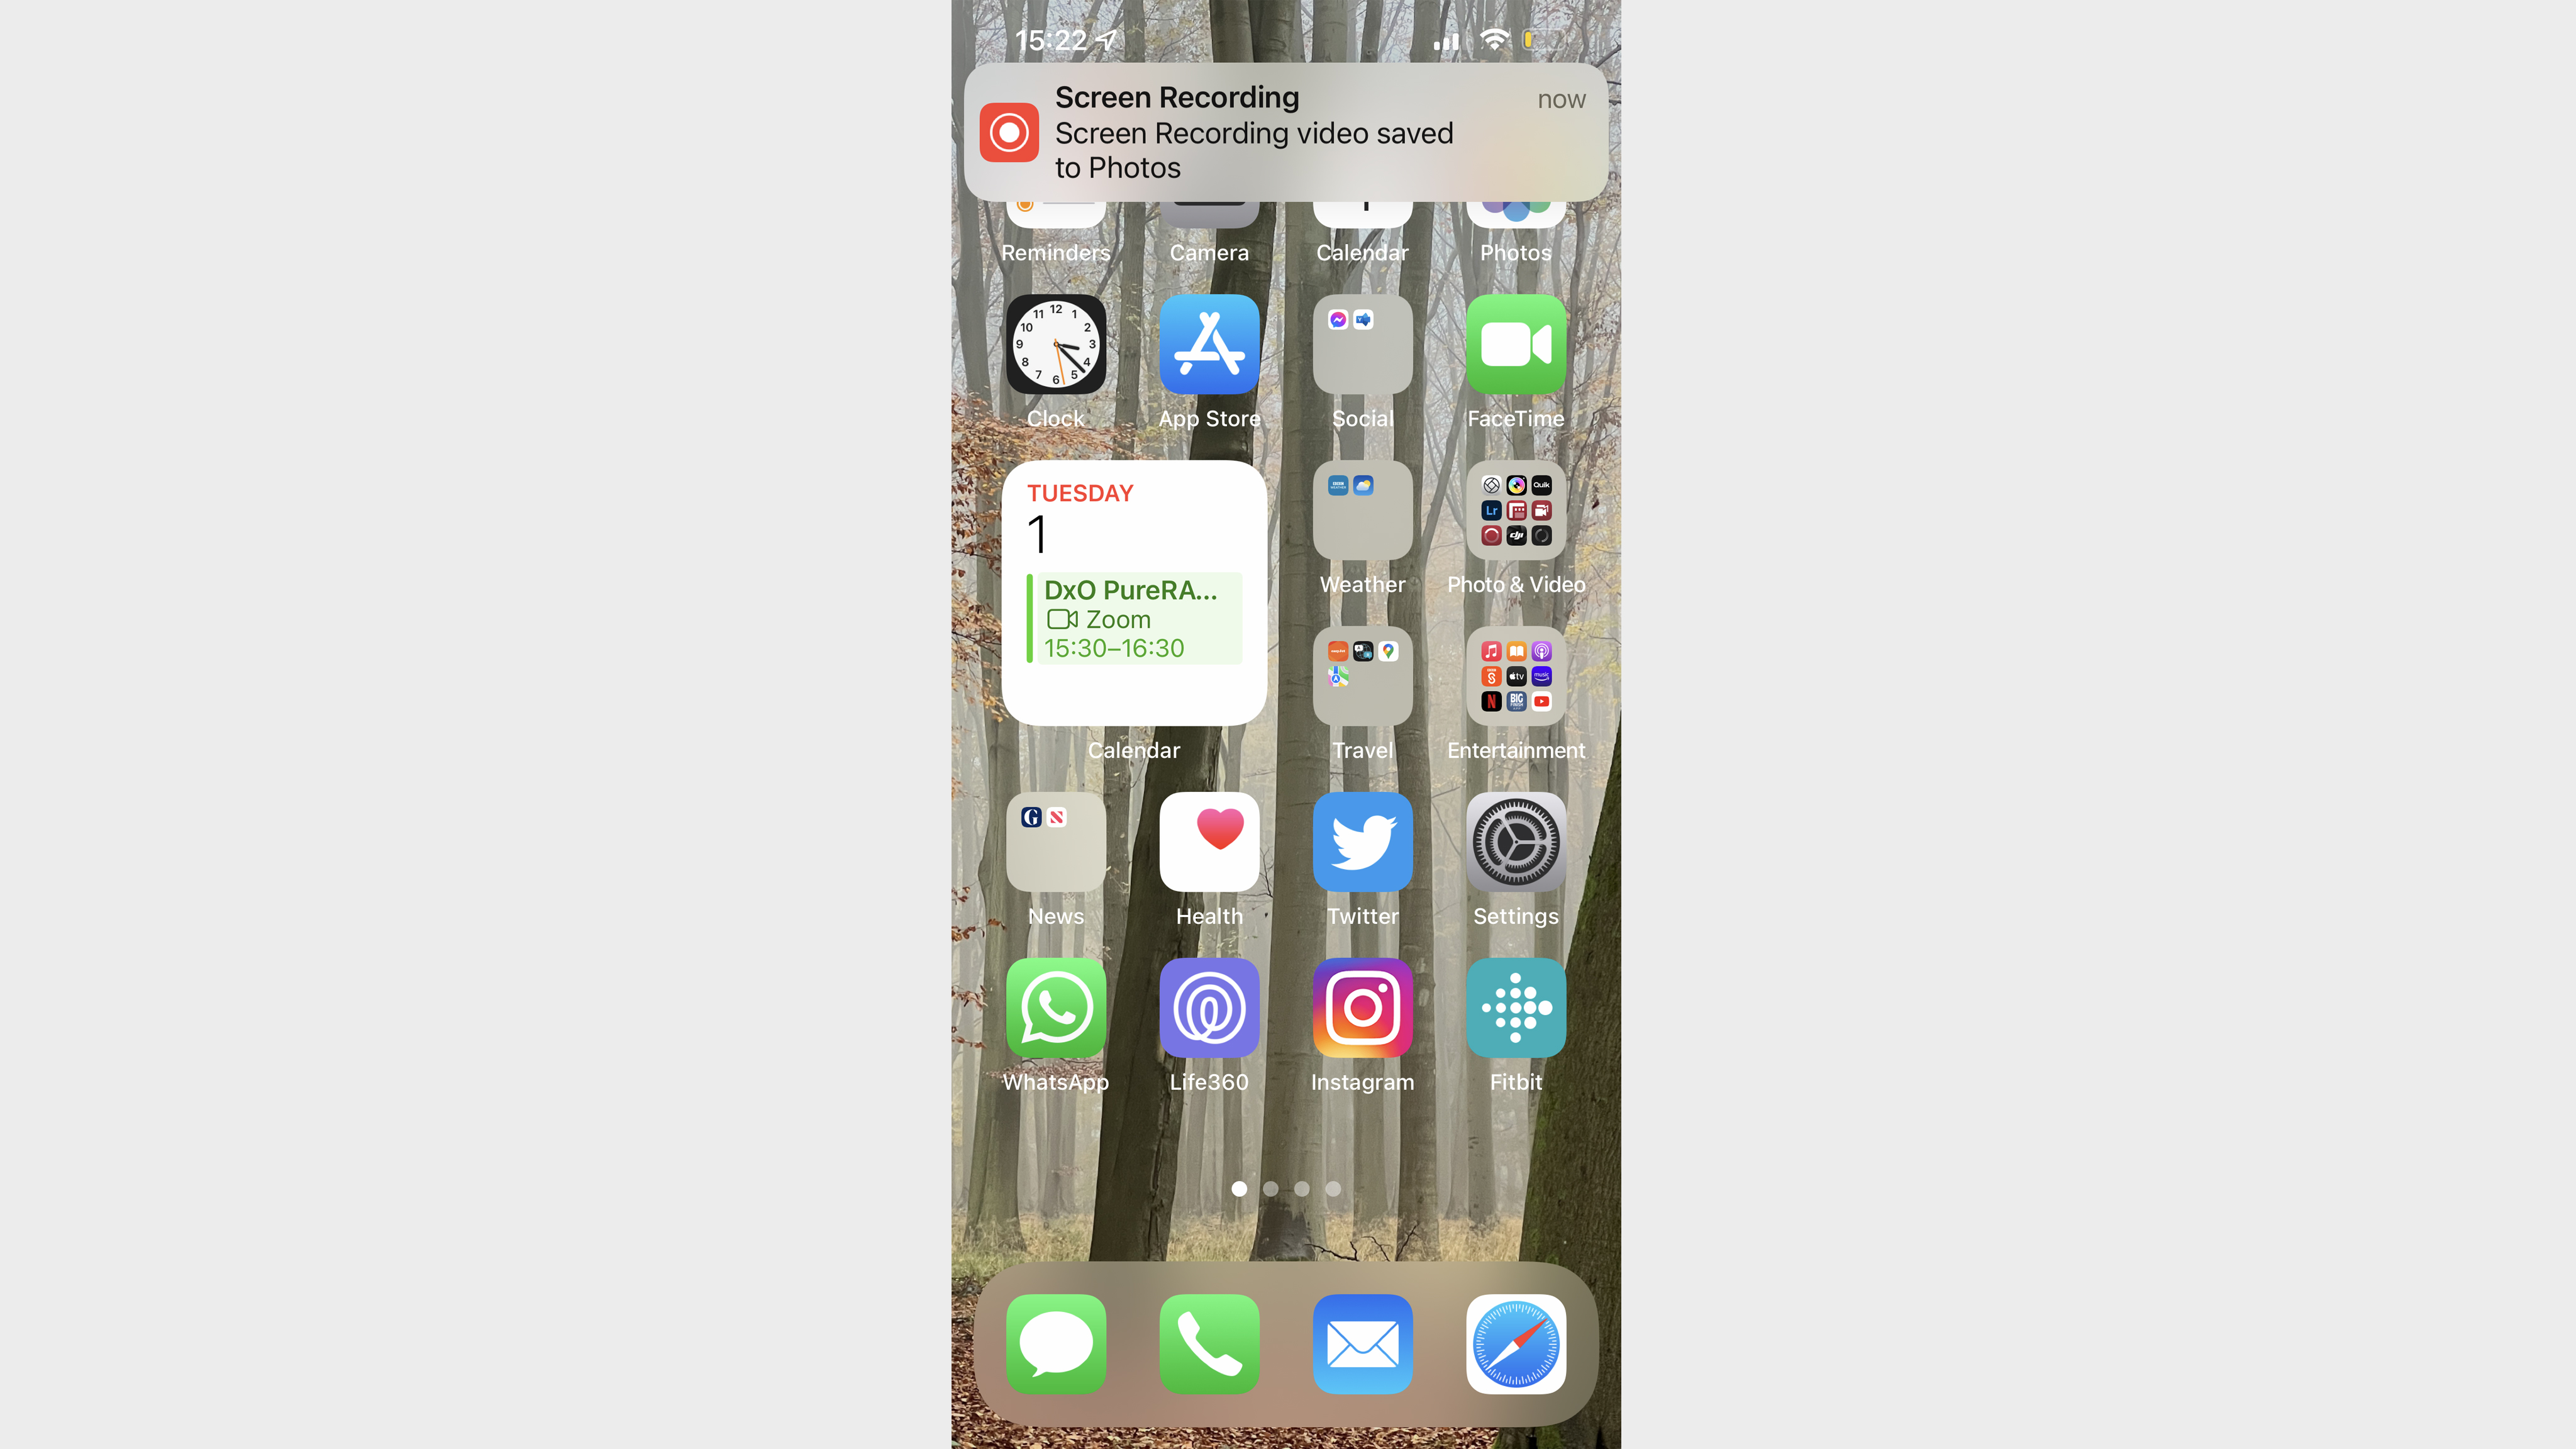
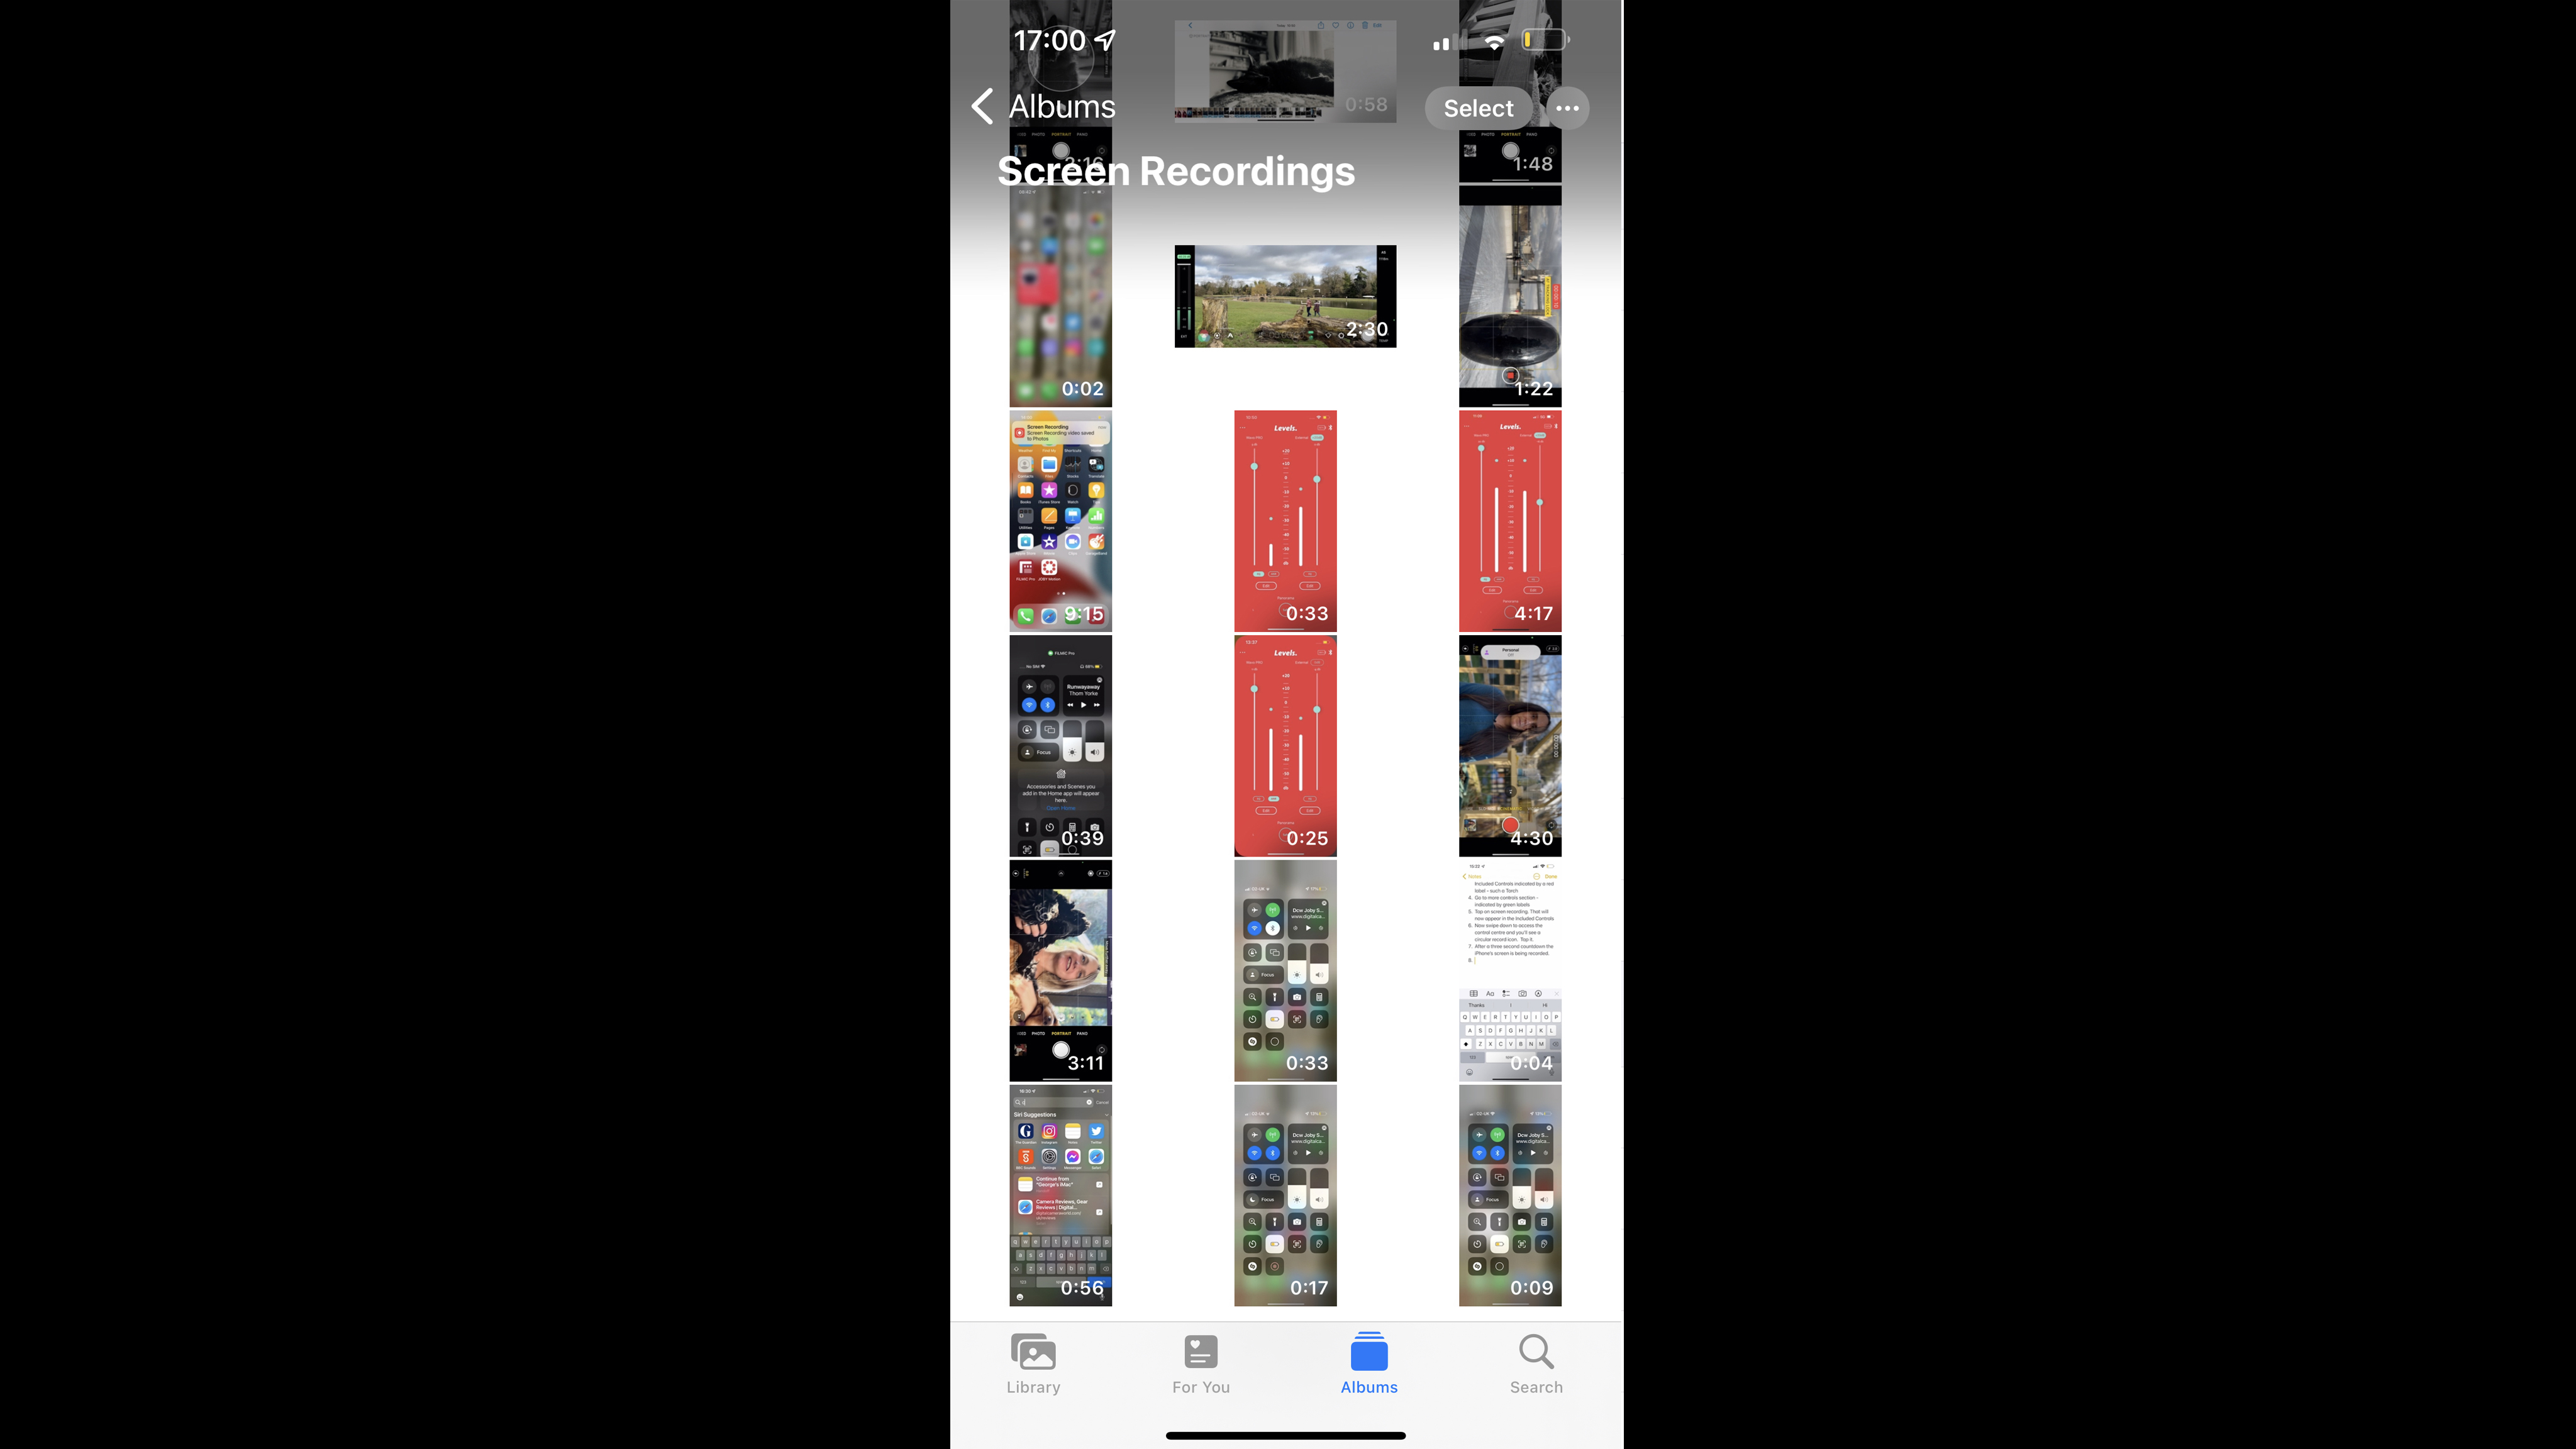
8. The resulting movie will be saved in the Photos app’s Screen Recordings album. Tap to play a Screen Recording movie.
Read more:
• Best camera phones
• Best iPhones for photography
• Best gimbals
• Best selfie sticks
George has been freelancing as a photo fixing and creative tutorial writer since 2002, working for award winning titles such as Digital Camera, PhotoPlus, N-Photo and Practical Photoshop. He's expert in communicating the ins and outs of Photoshop and Lightroom, as well as producing video production tutorials on Final Cut Pro and iMovie for magazines such as iCreate and Mac Format. He also produces regular and exclusive Photoshop CC tutorials for his YouTube channel.
