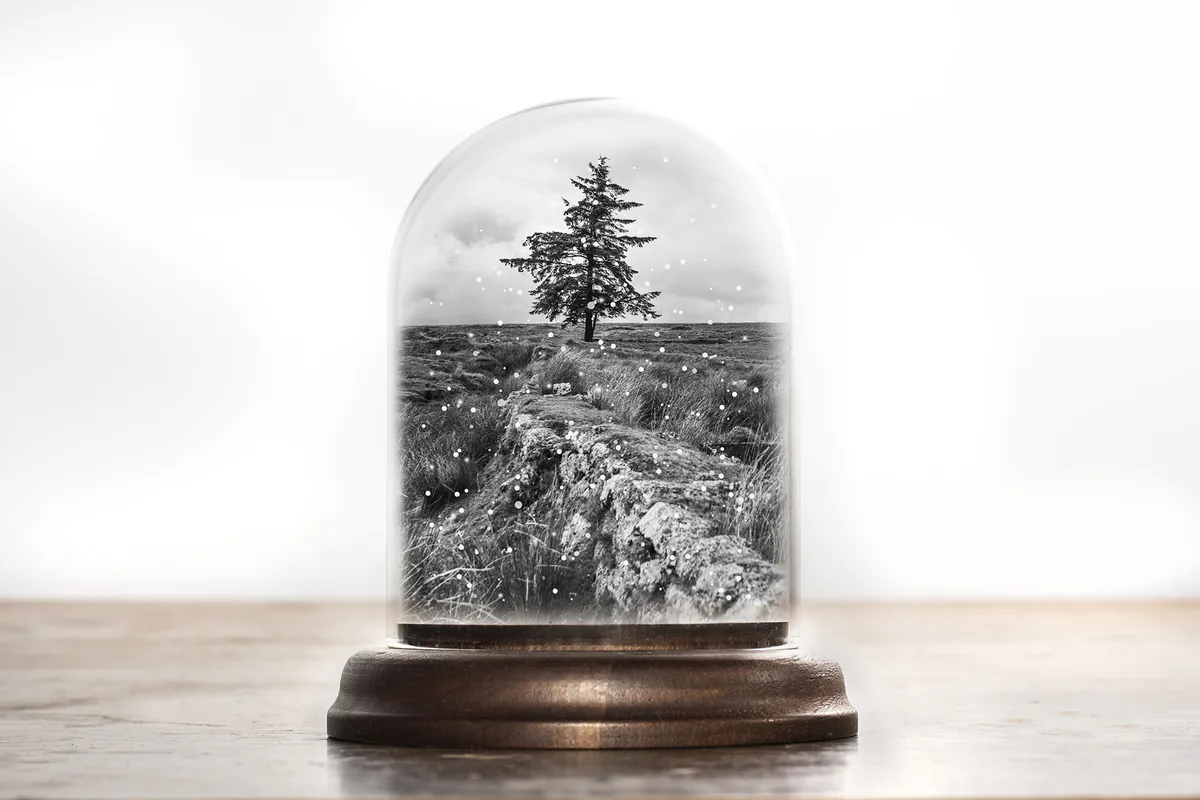
With the festive season now firmly upon us, what better way to capture a snowy scene than inside a globe?
For our snow globe we used a display case and an image we shot on Dartmoor, plus a little touch of Photoshop. You can get a display case similar to ours from many places; after a quick Google, we found a near-identical one from Ikea for very little outlay. If you don’t want to spend any money, then see what you have lying around at home: this effect will still work with an upside-down drinking glass.

For the scene inside, we decided to convert our image to monochrome, as this adds a touch of surrealism and looks great with the snow effect.
To take the shot of our display case we simply hung a white backdrop behind it to eliminate any distractions. You could include any other knick-knacks you like alongside your case, or keep it plain and simple, as we have. Have a play around to see what works!

Use Photoshop to create the snow scene

To combine your images together, you need to use a mixture of Layer Masks and the Selection Tool. To start, we moved our scene image (snowglobe_start_1.jpg) over to our display case image (snowglobe_start.jpg).
It helps to reduce the Opacity of the top layer so you can see where you want it to sit; push it back to 100% when everything’s in place. Use the Transform tool (Ctrl/Cmd+T) to adjust the size and position of the image to suit.

Next, hide the top layer, then select the bottom layer and use the Quick Selection Tool to make a selection of the display case image. Add a Layer Mask to that selection, and drag the mask to the hidden layer above. You can now click back on the eye icon to reveal the image.
On the Layer Mask, you now want to use a soft black brush and run around the edge of the glass to soften the edge. Finally add a new layer; using a small hard white brush, dab on spots of white to resemble snow until you’re satisfied you’ve created a winterland scene!