Home photography ideas: Honey I shrunk my subject!
Shrink your subject to the size of a mouse with in-camera skills and Photoshop wizardry
The best camera deals, reviews, product advice, and unmissable photography news, direct to your inbox!
You are now subscribed
Your newsletter sign-up was successful
Watch video: Home photography ideas – Honey I shrunk my subject!
Photography projects at home
• Home photography ideas
Useful home photography kit
• Best tripods
• Best lighting kits
• Best reflectors
• Best macro lenses
N-Photo: The Nikon Magazine is a monthly publication that's entirely dedicated to Nikon users. For the best news, reviews, projects and more, subscribe to N-Photo today!
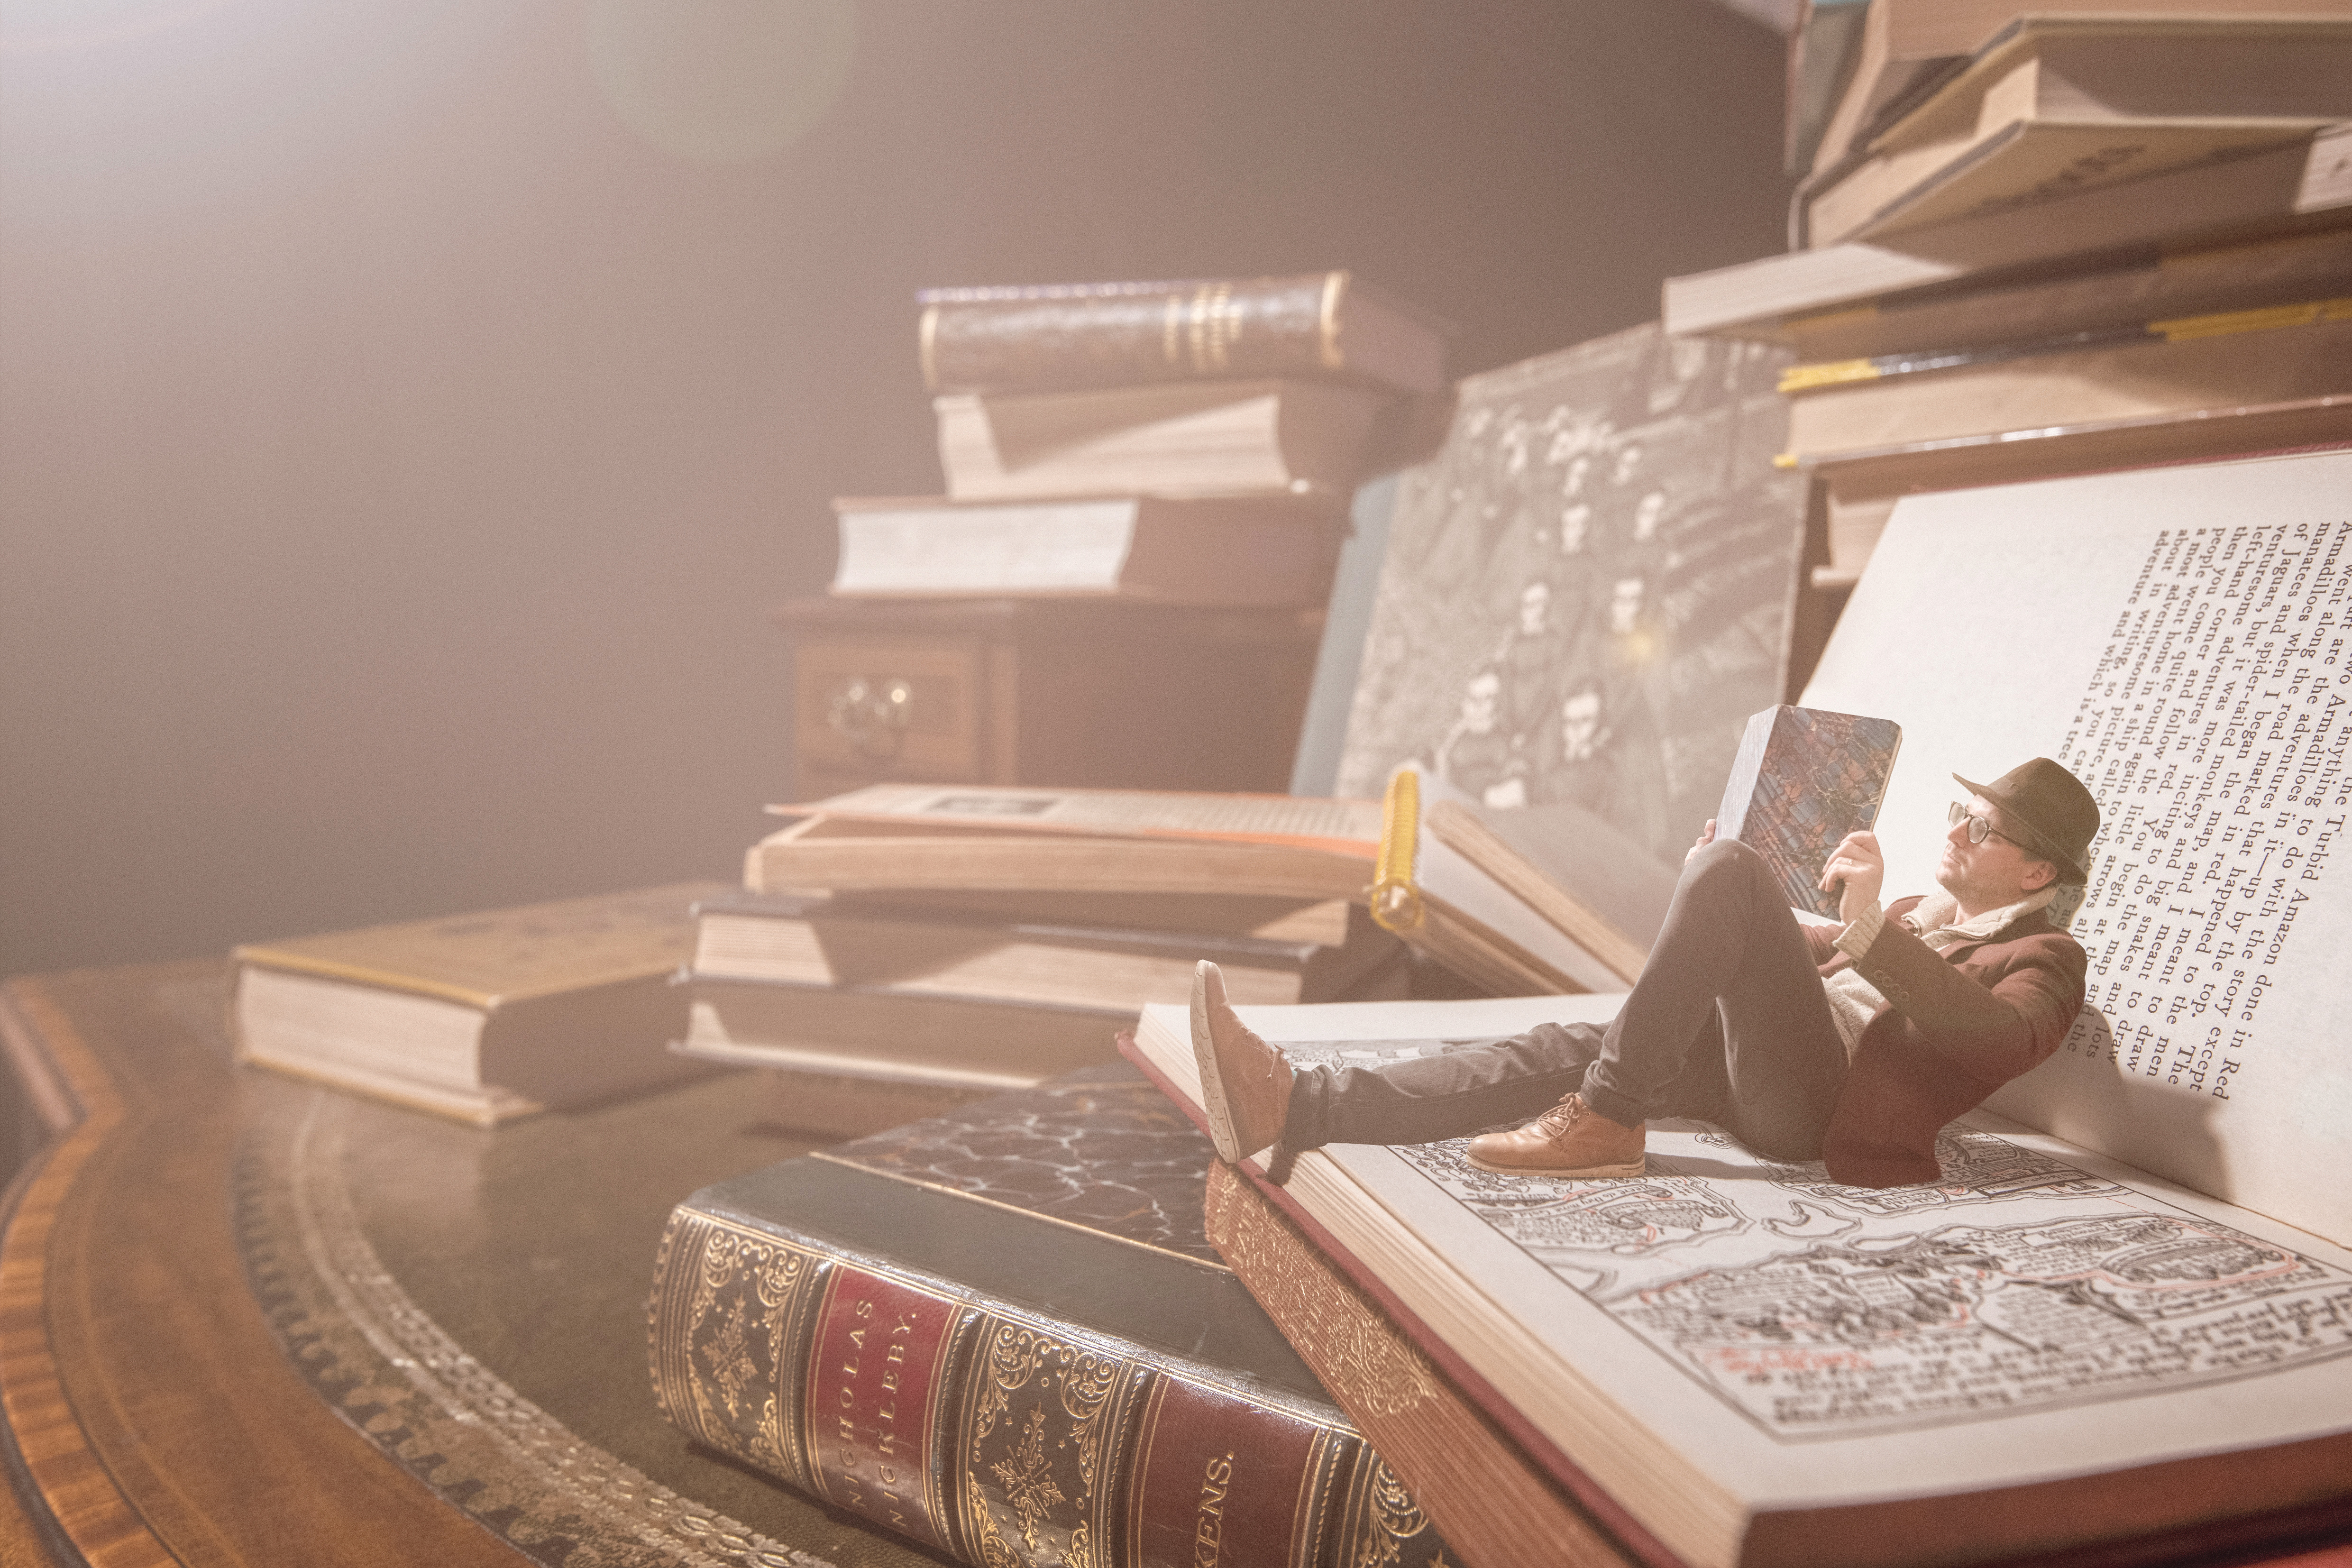
One of the most magical things about Photoshop is the ability it gives you to transport your subject to a different place – or in this case, a different scale. With a few simple skills you can create all kinds of fantastical composites.
However, it’s not just about image-editing wizardry in post production. Much of the hard work in this project is actually done in-camera – and it’s here that the effect really comes to life.
Article continues belowYou see, one of the things that makes a bad composite stand out is the mismatch of lighting or perspective – two things that have nothing to do with Photoshop. Try to drop a person into a random shot and, chances are, it will look wrong. There needs to be consistency between the two; the angles and lighting must match up.
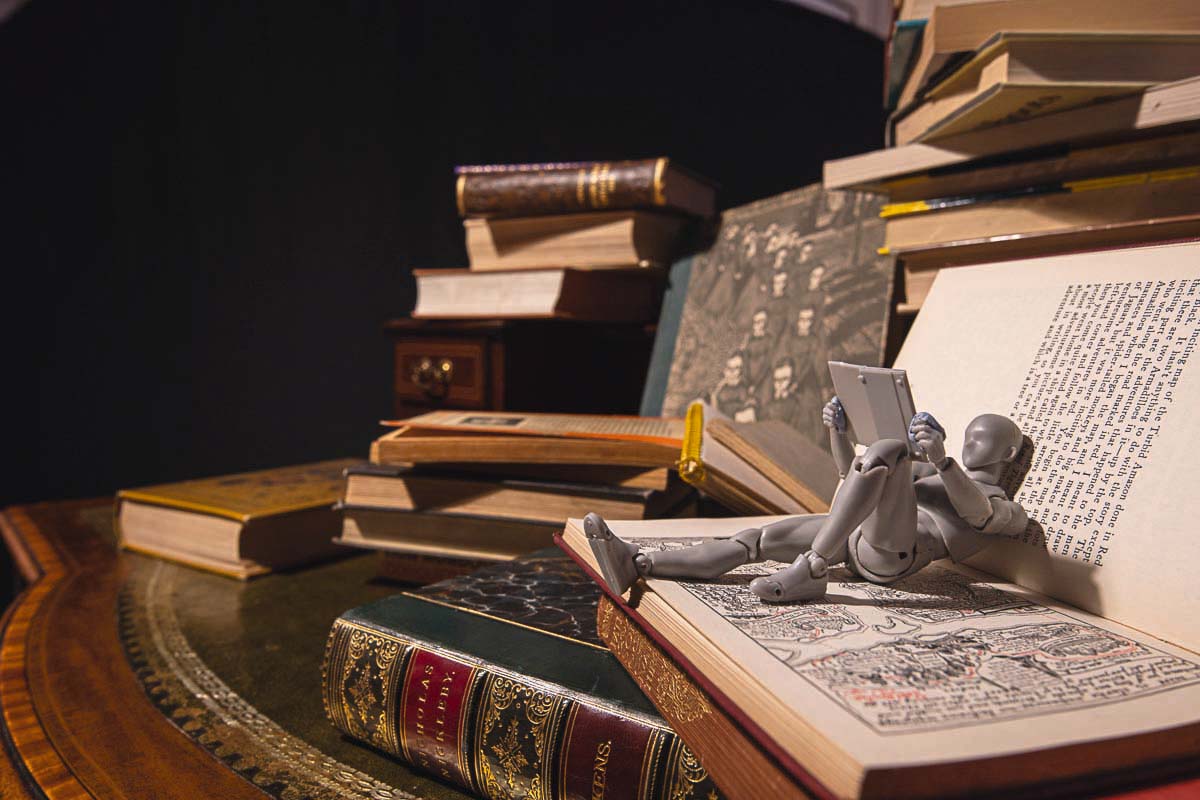
Here we’ll focus on consistency between the two main photos that we need for this – one of our miniature scene, the other of our the full-size portrait. To do so we can make use of our secret weapon: a miniature artist's mannequin.
By placing it in roughly the same pose as we’re going to shoot our full-size person, we’ll be able to capture natural shadows. Then, by matching up the poses, we can make the shadows look like they belong to our real-life subject!
So grab your camera gear, find a subject (or find the right outfit, if you'd rather shoot yourself) and download Photoshop for this fun and creative project…
The best camera deals, reviews, product advice, and unmissable photography news, direct to your inbox!
Set up your small world scene
01 The backdrop
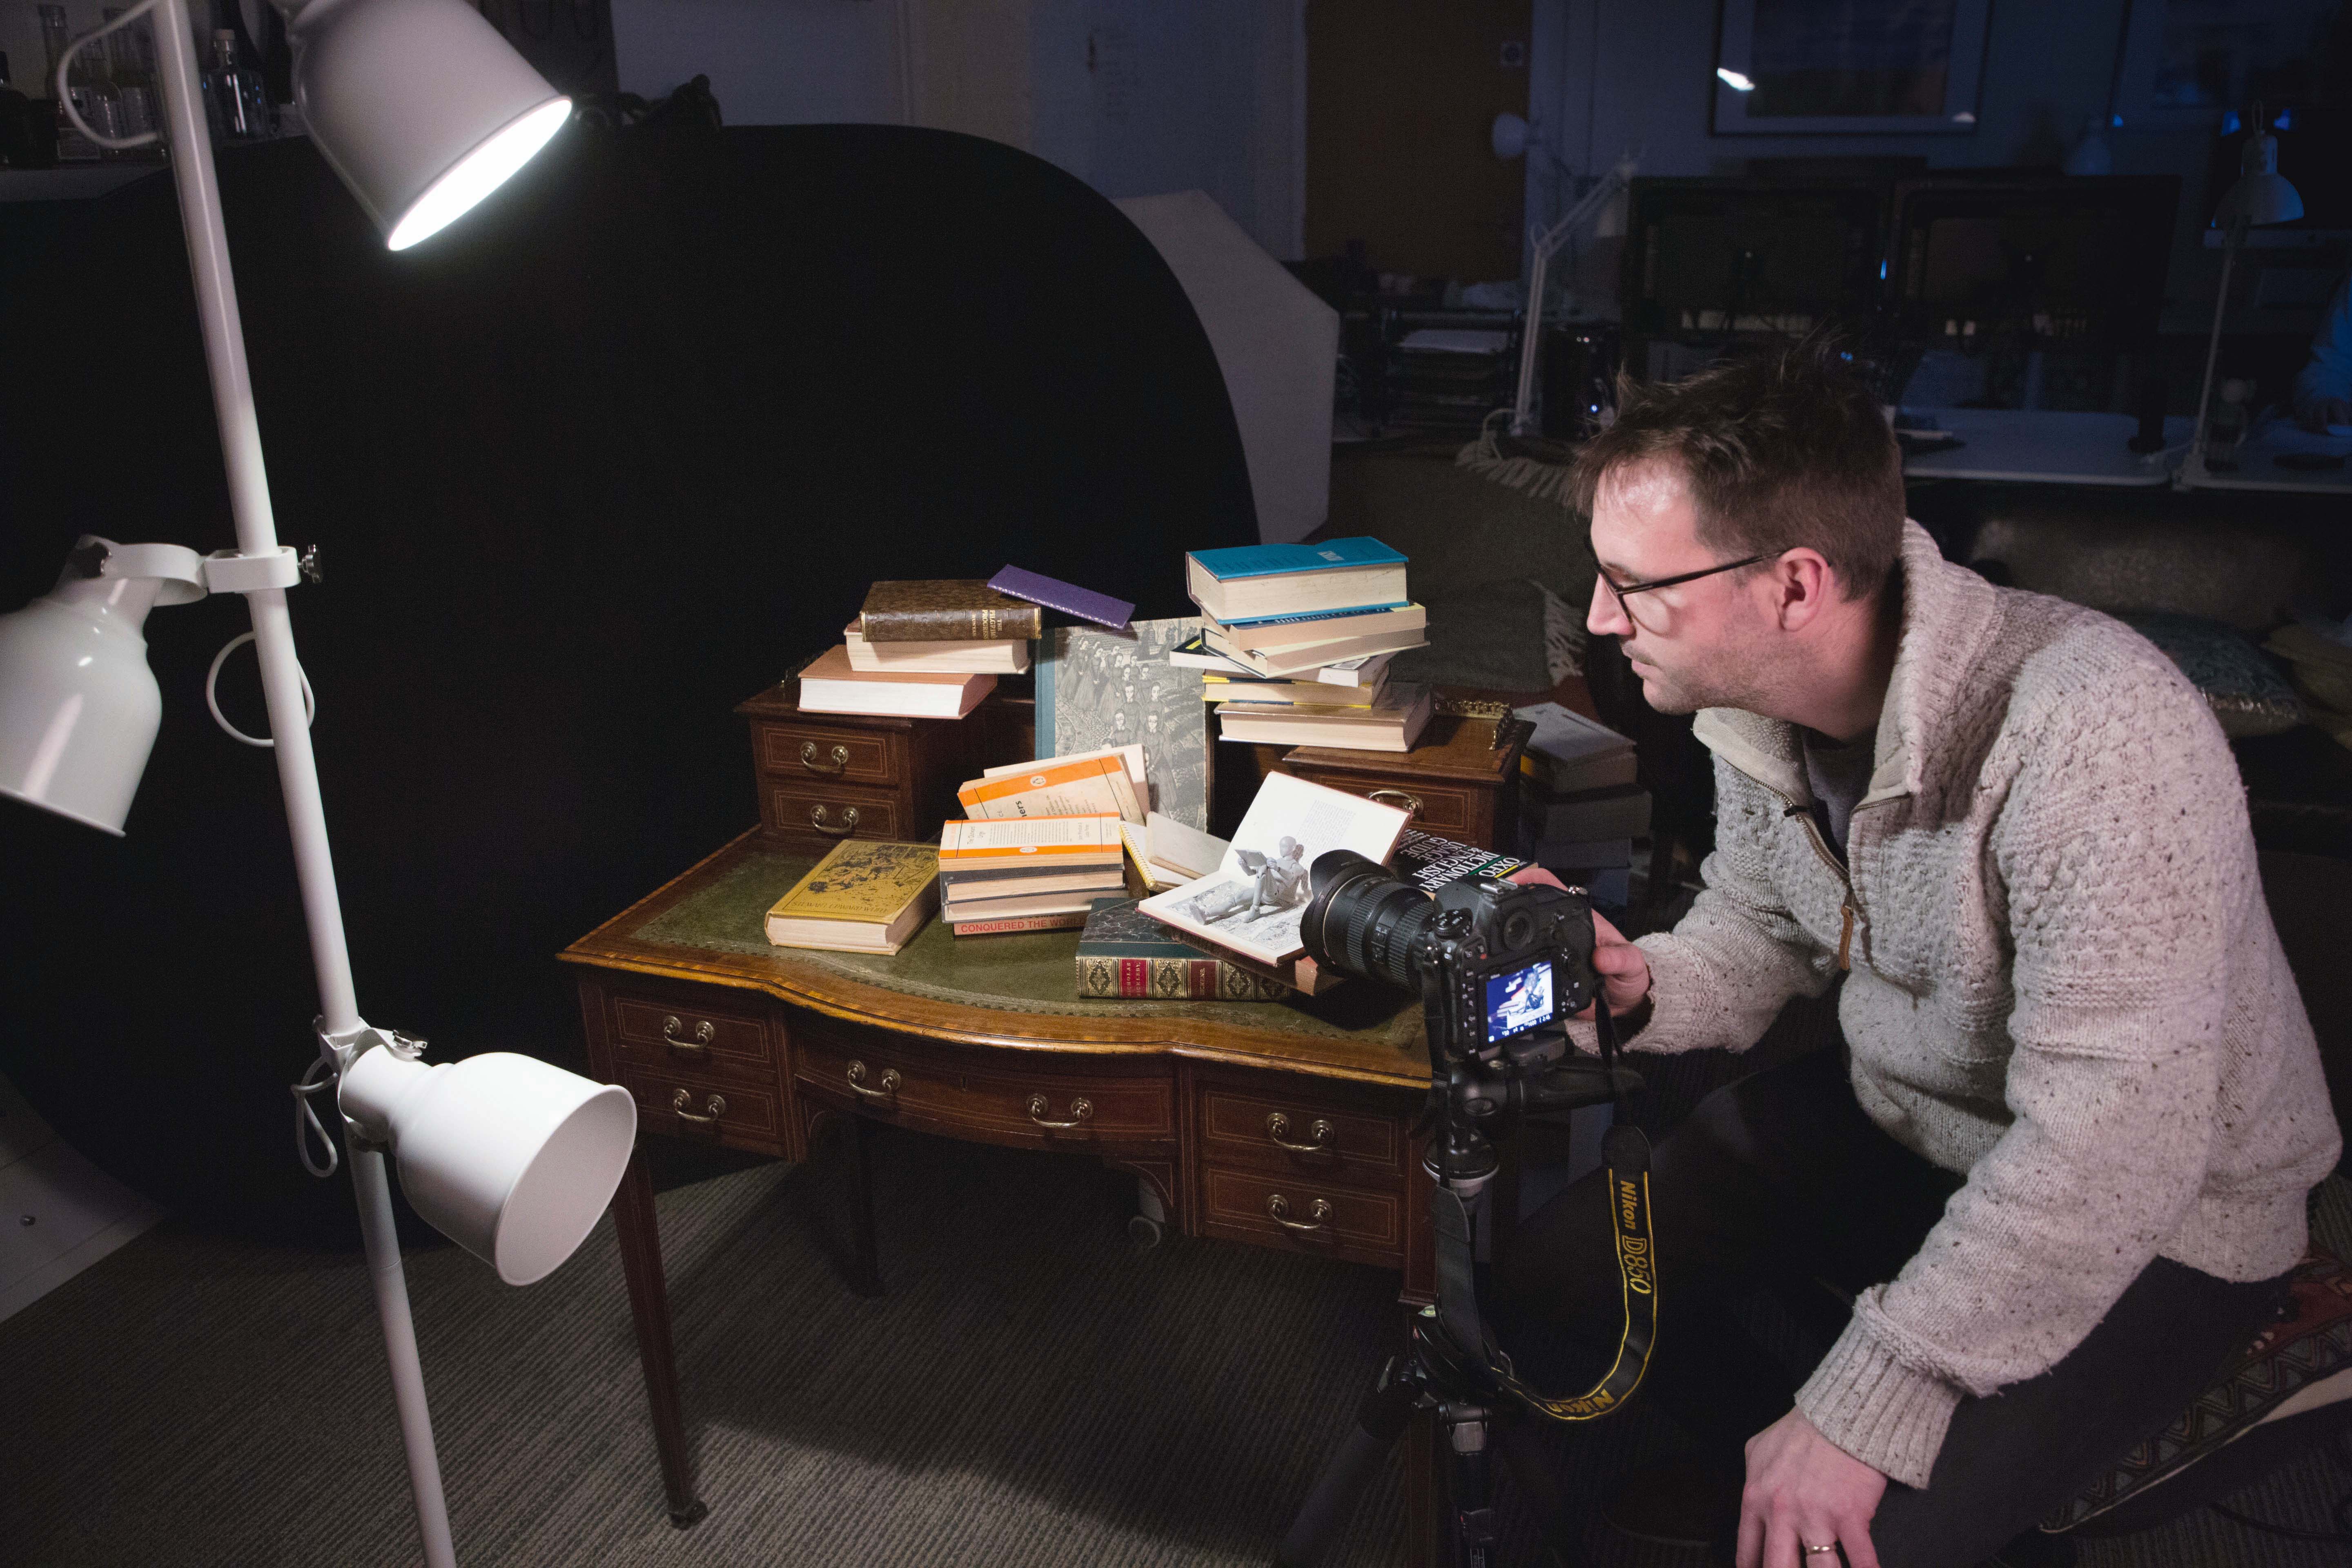
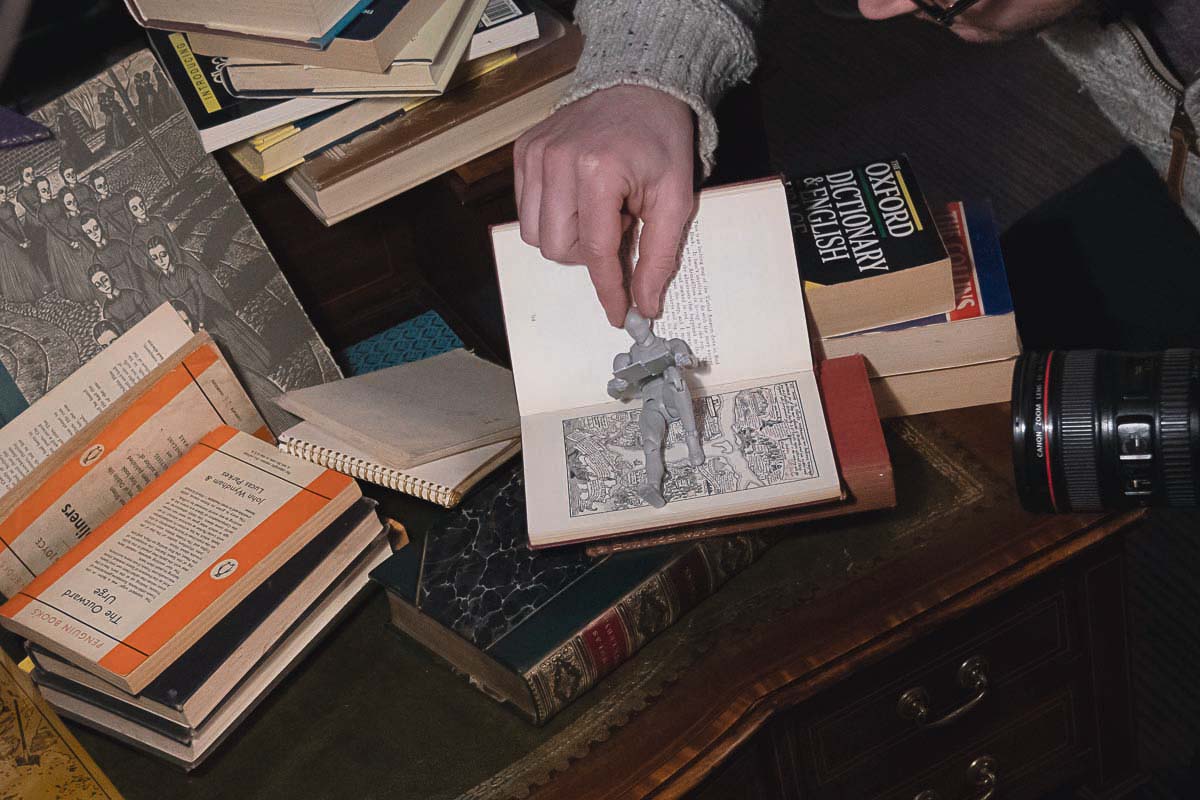
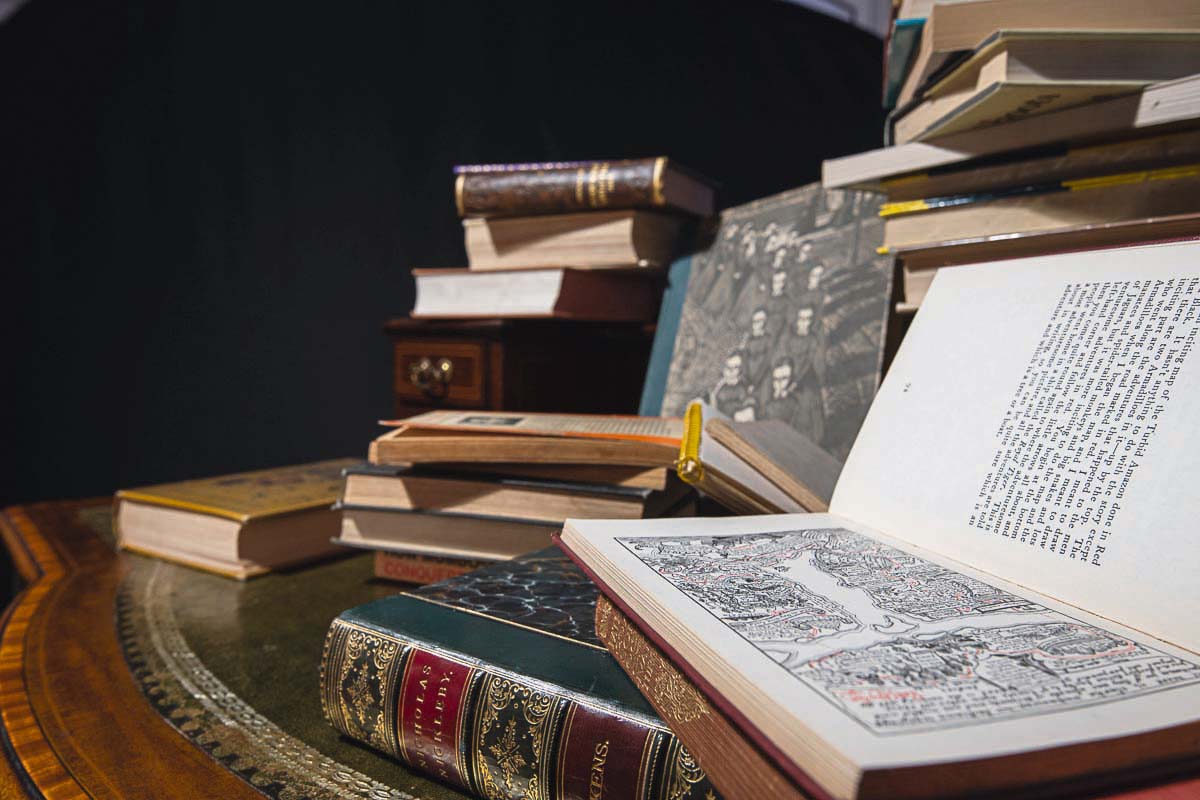
We used an array of old books placed on a vintage writing desk as a backdrop for our project. Books are a good choice as you can scatter them around the frame, but you could also set up any kind of miniature scene you like – so don’t be afraid to get creative!
02 Artist's mannequin
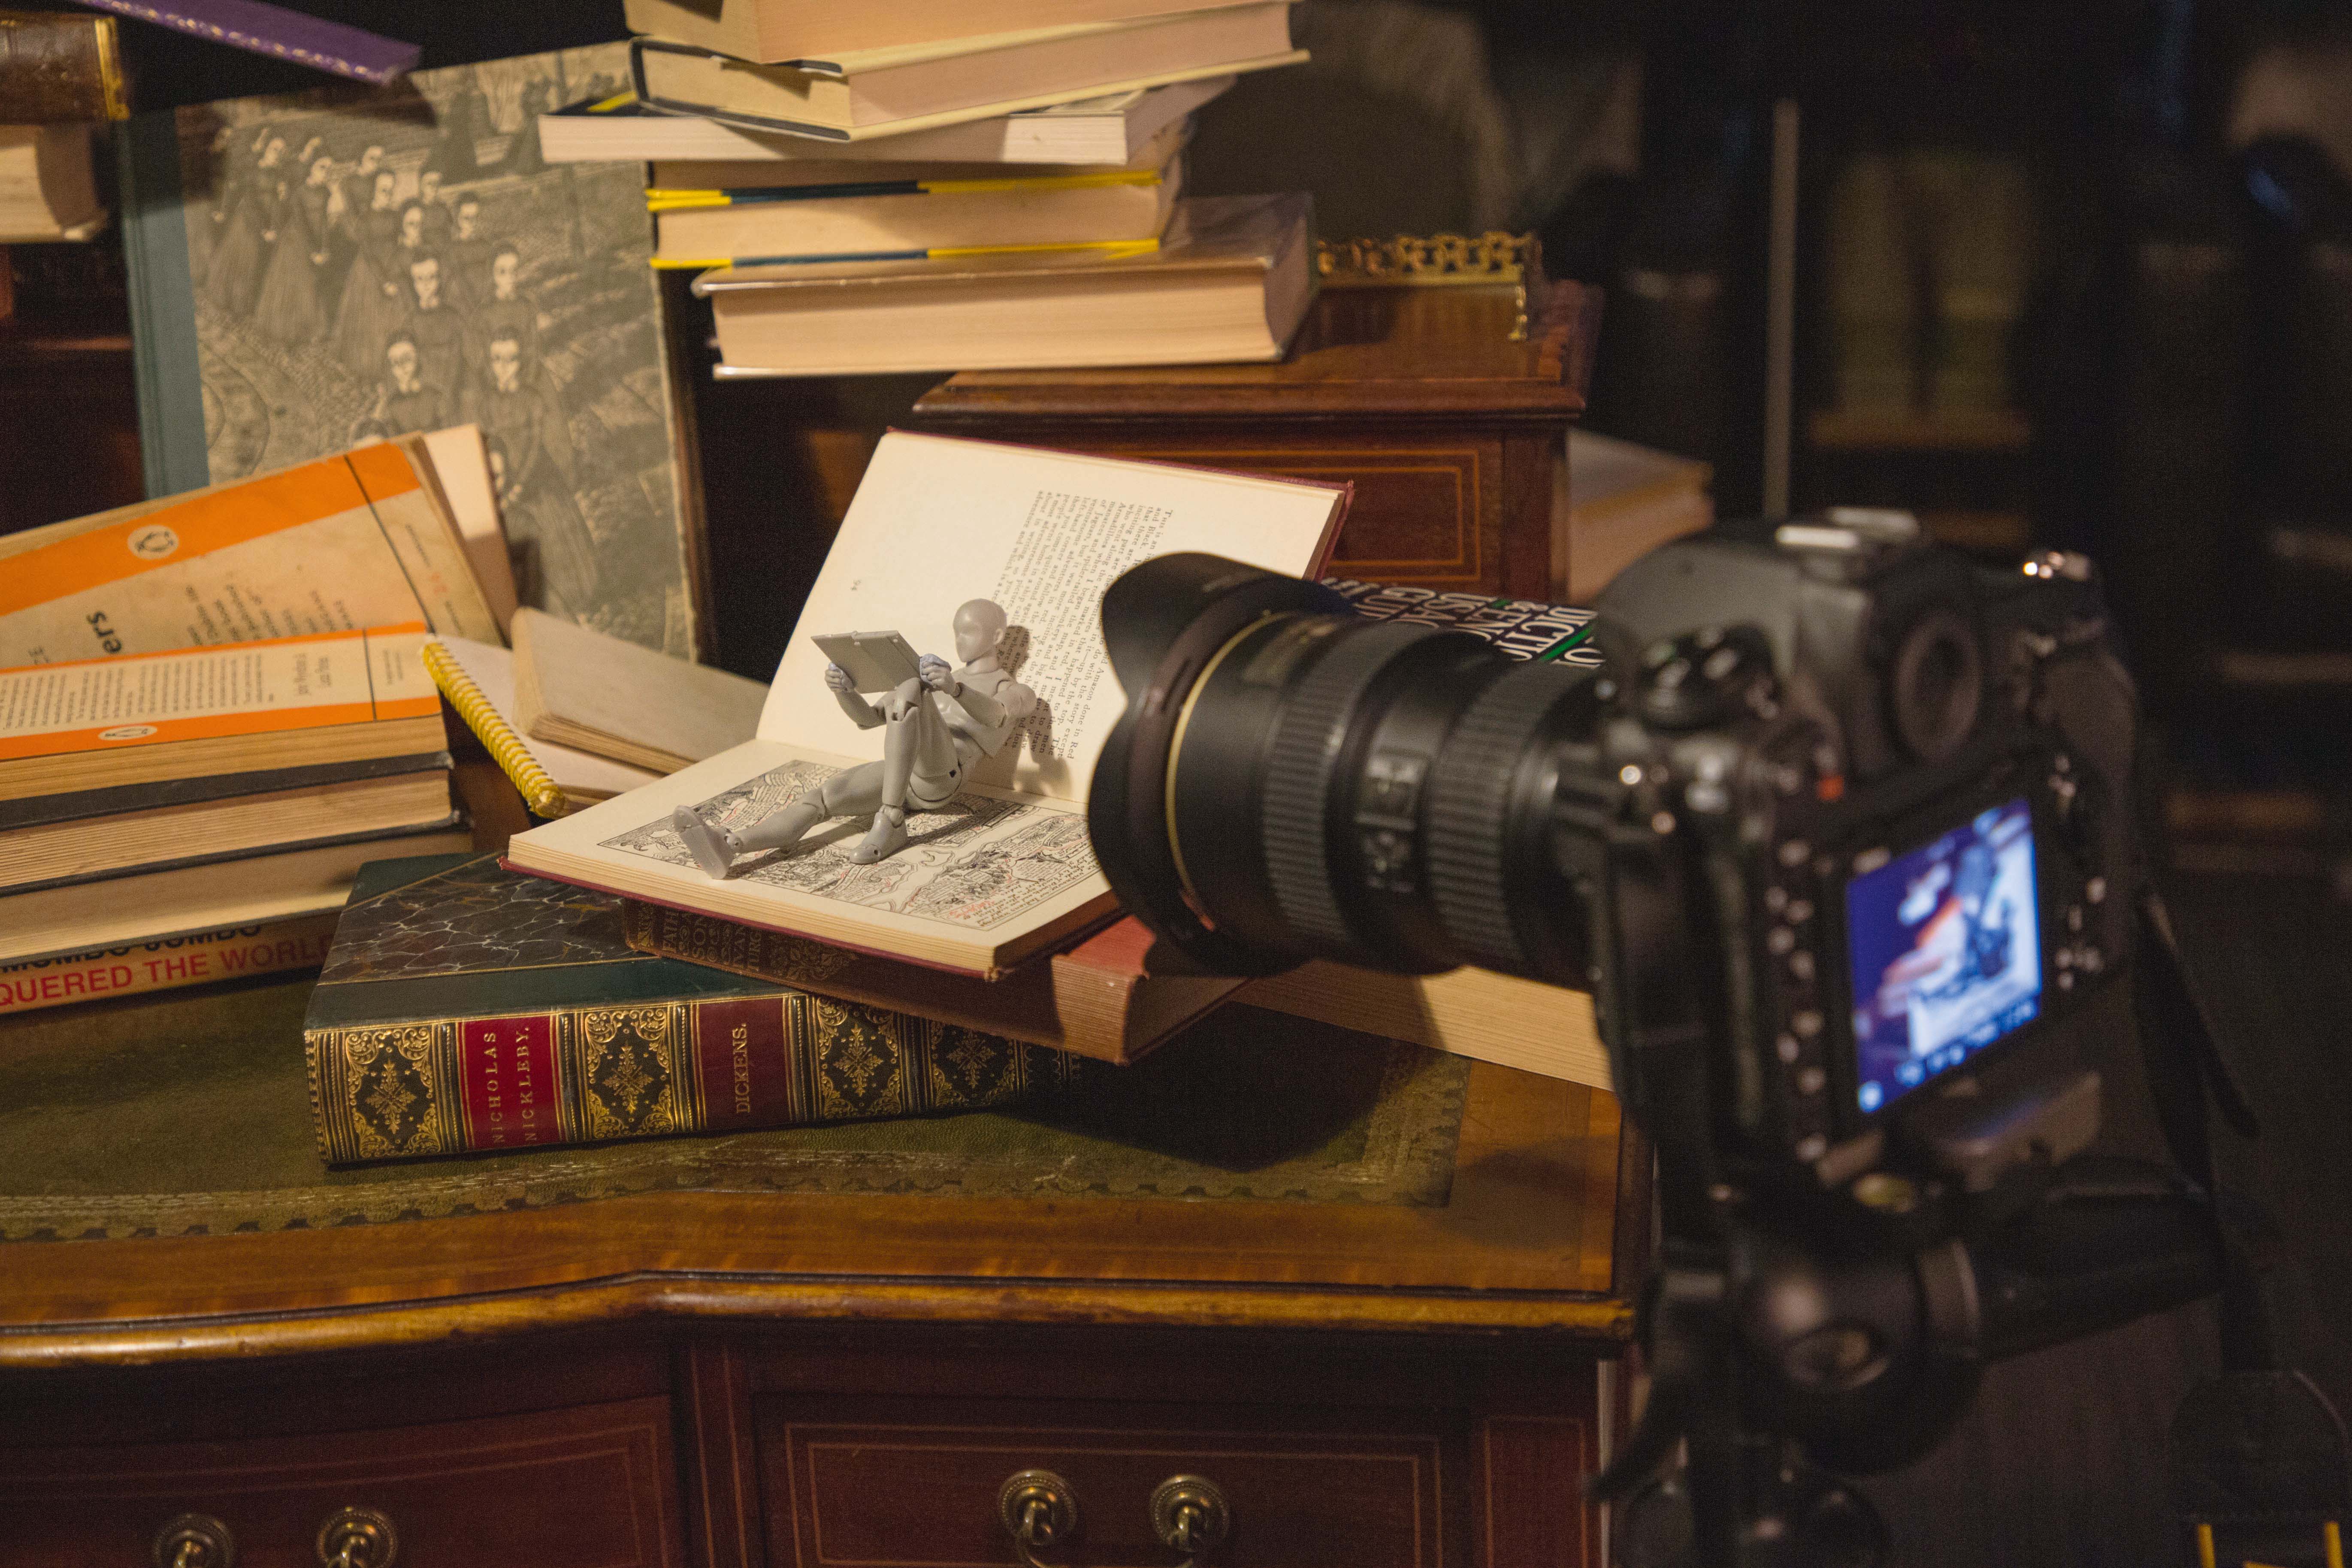
A wooden posing doll not only aids us in visualizing the finished image and perfecting the composition, it also casts realistic shadows that we can use later on in our composite image. A small artist’s mannequin like this is ideal, but you could also use a toy action figure.
03 Lamp
We’re using a regular tungsten desk lamp to light our scene. We’ve positioned the light behind and to the left here, which gives us atmospheric backlighting. We also placed a second, weaker, lamp near to the camera position, to provide a small amount of fill light.
04 Tripod
A tripod isn’t essential, but it frees your hands to perfect the composition and gives you the option to drop your shutter speed, use a low ISO, and vary your aperture – helpful for shooting with weak light from a tungsten lamp.
05 Camera settings
You can use any camera mode you like but, if you’re using a tungsten lamp like us, it’s likely that you’ll need to get set up for a long exposure, which means using a cable release or self-timer to prevent shake. We’re in manual at 2 secs, f/9, ISO100.
06 Focus distance
We used a wide angle of 24mm for our shot, which exaggerates the perspective. When the camera is this close to the subject (we’re at minimum focusing distance here) then depth of field can be quite narrow, even at higher f-numbers.
Craft consistent composites
01 Choose a camera height
When setting up your camera, choose a camera height you can match across both the mini scene and the full-size one. We’ve kept it roughly at chest height in both, but you could try varying it by shooting from a high or low angle instead. When composing, Live View is a big help.
02 Perfect the pose
Choose a pose that will be easy for your subject to copy in the full-size shot. We’ve gone for a sitting pose, with a leg up, so that the shadows fall across the page of the book our little man is using as a seat. Once posed, we can tweak the lighting position to control the look of the shadows.
03 Control the light
The smaller a light source is, the harder the shadows. Think about this when matching the lighting between the two scenes, especially as the size of the light will change in relation to the size of the subject. The shadows from our lamp are hard-edged because the source is small.
04 Shoot the empty scene
After capturing a shot of the mannequin, it’s crucial to take the figure out and then fire off another frame – making sure that the exposure settings, camera position and lighting stay the same. This way, if there’s any overlap in our composite, we can use the empty details to replace the figure.
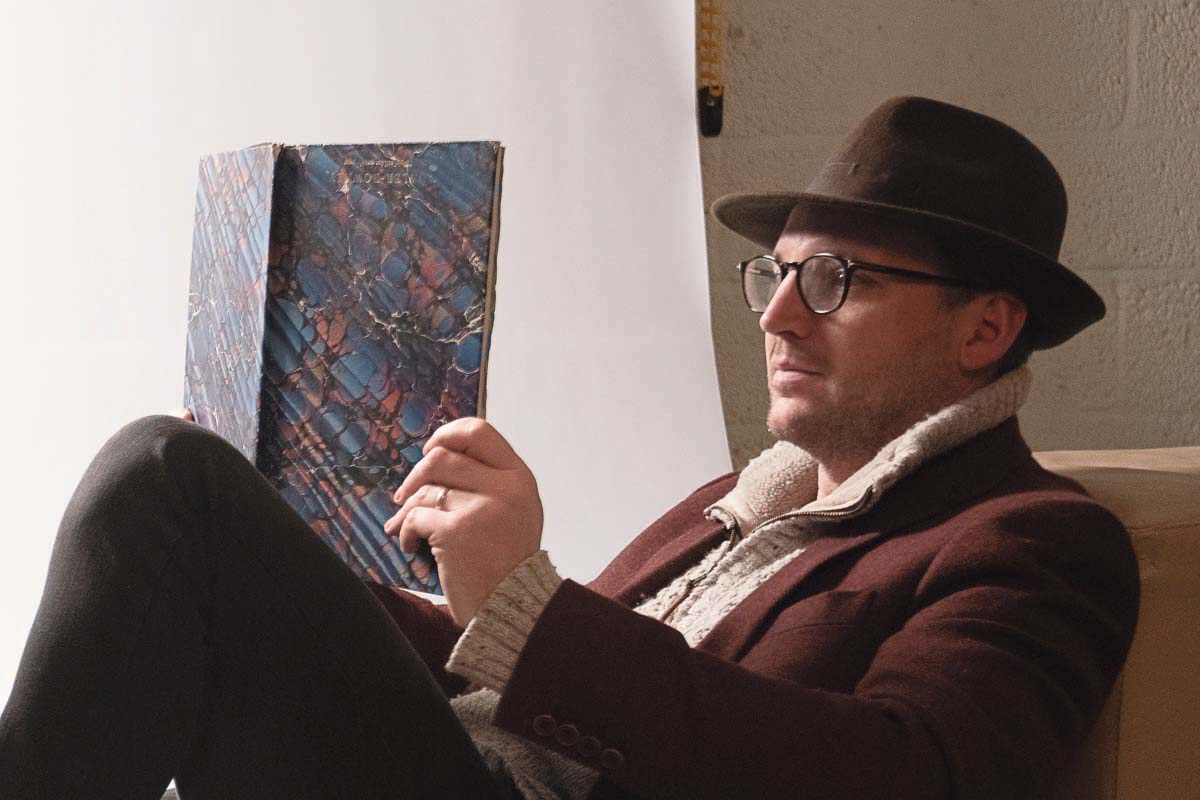
Shoot the portrait
01 Match the lighting
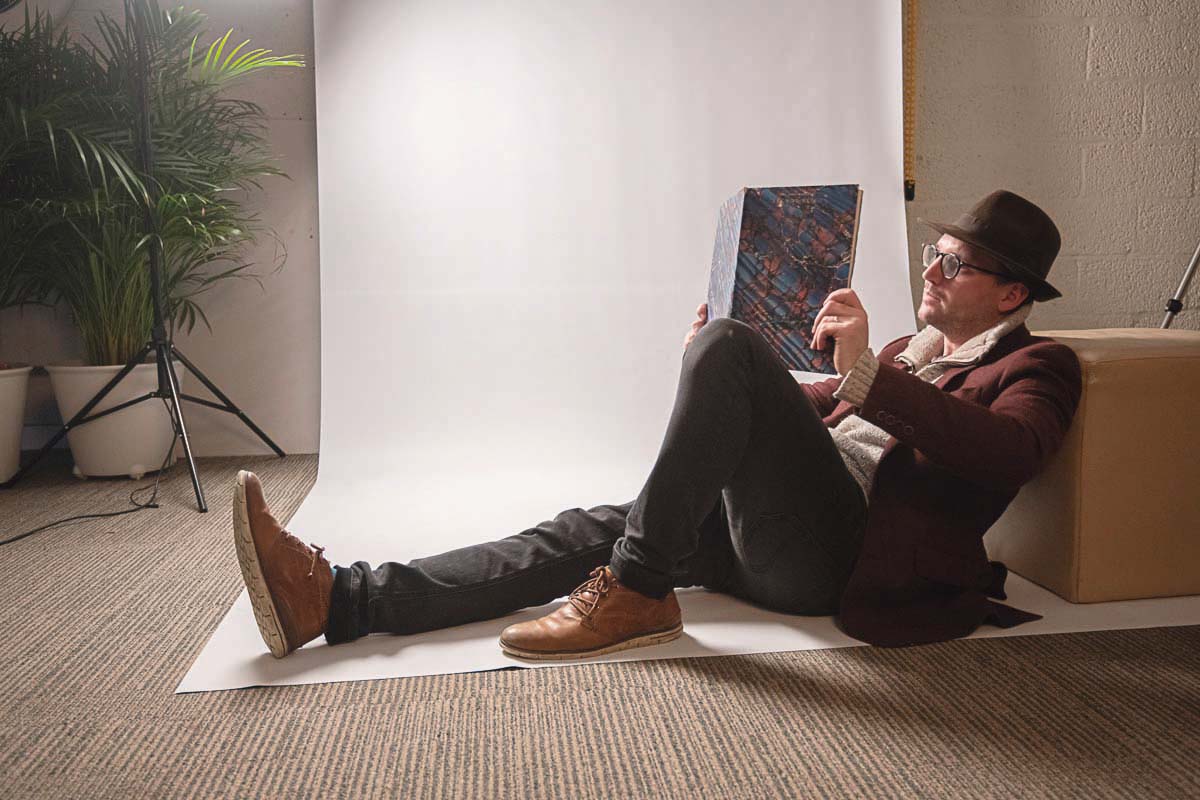
We need to match the lighting on our full-size portrait with that in the main background. We’ve used a single light, above, behind and to the left of the subject. Aim for similar shadows to the doll.
02: Plan ahead!
When you know that you’ll need to cut the subject out, you can shoot smart by using a plain backdrop like the roll of vinyl here. The hat is also helpful – we don’t have to cut out around the subject’s hair.
Shrink your subject into a scene in Photoshop
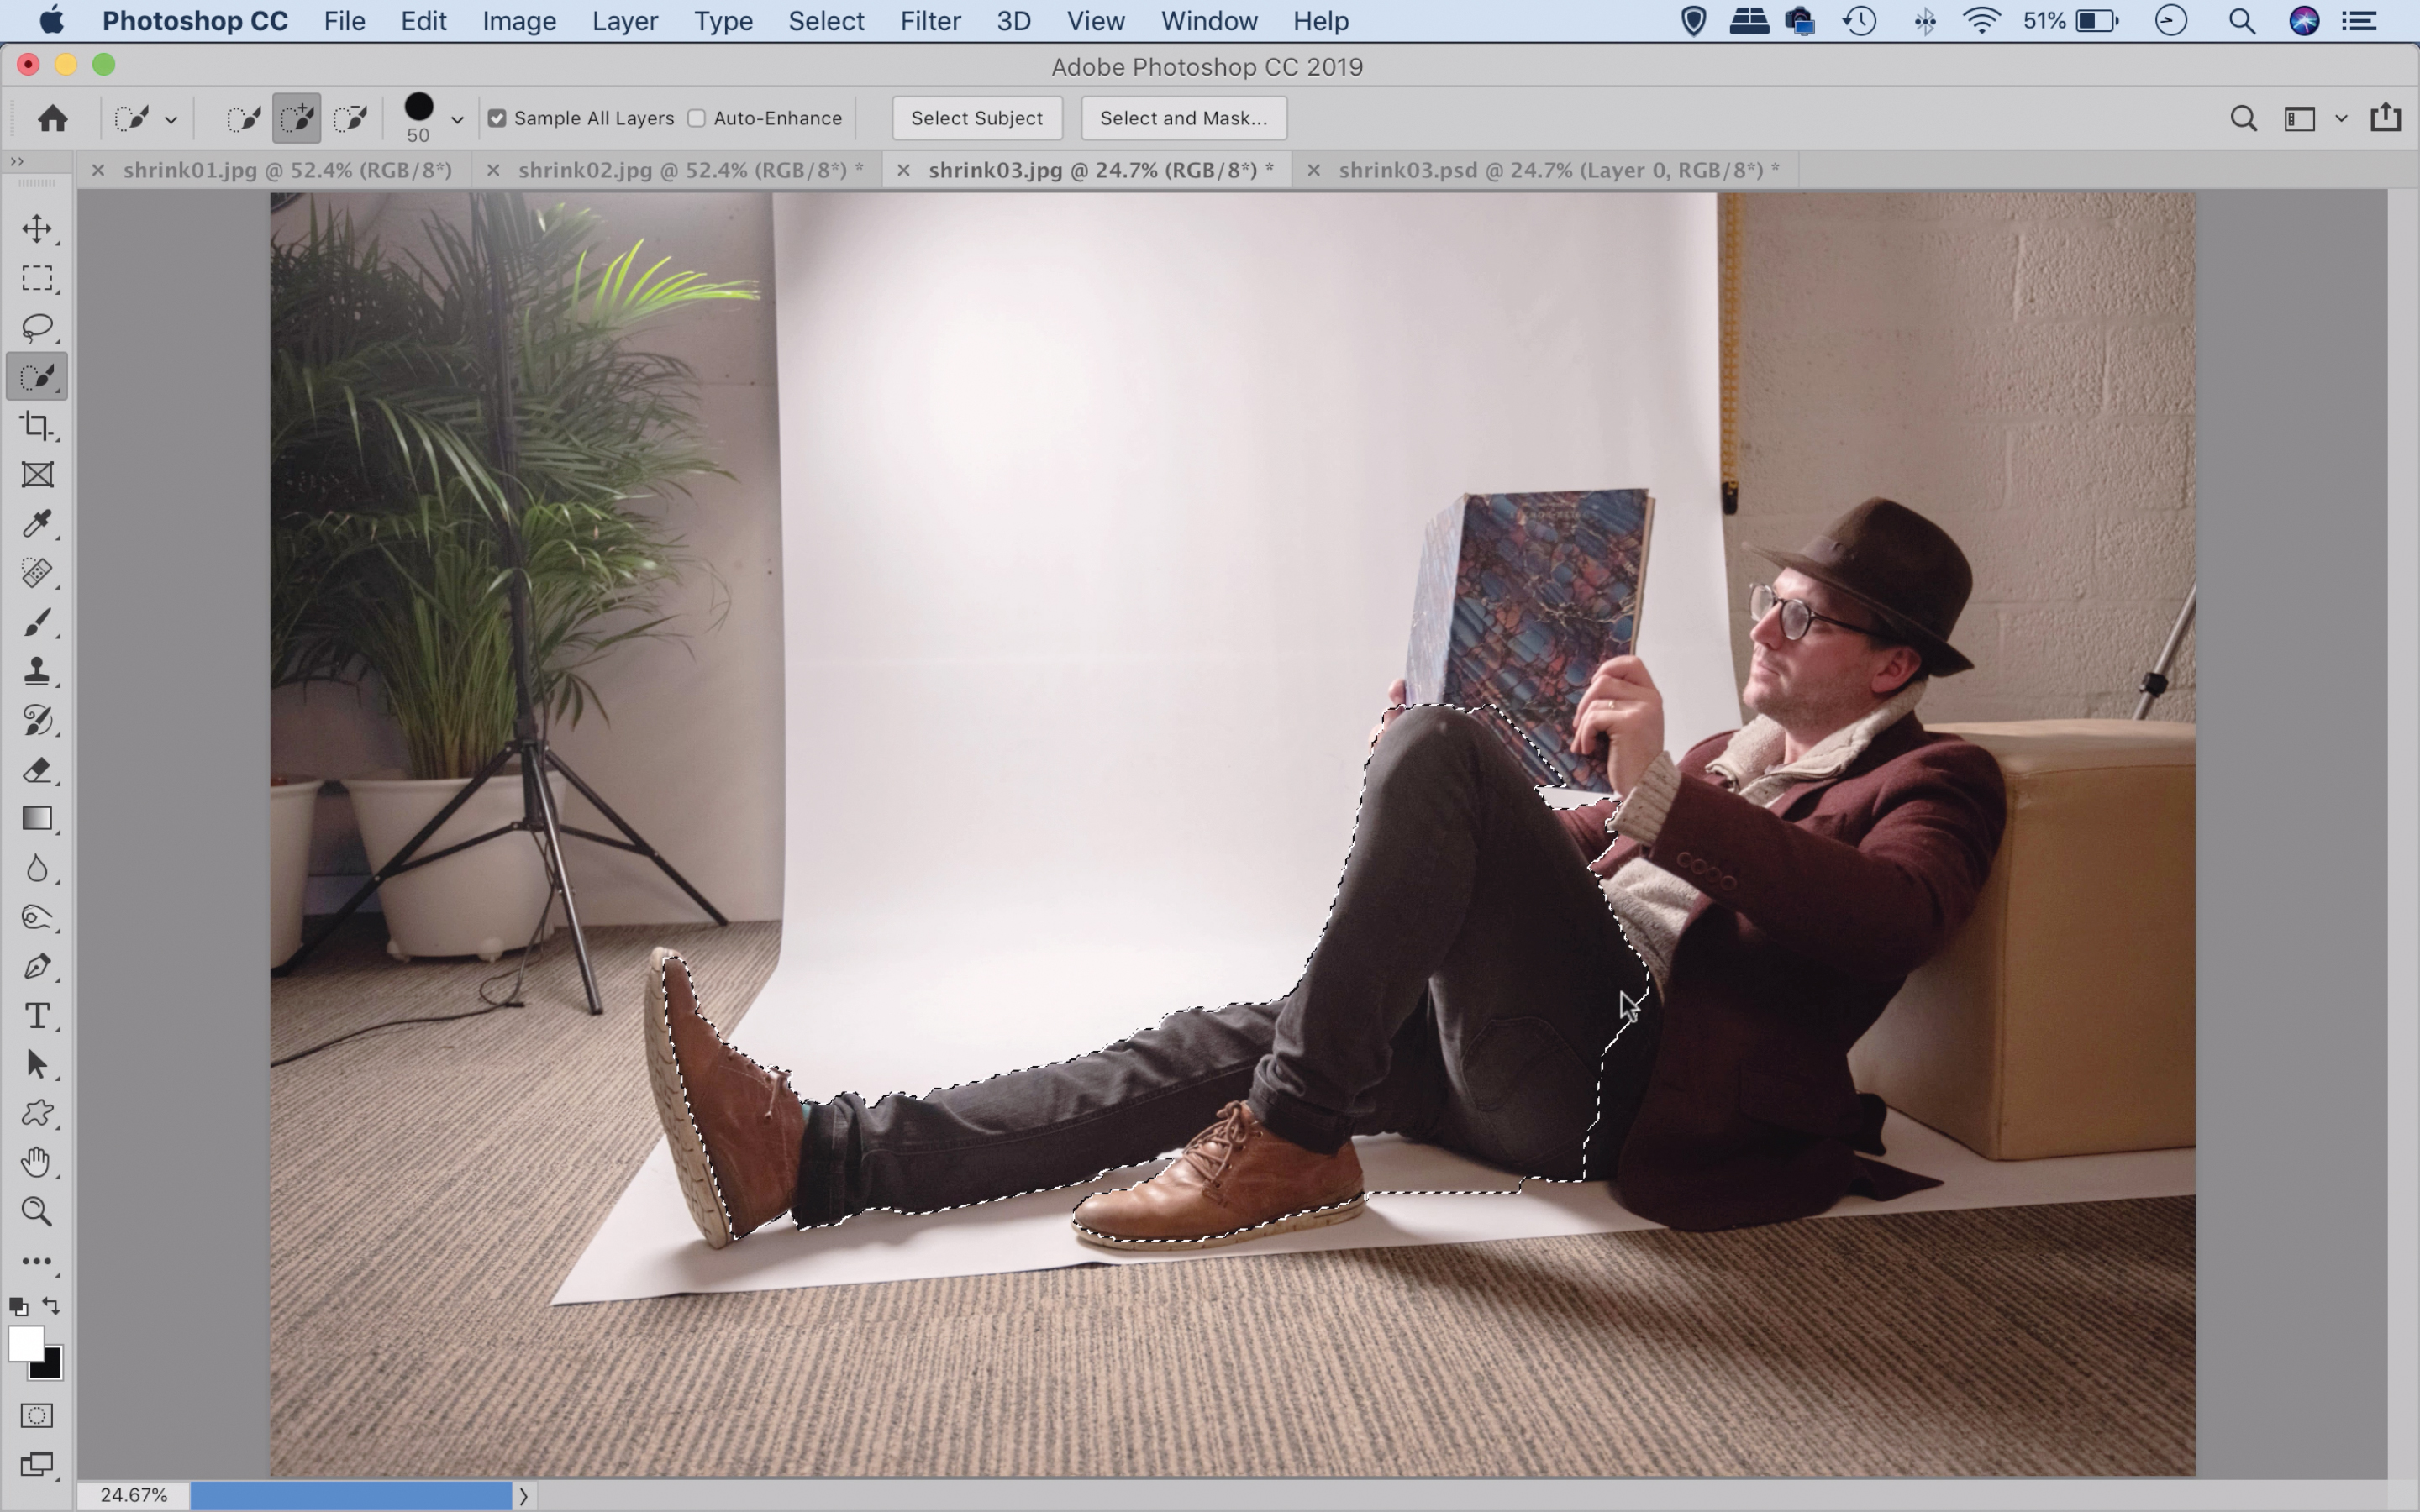
01 Select the person
Open the three images – the scene with/without the doll and the portrait – into Photoshop. First go to the portrait and grab the Quick Selection tool, then paint over the subject to select them. Hold Alt and paint to subtract if the selection goes wrong.
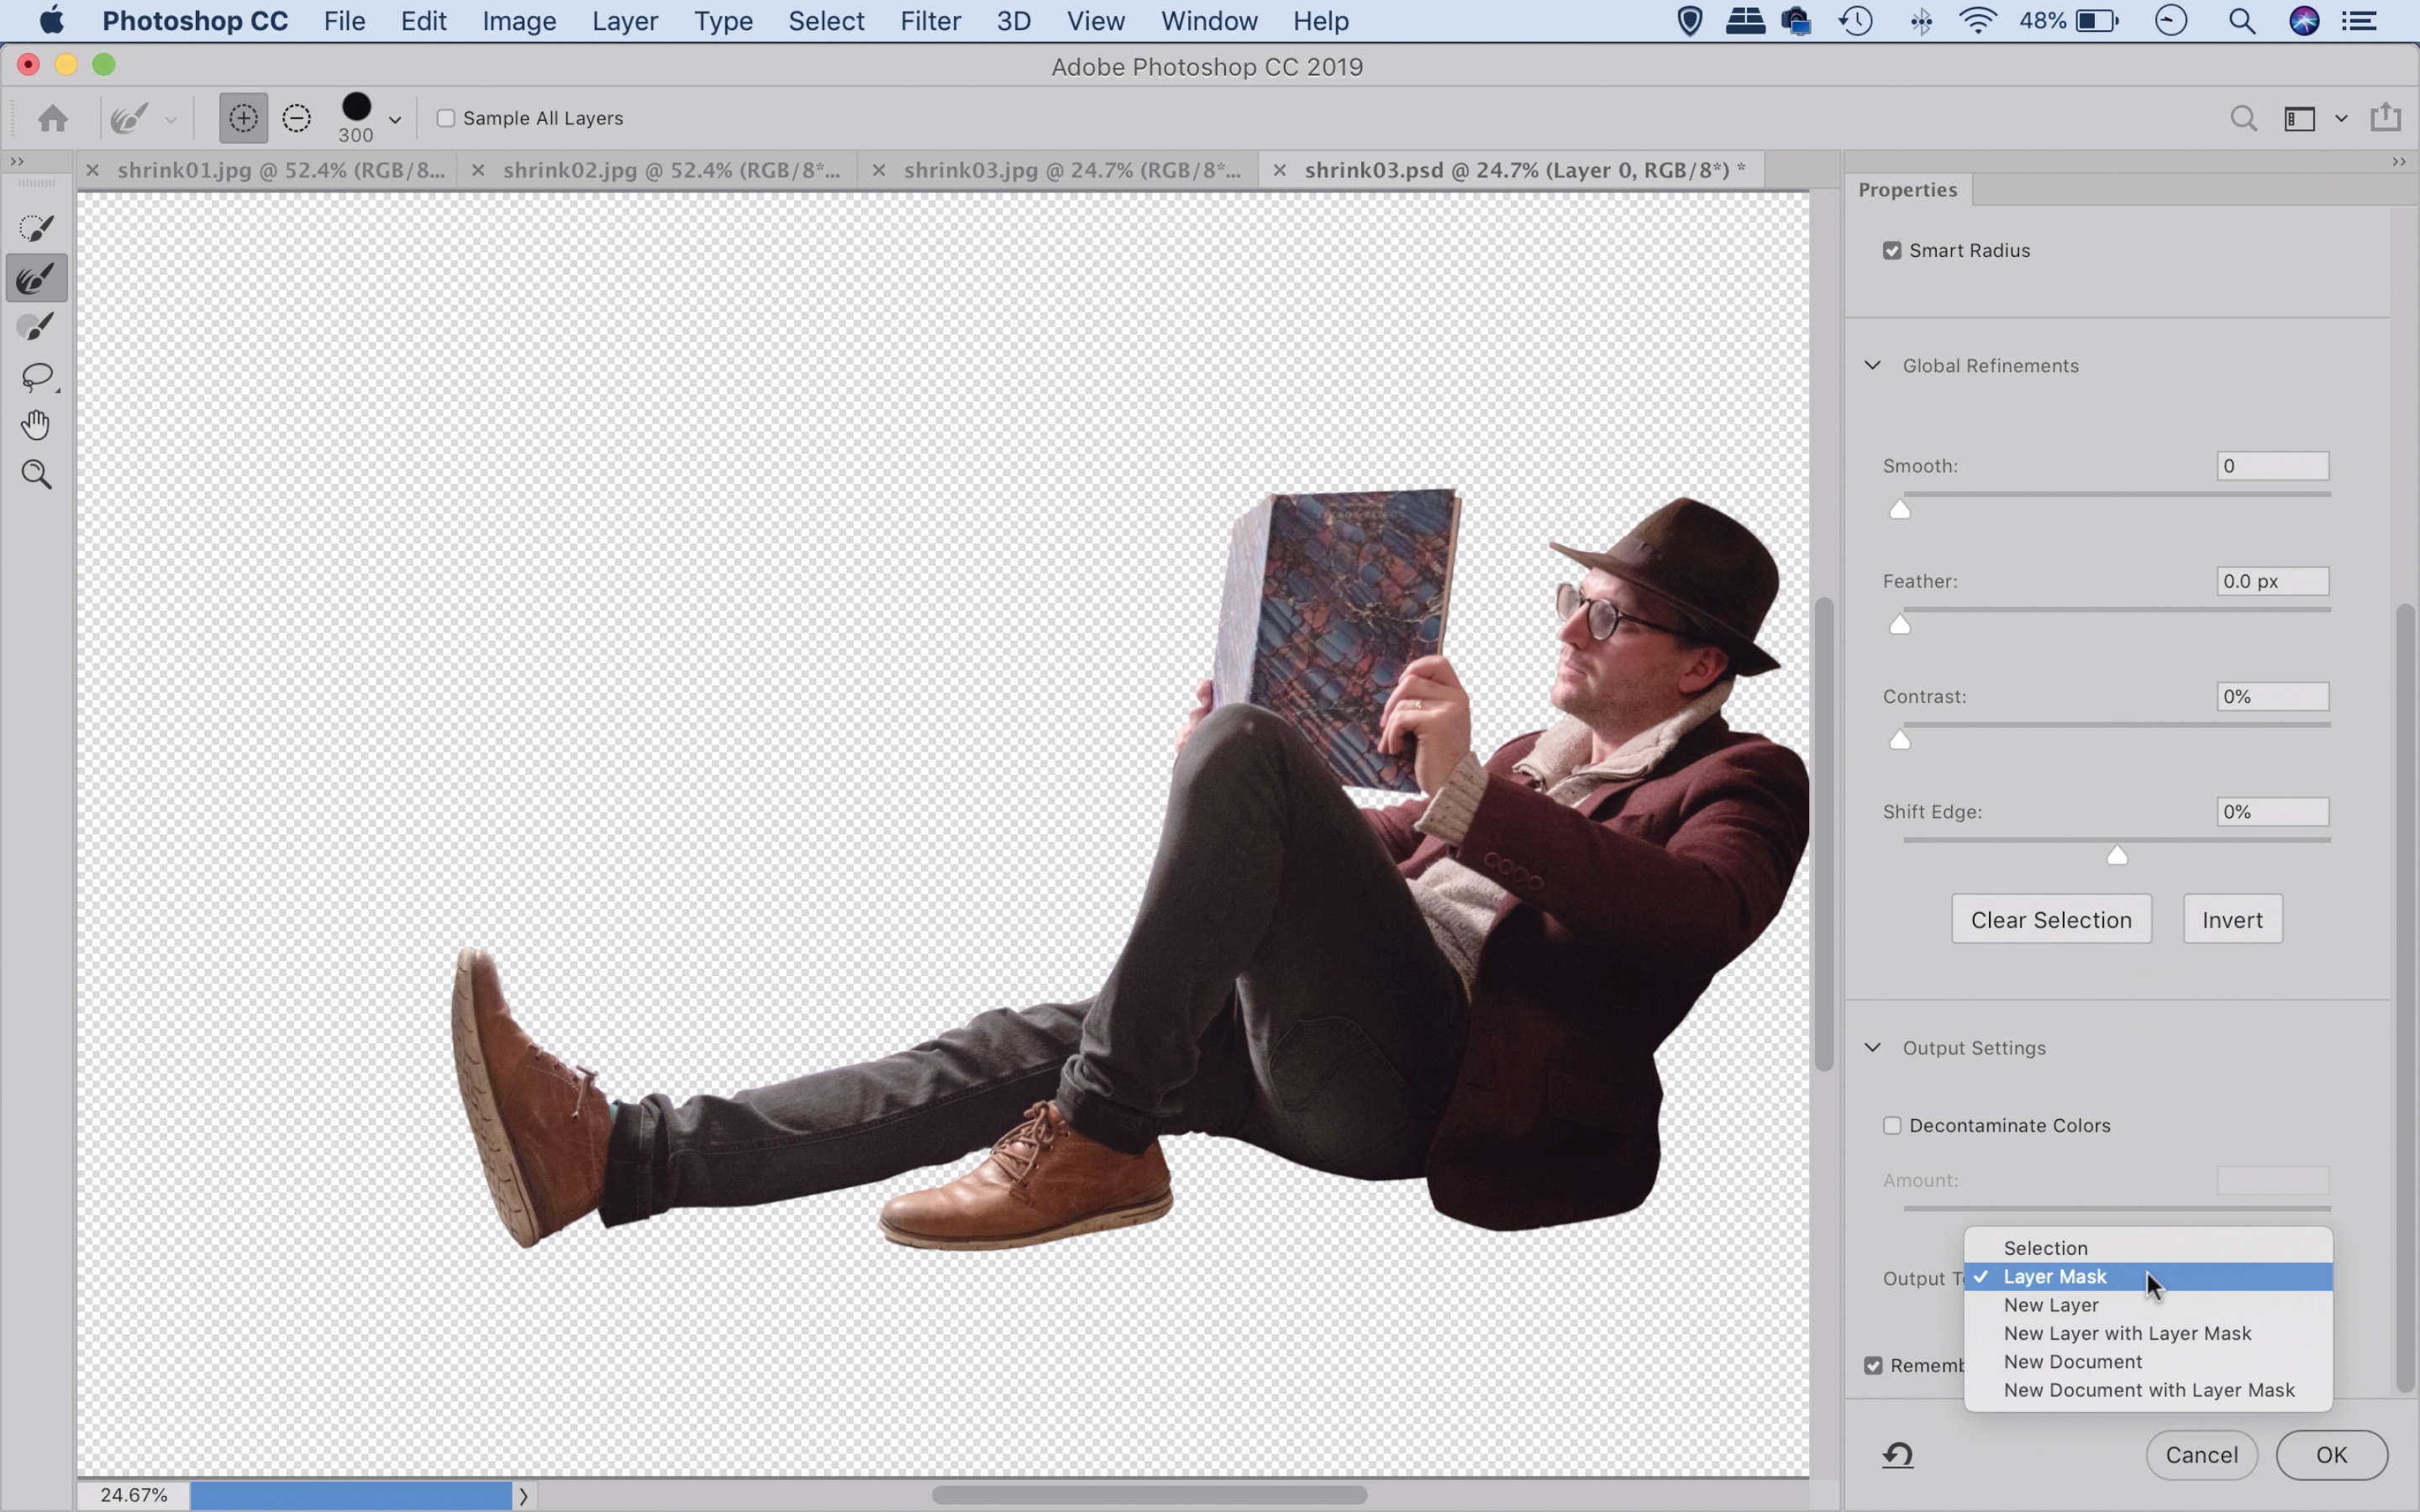
02 Improve the cutout
Once done click ‘Select and Mask’ at the top. Use the controls here to improve the selection edge. Increase the radius slightly and use the Refine Radius brush to paint over any fuzzy edges like hair. Once done, choose Output to: Layer Mask and hit OK.
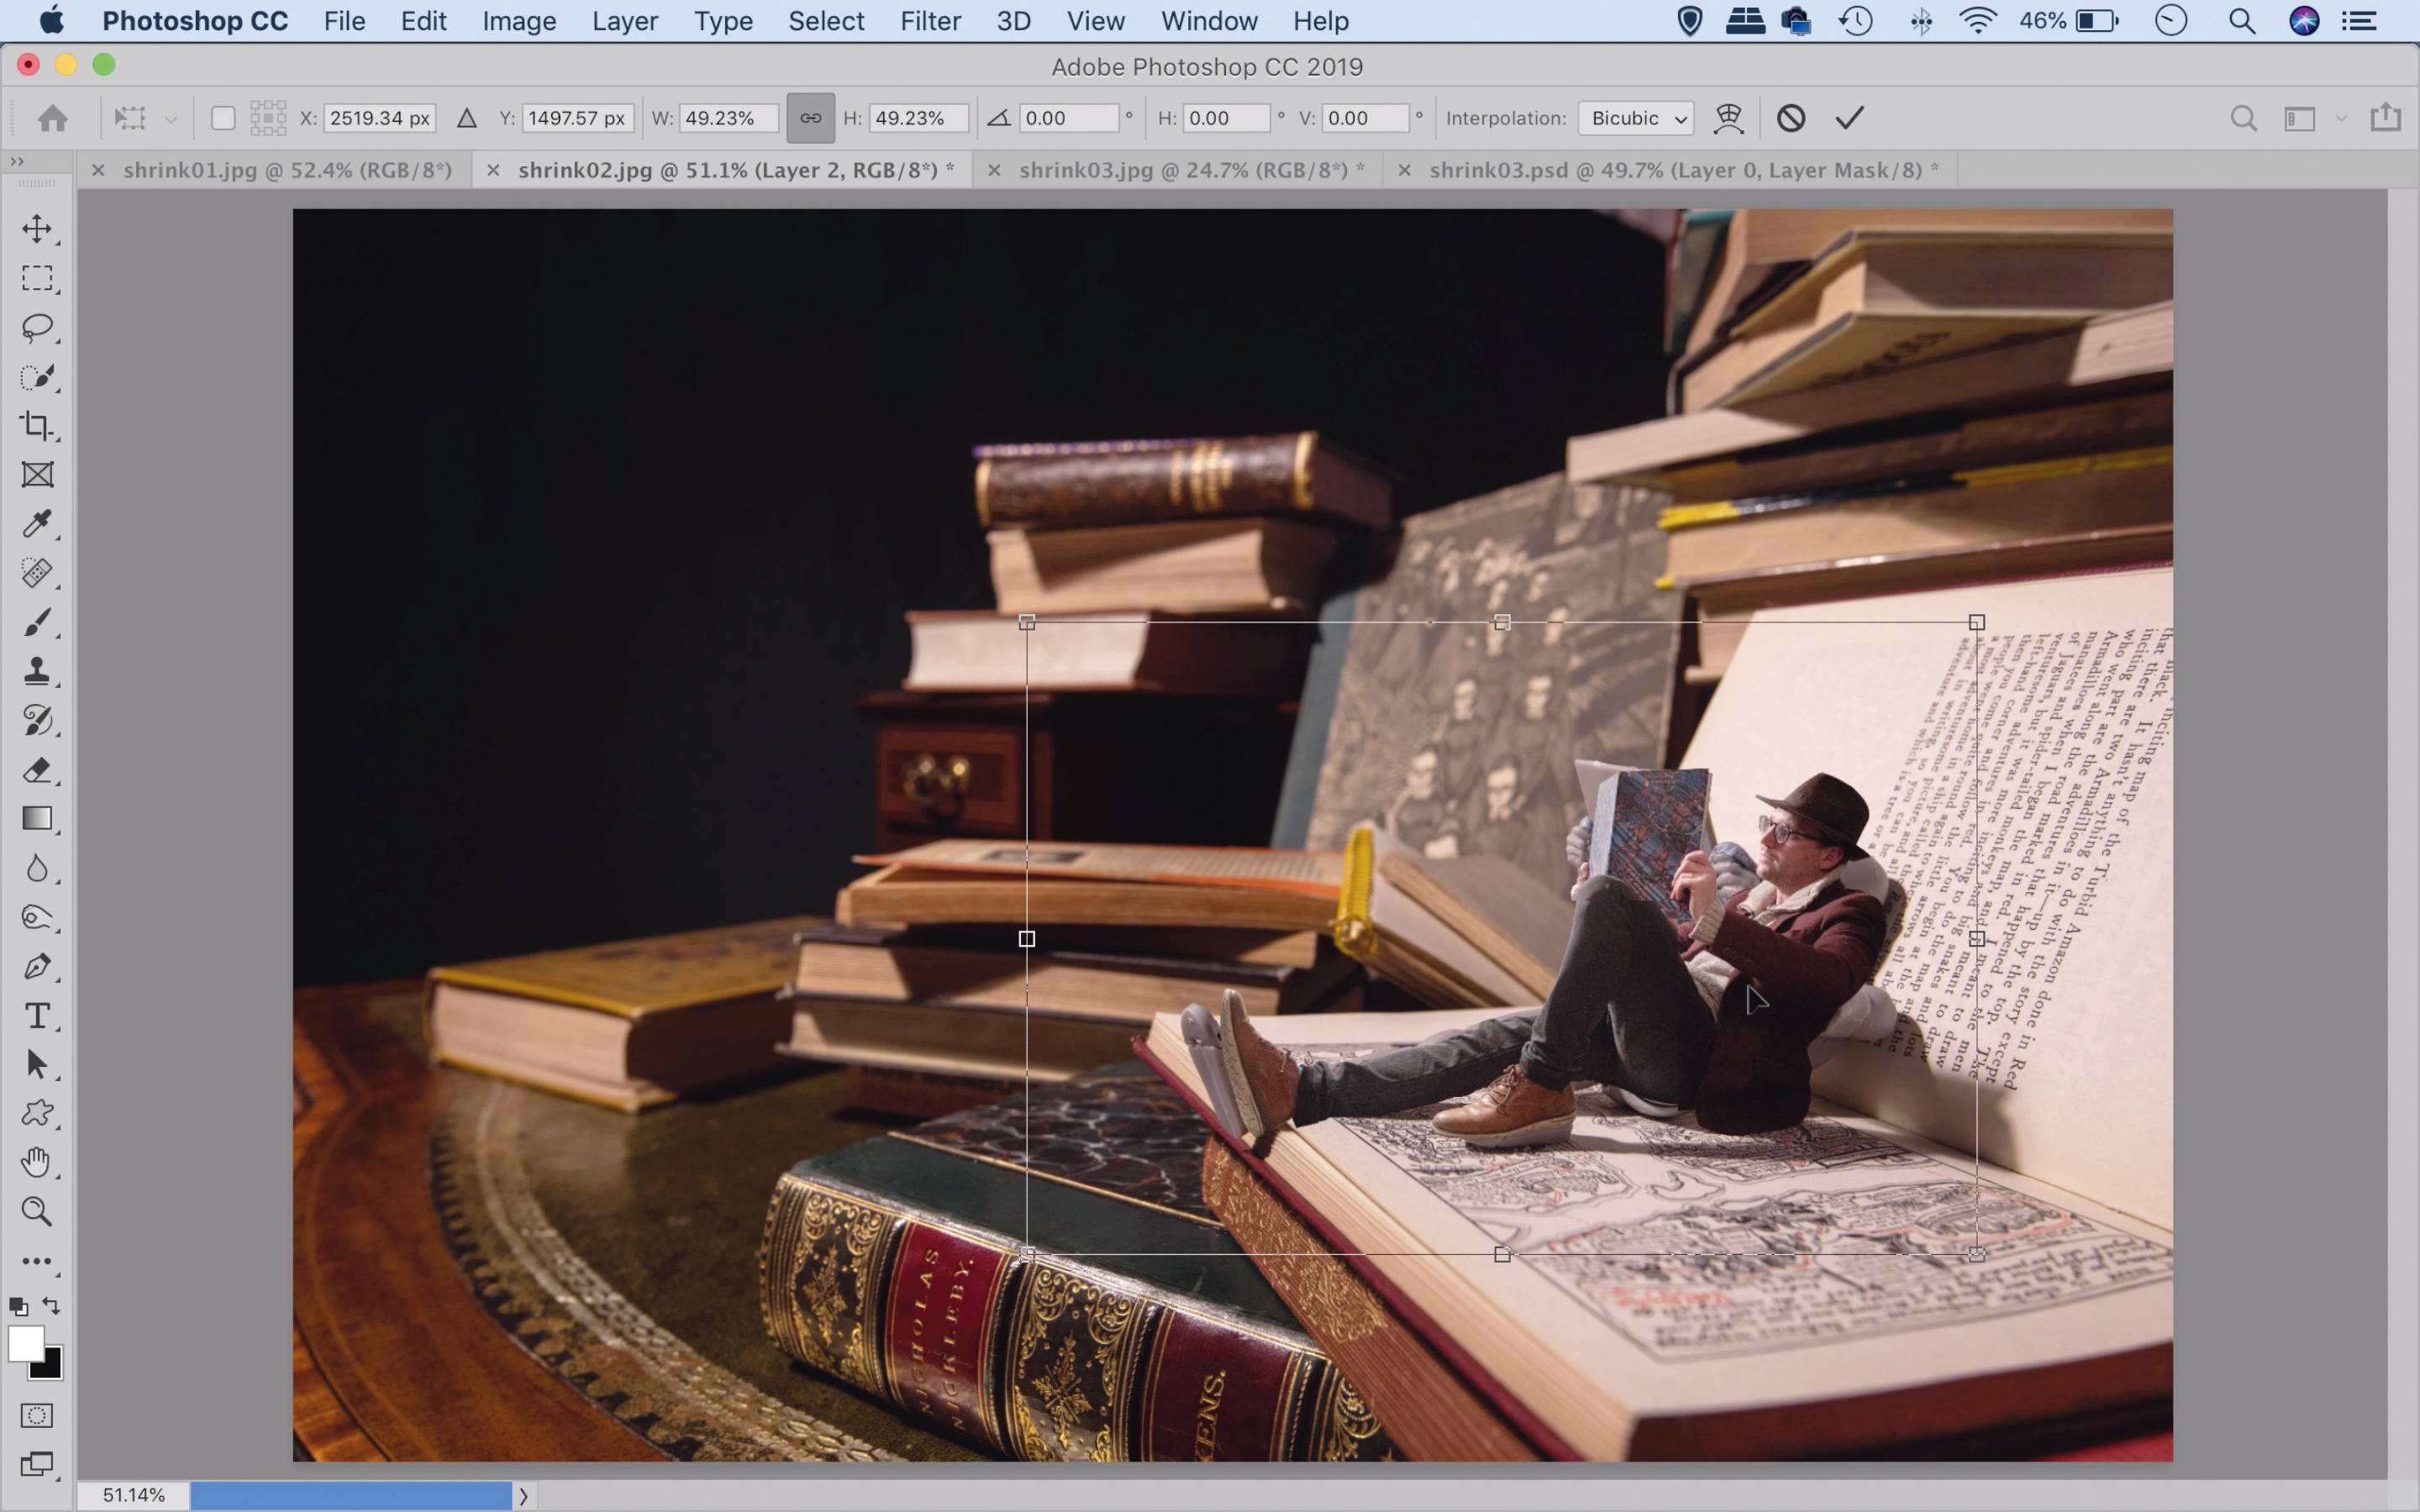
03 Combine the photos
Grab the Move tool for the toolbar and use it to drag first the image with the doll and then the image with the person into the empty book scene. Hit Cmd / Ctrl + T to transform the person then resize and position them to fit roughly over the doll.
04 Mask the doll
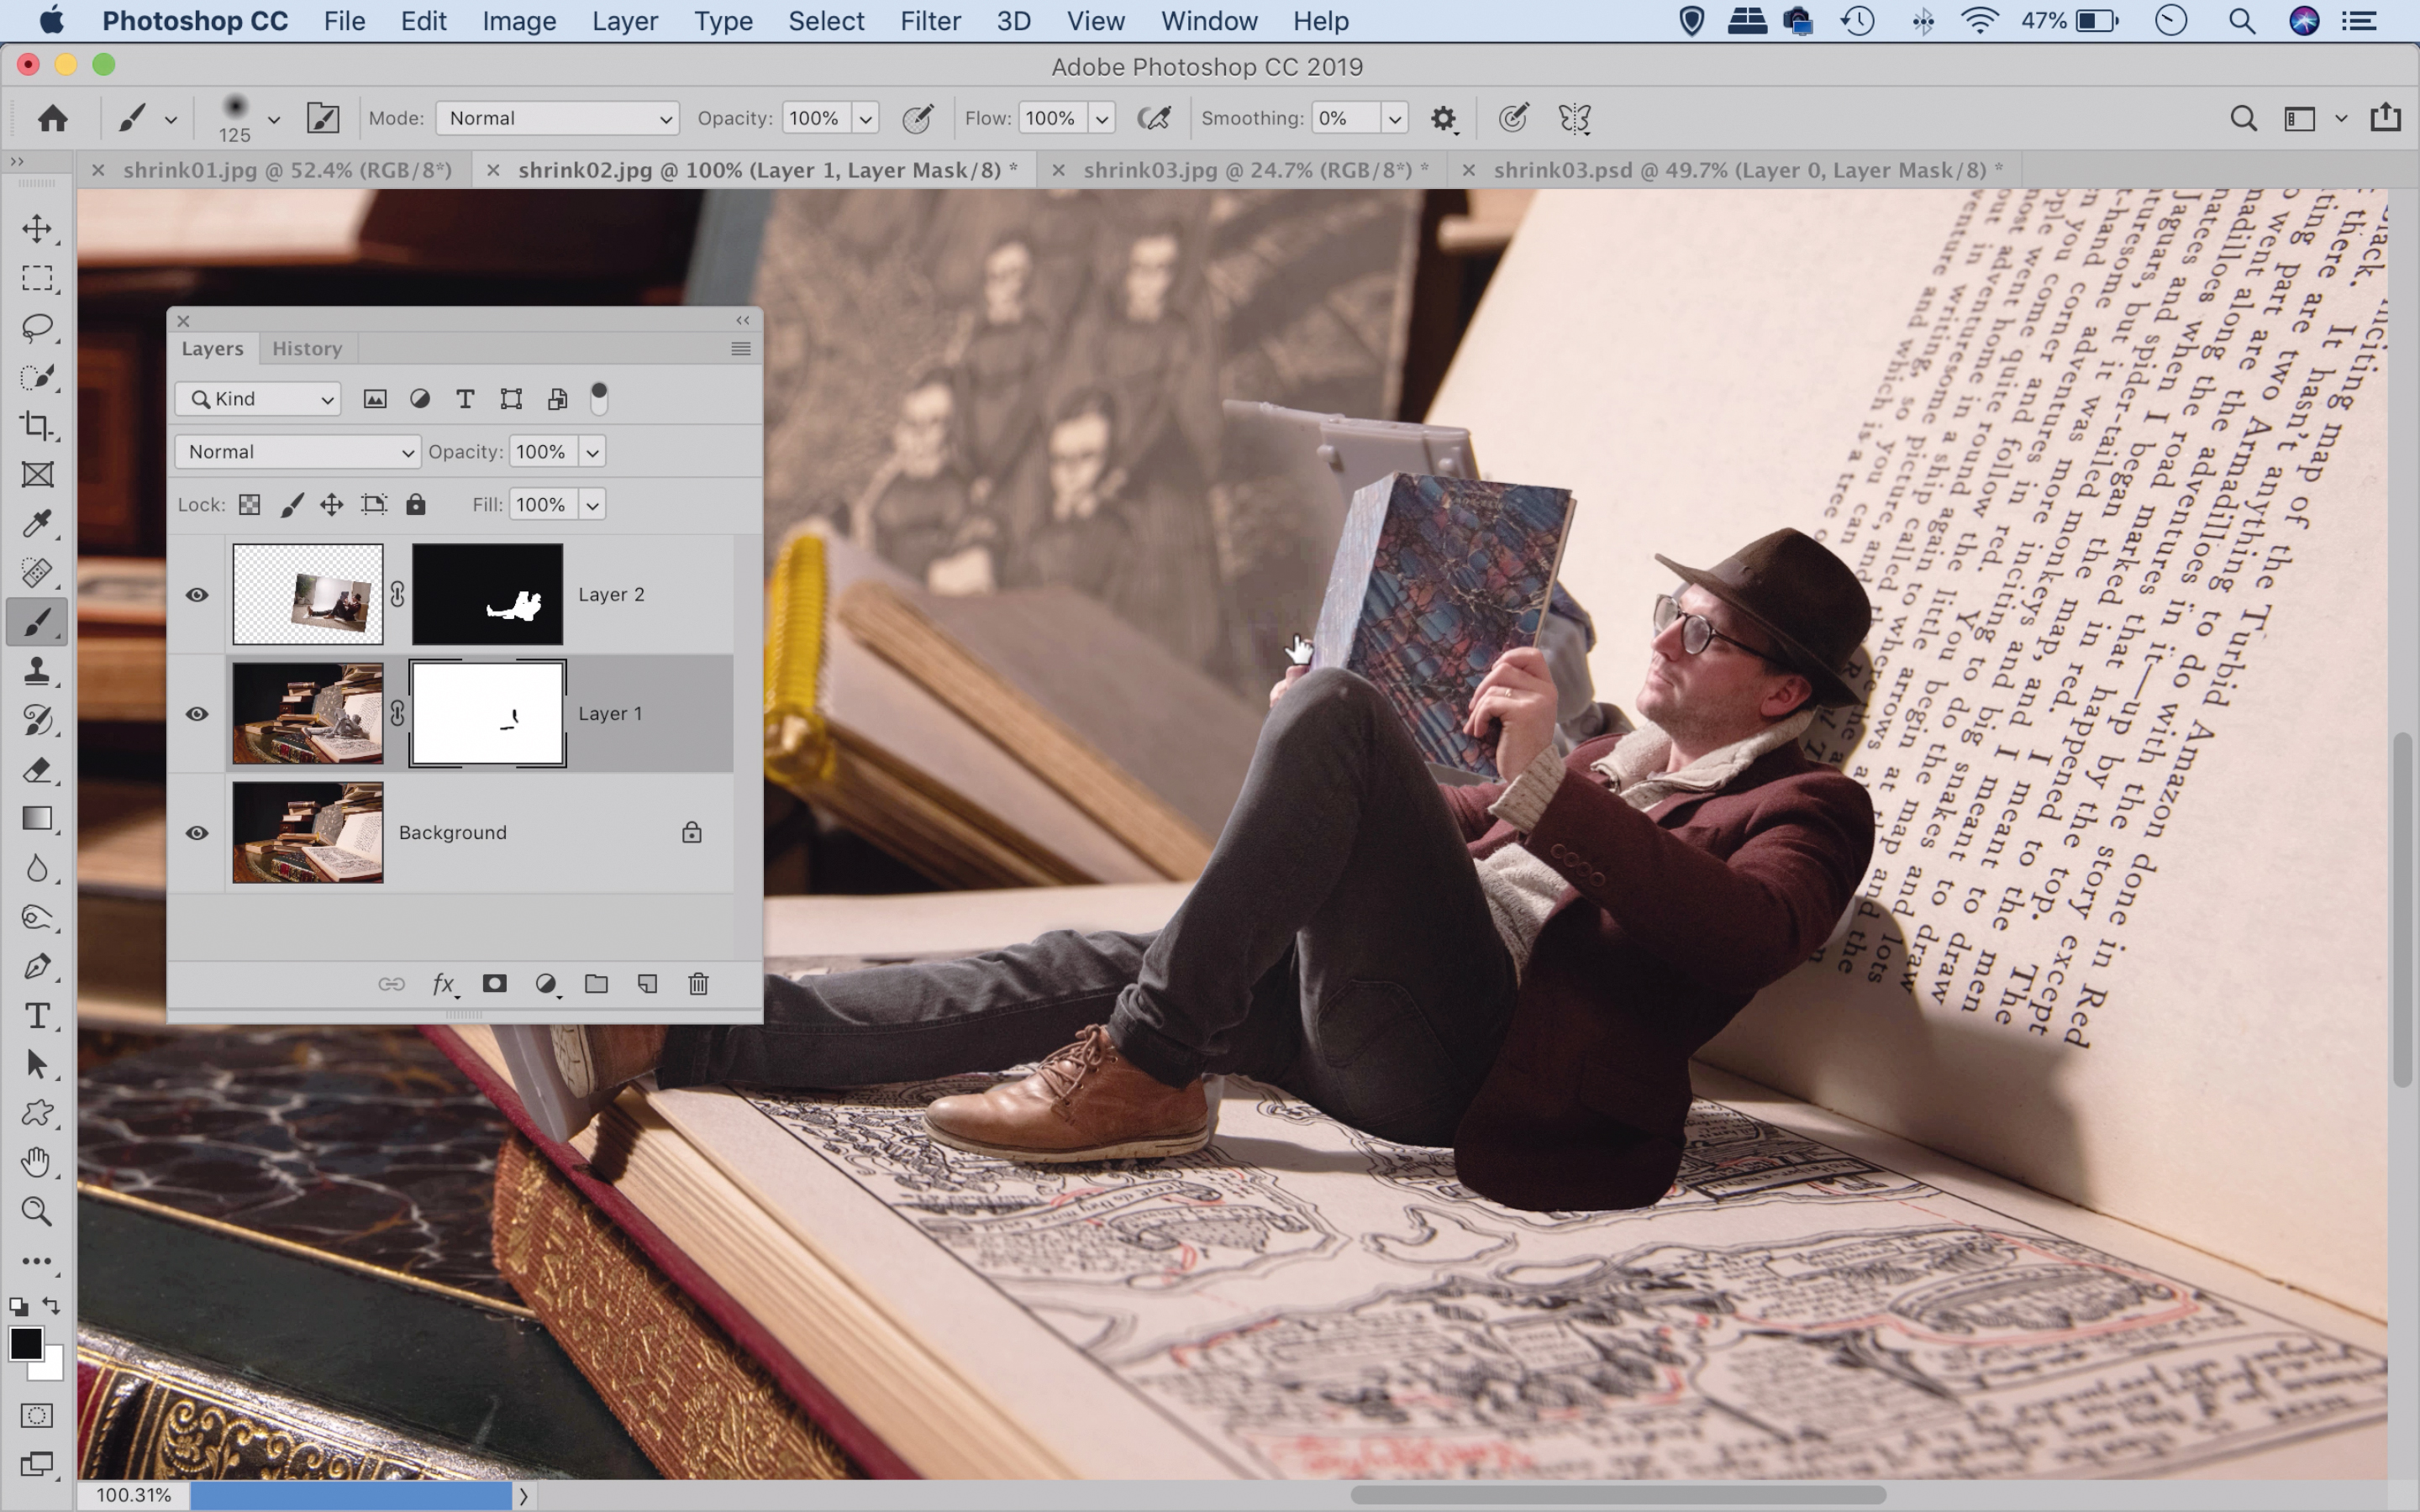
Go to the Layers panel and highlight the middle layer (the one with the doll). Click the Add Layer Mask icon at the bottom of the Layers panel, then grab the Brush tool, set the color to black and paint to hide any parts of the doll that are still showing.
05 Warp the body
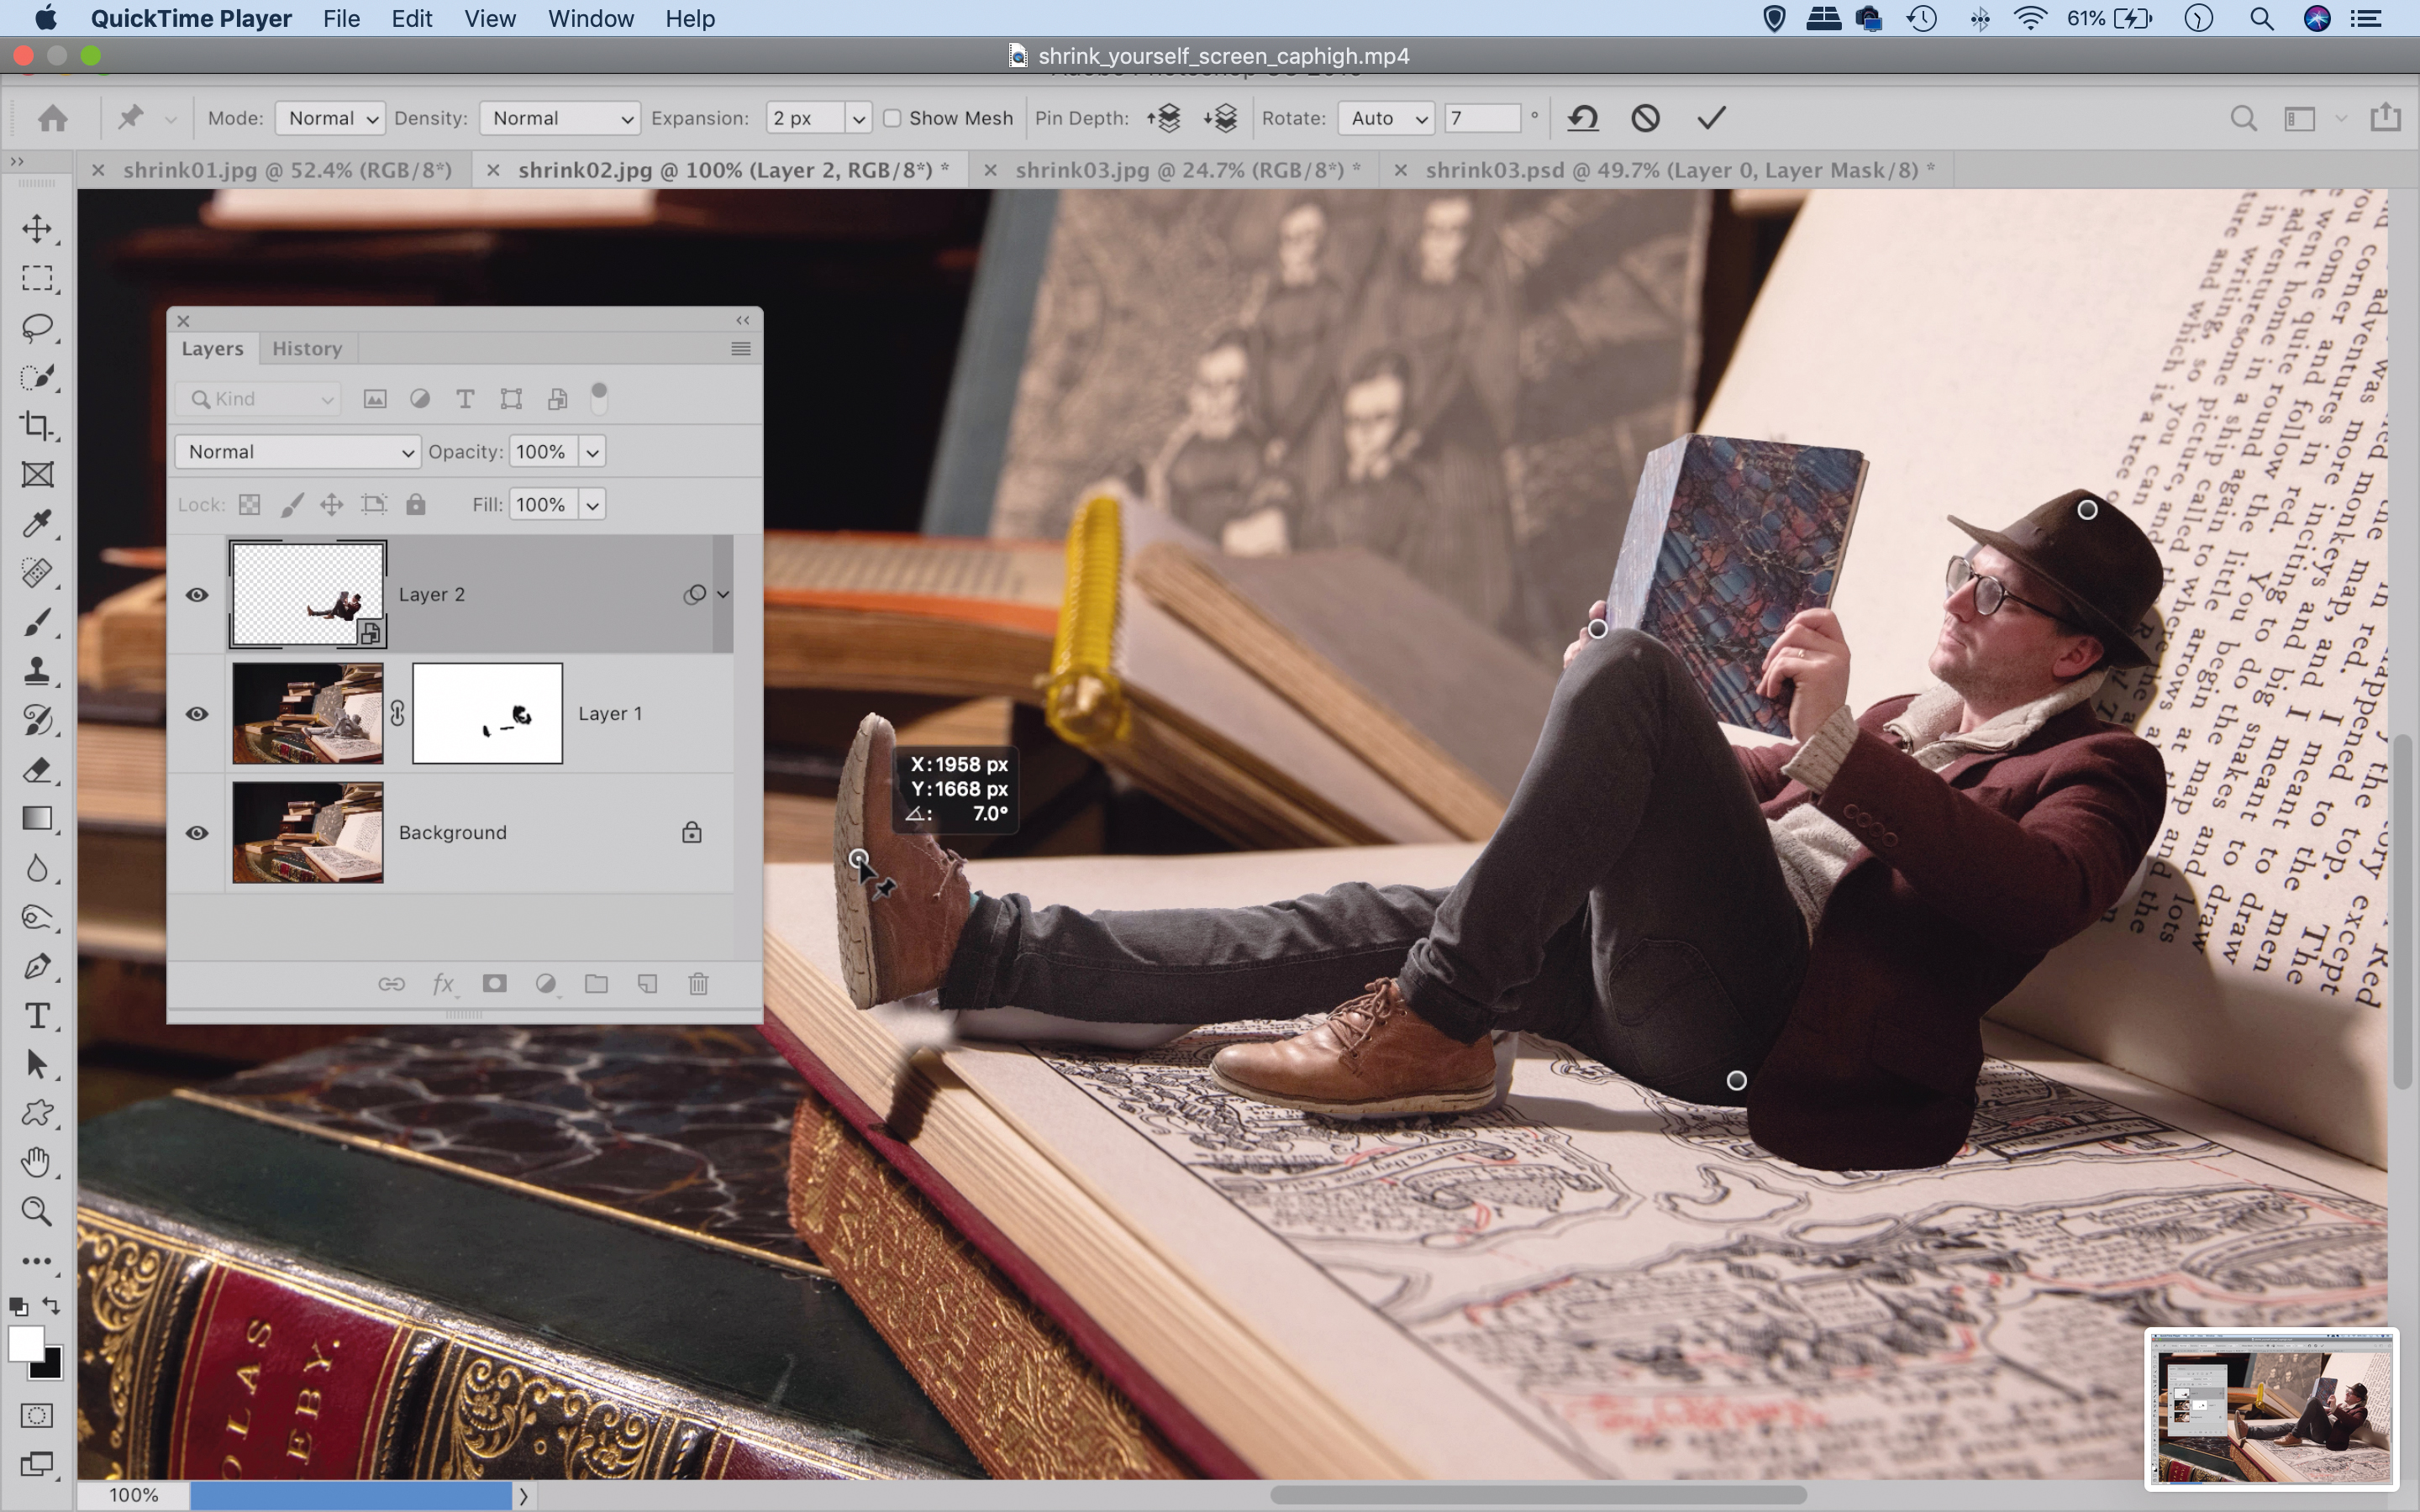
Highlight the top layer (of the person) then right-click it and ‘Convert to Smart Object’. Then go to Edit > Puppet Warp. Click several ‘pins’ over the person at points around the body, then drag the pins to subtly alter the figure so that it closely matches the shadows.
06 Adjust tones and colors
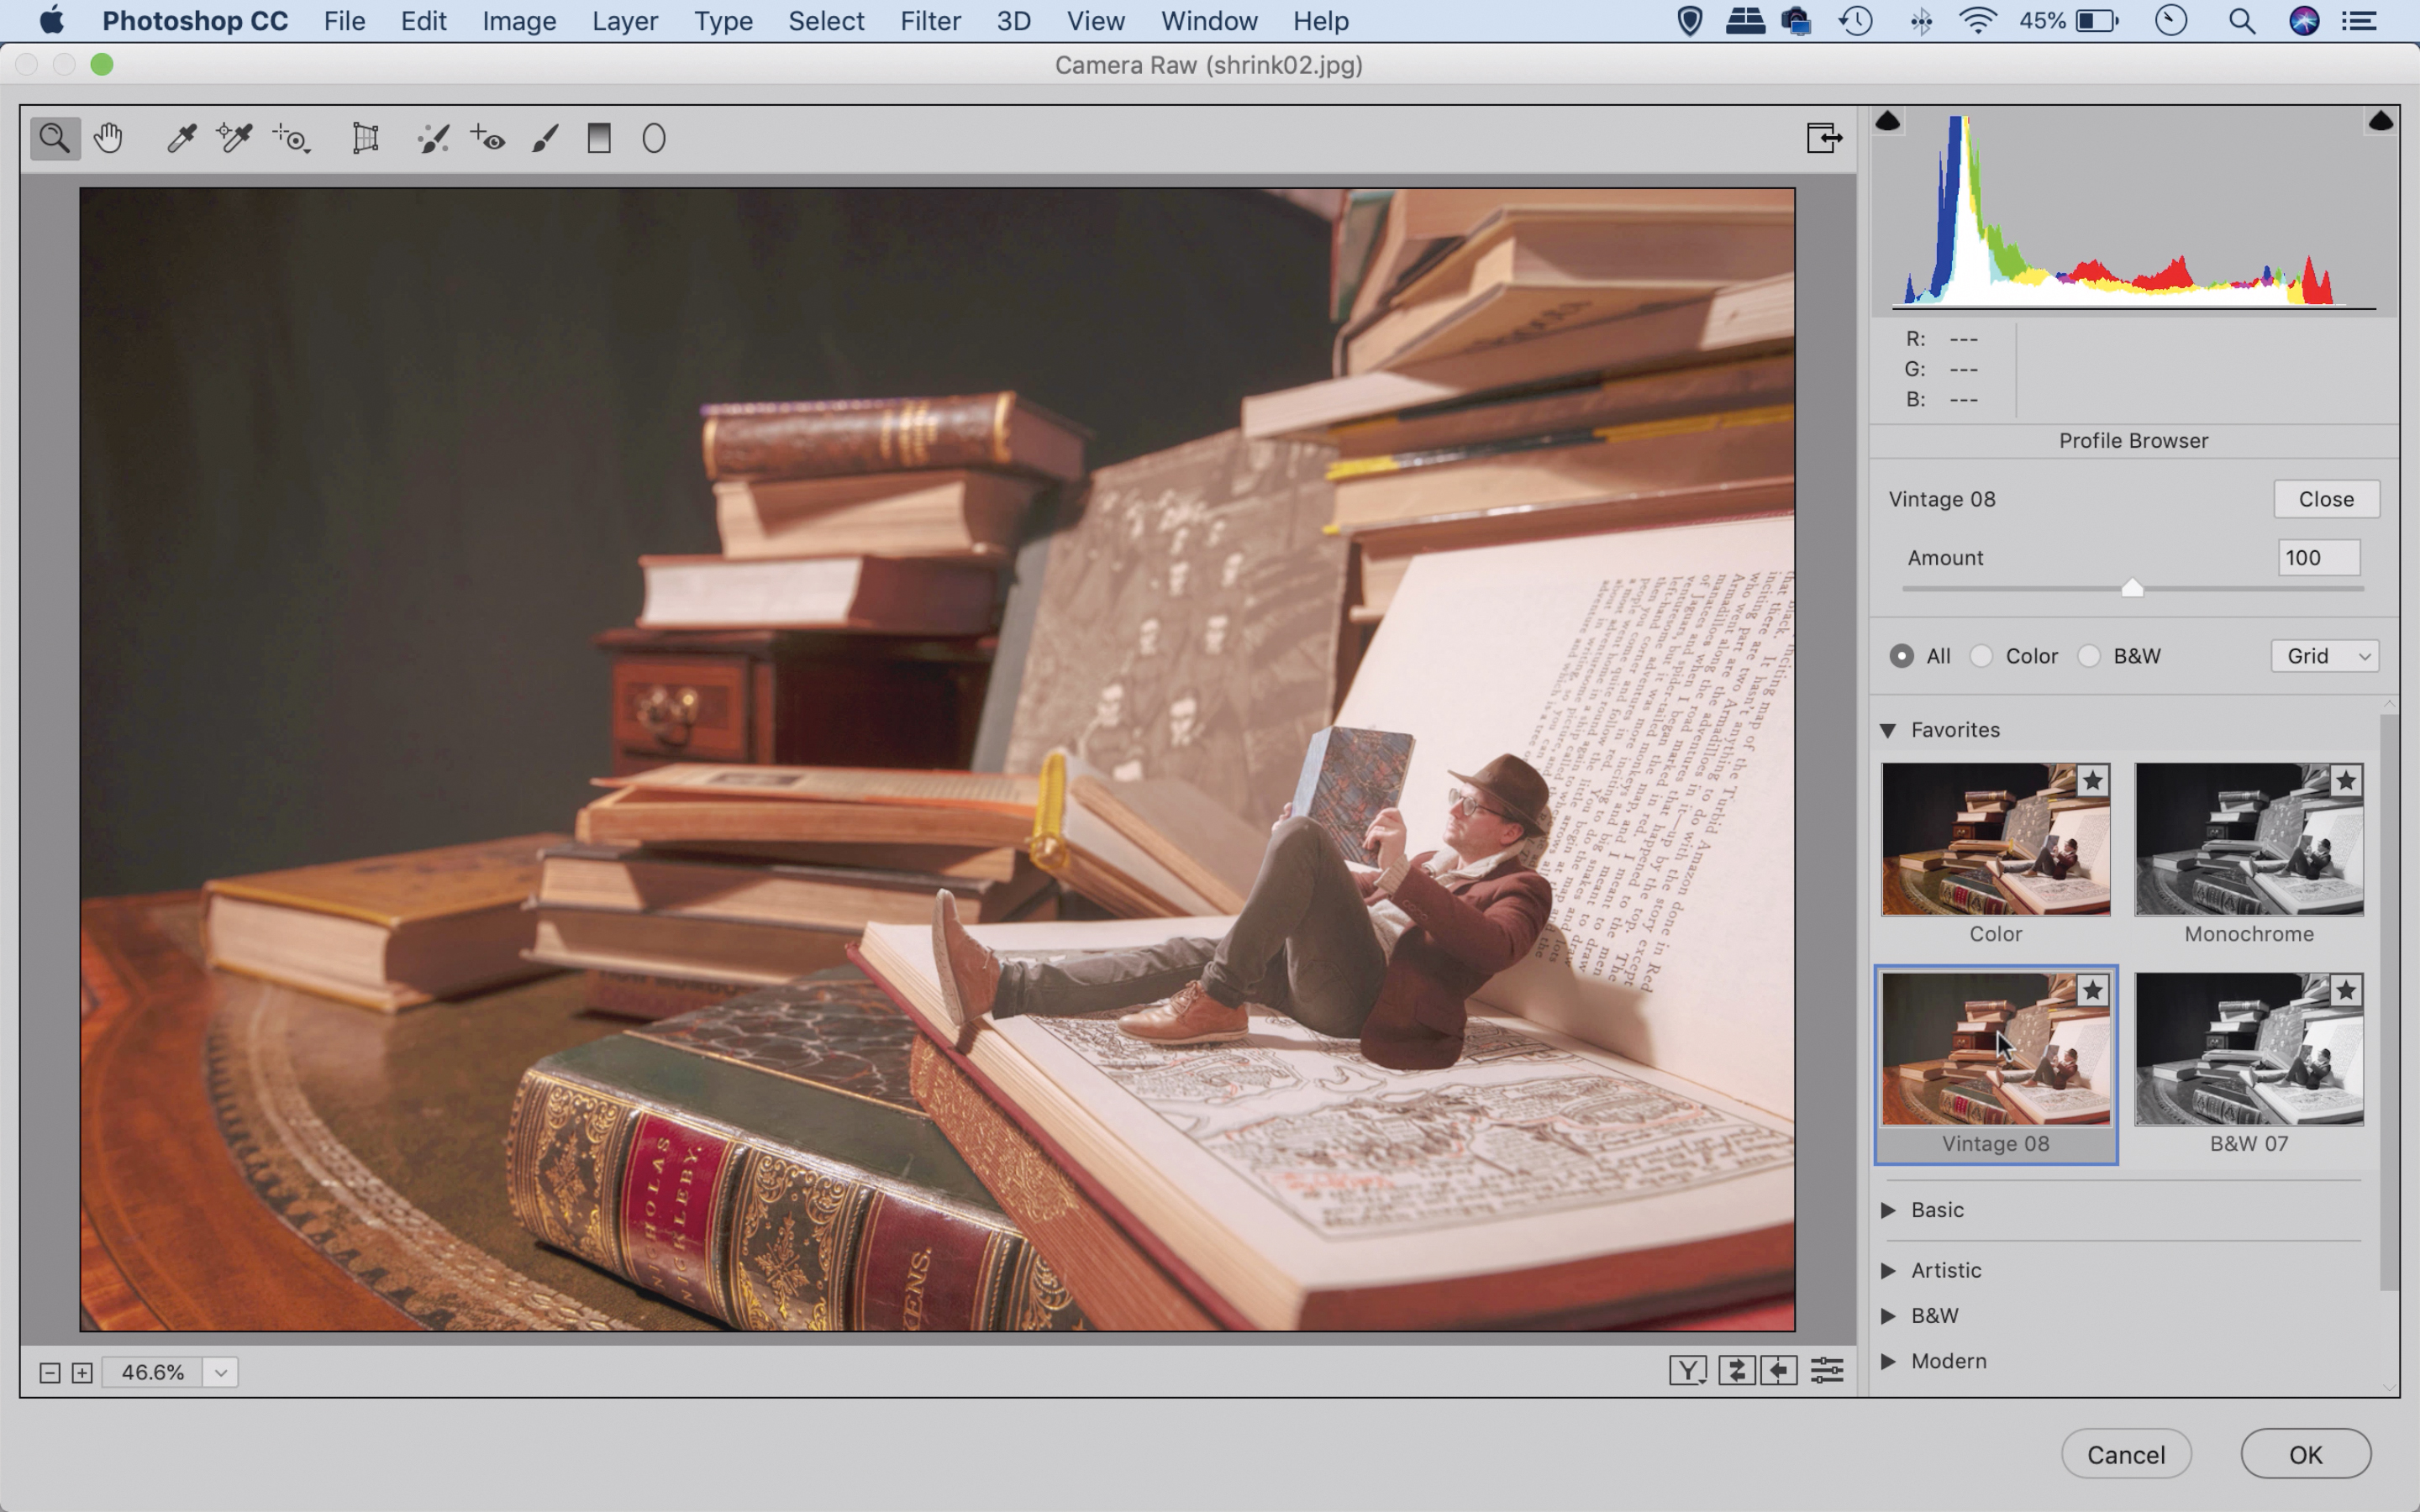
Adding a tonal effect on our final image will help it all gel together. Hit Cmd / Ctrl + Shift + Alt + E to merge a layer of everything, then go to Filter > Camera Raw Filter. Choose Profile in the settings, then lower the saturation a bit and make any tonal changes you like.
Read more:
100 Photoshop tips: learn all the tricks of the editing trade
215 photography tips, techniques and tutorials
The lead technique writer on Digital Camera Magazine, PhotoPlus: The Canon Magazine and N-Photo: The Nikon Magazine, James is a fantastic general practice photographer with an enviable array of skills across every genre of photography.
Whether it's flash photography techniques like stroboscopic portraits, astrophotography projects like photographing the Northern Lights, or turning sound into art by making paint dance on a set of speakers, James' tutorials and projects are as creative as they are enjoyable.
He's also a wizard at the dark arts of Photoshop, Lightroom and Affinity Photo, and is capable of some genuine black magic in the digital darkroom, making him one of the leading authorities on photo editing software and techniques.
