Create super-resolution images in software to print your photos BIG
Want to print your images in large format? Use Photoshop or a similar app to stitch ultra-high-resolution files
Modern cameras have resolutions that photographers of the last decade could only dream of – things have come a long way in very short time. The standard is now seen as around the 30MP mark, while it's not uncommon to find full frame mirrorless cameras with sensors higher than 50MP. With pixel counts such as these it is possible to print massive reproductions and crop heavily, without losing detail.
Even so, when using older models, cameras with smaller sensors or when you require far higher resolutions than normal, image blending is a solution. Capturing a scene across a series of image segments, rather than in a single shot, enables the native sensor resolution to be increased in the final result by an unlimited amount.
• Read more: Highest resolution cameras
Article continues belowIt is possible to output a 100MP photo using a 20MP APS-C camera, for example, revealing tremendous detail without the the noise issues caused by packing lots of photosites onto a compact sensor area. (Some cameras, like the Olympus OM-1 and Panasonic GH6, employ the same principle with pixel-shift technology.)
These image sequences can be shot by simple re-framing, much like you might do to capture a panorama, or you can put one of the best tilt-shift lenses to great use. The advantage of capturing a shift-stitch is that images tend to have less distortion and the blending process is more seamless.
Far from being a complicated workflow, these super-res files can be created manually in any good photo editing software. If your camera doesn't have a sensor-shift resolution mode, don't let it stop you from producing image files to keep even the most discerning stock picture editor happy!
1. Shoot and import
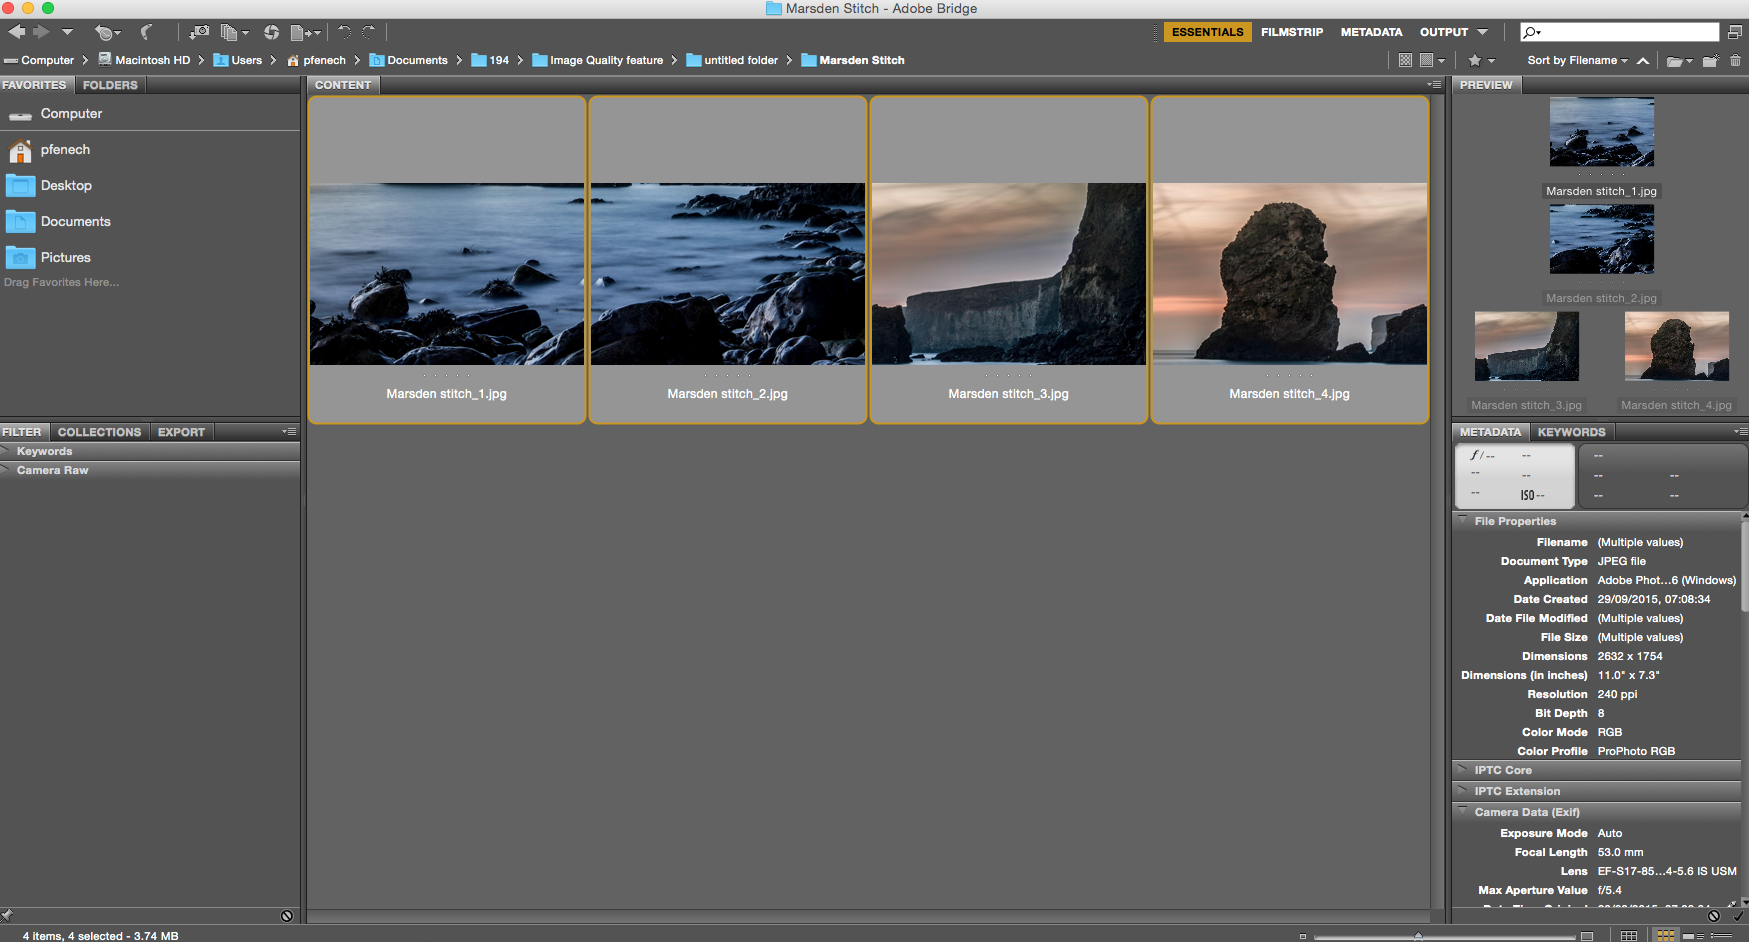
Use a zoom lens or tilt-shift optic to photograph a scene across several images, just like when shooting a panorama, but in two or three rows. A longer focal length is better if you don't have a shift available, as the compression will induce less distortion. Ensure that you overlap your shots by around 20%. Import your image sequence and find them in Bridge or Lightroom.
The best camera deals, reviews, product advice, and unmissable photography news, direct to your inbox!
2) Process the Raw files
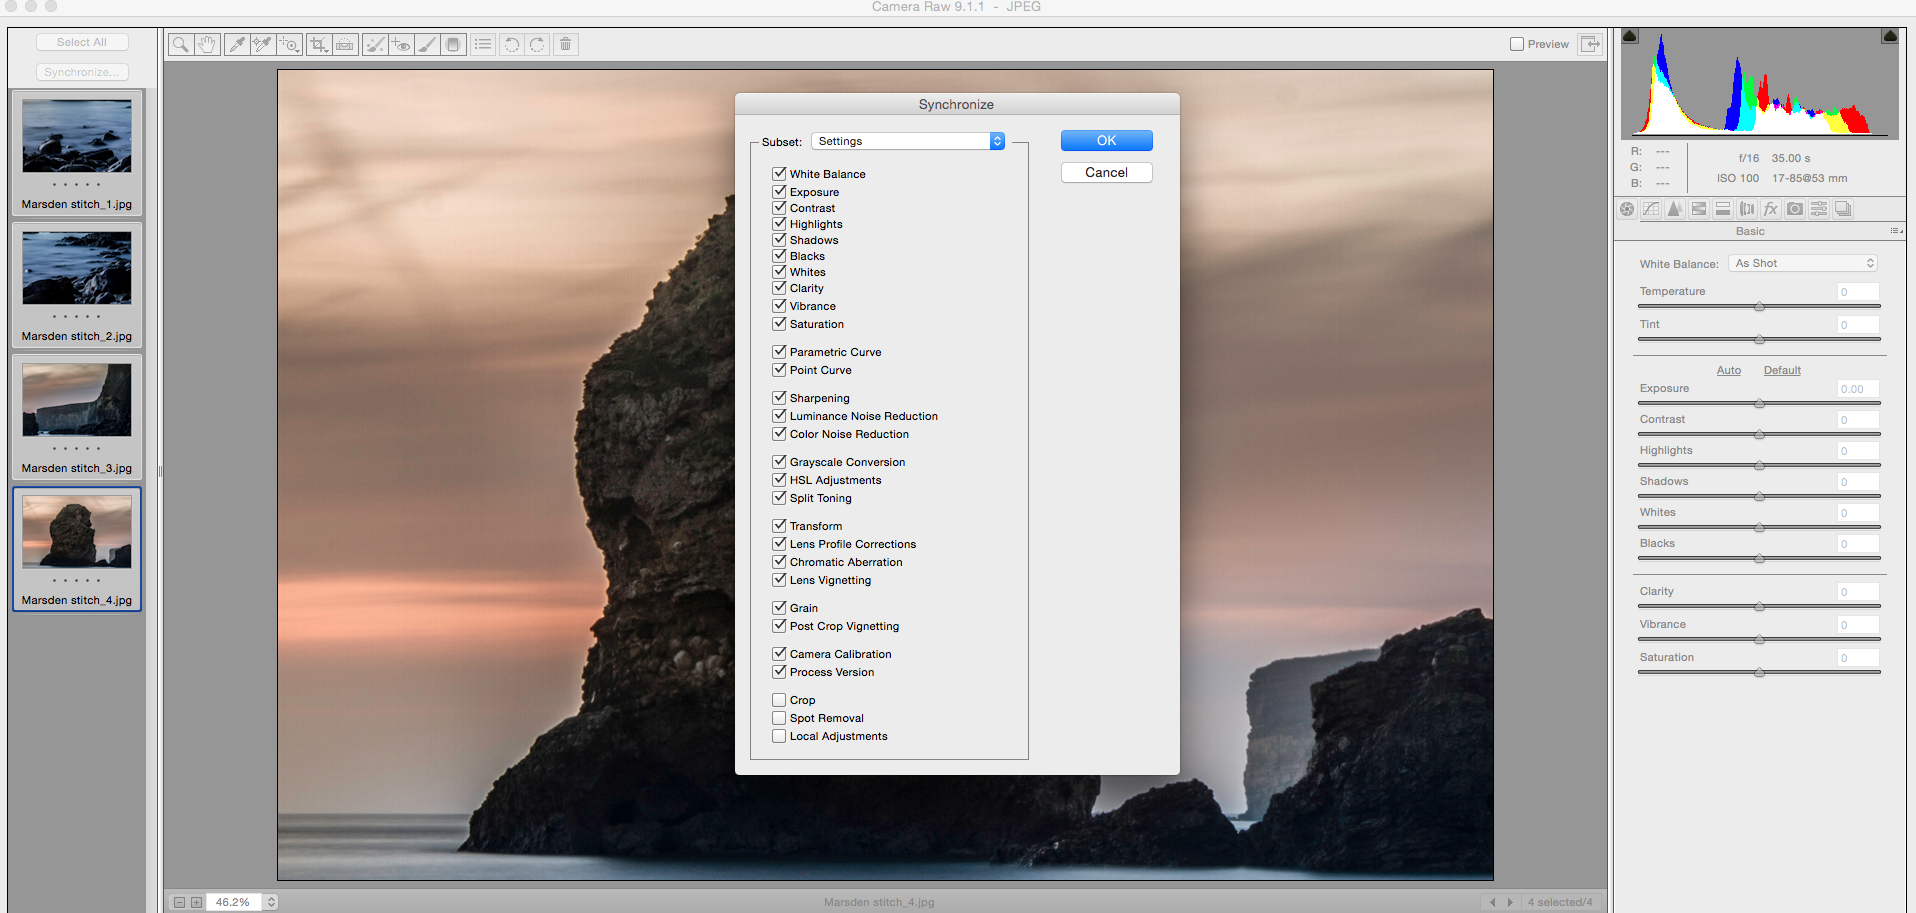
Make essential Raw adjustments in Adobe Camera Raw, Lightroom or Capture One. In Adobe, click Select All and Synchronize to make universal edits to all files. Apply lens distortion and chromatic aberration corrections to make image stitching easier. Leave local adjustments until after stitching is complete.
3. Open in Photoshop
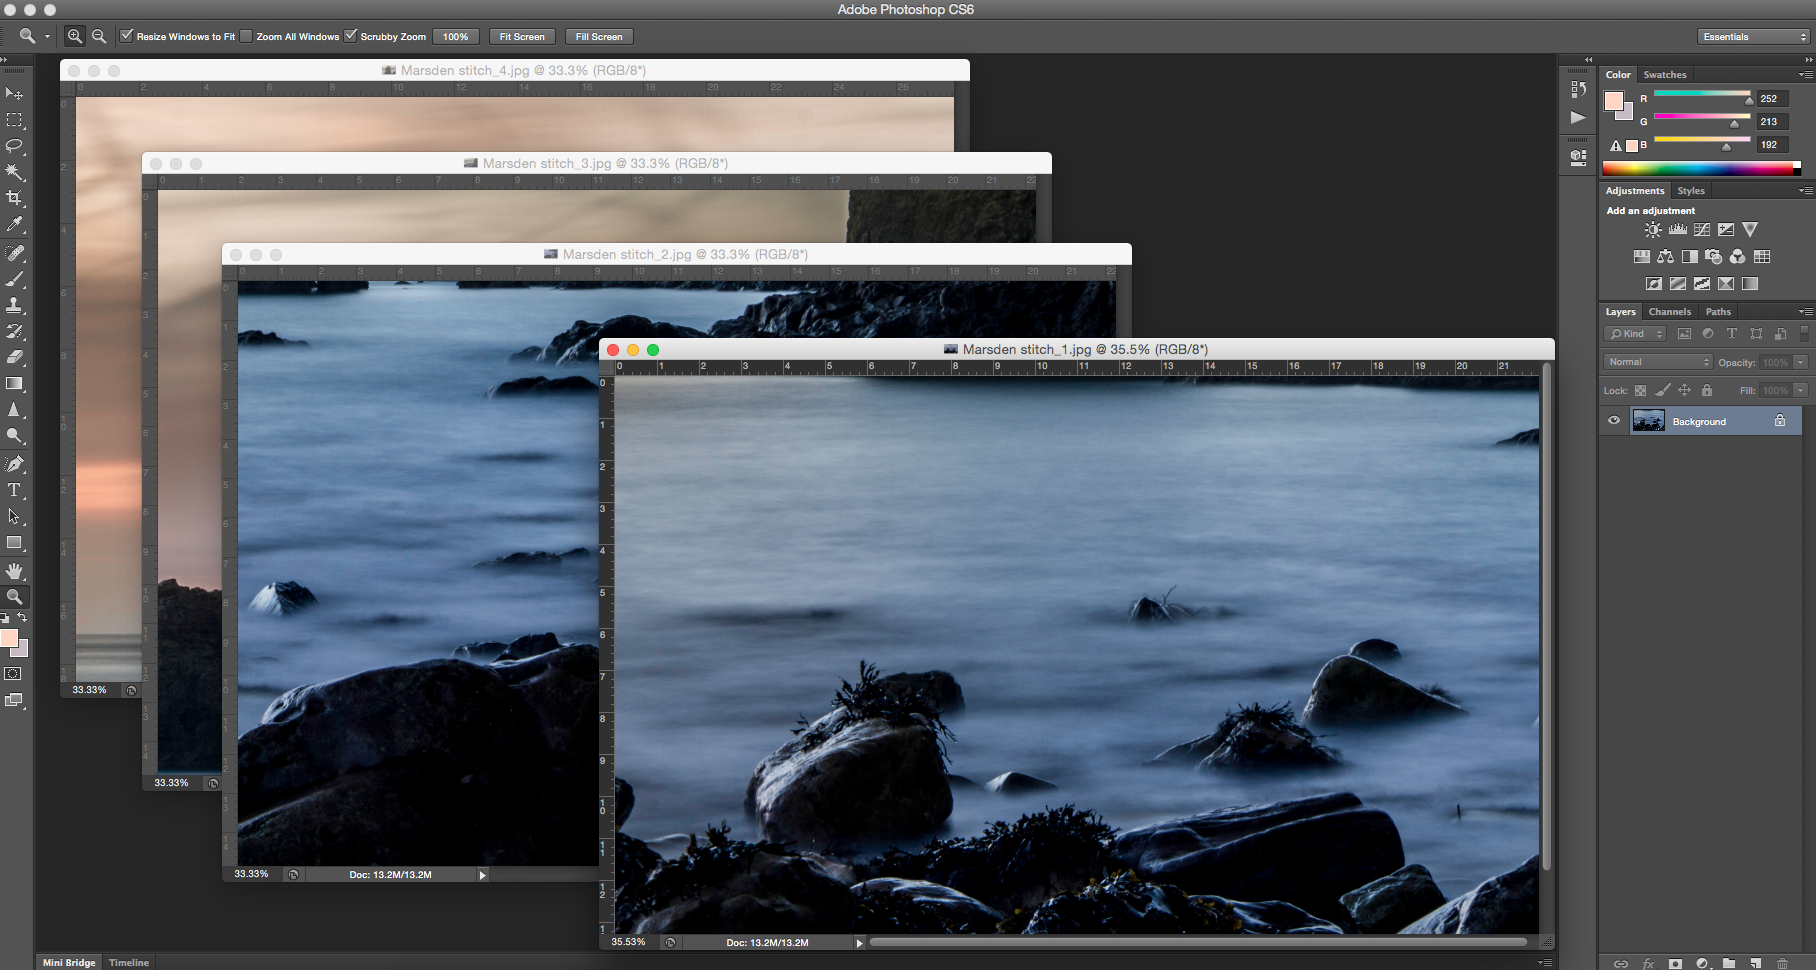
Move your processed Raw files into Photoshop. By default each image is assigned its own separate tab. We will need to bring the segments together into a single tab to blend them. Although image stitching can be automated, we will perform most steps manually here.
4. Extend your canvas
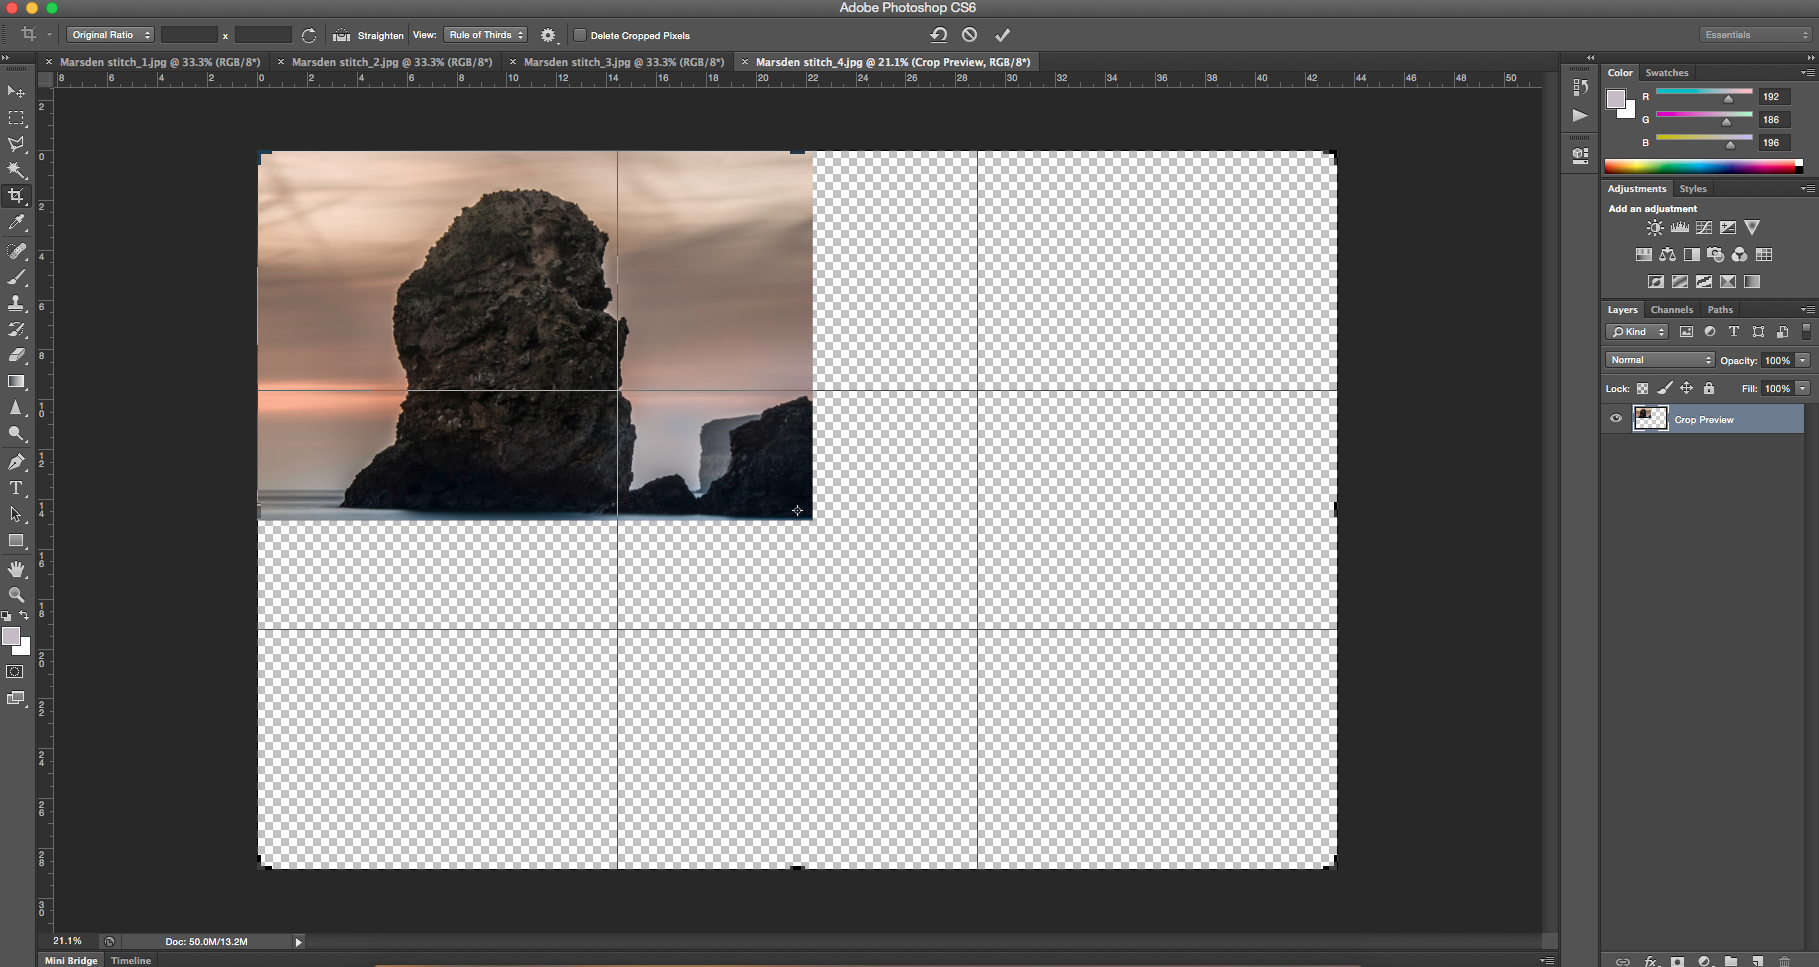
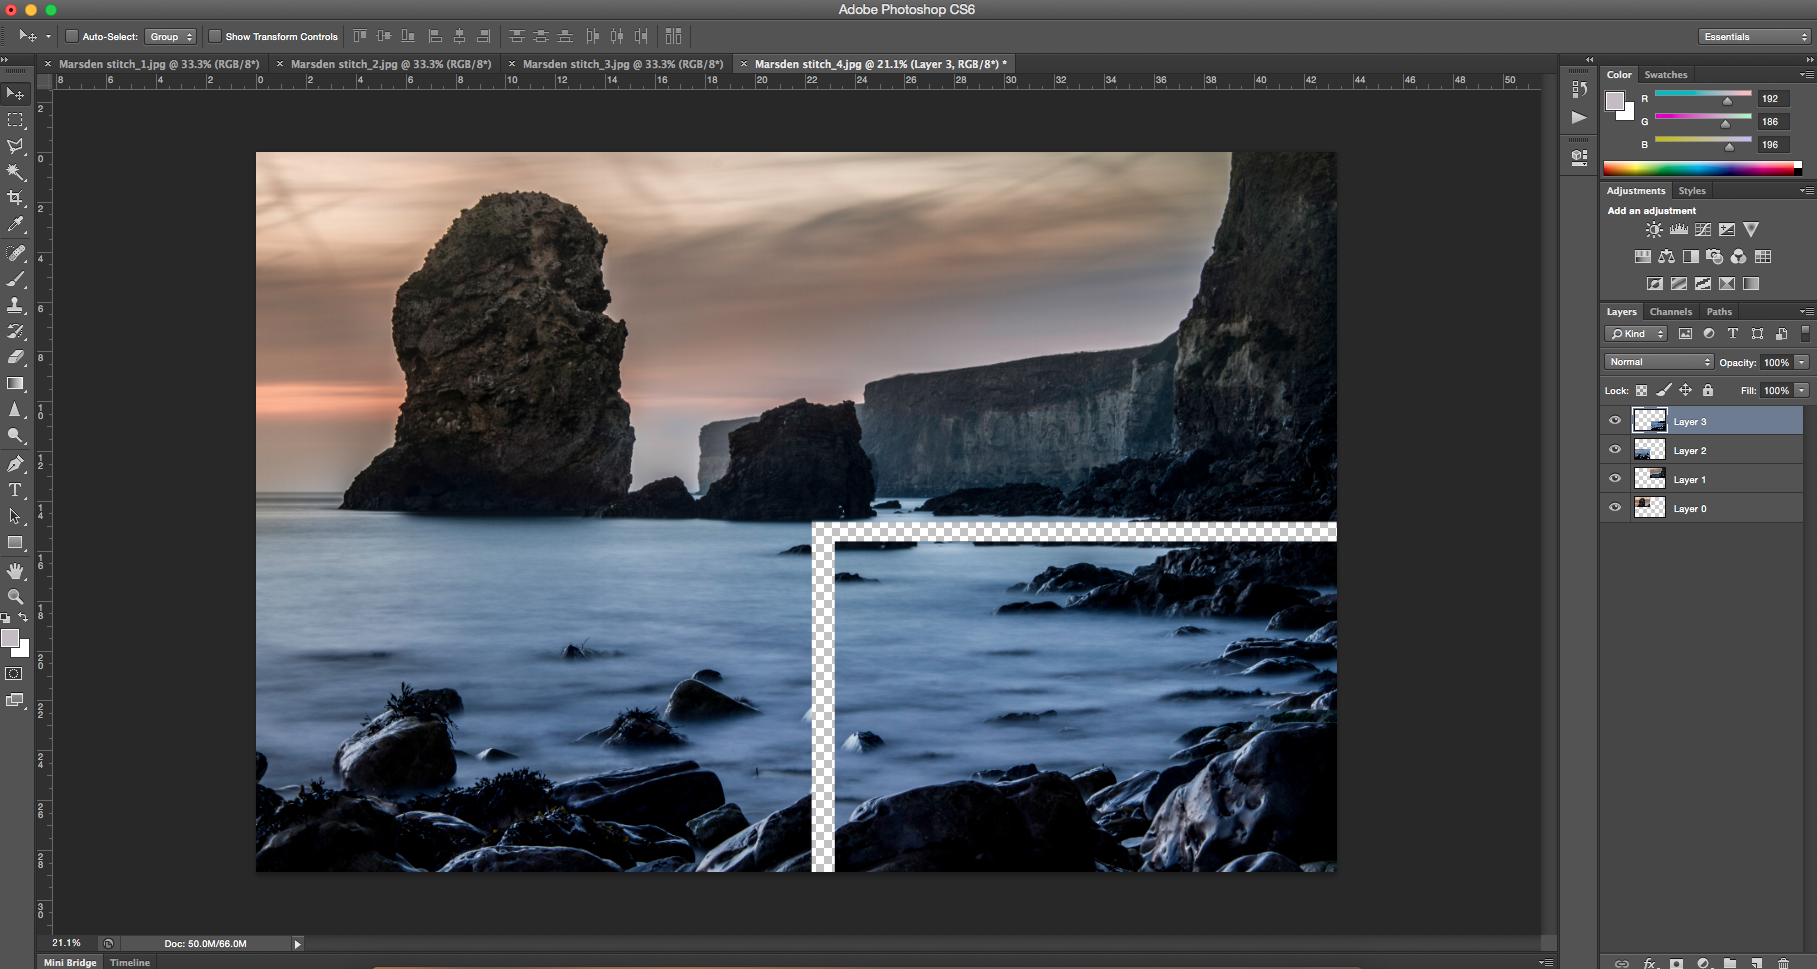
Select a corner image, choose the Crop Tool [C] and toggle Original Ratio from the aspect drop-down. Drag out space around your image, leaving room to place your remaining image segments. Any unwanted space can be removed again later. Hit Enter to confirm the crop.
5. Arrange your images
Go to the image that will sit next to the first photo horizontally, then Select > All, copy the image and paste it onto your extended canvas. Use Tab+V and move the shot approximately into position. When all images are in place, go to Edit > Auto-Align Layers.
6. Auto Blend Layers
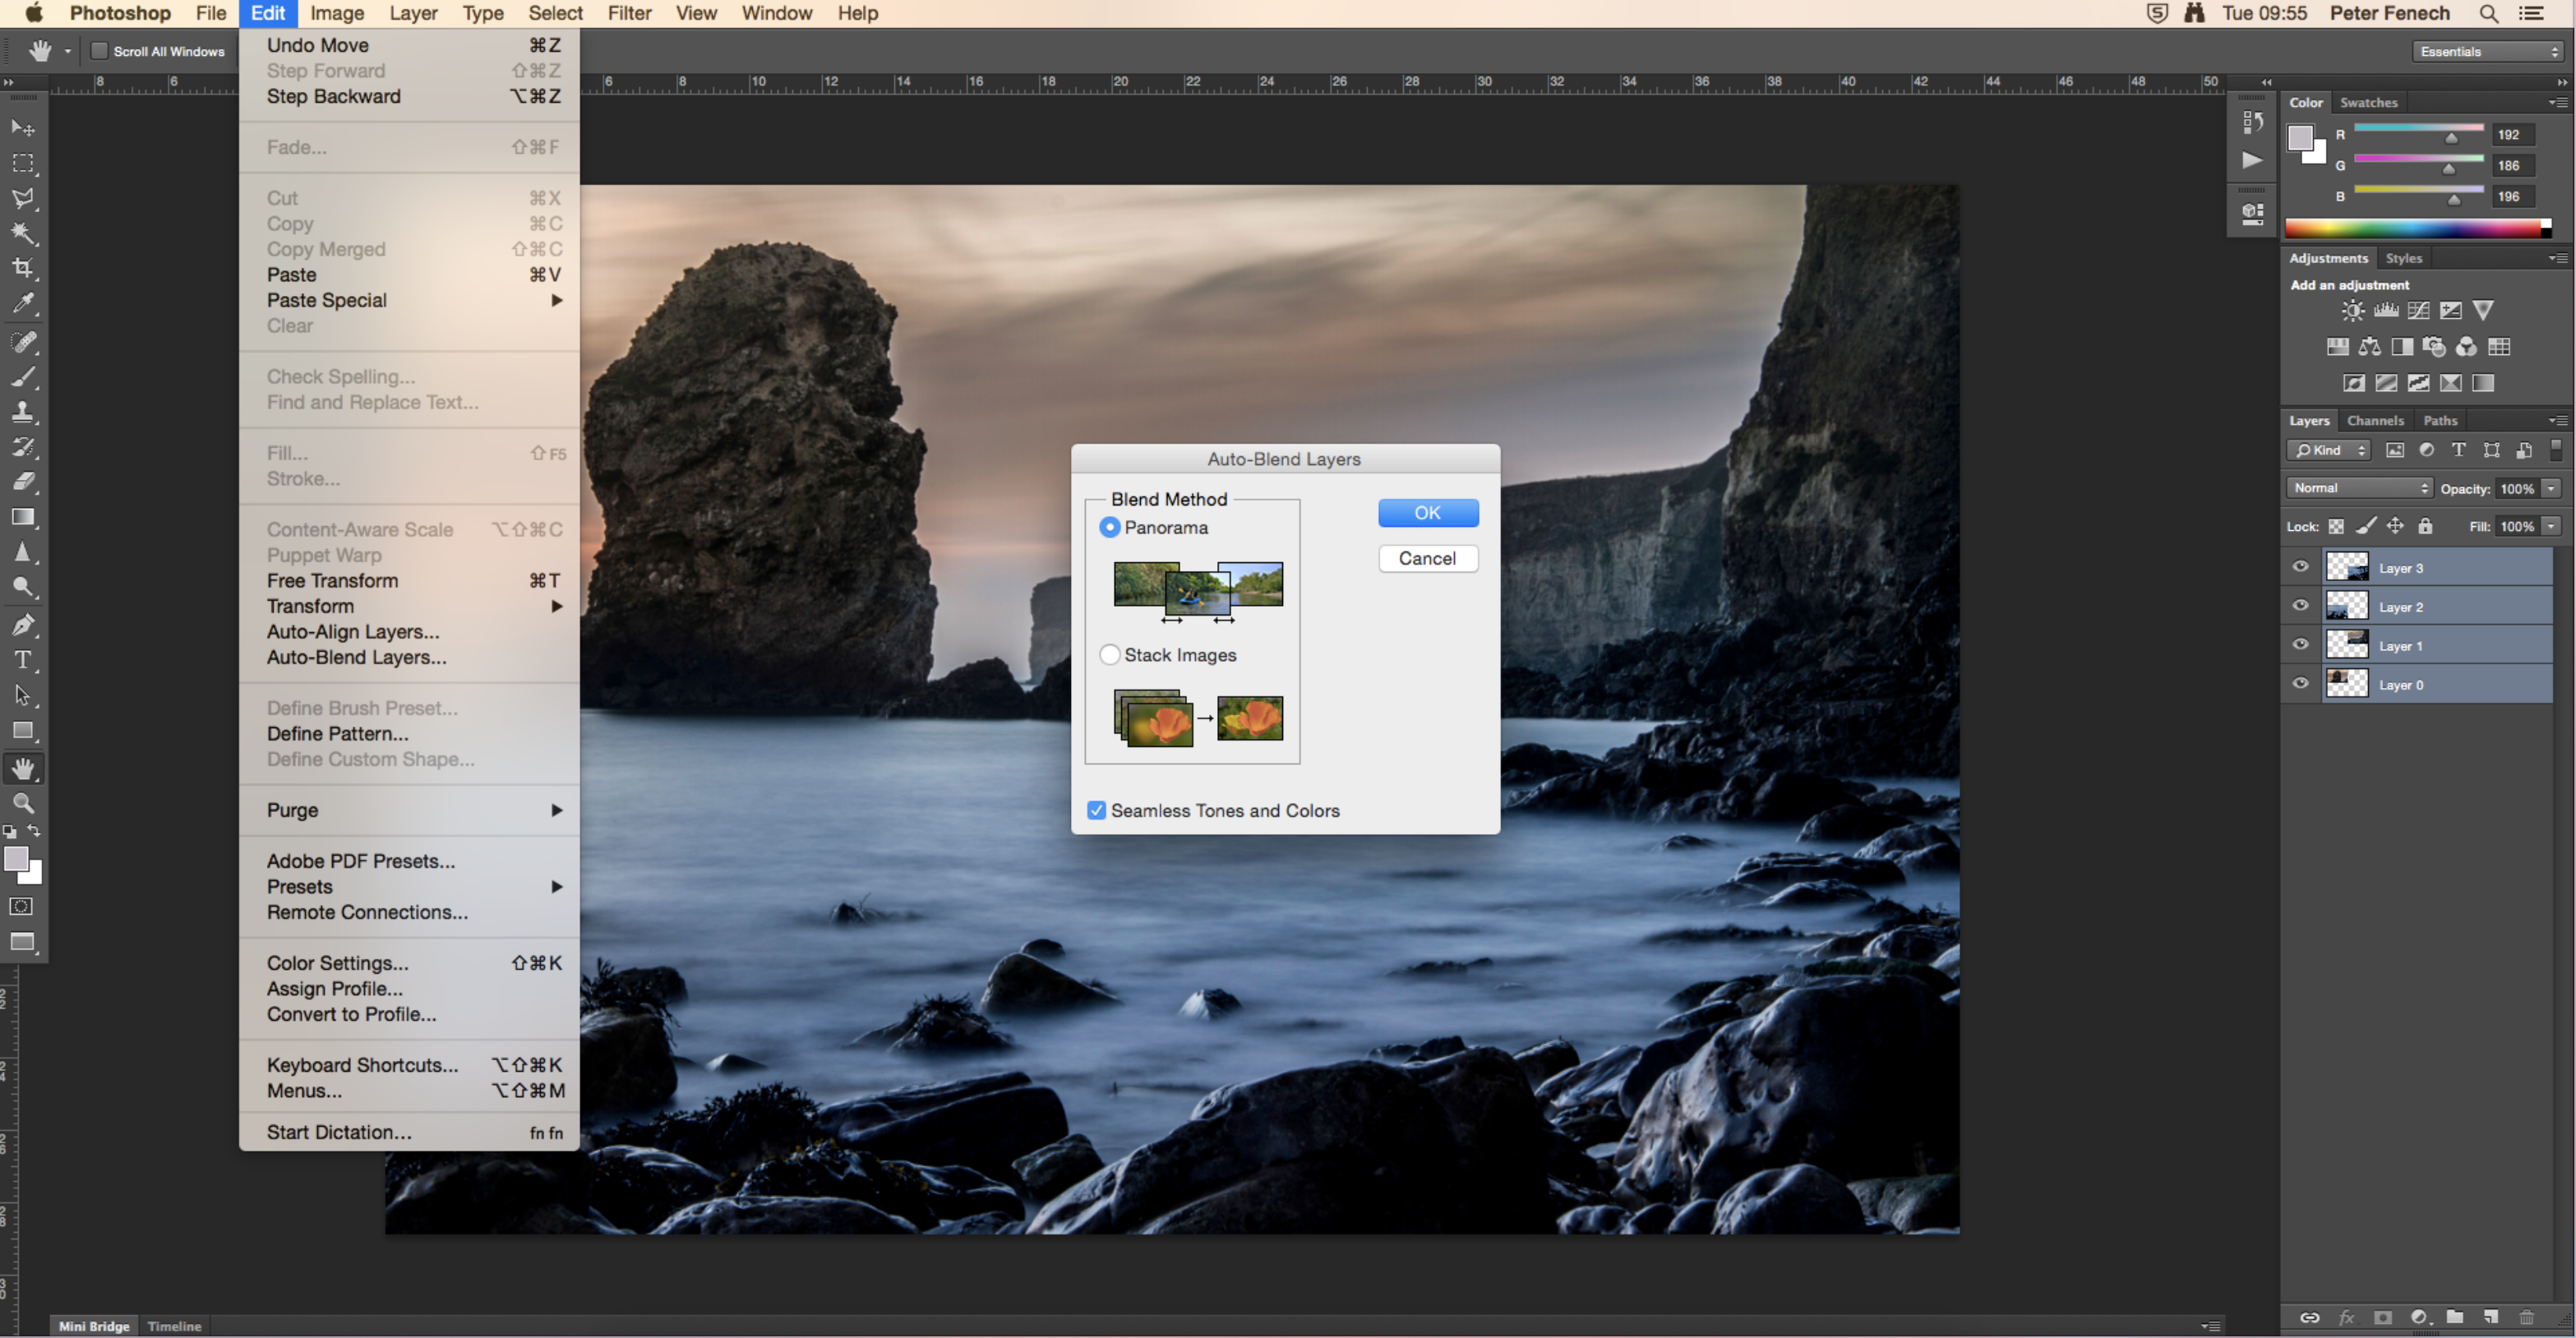
Follow Edit > Auto-Blend Layers and choose Panorama as the Blend Method. This will automatically identify the image seams and merge the segments at those points. Although the Photomerge Tool can be used to perform this function, manual arrangement and blending often produces more controllable results.
7. Retouch and crop
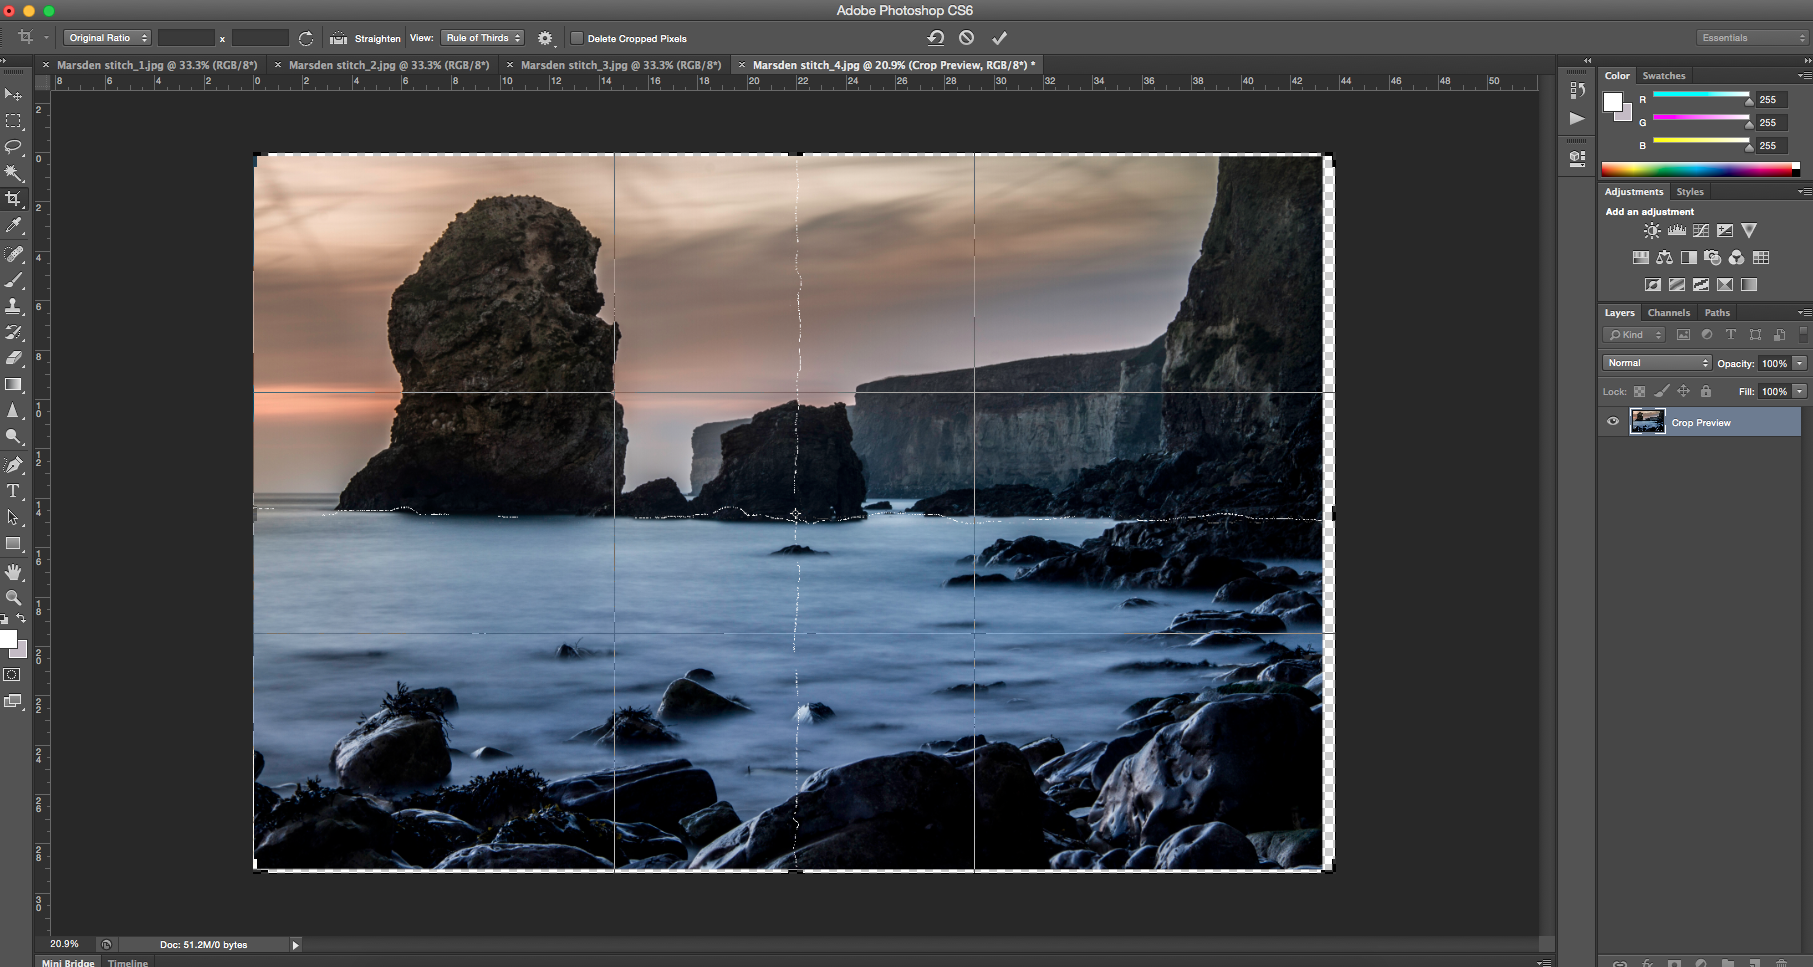
Auto-Blend Layers is a highly effective tool, but there may be small areas along the seams that require retouching. A simple application of the Clone Stamp Tool or Spot Healing Brush Tool should remove subtle joins. The Alignment and Blending process may necessitate slight cropping.
8. Make final adjustments
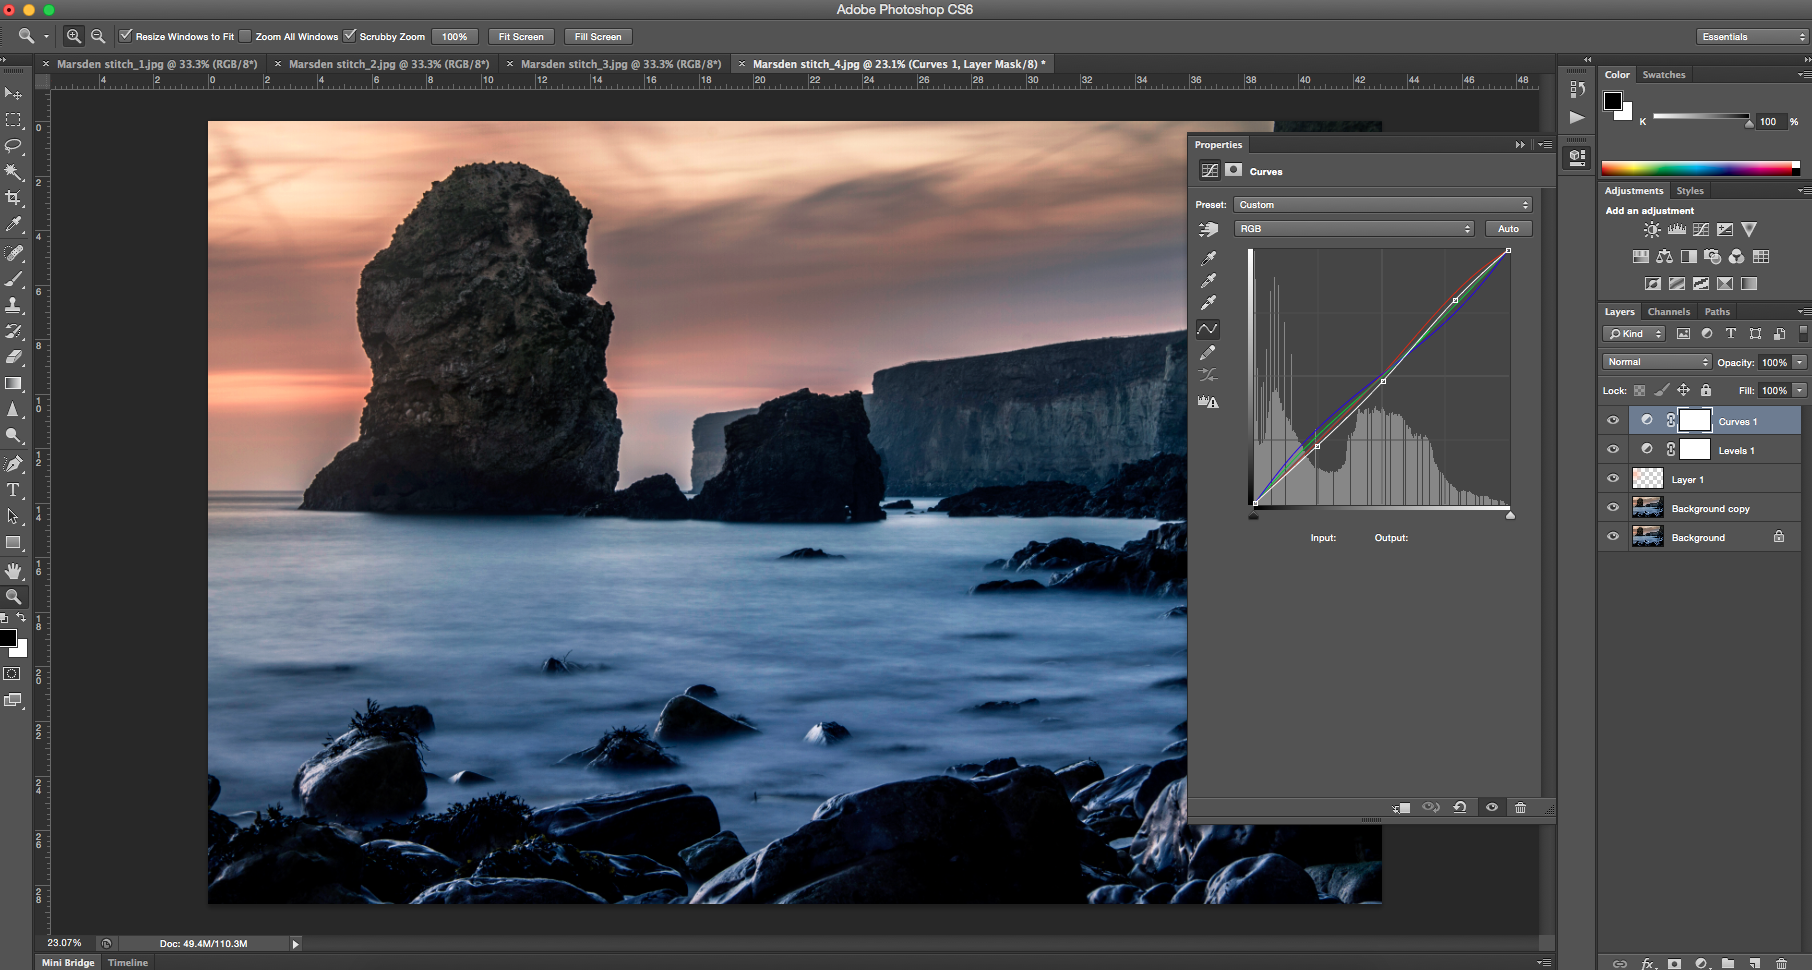
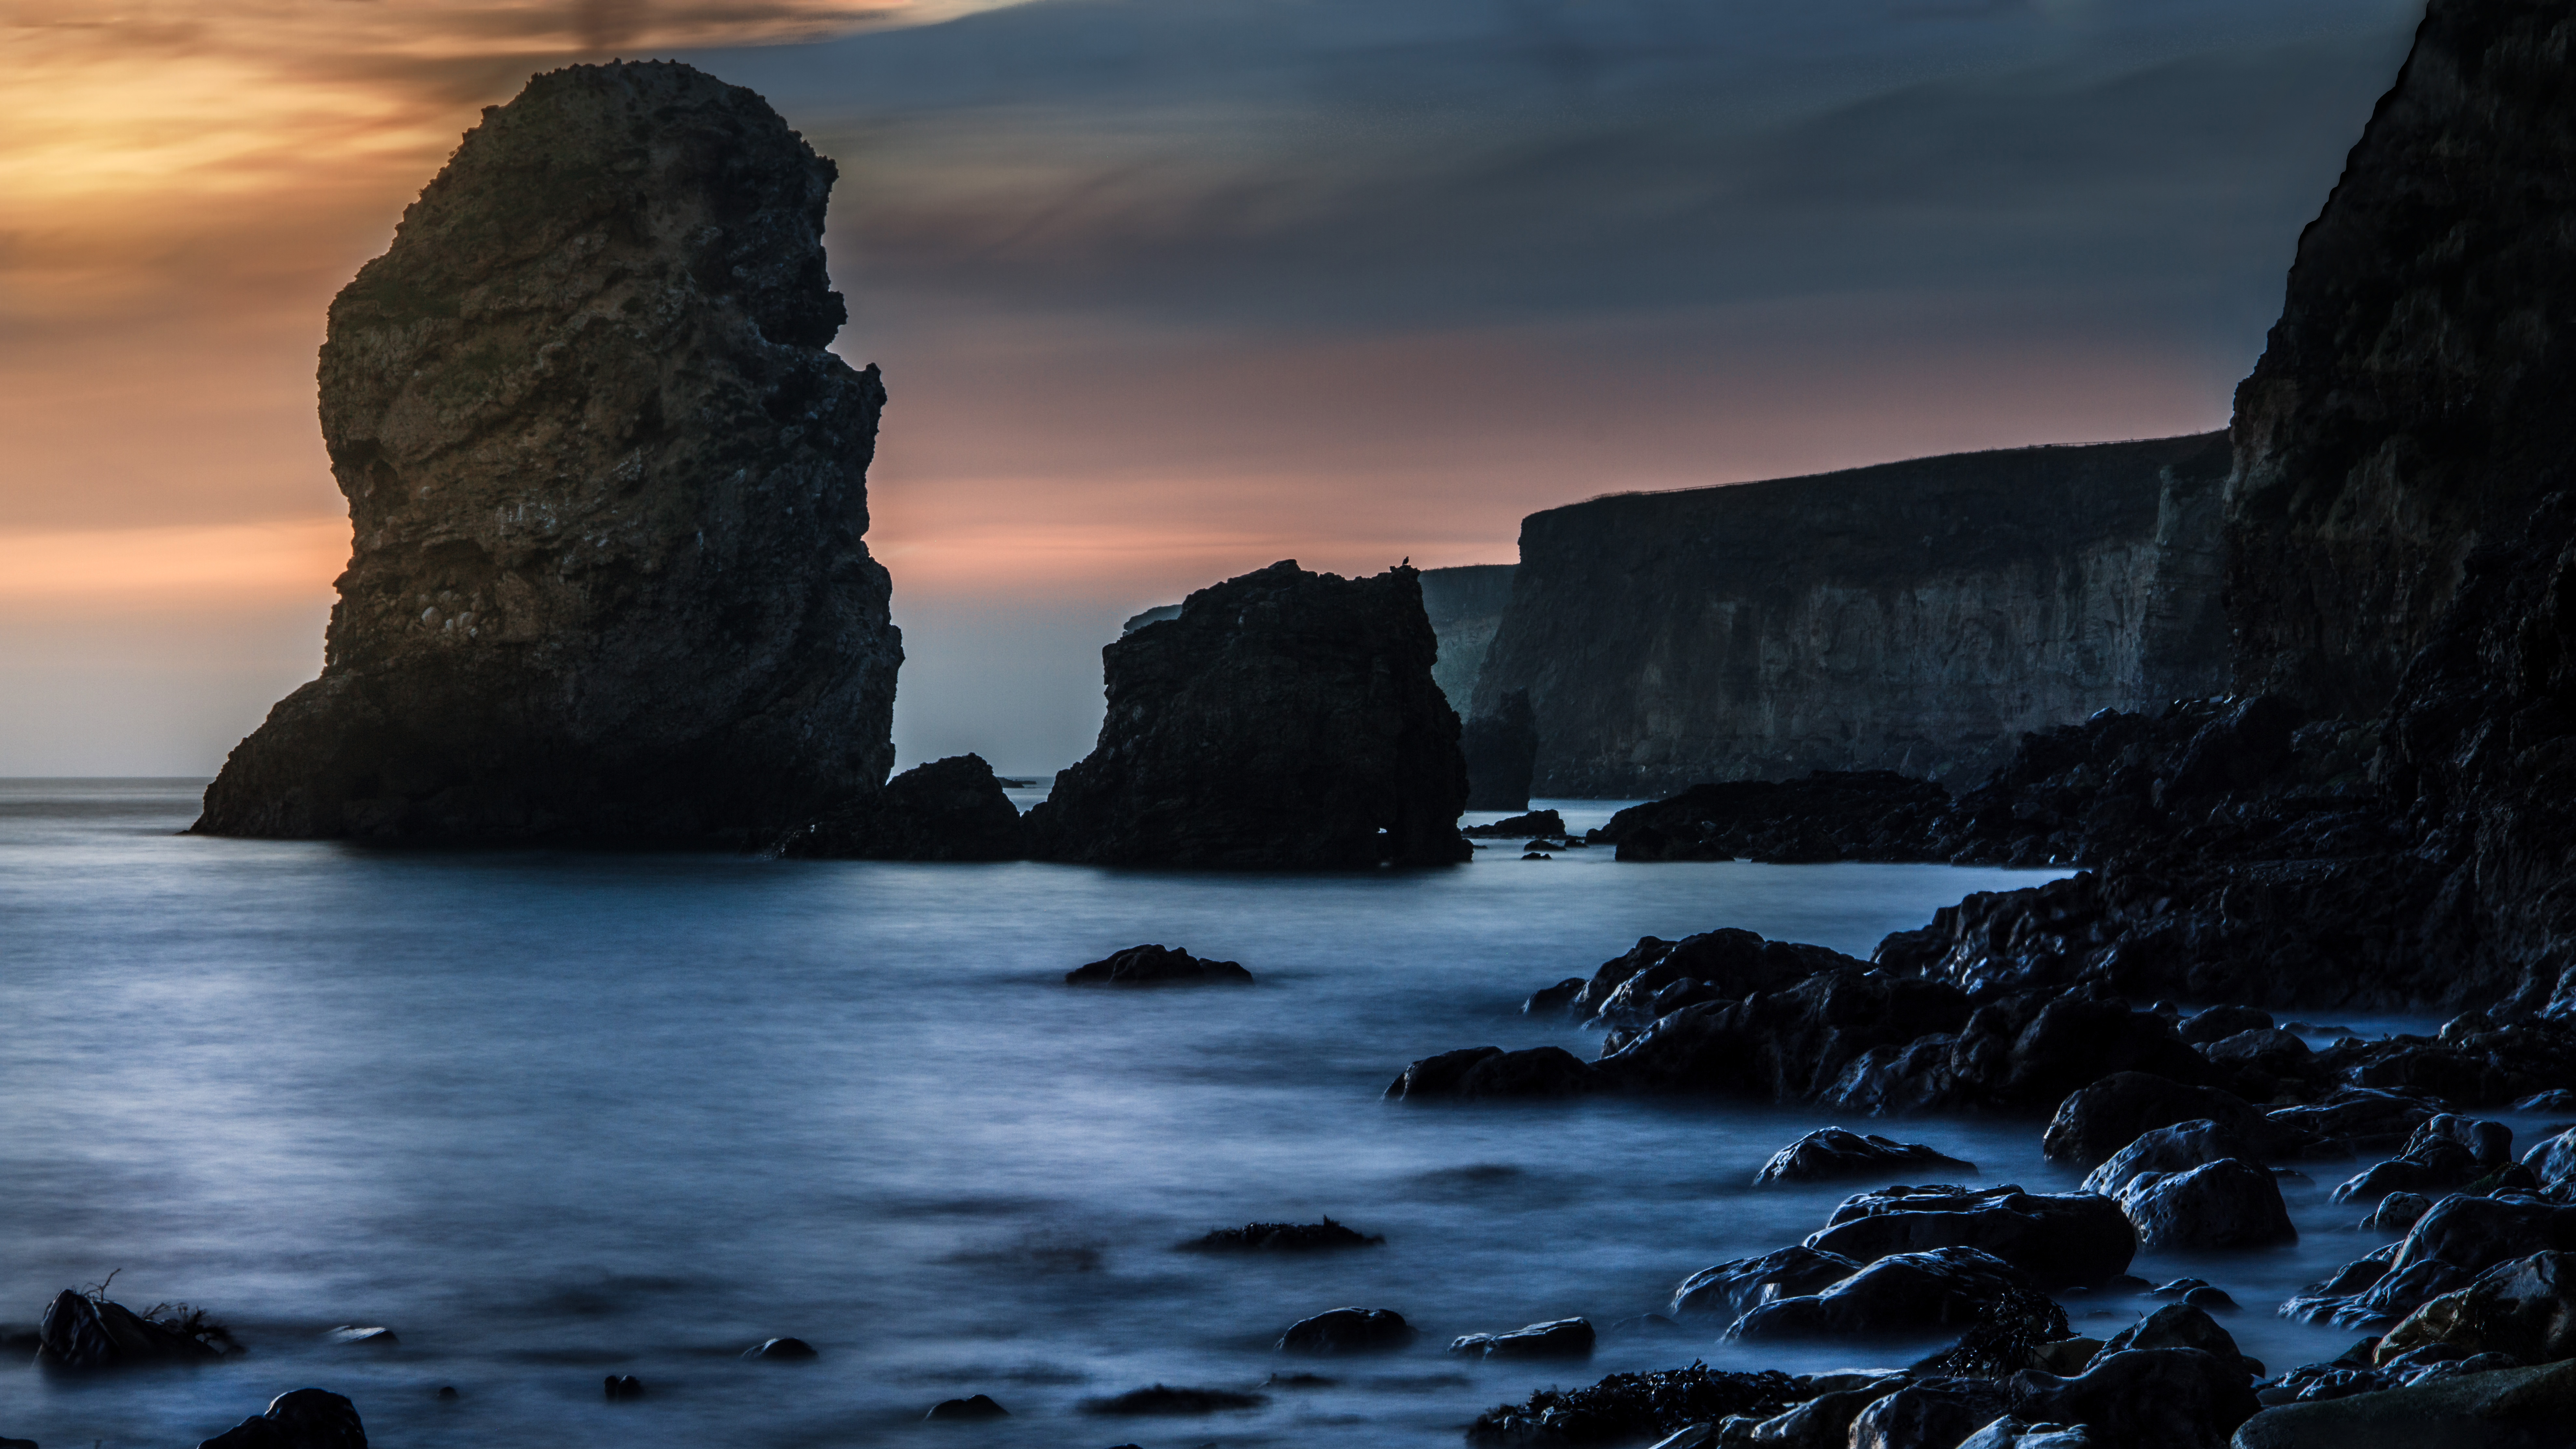
While editing the ultra-high-resolution image uses more processing power, local manipulation should be made at this stage to avoid producing uneven brightness across seams. On this image, some local dodging and burning was conducted, along with additional color, contrast and sharpening alterations.
Read more:
Best wide-angle lenses
Best photo editing software
Best free photo editing software
As the Editor for Digital Photographer magazine, Peter is a specialist in camera tutorials and creative projects to help you get the most out of your camera, lens, tripod, filters, gimbal, lighting and other imaging equipment.
After cutting his teeth working in retail for camera specialists like Jessops, he has spent 11 years as a photography journalist and freelance writer – and he is a Getty Images-registered photographer, to boot.
No matter what you want to shoot, Peter can help you sharpen your skills and elevate your ability, whether it’s taking portraits, capturing landscapes, shooting architecture, creating macro and still life, photographing action… he can help you learn and improve.
