Capture landscapes under a full moon with a super-long exposure
Time needed: One hour
Skill level: Intermediate
Kit needed: Tripod, cable release, torch, stopwatch
When you’re shooting at a stunning location it’s easy to lose yourself in the moment and, before you know it, then light is fading. However, just because the sun goes down there’s no need to head home. If the moon is out and the skies are clear, you can continue shooting well into the night.
To do so involves a fairly substantial long exposure. We’re not talking a few seconds here, more like a few minutes. Aside from the need for a tripod and cable release, we also have to be able to expose correctly for the moonlight. But how to do this with such long exposures?
We could experiment, but that might cost us an hour. Instead, the solution is to take a rough test shot with a really high ISO, then use it to work out an equivalent exposure, before capturing the final shot in Bulb mode. All exposures are a fine balance of three factors – aperture, shutter speed and ISO. If we tip the scales in one direction, we can compensate later. This is why we talk about stops of light, as they’re a means of balancing the scales – a stop decreased here can be made up with a stop added there.
Read more: How and when to photograph the moon
A moonlight shoot like this can be a challenge for your camera skills and your patience – especially when exposures last eight minutes or more – but it’s a chance to capture landscapes under the ethereal light of the moon, and the results can be unexpectedly beautiful.
Shooting skills: Get set up to shoot with moonlight
Make the most of a full moon and head out at night for beautiful landscape photos
1. Bring a sturdy tripod
Other than your camera, a good tripod is the most essential piece of kit for night-time shooting. When near water like this, make sure the legs have a firm footing, and if your tripod has spiked feet then consider using them to anchor it in place.
2. Focus with a torch
A head torch is vital for night-time shoots. Apart from the obvious benefit of being able to navigate rough terrain in the dark, you can shine the torch on foreground objects to aid focusing. And if you’re in a creative mood you could light paint with it.
3. Check light pollution
Light pollution is common near built-up areas. The reflected tungsten glow in the clouds can sometimes be unsightly, but not always; here we think the orange sky adds to the image. So look out for light pollution, but don’t always avoid it.

4. Use a cable release
Your camera has a max shutter length and anything that requires a longer exposure requires using the Bulb mode – where the shutter stays open as long as the button is engaged. A remote release is essential for locking open the shutter, and a stopwatch is handy to time the exposure.
5. Cover the viewfinder
During a long exposure light can leak in through the viewfinder; it usually appears as a purple ‘fog’ at the centre of the frame. Cover the viewfinder before taking the shot. Few things are as annoying as finding your eight-minute exposure is fogged!
6. The waiting game
With exposures lasting several minutes, a night-time shoot means lots of waiting around. Be prepared with warm clothes, a camping chair and a flask of something hot. If you have a second camera, you can set up another shot while you’re waiting.
Step-by-step guide: Work out your night-time exposure

1. Take a test shot
Set your highest ISO, such as ISO6400, and a wide aperture, like f/4. Under the full moon this should result in an exposure of no more than a few seconds. It’ll be horribly noisy, but it means we can come up with an exposure without waiting around for ages.

2. Check the exposure
Look at the test shot and histogram to check the exposure. While you’re at it, zoom in to check focus. If you’re happy, make note of your exposure settings. Now you can lower the ISO for better image quality and narrow the aperture for greater depth of field.

3. Lower the ISO
For each stop of ISO that we alter, we need to double the shutter length. Taking ISO6400 down to ISO400 is a difference of 4 stops, so 2 secs becomes 32 secs. We could go lower, perhaps to ISO100, but consider whether the extra quality is worth waiting around for.

4. Calculate the equivalent
Our initial aperture of f/4 doesn’t provide enough depth of field, so we closed up 4 stops to f/16. Now 32 secs becomes 8 mins 32 secs (an exposure calculator app, like PhotoPills, helps work it out). Set Bulb mode and use your cable release to lock open the shutter.
Should you lock up the mirror?

The common conception with long exposures is that you should lock up your mirror before taking the shot, as the clunk of the mirror can cause enough shake to blur the image. However, this is only really noticeable in comparably shorter long exposures – around 1/20sec to 2 secs. When your exposures stretch to several seconds the shake will have minimal effect on the exposure, because it only occurs in a split-second moment at the very start. So for long exposures at night there’s no need to engage Mirror lockup – although it can’t hurt either!
Top tips: Capturing the mountains at night
Look for interesting angles and watery reflections to enhance the mood in your moonlight landscapes.

Just like the sun, moonlight is more interesting when it’s directional. So compose with it off to one side, so that the scene is side-lit. Check the position of the moon throughout the night with apps like The Photographer’s Ephemeris or PhotoPills.
Read more: 15 of the best apps for photographers

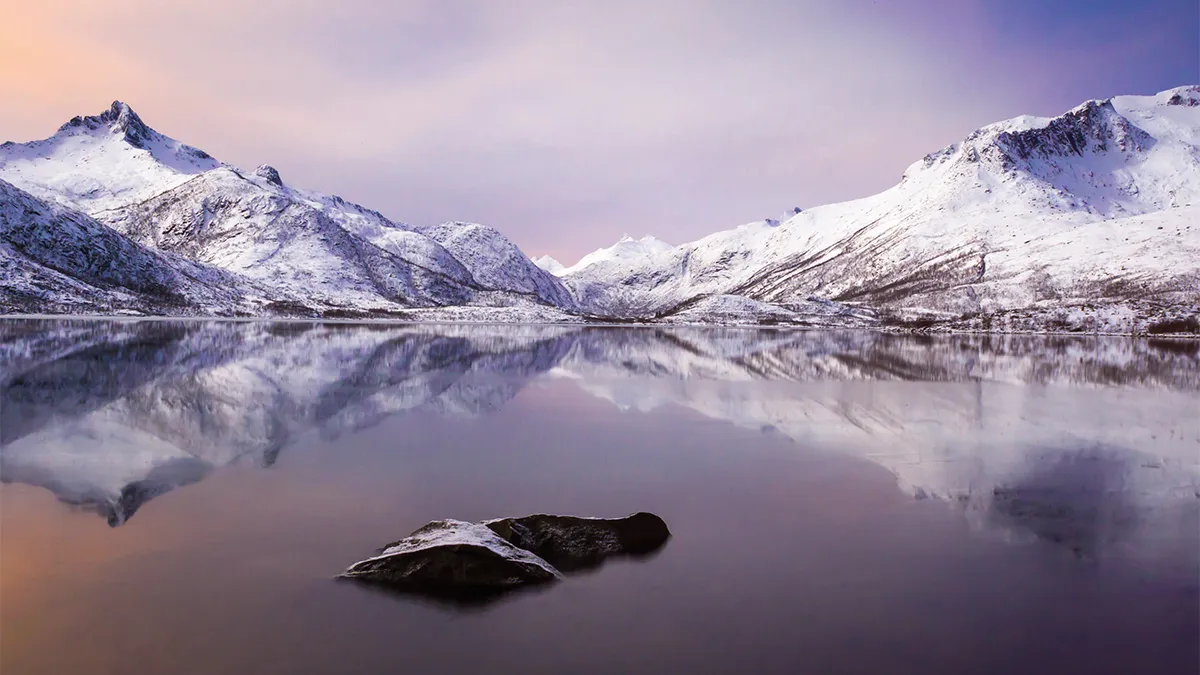
Look for water, as the flowing motion will be blurred during the exposure for a smooth, velvety surface. A fairly still body of water is ideal for mountain scenes as you’ll get a mirror-like reflection. If it’s too choppy, like this, then the reflection will be lost.
Top tips: Combat thermal noise
Your sensor heats up during a long exposure, causing unsightly noise. Here are three ways to prevent it.

1. The in-camera fix
Turn on Long Exposure Noise Reduction in your camera’s menu. With the feature enabled, your DSLR will automatically take a second shot that lasts exactly the same length as the first – without opening the shutter – then blends the two to reduce the amount of thermal noise.

2. Shoot a dark frame
Similar to Long Exposure Noise Reduction, but instead you shoot a dark frame manually with the lens cap on, using the same settings as your main shot. Use Photoshop (CC or Elements) to blend the two: copy and paste in the dark frame then set the layer blending mode to Difference.

3. Reduce noise in post-processing
Shooting a dark frame means waiting for double the exposure length, which can be a drag. If you’d rather not, or you forget at the time, you can fix noise later. The Detail panel, found in Lightroom and Photoshop’s Camera Raw plug-in, is ideal. Use the Luminance slider to reduce grain.
Composition: Is foreground interest that interesting?
We’ve all done it, but is it too easy to simply stick a rock in the foreground in your frame and take the shot?

Whether shooting during the day or at night, one of the most useful compositional devices for landscapes is to include foreground interest, but is it always necessary? It can be too easy – almost a little lazy – to simply find a rock and frame it up in the front, with a mountain or similarly pretty scene behind. But if that’s the default, then our landscapes can all end up looking very similar. More importantly, it might actually hinder us from finding a stronger composition if we’re always on the lookout for the right rock. So ask yourself, what’s most important to your composition? There’s no right or wrong here, but rather a challenge that goes to the heart of all photography – to find something interesting, unusual and true.

Read more: The beginner's guide to photographing the night sky

