To photograph an illuminated landmark at dusk
Time: One evening
Skill level: Beginner
Kit needed: DSLR, 50mm lens, tripod, cable release (optional)
Light pollution is fast becoming a hindrance to photographers across the globe, but for this project we’re going to make it work for us.
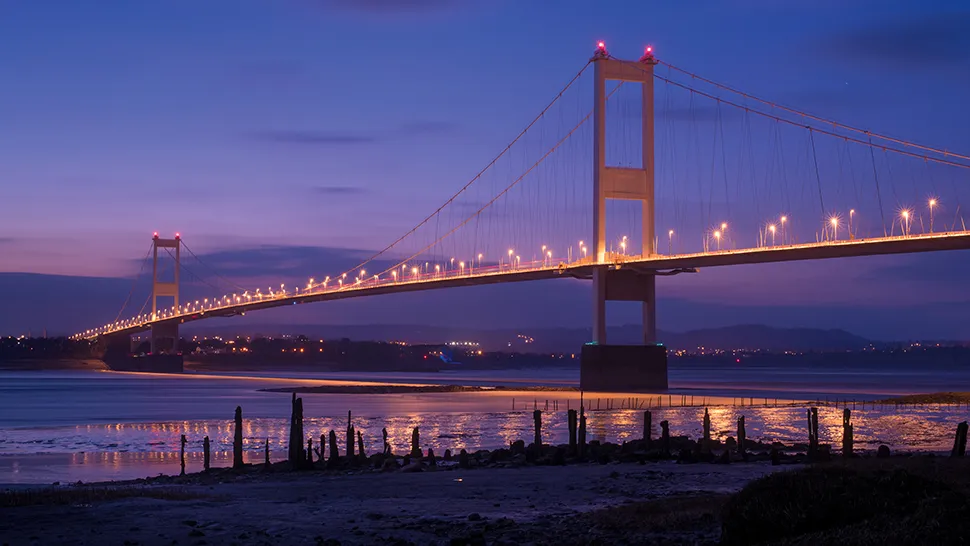
In the right setting, city lights can look great at dusk, and if those lights are illuminating an-already impressive landmark, they can give it a real lift. So with this in mind, we decided to try to photograph one of the UK’s most iconic bridges – the second Severn Bridge, between England and Wales – at twilight.
For a shot like this to work, it’s best to shoot in the direction of the setting sun, as the sky in that direction will retain its colour for longer. Timing is also key: shoot too early, and the sky will be much brighter than the landmark (and the landscape), which means that if you expose for the sky, the landmark will be turned into a silhouette. Shoot too late, and the sky will be black, without any colour.
What you’re after is that moment when the lights are all on, but there’s still a hint of blue in the sky. This is know as the blue moment, and part of its appeal lies in the fact that the warm glow of the lights complements the cool blue of the sky. Here’s how it’s done.
Step-by-step guide: The magnificent Severn
1. Find a suitable subject

Rocking up in a city and shooting the first lights you see is easy. What’s more difficult, but essential to getting this sort of shot right, is to have a clearly defined subject.
We travelled to Severn Beach and framed the second Severn bridge as our focal point.
2. Set up in daylight

A cable release is useful when doing low-light photography like this, as it prevents any movement from your hand transferring to the camera during the photo-taking process.
You’ll be shooting in the dark (or late twilight), so it’s best to set up while there’s still daylight. Unless you ramp up the ISO, you’re going to need a slow shutter speed to get a decent exposure. Put your camera on a tripod to prevent camera shake blurring the image.
3. Time it right

If you use a narrow aperture, small, bright lights will be captured as dramatic star-bursts – as in our final image
The key to this technique is to wait for the daylight to fade and the street lights to power up; they take about 20 minutes to get a good glow. We tried to strike a balance between the sky and the street lights by shooting at late twilight, and then shooting until it got dark.
4. Set the exposure

To determine the correct exposure, set an aperture of around f/14 in the Manual exposure mode to ensure good depth of field. Then, with the ISO set to 100 or 200 (to minimise noise) adjust the shutter speed until the exposure level indicator lines up with the zero on the exposure scale.
5. Check the histogram

The best way to assess your exposure is to check the histogram. You want the graph to be slightly to the left (as the scene will be darker than mid-tone), but not clipped. If it’s too far right, set a faster shutter speed to darken the image. As it gets darker, you may need set it slower.
6. Adjust the white balance

You could use Auto white balance, but night-time photos are often transformed when you use the Incandescent preset to change the colour temperature. If you’re feeling adventurous, you could even create your own white balance setting. We chose 3100K with +50 magenta.
Read more: Exposure compensation: What it is and how to use it

