How to add copyright and website details to every image
The pros do this – and so should you
The best camera deals, reviews, product advice, and unmissable photography news, direct to your inbox!
You are now subscribed
Your newsletter sign-up was successful
Photographers are more concerned than ever about protecting their images, particularly as many habitually share them online. There are a number of ways of going about this, but one of the easiest and best things you can do is to append your copyright details to every shot you take.
• Best website builders for photographers
In general, you automatically hold the copyright over every image you capture. There are exceptions, such as if you're working for a company to which you have already agreed to assign this, but otherwise it's yours. Nevertheless, it's a good idea to make sure your images all show this, as it can be difficult to prove without it.
Fortunately, this only needs to be done once in camera and then it will be stored as part of every image's metadata. This is the information attached to an image, which usually contains things like your exposure settings, the time and date of capture, and so on.
You can't see this information on the image itself like you would a watermark, but it's baked into the file's details. You can even now add your website address or contact details in this way, which is great from a marketing point of view.
Here's how it's all done…
1. Find the Copyright option
The best camera deals, reviews, product advice, and unmissable photography news, direct to your inbox!
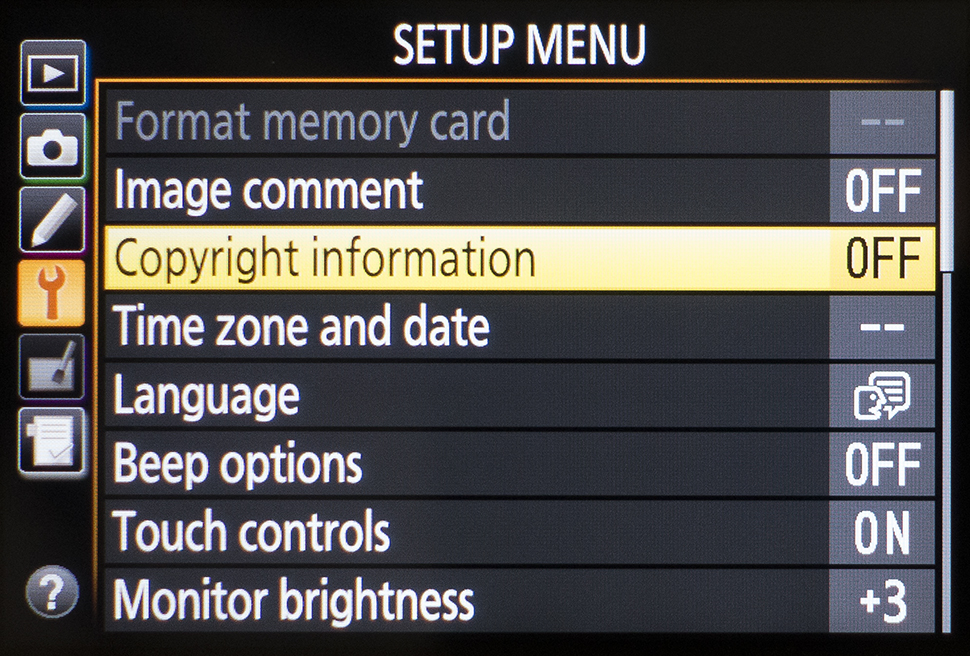
Your camera should have an option marked Copyright or Copyright Information somewhere within its menus. This will generally be in a tab titled Tools or Setup, usually marked with the icon of a spanner.
2. Add your details
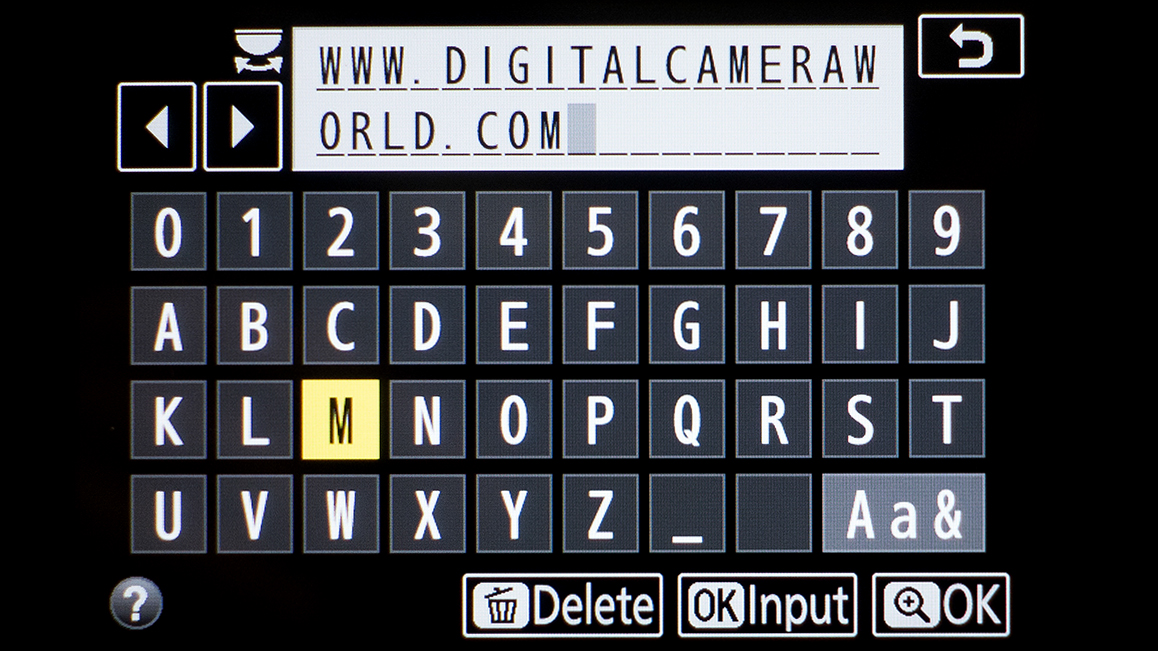
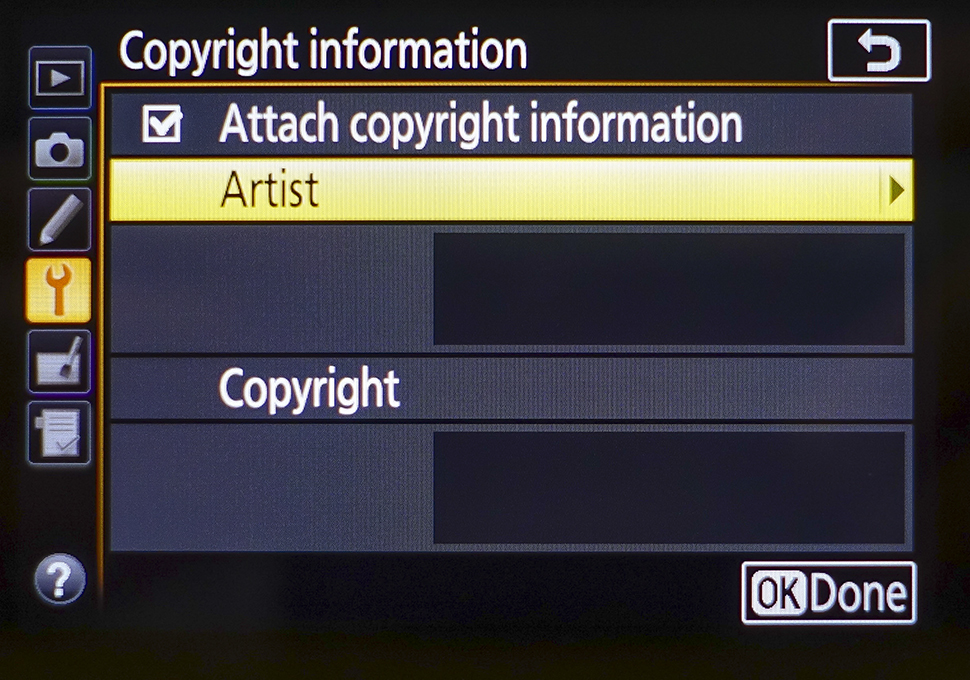
You will typically have two fields available to fill in: one with the photographer's name and one with the copyright holder's details, although this does vary between models. As these will usually be the same, you can use one for your name and another for your website details.
Many photographers also tend to put the year of capture next to their name. Whatever you choose to put down, this will now be stored for every shot you take.
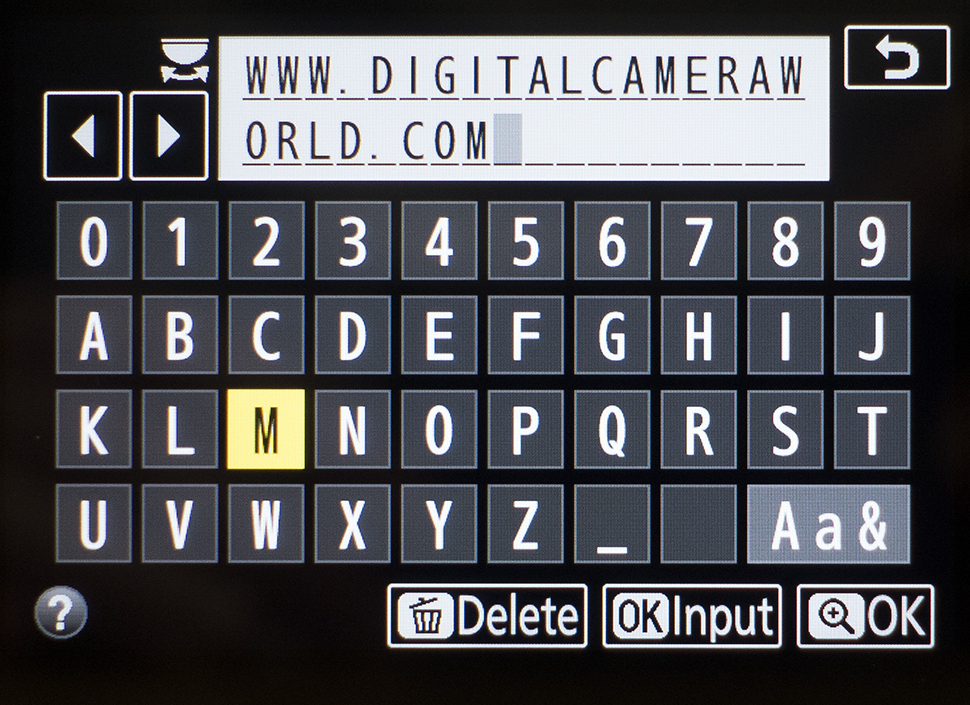
Storing the year as part of the copyright information? Remember to change it on January 1st!
3. Take an image
Follow the on-screen instructions to save your information and take an image. Now play it back and see whether this information is attached to it.
On Nikon bodies you will be able to see this along with all the other shooting information by pressing the up or down buttons on the menu pad. Sony bodies, meanwhile, show a copyright symbol. If in doubt, check your camera's manual.
And that's it! When you open up your image in Photoshop or another image editing program, you should now see these details within the file information.
Need to add more information? You can typically add things like usage terms, addresses and image comments using software such as Adobe Lightroom or Photoshop, or alternatively, with the software that came with your camera. More advanced cameras may also allow for a greater range of information to be input as standard.
Read more:
How to take photos magazines and companies want to use
How to sell your photographs as stock images
Best website builders for photographers
The former editor of Digital Camera World, "Matt G" has spent the bulk of his career working in or reporting on the photographic industry. For two and a half years he worked in the trade side of the business with Jessops and Wex, serving as content marketing manager for the latter.
Switching streams he also spent five years as a journalist, where he served as technical writer and technical editor for What Digital Camera before joining DCW, taking on assignments as a freelance writer and photographer in his own right. He currently works for SmartFrame, a specialist in image-streaming technology and protection.

