Home photography ideas: Shoot abstract oil and water photography
Create unique abstract patterns by combining cooking oil, water and reflected light
Watch video: Home photography ideas – Abstract oil and water photography
Photography projects at home
• Home photography ideas
Useful home photography kit
• Best tripods
• Best lighting kits
• Best reflectors
• Best macro lenses
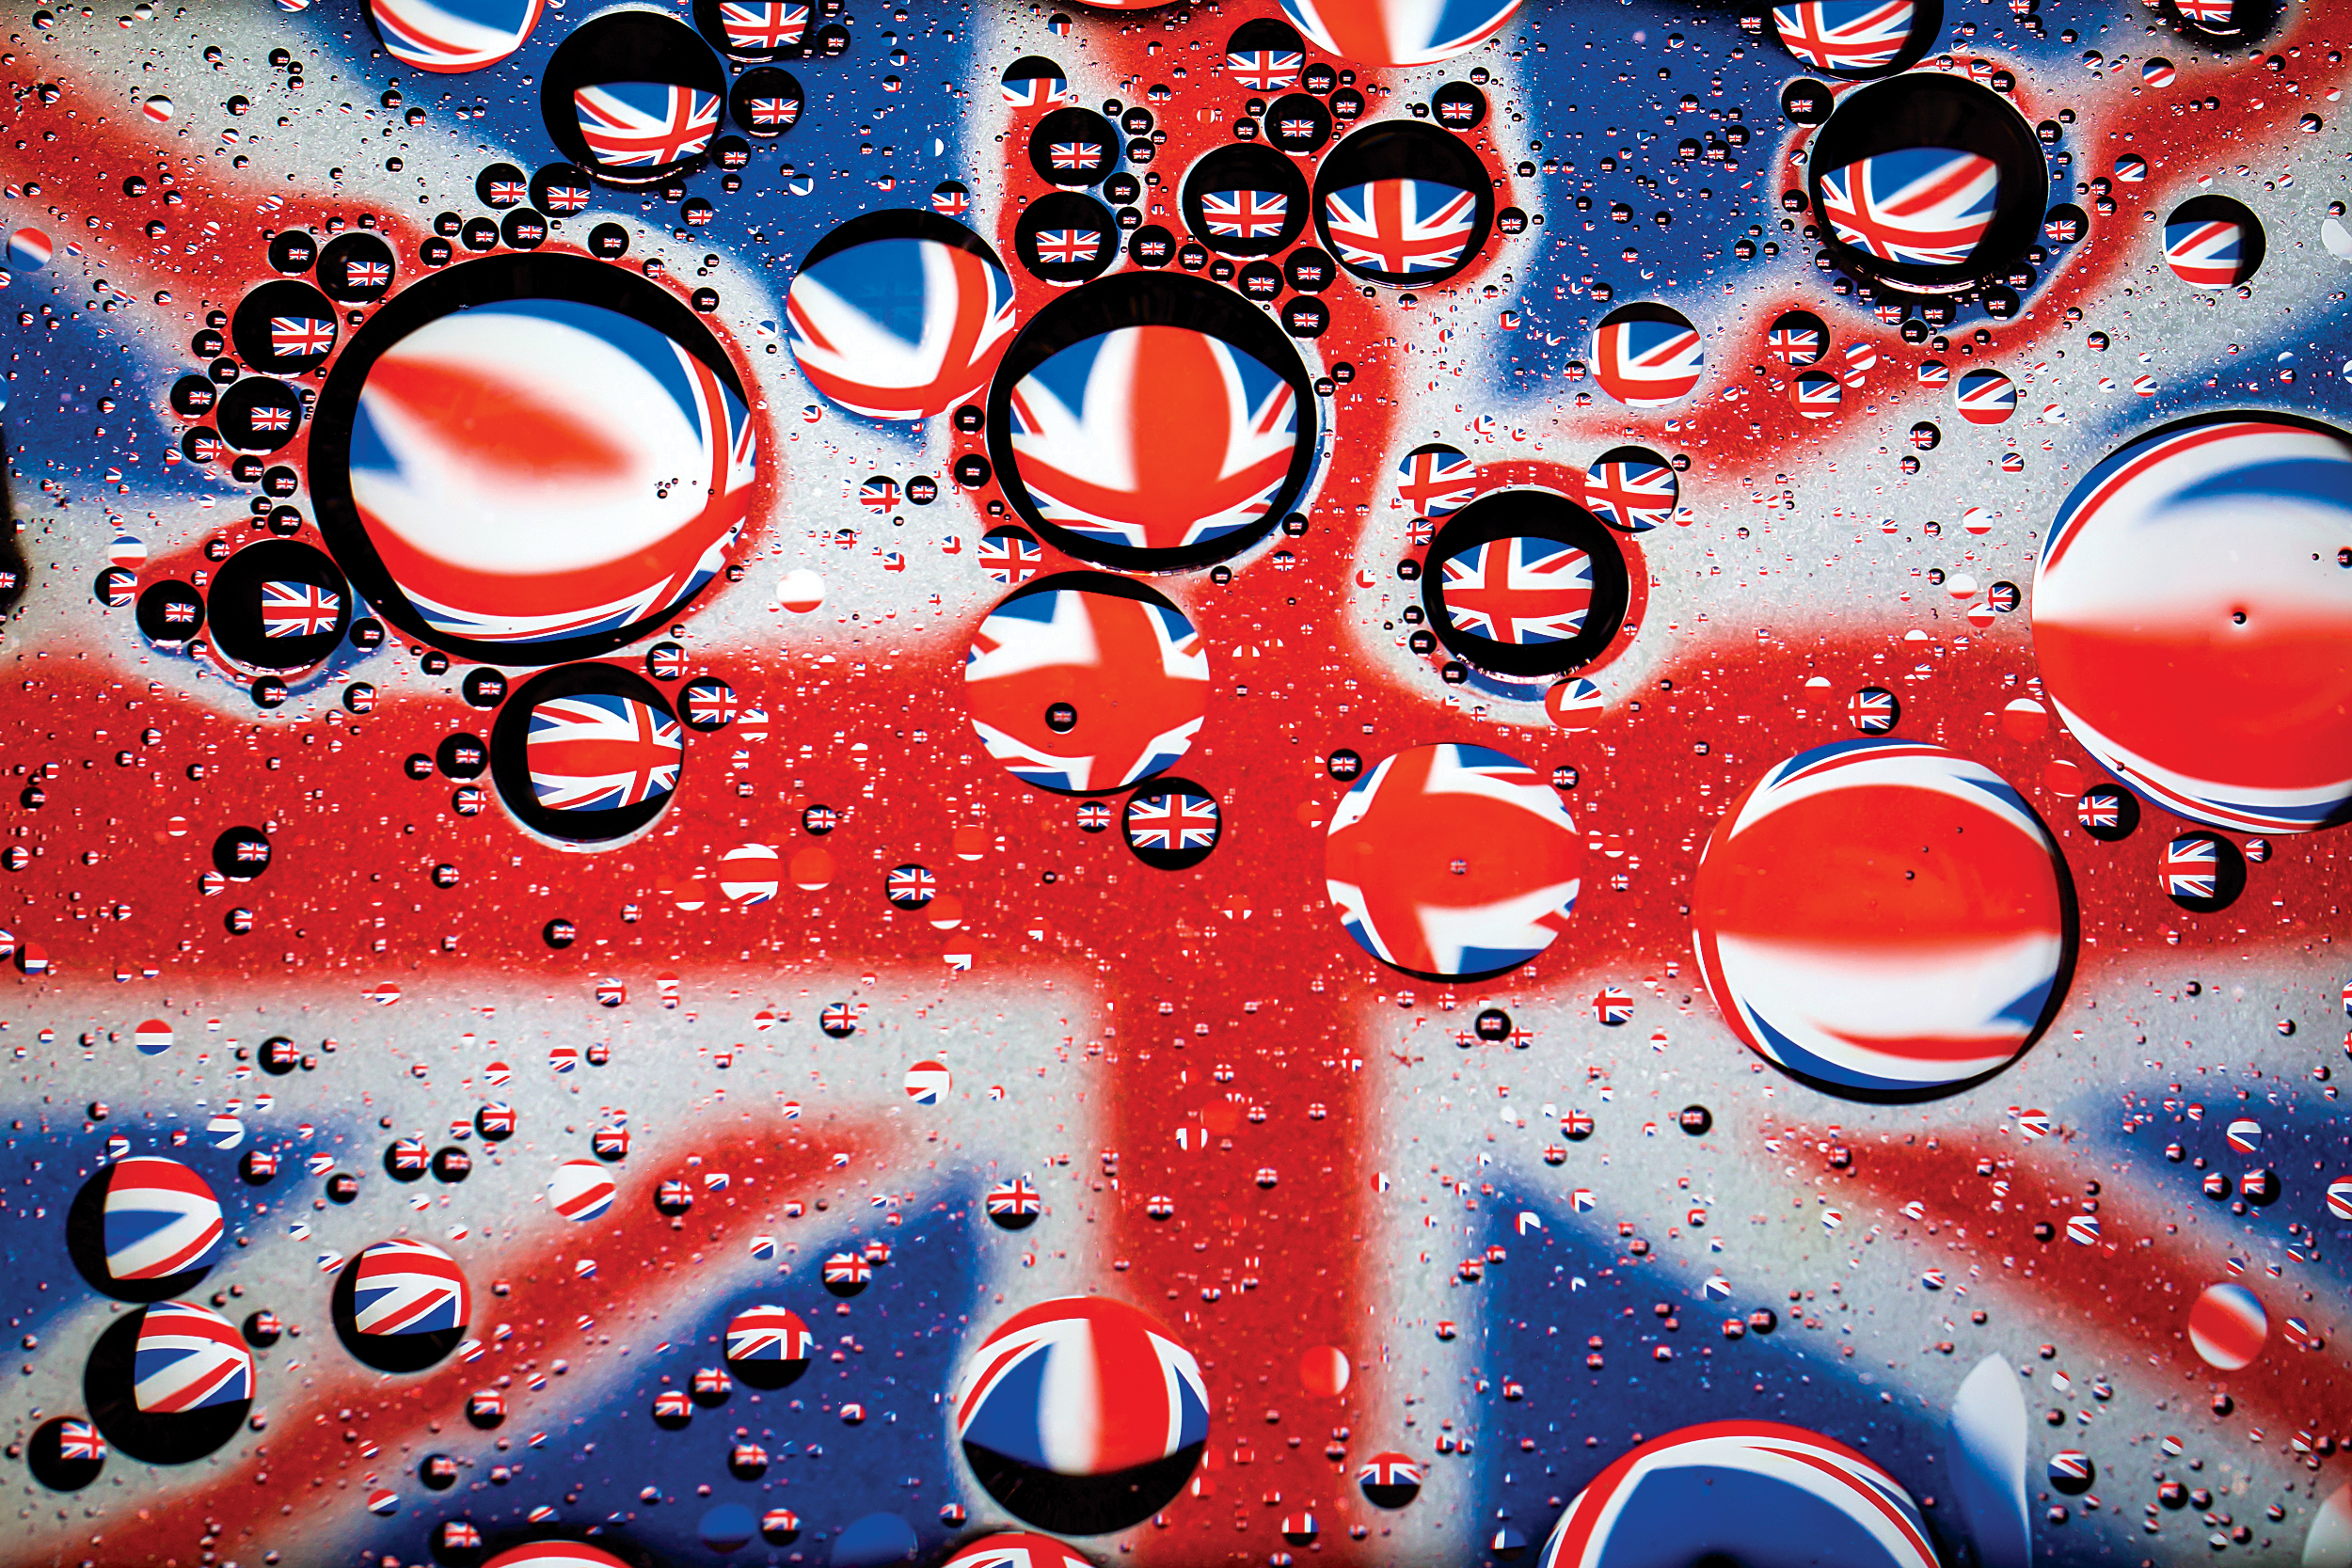
Water and oil may not mix, but they can create unique photographs. With a few household items, a flash (or powerful lamp) and the right camera settings, we can create bold, vibrant abstract pictures.
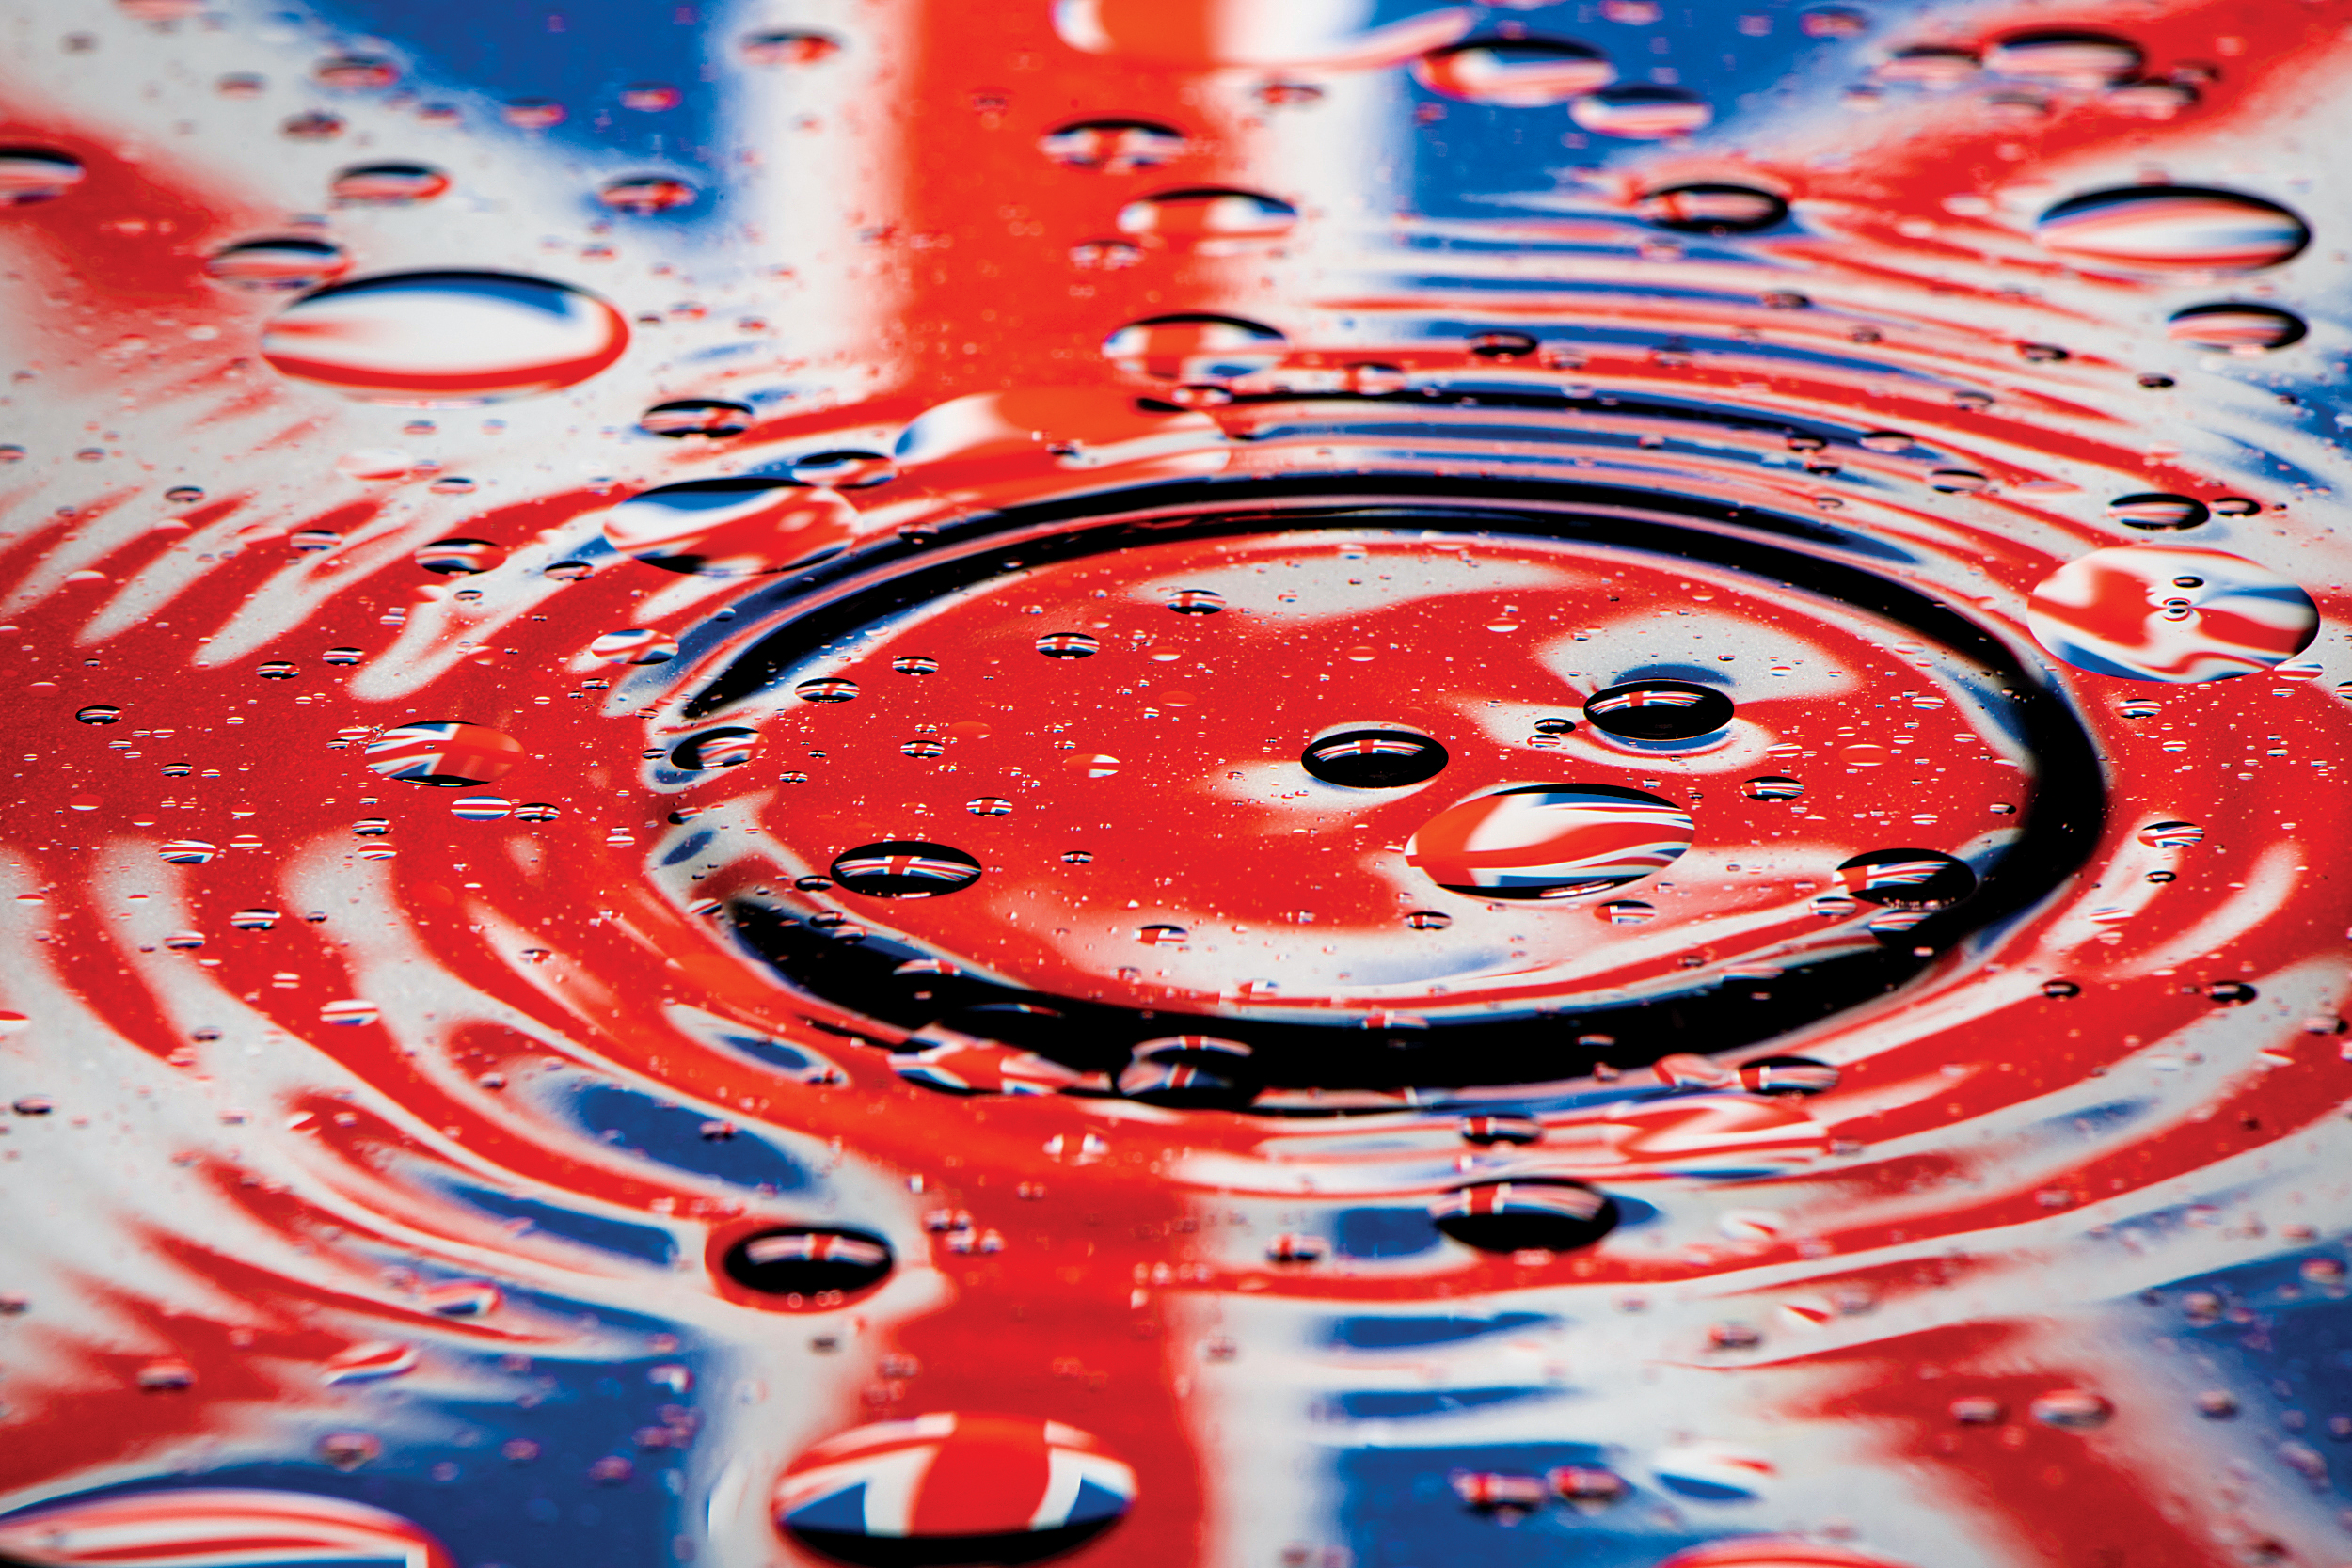
The key here is in customizing our light source. By placing a colorful material or custom shape in front of the light, we can transform it into our own light box. This light will then be reflected in the oil and the water to create our abstract art.
Every little bubble and drop of oil is highly reflective, so at the right angle they reflect the light from our source towards the camera. The result is a seemingly endless array of bubbles – some on the surface of the water, others drifting in the depths below – each containing the shapes and colors of our light source in miniature form.
We’ve used a colorful Union Jack flag for one of our oily reflections, but you could use any semi-translucent material. Or, if you prefer arts and craft, you could fashion your own creation using cardboard, scissors and tracing paper or colored acetate. Any bold shape will do, but it adds to the effect if the colors and shapes are familiar and recognizable.
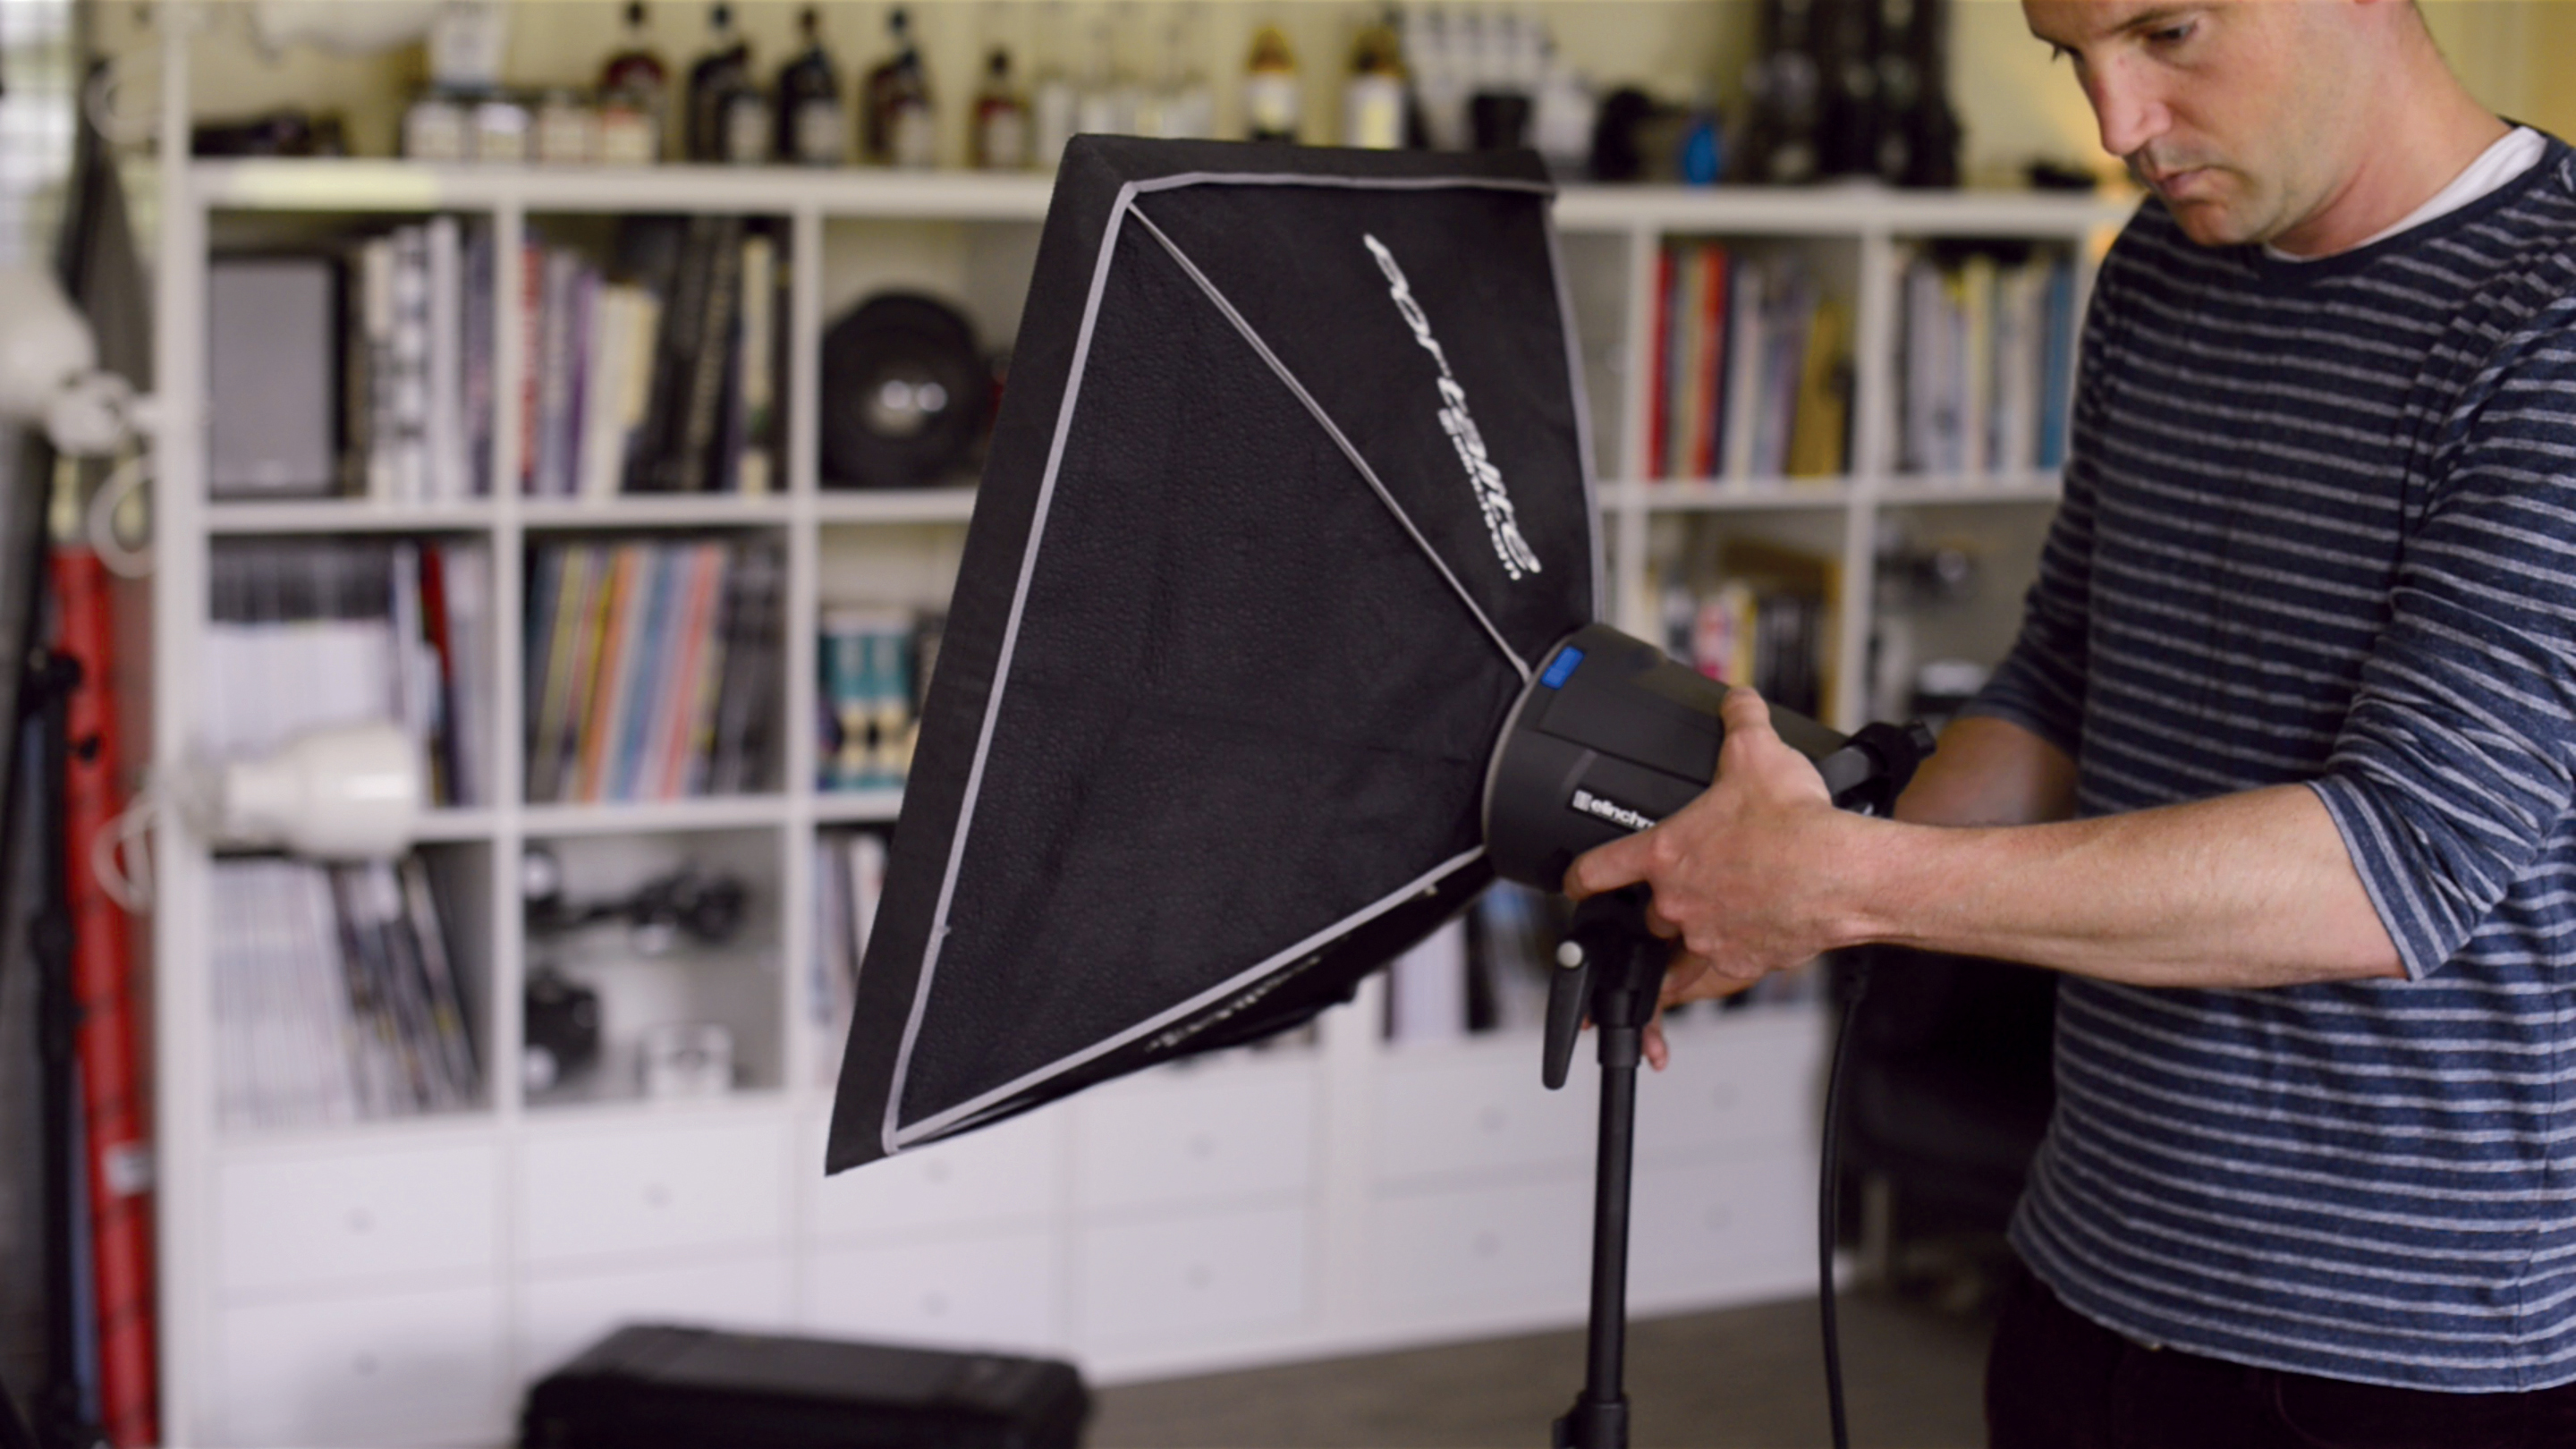
We first used a small studio softbox to light our oil and water. If you don’t have this kind of gear you can get similar results with various types of light-emitting devices – including a computer monitor!
• Best online photography courses
The best camera deals, reviews, product advice, and unmissable photography news, direct to your inbox!
Oil and water photography setup
01 Light template
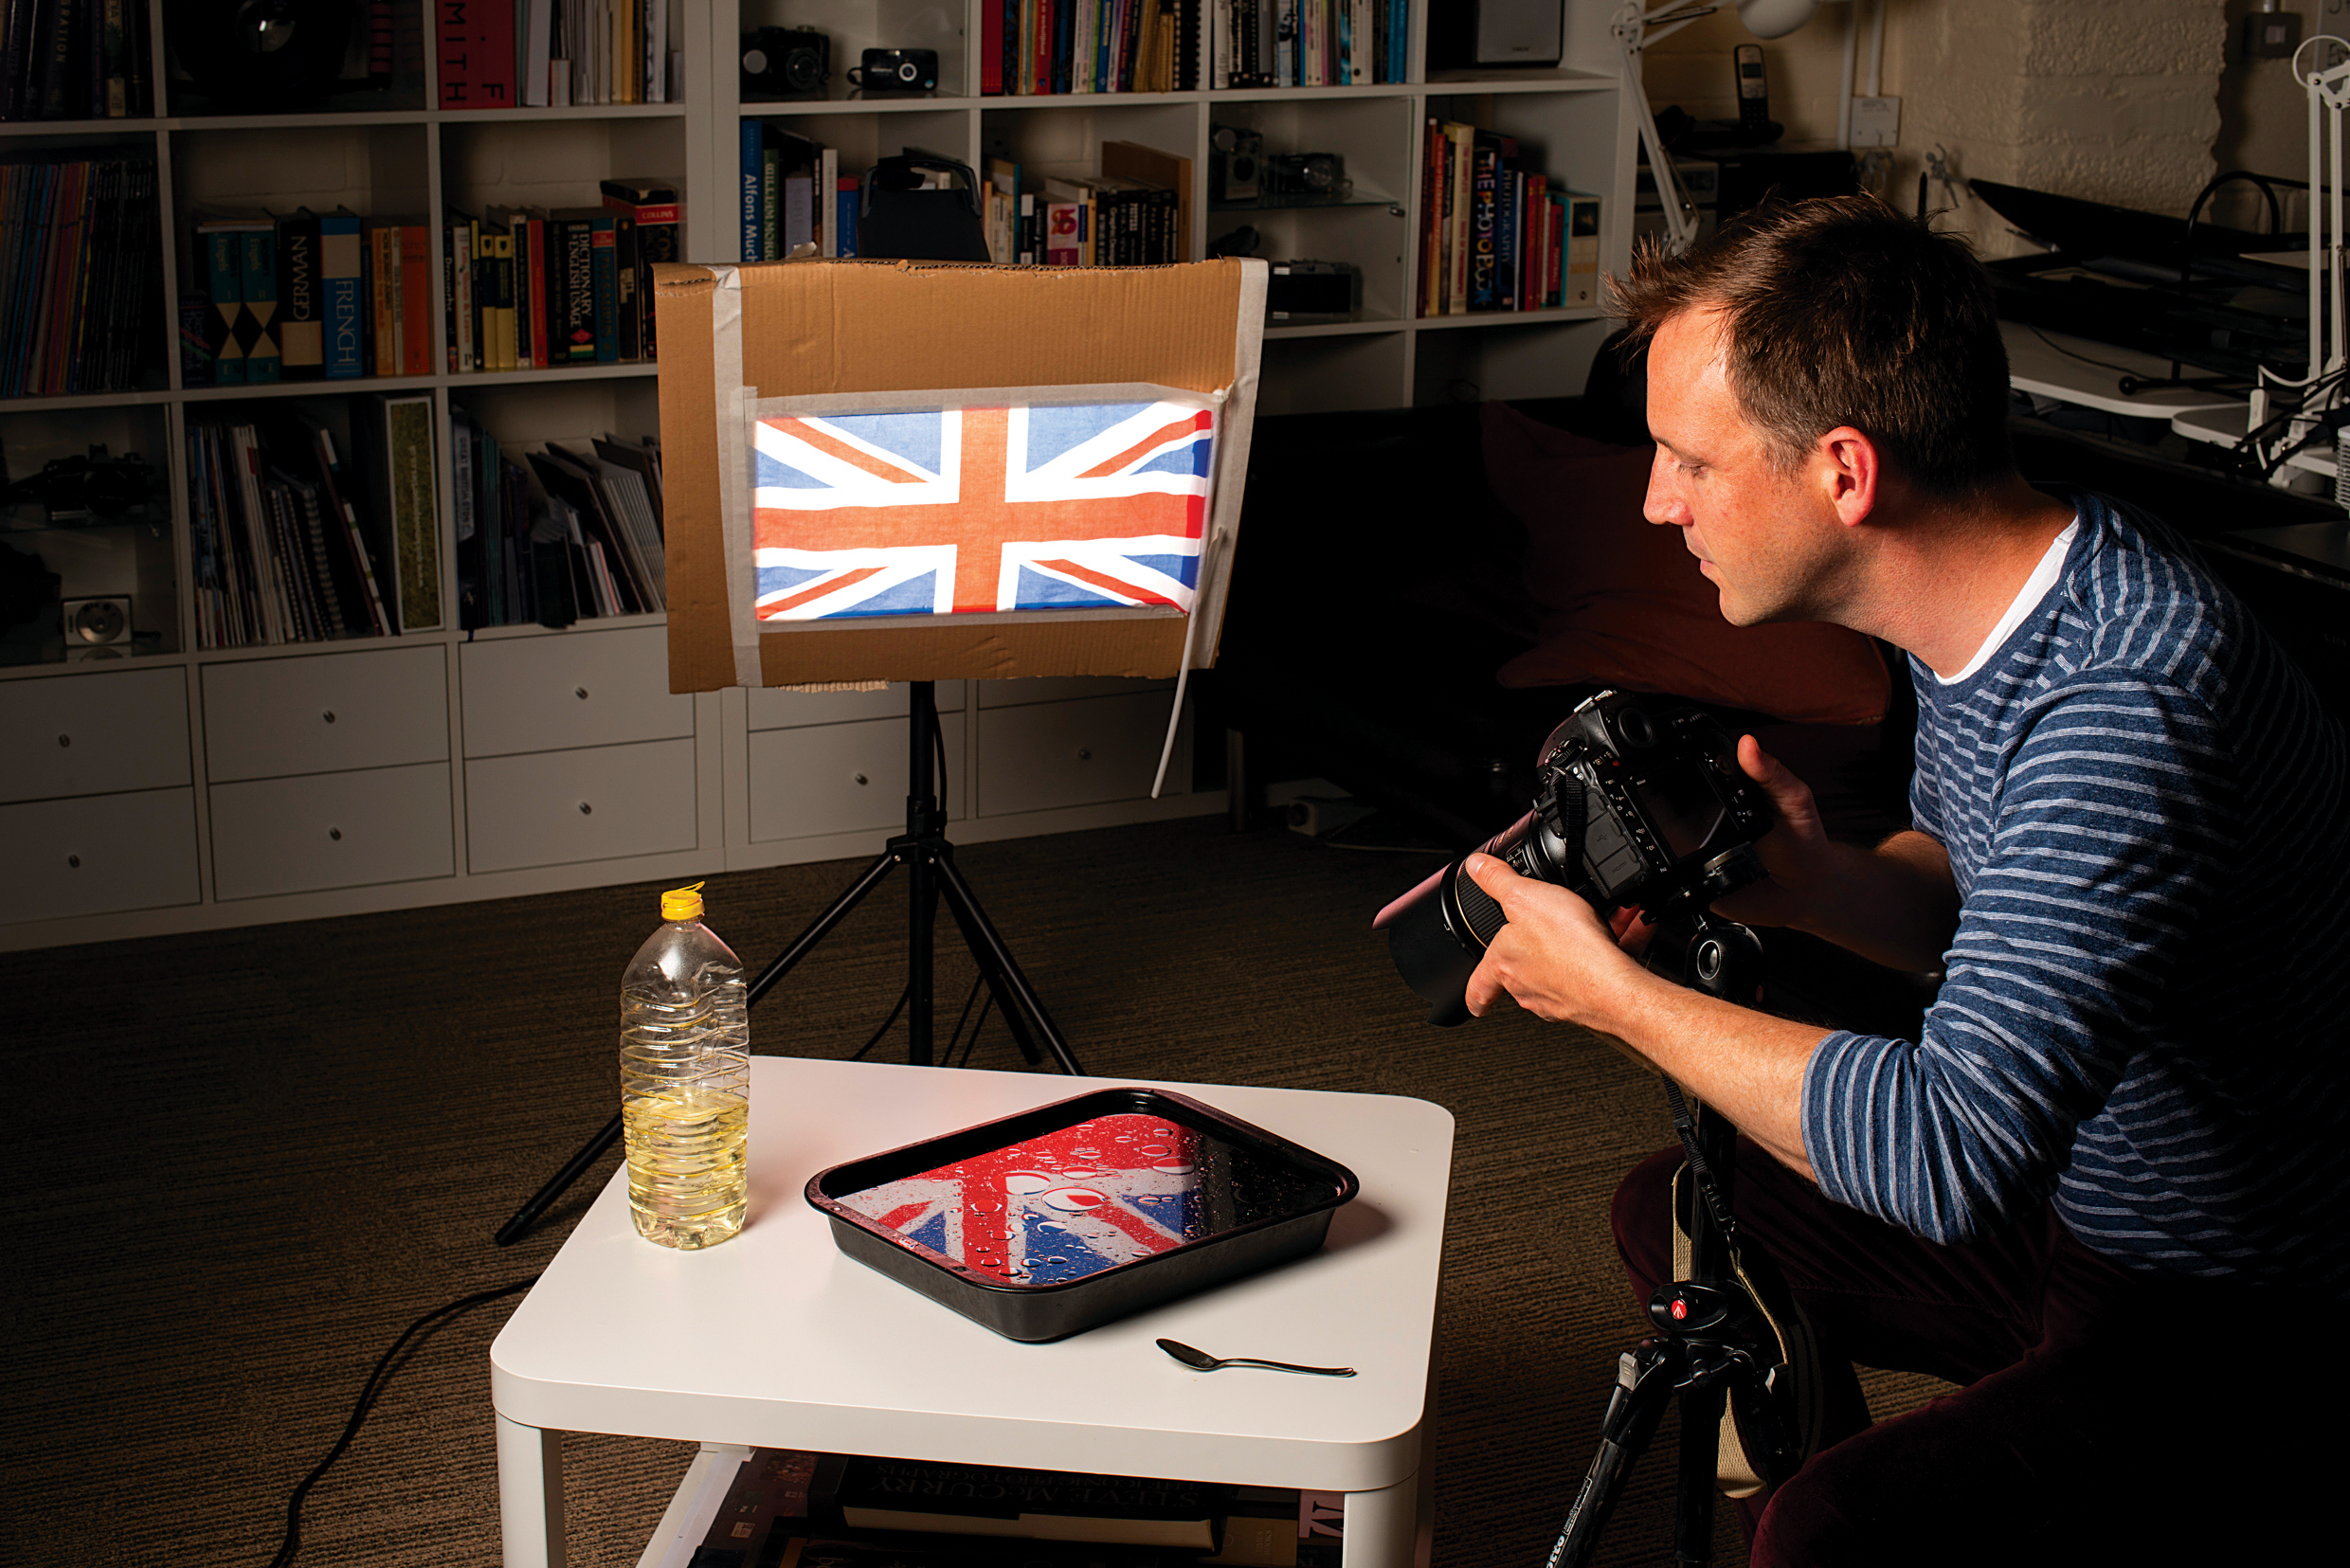
For this to work, you’ll need a colorful material to place over the top of your light. Any shape, pattern or color will work – we used a Union Jack flag. You’ll also need to create a cardboard template that’s big enough to fit over your light source.
02 Light source
We’ve used a studio flash and softbox. If you don’t have one you can make your own light box; cut out one side of a box and attach your flag or colorful material. Next, shine a lamp or speed light through a hole in the opposite side of the box.
03 Oil on the water
For this effect you’ll want a wide dark container, like a baking tray. Next, fill it with water and add a few drops of cooking oil. Each drop will create beautiful reflections, so be ready to start shooting. If the oil starts to clump, give it a quick swirl.
04 Macro lens
A macro lens enables us to get close to the surface of the water. If you don’t have one, don’t worry – any lens that enables you to zoom in with a short minimum focusing distance will be fine. Try using manual focus to get sharp shots.
Step by step
01 Flash settings
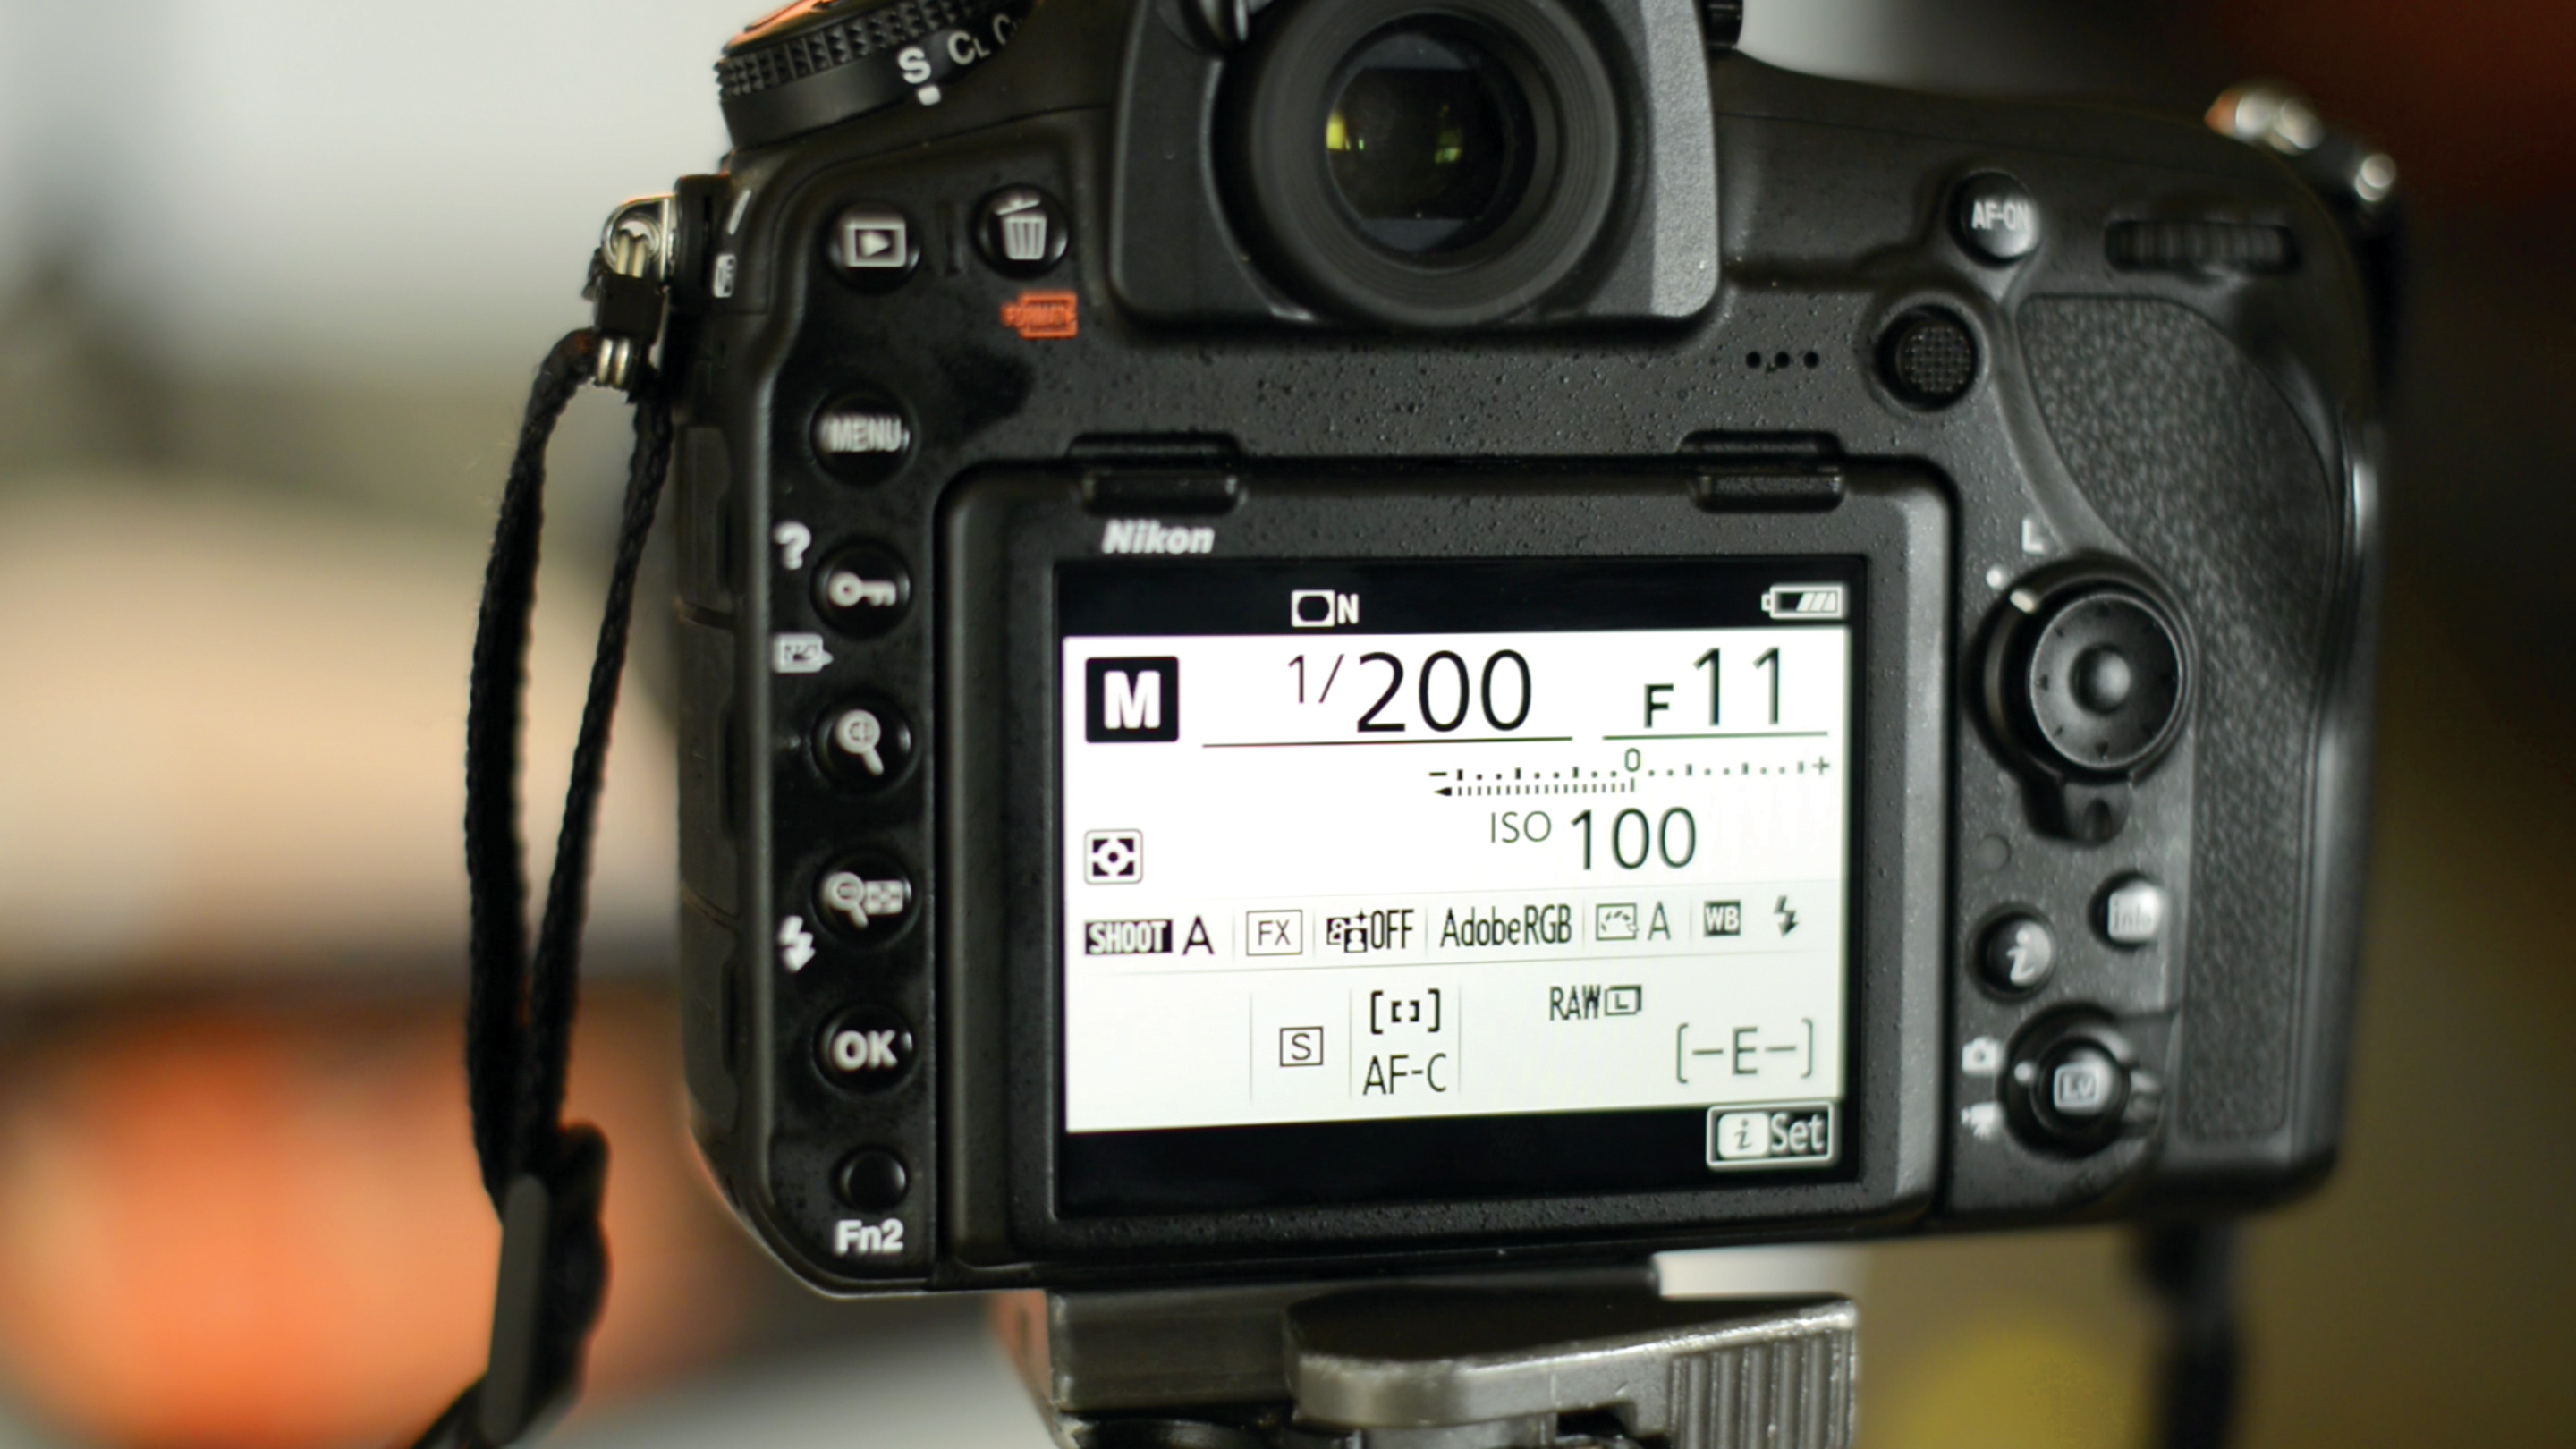
A great set of stock settings for flash indoors is: manual mode, 1/200 sec, f/11, ISO100. After this we can tweak the strength of the light to ideally suit our exposure. Position the camera directly opposite the light source and at a similar height, so that it can pick up the colorful and vast array of reflections.
02 Smart use of light
A studio flash head means that we can use a low ISO for maximum image quality and a high f-number for increased depth of field. The modeling light is also very convenient for focusing. If you don’t have a studio flash you could use a speed light, an LED, a powerful household lamp or potentially even your smartphone.
• Best photography lighting kits
03 Ripples in the water
If you like, you can try adding ripples and drops to the water. Simply place a spoon or similar utensil in the water and focus on the base of it. Lift it out of the water, being careful to hold it directly above the focus point. Then capture the moment as drops fall from the spoon and hit the water. A tripod comes in handy here, as it frees your hands to focus the lens and hold onto the spoon.
Alternate setups
Colorful oily abstracts
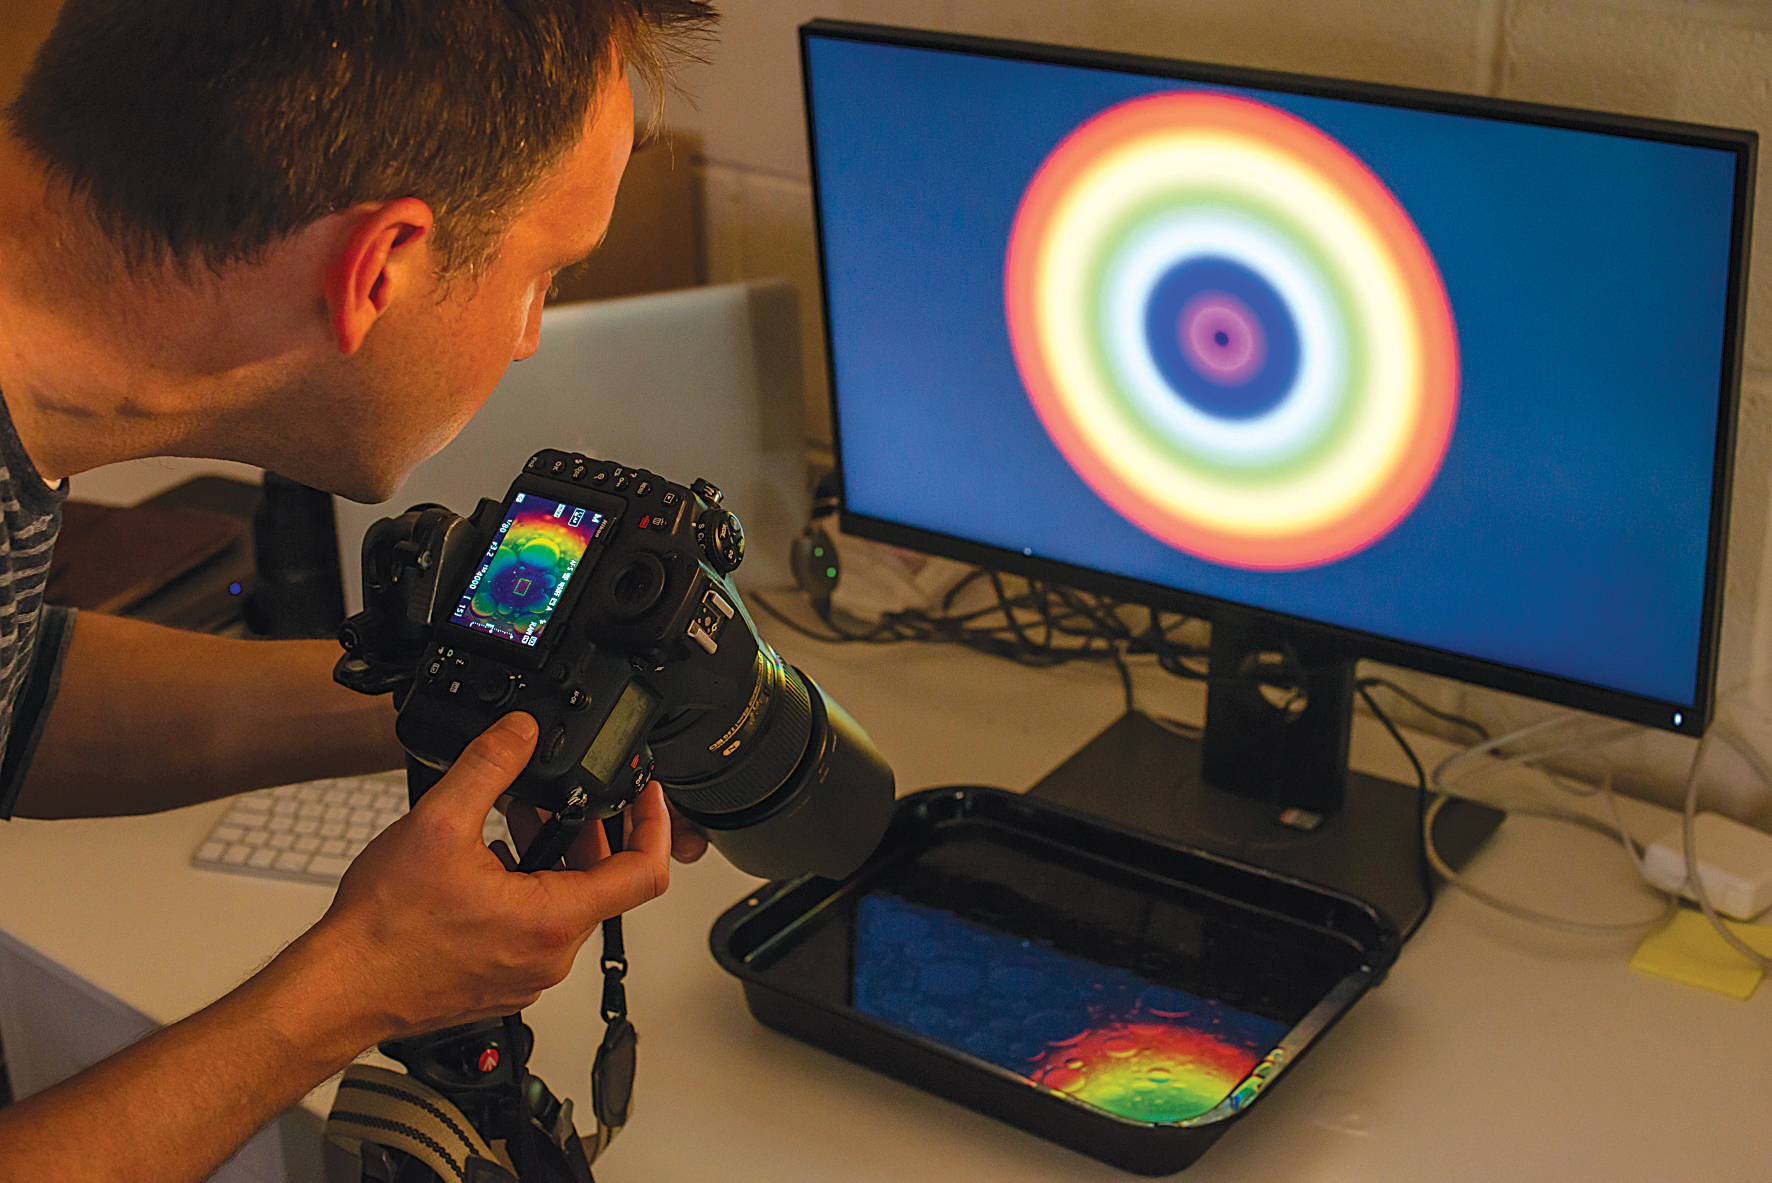
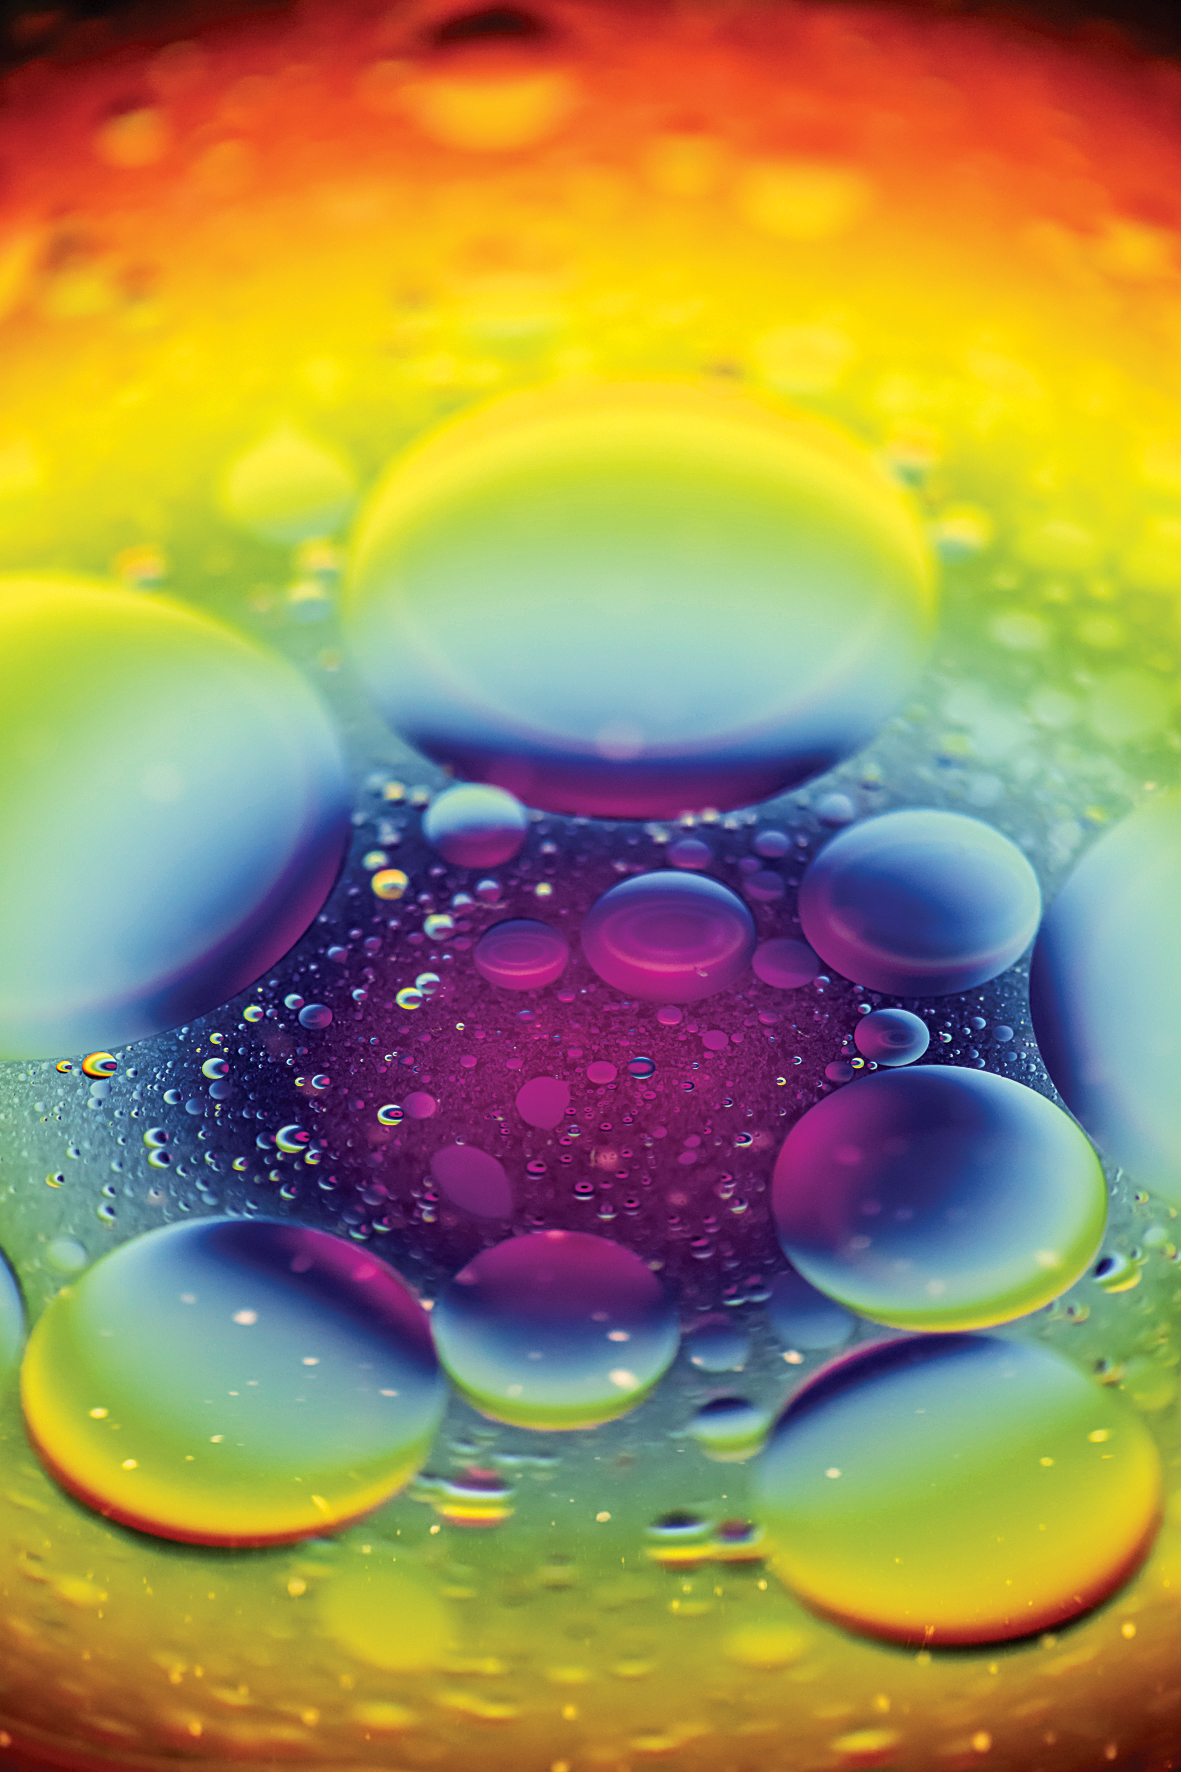
You can use all kinds of light sources for this, even a computer monitor or tablet screen. We positioned the oil and water in front of a monitor, then made a simple circular gradient in Photoshop. Of course, even with brightness turned to the maximum, a monitor screen isn’t nearly as powerful as a flash, so we needed a high ISO and a wide aperture. As for shutter speed, we can go down to perhaps 1/8 sec and use a tripod. But be sure to wait until the water is still, and use a self timer so as not to disturb the camera when pressing the shutter button.
Kit needed: Oil and water, monitor or any other digital screen, tripod
Exposure: 1/8 sec, f/5, ISO4000
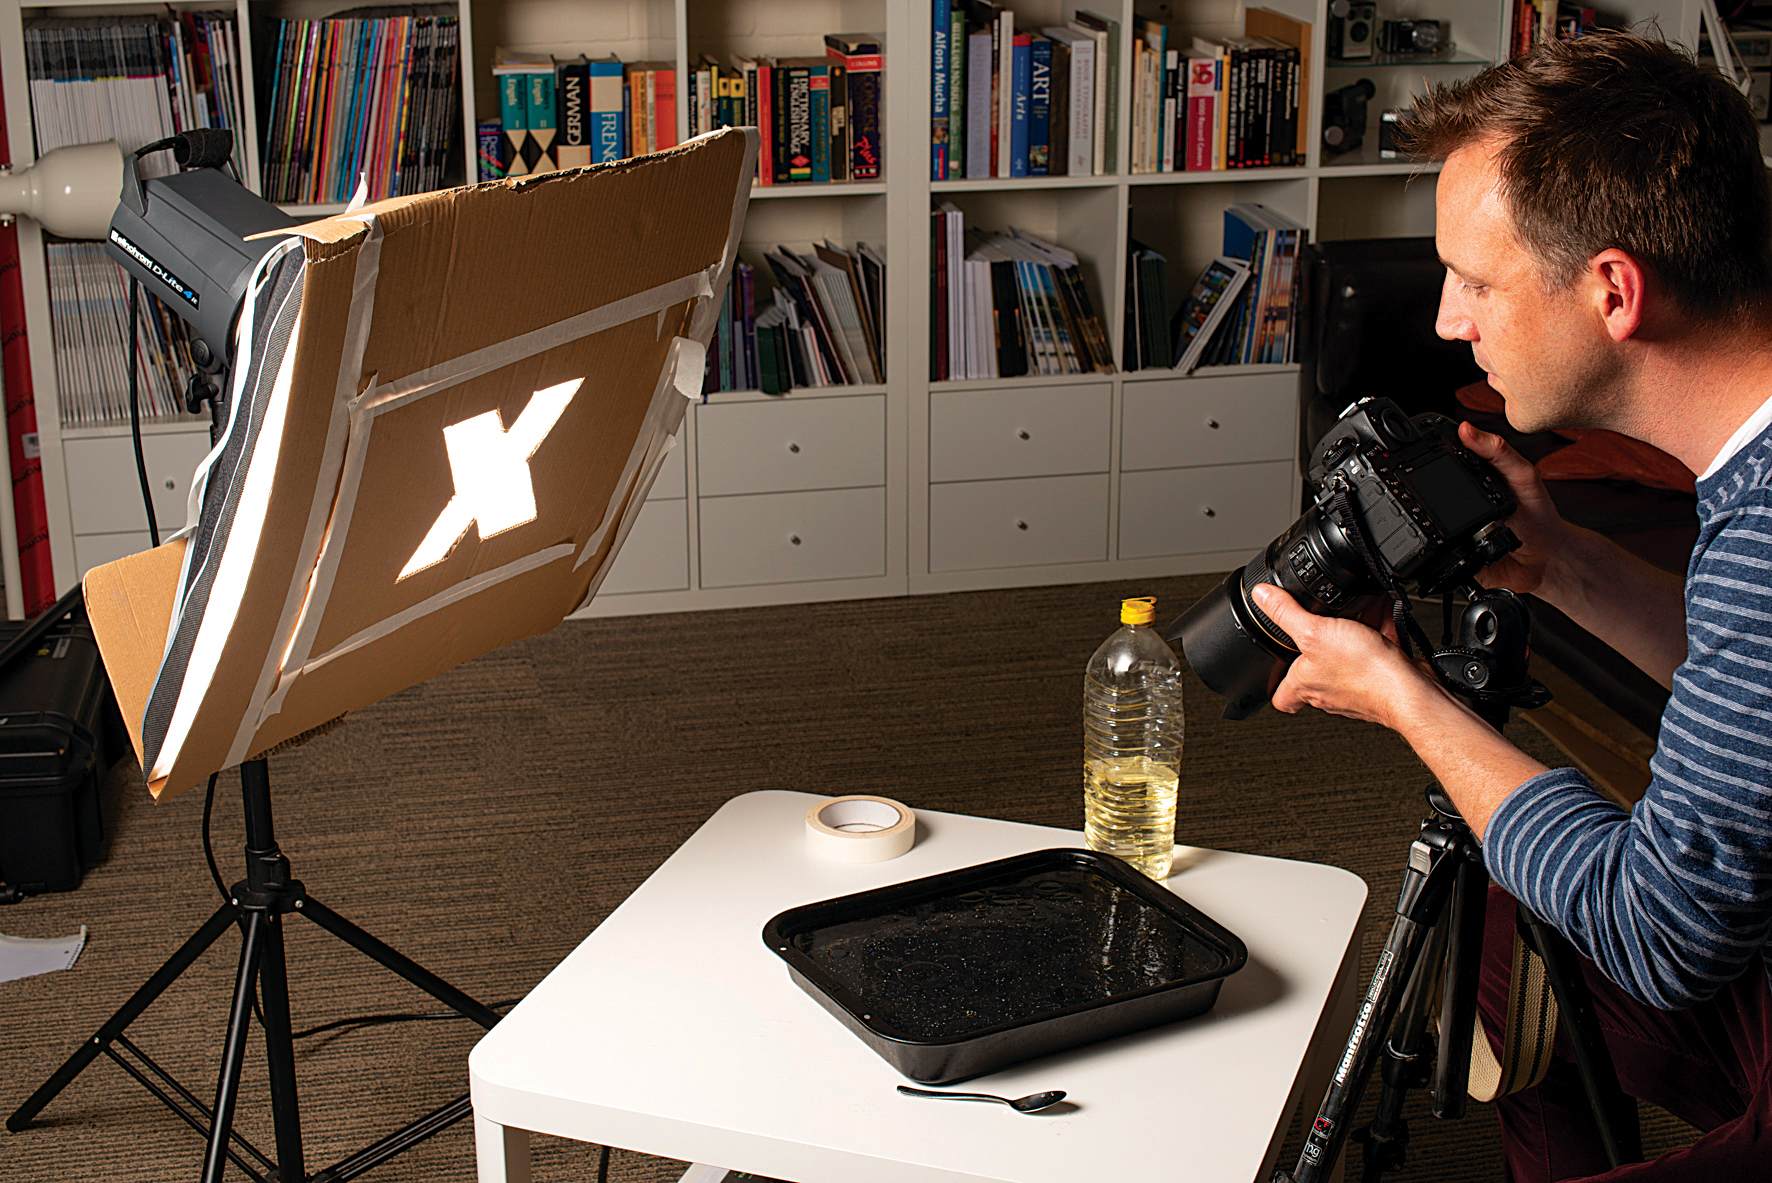
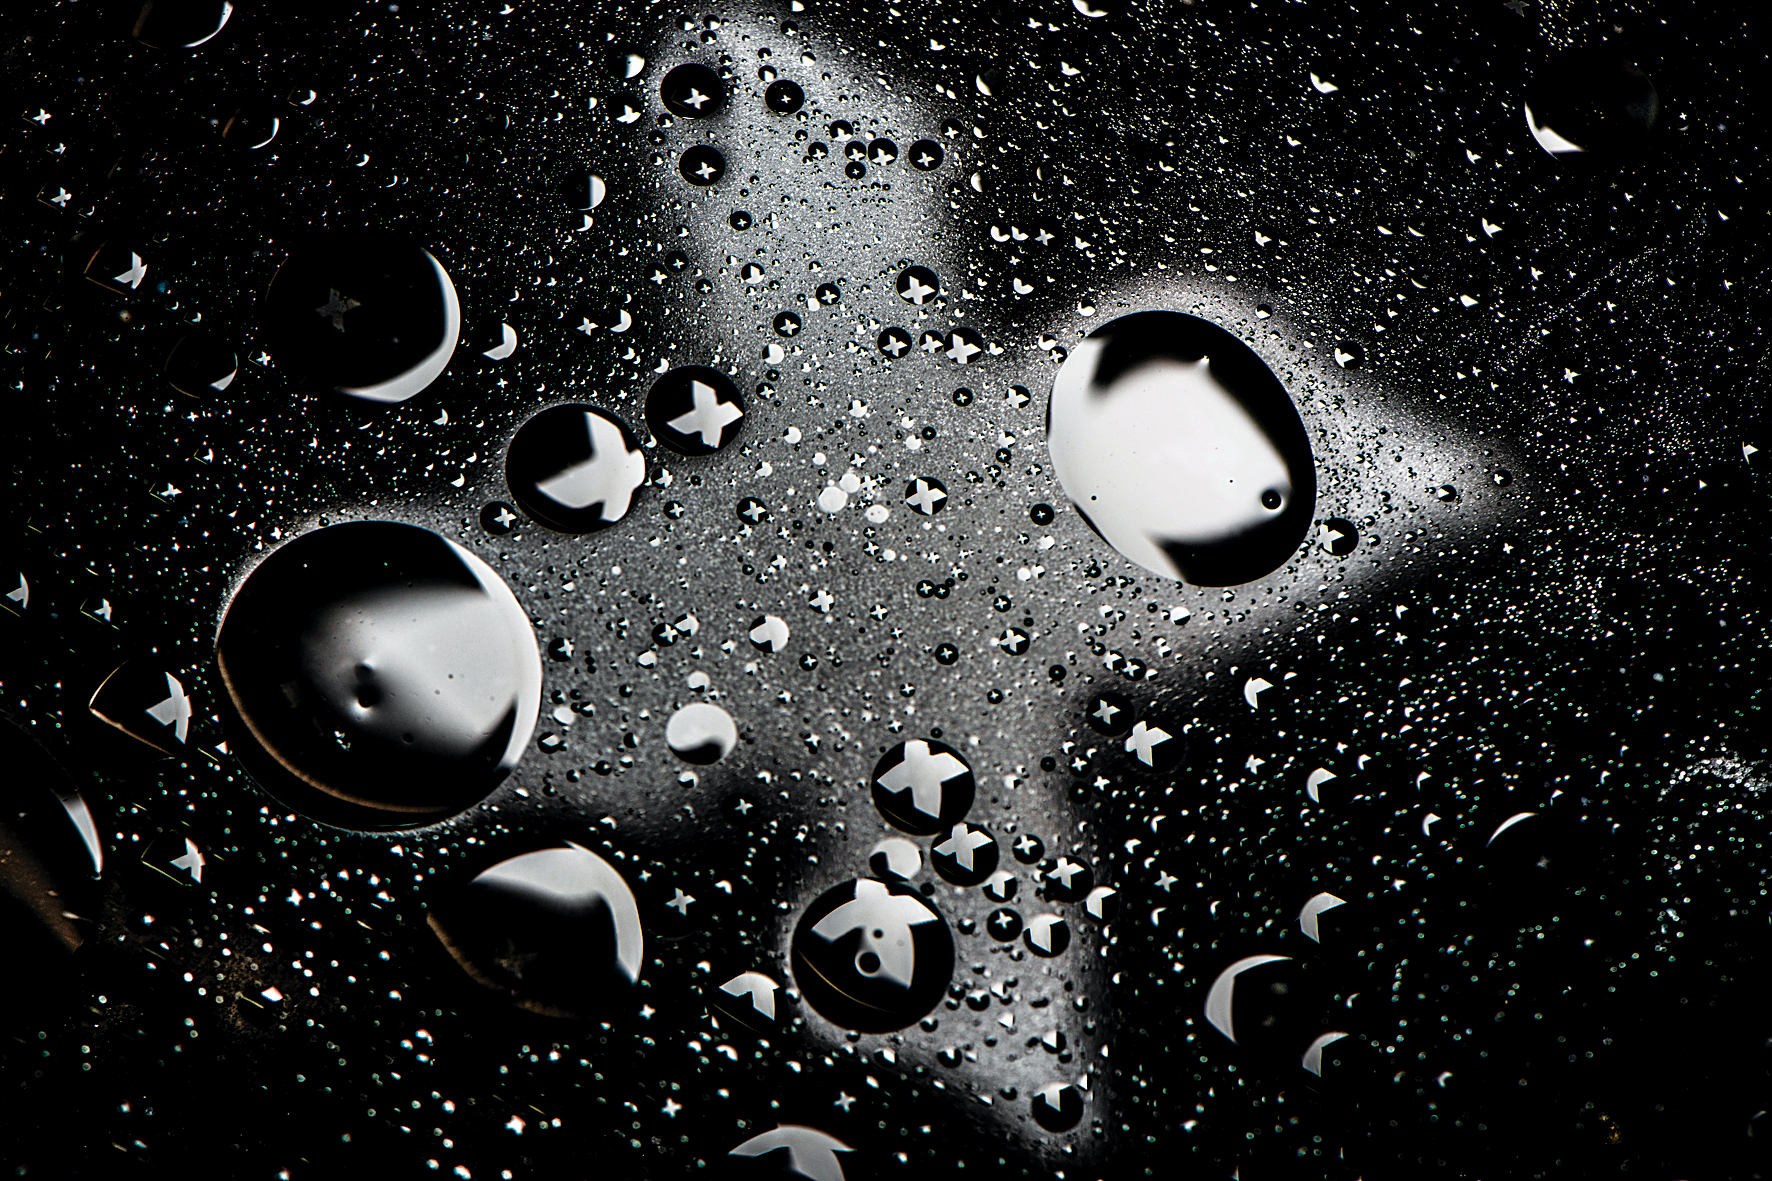
X marks the spot
As well as colored materials, we could also try cutting out a shape to fit over our light source. We made an X-shaped hole in a piece of cardboard then fitted it snugly over our softbox, making sure that the light couldn’t escape around the edges. It’s worth experimenting with the angle of the light source and your camera height. If we lift the light higher we can raise our camera for a steeper angle of view on the container. This brings us more straight-on to the surface of the water, meaning that more of the oil drops on the surface come into focus.
Kit needed: Flash, cardboard, scissors, tape
Exposure: 1/200 sec, f/11, ISO100
N-Photo: The Nikon Magazine is a monthly publication that's entirely dedicated to Nikon users. For the best news, reviews, projects and more, subscribe to N-Photo today!
Read more:
The best macro lenses: get closer to your subjects than ever before!
The best photography lighting kits: for studio, location and video
The best lighting kits for home studio or location photography
The lead technique writer on Digital Camera Magazine, PhotoPlus: The Canon Magazine and N-Photo: The Nikon Magazine, James is a fantastic general practice photographer with an enviable array of skills across every genre of photography.
Whether it's flash photography techniques like stroboscopic portraits, astrophotography projects like photographing the Northern Lights, or turning sound into art by making paint dance on a set of speakers, James' tutorials and projects are as creative as they are enjoyable.
He's also a wizard at the dark arts of Photoshop, Lightroom and Affinity Photo, and is capable of some genuine black magic in the digital darkroom, making him one of the leading authorities on photo editing software and techniques.
