Create glitch photo effects for your portraits in Affinity Photo
Use a combination of filter effects and layer skills to transform portraits into a fun digital glitch photo
Watch video: Make distorted glitch photo effects in Affinity Photo
A corrupted photo file will usually send us photographers into a cold sweat, but as a visual effect it can result in a striking image. Here we’ll show you how to get the pixelated glitch look in Affinity Photo using a range of simple tools.
We’ll begin by making two copies of our layer, then we’ll apply the Pixelate filter to each one in varying amounts. This handy filter effect breaks our image up into a series of colored blocks, each an average of the segment of image underneath.
By using blend modes we can combine the different pixelated versions of our picture. Once that’s done, we can select little slivers of the pixel blocks then shift them slightly to enhance the glitch effect in the photograph. Along the way we’ll encounter several fundamental Affinity Photo editing tools, such as layer masks, adjustment layers and curves.
To complement the pixelated look we’ll also skew the colors in parts of the image by creating a red version of our photograph, then use the Exclusion blend mode for a striking color effect. This can be strengthened with a combination of simple tonal adjustments, each applied using a different layer so that they all stay independent from one another and remain endlessly editable.
We’ve supplied a starting image in the project files (download here), but it’s more fun to use one of your own close-up portraits, so you can glitch your friends and family in minutes. And if you're looking for a better computer to edit on, be sure to check out our guide to the best desktop computers for photo editing.
01 Pixelate the portrait
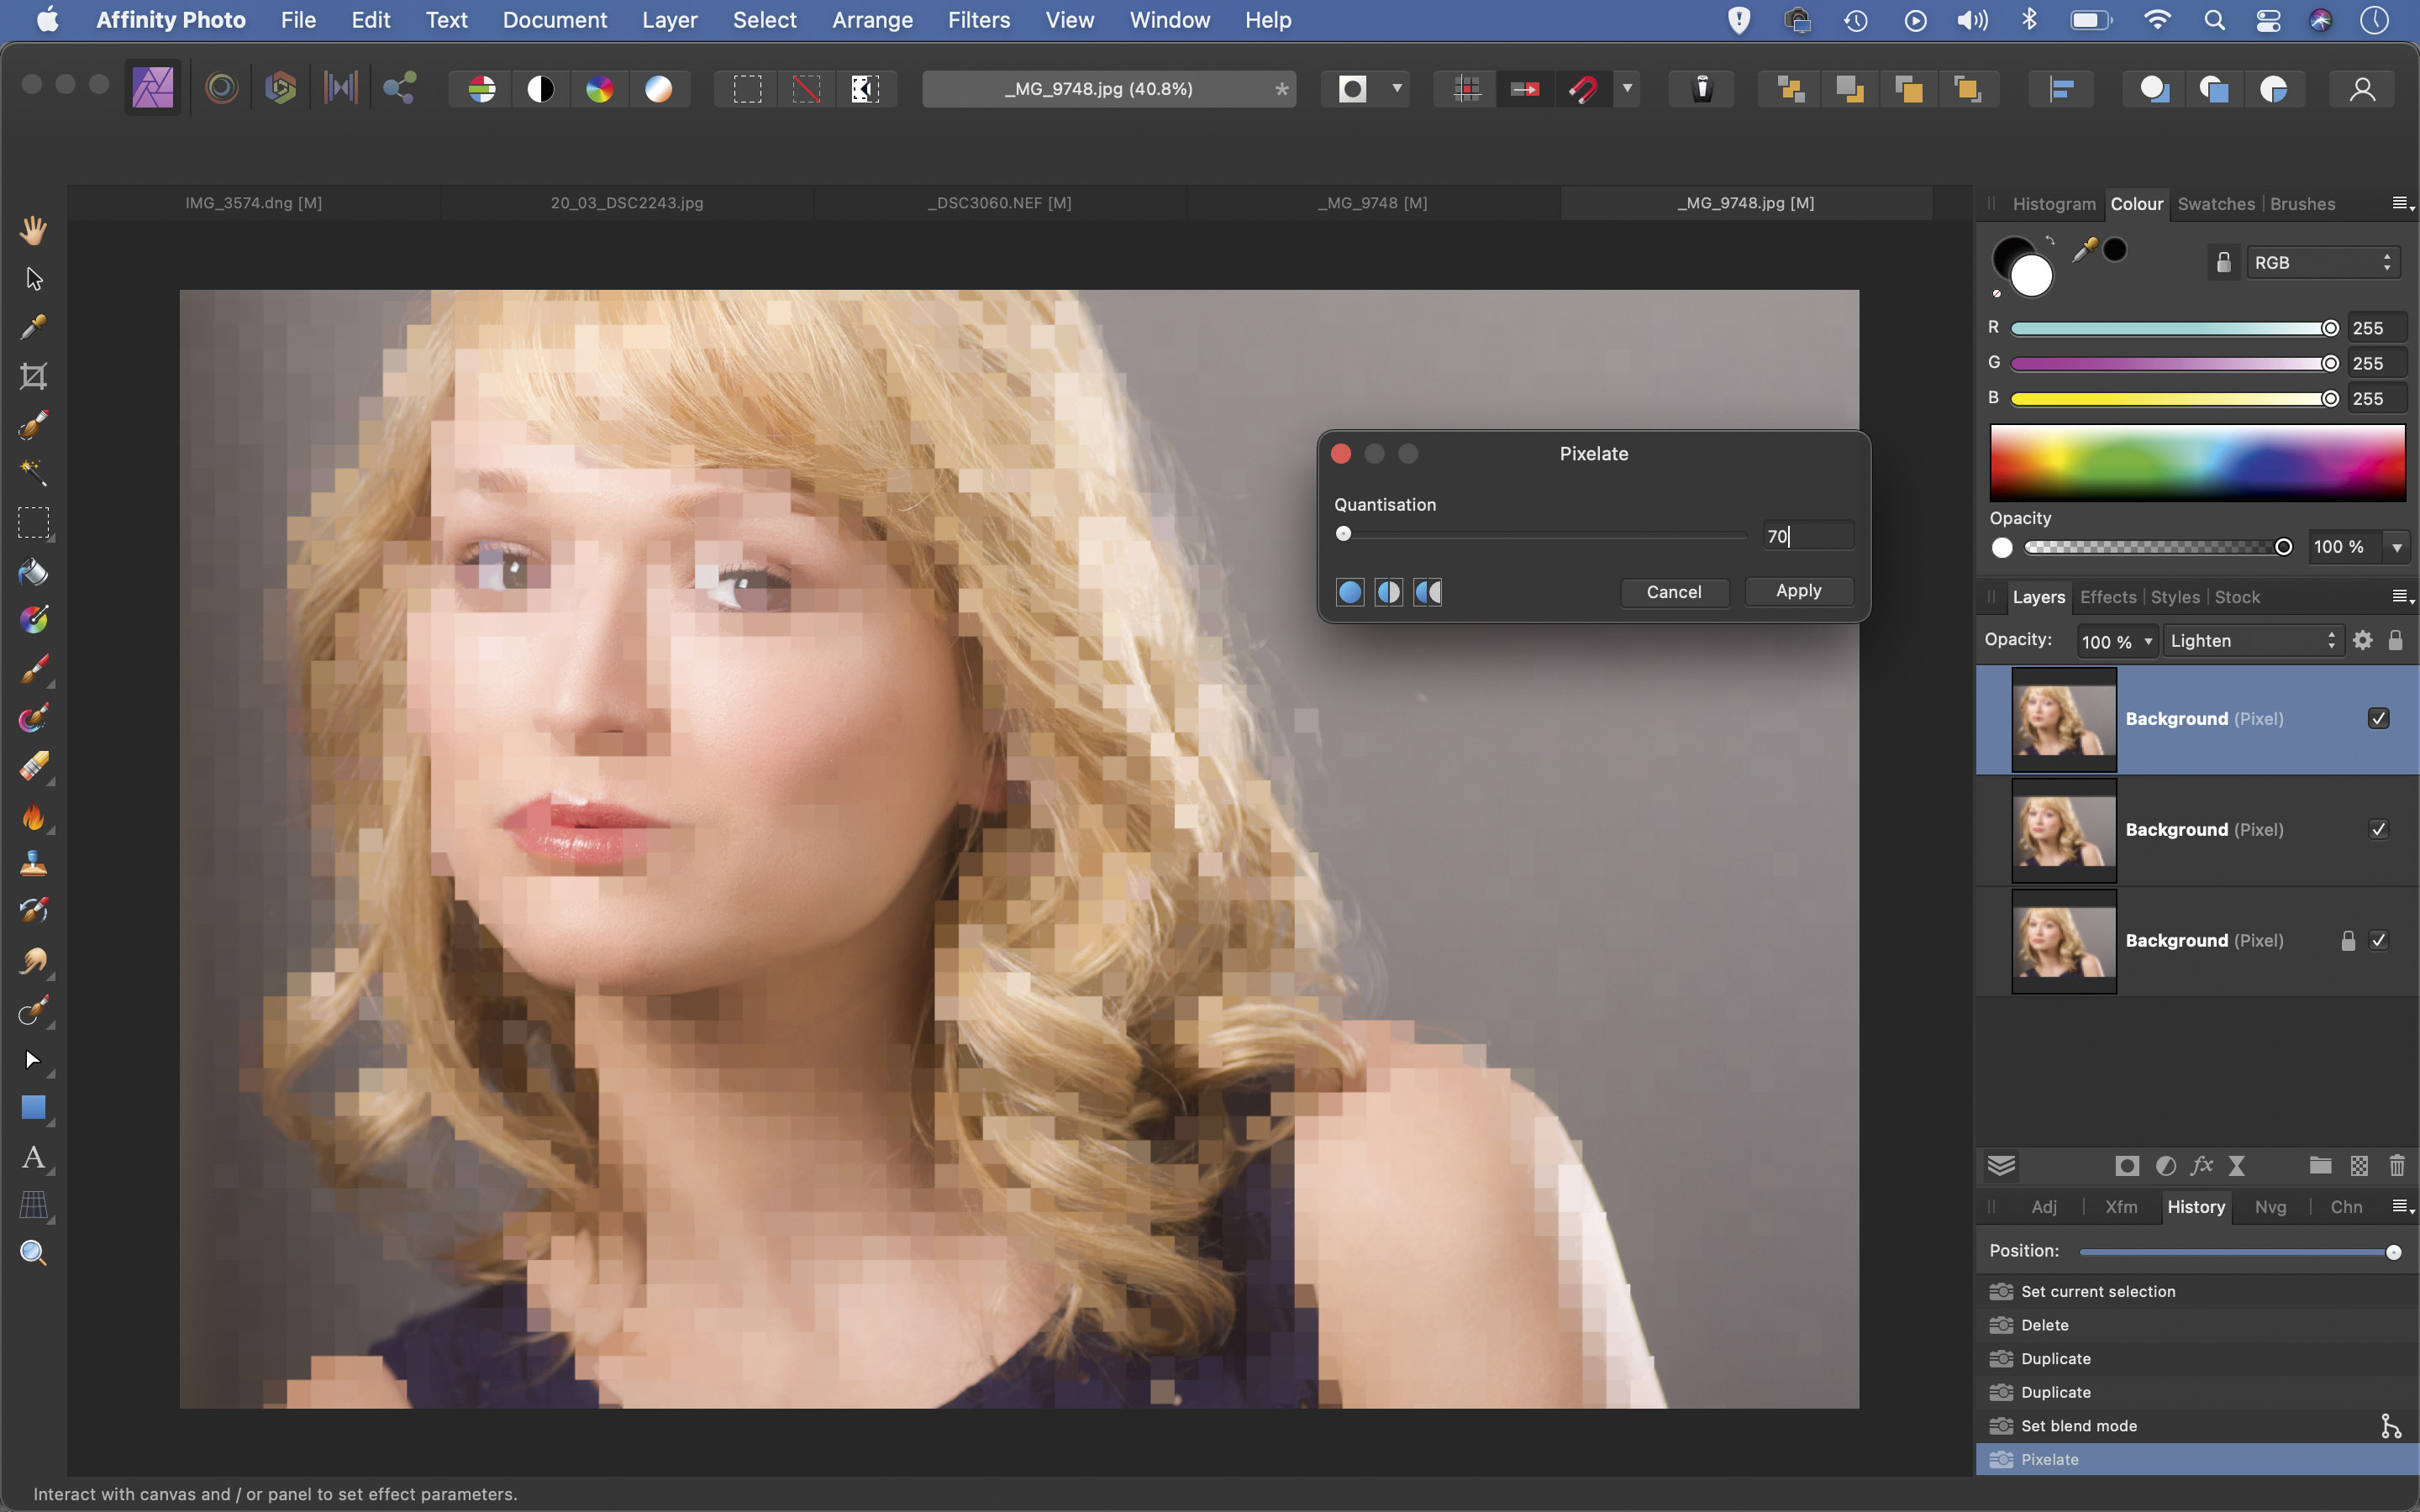
In Affinity open your portrait or our start image (download here) then press Cmd/Ctrl + J twice to make two copies of the layer. Go to the Layers panel and set the blend mode of the top layer to Lighten, then go to Filter > Distort > Pixelate. Set Quantization to around 70, or whatever works for your portrait.
The best camera deals, reviews, product advice, and unmissable photography news, direct to your inbox!
02 Liquify the image
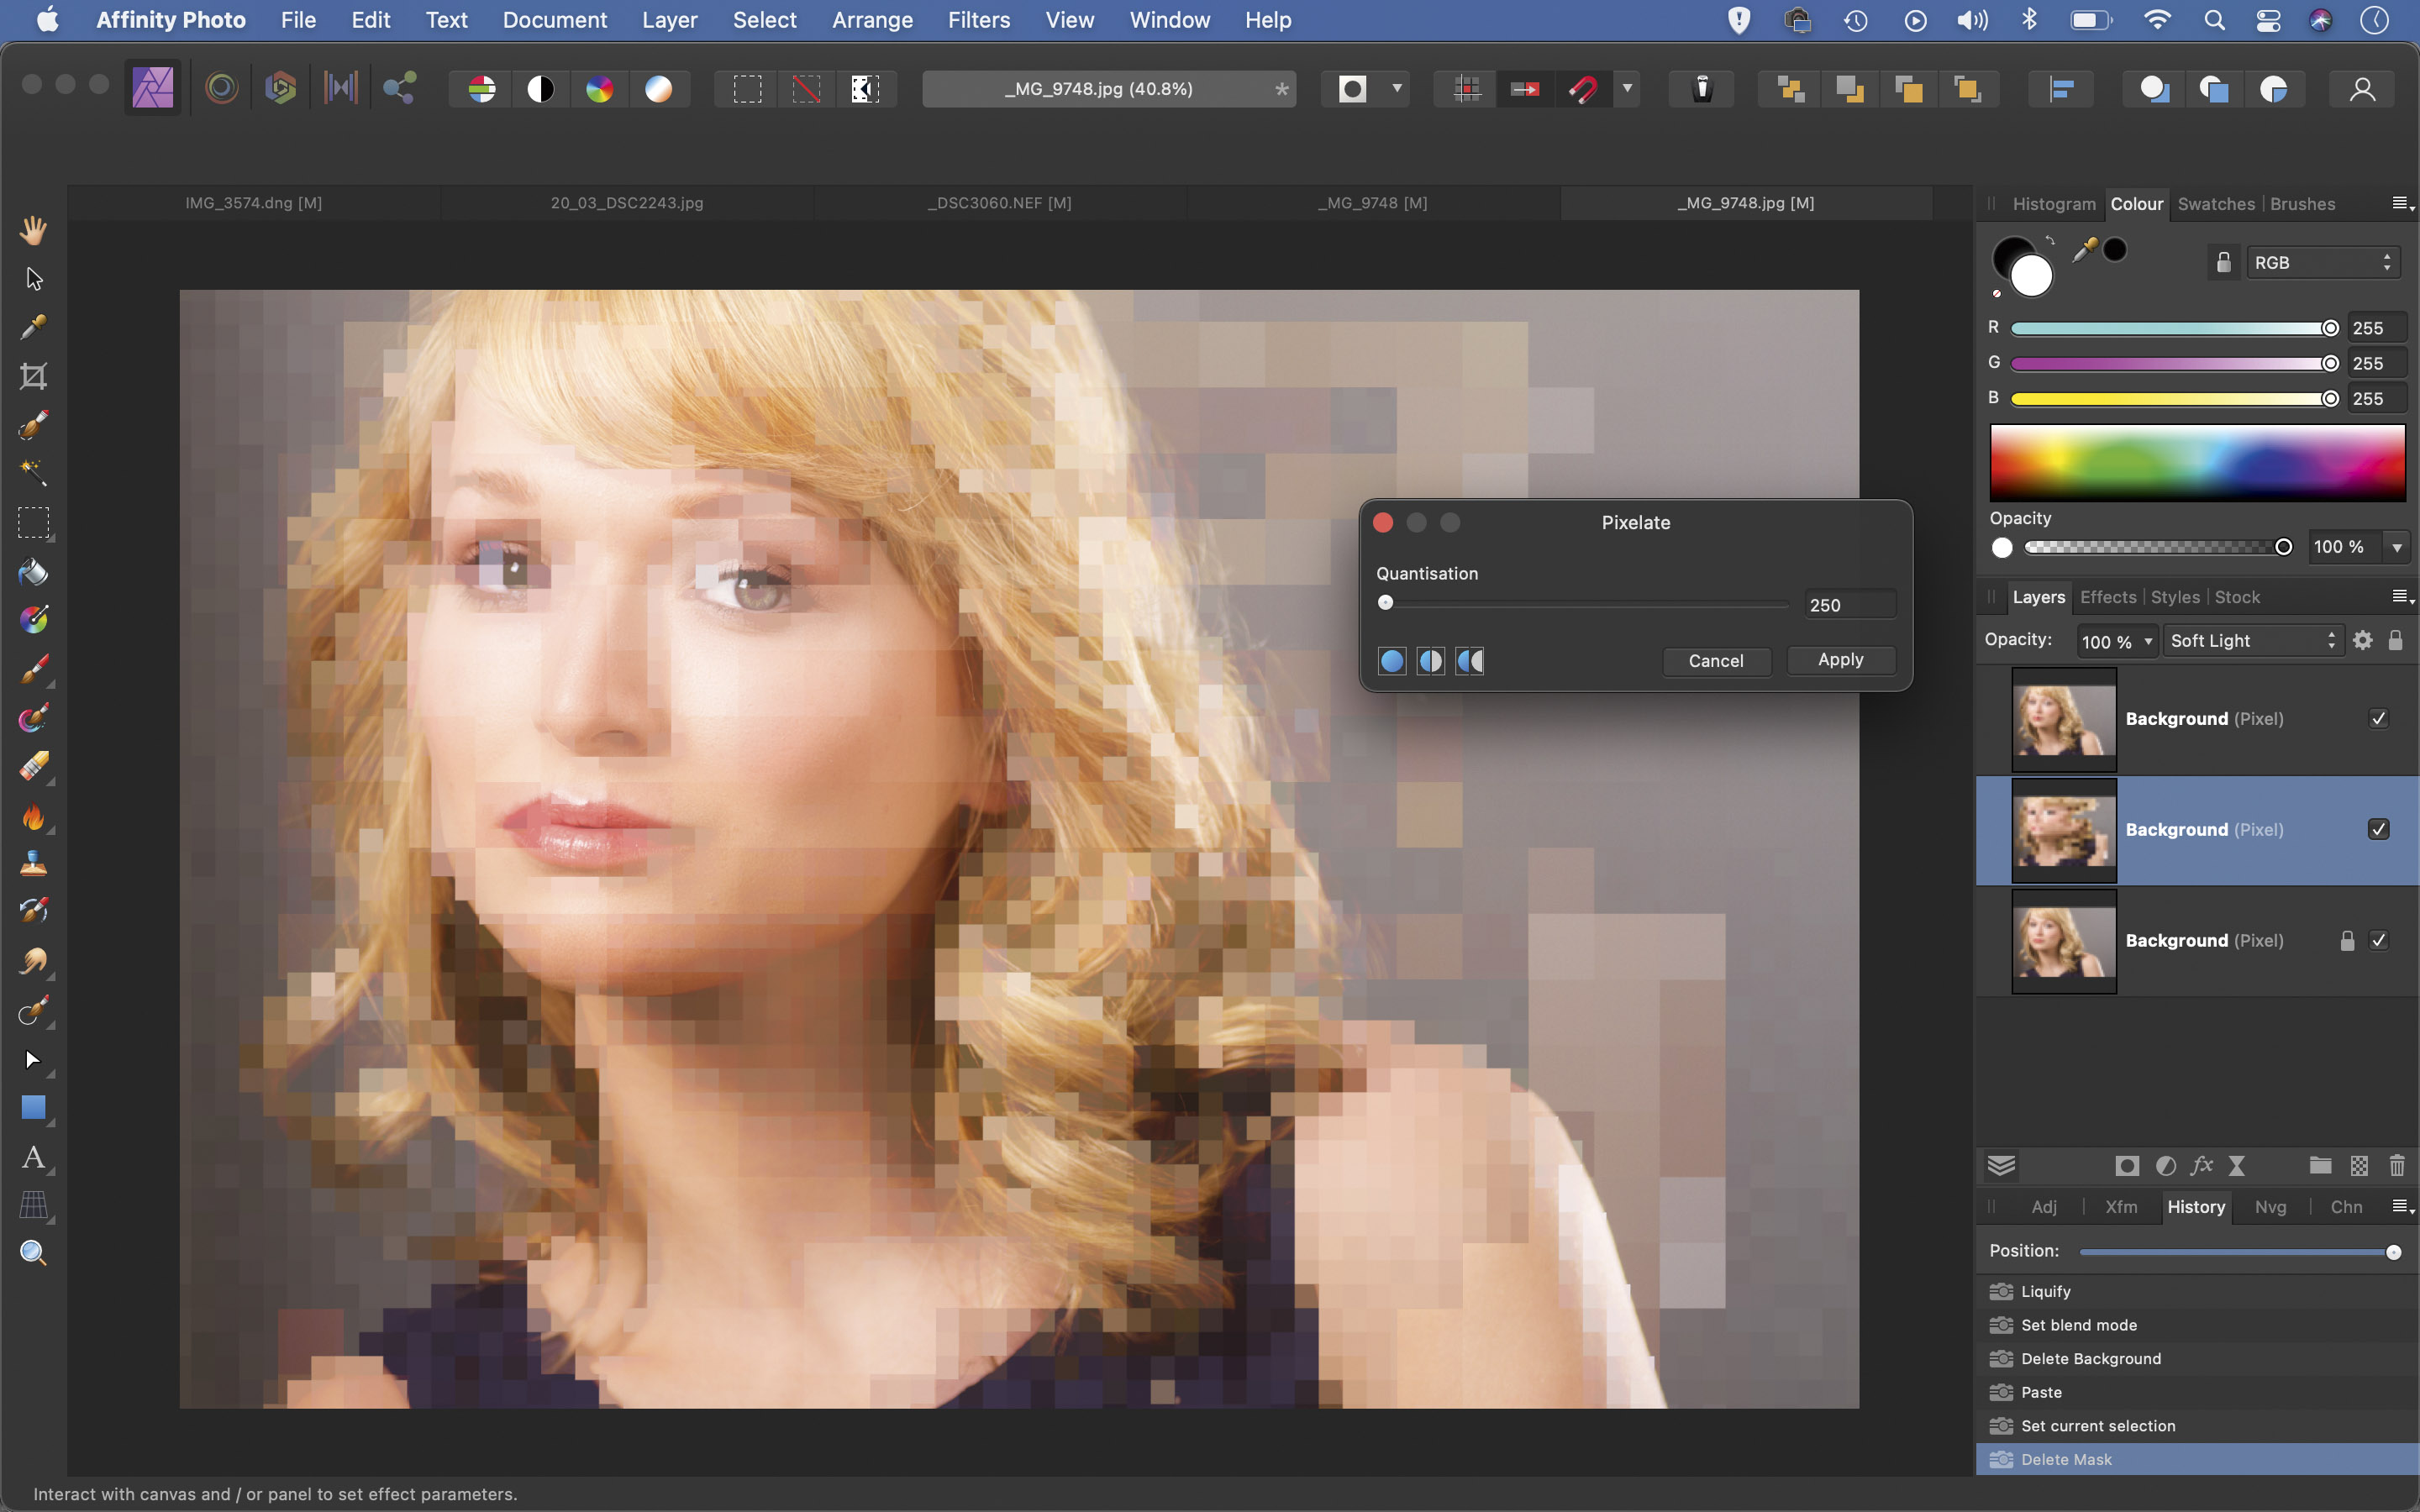
Highlight the middle layer then click Liquify Persona, top left. Use the Push Forward tool to warp the image, pushing the face to the side – any distortion will do. Hit Apply. Set the blend mode to Soft Light, then go to the Pixelate filter and use a higher amount, like 300.
03 Skew the colors
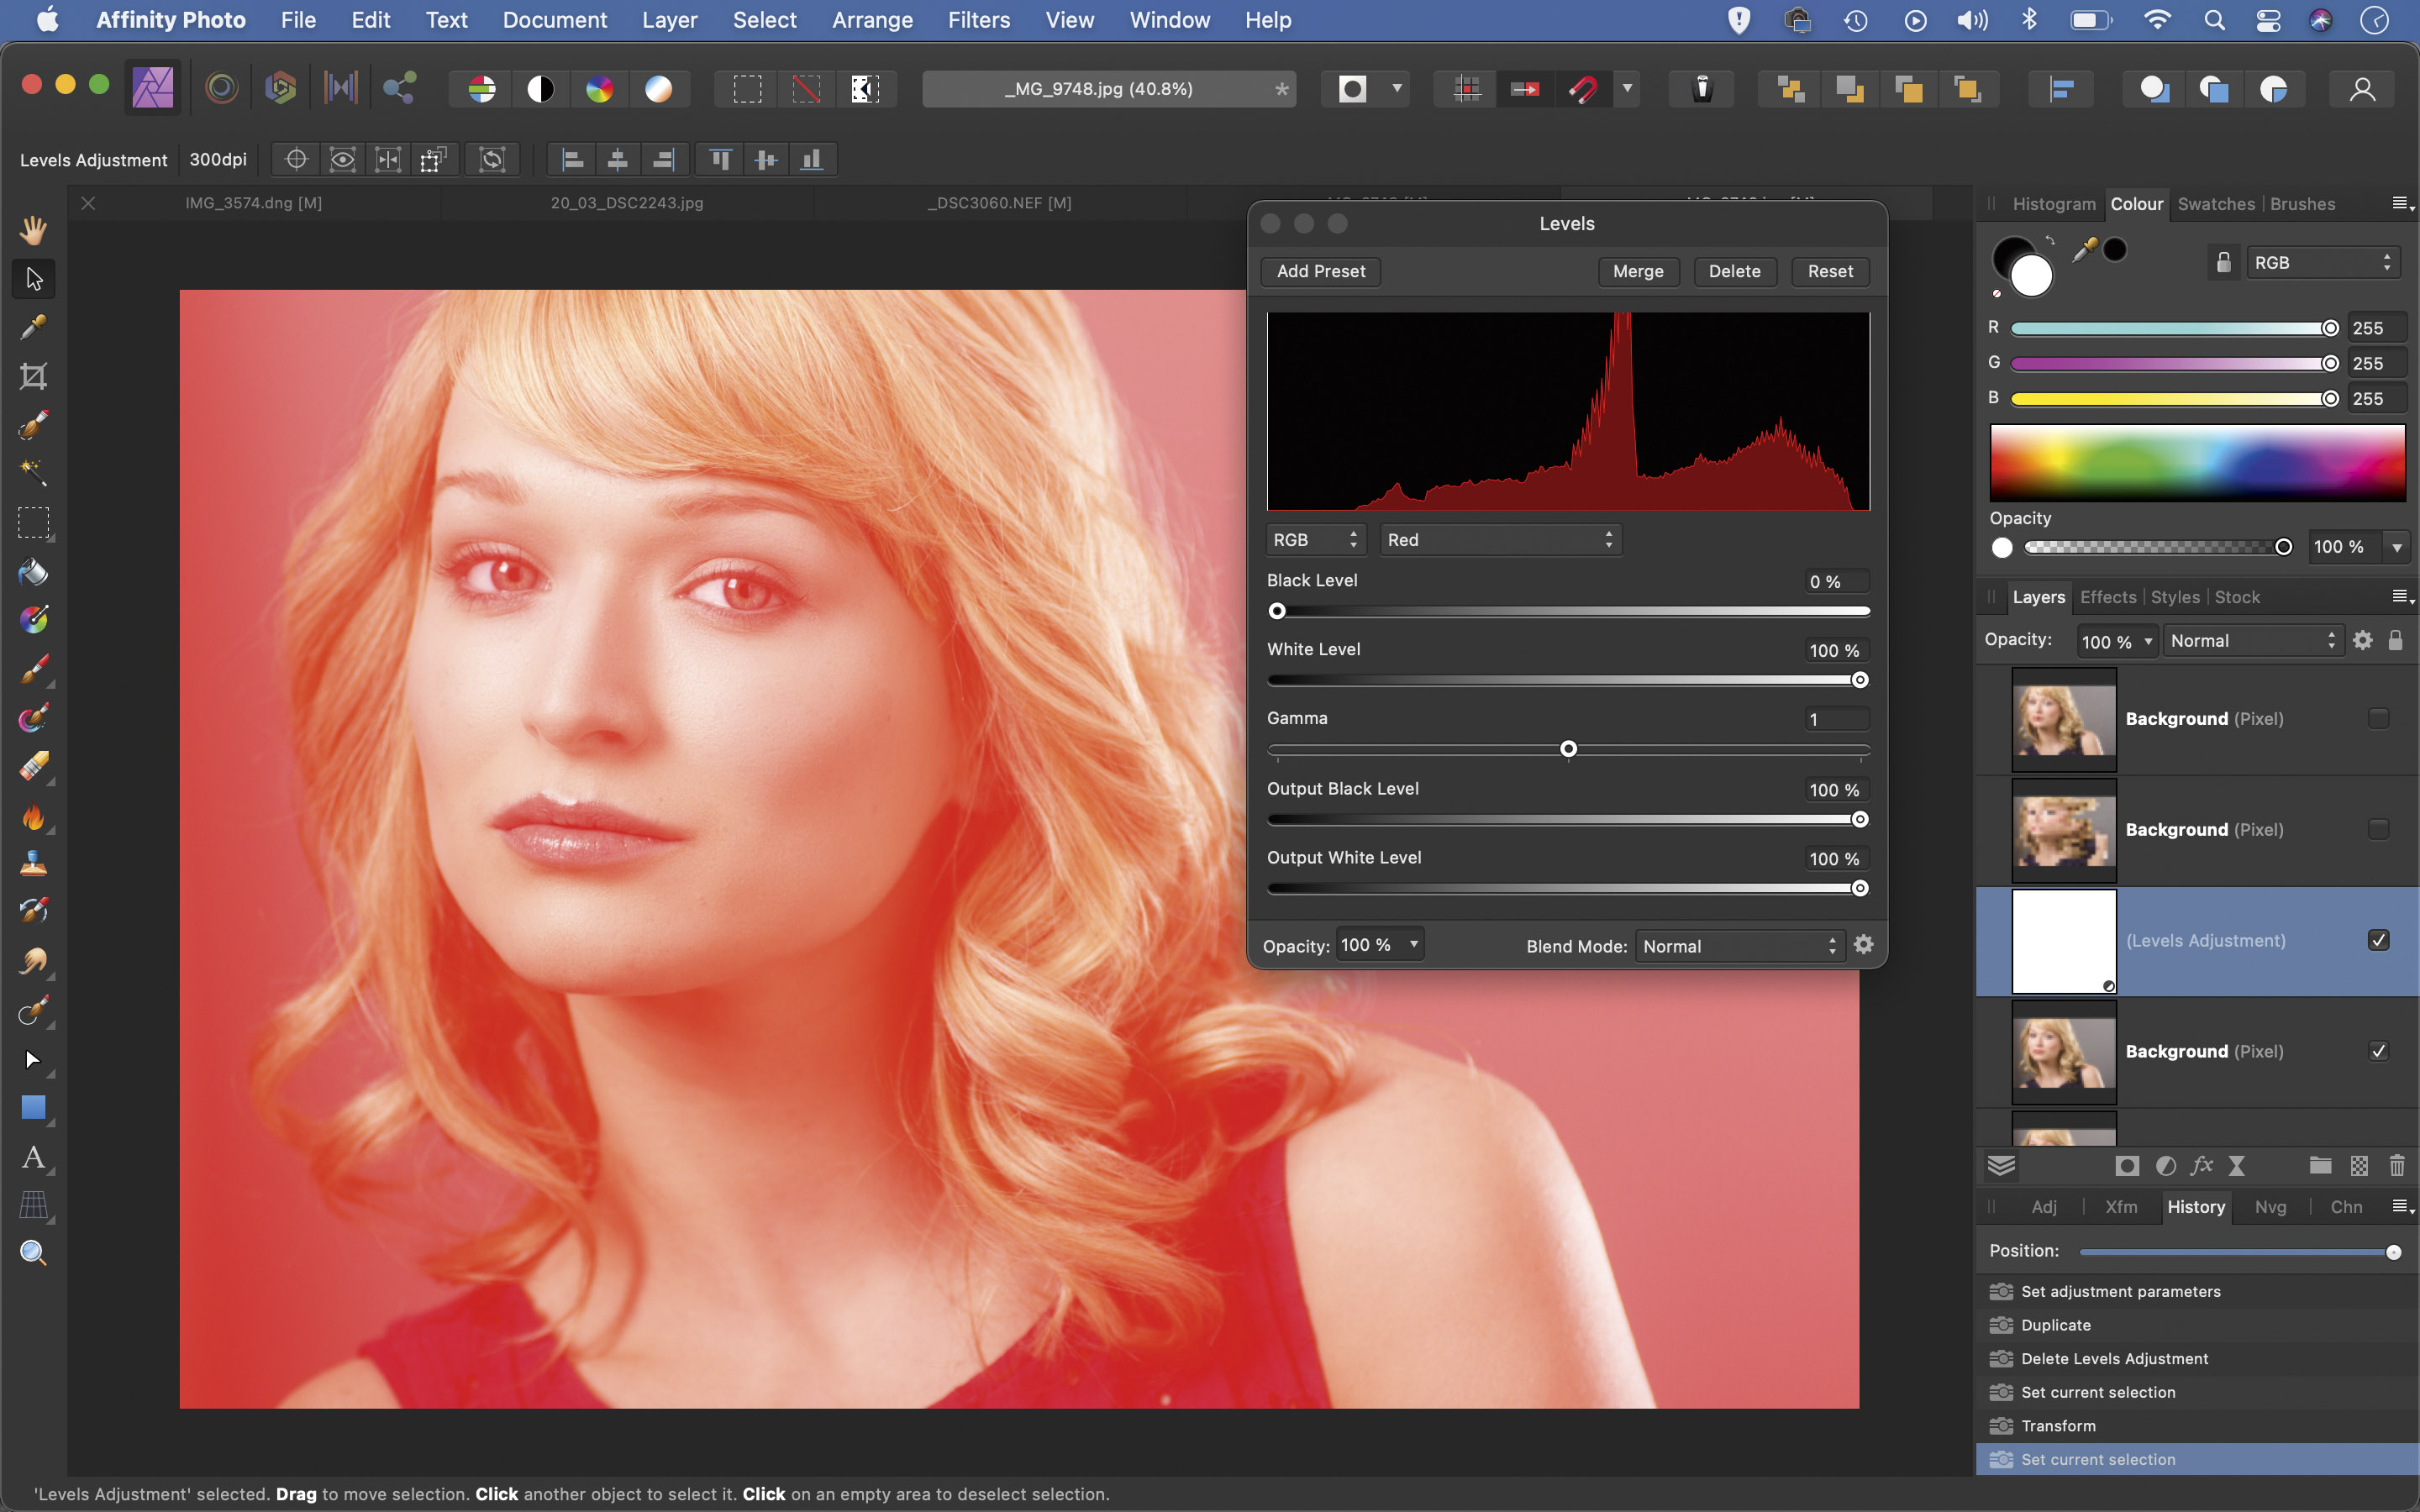
Highlight the bottom layer and use Cmd/Ctrl + J to copy. Hit Cmd/Ctrl + L for Levels. Click ‘Master’ and choose Red, drag the ‘Output Black Level’ slider to the right. Hit Cmd/Ctrl + E to merge the layer down, get the Move tool. Tap the left arrow to nudge the layer sideways.
04 Mask your layers
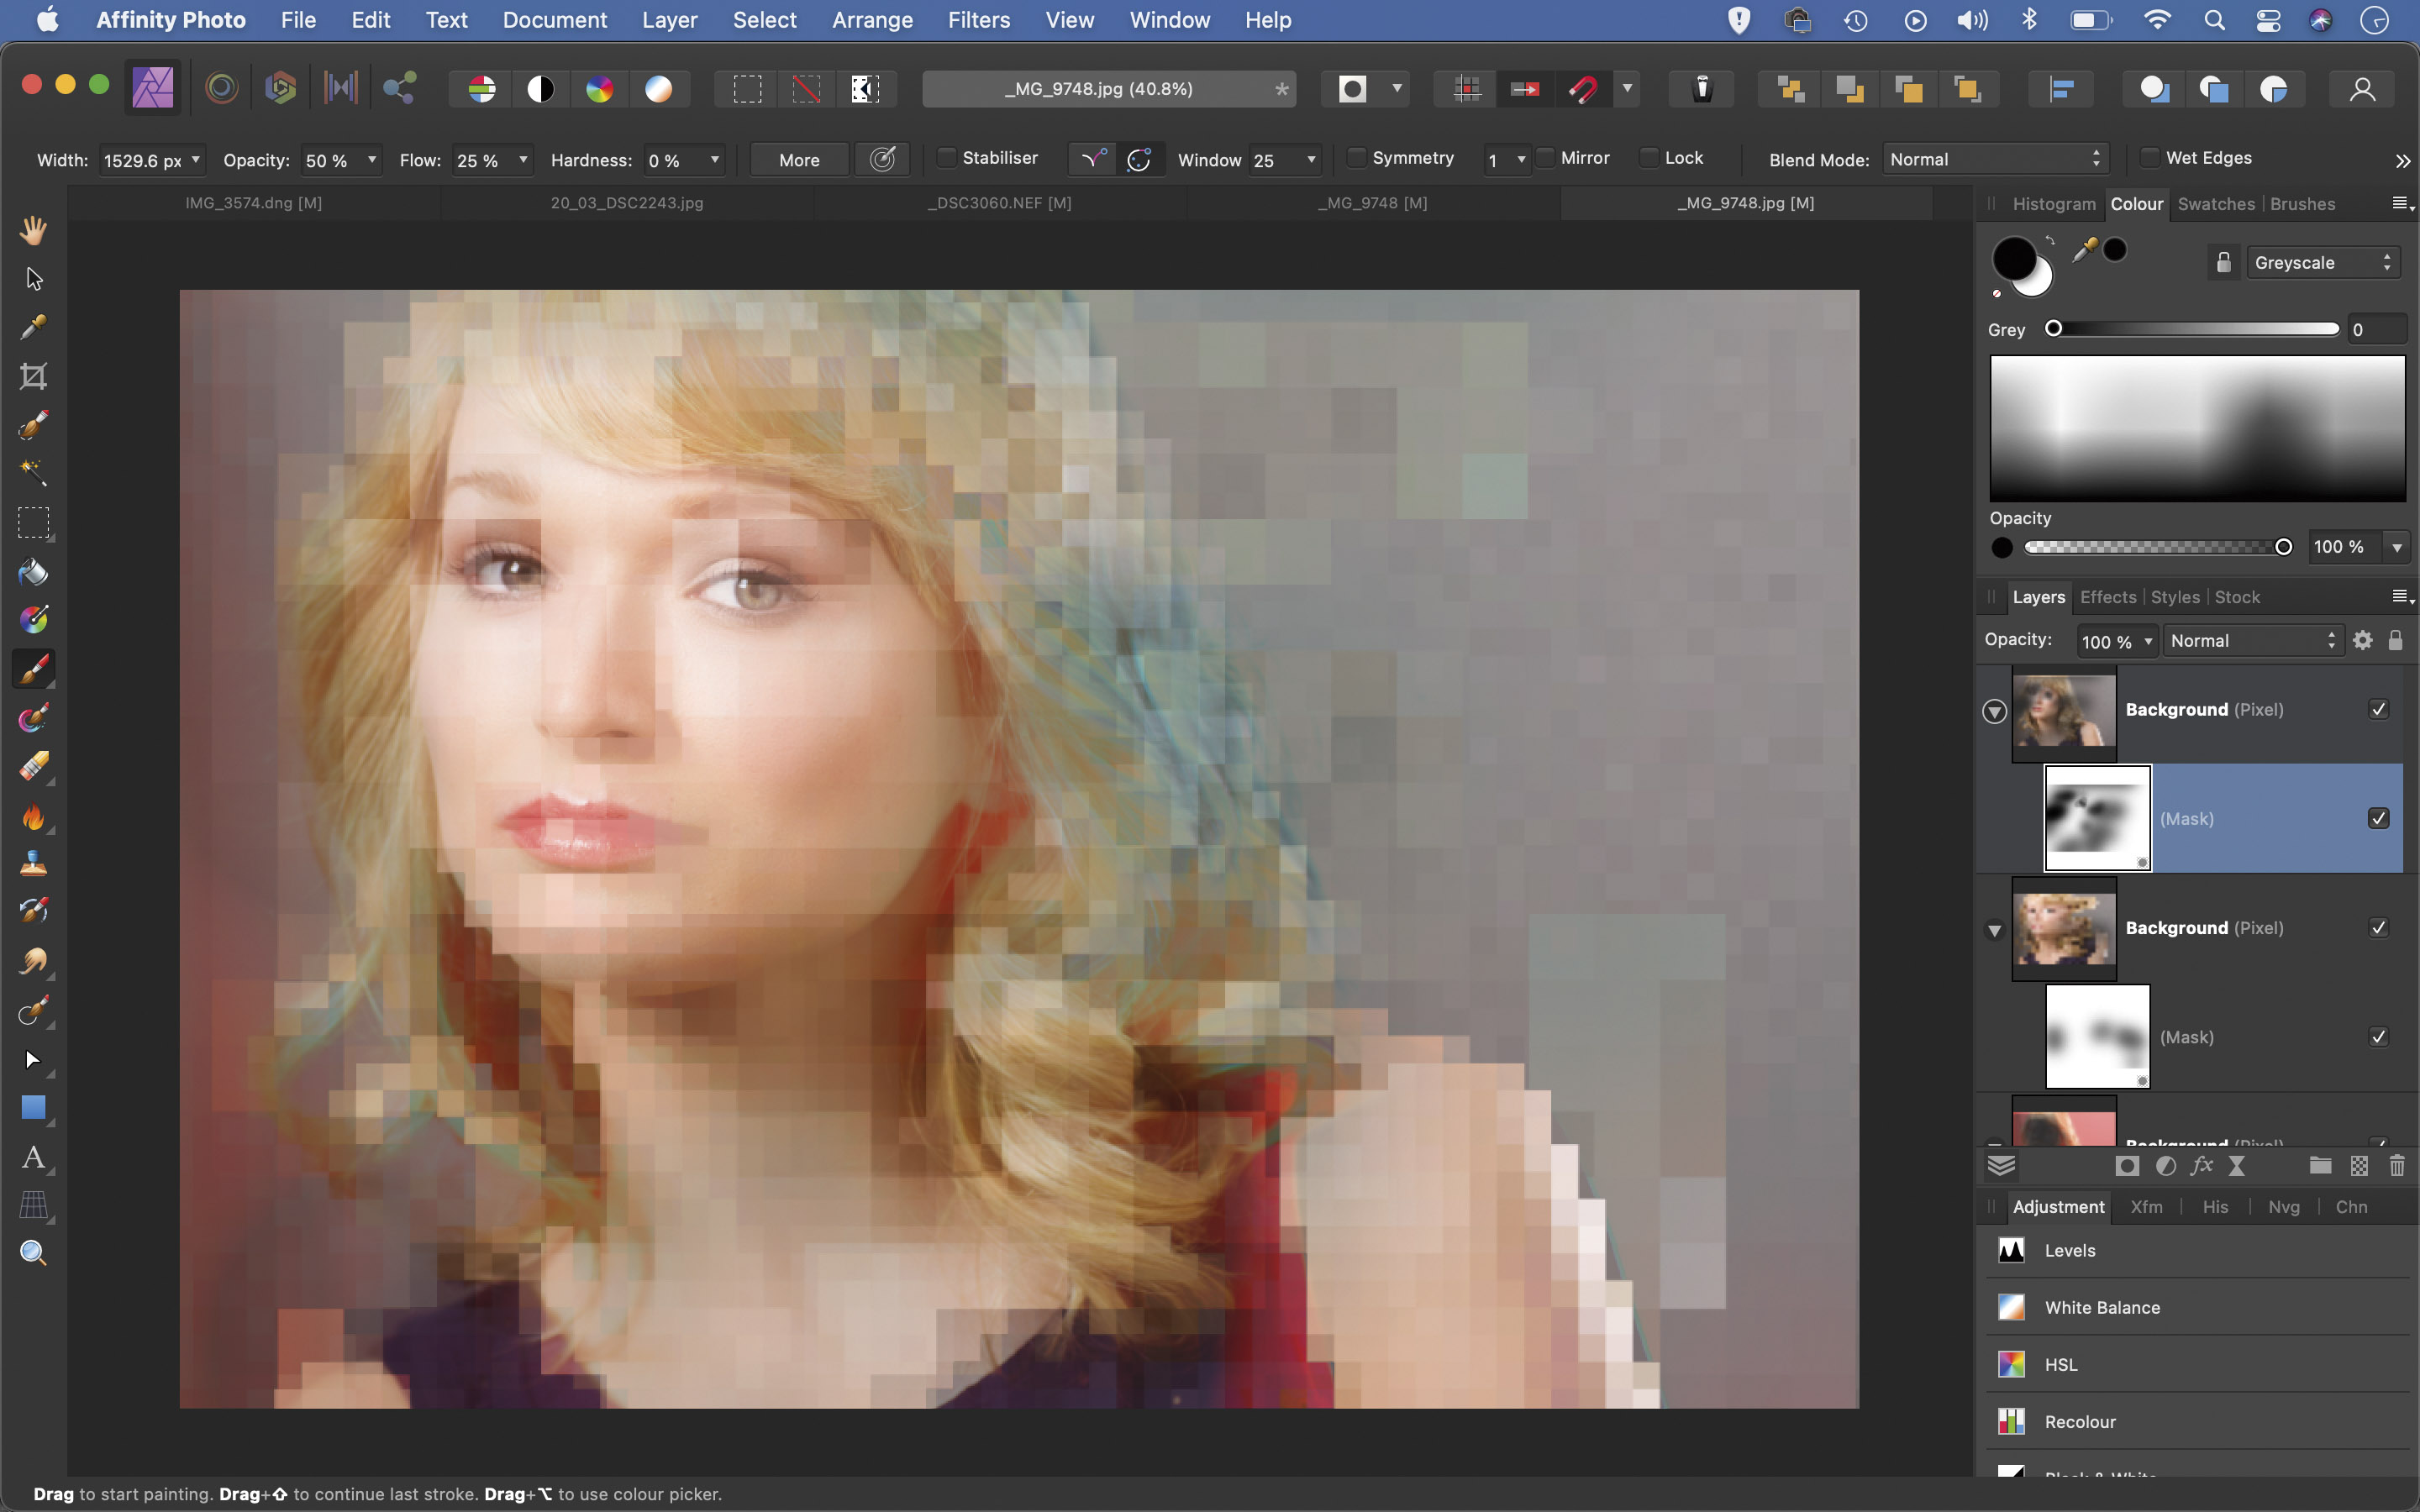
Change the blend mode of the red layer to Exclusion. Highlight the layer above and click the Add Mask icon, get the Brush tool and paint black to hide parts of the effect over areas in the face. Do the same with the other two layers to create a mix of pixels and colors.
05 Boost color and contrast
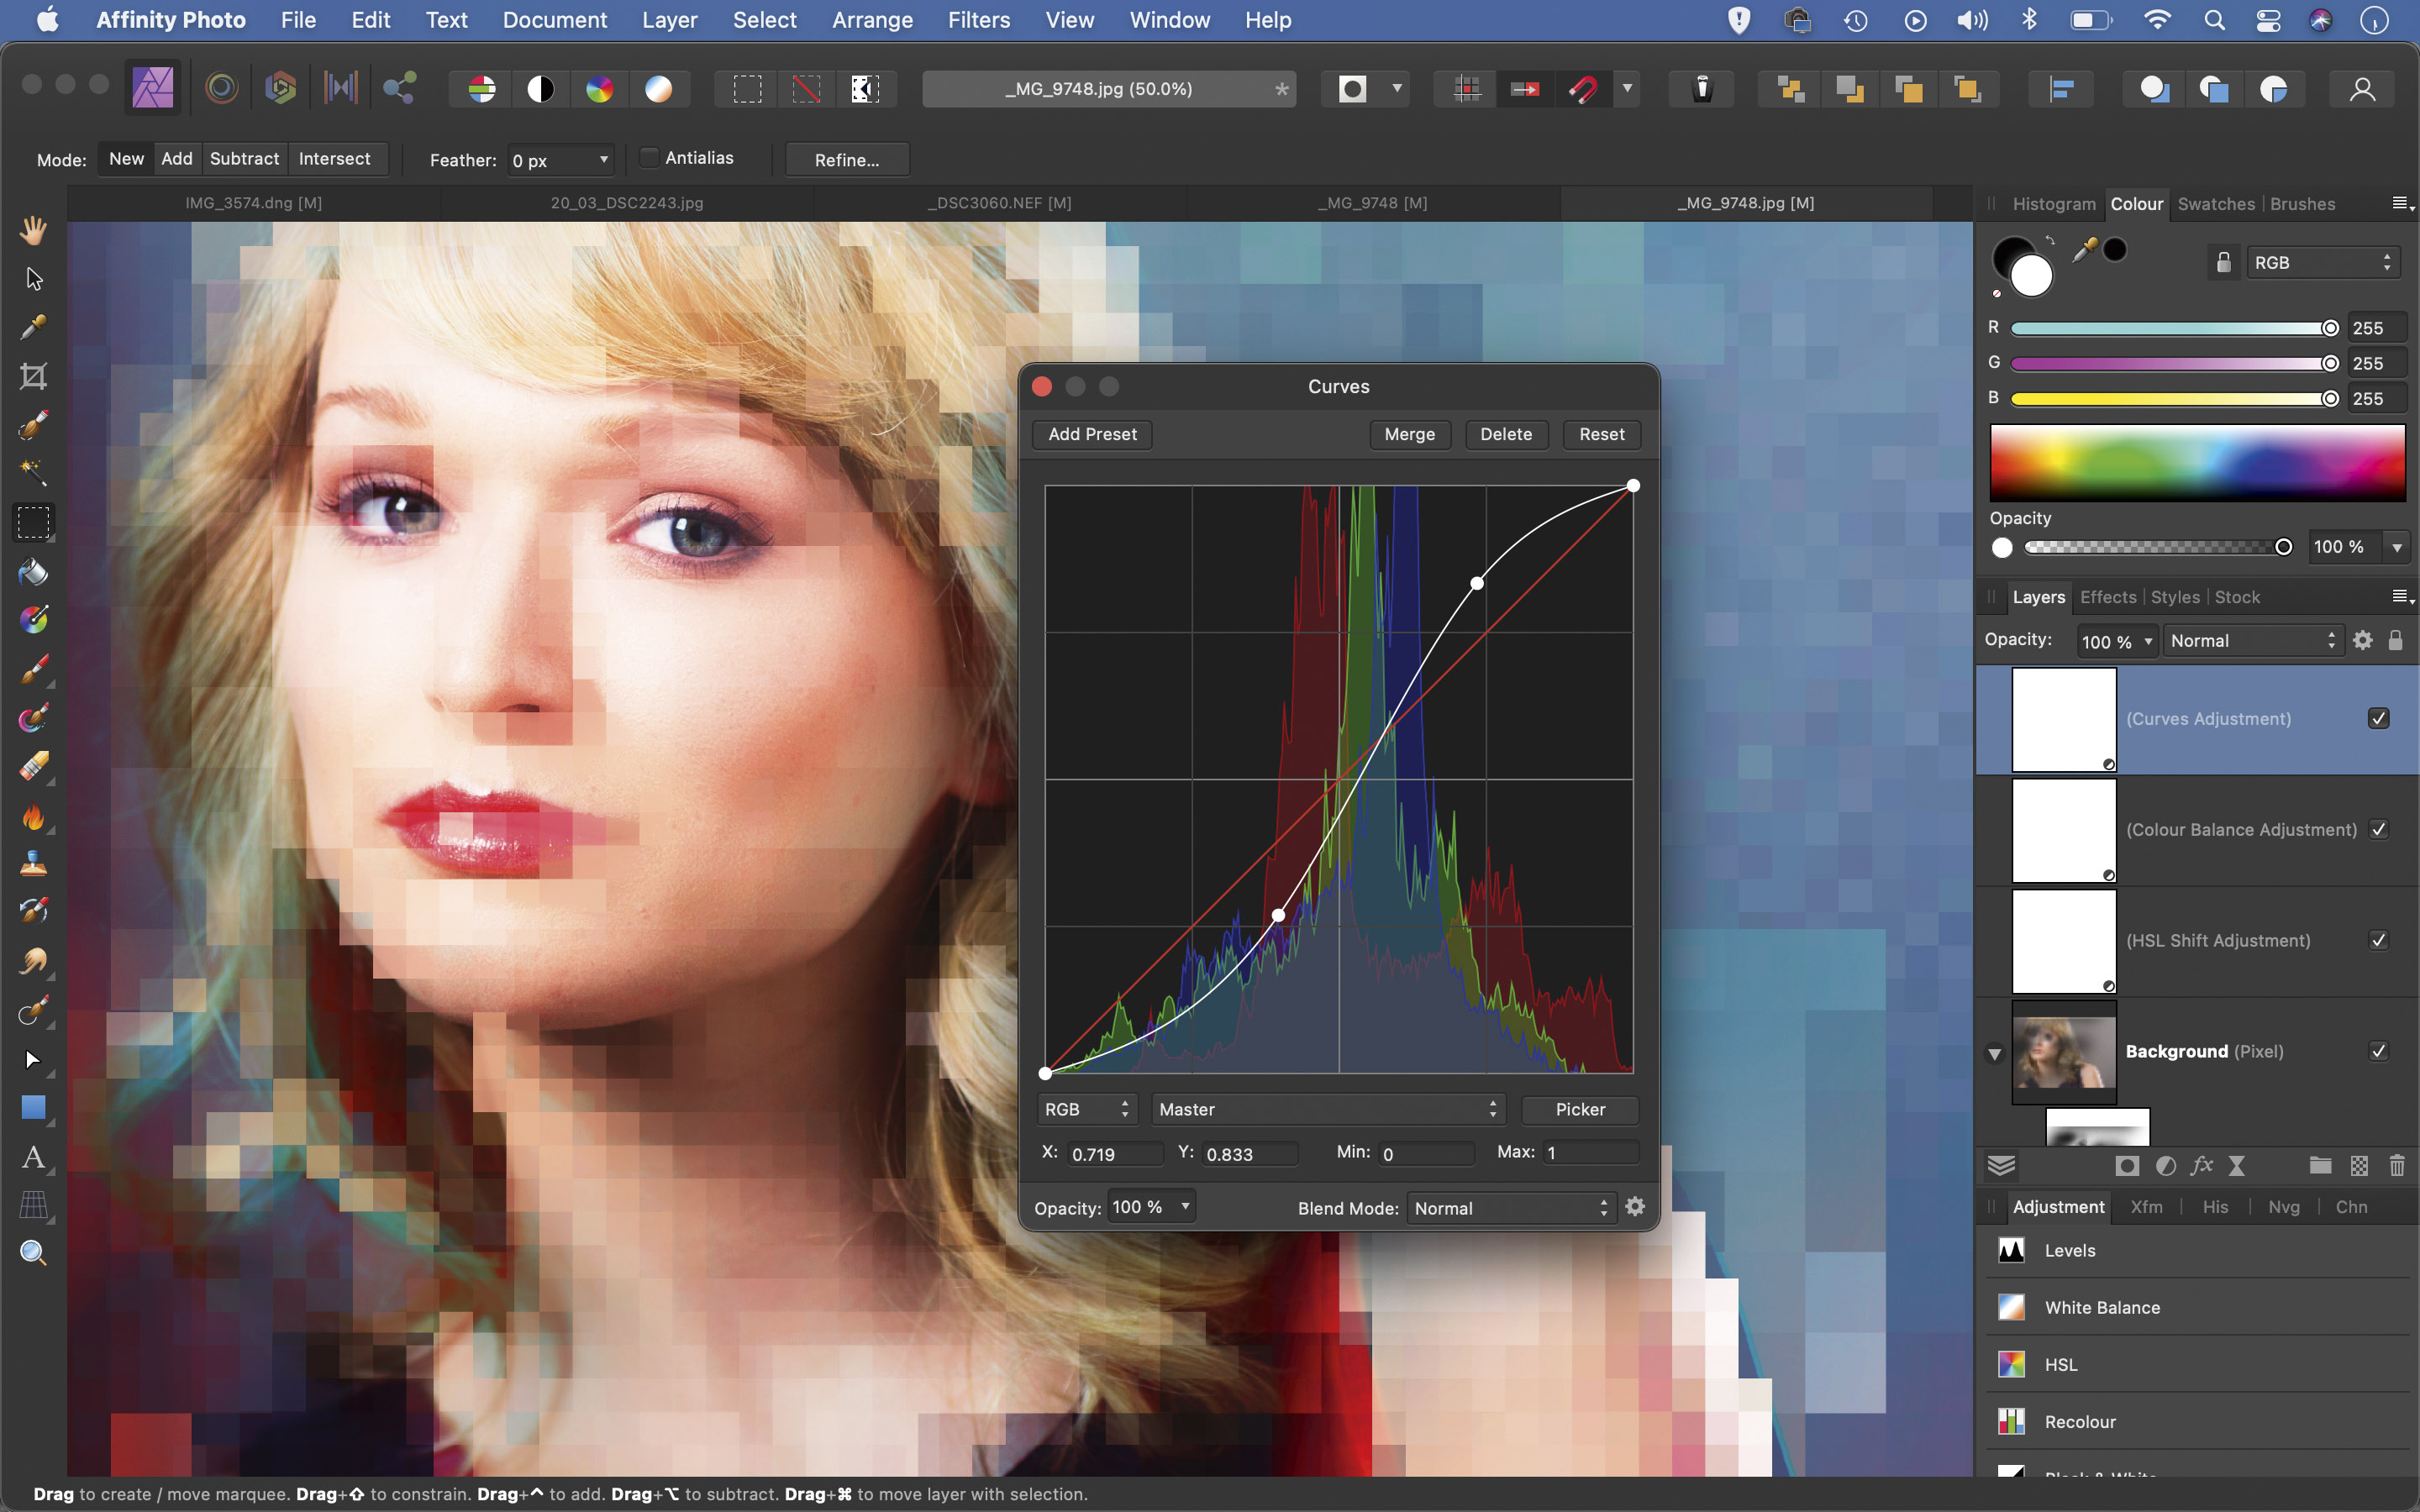
Click the Adjustment icon in the Layers panel and choose HSL, then increase Saturation. Next, add a Color Balance adjustment. Shift the colors towards Cyan and Blue. Then add a Curves adjustment and plot an S-shaped curve, as shown, to boost contrast.
06 Shift selections
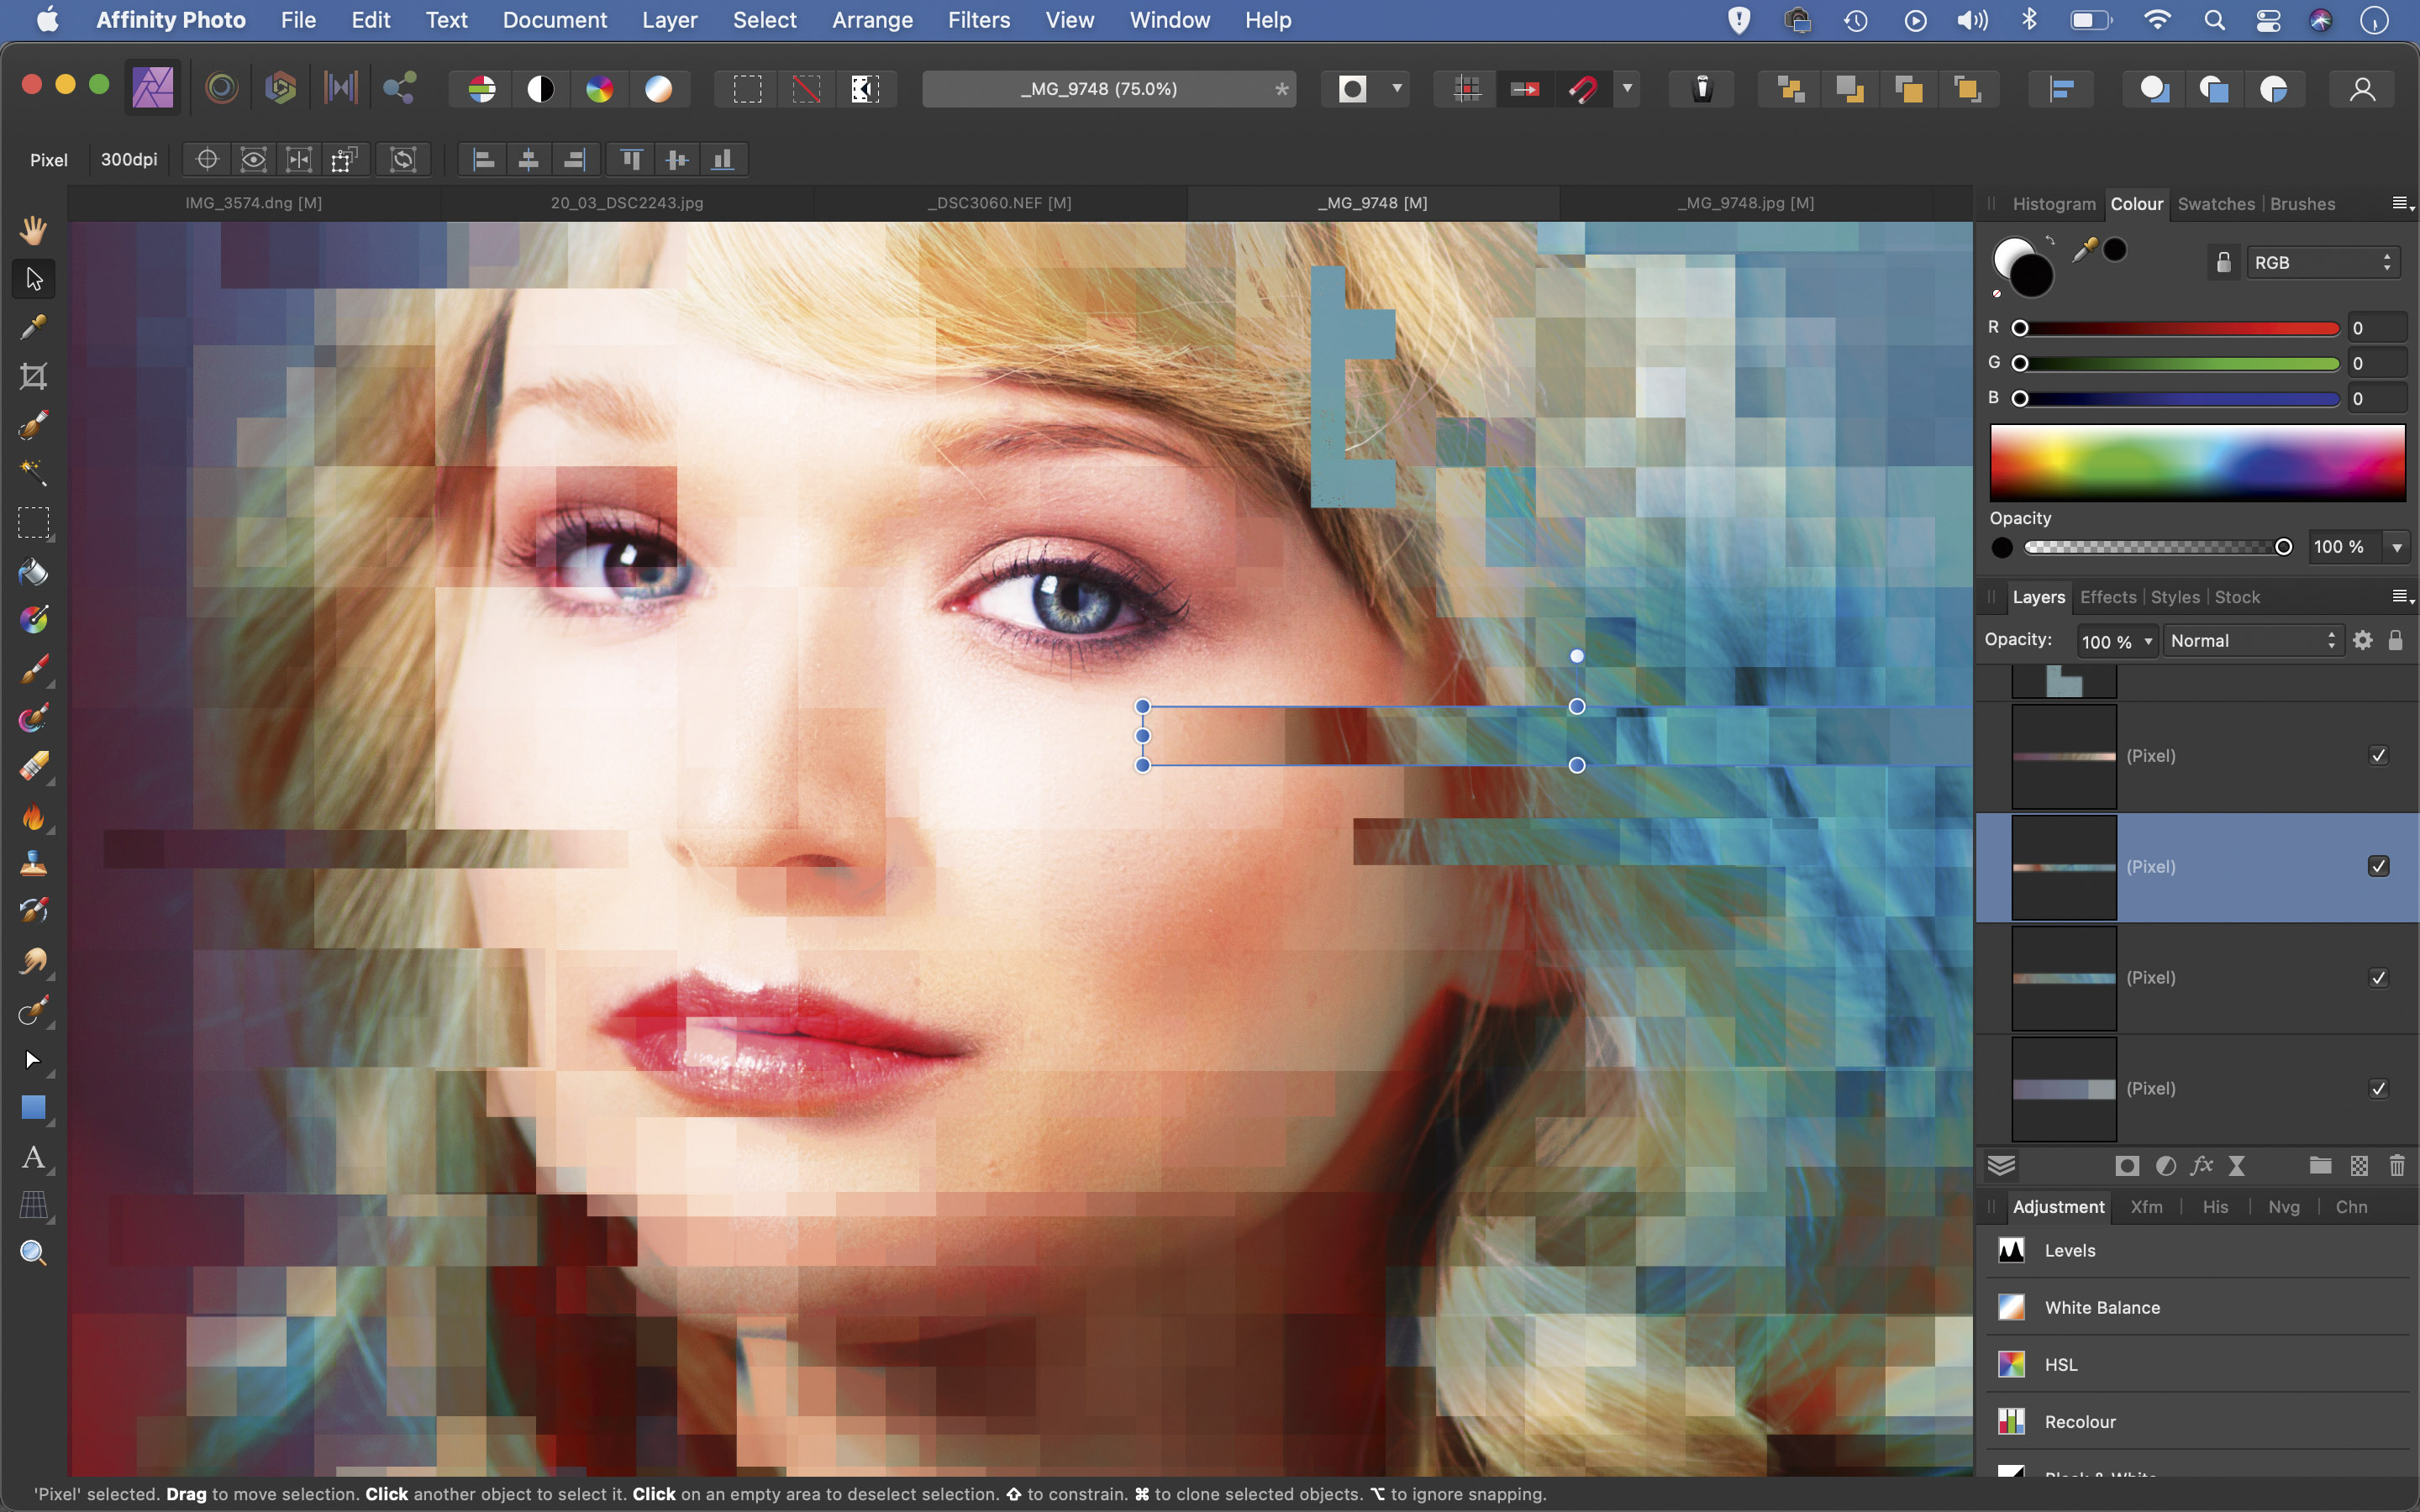
Press Cmd/Ctrl + Shift + Alt + E to merge a copy of the layers, then grab the Rectangular Marquee tool. Make a thin rectangular selection and use the Move tool to alter the position. Repeat to build up the effect gradually across the face.
PhotoPlus: The Canon Magazine is the world's only monthly newsstand title that's 100% devoted to Canon, so you can be sure the magazine is completely relevant to your system.
Read more:
Best photo editing software
Best photo editing laptops
Best online photography courses
The lead technique writer on Digital Camera Magazine, PhotoPlus: The Canon Magazine and N-Photo: The Nikon Magazine, James is a fantastic general practice photographer with an enviable array of skills across every genre of photography.
Whether it's flash photography techniques like stroboscopic portraits, astrophotography projects like photographing the Northern Lights, or turning sound into art by making paint dance on a set of speakers, James' tutorials and projects are as creative as they are enjoyable.
He's also a wizard at the dark arts of Photoshop, Lightroom and Affinity Photo, and is capable of some genuine black magic in the digital darkroom, making him one of the leading authorities on photo editing software and techniques.
