Night-sky photography is getting very popular, and the internet – particularly Instagram – is full of stunning images of star fields and the Milky Way.
They may look like highly polished images taken by photographers with years of experience, but it’s actually advances in modern cameras that are the main reason for the genre’s sudden popularity.
If you've a camera with a good deal of manual control and a clear sky, taking pictures of the night sky is much easier than you might think.
How to prepare for night-sky photography

Although you can use any camera that allows you to adjust the ISO, aperture and shutter speed, a compact with a one-inch sensor or a DSLR will yield the best results – and this is very much the case if you want to capture the Milky Way.
Since you’ll need to keep the camera as still as possible to take long exposures, a sturdy tripod is a must. A remote shutter-release cable is also helpful, though most cameras can be set to shoot on a two- or ten-second delay.
• See also Best light-light cameras
Another must-have is torch with a red light mode, which will help preserve your night vision (it’s also worth lowering the brightness on the LCD screen to prevent a blinding glare). However, the art of night photography is as much about knowing how to manipulate your camera by touch and feel rather than by sight. An easy (and warm) way to practice is to switch off the lights at home and see if you can set your camera up in the dark.
Remember to also prepare yourself for the night by wrapping up warmly and taking a hot drink if necessary.
Finding a good location

If you’re going to successfully capture the light of distant suns hundreds and thousands of light years away, you'll need two things: a clear sky and darkness. That’s not to say that you can’t capture stars from a light-polluted city – in fact, such images have a novelty value – but it's much more difficult.
When you’re starting out, find a location away from artificial light, which means only one thing: go to a place where there aren't any people. The International Dark Sky Association certifies a global network of Dark Sky Parks, while the online light pollution map and the dark site finder are also useful.
Just as critical in avoiding light pollution is to think about the moon. Plan to go on a night-sky shoot from one week before new moon to a few days afterwards to ensure there will be no significant moonlight between dusk and midnight.
Once you’re in a dark, moonless place at the right time, think about composition. It’s often overlooked by night-sky photographers, but it’s just as critical as it is for any landscape image.
Look for something interesting or unexpected to place in the foreground, such as a church, a tree, vehicle or a lake (the latter might even reflect star-light). It can be useful to arrive somewhere before dusk to scout-out some locations to try, then wait until at least an hour after sunset.
Setting up your camera

The trick to successfully photographing the night sky is to let as much light in as possible from as much sky as you can. That means using the fastest, widest lens you can. A 10-22mm lens (or thereabouts) with an aperture of f/4 is OK, but most night-sky photographers will use a lens that reaches f/2.8 or lower.
First, set the camera to manual mode. Now focus the lens on infinity, ensuring that autofocus is deactivated. This will keep the stars sharp, though finding the exact dial position on your lens that maximises sharpness will be a matter of trial and error.
Set the white balance to tungsten or daylight (though remember that you can change this in post-processing), and tell your camera to record in Raw plus JPEG formats.
With your camera on a tripod and pointing upwards towards a clear patch of sky, try these settings for your first shot: an aperture of f/2.8, ISO 800, and a 25sec shutter speed. Zoom into the resulting image on the LCD screen to see if the stars are sharp, and nudge the focus dial if necessary. Keep checking this; even if you get the focus spot-on, it’s too easy to nudge it accidentally while moving the camera, so check and re-check it.
Leave the aperture and exposure as they are (30 seconds tends to blur the stars because of Earth’s rotation), and start to experiment with ISO 1600, ISO 3200 and even higher if your camera can reach higher ISOs (and there’s zero artificial light around). If there is a streetlight or security light on somewhere nearly, using a higher ISO will introduce a lot of noise.
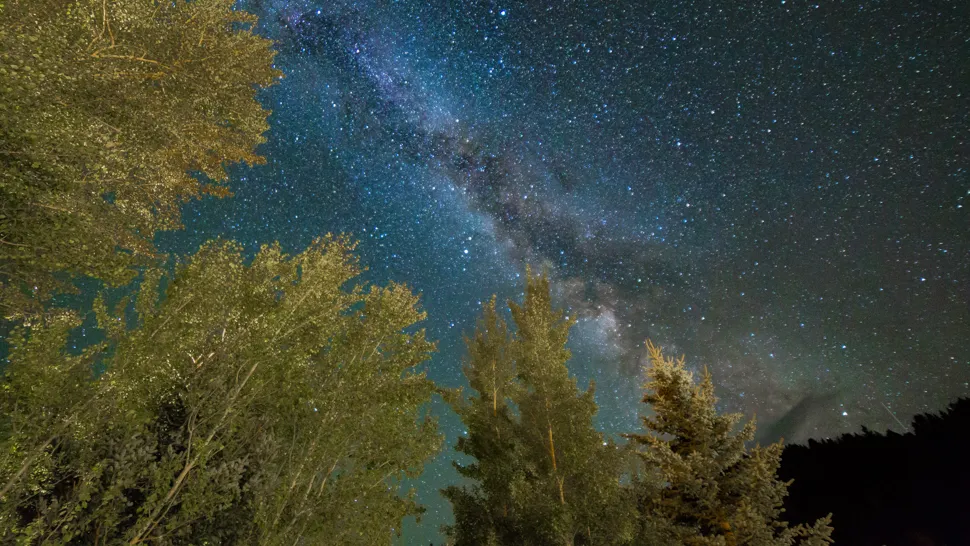
Photographing the Milky Way

Although a popular pastime among night-sky photographers, this one is all about timing.
Although the winter Milky Way can be pretty, it’s not got as much colour or depth as summer’s Milky Way. August is the most popular time to photograph the Milky Way because it’s streaming down to the southern horizon around midnight. However, you can cheat the system by going out in late spring to photograph it before dawn.
As well as good timing, you need a camera with at least a 1in sensor to successfully capture the Milky Way. Any full-frame DSLR camera or advanced compact camera will do well. Push the sensitivity up to ISO 6400 and even higher, and prepare for a long session on Photoshop or similar to tease out a bright Milky Way. It can be time consuming, but the results can be fabulous.
How to take a star-trail image

Another time-consuming, but technically quite simple, iconic night-sky image is the star trail.
If you want circles, you must point your camera at Polaris, the North Star. Earth’s axis points to Polaris, so all stars in the northern hemisphere appear to rotate around it. You could just point your camera towards the north, but if you want circles around, say, a church spire, you can easily find Polaris by using the stars of the easily recognisable constellation The Plough/Big Dipper.
The easiest and cleanest way is to take a series of 30-second exposures and stack them using free software. Expose for 30 seconds as a test shot, and once you’re happy with the image – particularly the focus and composition – just repeat it 100 times! Put the camera in continuous shooting mode and come back in 40 minutes.
When you get home, download StarStaX to a laptop, drag in the images, and in a few minutes it will compile a beautiful star trail. If the finished image contains dotted lines, they're airline tail lights, so remove individual frames and restart the process.
If you get really into star trails, it can be helpful to go out on a night shoot with two cameras capable of night sky shots. So, next time you’re out you can set up a compact on a small tripod pointing north that can shoot frames for a star trail while you use a DSLR on a bigger tripod for that Milky Way shot nearby. However, for night sky photography all you really need is a camera with manual control, a warm coat and clear skies.
Keen to learn more? Grab Jamie's book, A Stargazing Program for Beginners, here
Read more: How to create a moonstack

