If you’ve always wanted to shoot portraits like a professional then you’re in luck – there are just a few things that you need to do and your shots will instantly improve.
Taking pictures of people is actually really easy. It’s a bold statement, but as long as you have a camera, a subject and a suitable location then you’re already 75% of the way there.
The most difficult part of portraiture – that final 25% – is the finer points that are easy to miss, or you’re simply not aware of. We’re going to cut through the technical fluff to get you straight to the essential portrait photography tips.
So, if you’ve found your portraits have become stuck in a rut, or you’re simply looking to take your shots to the next level, you’re in the right place.
• Get more photoshoot ideas
1. Plan your shoot

When thinking about a portrait shoot it’s easy to simply head out with a model hoping for the best. And while this can work, there’s nothing better than having a list of location ideas that you know will work at different times of the day and in different weather conditions.
The easiest conditions to shoot in are overcast days; this because the cloud acts like a giant softbox, which gives you fairly even lighting throughout the day. On clearer days, shoot around sunrise or sunset when the sun is low in the sky, and position your model with the sun behind them. And whether you’re shooting on location or in the studio, practise the techniques you’ll be using with a friend so you can get everything perfect on the day.
2. Shoot wide with a prime lens

A prime lens is one that has a fixed focal length such as 50mm, 85mm or 135mm – all of which are classic portrait focal lengths. The advantage of a prime is that they most often have a larger maximum aperture than zoom lenses, which means you can create a shallow depth-of-field more easily to isolate your subject.
Read more: The 8 best portrait lenses for Nikon users
One problem you may face when shooting outdoors, and in the studio with flash, is that you can’t achieve a correct exposure with the aperture set to f/1.4 or f/1.8. The way to get around this is to use a neutral density (ND) filter. These filters reduce the amount of light entering the lens with no effect on colour, which means you can shoot with a wider aperture in bright conditions. Two-stop NDs and variable NDs are the best options for portrait photographers.
3. Aim for focus perfection

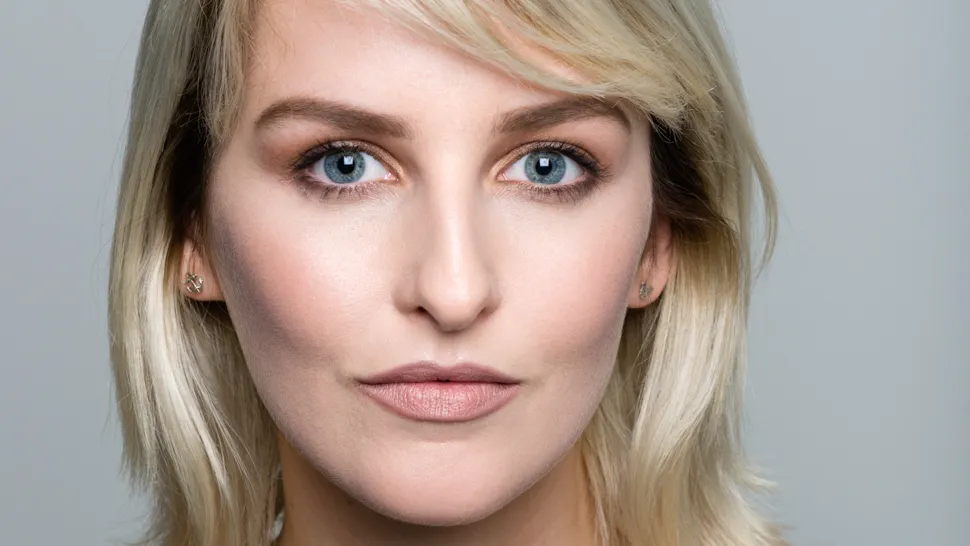
Focusing is a critical skill regardless of the subject you’re shooting, but if you’re using a wide aperture such as f/1.8, getting it right becomes much more difficult. With a wide aperture like this depth-of-field is incredibly shallow, so focus has to be absolutely perfect and on the right part of the subject.
When shooting wide open, focus on the subject’s eye that’s closest to the camera. This is to make sure that the part of the image that connects with the viewer – ie the eyes – are pin-sharp. Set the camera to single-point AF and select the focus point closest to the subject’s eye when composing the shot through the viewfinder.
One of the potential issues here is that the eyelashes can be picked up by the AF point, and this is more of a problem when shooting tighter headshots. For waist-level and full-length crops, focusing in the eye area is still advised but less critical.
4. Think about backgrounds

You’ve probably heard this a million times, but the background should ideally be clear and free of distractions that could potentially draw attention away from the subject.
Potential backgrounds can be elements within a scene such as walls or foliage, but you can also introduce them – whether that’s a pop-up backdrop, a sheet of wood, material, A1 card or something else.
Another way of simplifying a background is to shoot at a wide aperture. This will throw the background out of focus, but will maintain a sense of place. It’s still worth looking out for objects in the background that could be distracting even when out of focus – look out for bright colours, people and objects like lamp posts.
5. Use Auto ISO to ensure shake-free shots

When you’re in the thick of a shoot, directing the model and concentrating on things like focusing, it’s easy to forget to keep an eye on shutter speed. With Auto ISO the camera will automatically select the lowest ISO setting possible to achieve a shutter speed that's fast enough to avoid camera shake with the lens you’re using. Many cameras even allow you to manually set a faster minimum shutter speed than the camera would select automatically.
Read more: Cheat sheet – How to understand ISO settings
Auto ISO allows you to set the minimum desired sensitivity, which should be ISO 100 or ISO 200 depending on your camera, alongside the maximum you’d be happy to go up to. A safe option is to set the maximum to ISO 1600, which is much higher than the desired setting of ISO 100, but will ensure sharp images even if light levels change. And don’t forget, the camera will always select the lowest setting possible.
6. Work with light, don’t let it work against you

Model aside, light is one of the most important aspects of portraiture and without good light your images will look dull and boring.
Light is something of a magical ingredient in photography, and you may be surprised about how little of it you actually need. Shooting with your subject sitting next to a window is often a great way to achieve a clean background with moody lighting. For this type of image don’t be afraid to use a high ISO setting such as ISO 3200, as well as exposure compensation to control exposure.
In situations where there is no light, consider adding your own with flash. You’ll nearly always get the best results from off-camera flash, and if you’ve never tried it before it’s probably much easier than you think. One flashgun, triggers and a reflector are all you need to get started with some basic yet eye-catching techniques.
7. Shoot at the subject’s level

One of the most effective viewpoints for portraits is fractionally above the subject’s eye level, looking down ever so slightly. So slight in fact, that it’s difficult or impossible for the viewer to notice.
Of course, there will be times where you might want to create a narrative, so you may decide to shoot from a low angle to make the subject look more powerful and/or dominant. Conversely, shooting down from a noticeably high angle will make the subject look smaller or more submissive.
When it comes to children and pets, a common mistake is for photographers to shoot from their standing height, which results in a poorly composed image and one where the subject is too small in the frame and captured from an unflattering angle. So, get down to the subject’s level and your images will immediately improve.
8. Guide and direct your subject

Simply asking someone to stand in front of the camera and smile is rarely enough direction for anything more than a quick snapshot. For something more considered, explain what you’re aiming for and, if necessary, demonstrate what you mean.
Looking through books and magazines to find poses you like before a shoot, as well as having a few ‘stock’ poses you know will work, will make the shoot itself much smoother.
Read more: The 8 best portrait lenses for Canon DSLR users
One way to get a portrait session started, whether you’re working with a professional model or a friend or family member, is to ask them to pull faces at the camera. Not only will this help you and the subject to relax, it’s not uncommon to get some fun and interesting shots from the exercise too.
9. Work on a personal project

One of the best ways to motivate yourself and to give your photography a sense of purpose is to shoot a personal project that follows a theme. The theme itself can be as wide or as narrow as you wish, and can be technique, subject led or even based on an editing style.
Themes could include shooting strangers against a white wall in a city; tight head shots lit by flash; focusing on men with beards; black-and-white, low-light portraits; people at work; people wearing hats ... the list goes on!
Working on a project with a set theme allows you to focus on the variable, which is the individuals you’re photographing, while the location or photographic approach remains the same in each to provide consistency. Producing a body of work could take as little as a few hours, or as long as several years. It’s your project, so approach in a way that suits the theme and your working style.
10. Develop an editing style

Having a shooting style can often come from shooting a personal project with a theme. As you focus on a specific technical and aesthetic approach you’ll soon begin to see a personal style developing.
Editing is just as important, and finding your voice through your editing is a great way to not only differentiate your work from that of other photographers, but also to give it a professional finish.
Portraits are difficult to edit well because they’re much easier to ‘overcook’ than, for example, landscapes. Plus, you’ve got skin tones to deal with and it’s important to keep these as natural as possible – even when applying effects such as retro colouring and desaturation techniques.
Shoot Raw files and process them as naturally as possible at first, then use Photoshop to apply effects because there’s much more fine control here for effects than in Raw-processing software. Converting to black and white, however, is best done in Raw.
Read more:
• 32 tips to make a basic camera more powerful
• Boudoir photography tips

