Turn your holiday photos into a beautiful photomosaic
Create a contact sheet of hundreds of images to build your own photomosaic portrait
The best camera deals, reviews, product advice, and unmissable photography news, direct to your inbox!
You are now subscribed
Your newsletter sign-up was successful
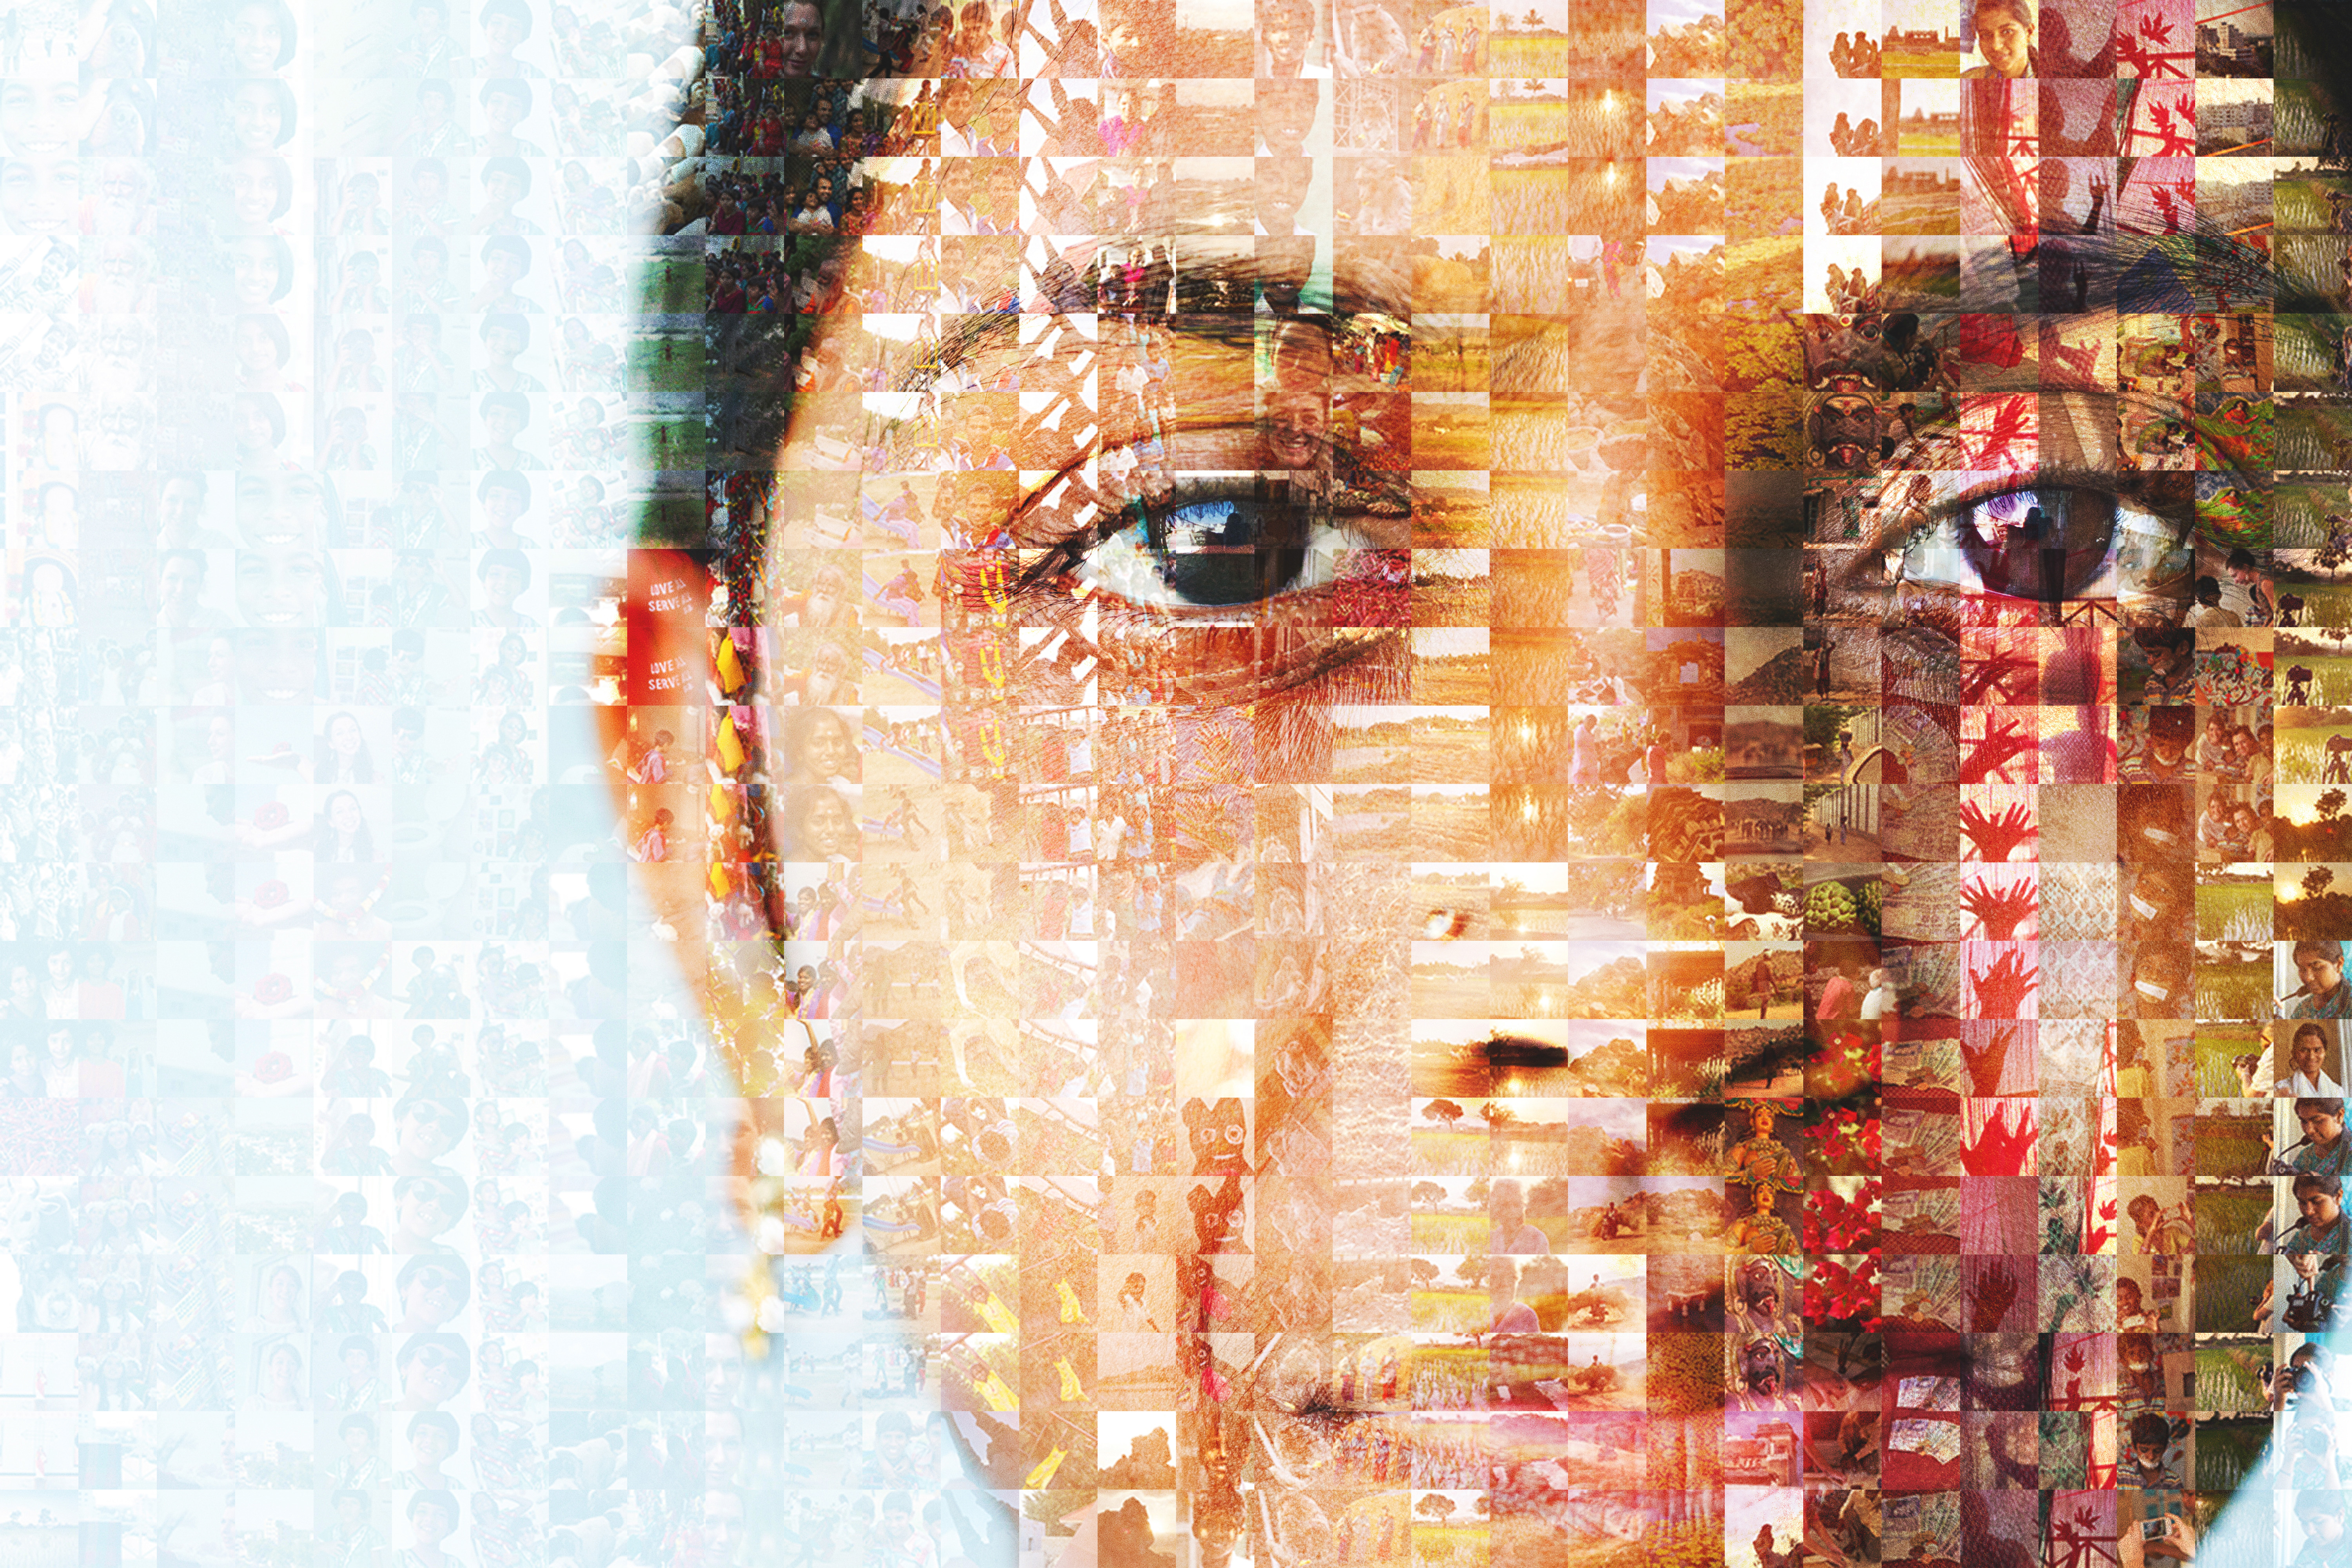
In this project, we’re going to show you how to make one image from hundreds. Our main image was taken in India on a trip a few years ago. The rest of the images that make up the portrait were also taken on that trip, and include the local children and places that we visited.
Before you can start making your mosaic, you’ll need to gather a batch of images that you want as the background scene. You also need to select a strong lead image that will go over the top. When you copy your background images into a new folder make sure these are copies of the originals, as you’re going to be resizing them to a small size.
The quickest and easiest way to batch-resize images is to use use the Image Processor in Photoshop - which you can find in the top bar via File > Scripts > Image Processor.
Article continues below1: Make the grid
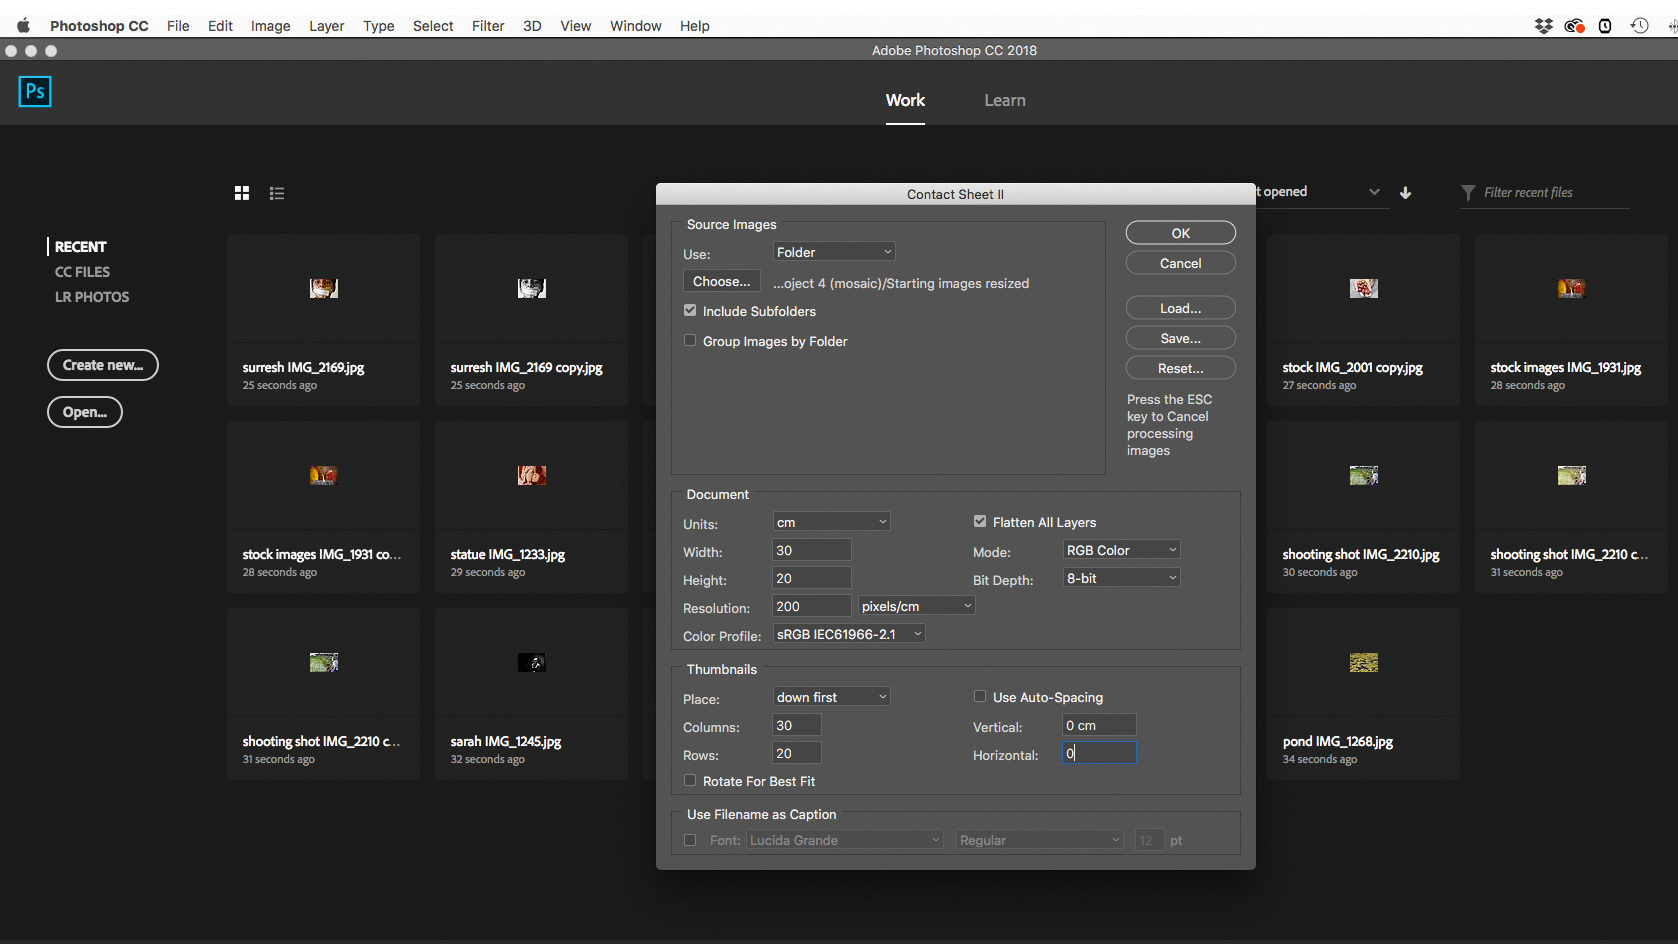
To put the images in a grid, go to File > Automate > Contact Sheet II. Click Choose and select your resized images. Change the Document size to 30cm width by 20cm height. Change Columns to 30 and Rows to 20. Ensure Auto-Spacing is unticked and both Vertical and Horizontal are set to 0. Untick Font and tick Flatten All Layers. Click OK and your grid will be made; it may take a few minutes.
2: Add the main photo
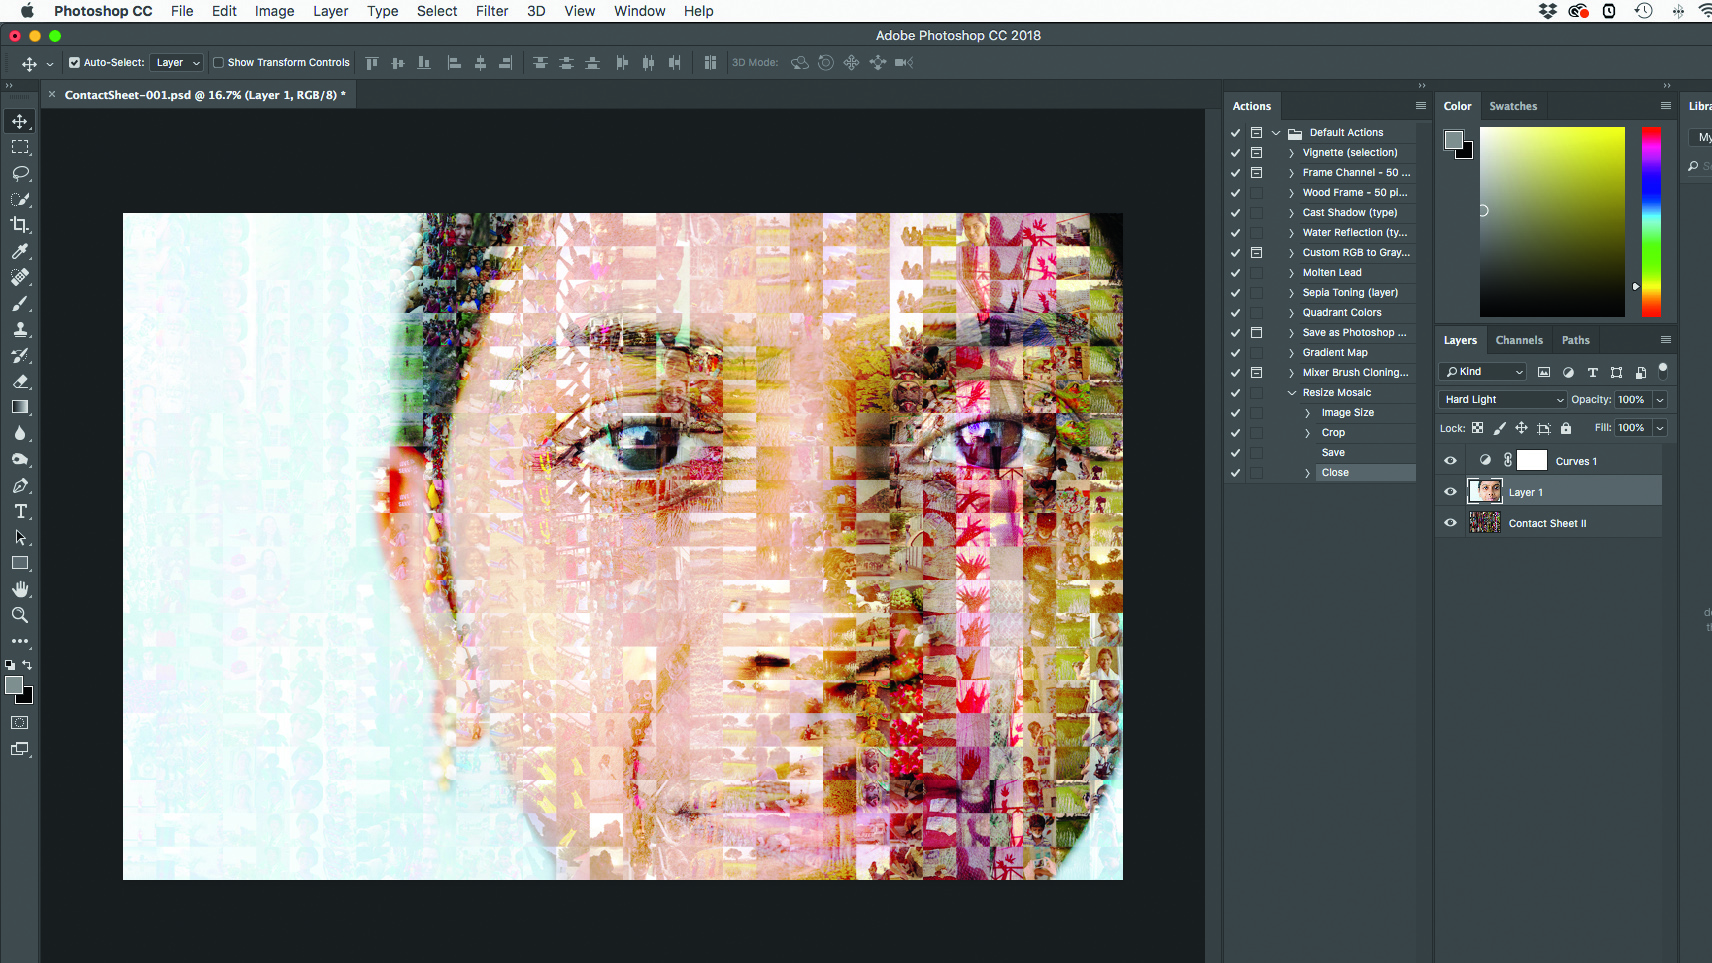
Open your lead image and drag it over to your newly made contact sheet, where it will be added as a new layer. Change this layer’s Blending mode to Hard Light, and there you go! If you want to make further adjustments, you can play around with Curves or the Dodge and Burn tools until you’re happy with the final result.
The best camera deals, reviews, product advice, and unmissable photography news, direct to your inbox!
Claire is a professional photographer and writer, and lives by the the sea with her two young children, husband and cat in the southwest of the UK.
After graduating from The Bournemouth Arts Institute with a first-class degree in photography, Claire worked for a number of years in the publishing industry, including as Technique Editor for Digital Camera magazine.
She loves anything and everything to do with photography, from creating magazine articles to photographing ballerinas on the beach and newborn babies (but not at the same time). She mainly shoots with digital DSLRs, but does dust off her beloved Hasselblad medium-format film camera once in a while…
