Rear curtain sync: create light streak photography with second curtain sync
How to capture those streaky headlight shots – with the streaks going in the right direction

The best camera deals, reviews, product advice, and unmissable photography news, direct to your inbox!
You are now subscribed
Your newsletter sign-up was successful
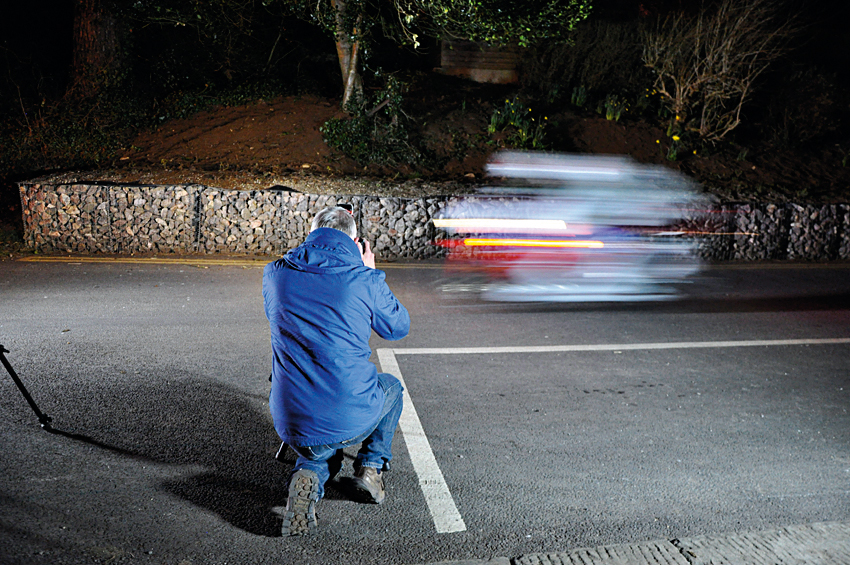
You can get great shots by combining flash with a long exposure. Usually all you need to do is set your camera to slow sync mode and start shooting; your subject is sharply lit, but you also get ghostly movement blur and trails of light from moving light sources.
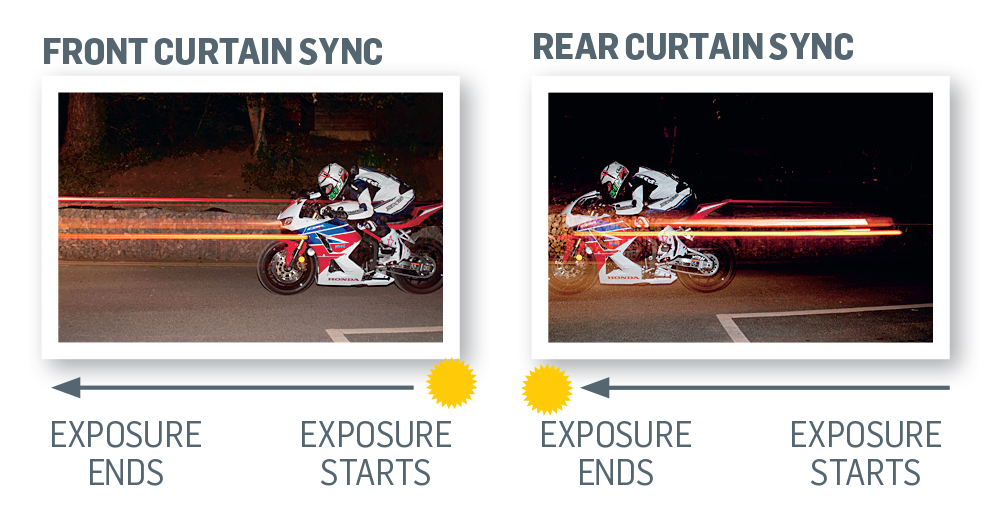
However, there’s a problem; in regular slow sync mode the flash fires at the start of the exposure, and then the shutter stays open to record the ambient light and movement blur. If your subject is clearly heading in a specific direction, the effect looks wrong because the blur is traveling ahead of your subject instead of behind it.
Front curtain vs Rear curtain sync
That’s why most cameras have a rear curtain sync flash mode – also called second curtain sync or 'pop and burn' – where the flash fires at the end of the exposure, so that the movement trail is behind your subject.
Why isn’t this the default mode for slow sync flash? Because it’s very difficult to time your shots when the flash is at the end of the exposure! It’s worth the effort, though, because when these shots work, they look terrific.
01 Set up your shot
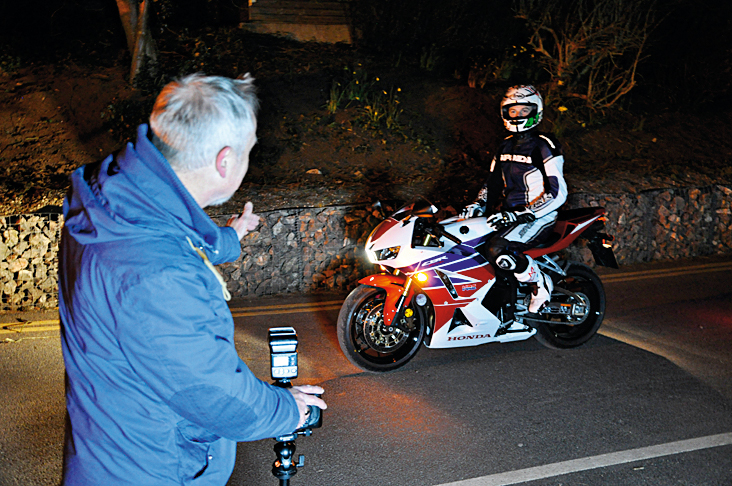
You need to plan your composition carefully. Place your subject in the position you want it to be in when the flash fires, but frame the shot to allow room behind for the light trail as well. Now’s a good time to set the focus – the camera won’t track a moving subject in the dark.
02 Switch to manual
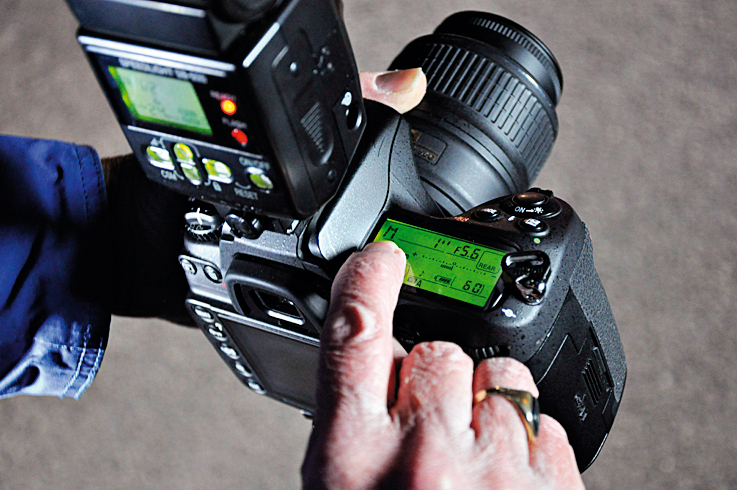
The main light will come from the flash, but you still want some of the ambient background light to register and a long enough exposure to record the light trail. We’re using a one-second exposure at f/5.6 (avoid smaller lens apertures because these will sap the flash power).
03 Manual flash power

We could use TTL auto flash, but in situations like this it’s simpler to experiment with the flash power manually. For this you switch your flash to manual mode, then choose the power setting; 1/1 is full power, 1/2 is half power and so on. You need plenty of power for outdoor shots.
The best camera deals, reviews, product advice, and unmissable photography news, direct to your inbox!
04 Rear curtain sync
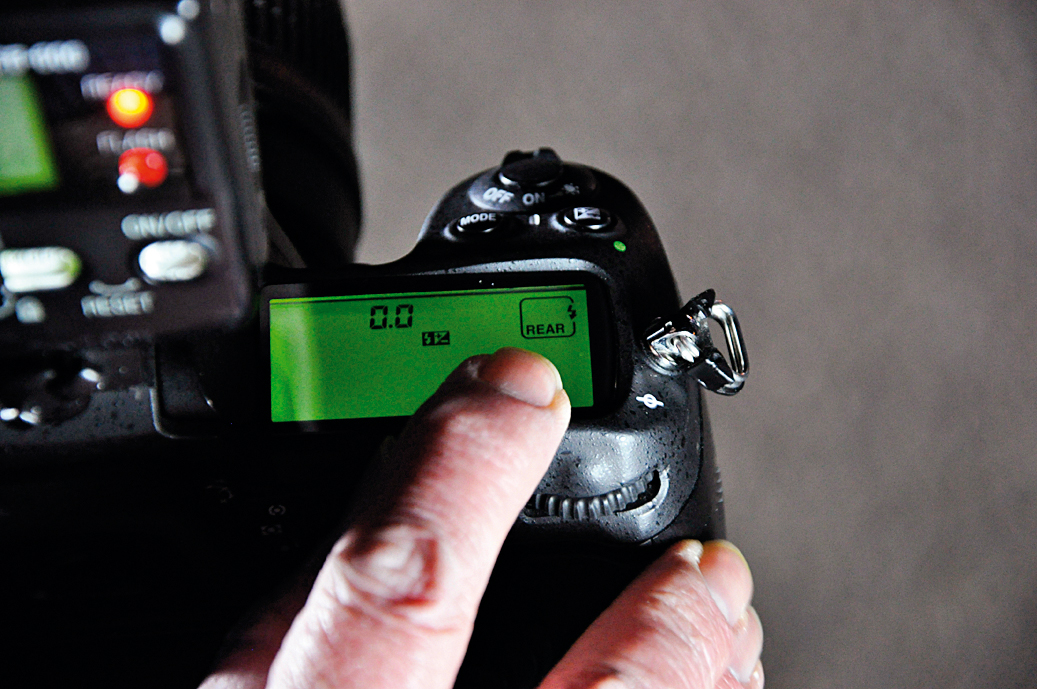
Now change your camera’s flash mode to rear curtain sync or second curtain sync. The method for this will depend on your camera – and some models require a hotshoe add-on to enable the function.
05 Try some shots
Now you’ll need a willing subject who’s prepared to drive up and down while you get the timing and the positioning right! Remember that you need to time the shot so your subject is in position at the end of the exposure, not the start, and that can take some practice.
06 Final directions
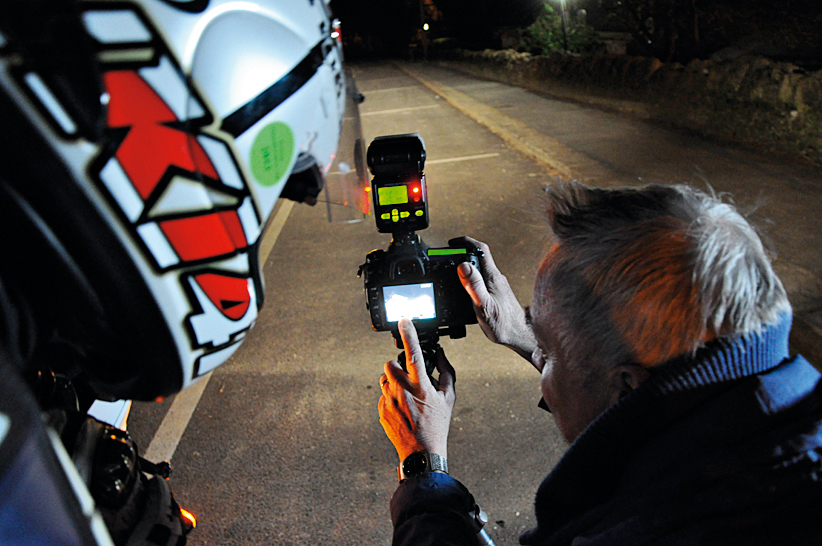
To get proper control over the timing and the length of the light trail, you’ll need to give your subject precise instructions. Our shots look fast, but the bike was only traveling at 12mph! Get your subject to follow a fixed line through the shot, because this will help with focusing.
More videos:
Photography tips and techniques videos
Light painting: tips for photographing light orbs
Perfect the strobist look with off-camera flash photography
Photography cheat sheets
Rod is an independent photography journalist and editor, and a long-standing Digital Camera World contributor, having previously worked as DCW's Group Reviews editor. Before that he has been technique editor on N-Photo, Head of Testing for the photography division and Camera Channel editor on TechRadar, as well as contributing to many other publications. He has been writing about photography technique, photo editing and digital cameras since they first appeared, and before that began his career writing about film photography. He has used and reviewed practically every interchangeable lens camera launched in the past 20 years, from entry-level DSLRs to medium format cameras, together with lenses, tripods, gimbals, light meters, camera bags and more. Rod has his own camera gear blog at fotovolo.com but also writes about photo-editing applications and techniques at lifeafterphotoshop.com
