How to reshape photos of wildlife and pets
Use Photoshop’s Liquify filter to create a playful ‘creature caricature’
Download project files to your computer from: http://downloads.photoplusmag.com/pp120.zip
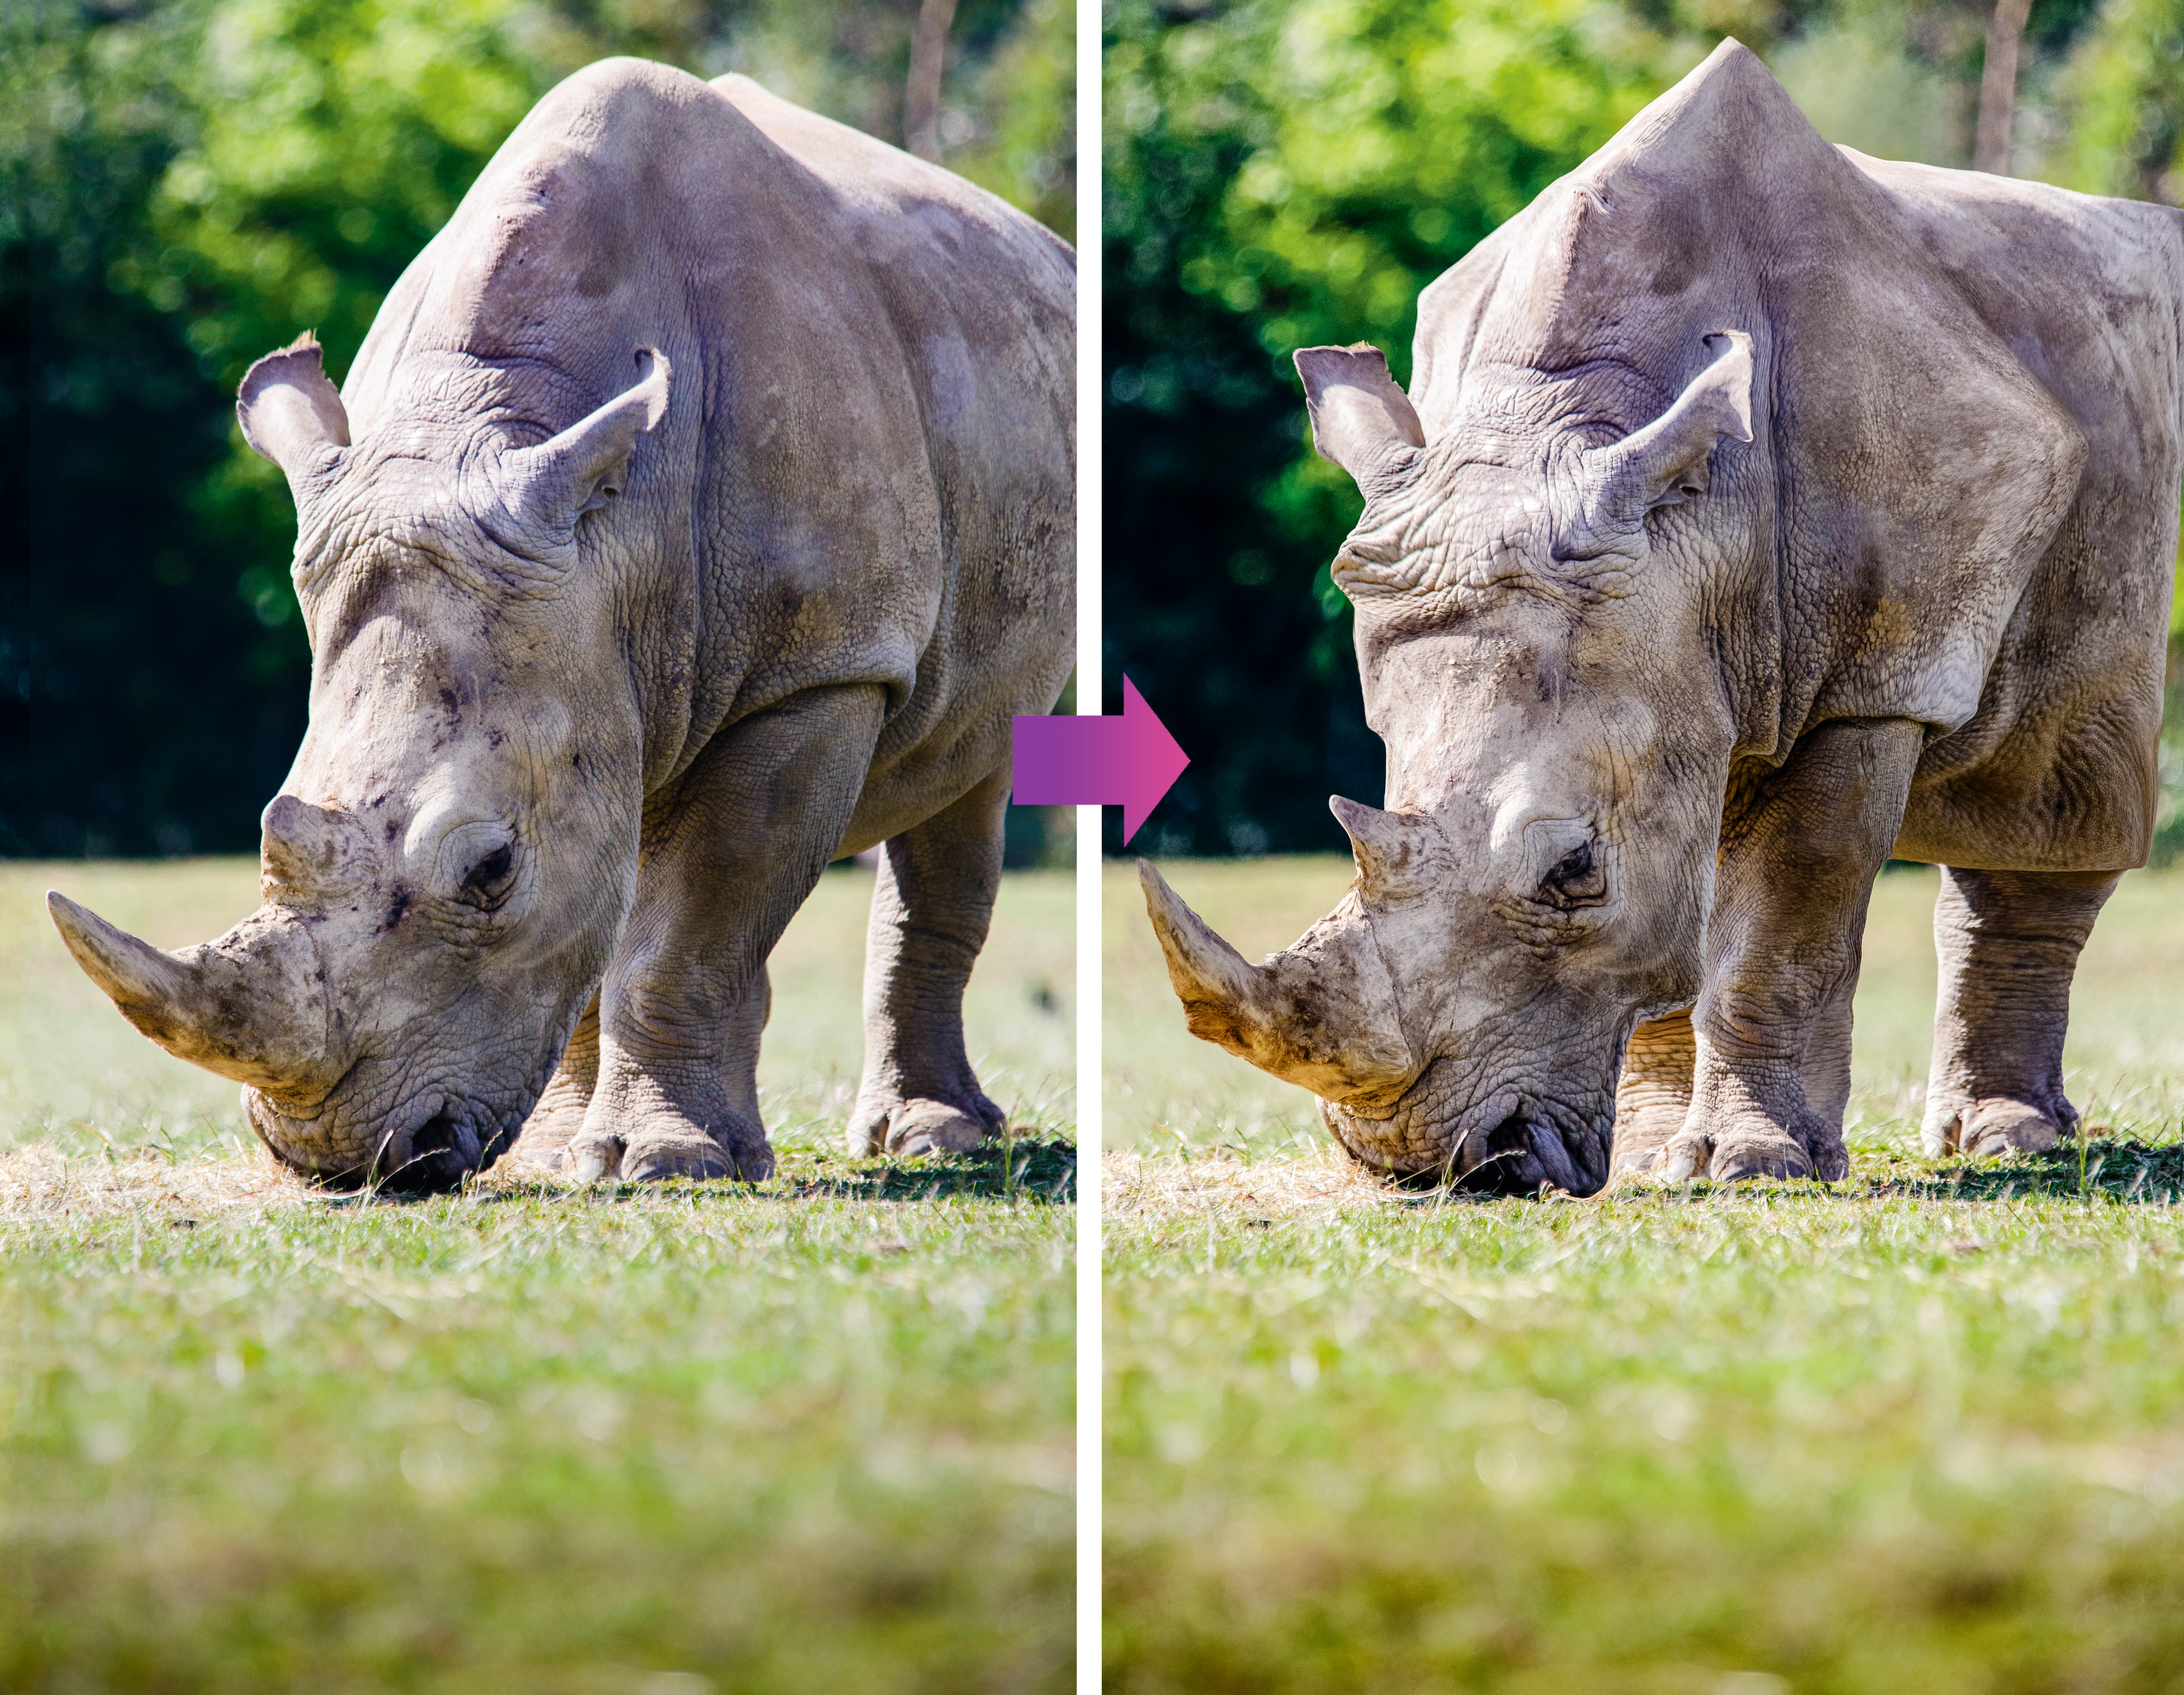
Get to grips with the Liquify filter and transform an animal photo into a unique caricature
Time needed: 30 minutes
Skill level: Intermediate
Kit needed: Photoshop CC
Among the most enticing tools in Photoshop’s box of tricks are those that give you the power to reshape objects, people or even animals.
Chief among these pixel-pushing tools is the Liquify command. It acts almost like a mini-app within Photoshop, coming complete with its own toolbar, menus and shortcuts. With Liquify, you can smoothly nudge a shape into something entirely new. The most common – and controversial – application of this technique is to reshape the bodies of models for fashion magazine photo shoots, but it can be used for almost anything – including creating a caricature of a rhinoceros!
You begin by creating a rough cutout of the rhino and copying it to a new layer, so you can reshape it without affecting the pixels in the background. Once done, you can get stuck in with the Liquify command. The trick is to emphasize the natural shape of the animal, so that at first glance you can’t quite put your finger in why it looks a little odd…
STEP BY STEP: Box clever
Create a playful creature caricature using the Liquify filter
We’ve provided the start image for this project, but if you’d like to experiment on one of your own images, why not take a pet portrait? Pets make excellent subjects for photography, as they don’t mind having a camera pointed at them and – with dogs or cats in particular – it’s easy to coerce them to capture dramatic action poses.
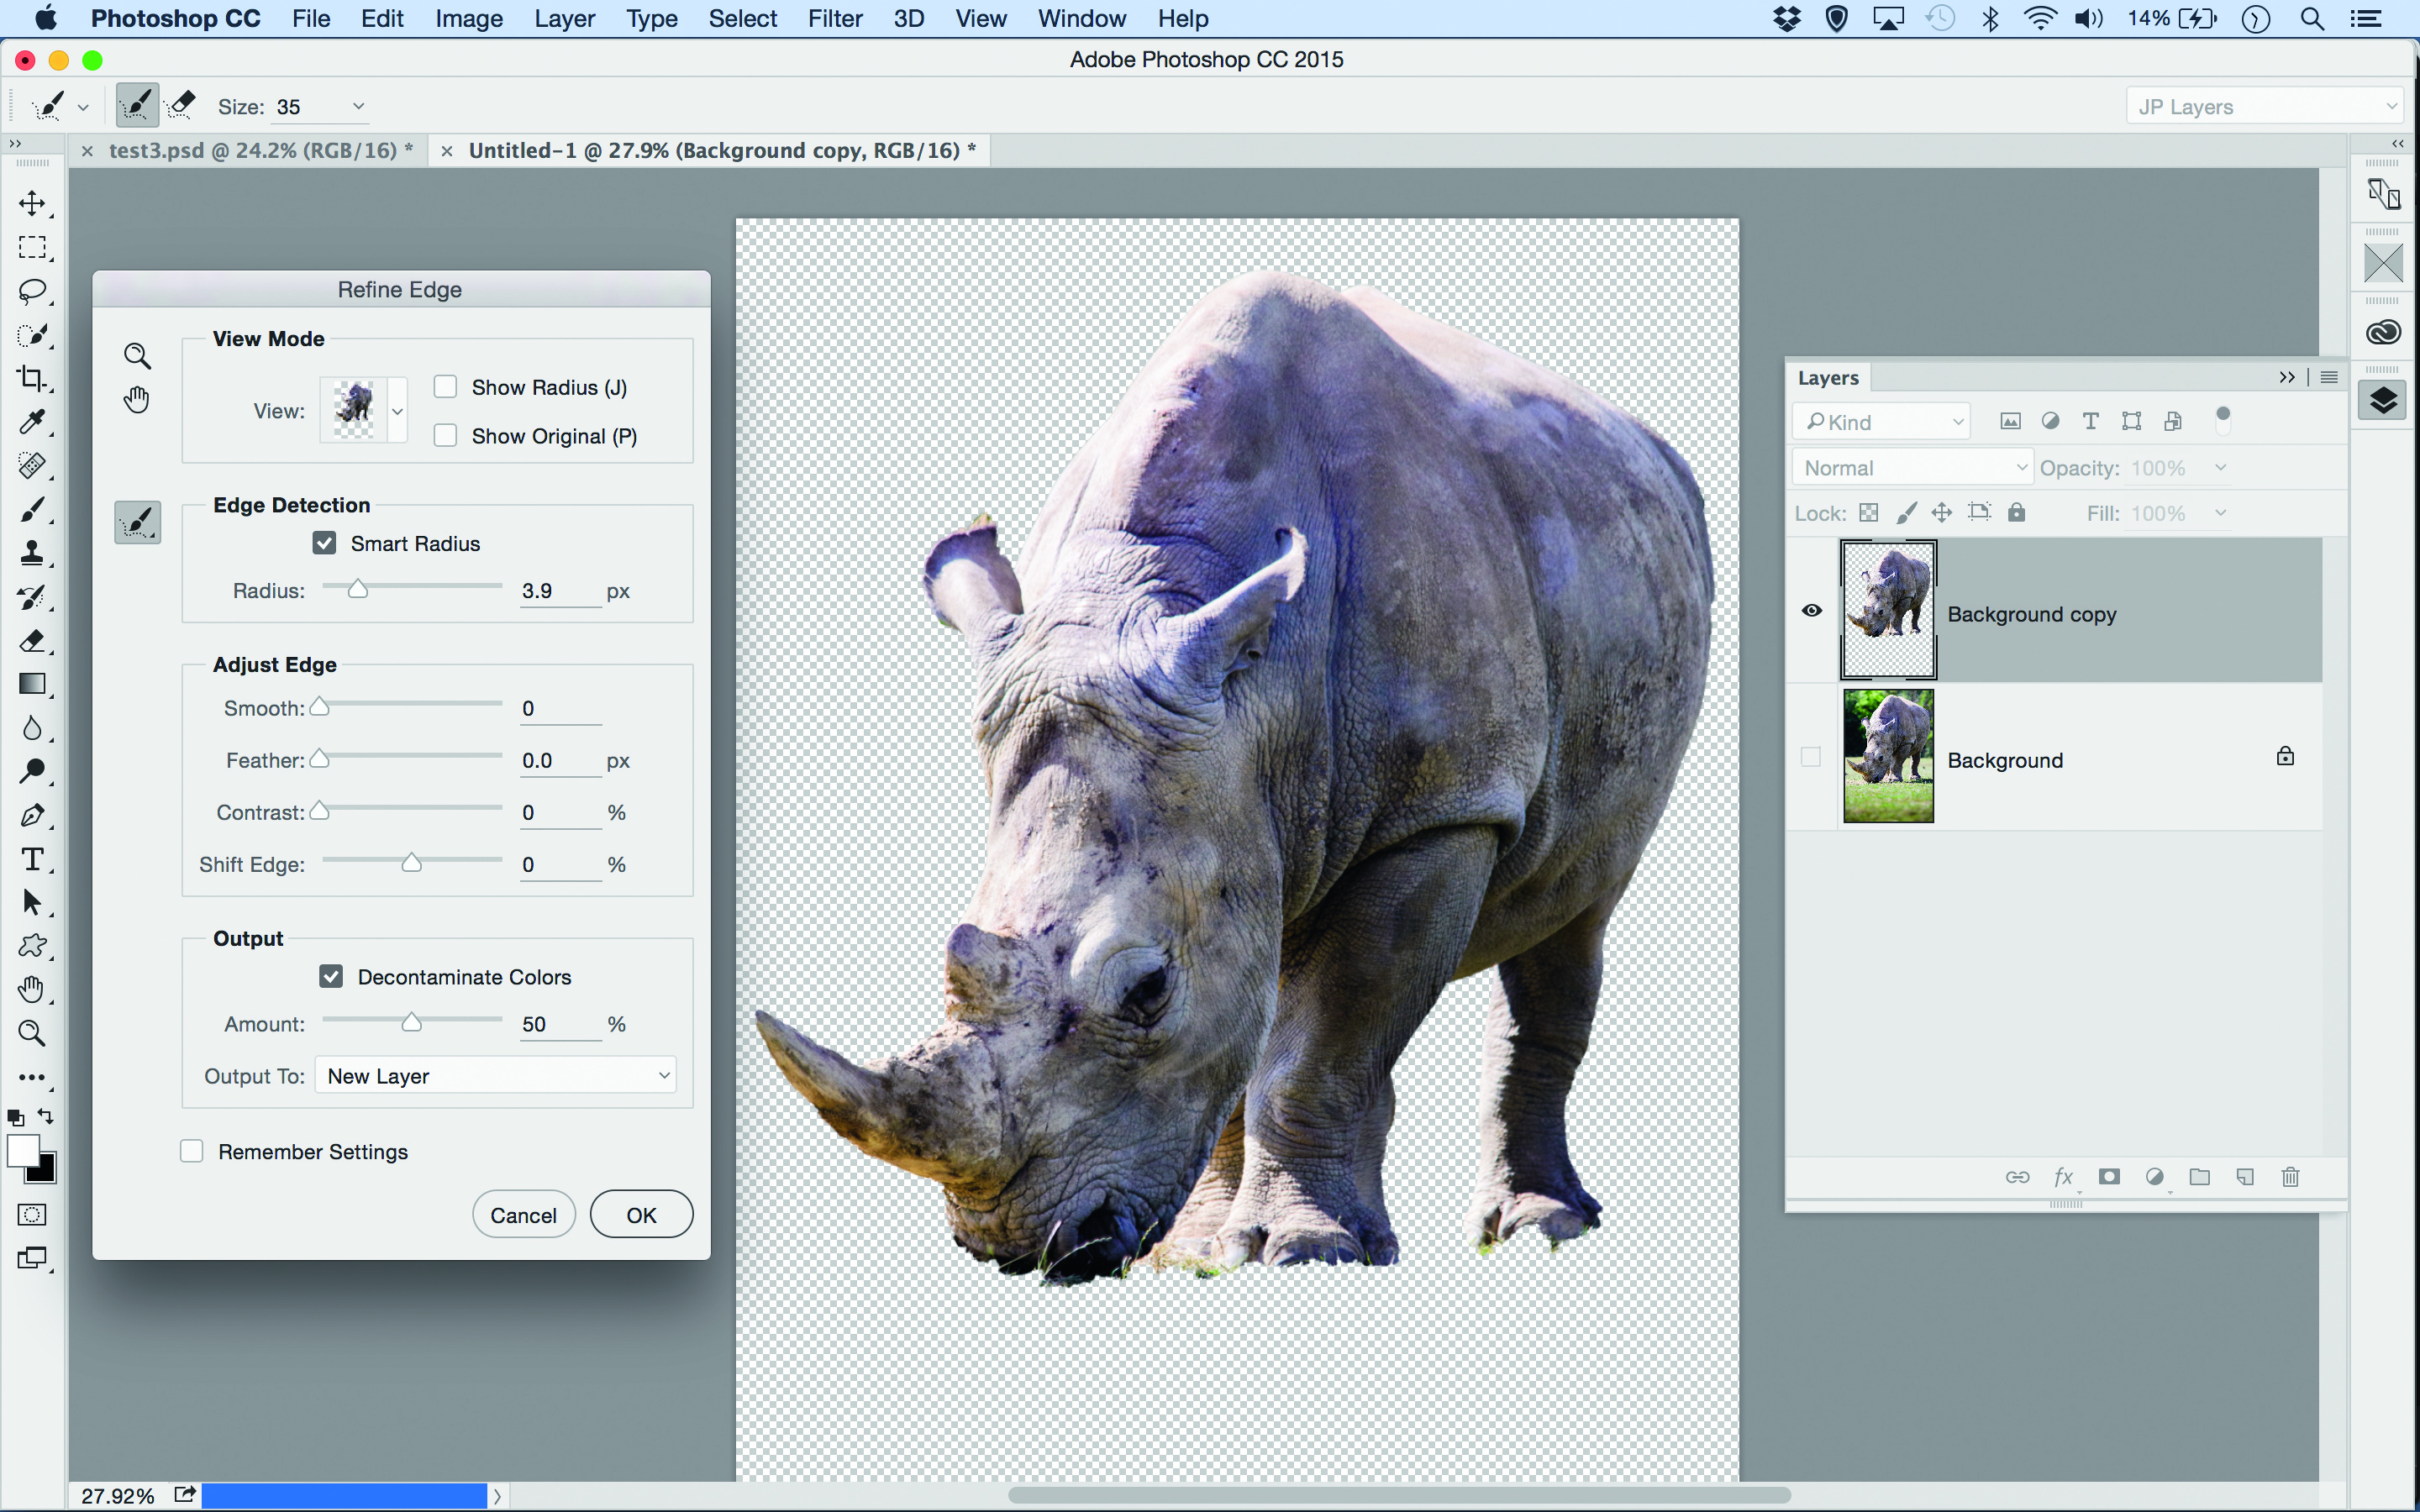
01 ISOLATE THE ANIMAL
Paint over the animal with the Quick Selection Brush (if it picks up any background, hold Alt and paint to subtract). Once you have a selection, go to Select> Refine Edge, increase Radius and check Smart Radius to improve it. Set Output to: New Layer. Hit OK.
The best camera deals, reviews, product advice, and unmissable photography news, direct to your inbox!
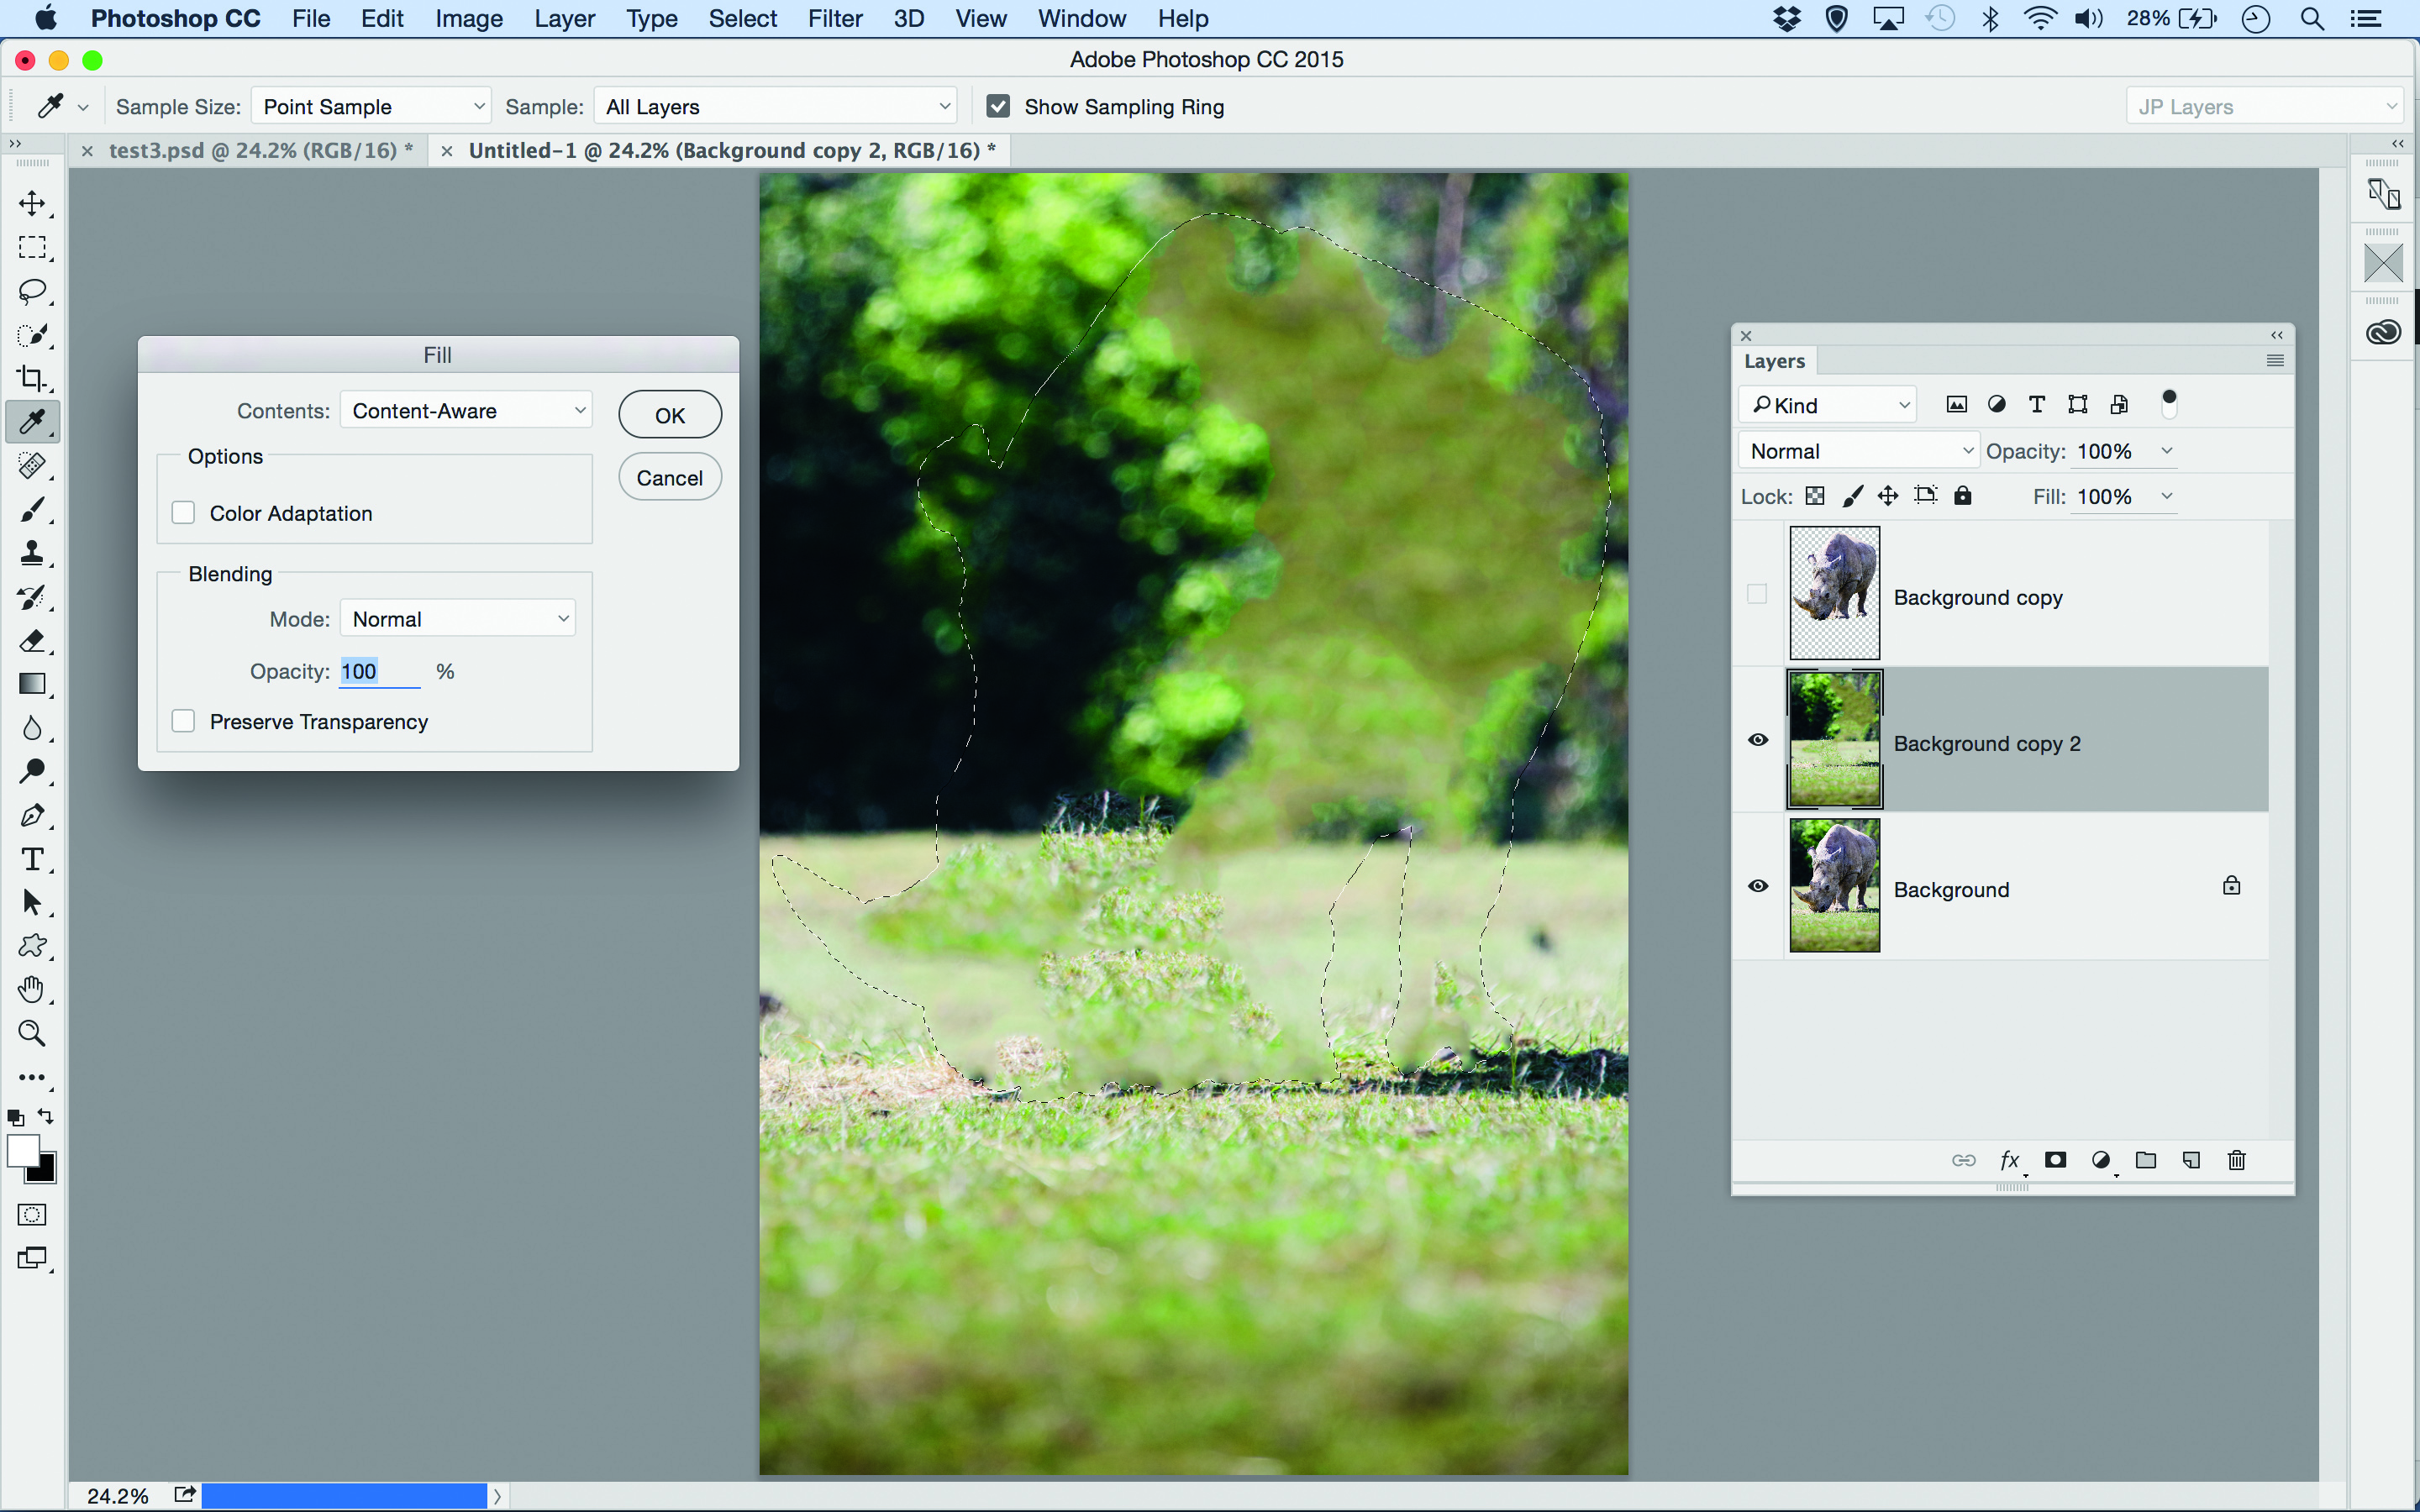
02 FILL IN THE BACKGROUND
Go to the Layers panel, highlight the bottom layer and hit Ctrl+J to duplicate it. Ctrl-click on the rhino layer’s thumbnail. Go to Select>Modify>Expand and set 15px. Go to Edit>Fill and choose Contents: Content-Aware to create a rough backdrop minus the rhino.
03 RESHAPE THE BODY
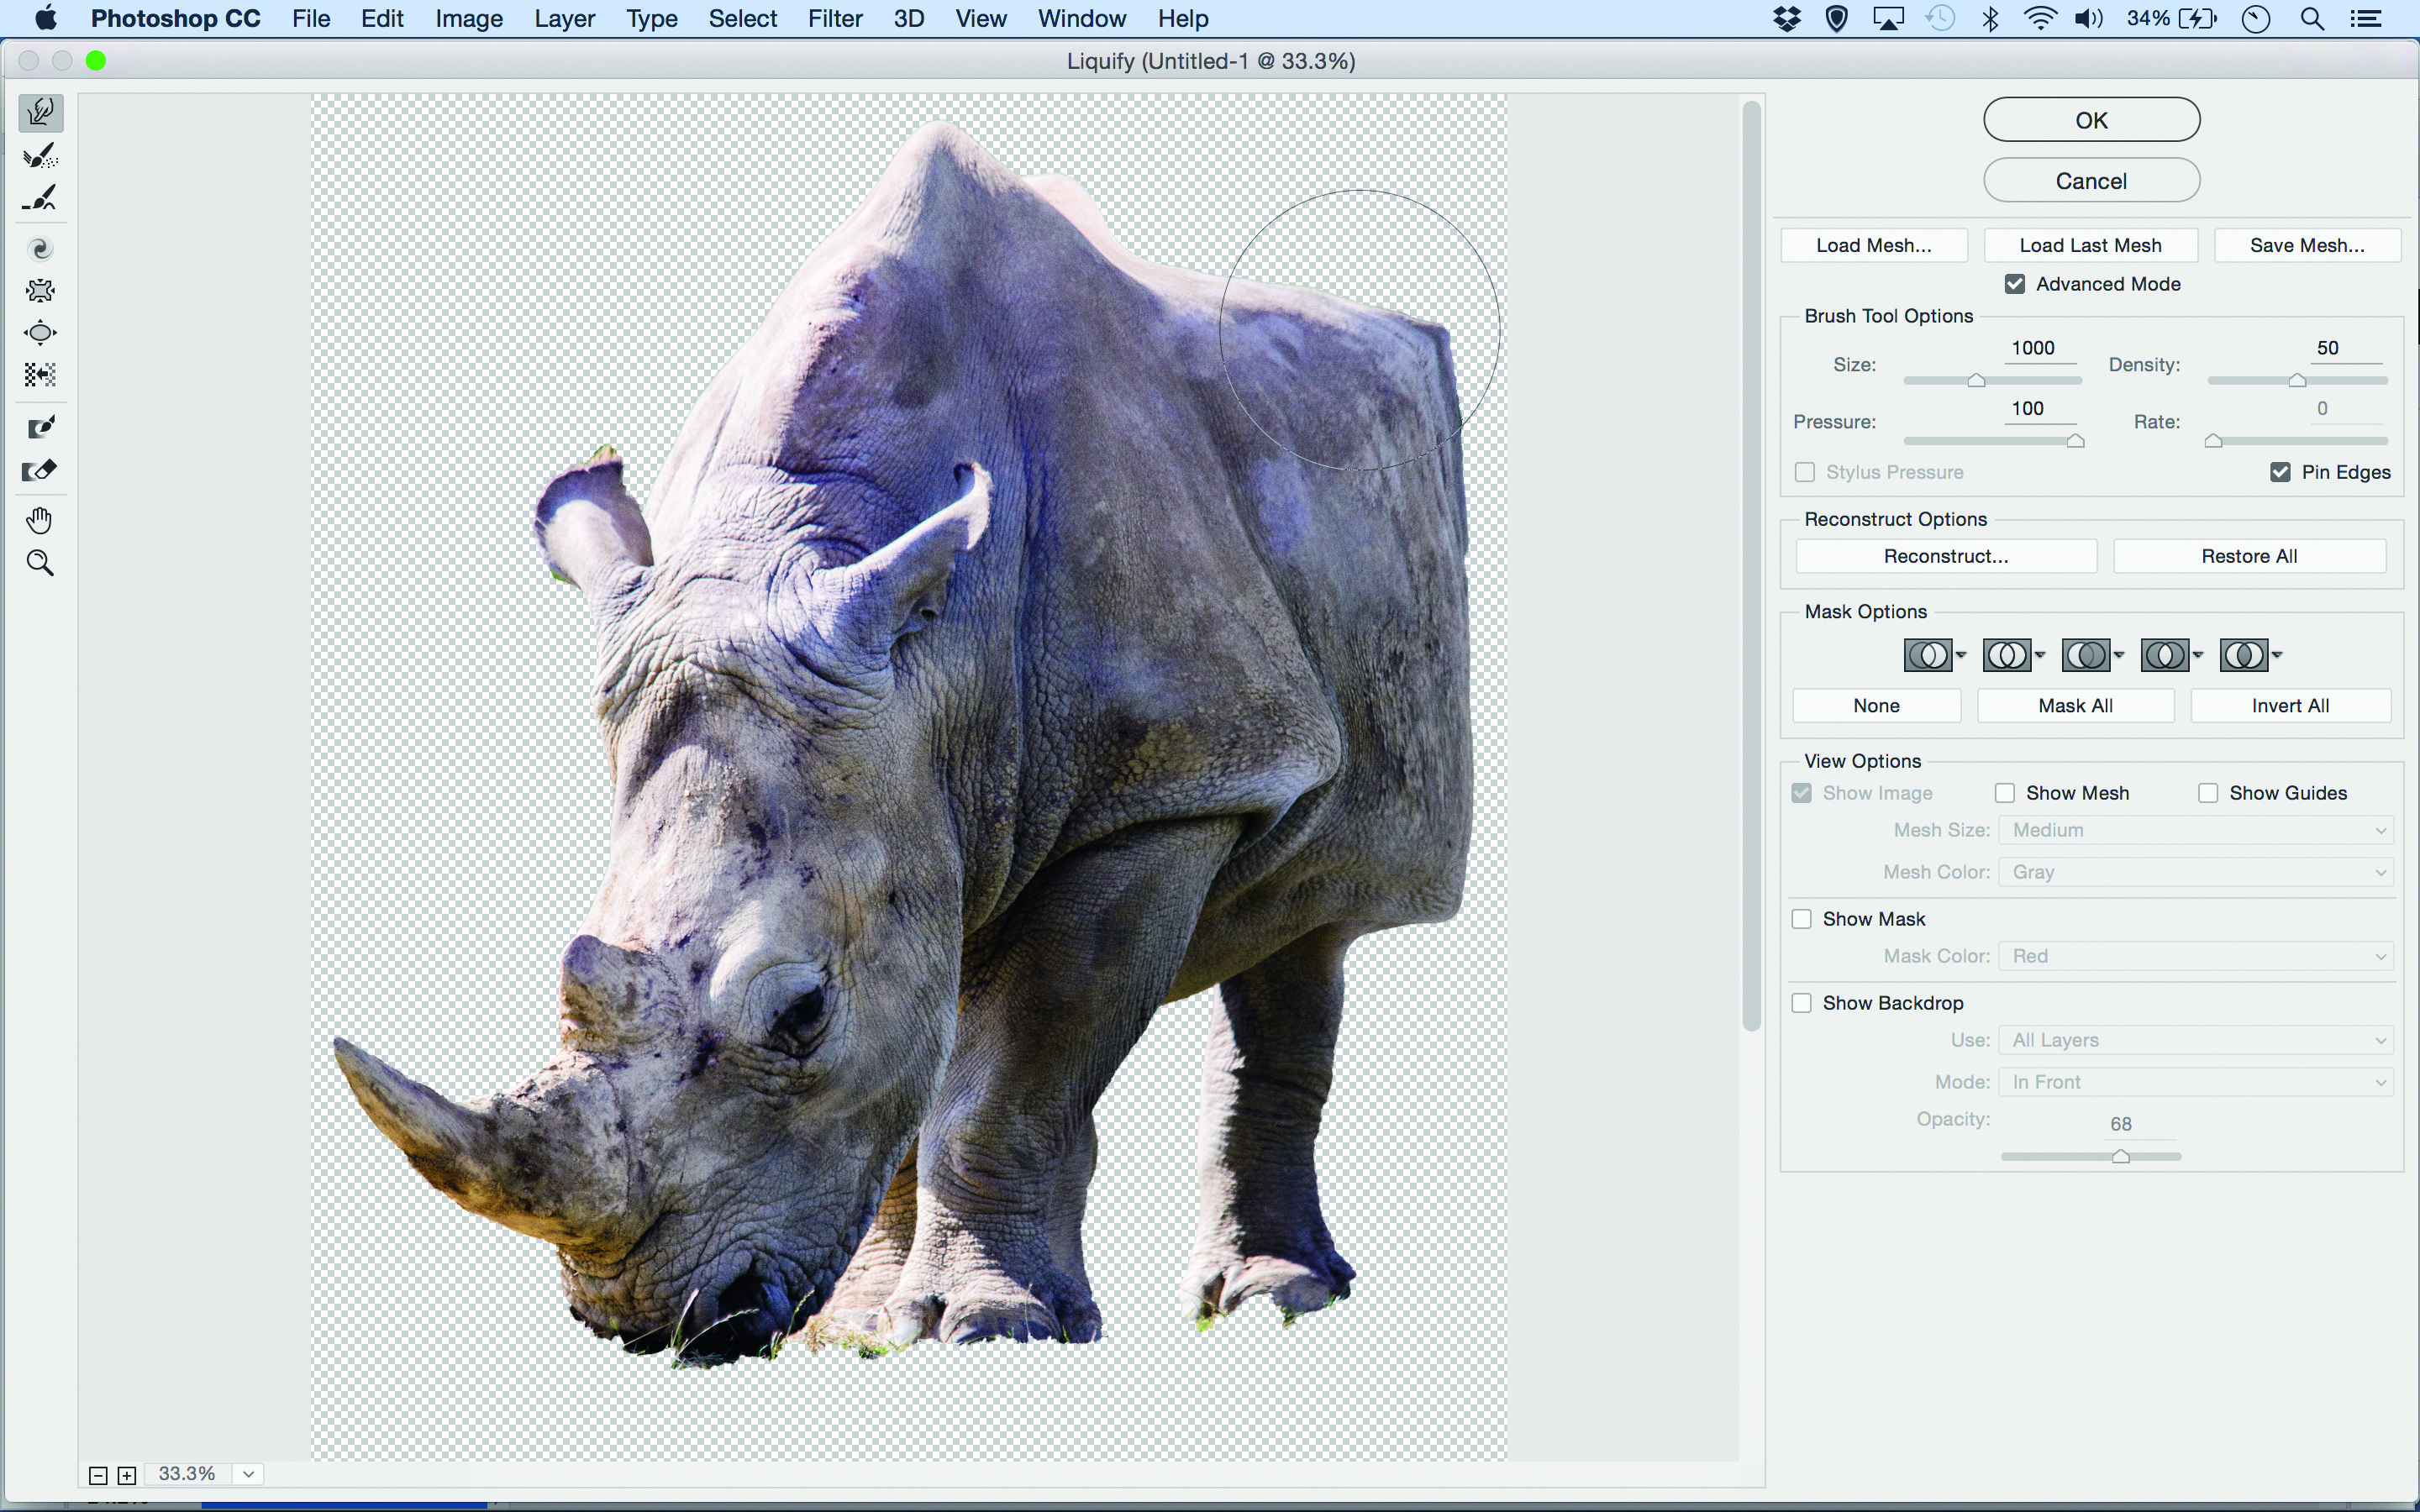
Right-click on the top layer and ‘Convert to Smart Object’. Go to Filter>Liquify. Use the Forward Warp tool and a large brush size to nudge the edges of the animal into whatever shape you like. The Forward Warp tool is most effective with lots of short pushes.
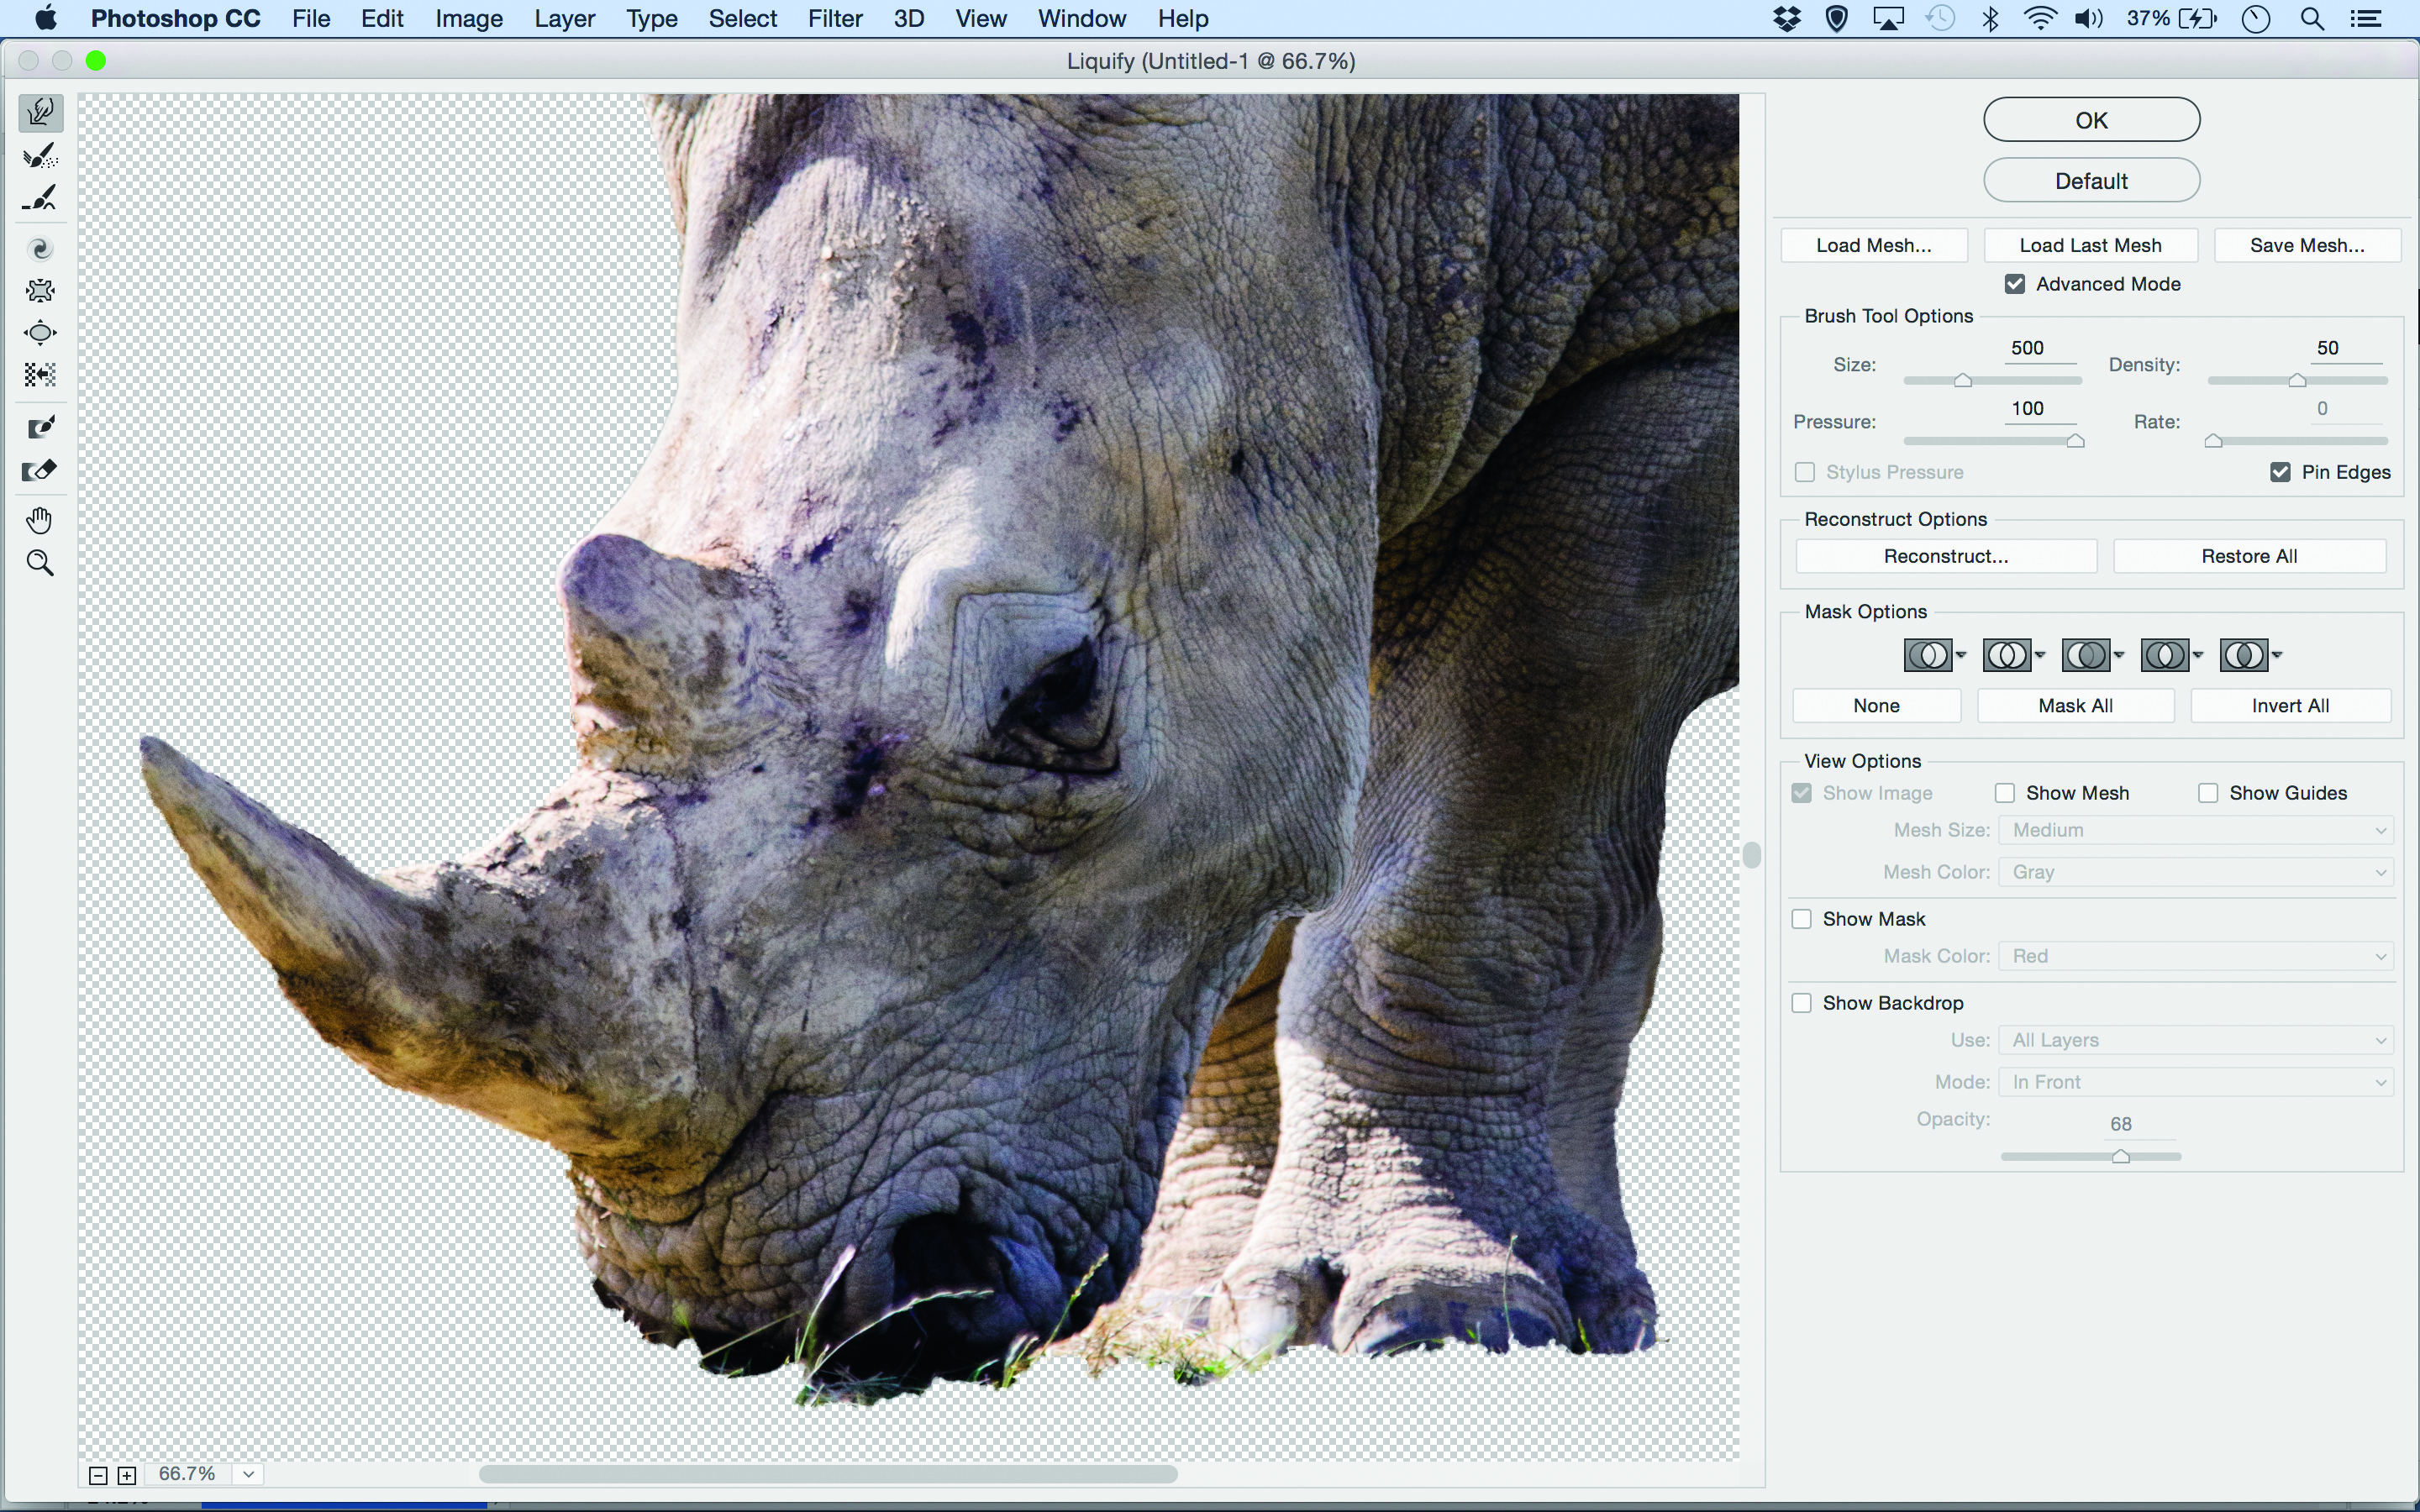
Liquify can be applied non-destructively to a Smart Object layer so that the filter remains endlessly editable
04 ANGLE THE DETAILS
Continue pushing pixels with the Liquify tools. You can take the effect as far as you like, perhaps by making the details, like the eye here, more angular. If any areas go wrong, rebuild them using the Reconstruct tool in the Liquify toolbar. Hit OK when you’re happy.
05 TIDY THE EDGES
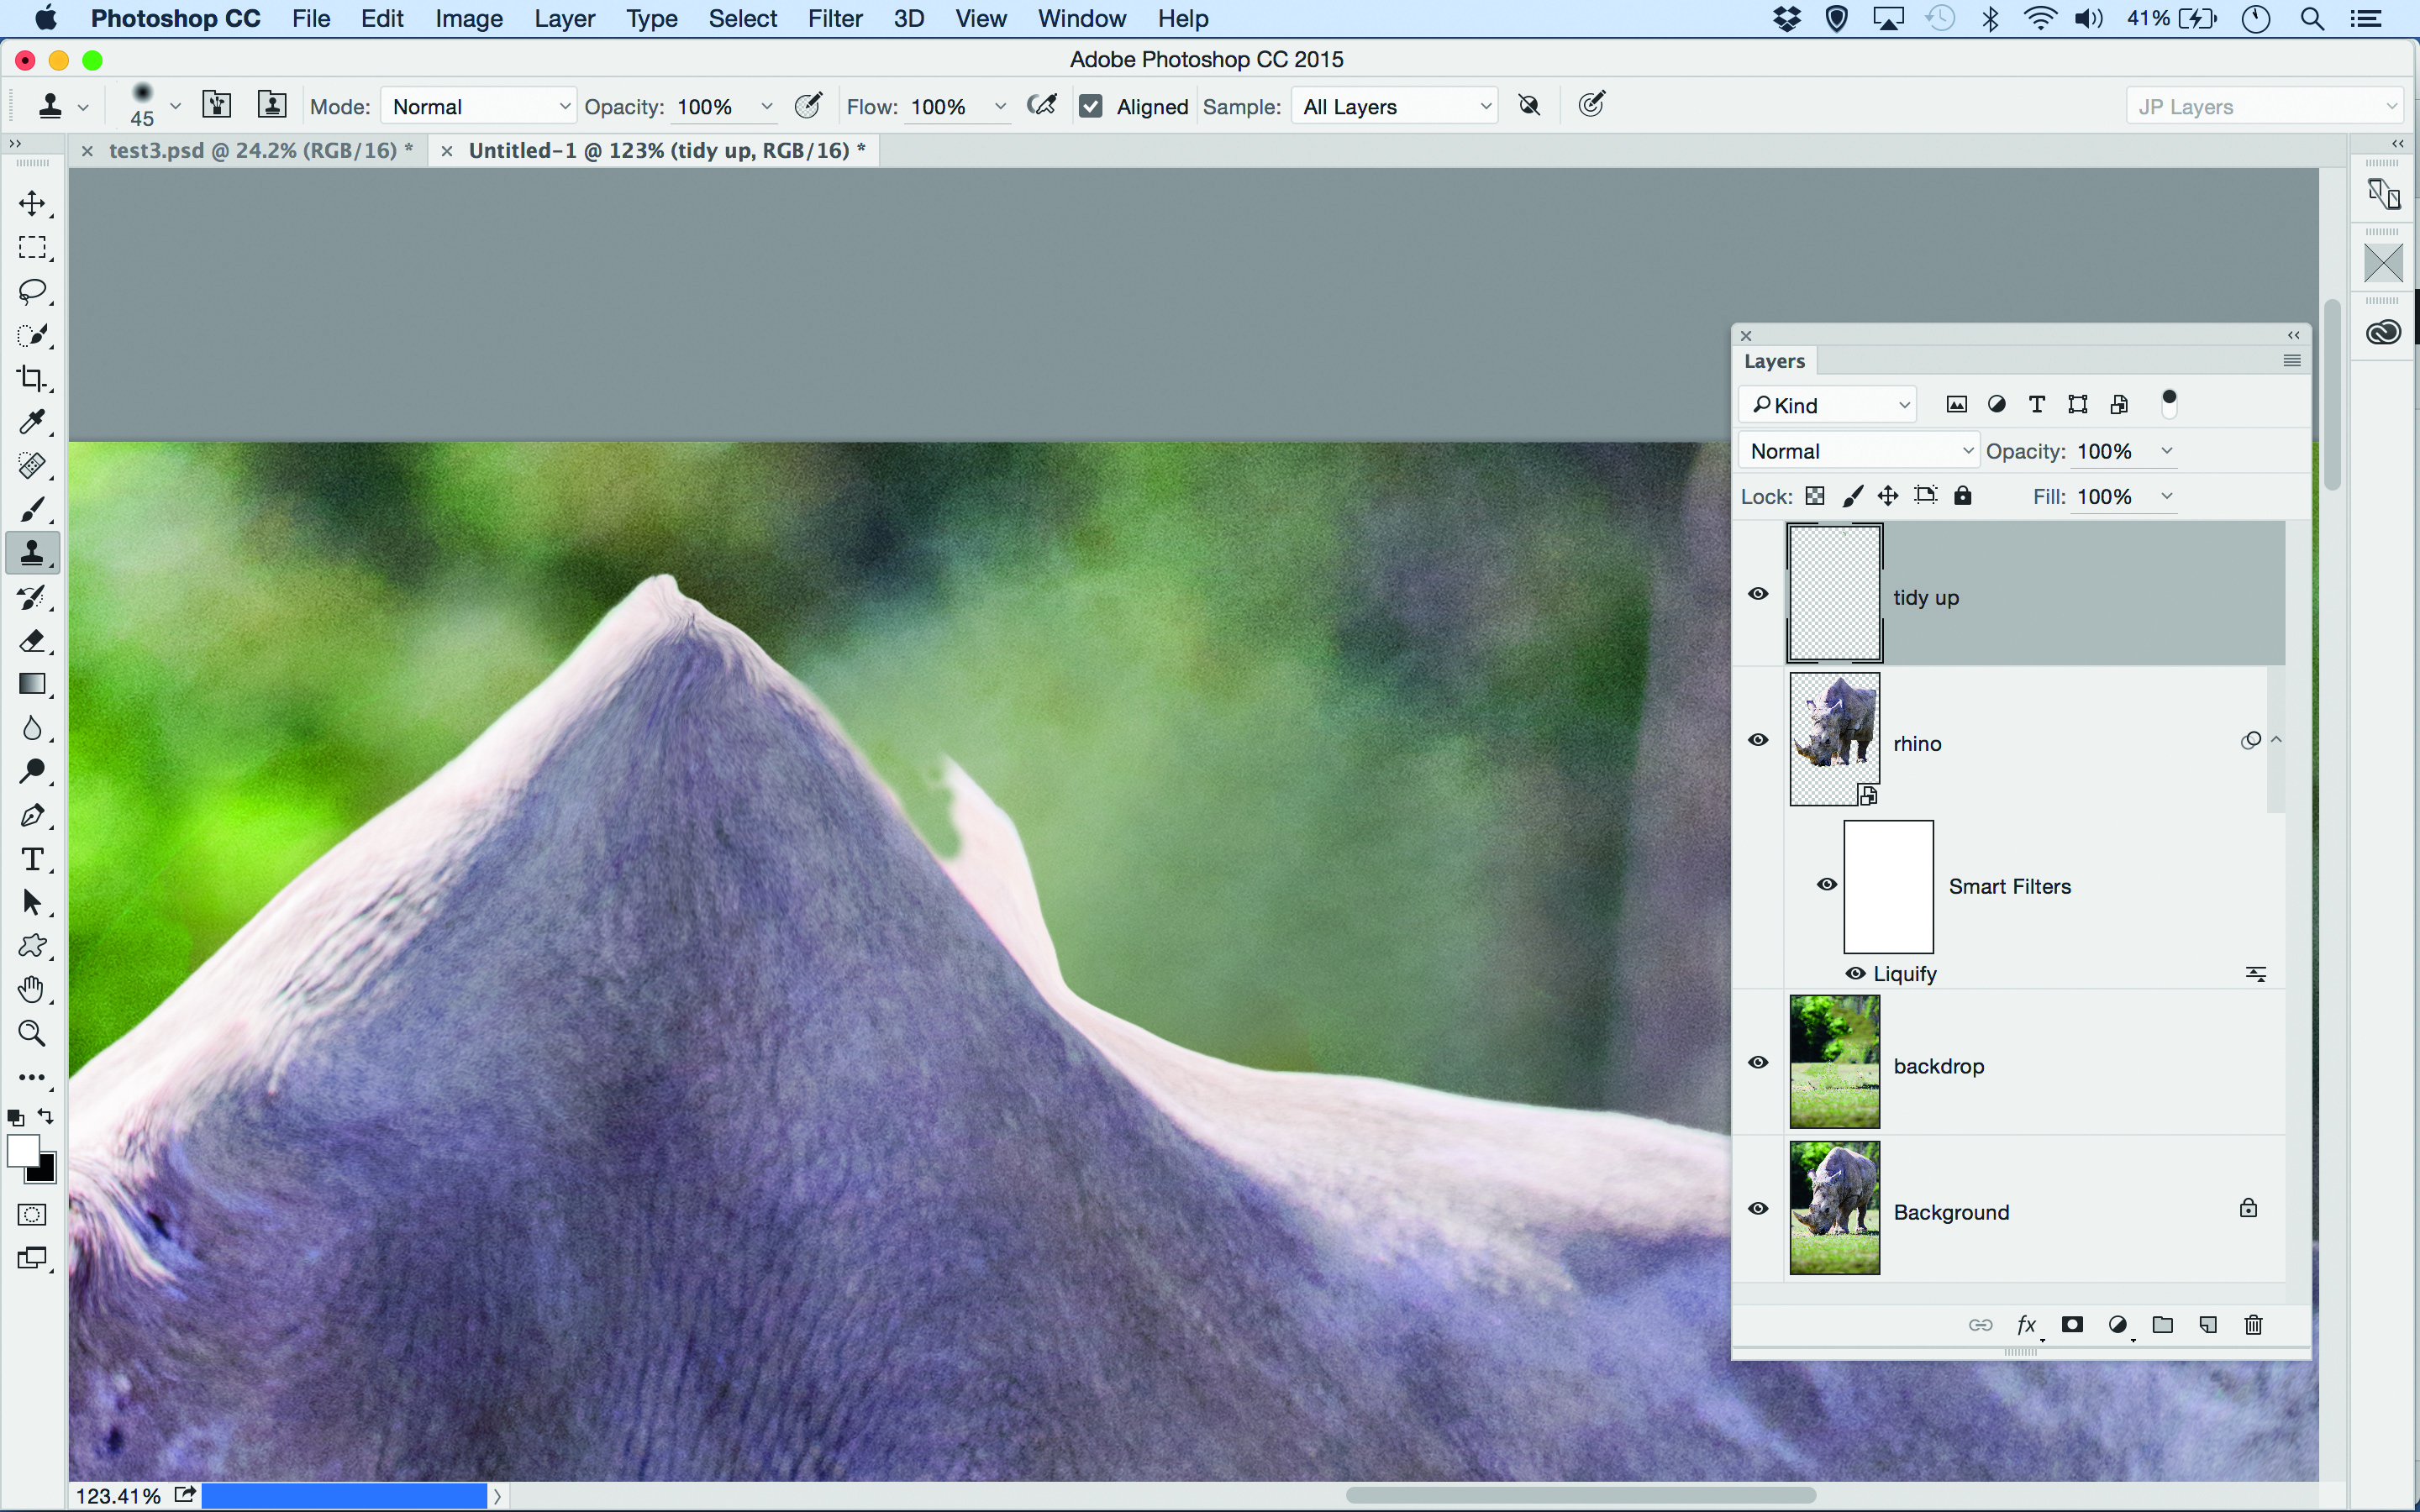
There will be messy patches around the edges of the animal. Click on the Create New Layer icon in the Layers panel and grab the Clone tool. Set Sample: All Layers in the tool options, then zoom in, hold Alt to sample the nearby background, and clone to tidy up.
06 FINISHING TOUCHES
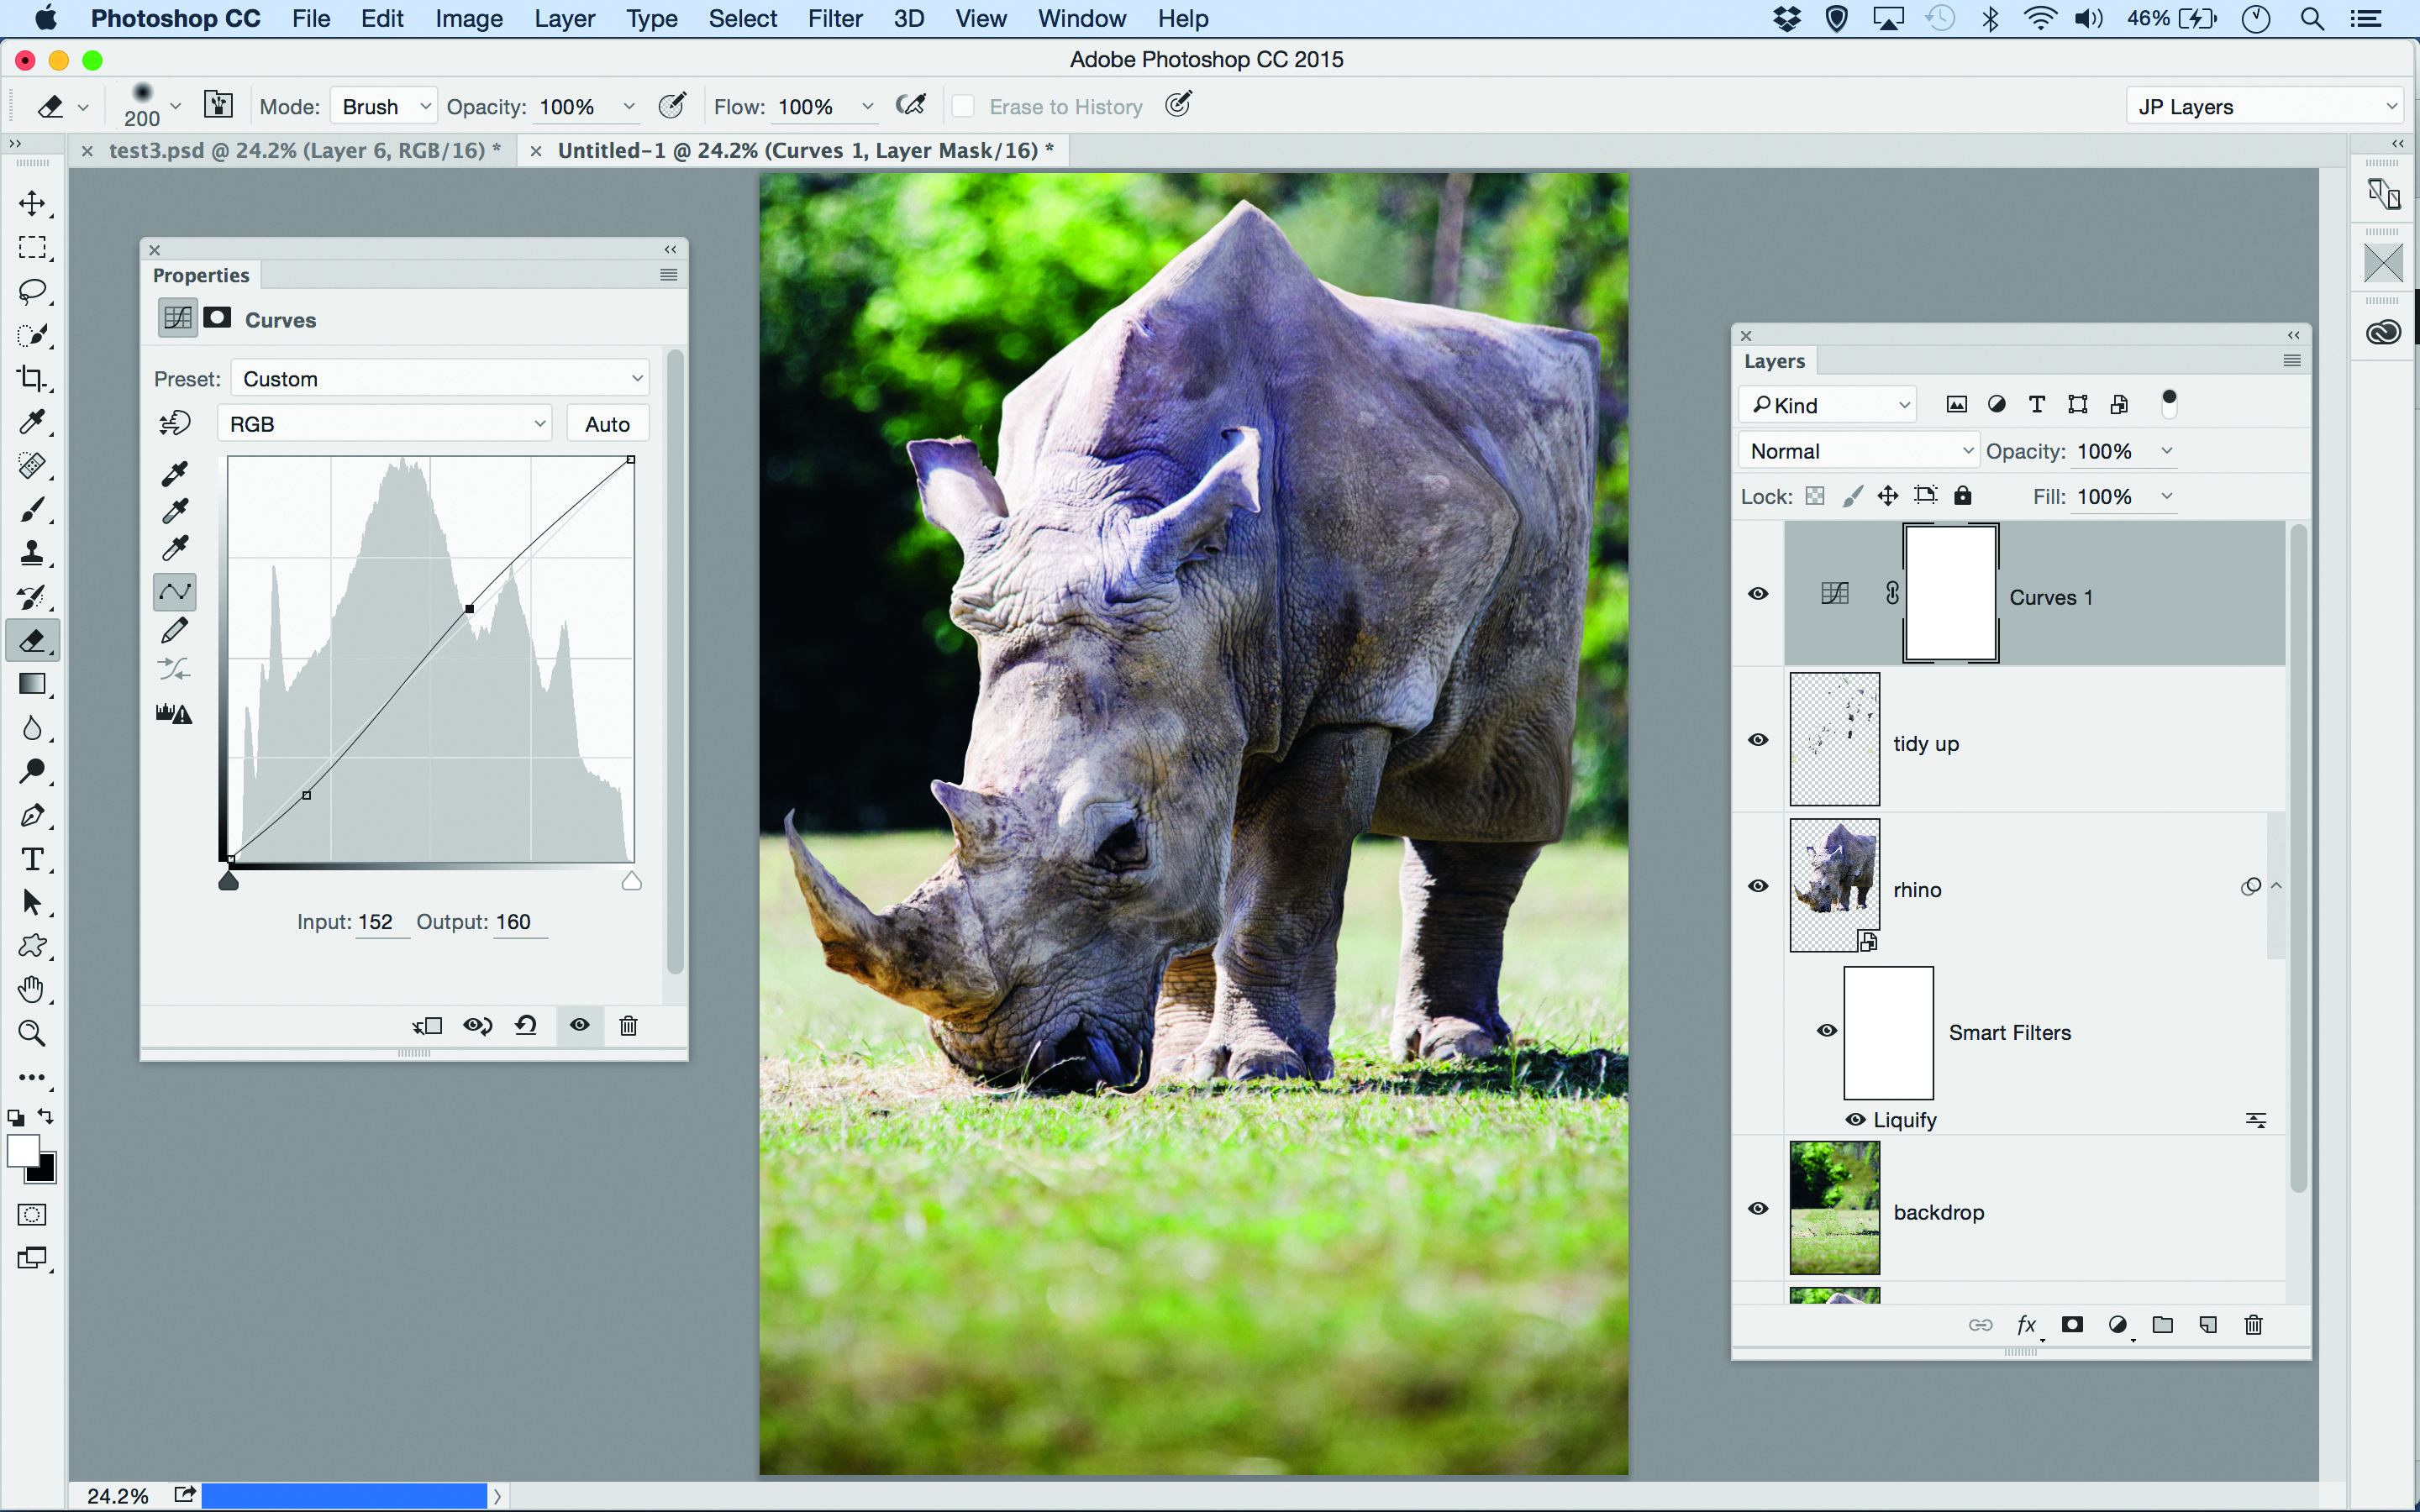
Pick the Spot Healing tool, set to Sample All Layers, and paint to remove any messy spots. Finally, with the top layer highlighted, click on the Create Adjustment Layer icon in the Layers panel, pick Curves, then plot an S-shaped curve to boost the colours slightly.
The lead technique writer on Digital Camera Magazine, PhotoPlus: The Canon Magazine and N-Photo: The Nikon Magazine, James is a fantastic general practice photographer with an enviable array of skills across every genre of photography.
Whether it's flash photography techniques like stroboscopic portraits, astrophotography projects like photographing the Northern Lights, or turning sound into art by making paint dance on a set of speakers, James' tutorials and projects are as creative as they are enjoyable.
He's also a wizard at the dark arts of Photoshop, Lightroom and Affinity Photo, and is capable of some genuine black magic in the digital darkroom, making him one of the leading authorities on photo editing software and techniques.

