
A photo reflector will often give you all the control you need to achieve perfectly lit portraits, still lifes, macro shots and any other kind of image where the subject isn’t too big and you can get up close to it.
Reflectors are perfect for those situations where you’ve got a single, strong light source, such as a window or solitary lamp, and need to balance it by adding light from the other side so that the shadows don’t appear too dense. All you have to do is hold the reflector on the other side of your subject so it ‘bounces’ light back into the darker areas of shadow.

How to use a reflector
01: Hold and shoot

If you’re shooting a head-and-shoulders portrait, you might be close enough to hold the reflector yourself. If the light is coming from the left, cross your hands over and rest your camera hand on your left wrist. However, make sure you don’t get so close that your subject’s features get distorted.
• Essential portrait photography tips
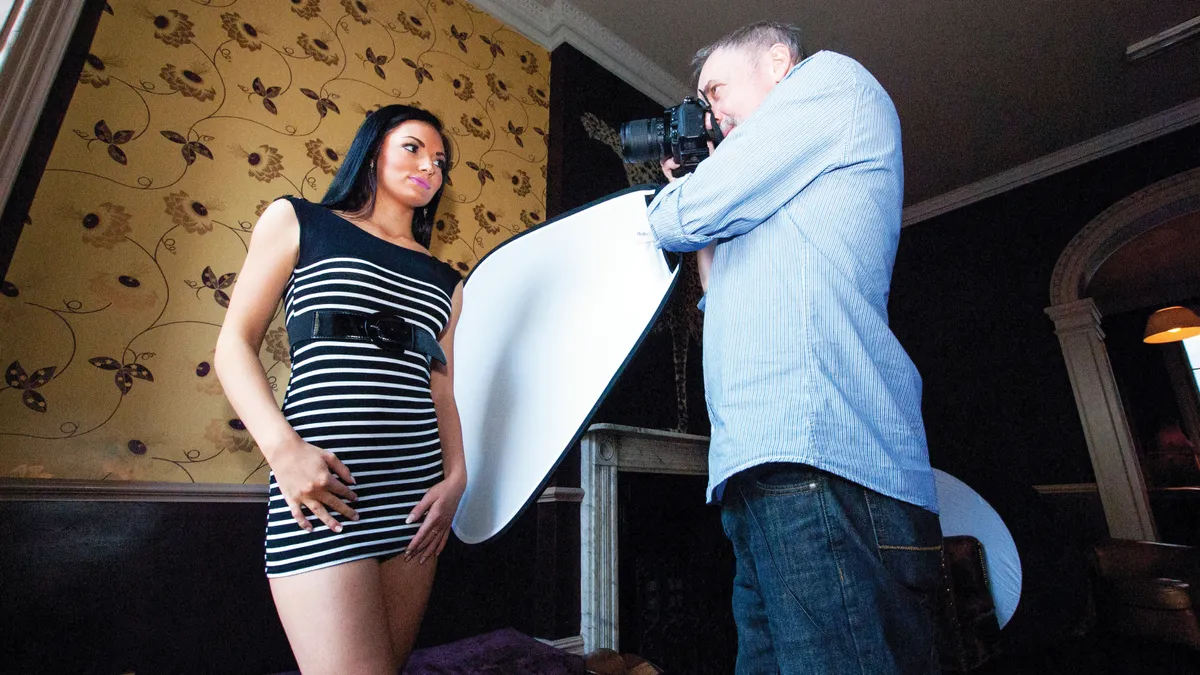
02: A helping hand

Getting someone else to hold the reflector makes a big difference. Not only does it leave you with both hands free to operate the camera, it also enables you to stand further back and use a longer focal length. This produces a much more flattering perspective for portrait shots.
03: Pick a color

A white reflector is usually the best option for portraiture (and for still life). However, many commercially-bought reflectors come with two or more different colored reflector surfaces . This gold reflector produces a really warm, rich tone, which will give paler-skinned subjects a healthy, tanned look. A silvered finish that gives a brighter, more sparkly light.
04: Watch the catch

‘Catchlights’ are reflections of your light source in your subject’s eyes, and they’re what give the eyes their life and sparkle. If you’re careful, you can control the size of the catchlights by moving the reflector in and out. You can see them here on the right side of our model’s eyes.
How to choose a reflector
Commercially available reflectors usually have a highly reflective, matt white surface that gives even, neutral illumination. But you can also get other types that provide a range of different effects. For example, gold reflectors provide attractive, warm skin tones in portrait shots, while metallic silver foil finishes produce a bright, sparkly light.
05: Small reflectors

This miniature reflector folds up small enough to fit into any gadget bag, but is still big enough to produce great fill-in light for head shots. Reflectors like these are particularly handy to use because they fold up to fit into a small carry pouch. But bigger reflectors allow you to place them further away from the subject, and light larger areas.
06: Reflectors with handles
This Lastolite TriGrip is considerably bigger, but it provides more fill-in light, and has a solid grip for easy one-handed use. A handle is particularly useful if you don't have an assistant to hold the reflector for you.
07: 5-in-1 reflectors
This Phottix 5-in-1 reflector has removable, and reversible sleeves, so you can provide a wide variety of reflector colors and effects in the one collapsible lighting accessory.
08: Full-length reflectors

Man-sized Full-length portraits need a full-length reflector. This dual-finish Lastolite is hard to handle but packs down into a manageable size. The bigger the reflector, the trickier it becomes to fold it back into its patch. With full-length collapsible reflectors there is a real knack to this!
09 Homemade reflectors

This home-made reflector is fine for head-and-shoulders shots, and you can angle the two panels separately for an all-round fill effect.’ Alternatively, you can make your own reflector – you just need two sheets of A3-size white foam board, available from most stationery stores. You then tape these together with masking tape.
For smaller subjects, you can use it folded, while for larger subjects you can open it out to A3 to provide more fill-in light. The ‘hinge’ in the middle means you can stand the reflector up, which is ideal for table-top and still-life photography.
You can also use a sheet, some white paper or any other reflective surface in place of a proper reflector. You can even use a mirror, which will provide a mirror image – literally – of your main light source.
Read more
Portrait photography tips: take perfect people pictures
The best reflectors for photography you can buy

