Watch video: Home photography ideas – Miami Vice-style portraits
Photography projects at home
• Home photography ideas
Useful home photography kit
• Best tripods
• Best lighting kits
• Best reflectors
• Best macro lenses
Light painting is a great way to get into long-exposure photography and opens up a world where we can control light and shape it to suit our needs. Most of the time we use a powerful torch in low light or at night to visually paint a scene, with results often looking fantastical.
However, in this project we’re going to place gelled torches in hollow plastic rods covered in translucent paper to create a light wand that features heavily in the creation of the final image.
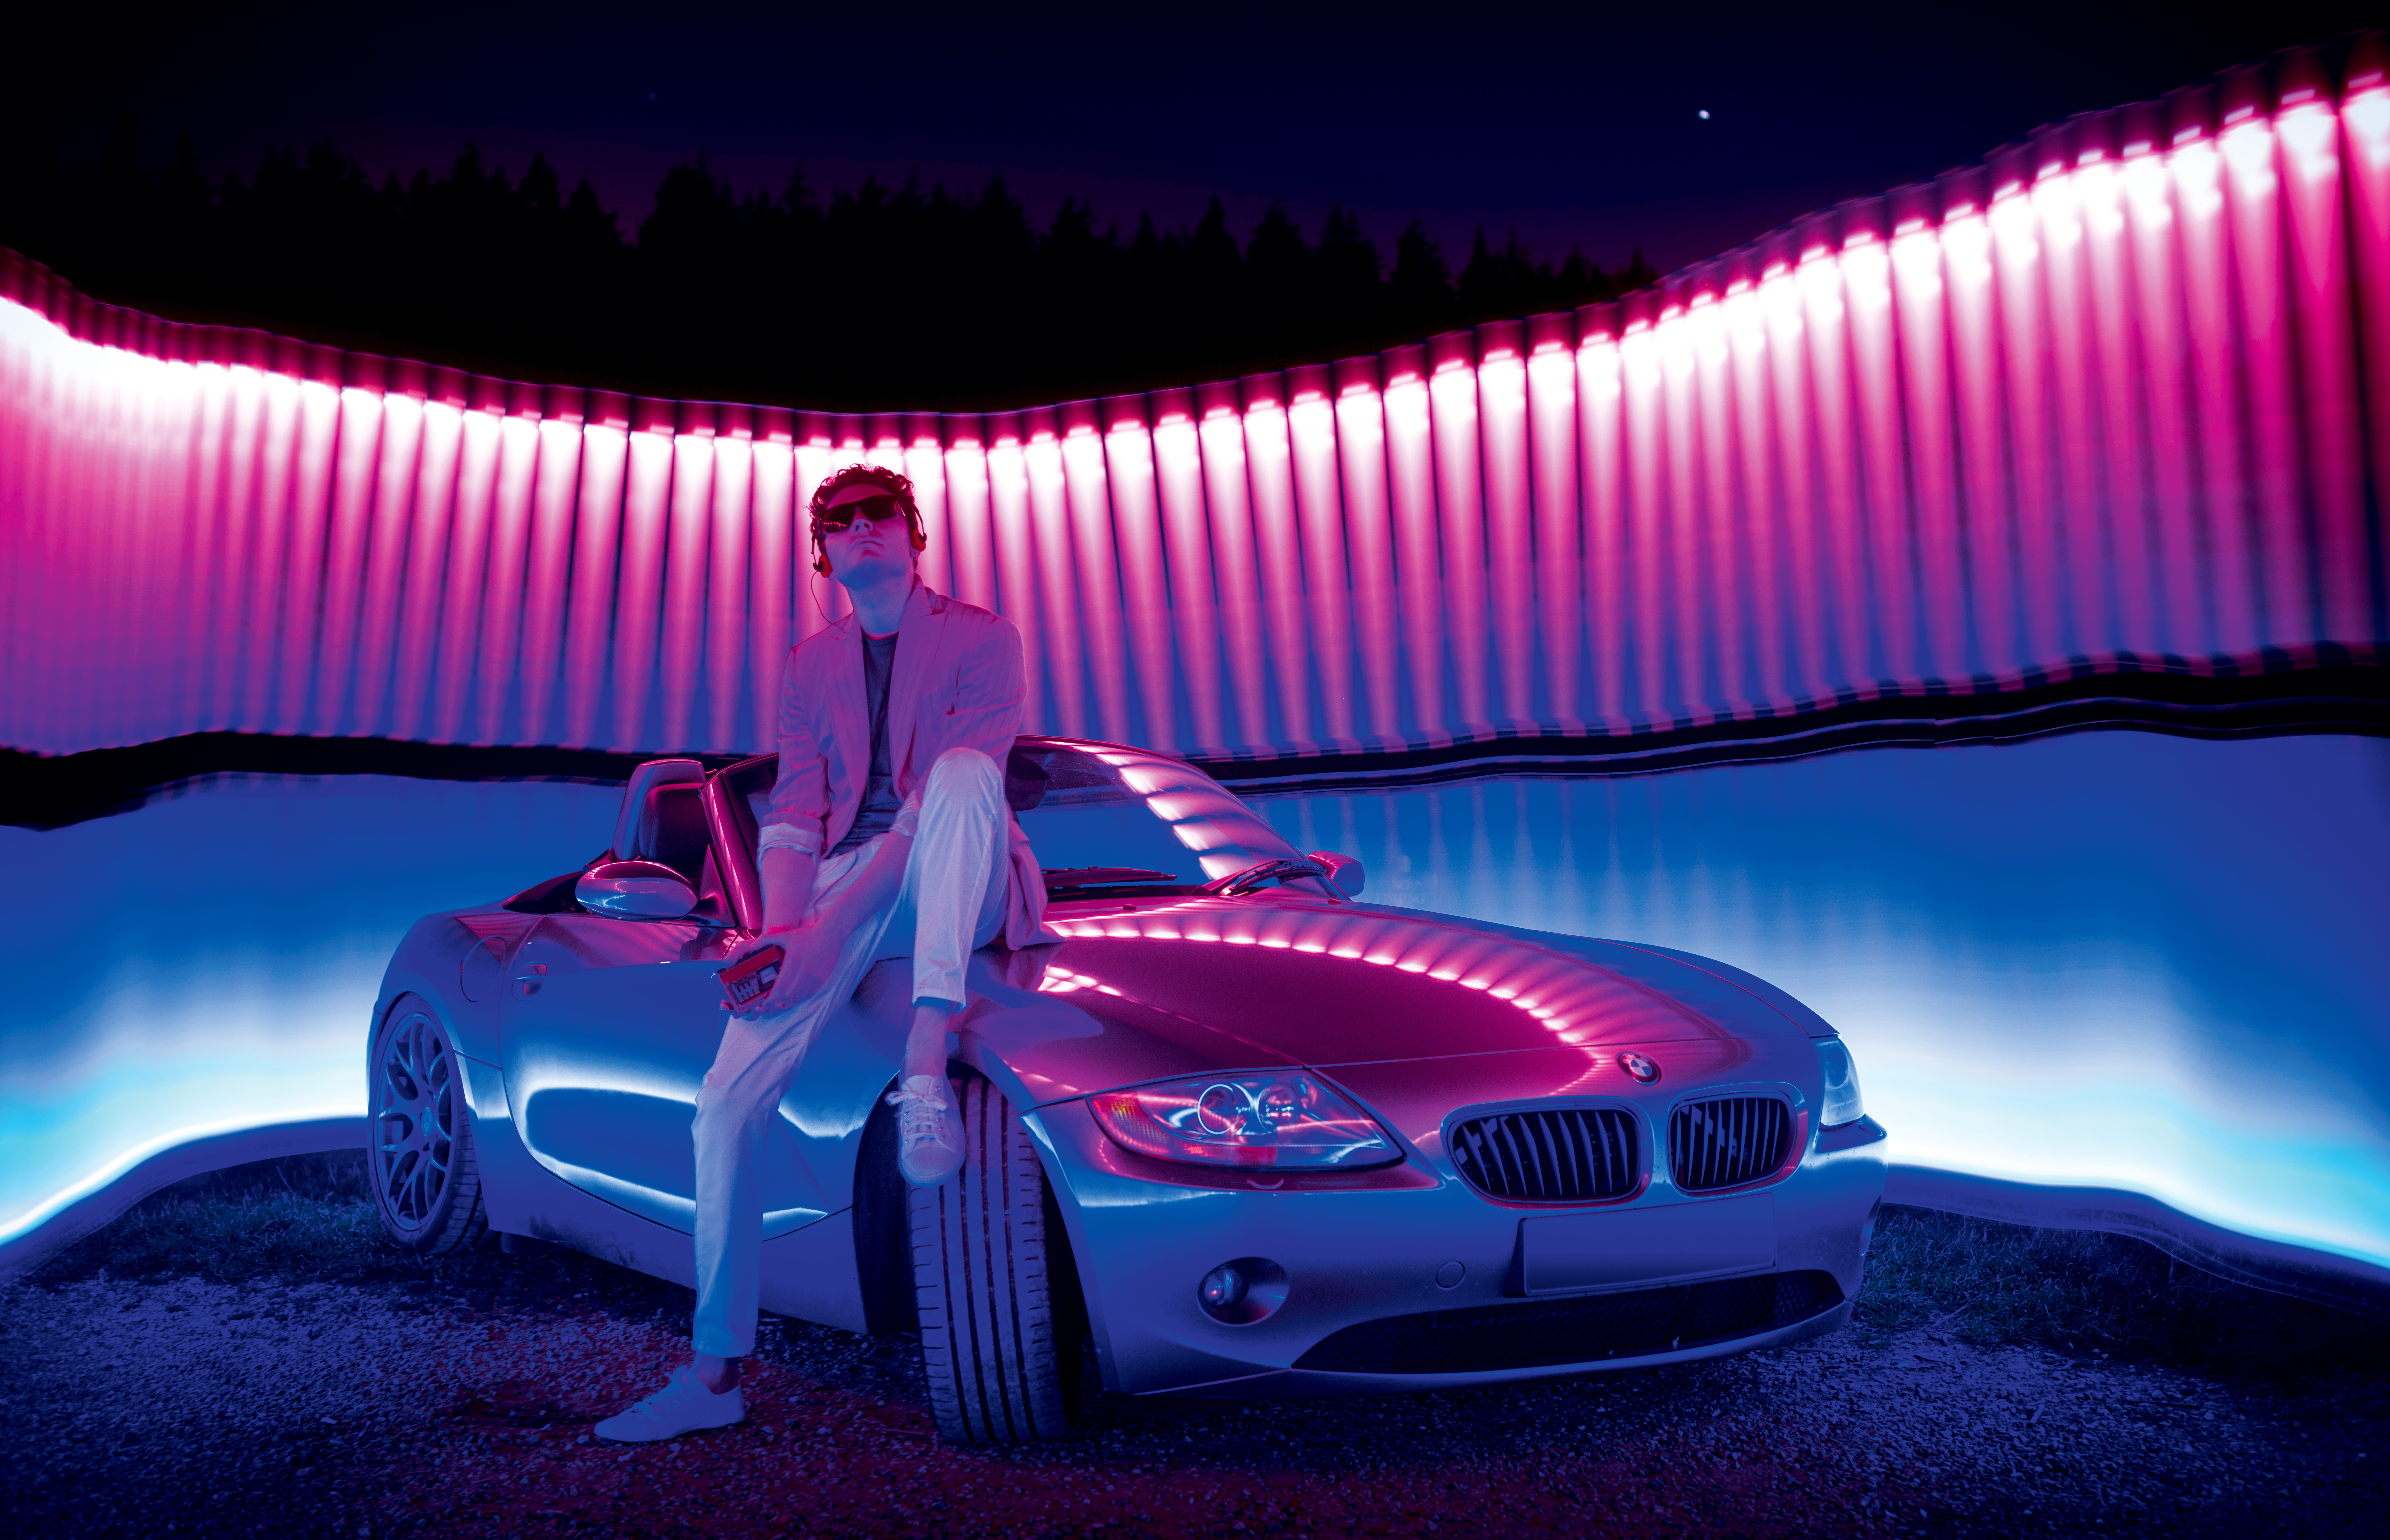
The torch we’re using also has a stroboscopic effect built-in, so we’re using this to our advantage to mimic a style reminiscent of 1980s film posters. Think of films like Tron and The Terminator, where the sleek neon colors are simultaneously retro and contemporary.
• Get more photoshoot ideas
And with current TV shows like Stranger Things and modern music like synthwave harking back to this style, this period hasn’t been as popular since… well, the since the Eighties.
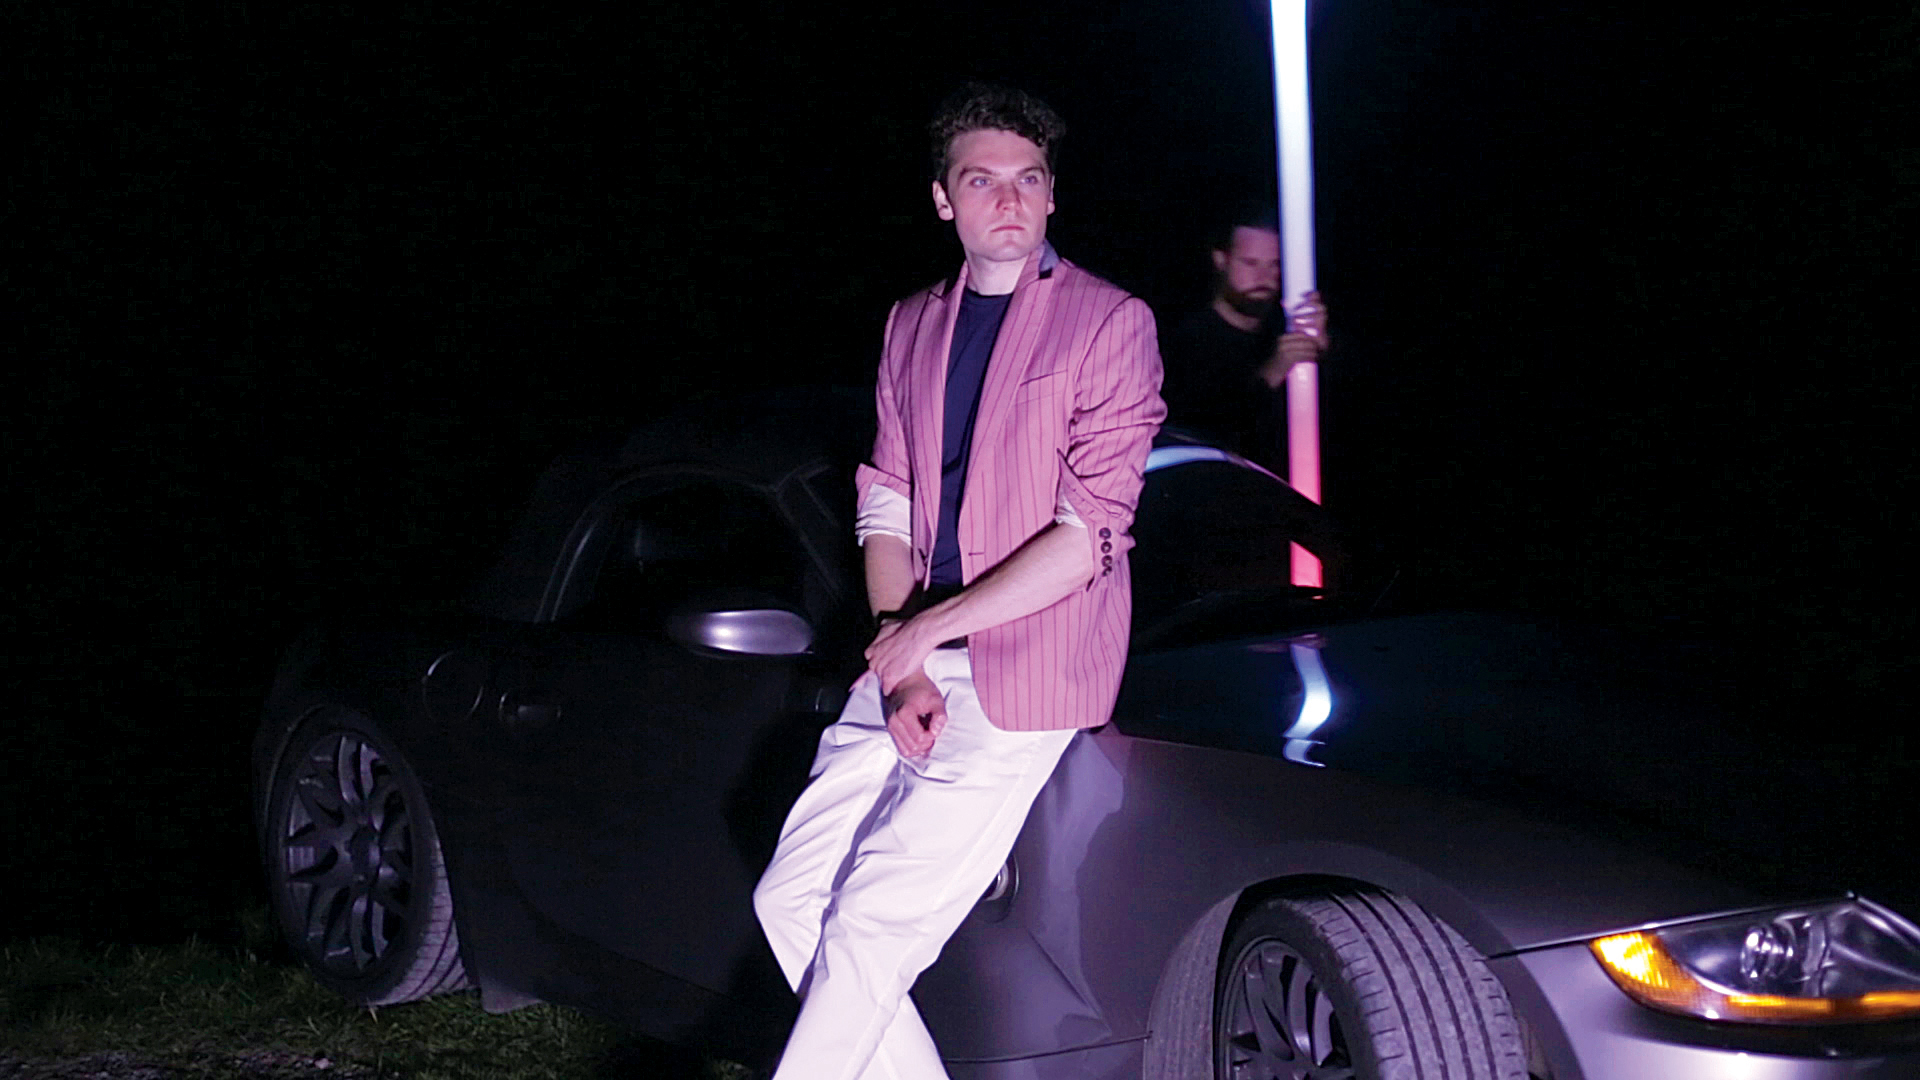
So, with a soft-top car and our model kitted out like he’s a character from Miami Vice, we’re going to use the light wand to create these ace effects in-camera – and then polish off the colors in Photoshop later on.
The best camera deals, reviews, product advice, and unmissable photography news, direct to your inbox!
To get this looking good will take a lot of practice – and once you do have the technique nailed, it's so much fun that you'll want to keep on shooting! So let’s see how it's done…
• Best online photography courses
Feel it, calling in the air…
01 Gather your kit
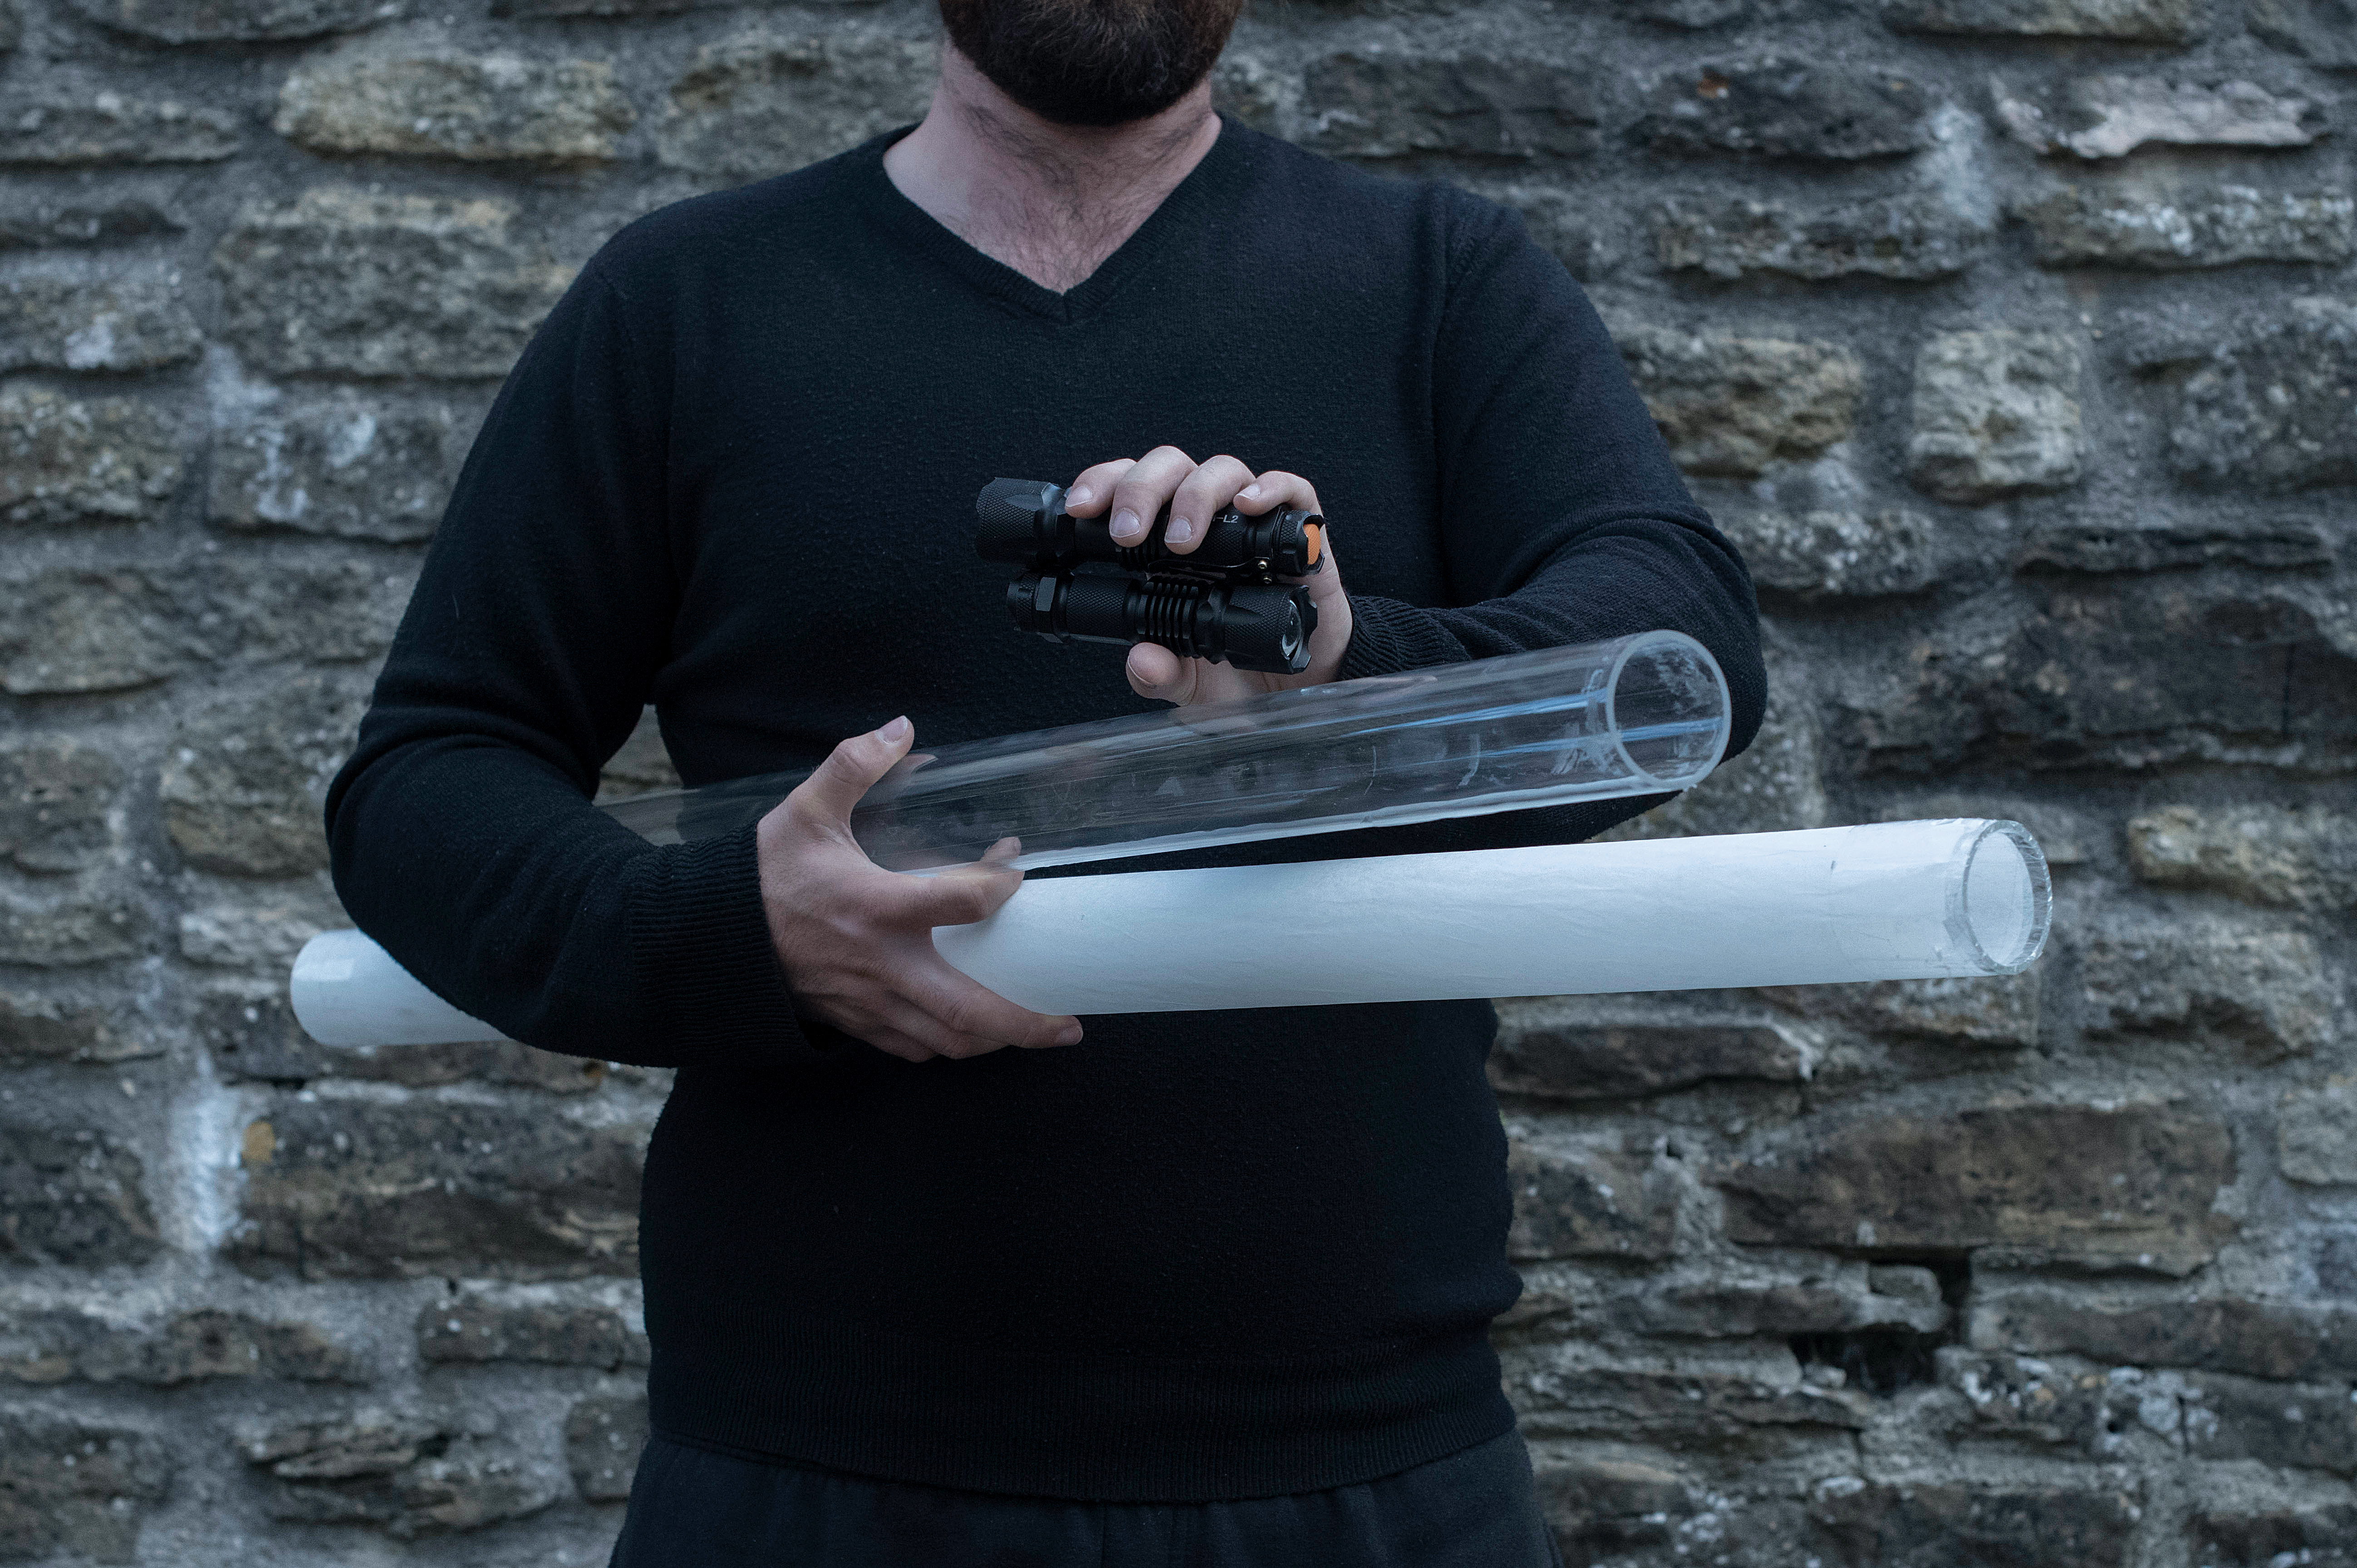
We’re using two tactical military flashlights, with adjustable power and strobe settings, and we’ve taped pink and blue plastic over the ends. We also bought a couple of hollow acrylic tubes from eBay and tucked the torches inside. Alternatively, while they don't strobe and they're not as powerful, you could also try an Icelight or a Yongnuo Light Wand (which even changes color!).
02 Wrap up the light
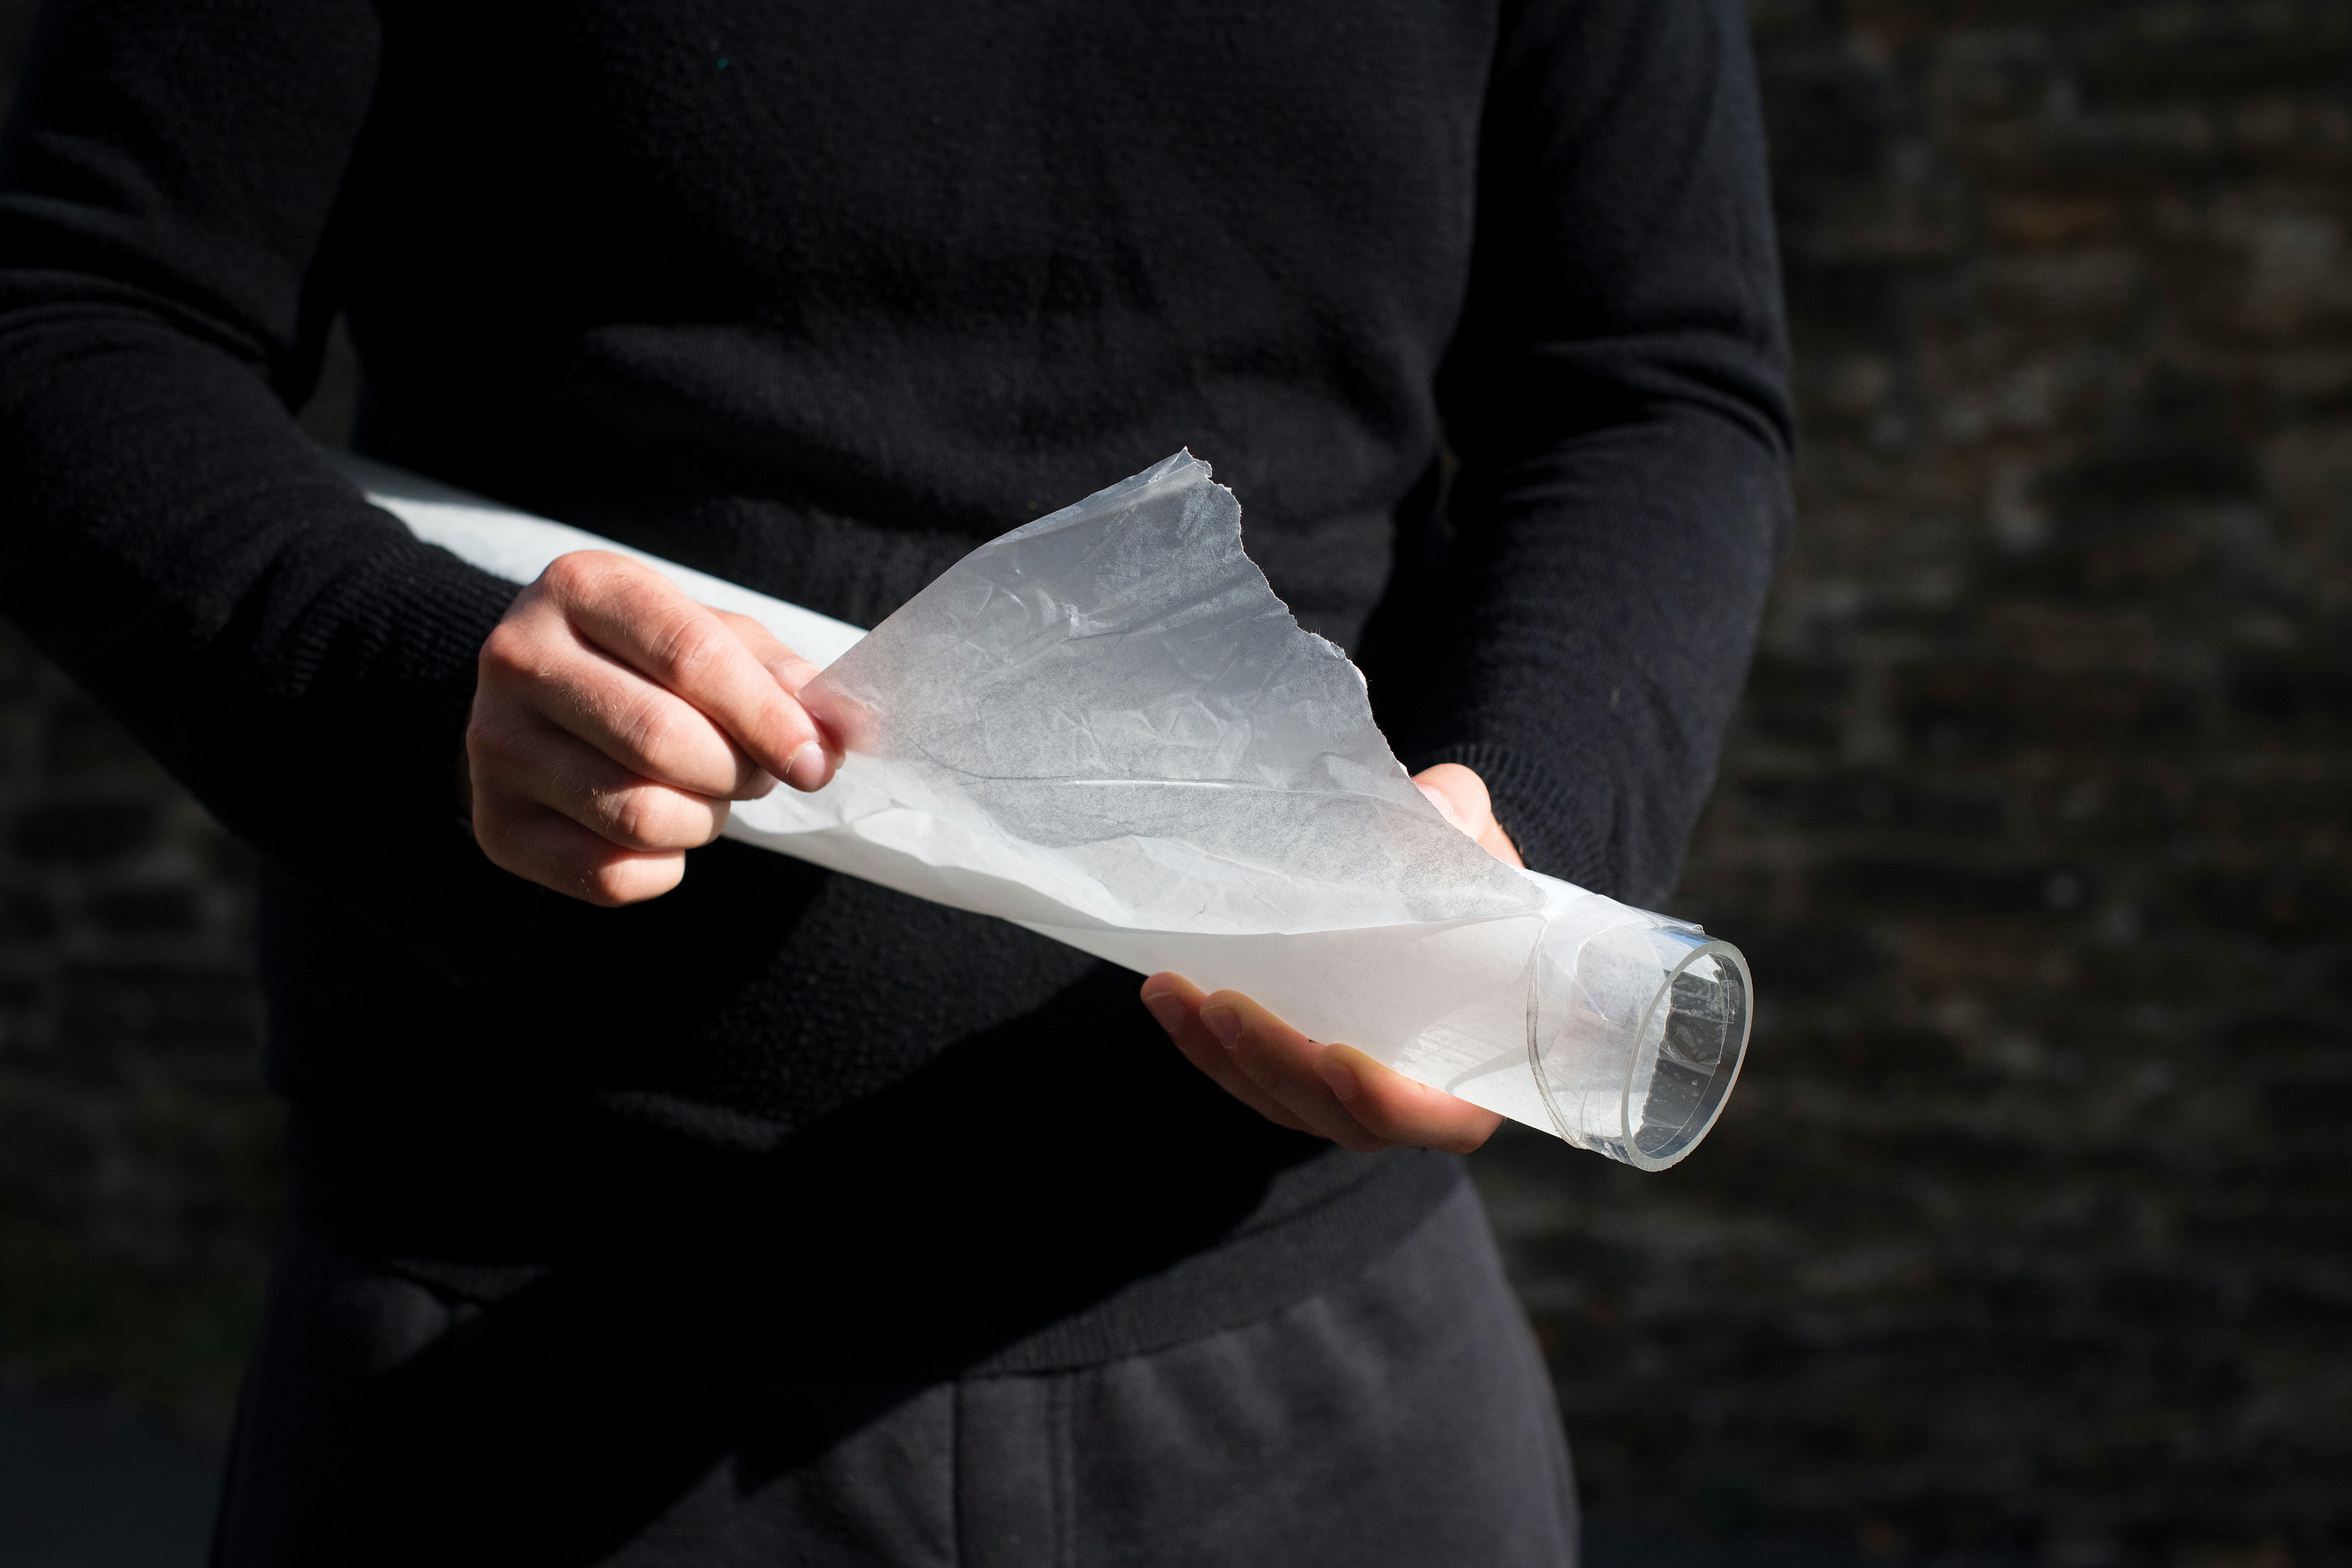
We knew that the rod wouldn’t light up much if it was clear, so we wrapped some greaseproof paper around it to help diffuse the illumination better, creating more definition. If you have problems with flare coming from the top of the rod, just cover it with some gaffer tape.
03 Use Bulb mode
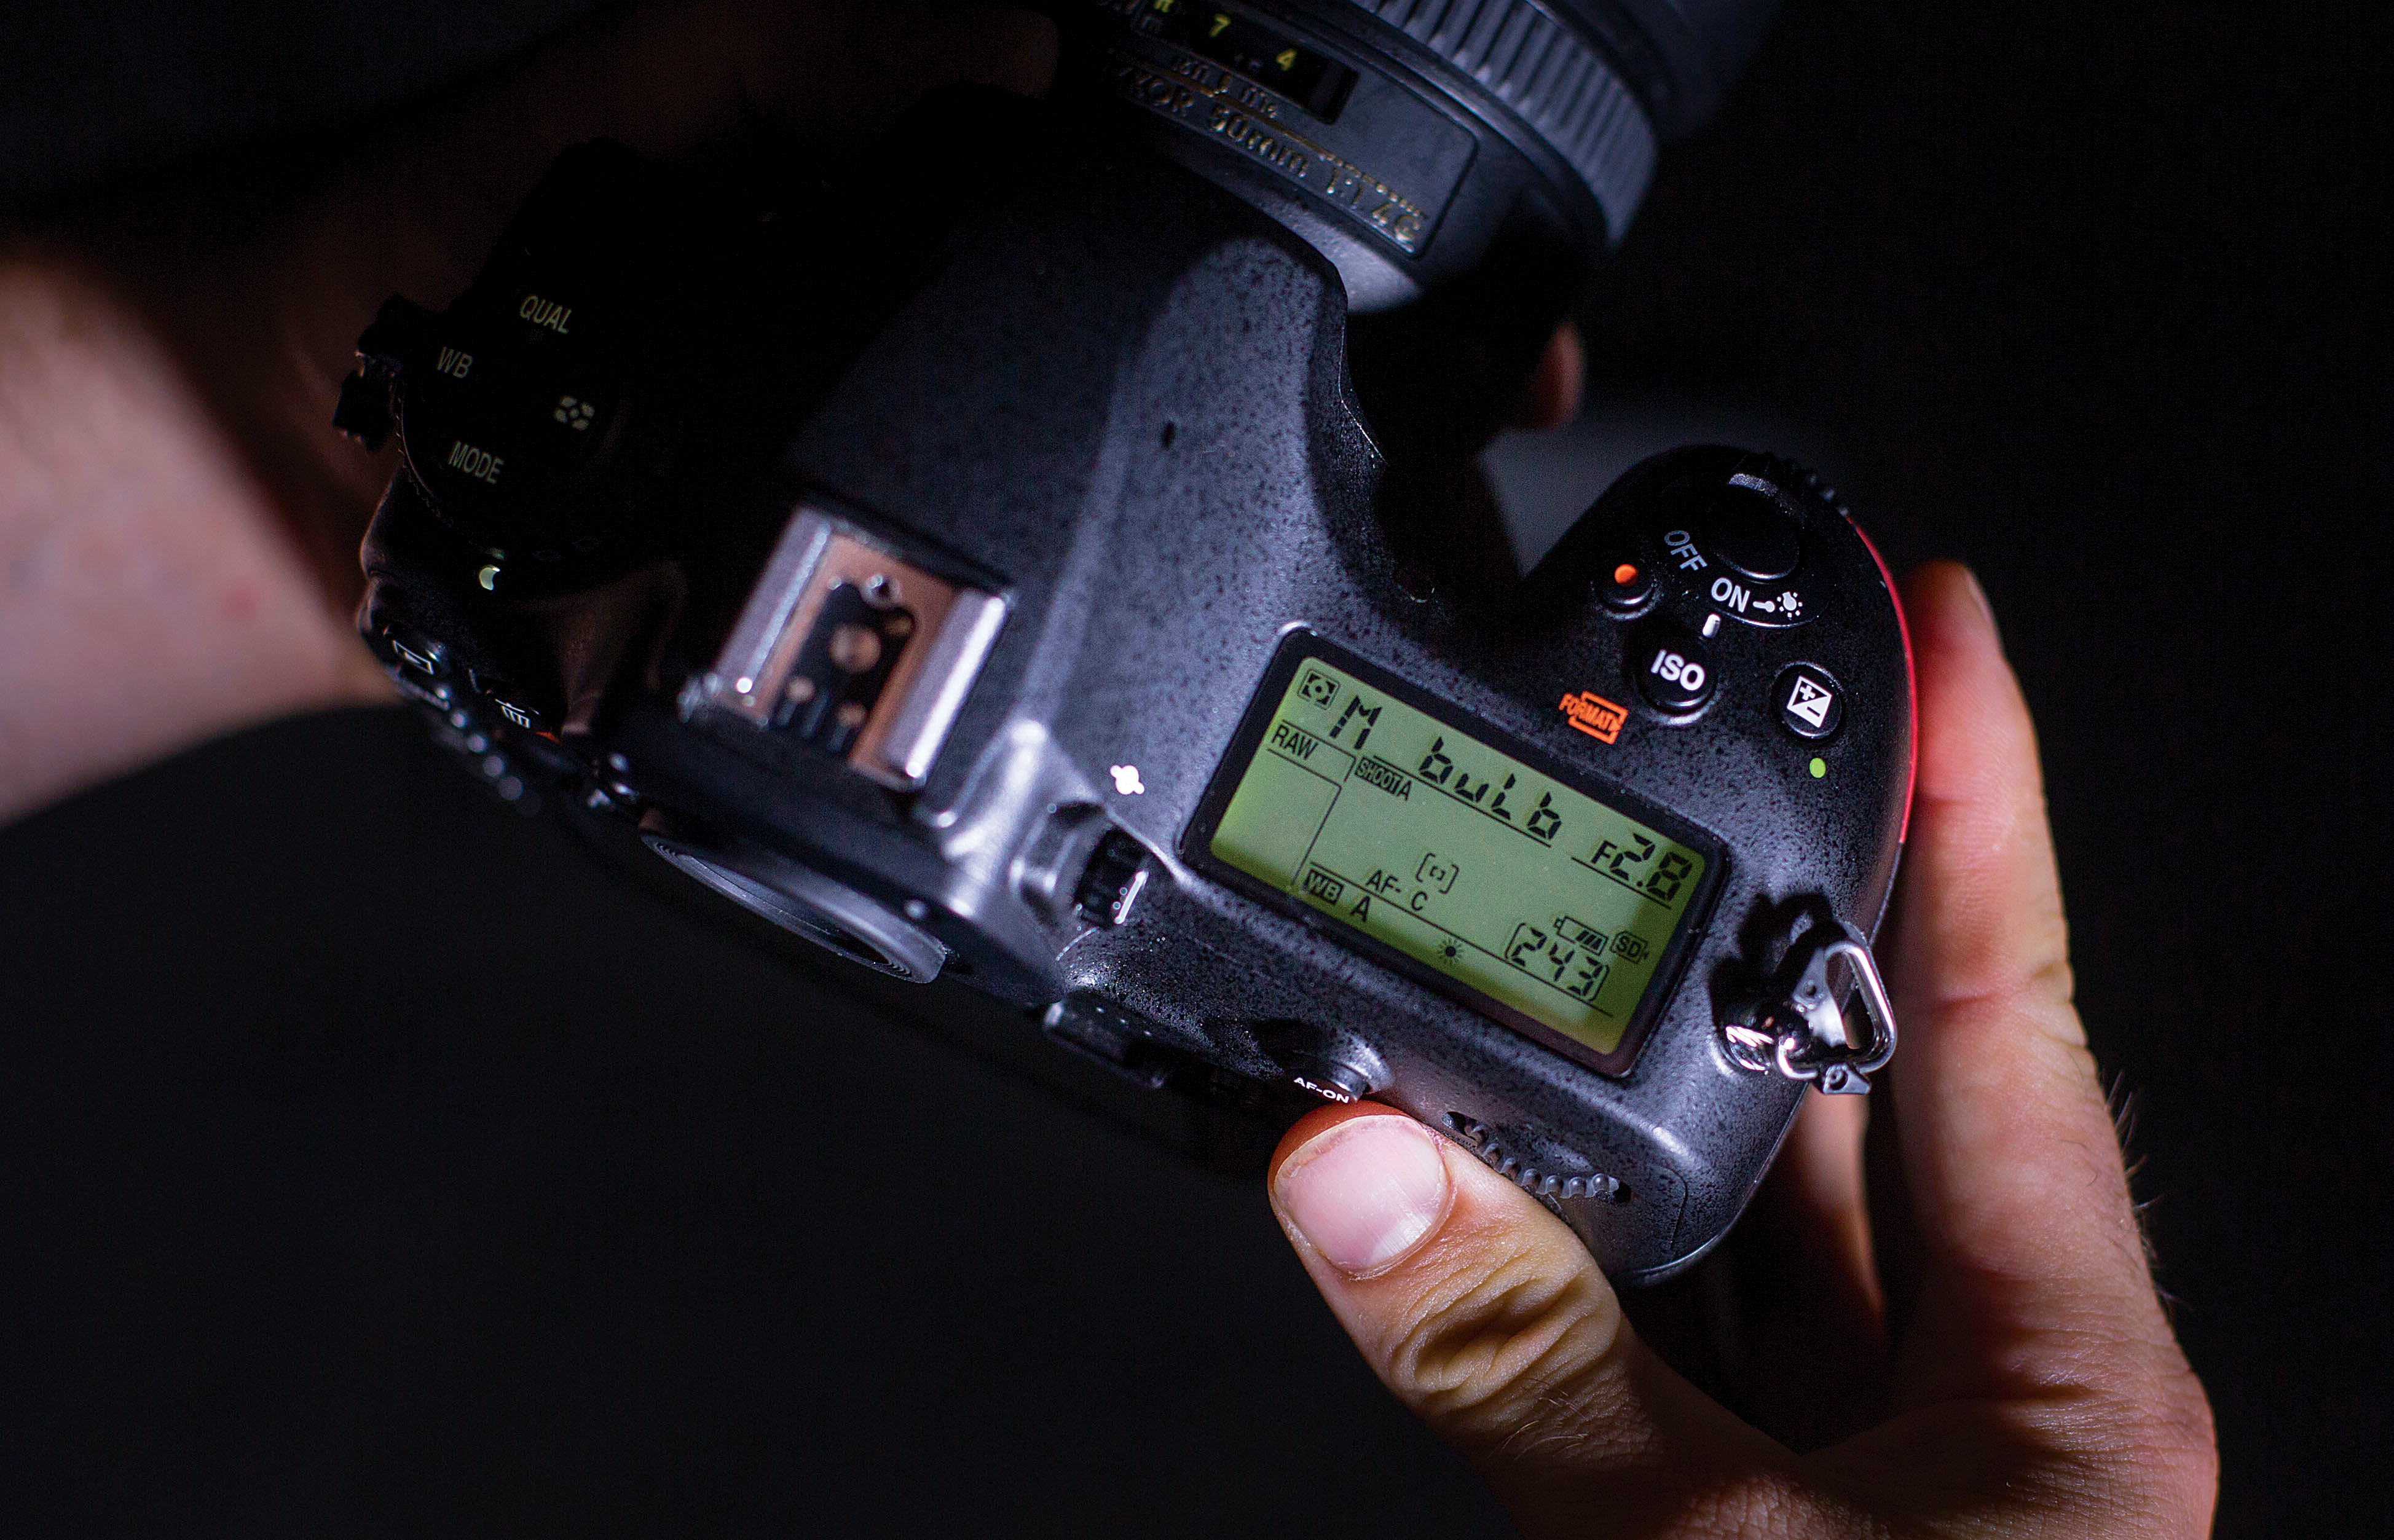
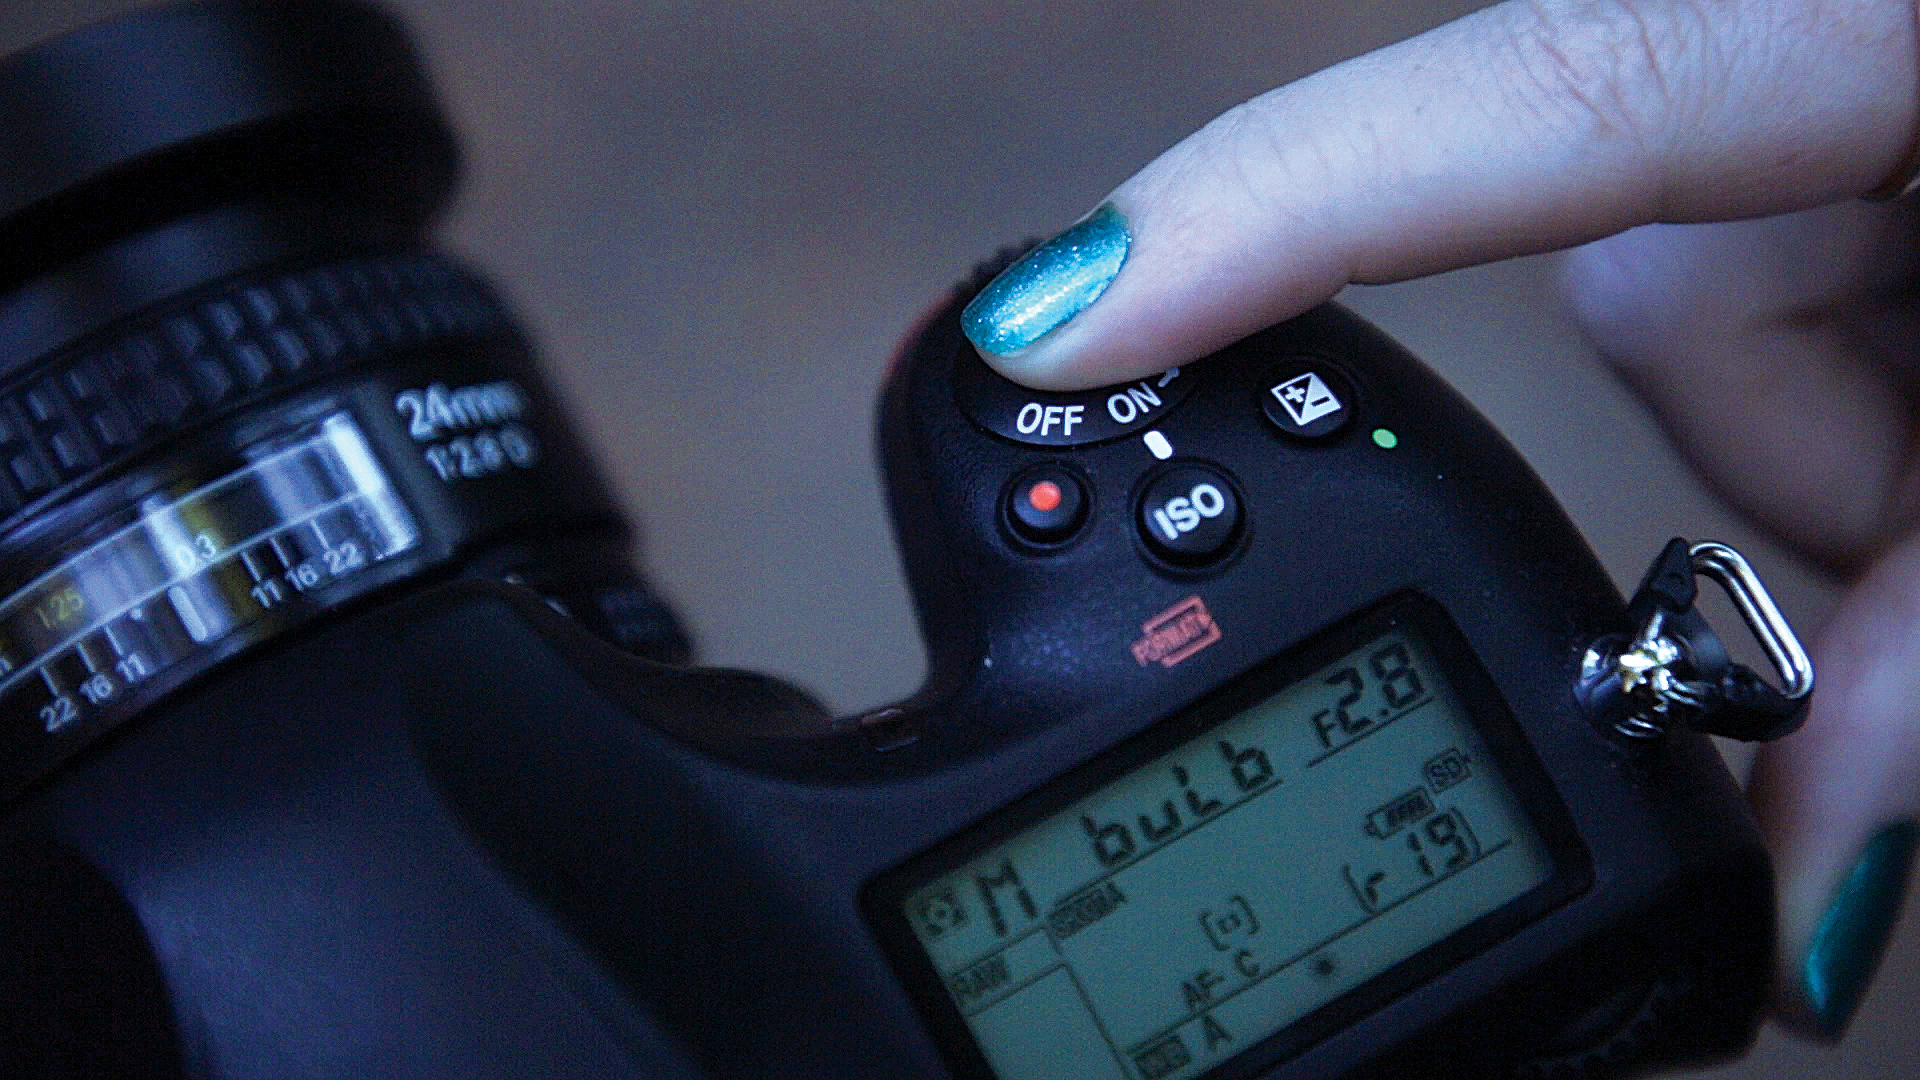
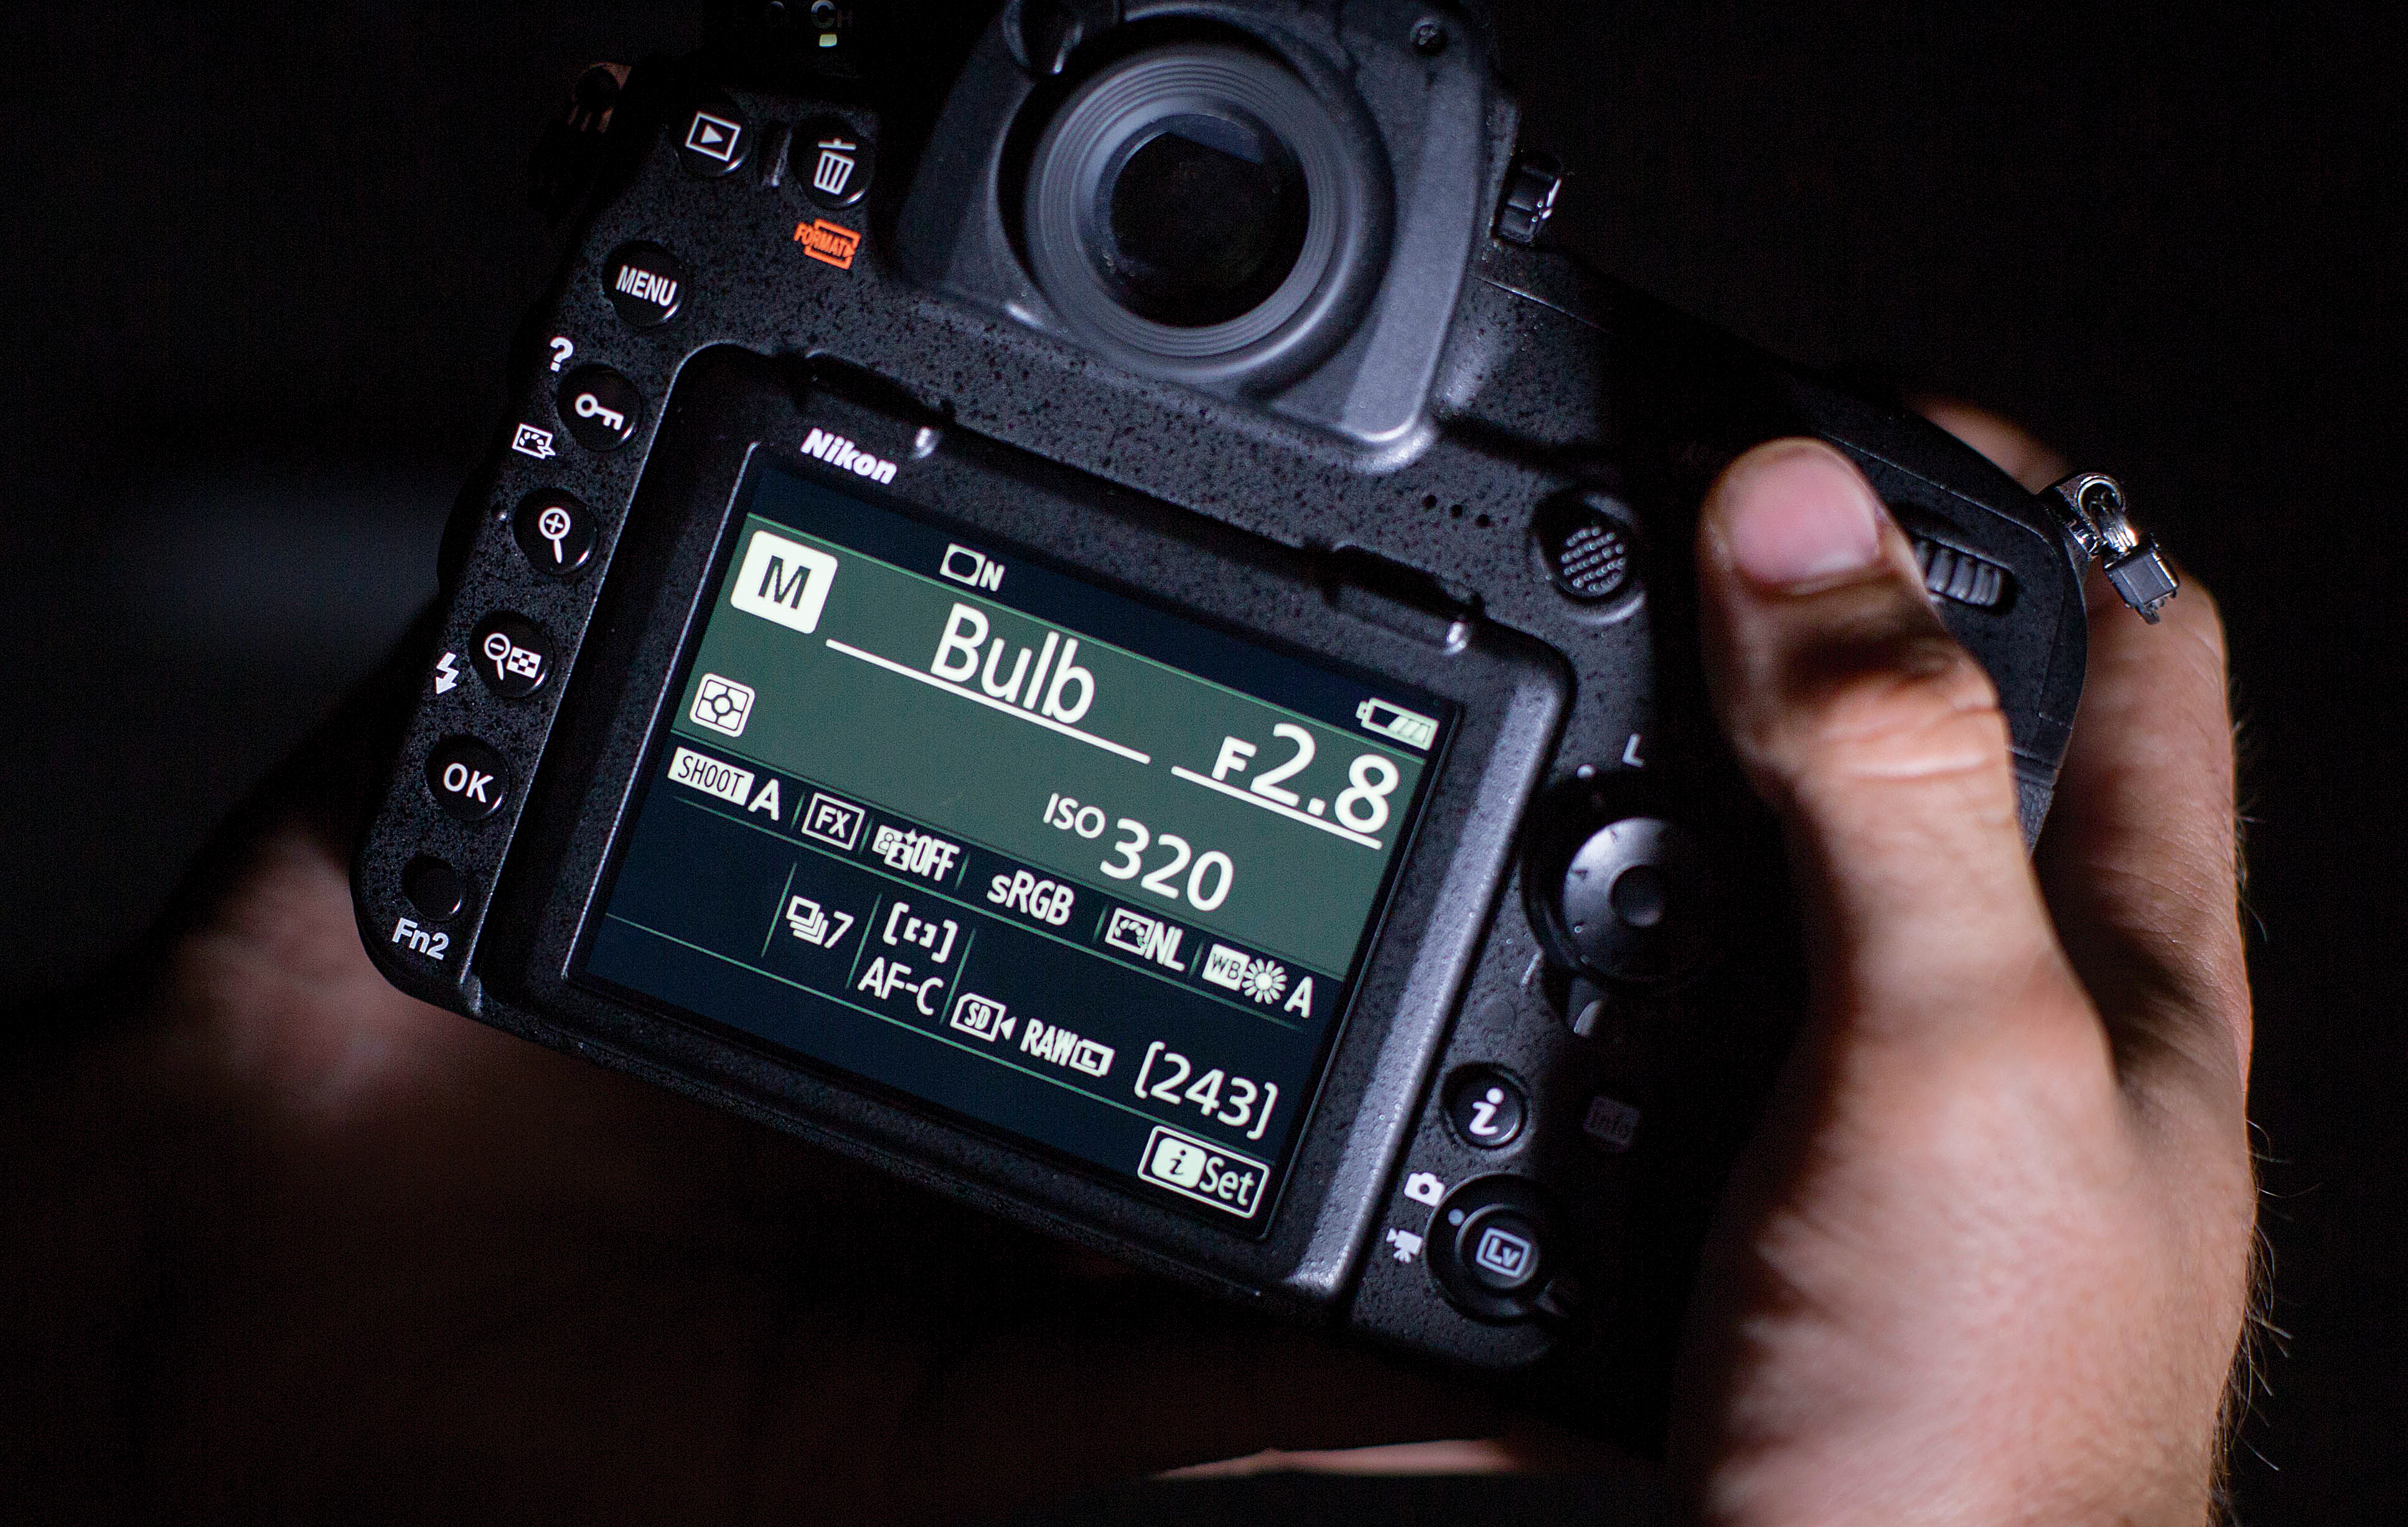
Compose your scene to leave space in the frame around your subject – we're using a 24mm lens, but choose a wide focal length that suits your subject and scene. Now, here's the key: set your camera to manual mode and adjust the command dial until your shutter speed reads Bulb. Now your exposure will last as long as the shutter release button is depressed.
04 Trigger the camera
With your camera on a tripod, you’ll need a friend to press the shutter release for you while you move the light rods around your subject. If you don’t have an extra pair of hands, grab a wireless remote shutter release to use while you dance the light rods around.
05 Maximize your light
We used an aperture of f/2.8 to maximize the light coming into the lens and bumped our ISO to 320 as we were getting underexposed images at ISO100 with the shutter speed on Bulb mode. We achieved around four to six seconds of exposure, but it varied each time we shot.
06 Flashdance
Start on the left, then during the exposure move across, around and behind your subject; then ensure you’ve left the frame on the right before doubling back, camera-right, to create a U shape. Starting and stopping like this ensures that light is on the front of your subject.
Amp it up in post
01 Remove distractions
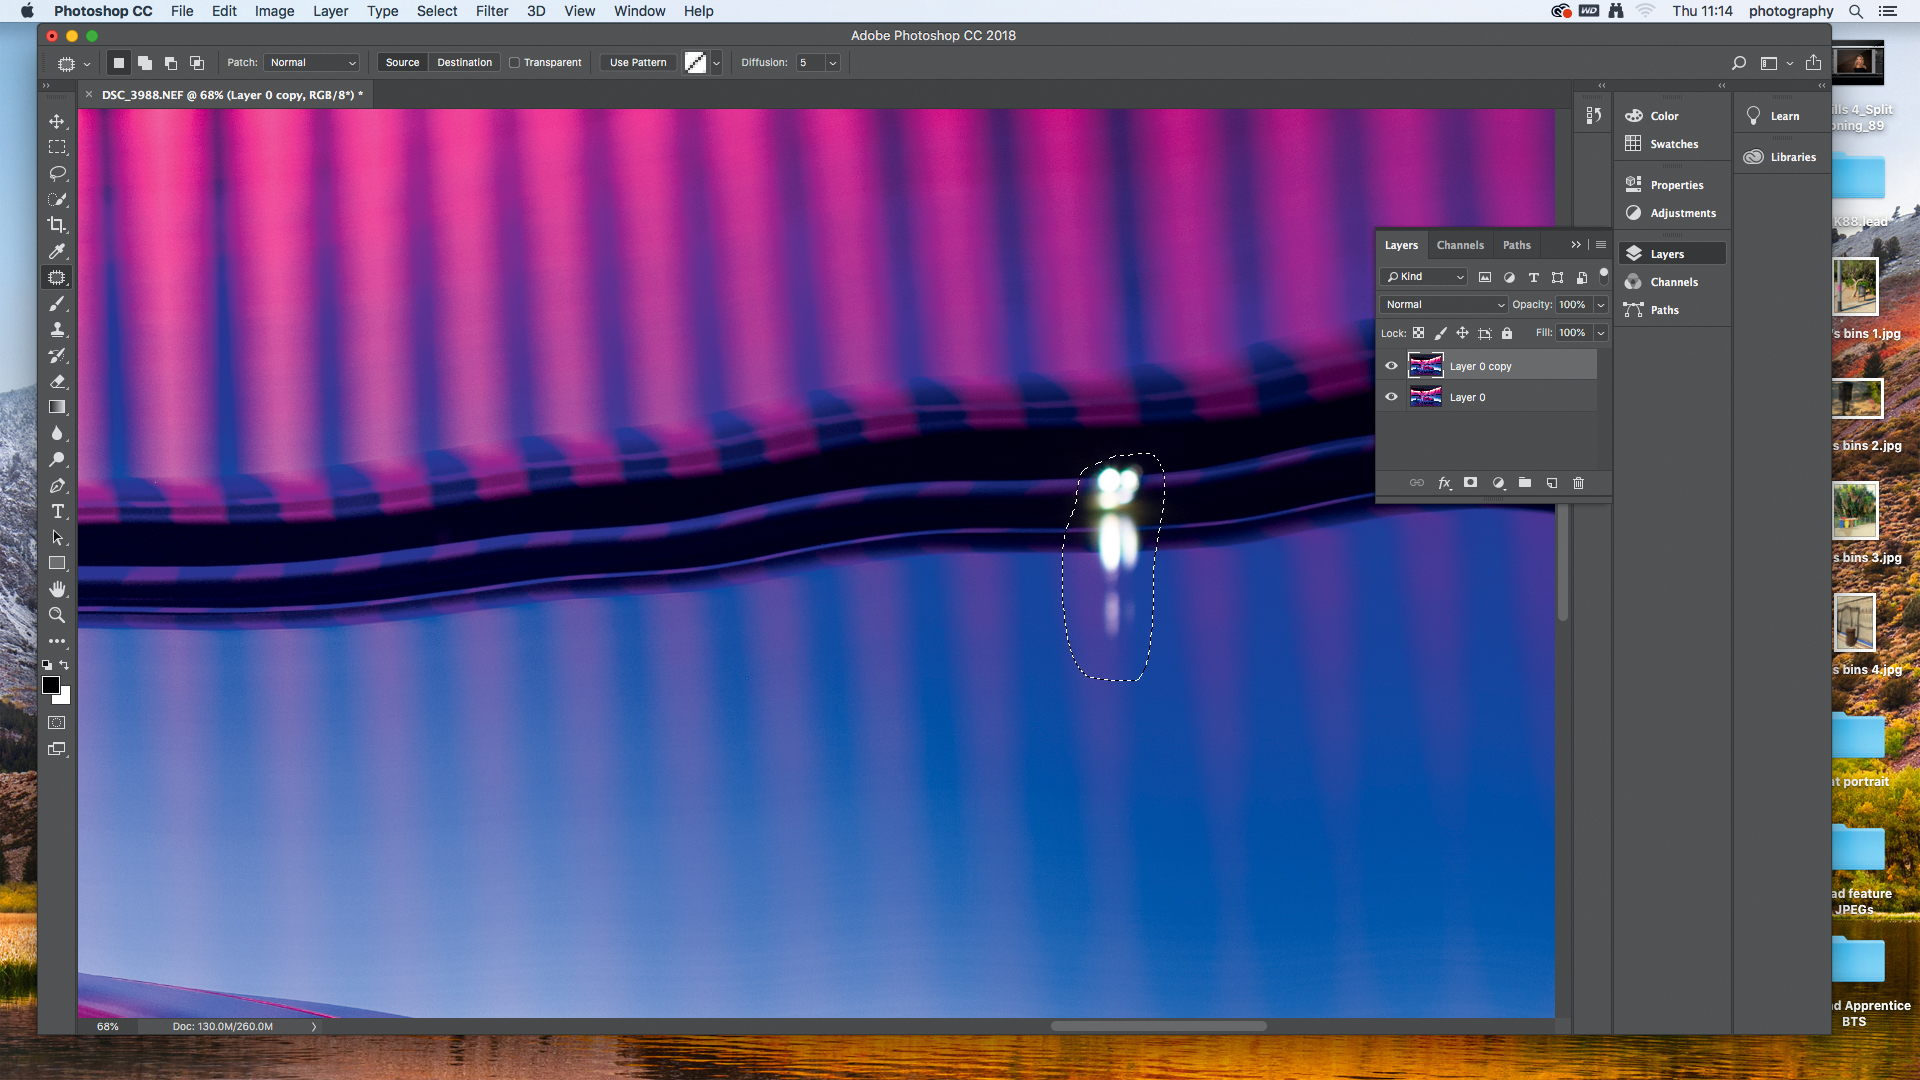
Load your image into Photoshop CC and use the Patch tool (J) to draw around any unwanted light spots, then click and drag the selected area over an unaffected bit of your image. The Patch tool will match the texture of the dragged area and remove the unsightly spots.
02 Convert to a smart object
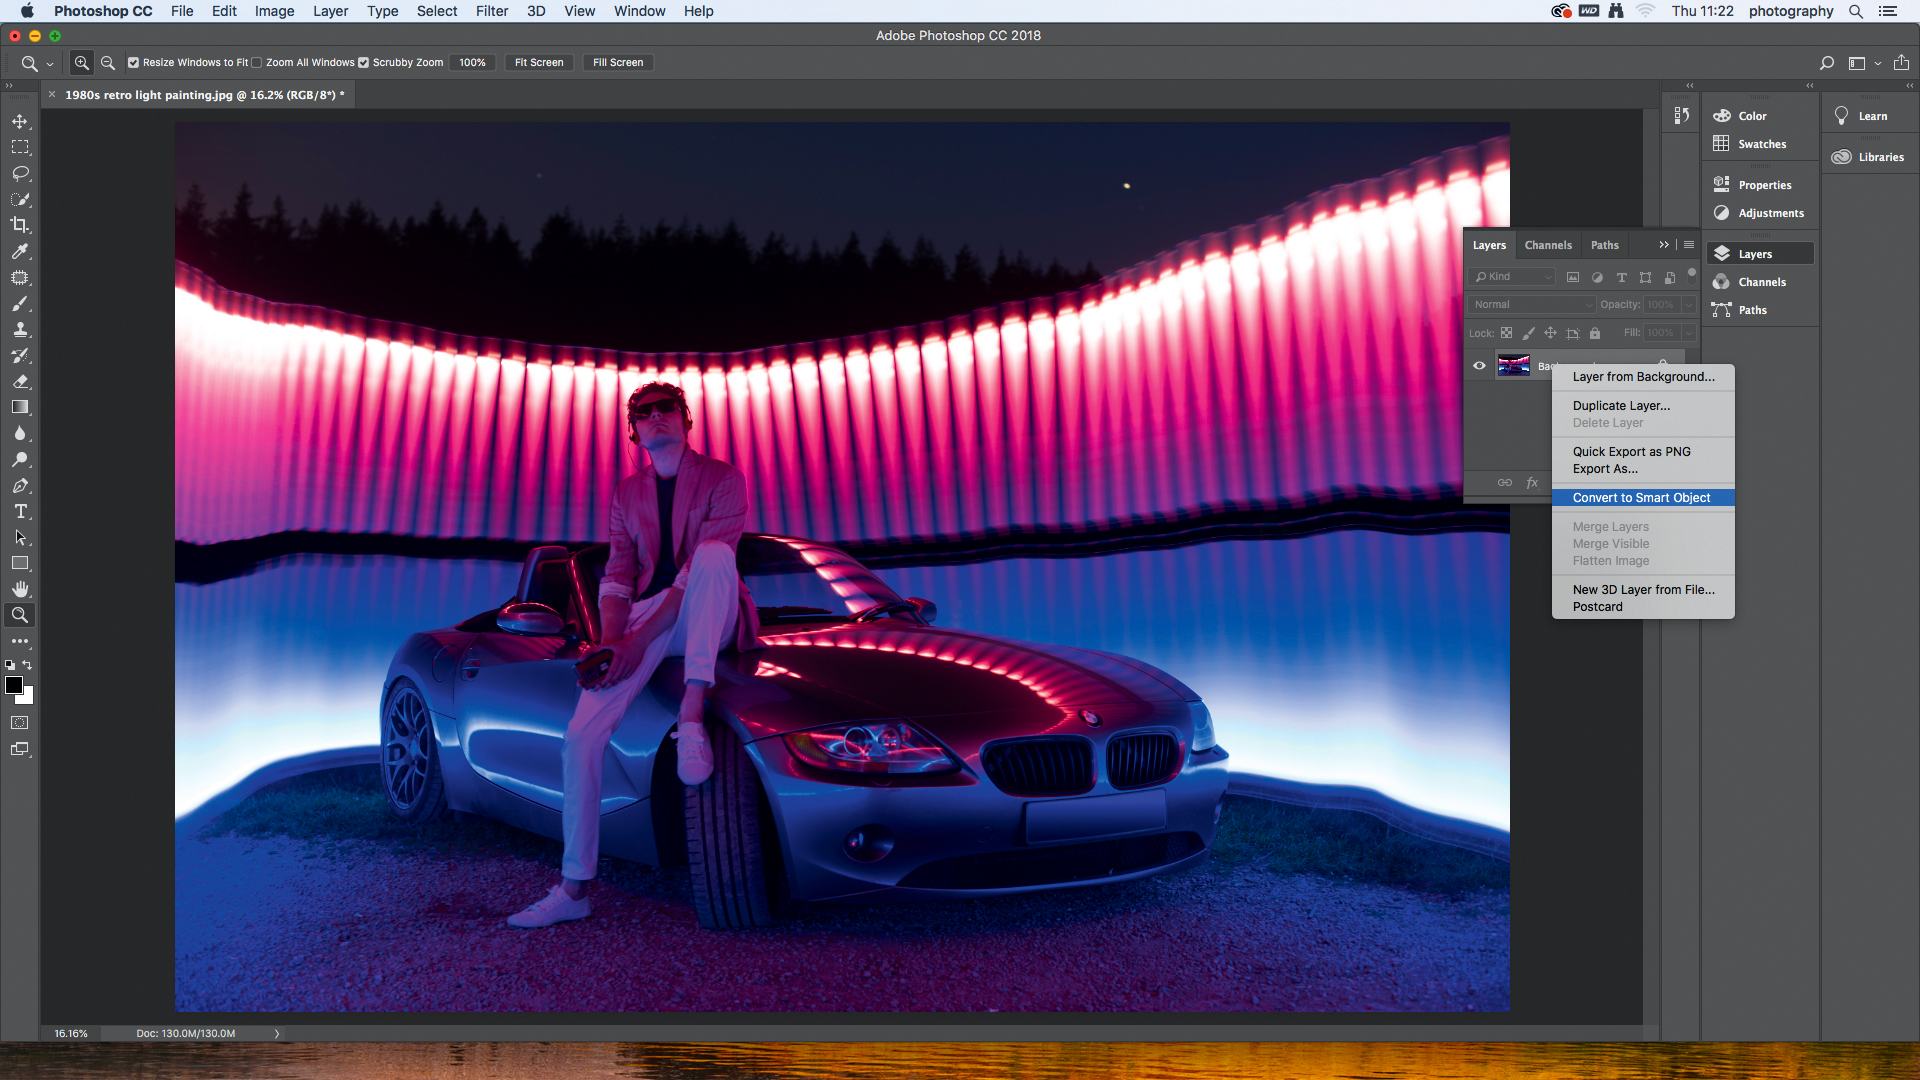
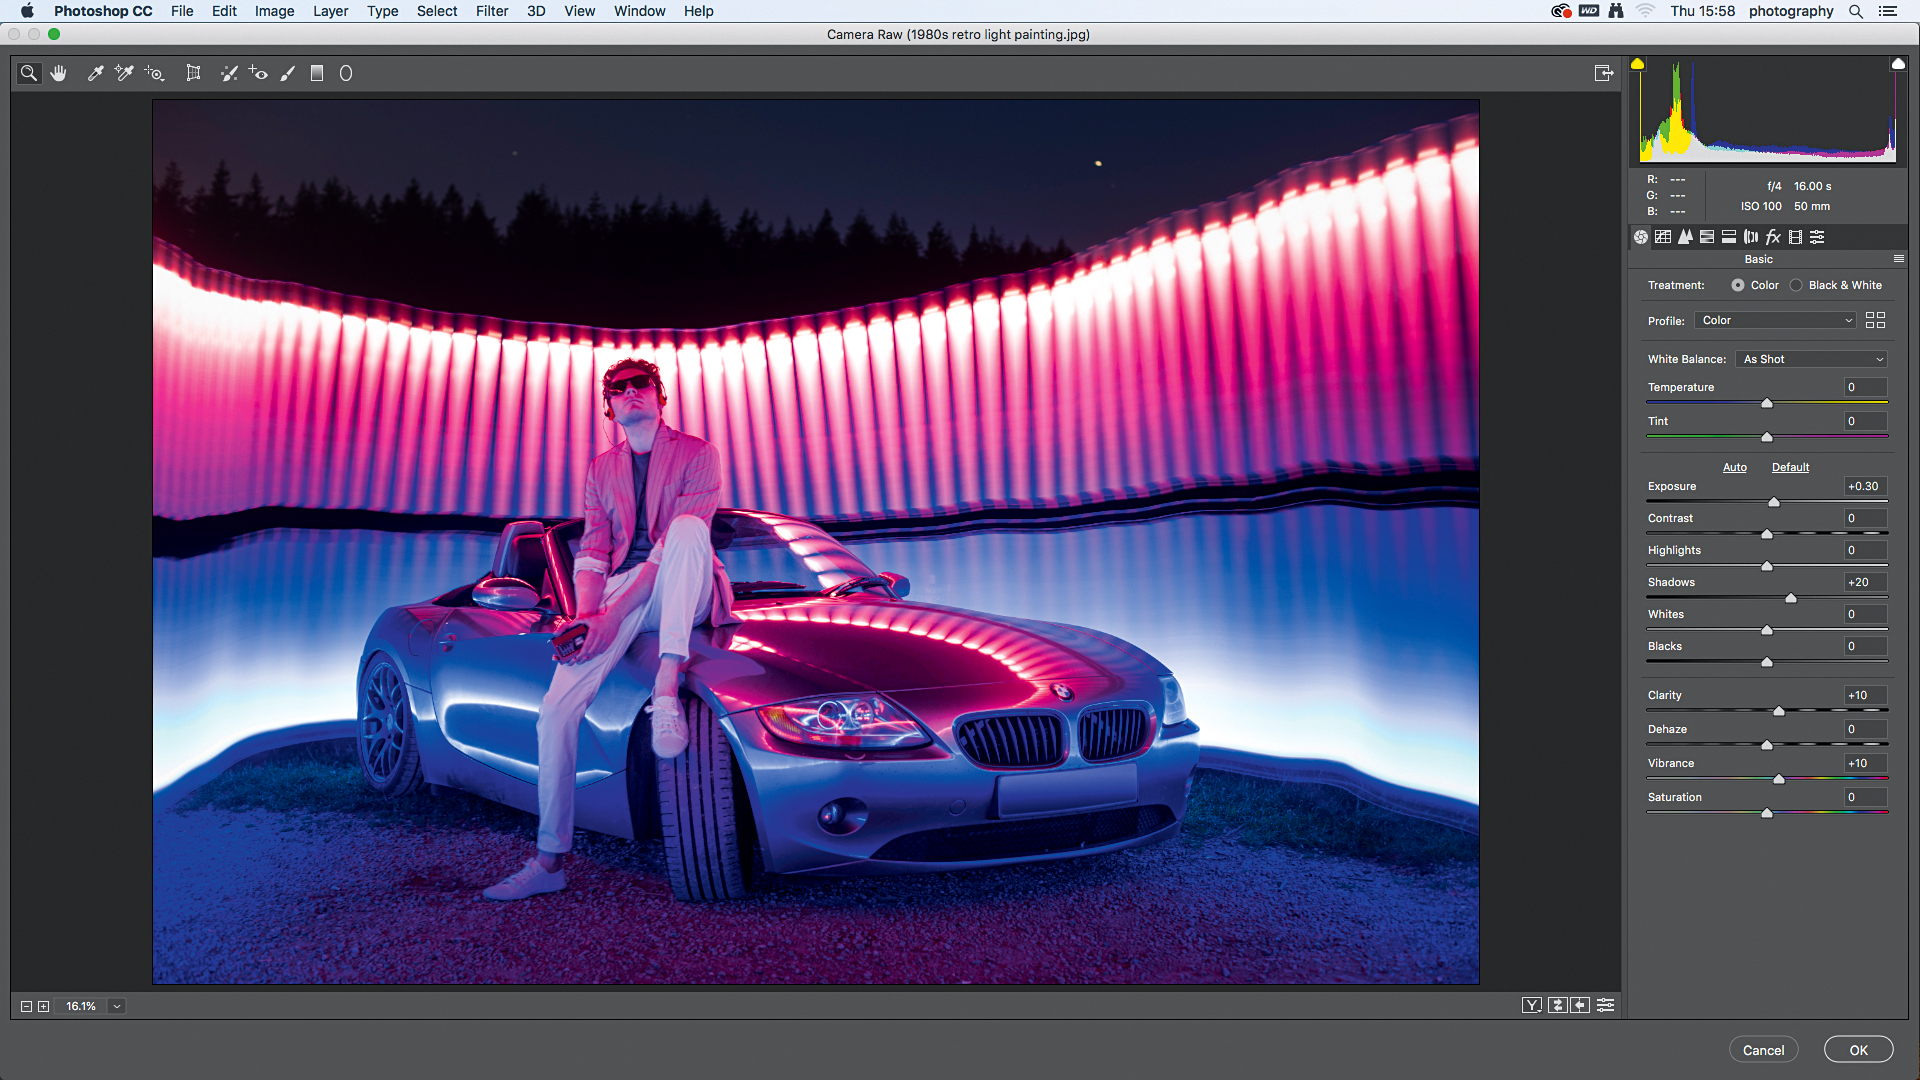
Now we convert our layer to a smart object to give us some more options. Right-click on the layer and go to Convert to Smart Object, then head to Filter > Camera Raw Filter. Changes you make in Camera Raw are non-destructive, so you can adjust them later if you desire.
03 Every tweak you make
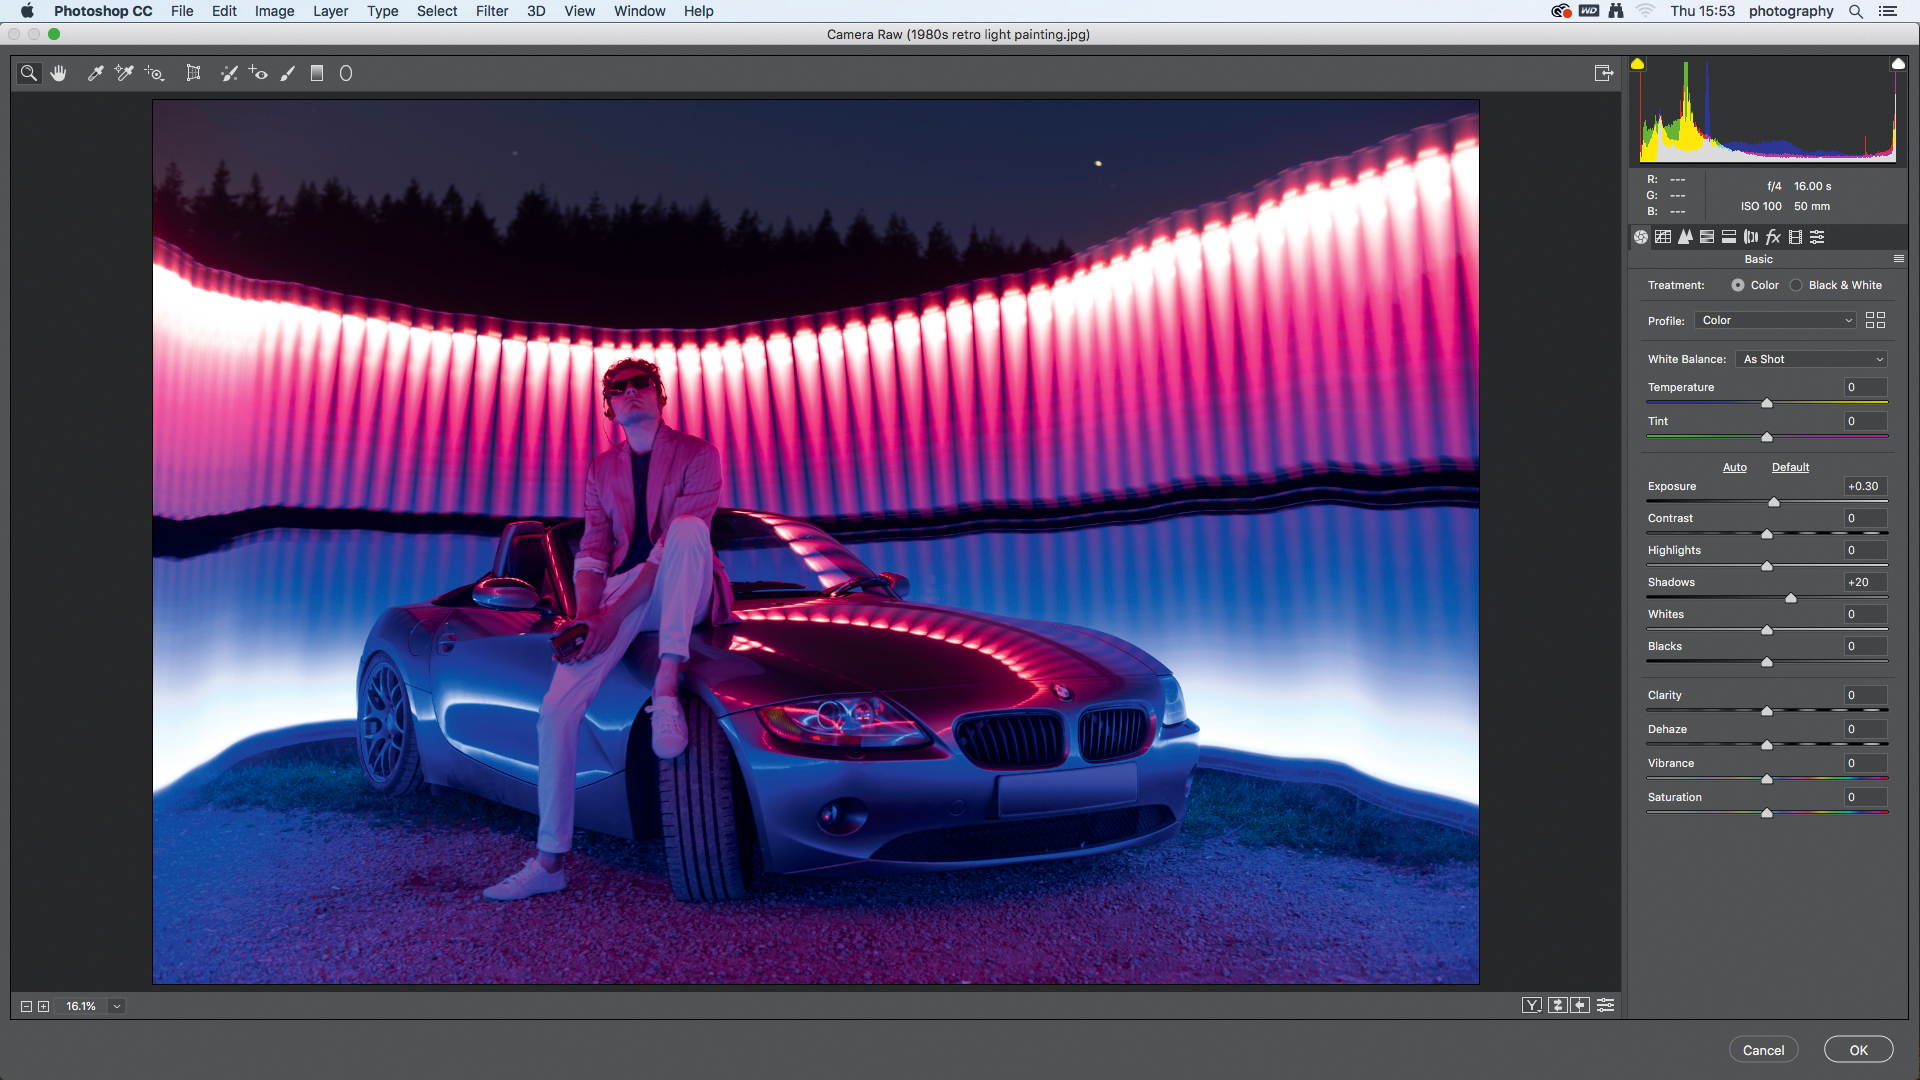
We started by increasing the Exposure by +0.3 to make the image a bit brighter. Then we lifted the Shadows with +20 to bring out some detail in the darker areas of the photo – which is especially noticeable around the tires and grilles on the car.
04 Pour some light on me
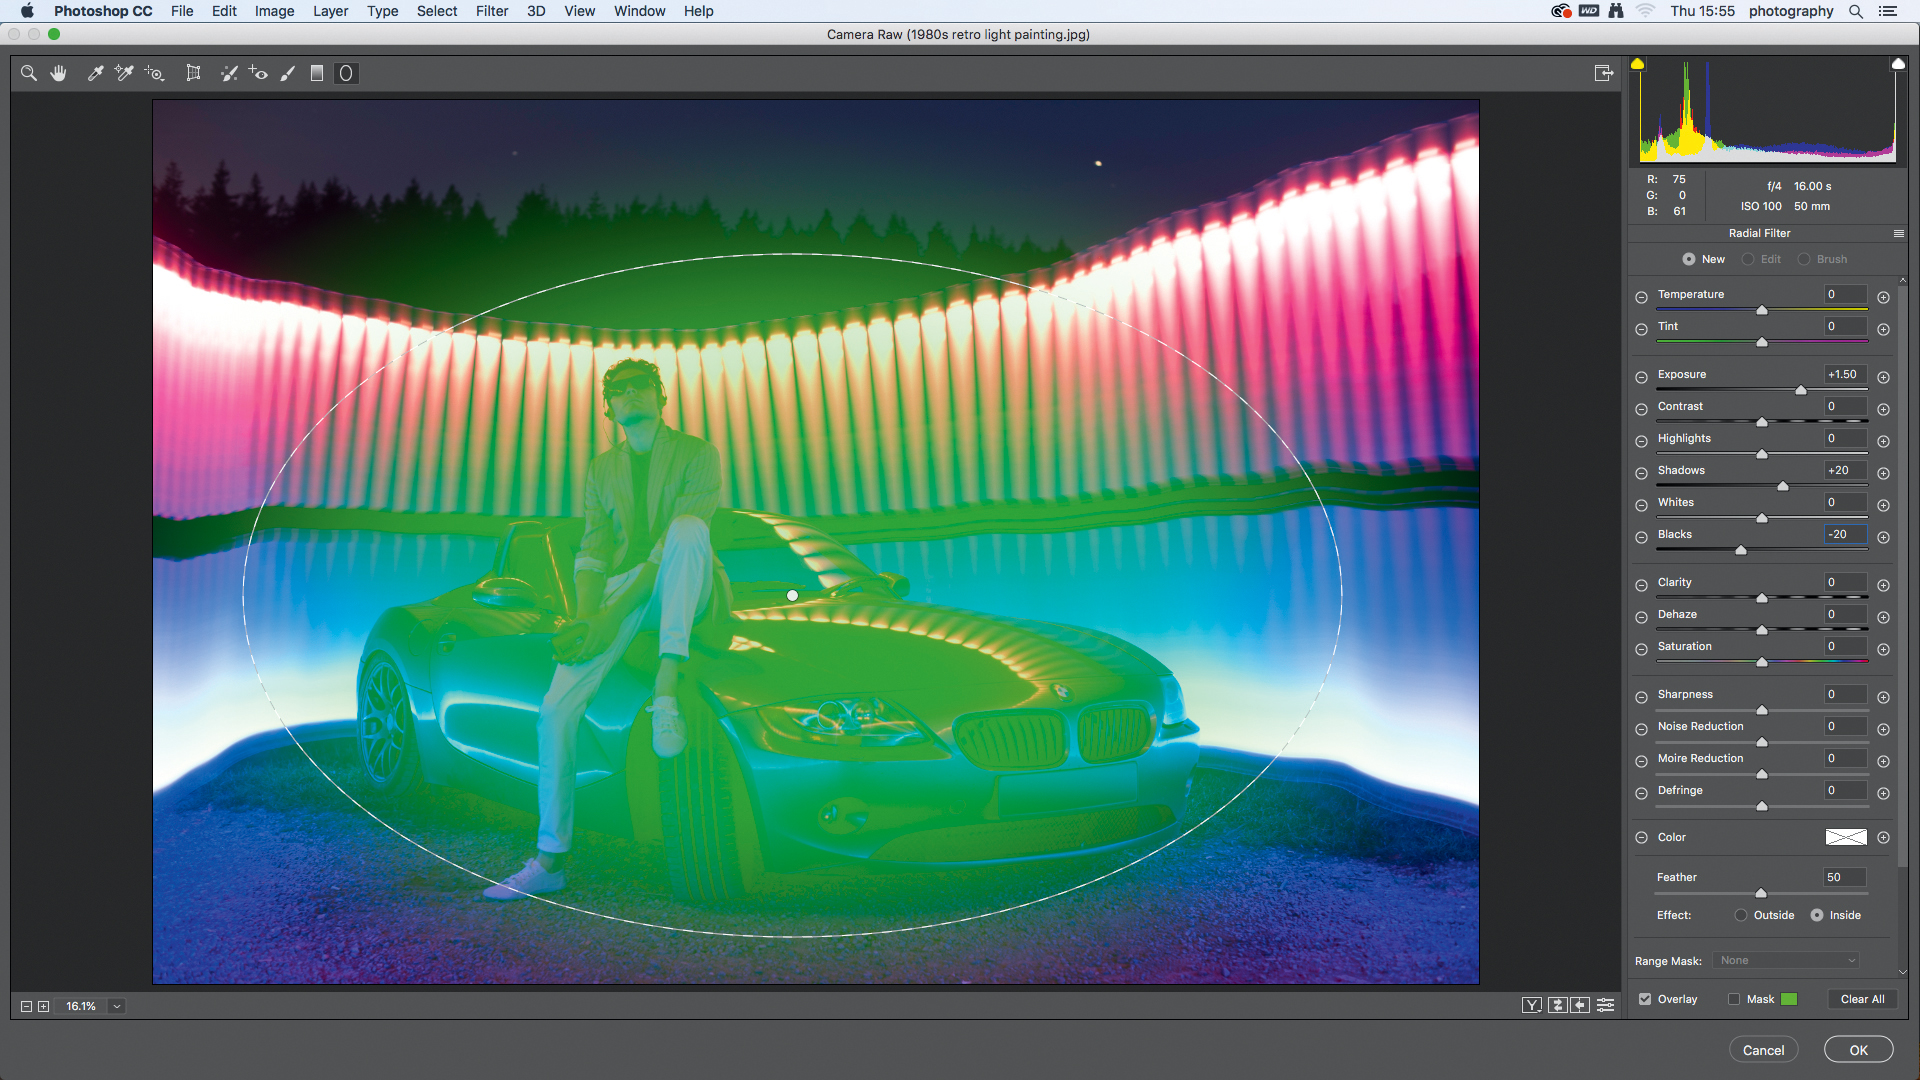
With the Radial filter, draw a circle around the subjects. Under Effects tick Inside and hover over the drop pin to see the masked area you’re affecting. Now to brighten the shot boost Exposure +1.5, lift Shadows +20 and drop Blacks -20 to keep contrast centralized in the frame.
05 Finish with a vignette
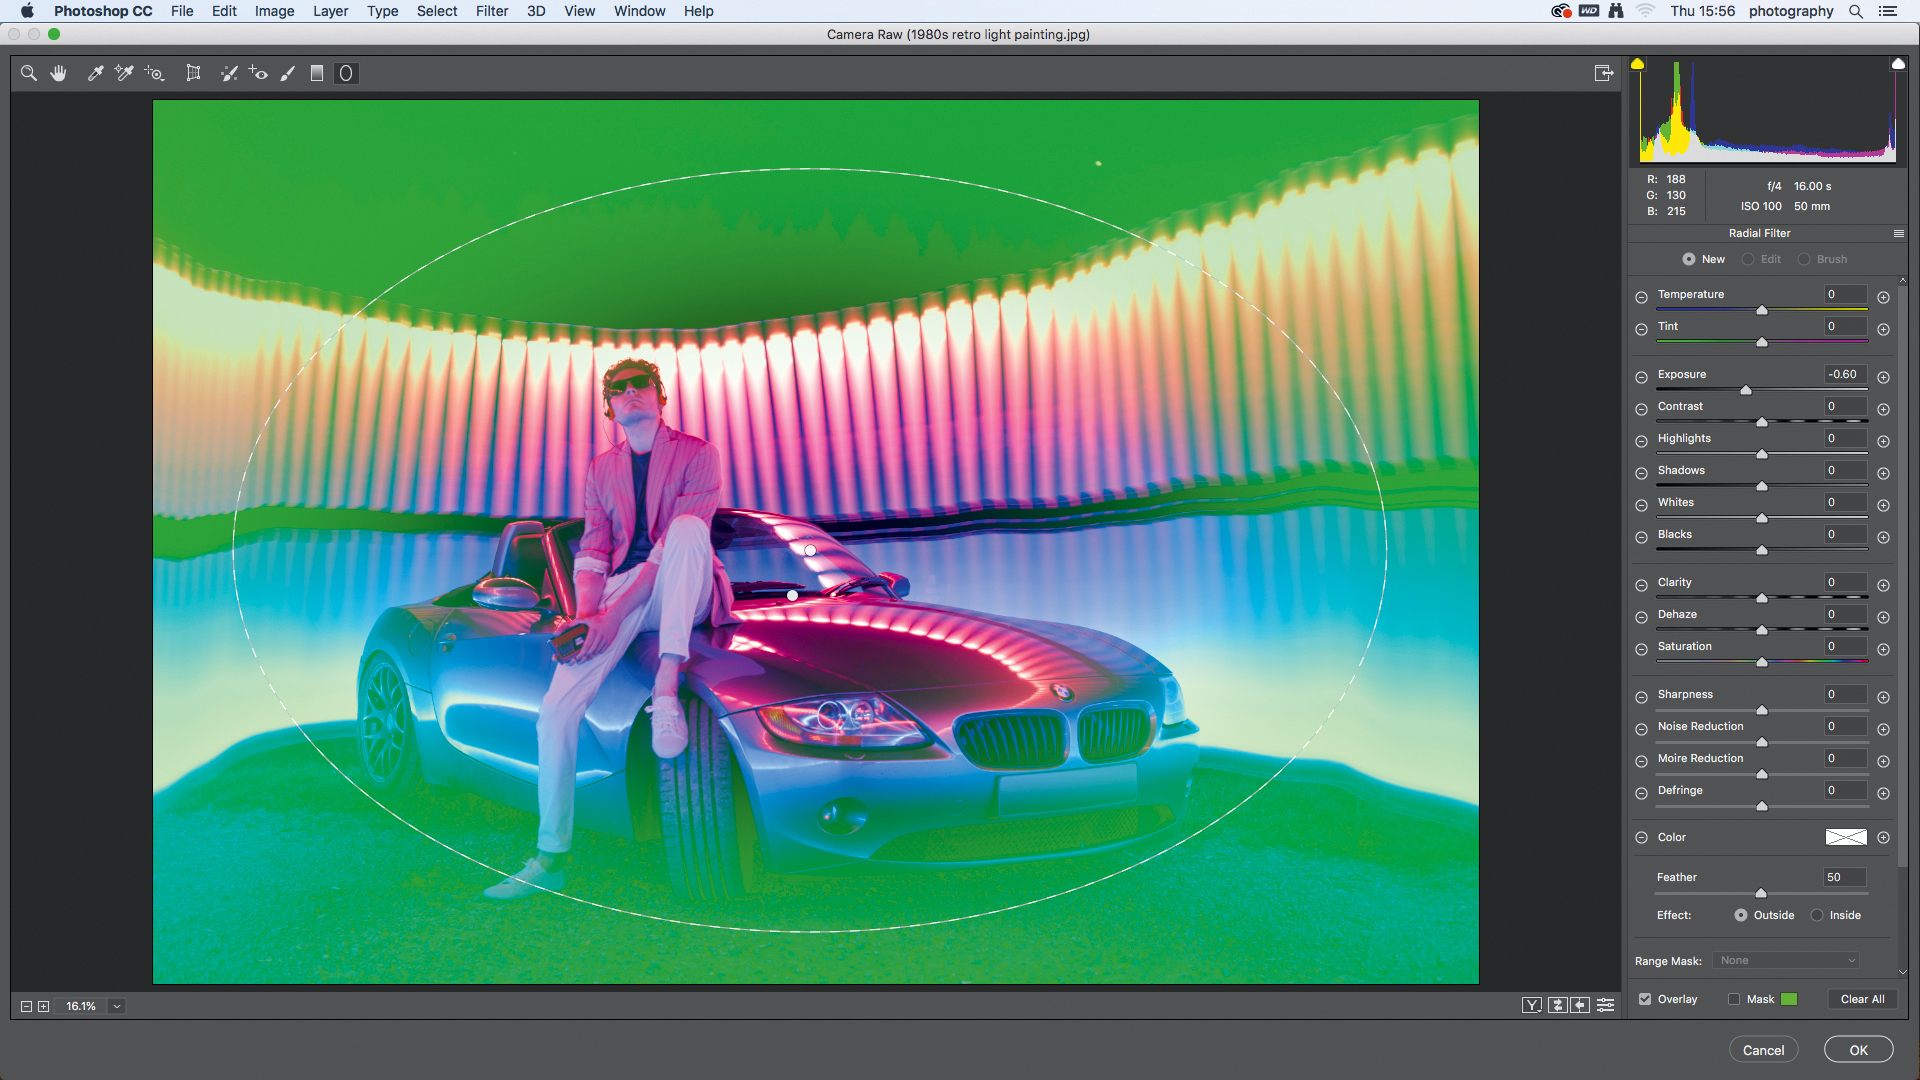
With the Radial filter, click ‘New’ at the top of the toolbar on the right and draw a wider selection. Now click Outside in the Effect section and dial in Exposure -0.6 to darken the edges.
06 Neon demons
Click the Hand icon (H) in the Camera Raw Filter window and you’ll see the basic panel on the right. Add even more punch by upping the Vibrance and Clarity sliders to +10, which adds color without clipping.
N-Photo: The Nikon Magazine is a monthly publication that's entirely dedicated to Nikon users. For the best news, reviews, projects and more, subscribe to N-Photo today!
Read more:
The best LED light panels: portable lighting for photography and video
The best photography lighting kits: for studio, location and video
Portrait photography tips: how to take perfect people pictures
N-Photo: The Nikon Magazine is a monthly publication that's entirely dedicated to Nikon users. As a 100% independent magazine, you can be assured of unbiased opinion from a trustworthy team of devoted photography experts including editor Adam Waring and Deputy Editor Mike Harris.
Aimed at all users, from camera newcomers to working pros, every issue is packed with practical, Nikon-specific advice for taking better photos, in-depth reviews of Nikon-compatible gear, and inspiring projects and exciting video lessons for mastering camera, lens and Photoshop techniques.
Written by Nikon users for Nikon users, N-Photo is your one-stop shop for everything to do with cameras, lenses, tripods, bags, tips, tricks and techniques to get the most out of your photography.
