Learn to use Photoshop Element's Haze Removal tool
Banish haze from landscapes
Download project files to your computer from: http://downloads.photoplusmag.com/pp119.zip
Use the new Haze Removal tool in Photoshop Elements 14
Time needed: 10 minutes
Skill level: Beginner
Kit needed: Photoshop Elements 14
You often get distant haze in landscape shots, which makes parts of a scene and subjects in the distance appear washed out and less distinct than what they would be close up. It happens when there’s dust or moisture in the air, and increases with distance. It’s sometimes called ‘aerial perspective’ and can be a useful creative effect, but much of the time it’s an annoyance because the spectacular backdrop that we thought we were going to get comes out looking unexpectedly flat.
Which is where the Remove Haze option in Photoshop Elements 14 comes in. It’s designed to restore contrast and colour to distant hazy views, but without affecting objects in the foreground. It’s billed as a tool for enhancing landscapes, since this is where you’re likely to notice the effects of haze on contrast, but we’re using it here to restore detail to a weak and hazy sky.
STEP BY STEP: Don't be so hazy
Getting to grips with Photoshop Elements 14’s new Haze Removal tool
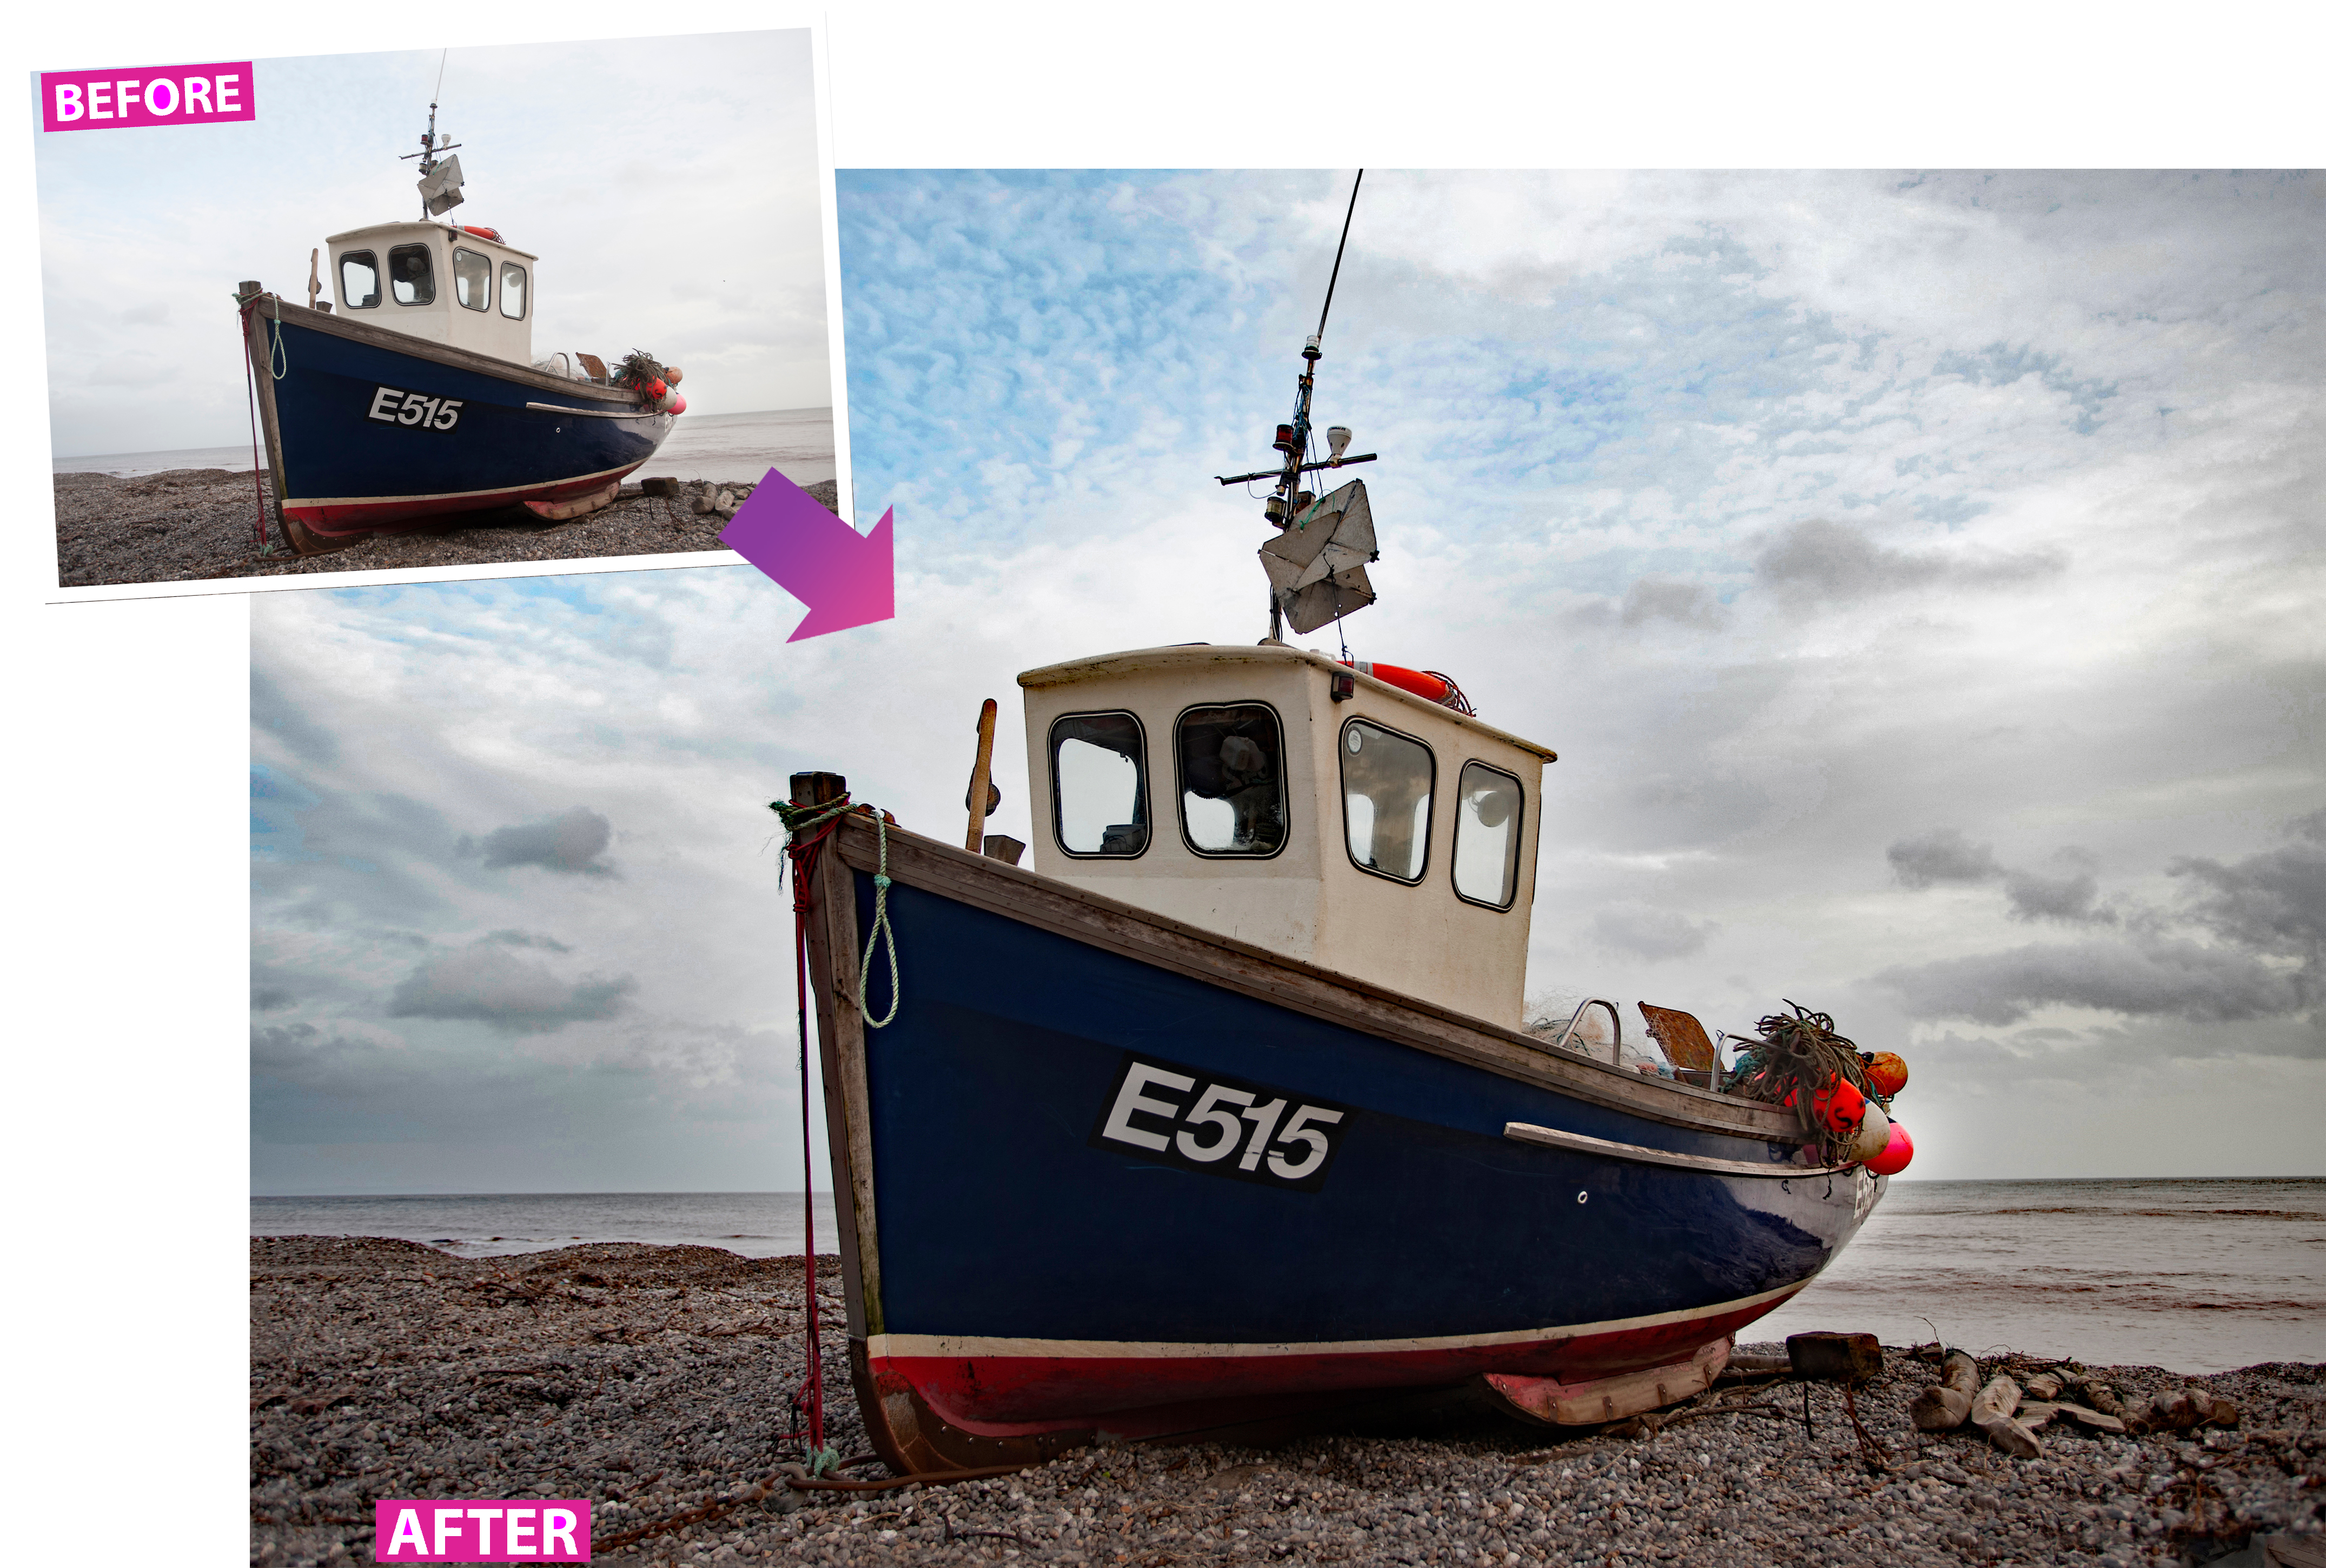
Sometimes haze is a good thing and may just need to be reduced a little in order to retain the atmosphere of a scene
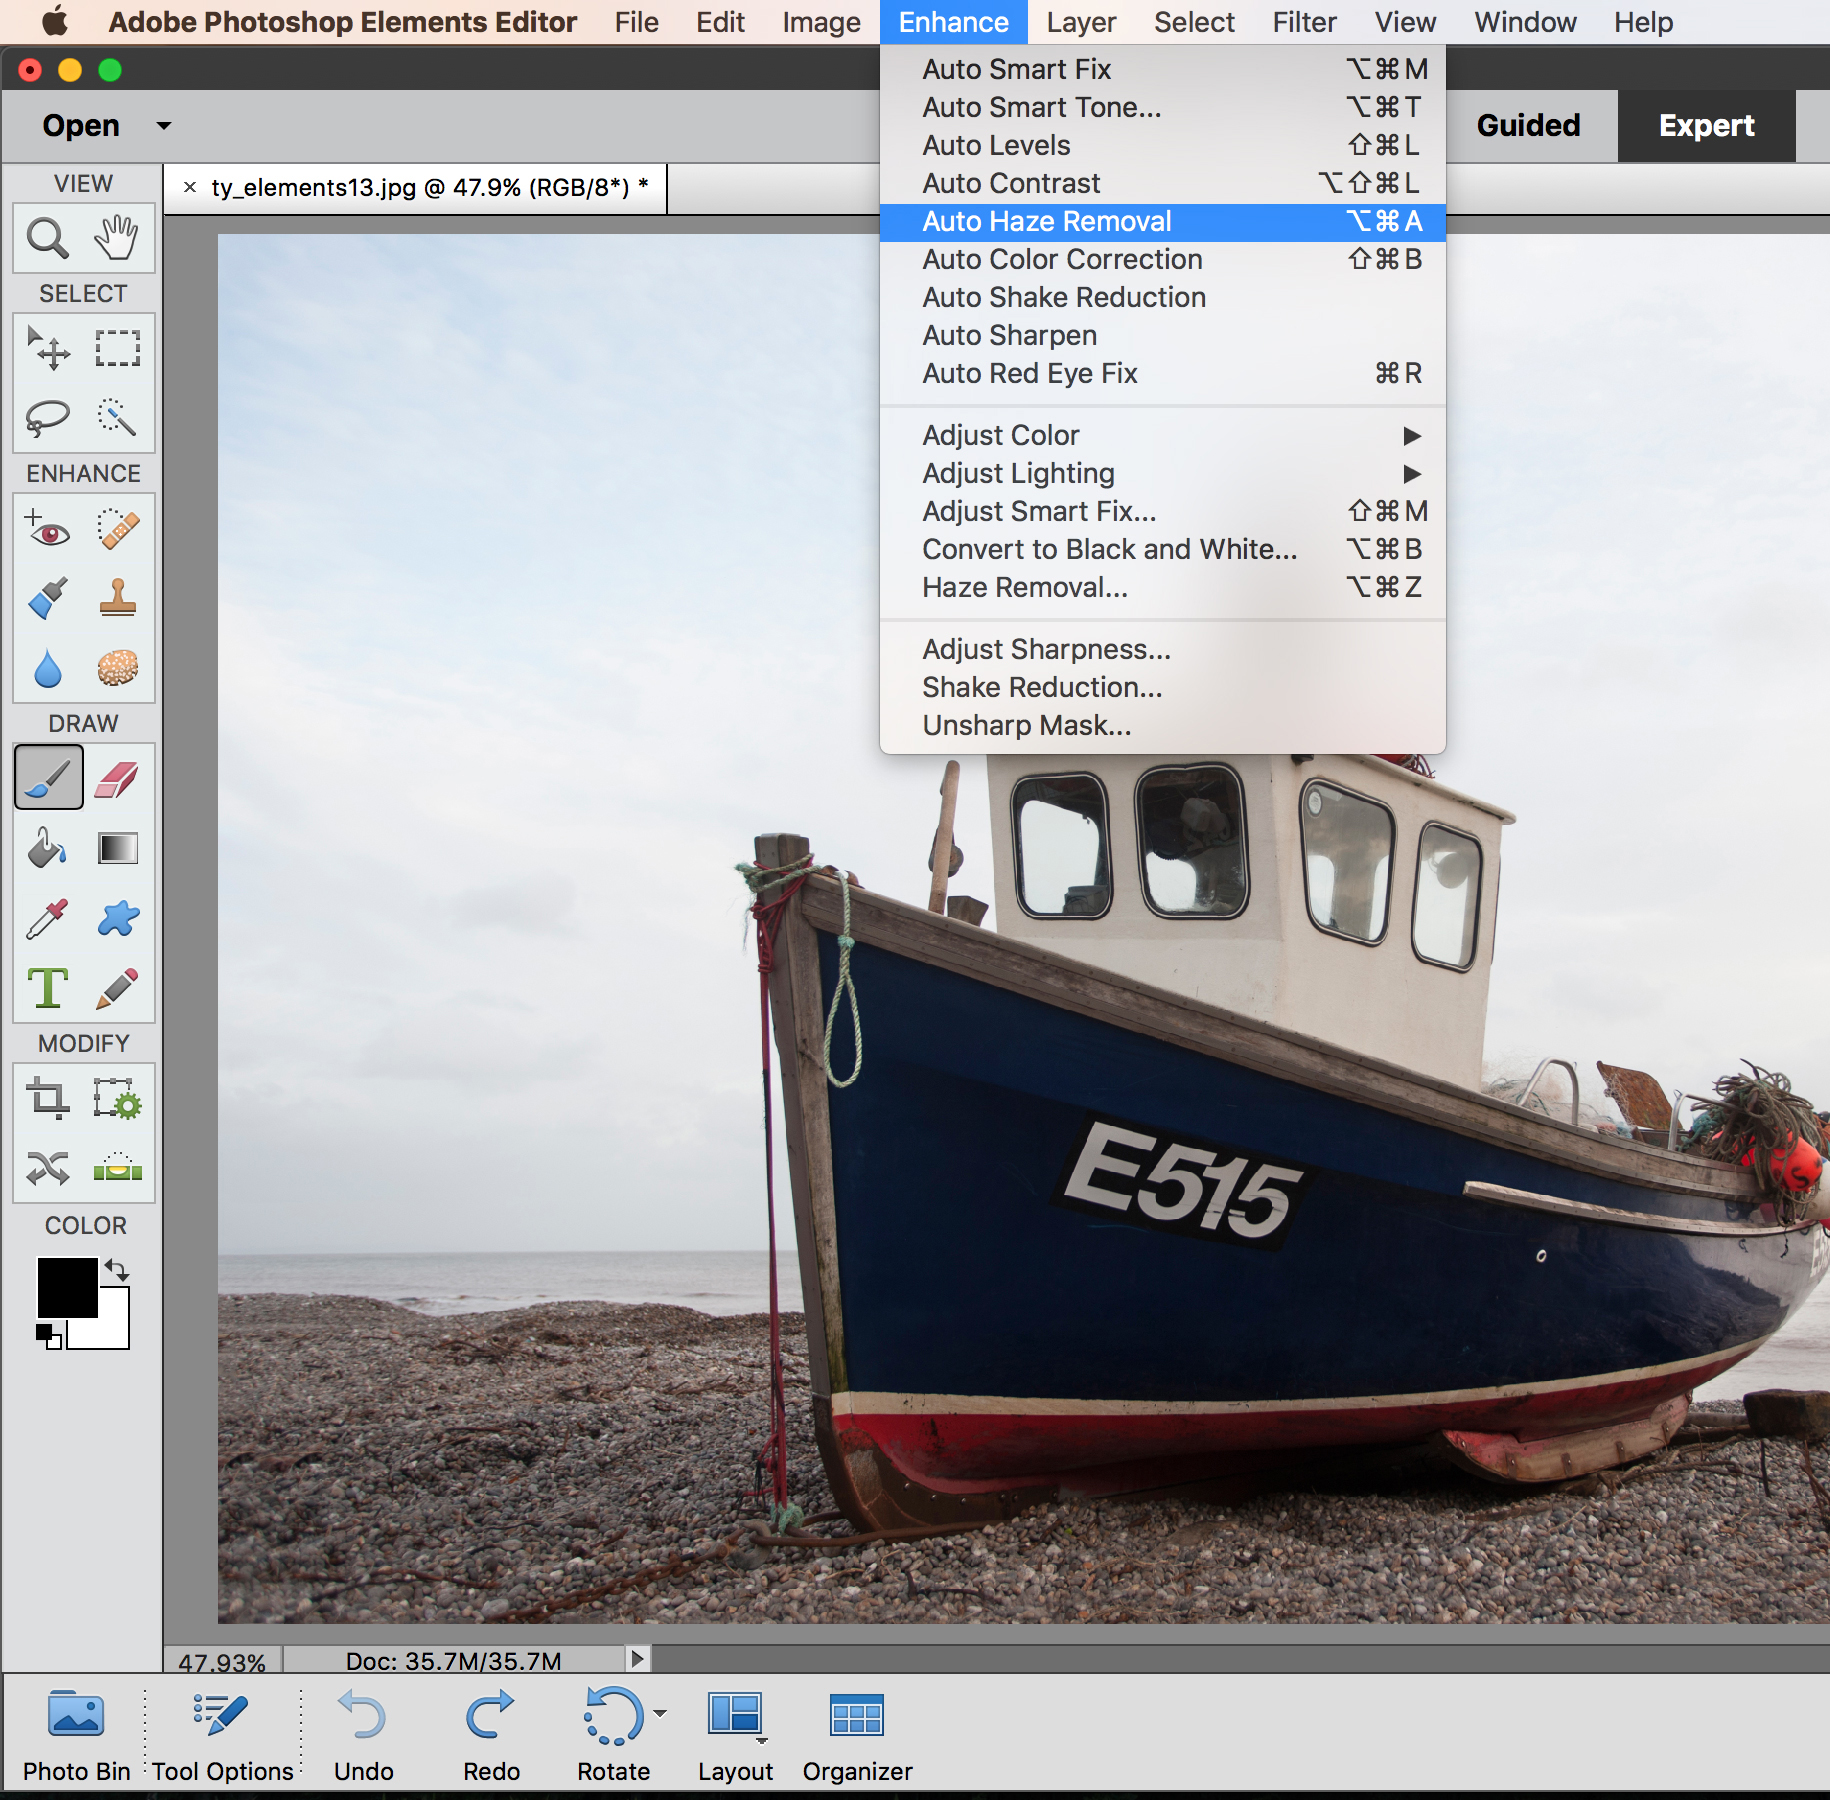
01 WHERE TO FIND HAZE REMOVAL
The Haze Removal options are on the Enhance menu, and this is available in both Quick and Expert modes. You can use the Auto Haze Removal option on the menu to get a quick result, though for maximum control you need to select the Haze Removal tool further down the menu.
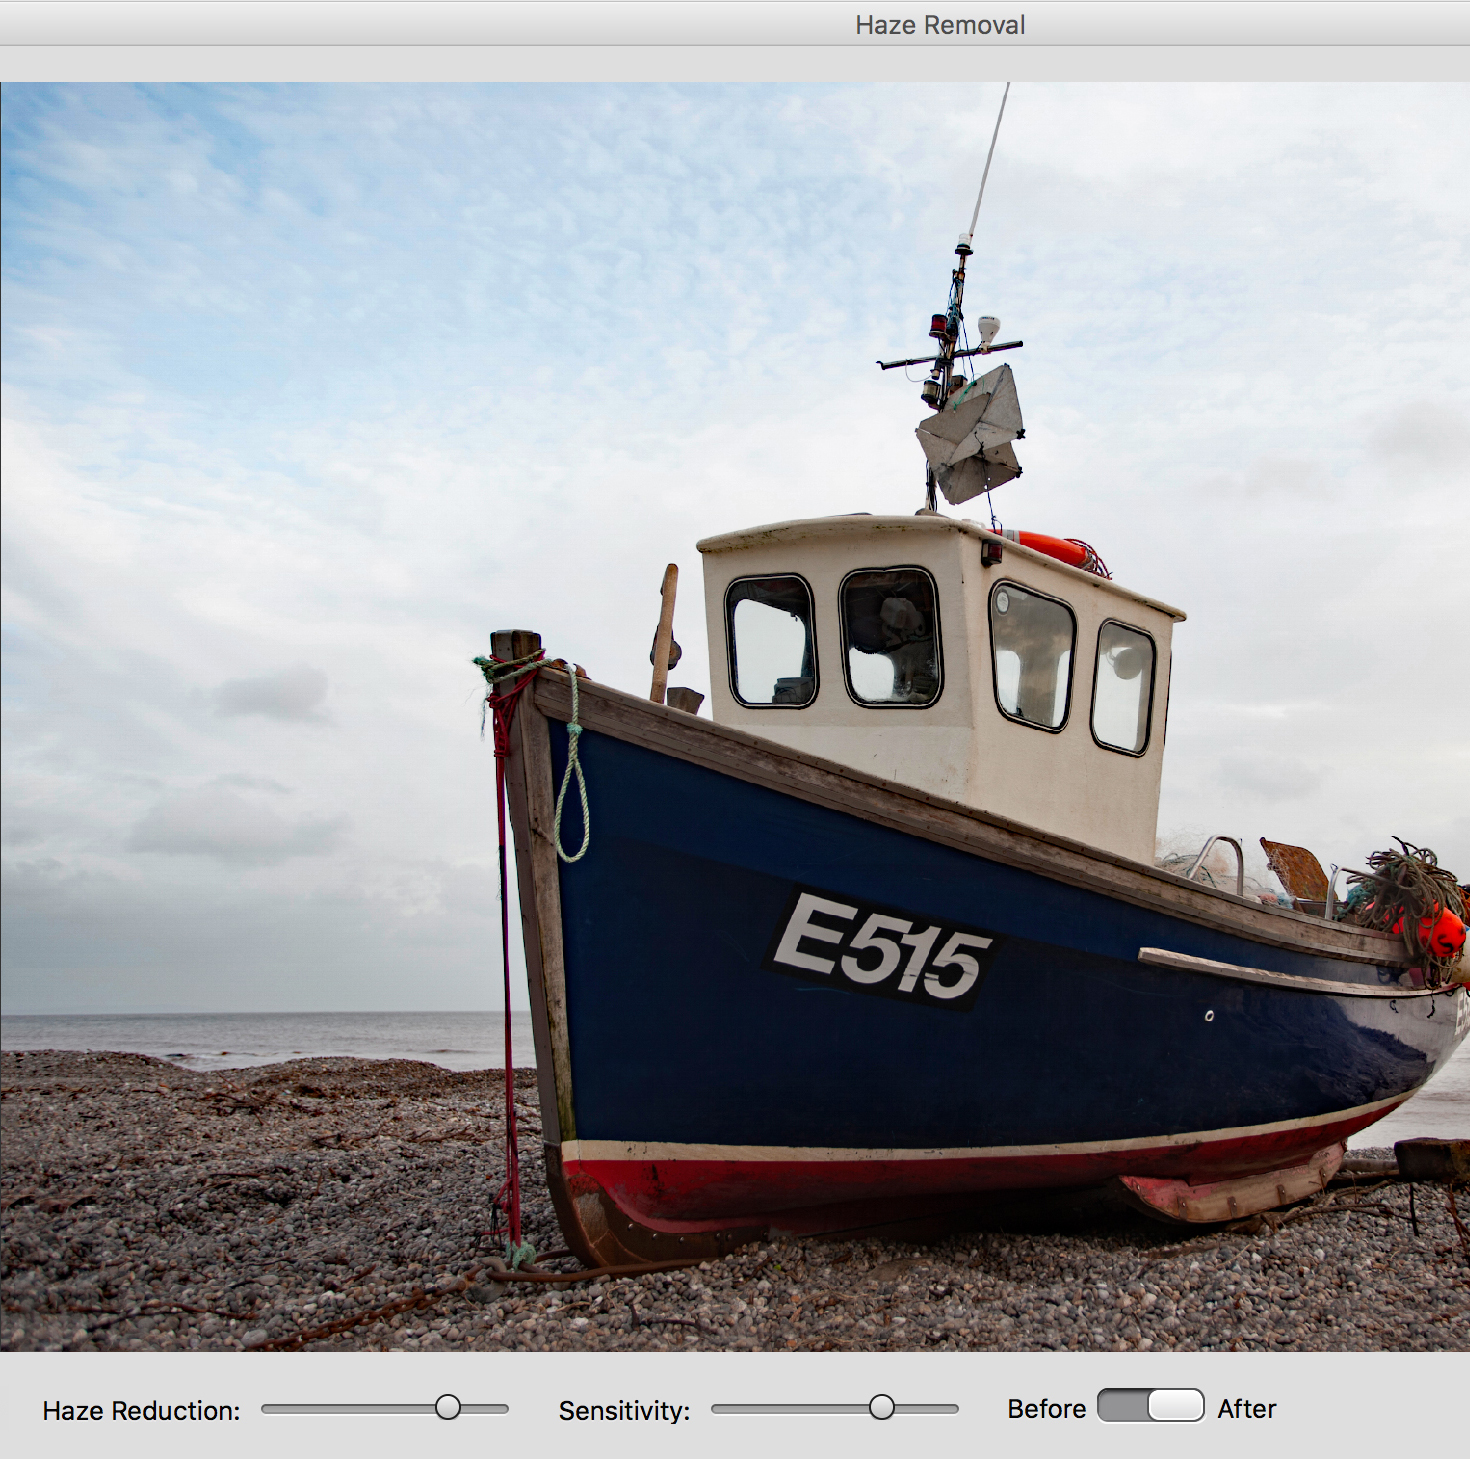
02 HAZE REMOVAL CONTROLS
The best camera deals, reviews, product advice, and unmissable photography news, direct to your inbox!
The key controls in this window are at the bottom of the image window. These are sliders for Haze Reduction and Sensitivity, and by default you should find the two sliders set to about two-thirds of their maximum travel – this corresponds roughly with the Auto Haze Removal settings.
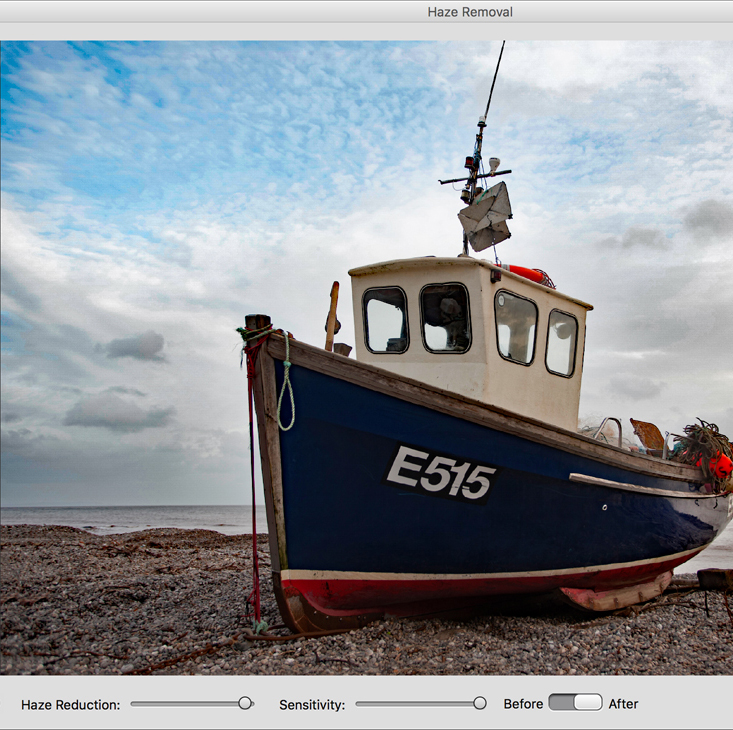
The Haze Removal tool will do a great job of reducing or removing the haze from your images, however, it’s not a quick-fix tool and you’ll still need to perform your usual post-processing routine. Keep in mind that the tool has a tendency to deepen blues and increase contrast, so a little more attention to detail may be required.
03 MAXING OUT!
So let’s see how far we can push our photo by pushing both sliders right to their maximum settings. The amount of detail the Haze Removal tool has been able to extract from the sky is impressive, but as you can see here, it’s a step too far, creating a nasty soot-and-whitewash effect in the clouds.
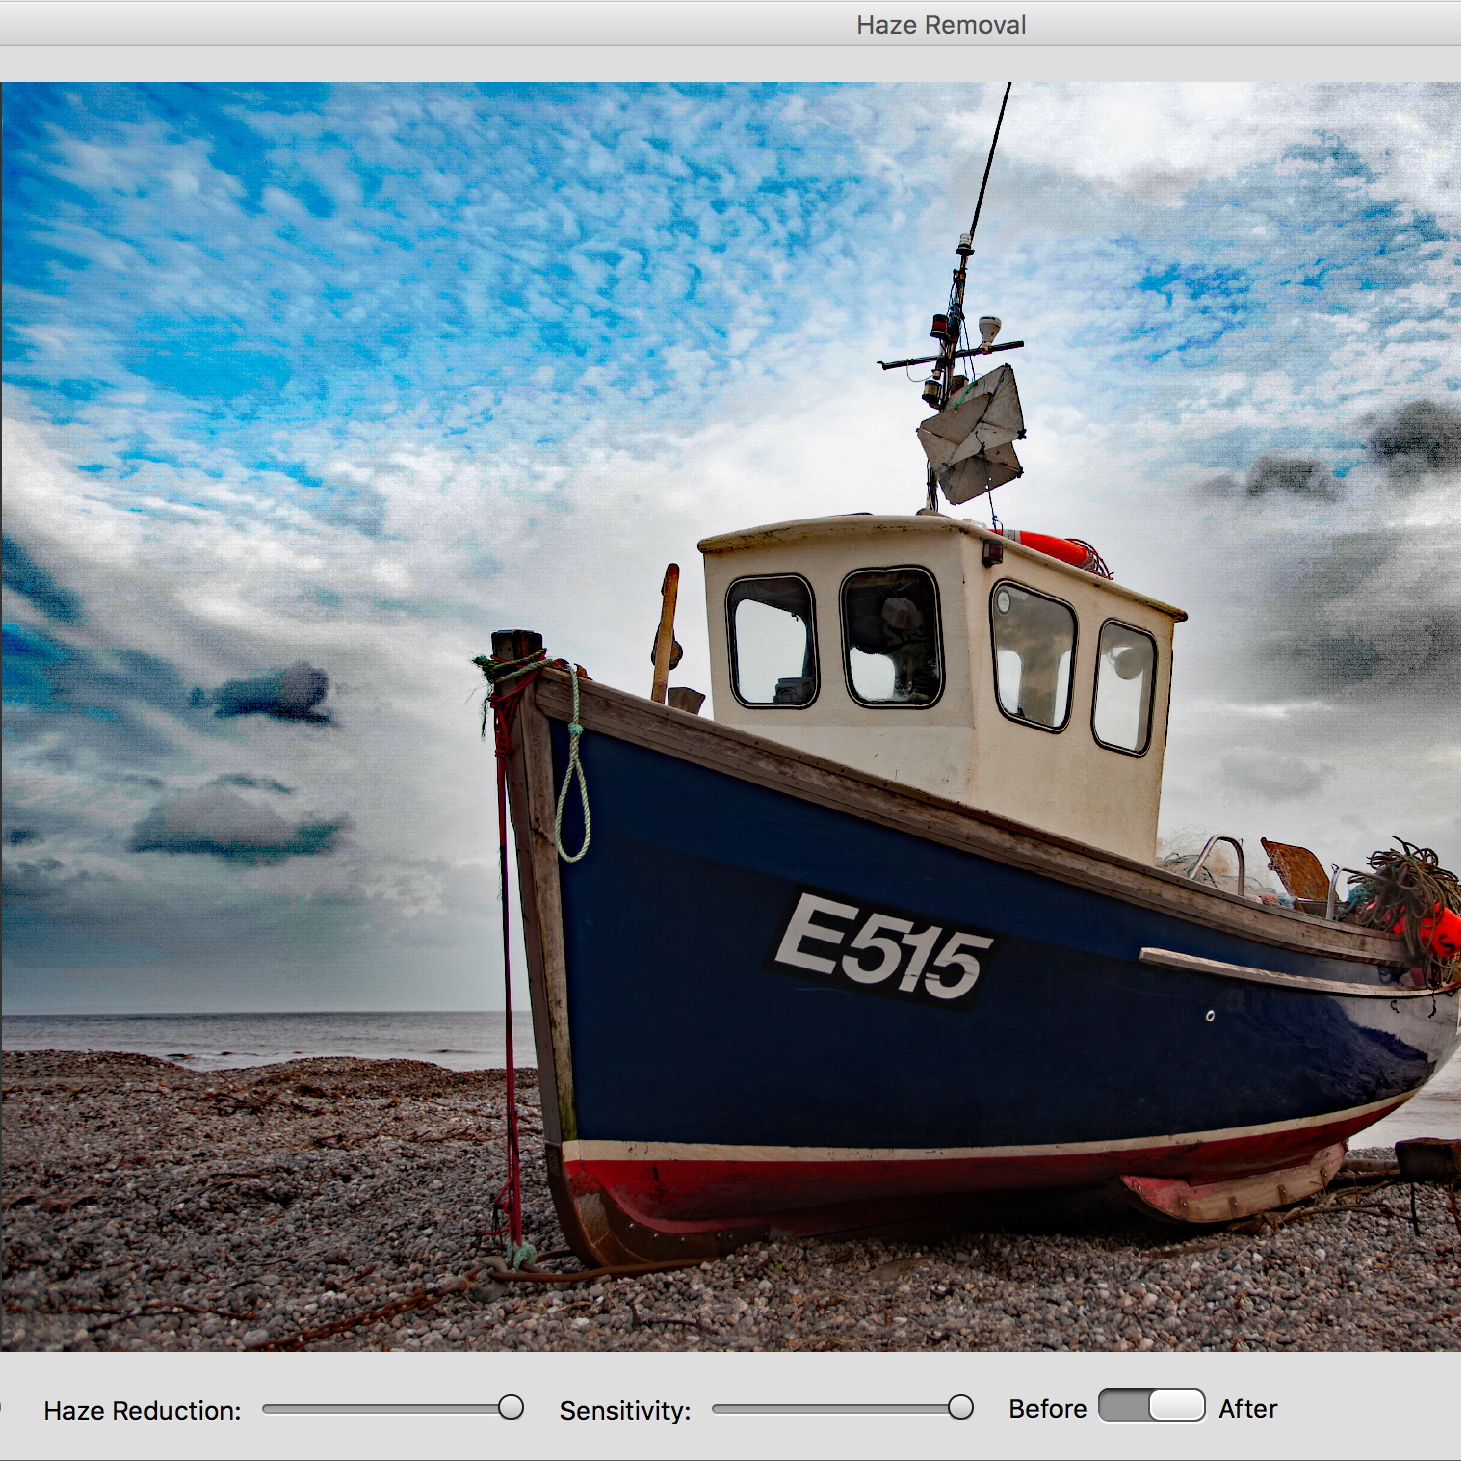
04 THE SLIDERS
The Sensitivity slider seems to control the detail enhancement – higher settings bring out ever smaller details. We’ll leave this set to maximum. The Haze Removal slider controls the strength of the correction, and we can get rid of those artefacts with just a small leftward adjustment.

Rod is an independent photography journalist and editor, and a long-standing Digital Camera World contributor, having previously worked as DCW's Group Reviews editor. Before that he has been technique editor on N-Photo, Head of Testing for the photography division and Camera Channel editor on TechRadar, as well as contributing to many other publications. He has been writing about photography technique, photo editing and digital cameras since they first appeared, and before that began his career writing about film photography. He has used and reviewed practically every interchangeable lens camera launched in the past 20 years, from entry-level DSLRs to medium format cameras, together with lenses, tripods, gimbals, light meters, camera bags and more. Rod has his own camera gear blog at fotovolo.com but also writes about photo-editing applications and techniques at lifeafterphotoshop.com
