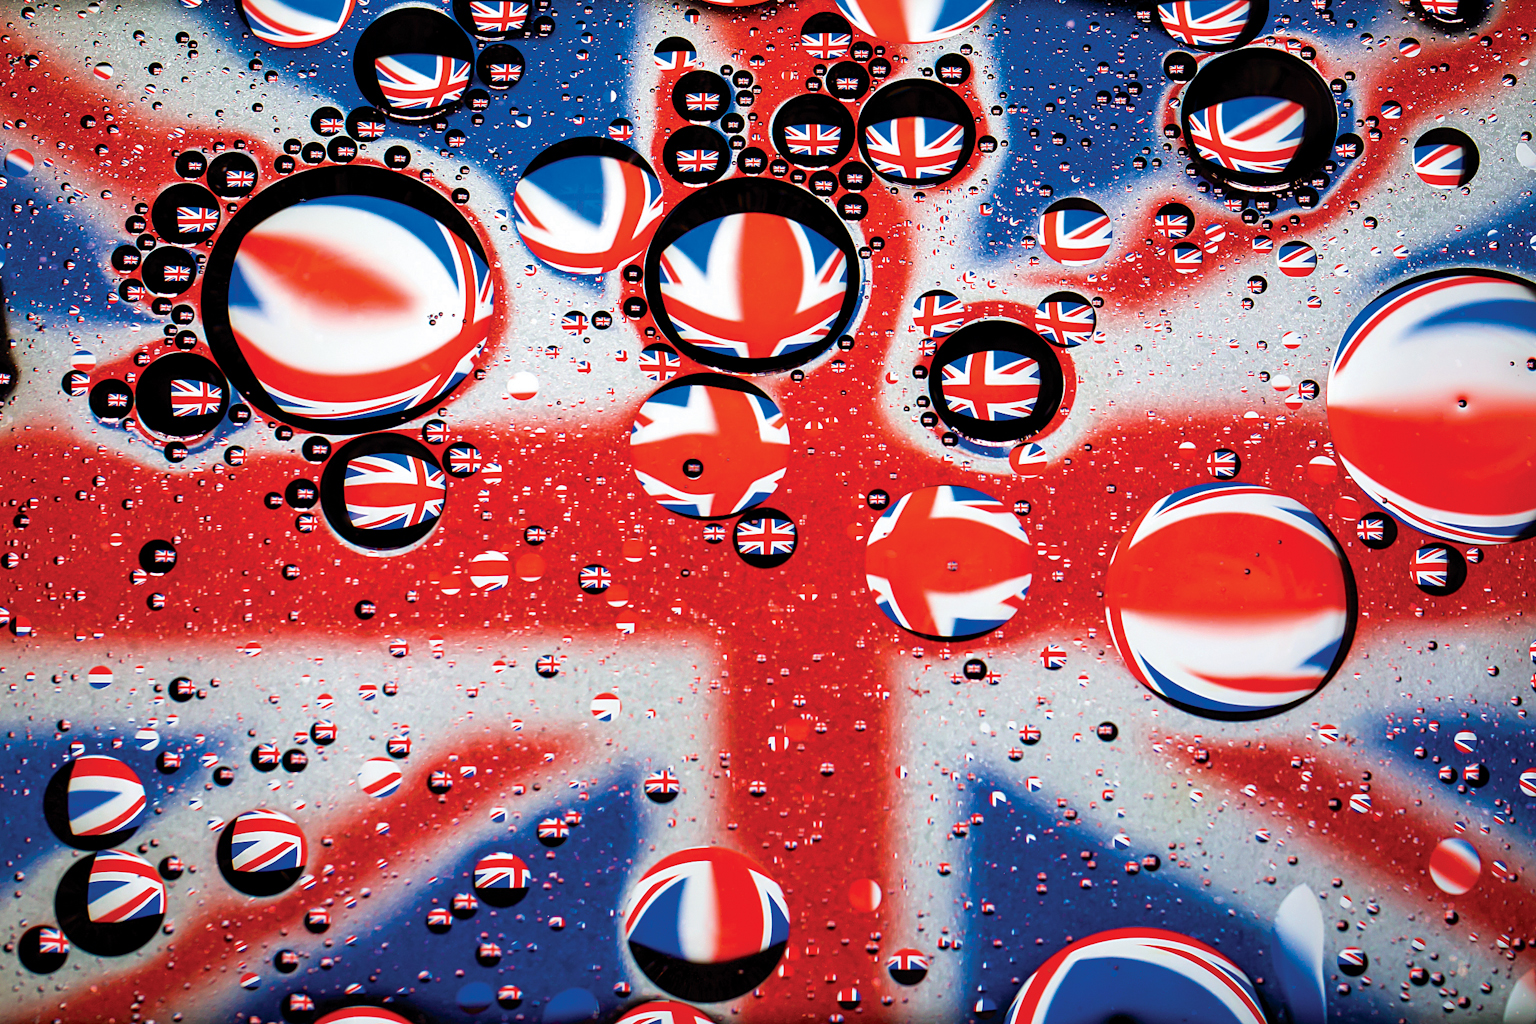
Celebrate the Queen's Jubilee with this fun Union Jack photo project!
Ahead of the Queen's Jubilee we show you how to create unique abstract patterns of the Union Jack flag by combining cooking oil, water and reflected light
The best camera deals, reviews, product advice, and unmissable photography news, direct to your inbox!
You are now subscribed
Your newsletter sign-up was successful
The Queen's Jubilee weekend in the UK is nearly here, and whether you're a royalist or not, it's hard not to pick up on the excitement surrounding the event. This year Her Majesty The Queen becomes the first British Monarch to celebrate a Platinum Jubilee that marks 70 years of service.
During the the Platinum Jubilee Central Weekend (June 2-5) people across the United Kingdom and indeed the world are marking the celebration in their own unique way over the bank holiday weekend. For photographers, we thought we'd put together some fun, silly and slightly patriotic projects that you can try at home to mark the occasion.
Read more: See these rare photos of The Queen
With that in mind, here's a tutorial that will show you how to photograph the Union Jack flag in an abstract and fun way using things that you've already got lying around your kitchen. Water and oil may not mix, but they can create unique photos. With a few household items, a flash (or powerful lamp) and the right camera settings, we can create bold, vibrant abstract pictures. Read on and find out how to turn the British flag into a work of art and celebrate the Queen's Jubilee in 2022.
The mission: Create vibrant abstract art by making reflections in oil and water
Time: One hour
Skill level: Intermediate
Kit needed: Flash or strong lamp, macro lens (optional), tripod (optional)
The key here is in customising our light source. By placing a colourful material in front of the light we can transform it into our own light box. This light will then be reflected into the oil and the water to create our abstract art.
Every little bubble and drop of oil is highly reflective, so at the right angle they reflect the light from our source towards the camera. The result is a seemingly endless array of bubbles – some on the surface of the water, others drifting in the depths below – and each containing the shapes and colours of our light source in miniature form.
We’ve used a colourful Union Jack flag for our oily reflection, but you could use any semi-translucent material. Or if you prefer arts and craft you could fashion your own with cardboard, scissors and tracing paper or coloured acetate. Any bold shape will do, but it adds to the effect if the colours and shapes are familiar and recognisable.
The best camera deals, reviews, product advice, and unmissable photography news, direct to your inbox!
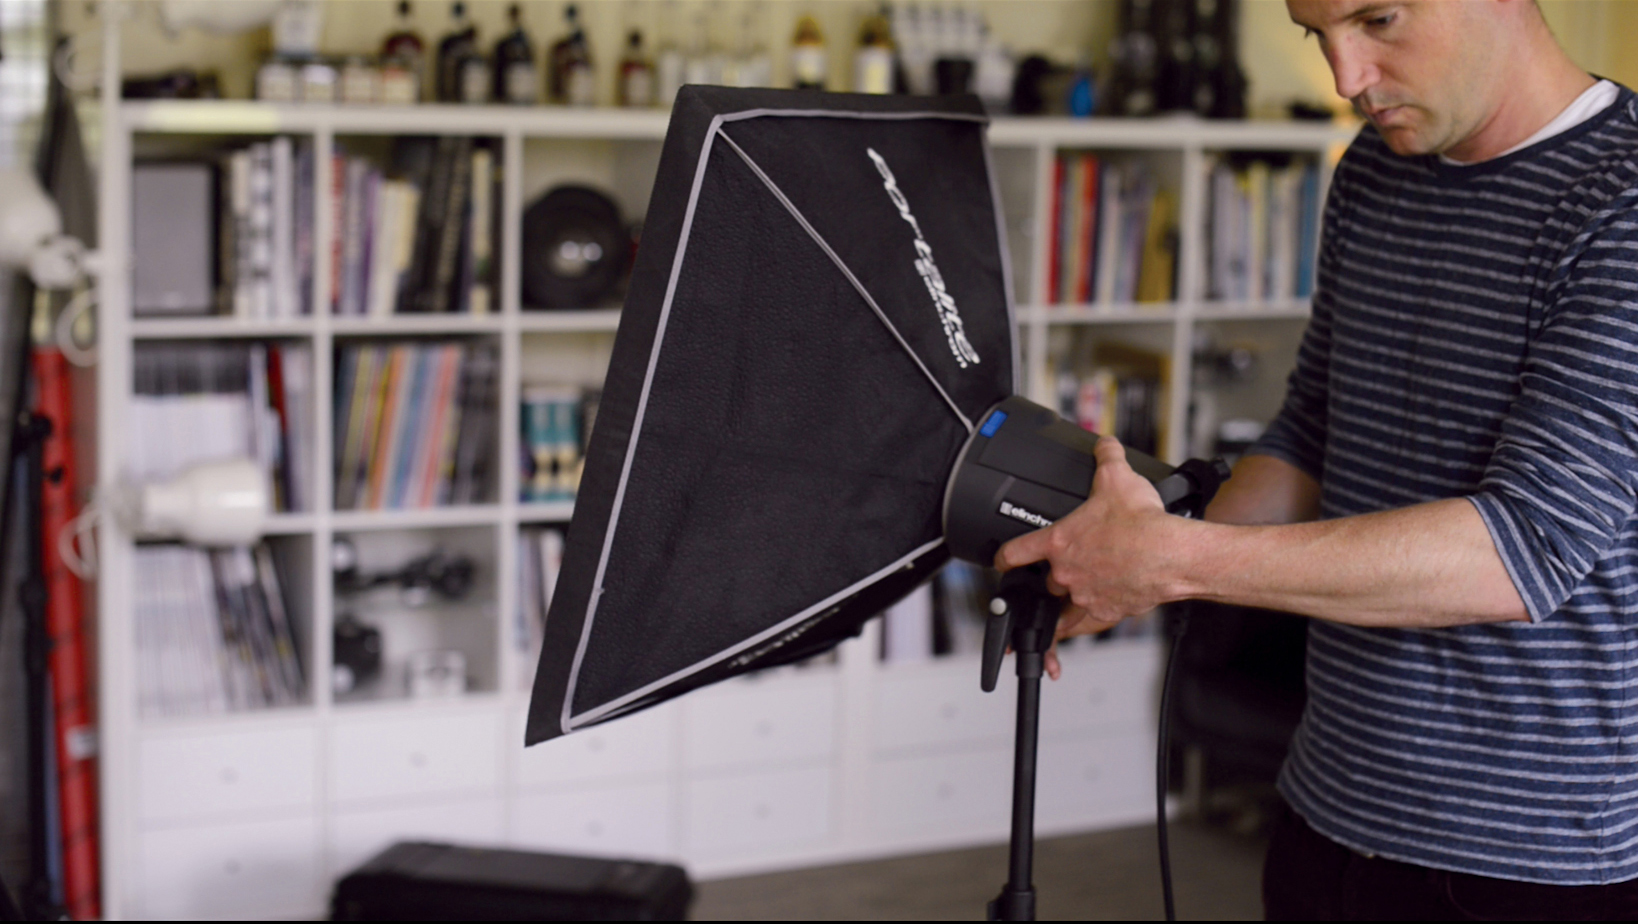
We used a small studio softbox to light our oil and water. If you don’t have this kind of gear you can get similar results with various types of light-emitting devices, as you’ll see.
How to set up your Queen's Jubilee inspired shot
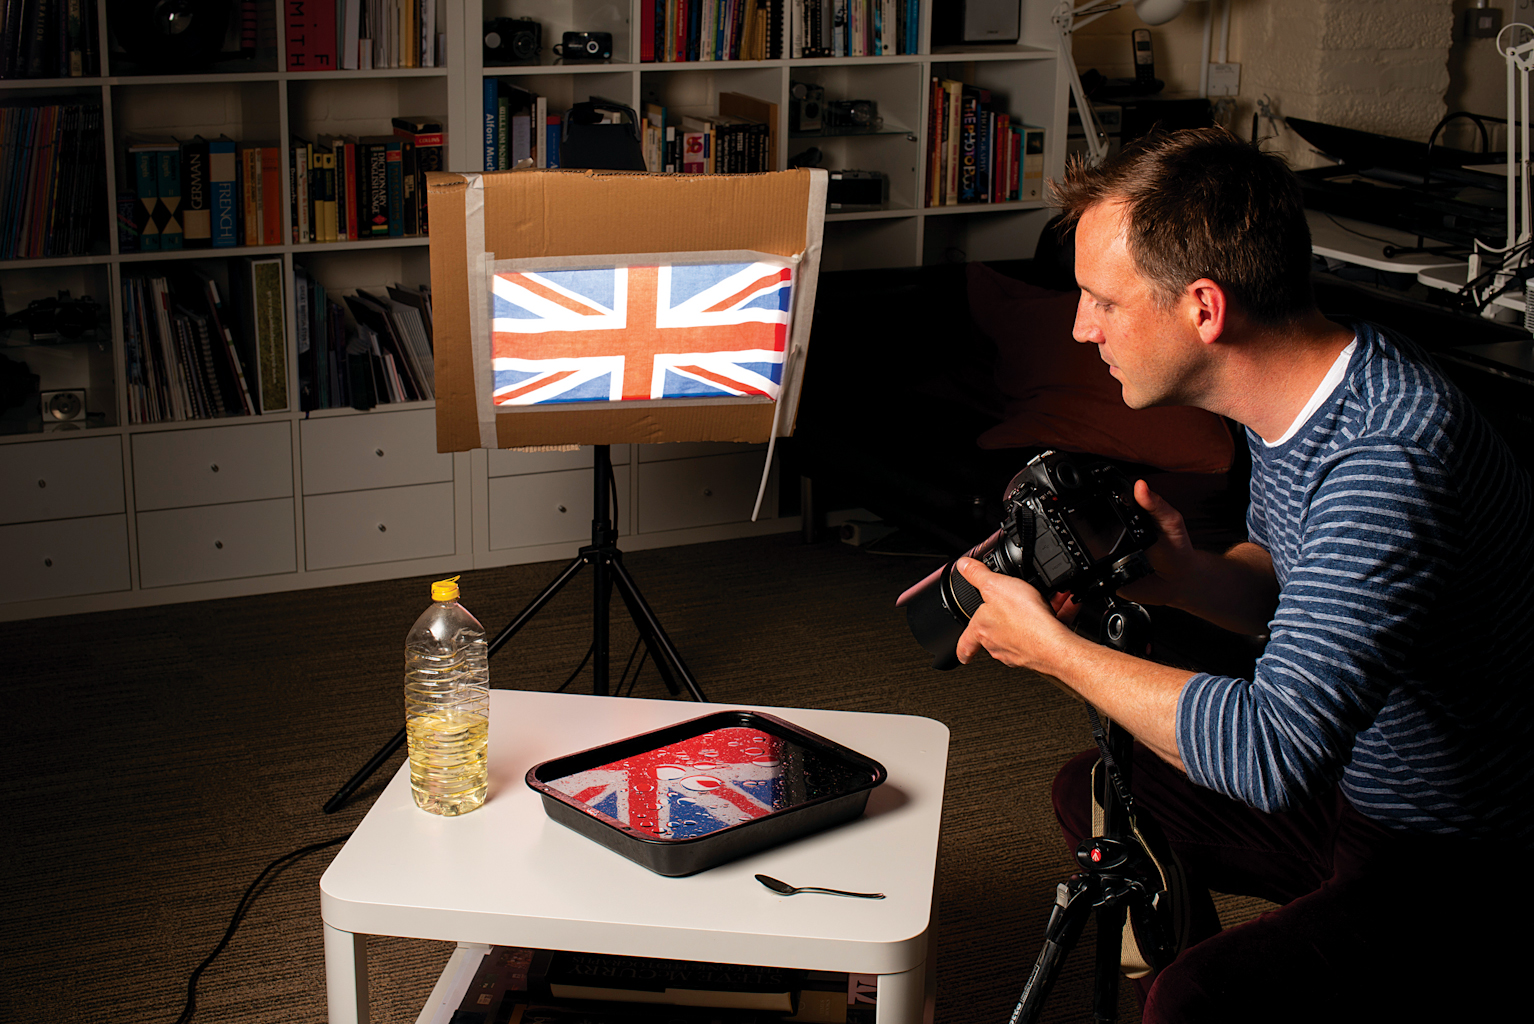
Light source
For this to work, you’ll need a colourful material to place over the top of your light. Any shape, pattern or colour will work – we used a Union Jack flag. You’ll also need to create a cardboard template that’s big enough to fit over your light source.
Light template
We’ve used a studio flash and softbox. If you don’t have one you can craft your own light box. Cut out one side of a box and attach your flag or colourful material. Next, shine a lamp or flashgun through a hole in the opposite side of the box.
Oil on the water
For this effect you’ll want a wide dark container, like a baking tray. Next, fill it with water and add a few drops of cooking oil. Each drop will create beautiful reflections, so be ready to start shooting. If the oil starts to clump give it a quick swirl.
Macro lens
A macro lens enables us to get close to the surface of the water. If you don’t have one, don’t worry – any lens that enables you to zoom in with a short minimum focusing distance will be fine. Try using manual focus to get sharp shots.
Exposure and flash settings
A great set of stock settings for flash indoors is: Manual mode, 1/200 sec, f/11, ISO 100. After this we can tweak the strength of the light to ideally suit our exposure. Position the camera directly opposite the light source and at a similar height so that it can pick up the colourful and vast array of reflections.
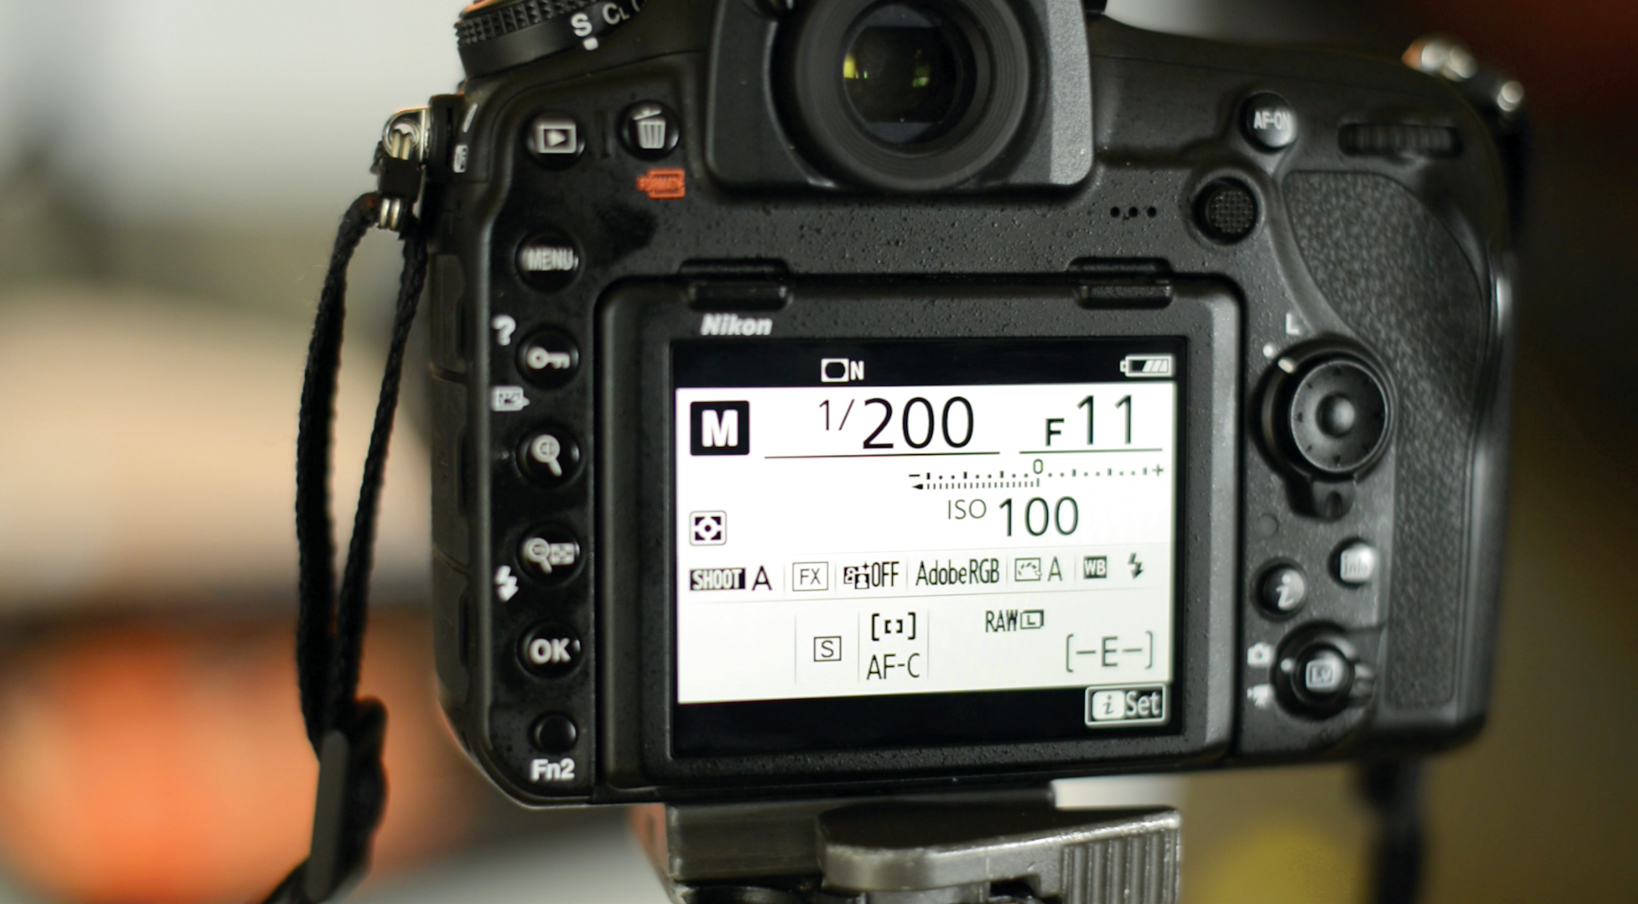
A studio flash head means we can use a low ISO for maximum image quality and a high f-number for increased depth of field. The modelling light is also very convenient for focusing. If you don’t have a studio flash you could use a flashgun, an LED, a powerful household lamp, or potentially even your smartphone.
Setup 1: Colourful, oily abstracts
If you like you can try adding ripples and drops to the water. Simply place a spoon or similar utensil in the water and focus on the base of it. Lift it out of the water, being careful to hold it directly above the focus point. Then capture the moment as drops fall from the spoon and hit the water. A tripod comes in handy here as it frees your hands to focus the lens and hold onto the spoon.
Use your monitor
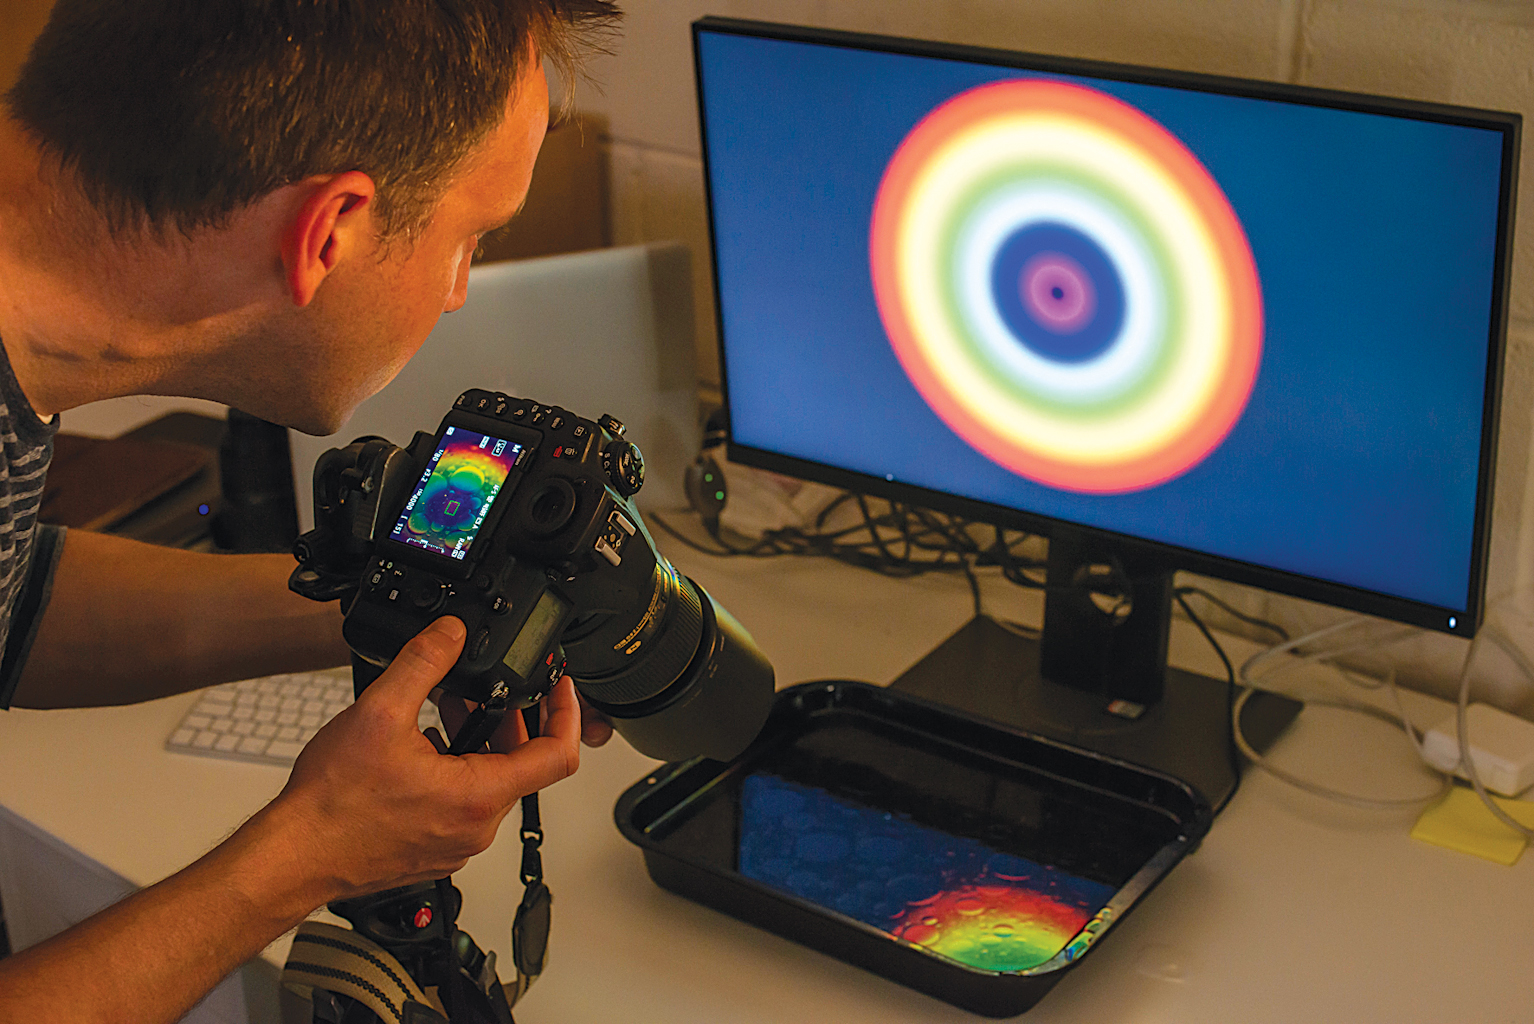
You can use all kinds of light sources for this, even a monitor or tablet screen. We positioned the oil and water in front of a monitor then made a simple circular gradient in Photoshop. Of course, even with brightness turned to the maximum a monitor screen isn’t nearly as powerful as a flash so we needed a high ISO and a wide aperture. As for shutter speed, we can go down to perhaps 1/8 sec and use a tripod. But be sure to wait until the water is still, and use a self timer so as not to disturb the camera when pressing the shutter button.
Kit needed: Oil and water, monitor or any other digital screen, tripod
Exposure: 1/8 sec, f/5, ISO4000
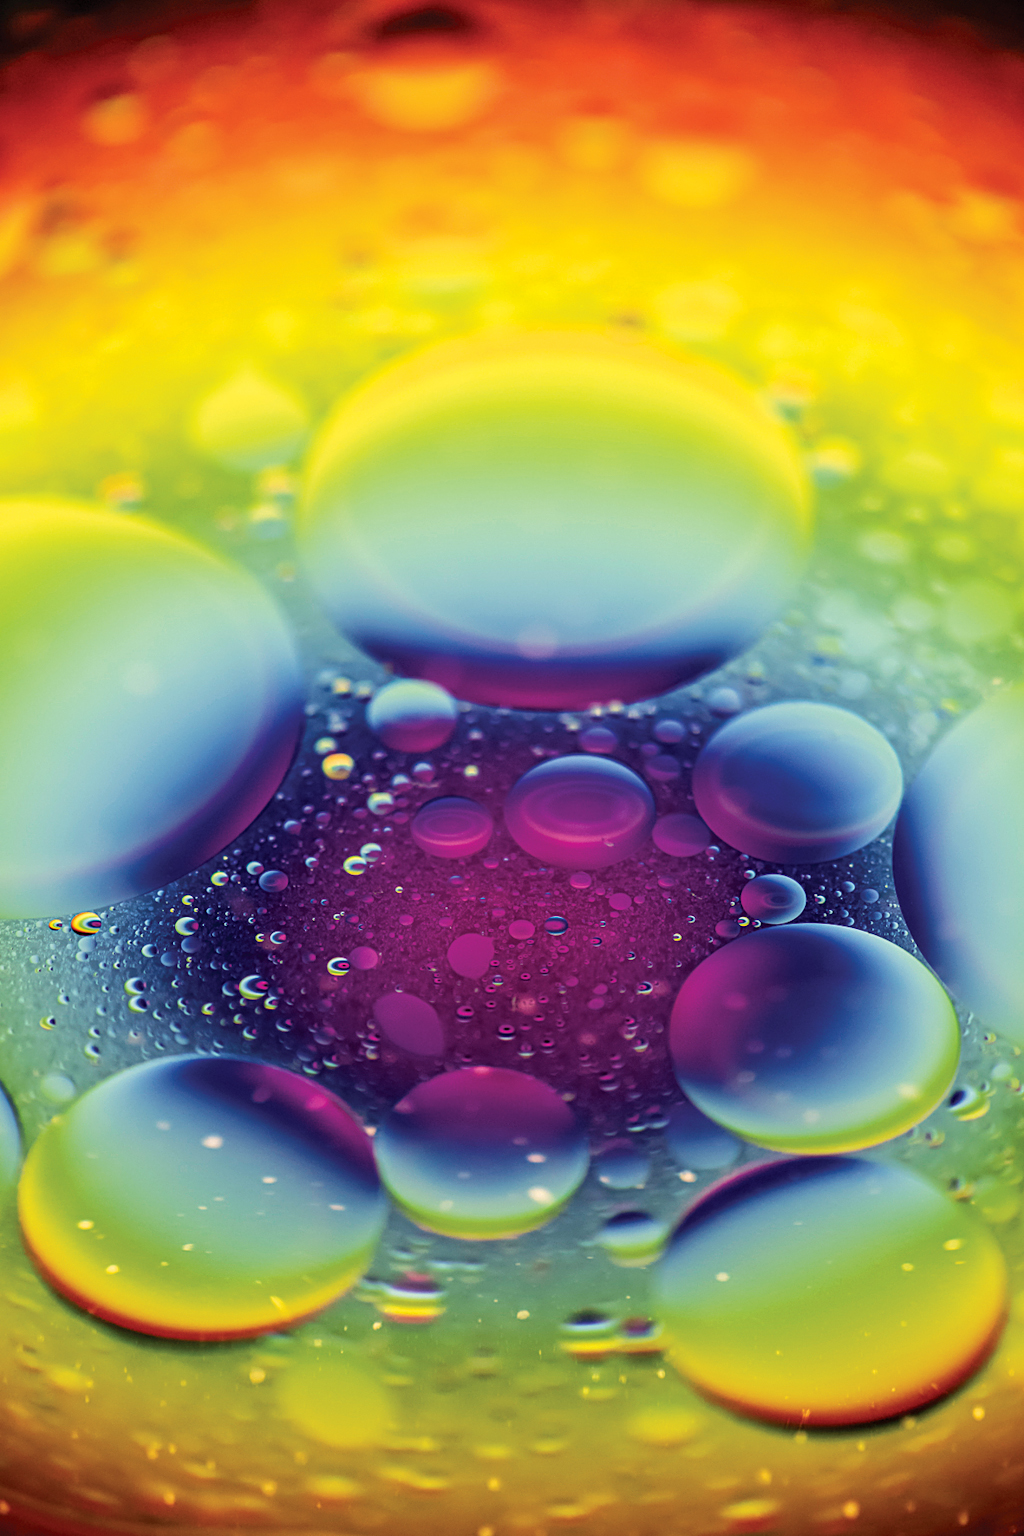
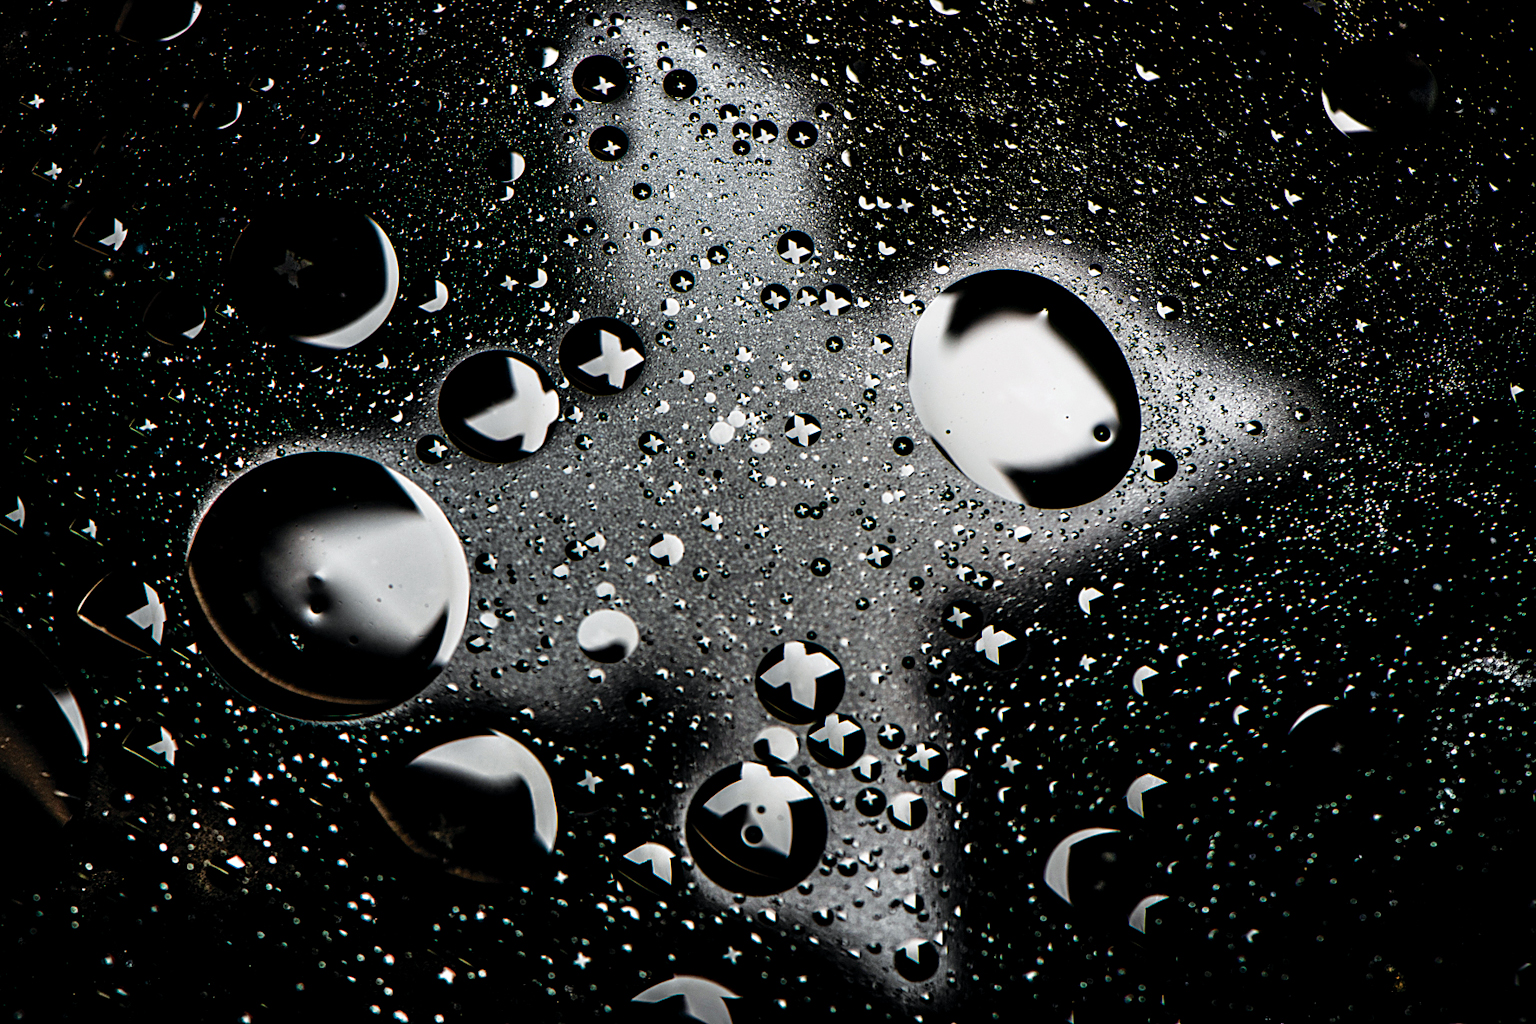
Setup 2: X marks the spot
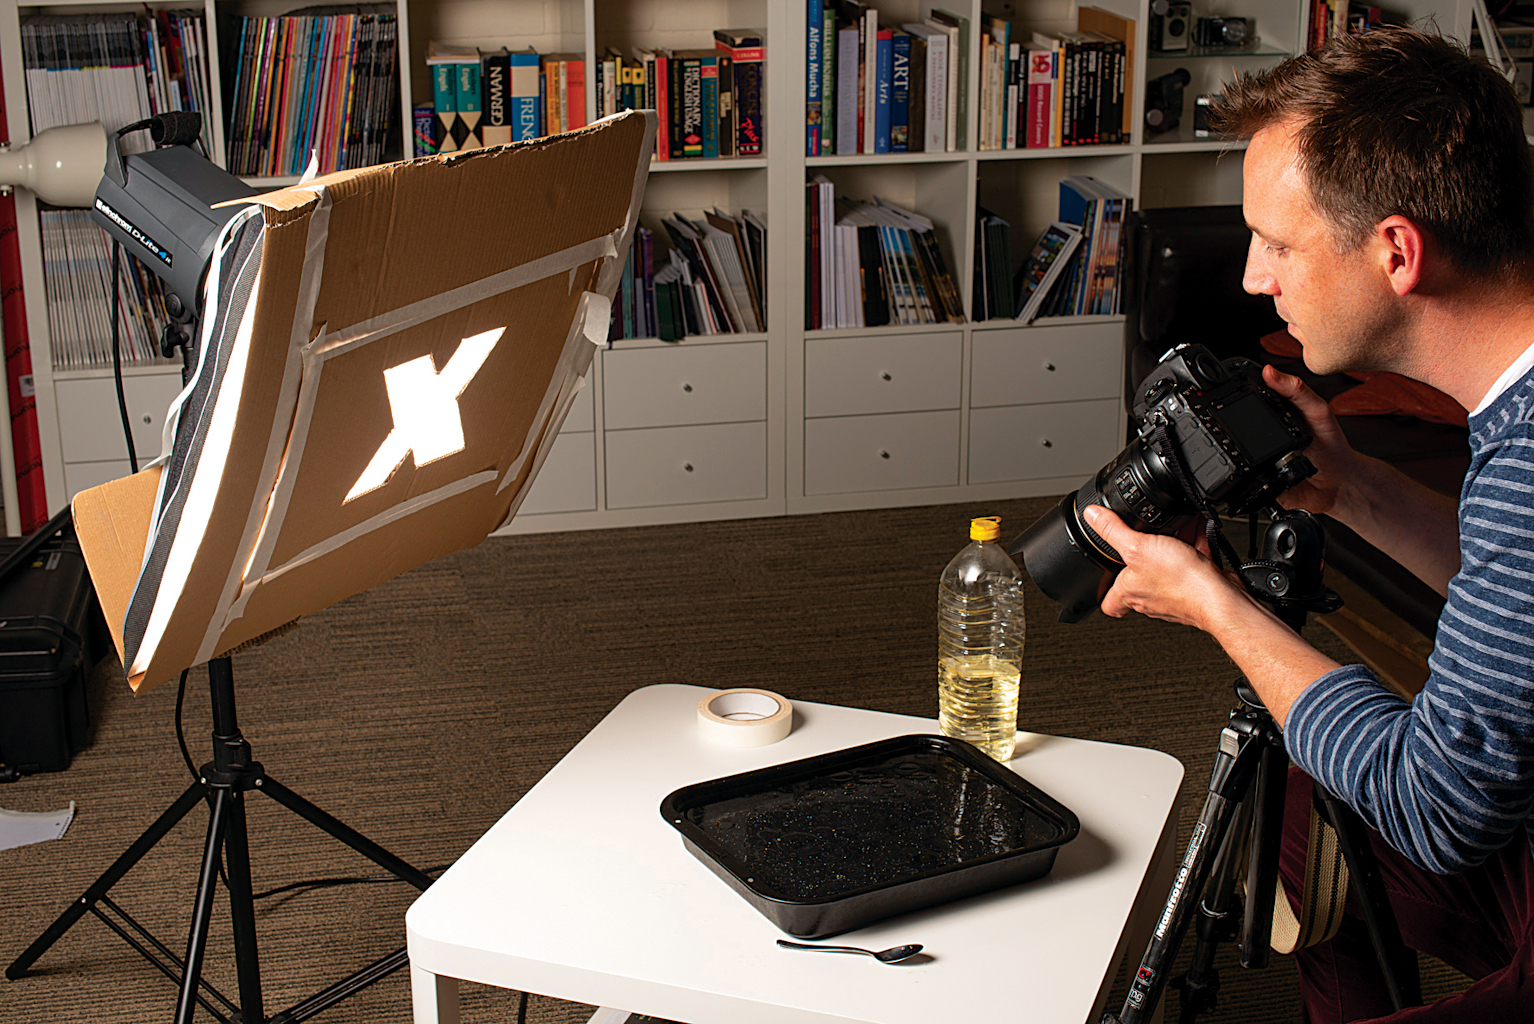
Shape a template
As well as coloured materials like our flag image overleaf we could also try cutting out a shape to fit over our light source. We made an X-shaped hole in a piece of cardboard then fitted it snugly over our softbox, making sure the light couldn’t escape around the edges. It’s worth experimenting with the angle of the light source and your camera height. If we lift the light higher we can raise our camera for a steeper angle of view on the container. This brings us more straight-on to the surface of the water, meaning that more of the oil drops on the surface come into focus.
Kit needed: Flash, cardboard, scissors, tape
Exposure: 1/200 sec, f/11, ISO100
Read more:
Photography cheat sheets
How to create light spheres
Duchess of Cambridge becomes patron of The Royal Photographic Society

Lauren is a writer, reviewer, and photographer with ten years of experience in the camera industry. She's the former Managing Editor of Digital Camera World, and previously served as Editor of Digital Photographer magazine, Technique editor for PhotoPlus: The Canon Magazine, and Deputy Editor of our sister publication, Digital Camera Magazine. An experienced journalist and freelance photographer, Lauren also has bylines at Tech Radar, Space.com, Canon Europe, PCGamesN, T3, Stuff, and British Airways' in-flight magazine. When she's not testing gear for DCW, she's probably in the kitchen testing yet another new curry recipe or walking in the Cotswolds with her Flat-coated Retriever.
