Learn to add bokeh effects to portraits
Spice up portraits with out-of-focus effects and brush techniques

Create a background bokeh effect using Photoshop brushes
Time: 30 minutes
Skill level: Intermediate
Kit needed: Photoshop CC
The term ‘bokeh’ refers to the circular spots that appear in out-of-focus areas of an image. Usually creating bokeh in-camera means investing in a fast lens, shooting at a wide aperture and catching out-of-focus highlights in the background. But with a few simple skills we can replicate the effect in Photoshop.
The key to success here is the amazing Photoshop brush engine. Not only can you create your own brush tips from any shape you like, you can also change the way the brush applies colour by randomising it. If this all sounds like it could get a little bit too complicated, then don’t worry – it’s simply a case of opening up the Brush panel and experimenting with the settings. The key sliders for our bokeh effect here are Scattering and Jitters. Combine them with the right Spacing setting, and you can create beautiful random patterns with just a couple of brush strokes.
• Essential portrait photography tips
We’ll show you how to define a bubble-like brush tip for our bokeh effect, with a transparent centre and opaque edge. Once done, we’ll apply a few simple settings to create our randomised bokeh brush. All we have to do then is paint with the brush on a few separate layers and apply some different strengths of blur to each layer to add depth to the effect, then drop in our cut-out portrait. It’s great fun, and easier than you might think…
STEP BY STEP: Grab a brush
Mimicing bokeh
Cut out a portrait
We’ve provided a cut-out portrait for you to use (download from www.bit.ly/start-70), but if you want to cut out your own, begin by painting over the figure with the Quick Selection brush to select it (hold Alt to erase bits if it goes wrong). When you’re happy with the initial selection, go to Select>Refine Edge and increase the radius to improve it (while in the Refine Edge command, paint over tricky edges, like hair, for a better result). Set Output to Layer Mask and hit OK. You should now have a precise cut-out, to use for this effect or for any other montage idea.
The best camera deals, reviews, product advice, and unmissable photography news, direct to your inbox!
1. MAKE A BRUSH
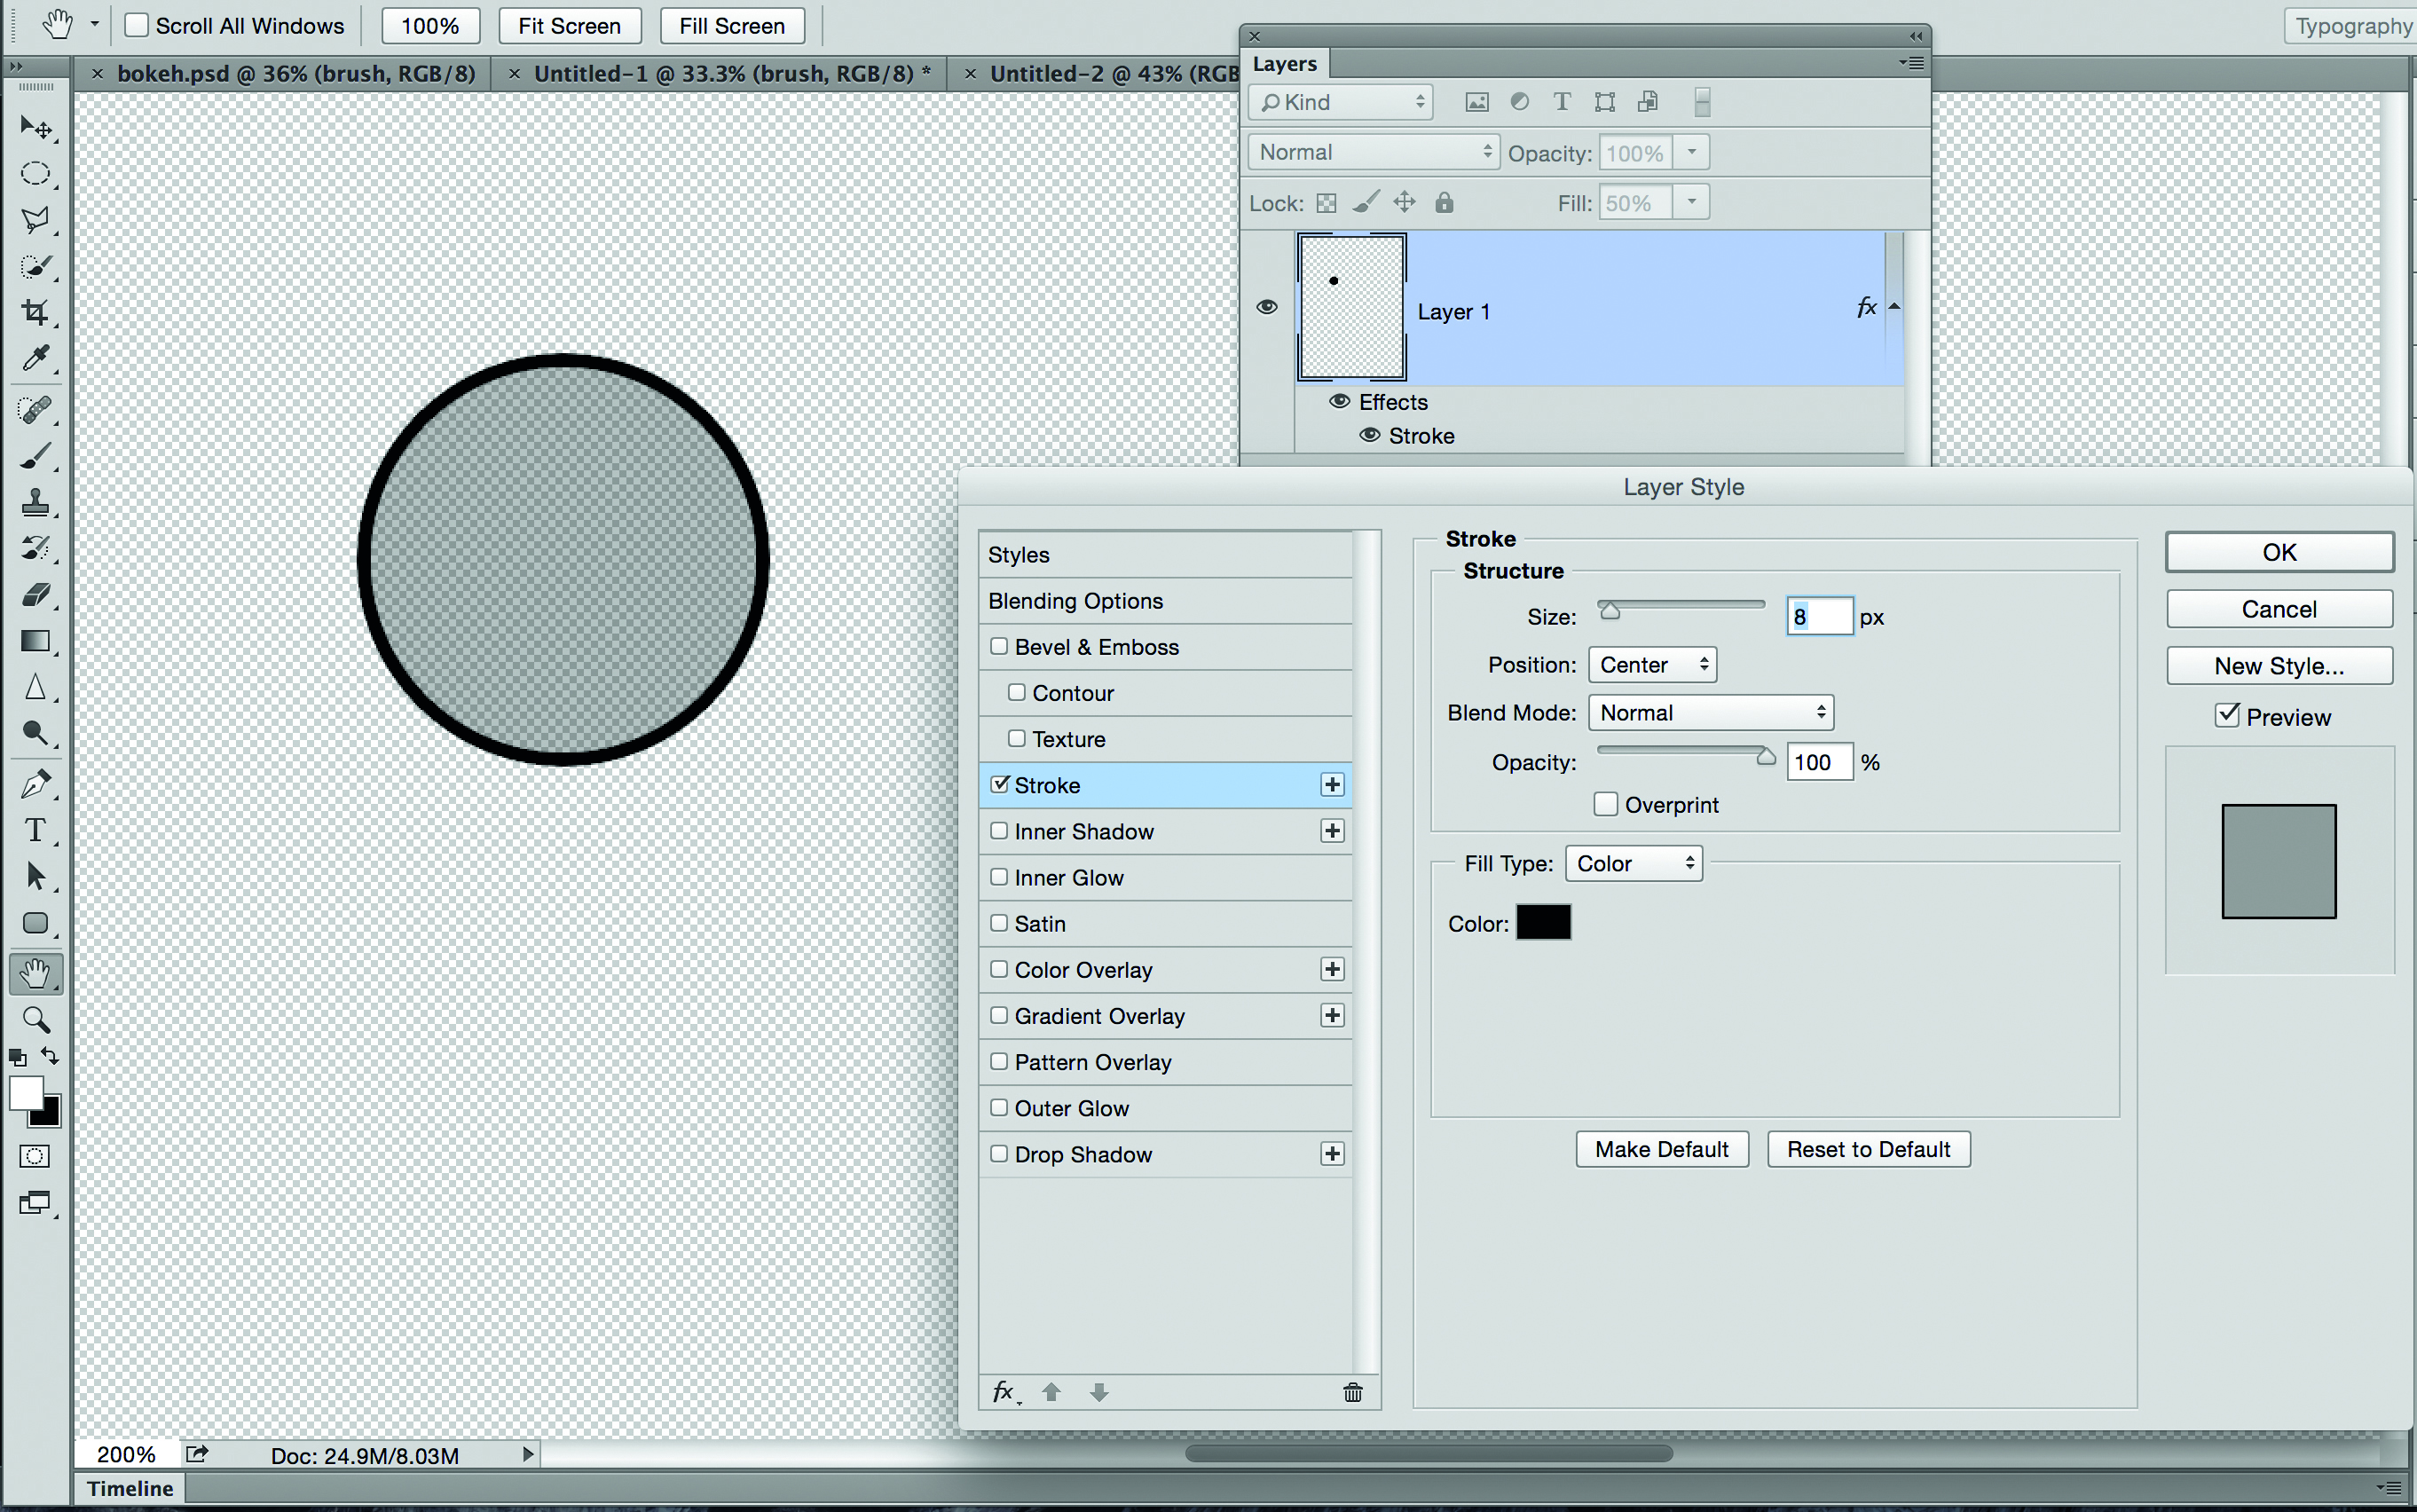
Go to File>New, choose A4, set Background Contents: Transparent, hit OK. Grab the Elliptical Marquee tool. Shift-draw a small circle, go to Edit>Fill and use black. In the Layers panel, set Fill 50%, then go to Layer>Layer Style>Stroke. Set Size 8px, colour black. Hit OK.
2. DEFINE A BRUSH
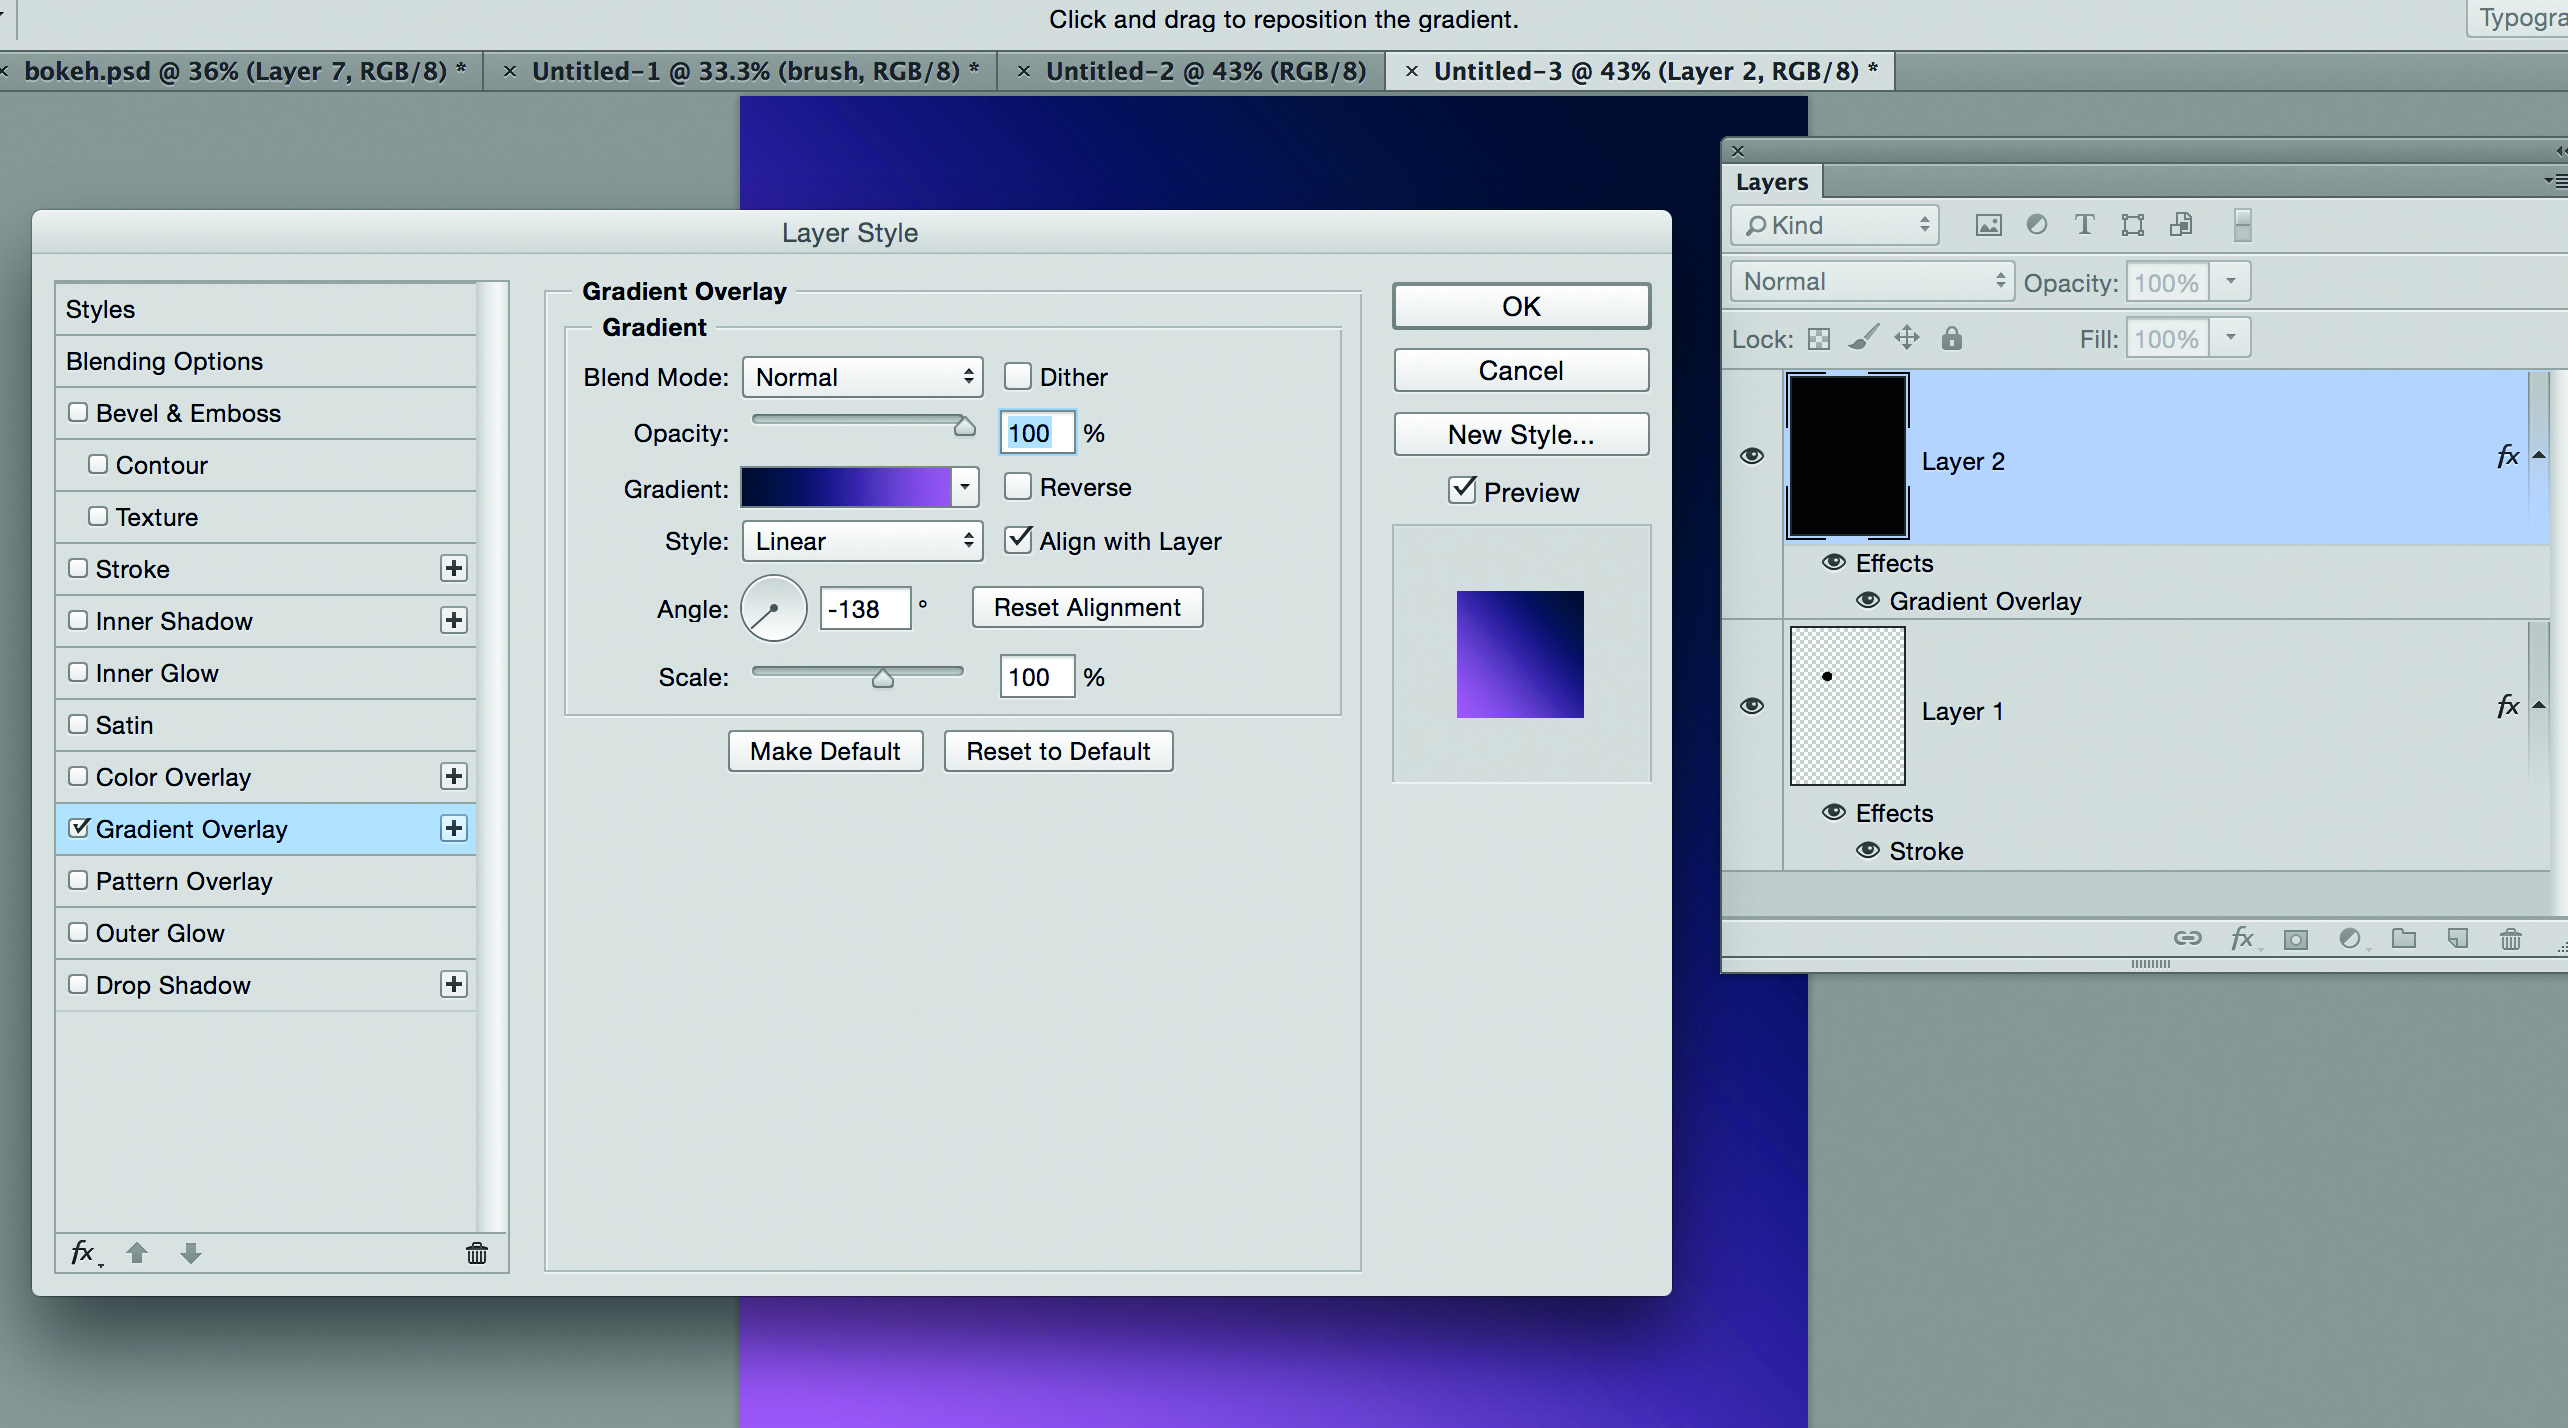
Go to Edit>Define Brush Preset. Name it and hit OK. Create a new layer, hit Alt+Delete to fill it, go to Layer>Layer Style>Gradient Overlay. Click the preview bar, double-click the little squares under the gradient to choose two colours (blue and purple here). Hit OK.
3. CUSTOMISE THE BRUSH
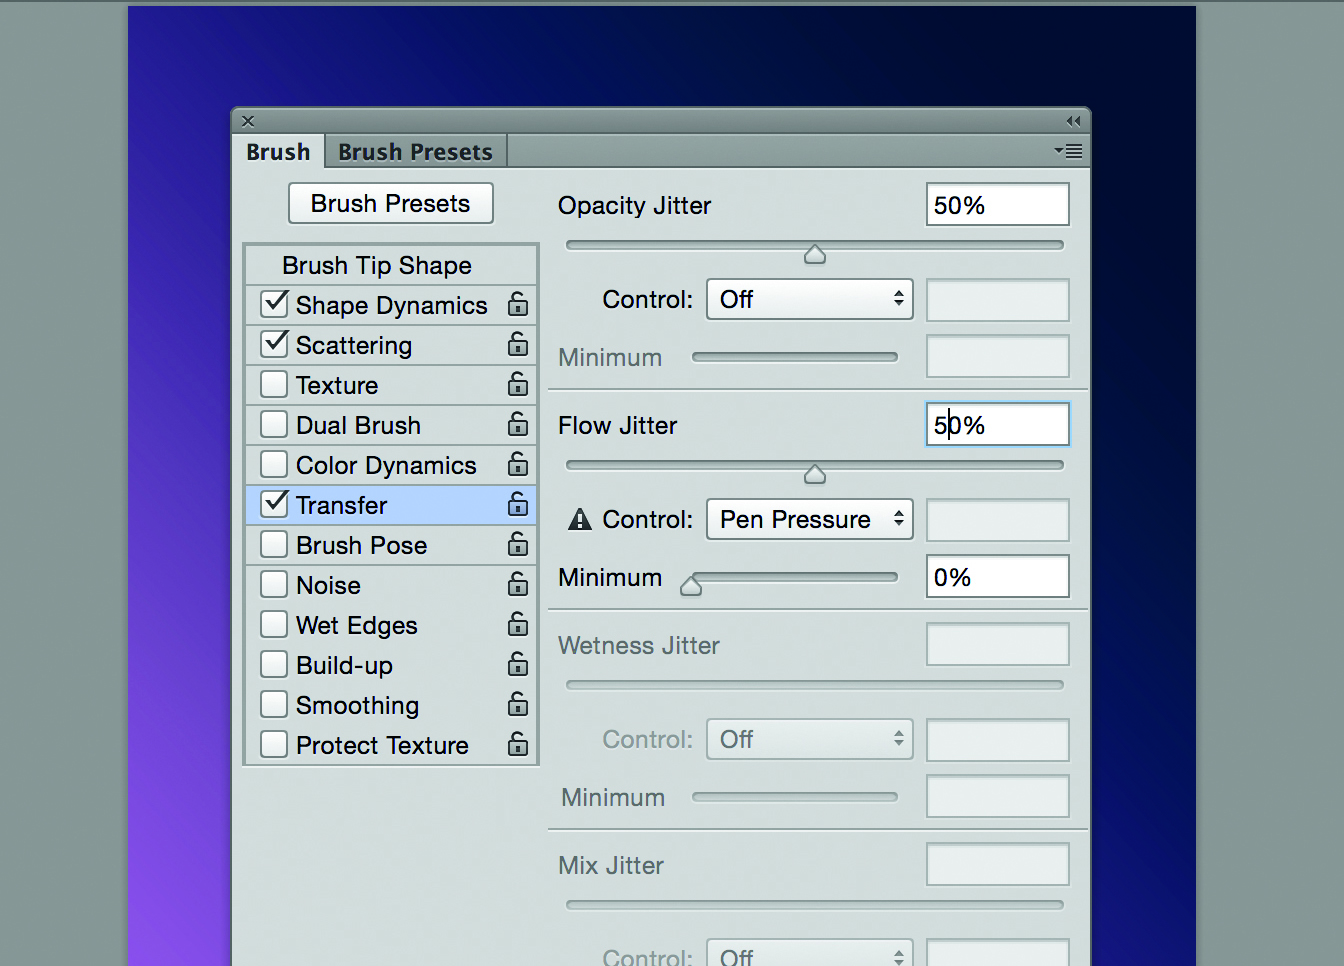
Grab the Brush tool. Toggle the Brush panel in the Options bar. Use Brush Tip Shape, set Spacing 100%. Use Shape Dynamics, set Size Jitter to 100, Minimum Diameter 50. Use Scattering, set Scatter 1000, Count 3. Go to Transfer, set Opacity Jitter and Flow Jitter to 50%.
4. PAINT AND BLUR
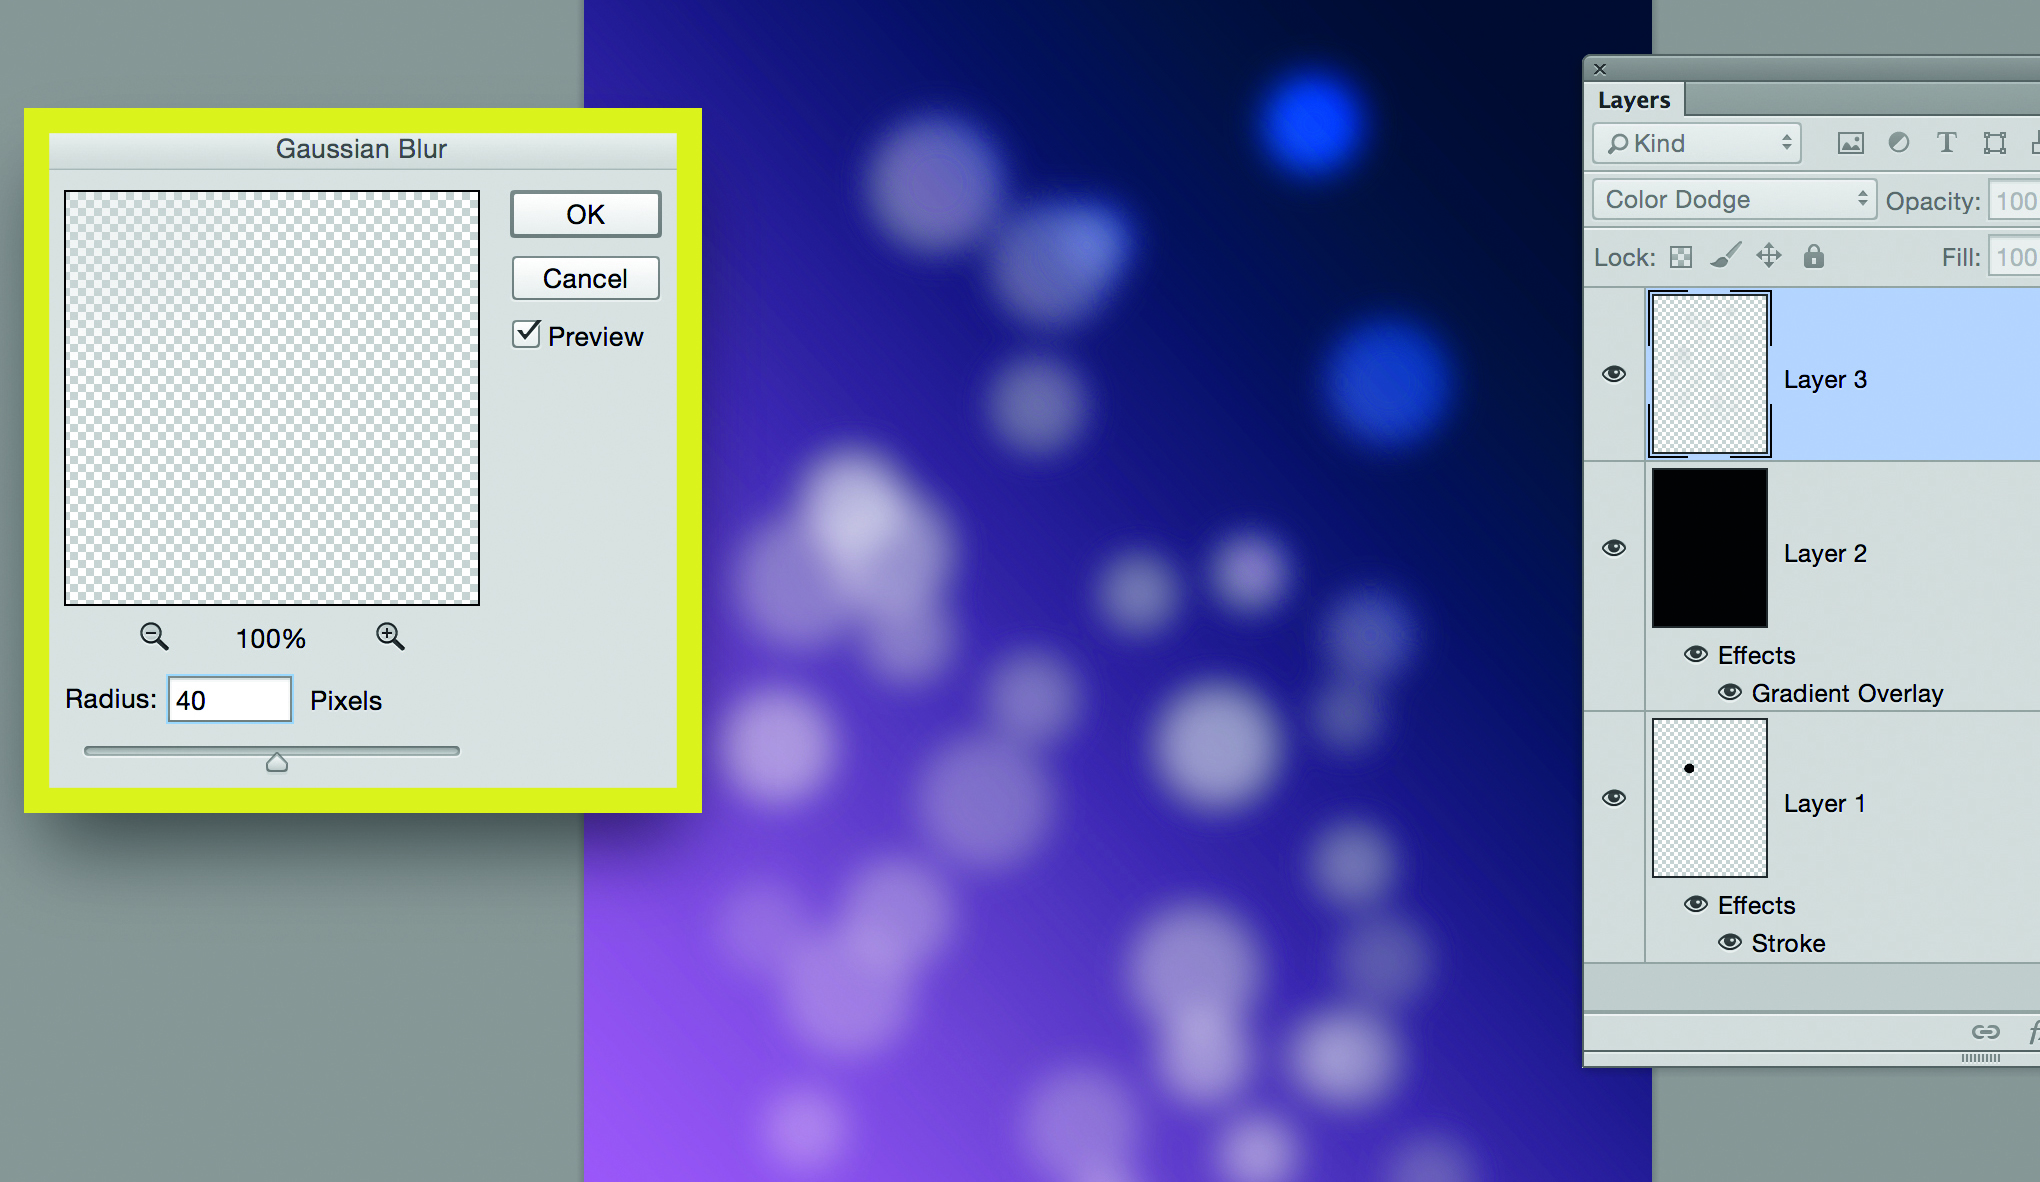
Make a new layer, click the Blending Mode drop-down in the Layers panel, choose Color Dodge. Pick a light grey and paint scattered bubbles. Pick Filter>Blur>Gaussian Blur. Blur the bubbles (Radius 40px), hit OK. Repeat on another layer, with a lower amount of blur.

5. BUILD IT UP
Continue painting and blurring on more layers (set to Color Dodge), varying the brush size and blur. Go to File>Place Embedded and open the bokeh_cutout.png start file to drop in the subject. Add more bokeh layers on top. Hit Ctrl/Cmd+Shift+Alt+E to merge a layer.
To add atmospheric sparks to the effect, paint random white dots then use Filter>Blur Gallery>Path Blur to create streaks of light
6. ADD TONAL EFFECTS
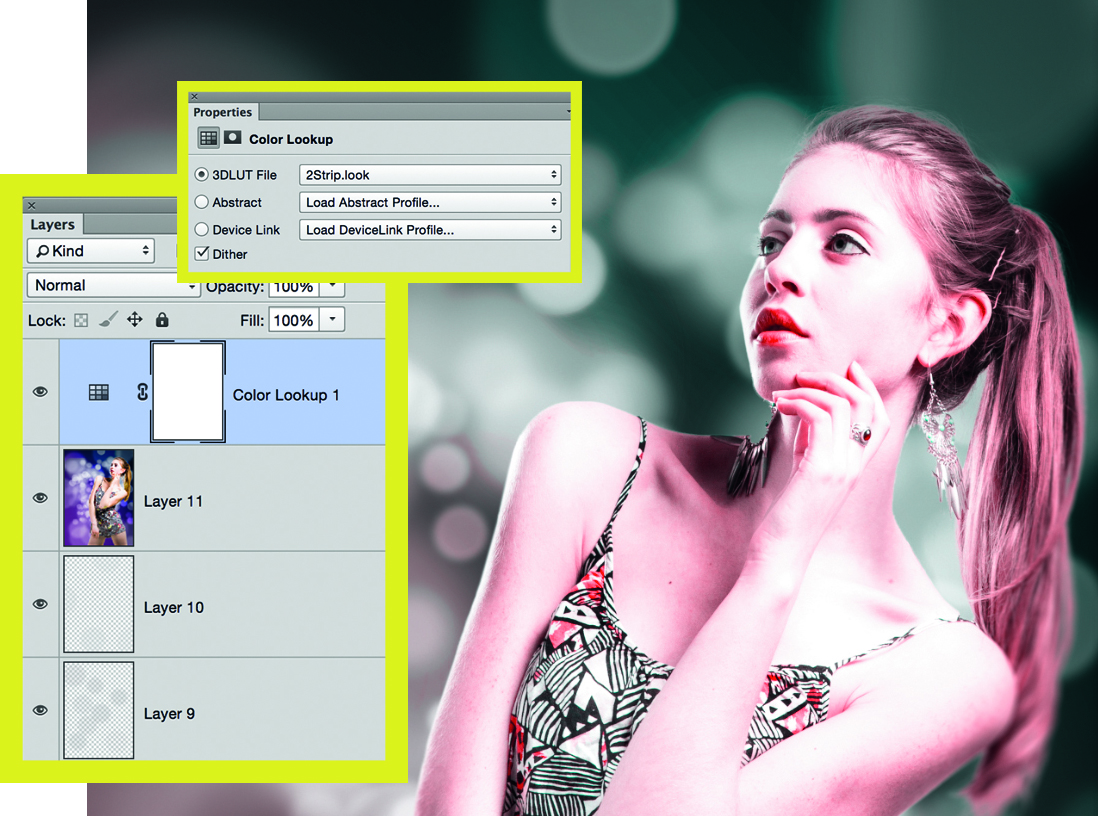
Select Filter>Blur Gallery>Iris Blur and blur the edges of the frame. Go to Filter>Camera Raw Filter. Grab the Radial Filter, set Exposure -3 and drag to darken the corners. Create an adjustment layer, choose Colour Lookup and select a tonal preset, like ‘2 Strip’ here.
The lead technique writer on Digital Camera Magazine, PhotoPlus: The Canon Magazine and N-Photo: The Nikon Magazine, James is a fantastic general practice photographer with an enviable array of skills across every genre of photography.
Whether it's flash photography techniques like stroboscopic portraits, astrophotography projects like photographing the Northern Lights, or turning sound into art by making paint dance on a set of speakers, James' tutorials and projects are as creative as they are enjoyable.
He's also a wizard at the dark arts of Photoshop, Lightroom and Affinity Photo, and is capable of some genuine black magic in the digital darkroom, making him one of the leading authorities on photo editing software and techniques.


