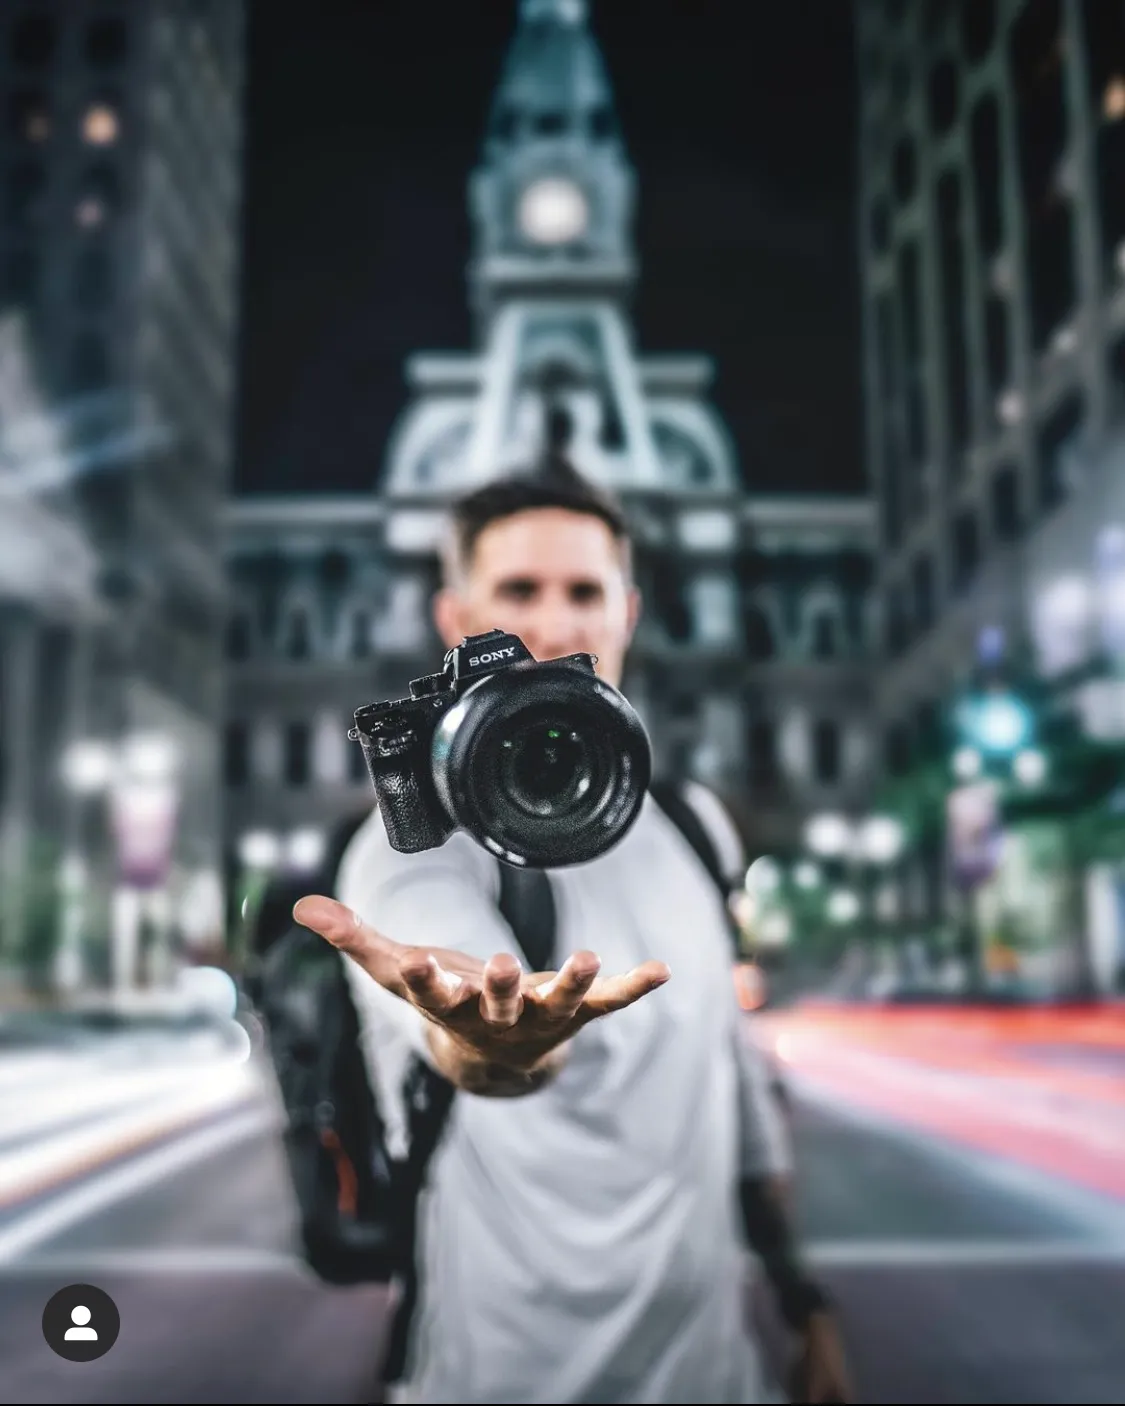
The floating camera trick is a fun technique to play around with, and although there are different ways to achieve the effect, we like Ryan Fredericks’ very simple approach. For his levitating camera shot, Ryan simply dropped the camera and captured the results of it in midair using a fast shutter speed.
"Every now and then I will see a commercial photo in a piece of advertising that looks as though a product is suspended in mid-air, and I thought it would be a great concept to put my own spin on," Ryan tells us.
"There are so many creative images out there, whether they're in a magazine or on an Instagram feed, so I do my best to remember what concepts really strike me and use them as inspiration to try and expand upon."
We asked Ryan for his practical settings and tips so that we could try it ourselves. Obviously... be careful when dropping your own camera. If you're giving this a go at home rather than in an urban environment, why not plump up a few cushions underneath the drop zone just to be on the safe side?
How did Ryan create this effect?
“I captured three different images with a Sony A7iii and Sony Zeiss 35mm 1.4 lens, each with a different focal point. By setting up a tripod to make sure the frame never changed, I was able to blend all three photos together in Photoshop for the final image.”

1. Shoot the background
This was taken as a long exposure to achieve the light trails you see from the cars passing by, using f/11, ISO 50 and an 8 second exposure.

2. Shoot 'middle' layer
I stood in the centre of the frame with my arm extended and hand open, mimicking holding a camera. I went for a shallow depth of field with an f/1.4 aperture to pull the focus to only my hand.

3. Capture final shot
This was the “levitating” camera. Luckily, after just a few attempts, I got a shot with the camera completely suspended and in focus, thanks to a 1/2500 shutter, ISO6400 and f/1.4 aperture.
Keeping your camera in one position is key for this technique to work. Once your three images are shot, merge your layers using your favourite editing software and add then apply any edits to your final image.
Read more:
Ryan Frederick's video tutorial
Home photography ideas
Levitation photography secrets

