No limit to these skies! Discover top tricks for boosting your sunsets in Affinity Photo 2
Sunsets, seaside, silhouettes… there are plenty of subjects to poke your
lens at in the summer months. Here are some tips to get started, plus scroll down and discover how to boost your sunset skies in Affinity Photo 2!
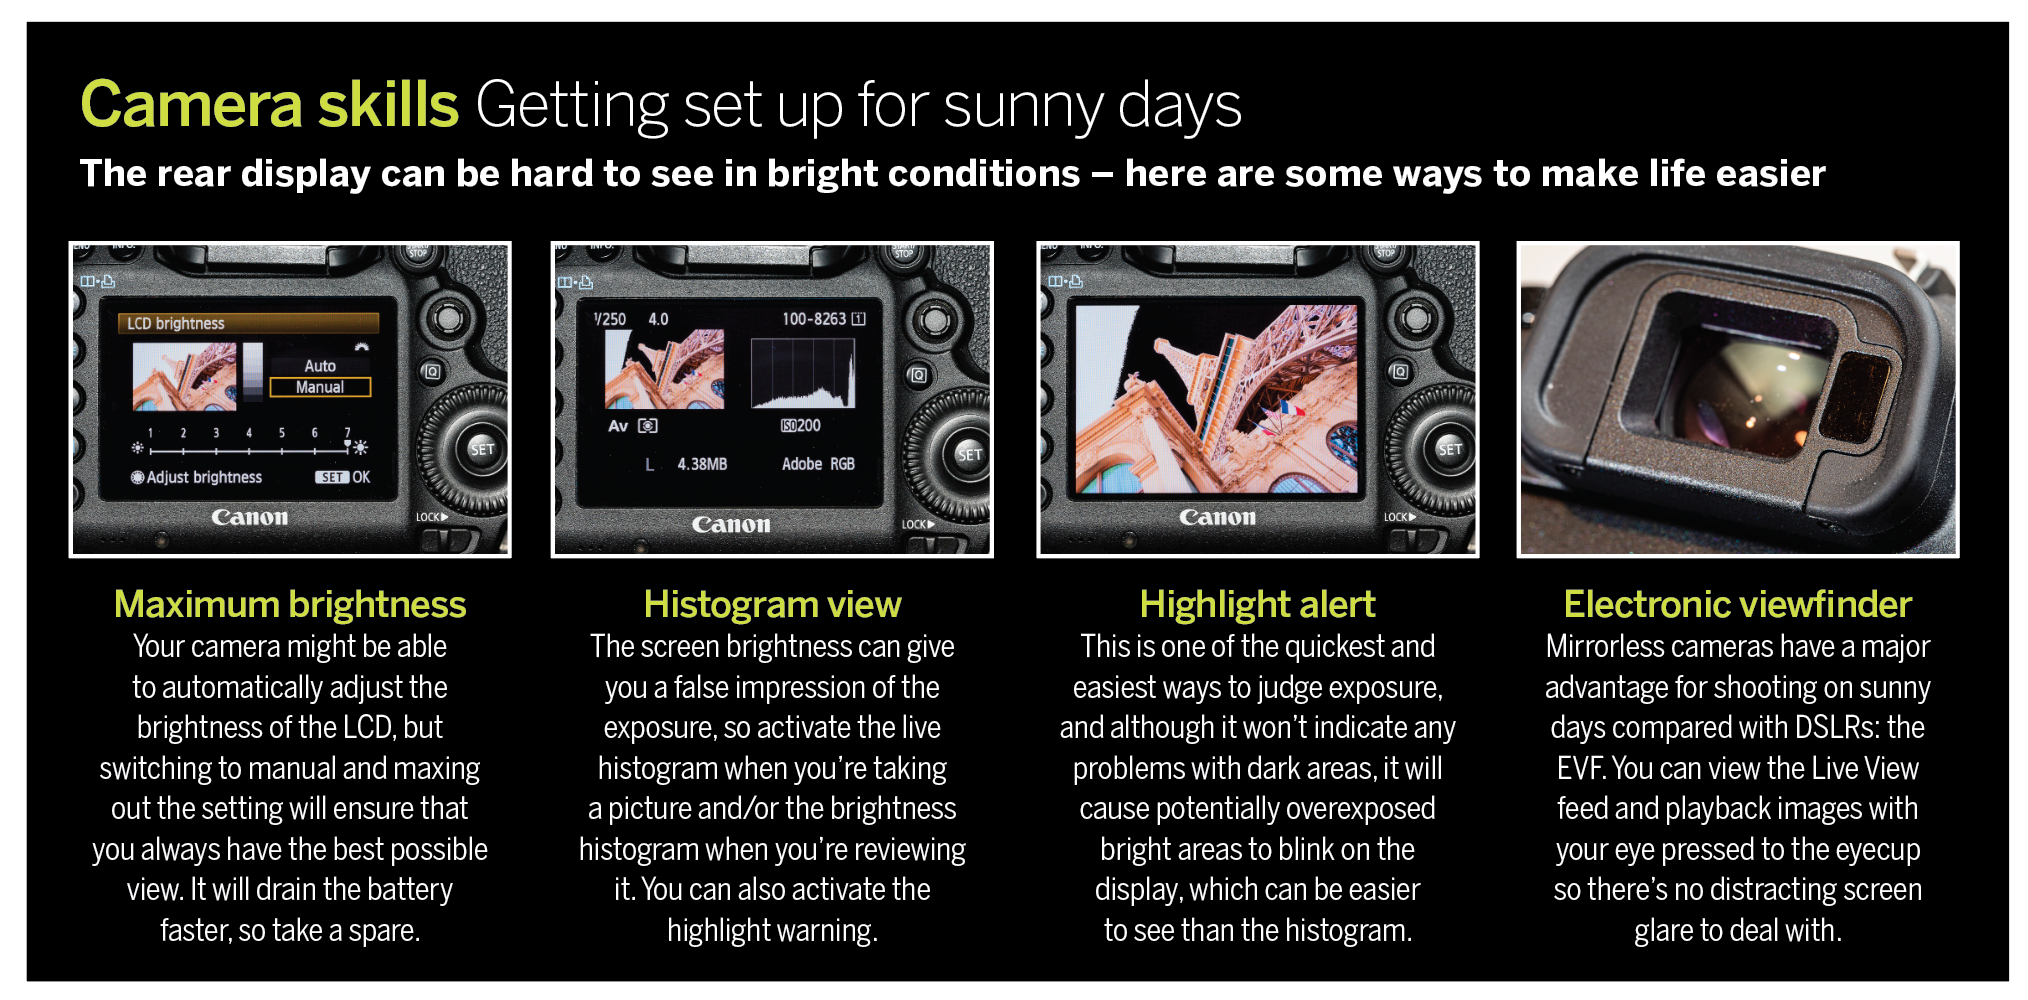
For photographers, summer is something of a mixed blessing. There’s no doubt that it’s more pleasant to be out and about with a camera in warmer temperatures and (potentially) dry conditions. But while it’s nice and bright, it’s often the wrong kind of light.
Midday on sunny days serves up slabs of hard light that create deep, sharp shadows and gloss-white highlights that can make it harder to achieve balanced exposures and more challenging to take flattering portraits and close-ups. Of course, you can modify and control the light through the use of reflectors, diffusers and flashguns.

Out now, Affinity Photo 2 is the brand-new version of the only fully-loaded photo editor integrated across macOS, Windows and iPad. The first choice of millions of creative and photography professionals around the world who love its speed, power and precision, Affinity Photo 2 has everything you need to edit and retouch images, create multi-layered compositions, beautiful raster paintings and so much more. It's also equipped with hundreds of timesaving tools and a completely redesigned UI to make your editing experience more seamless than ever. Affinity Photo 2 is available for a one-off payment with no subscription, or try the 30-day free trial.
The trick is to make sure that the bright areas of a picture are well exposed, and use the modifier to bring back detail in the dark areas. For example, if you’re shooting a portrait, make sure that the sun is behind or to the side of the subject so that they’re not squinting into the lens, then set the exposure for the bright background. You can then use a reflector or a burst of flash to throw light onto the person in shadow. Alternatively, seek out pockets of shade, where you can achieve a soft and even level of illumination.
There is a host of creative ways in which you can approach summer photography. You could embrace colour as a theme, for example. A polarising filter can be an advantage here; as it will cut through reflections and saturate colours it is particularly useful when you’re shooting at the coast. You could focus on silhouettes, sun flares, sunsets or slow exposures, with the aid of a strong ND (Neutral Density) filter. And with the prospect of a clear night, you could even shoot the stars and try photographing the Milky Way.
Summer is also a time for travel, whether it’s a day out at the beach, a quick city break or a full-blown family vacation. A single standard zoom lens is going to be perfect for most of your summer photography needs: if you’re on a beach, the last thing you want to be doing is changing lenses and risking the sensor being exposed to sand. Add a UV filter to protect the front element from salt spray and a flashgun to open up shadow detail in portraits.
Landscape photography is one area where you’re probably going to have more joy by shooting at either end of the day rather than in the middle. Not only will you be able to take pictures in richer, more interesting light, but you’ll also be able to benefit from fewer people being at a popular location.
5 summer photography tips
1) Rise early and stay out late
When the weather forecast points to days of clear blue skies, it pays to shoot when the sky isn’t high in the sky. The light is softer during the hours after sunrise and before sunset, which makes it easier to record fine details.
2) Expose for the highlights
It’s easy to end up with bleached-out bright areas and hard black shadows due to the intensity of light on a summer day. Featureless shadows look more natural than featureless highlights, so exposure your pictures so that the bright areas retain detail. You can do this by dialling in negative exposure compensation.
3) Control the light
To create more balanced exposures, expose for the highlights and use a reflector or a blip of flash to add some detail to the darker areas if you’re close enough.
4) Shoot in the shade
If you’re shooting a portrait, you’ll get more even lighting and flattering results if you find a patch of shade to shoot in rather than out in the sun. Set the Shade white balance on your camera so that the image doesn’t look too cool.
5) Use a circular polariser
This filter will enable you to remove reflections and saturate colours, and is especially useful for landscape and coastal photography. It does cost you some light, though, so for sharp results, check that the shutter speed doesn’t get too slow.
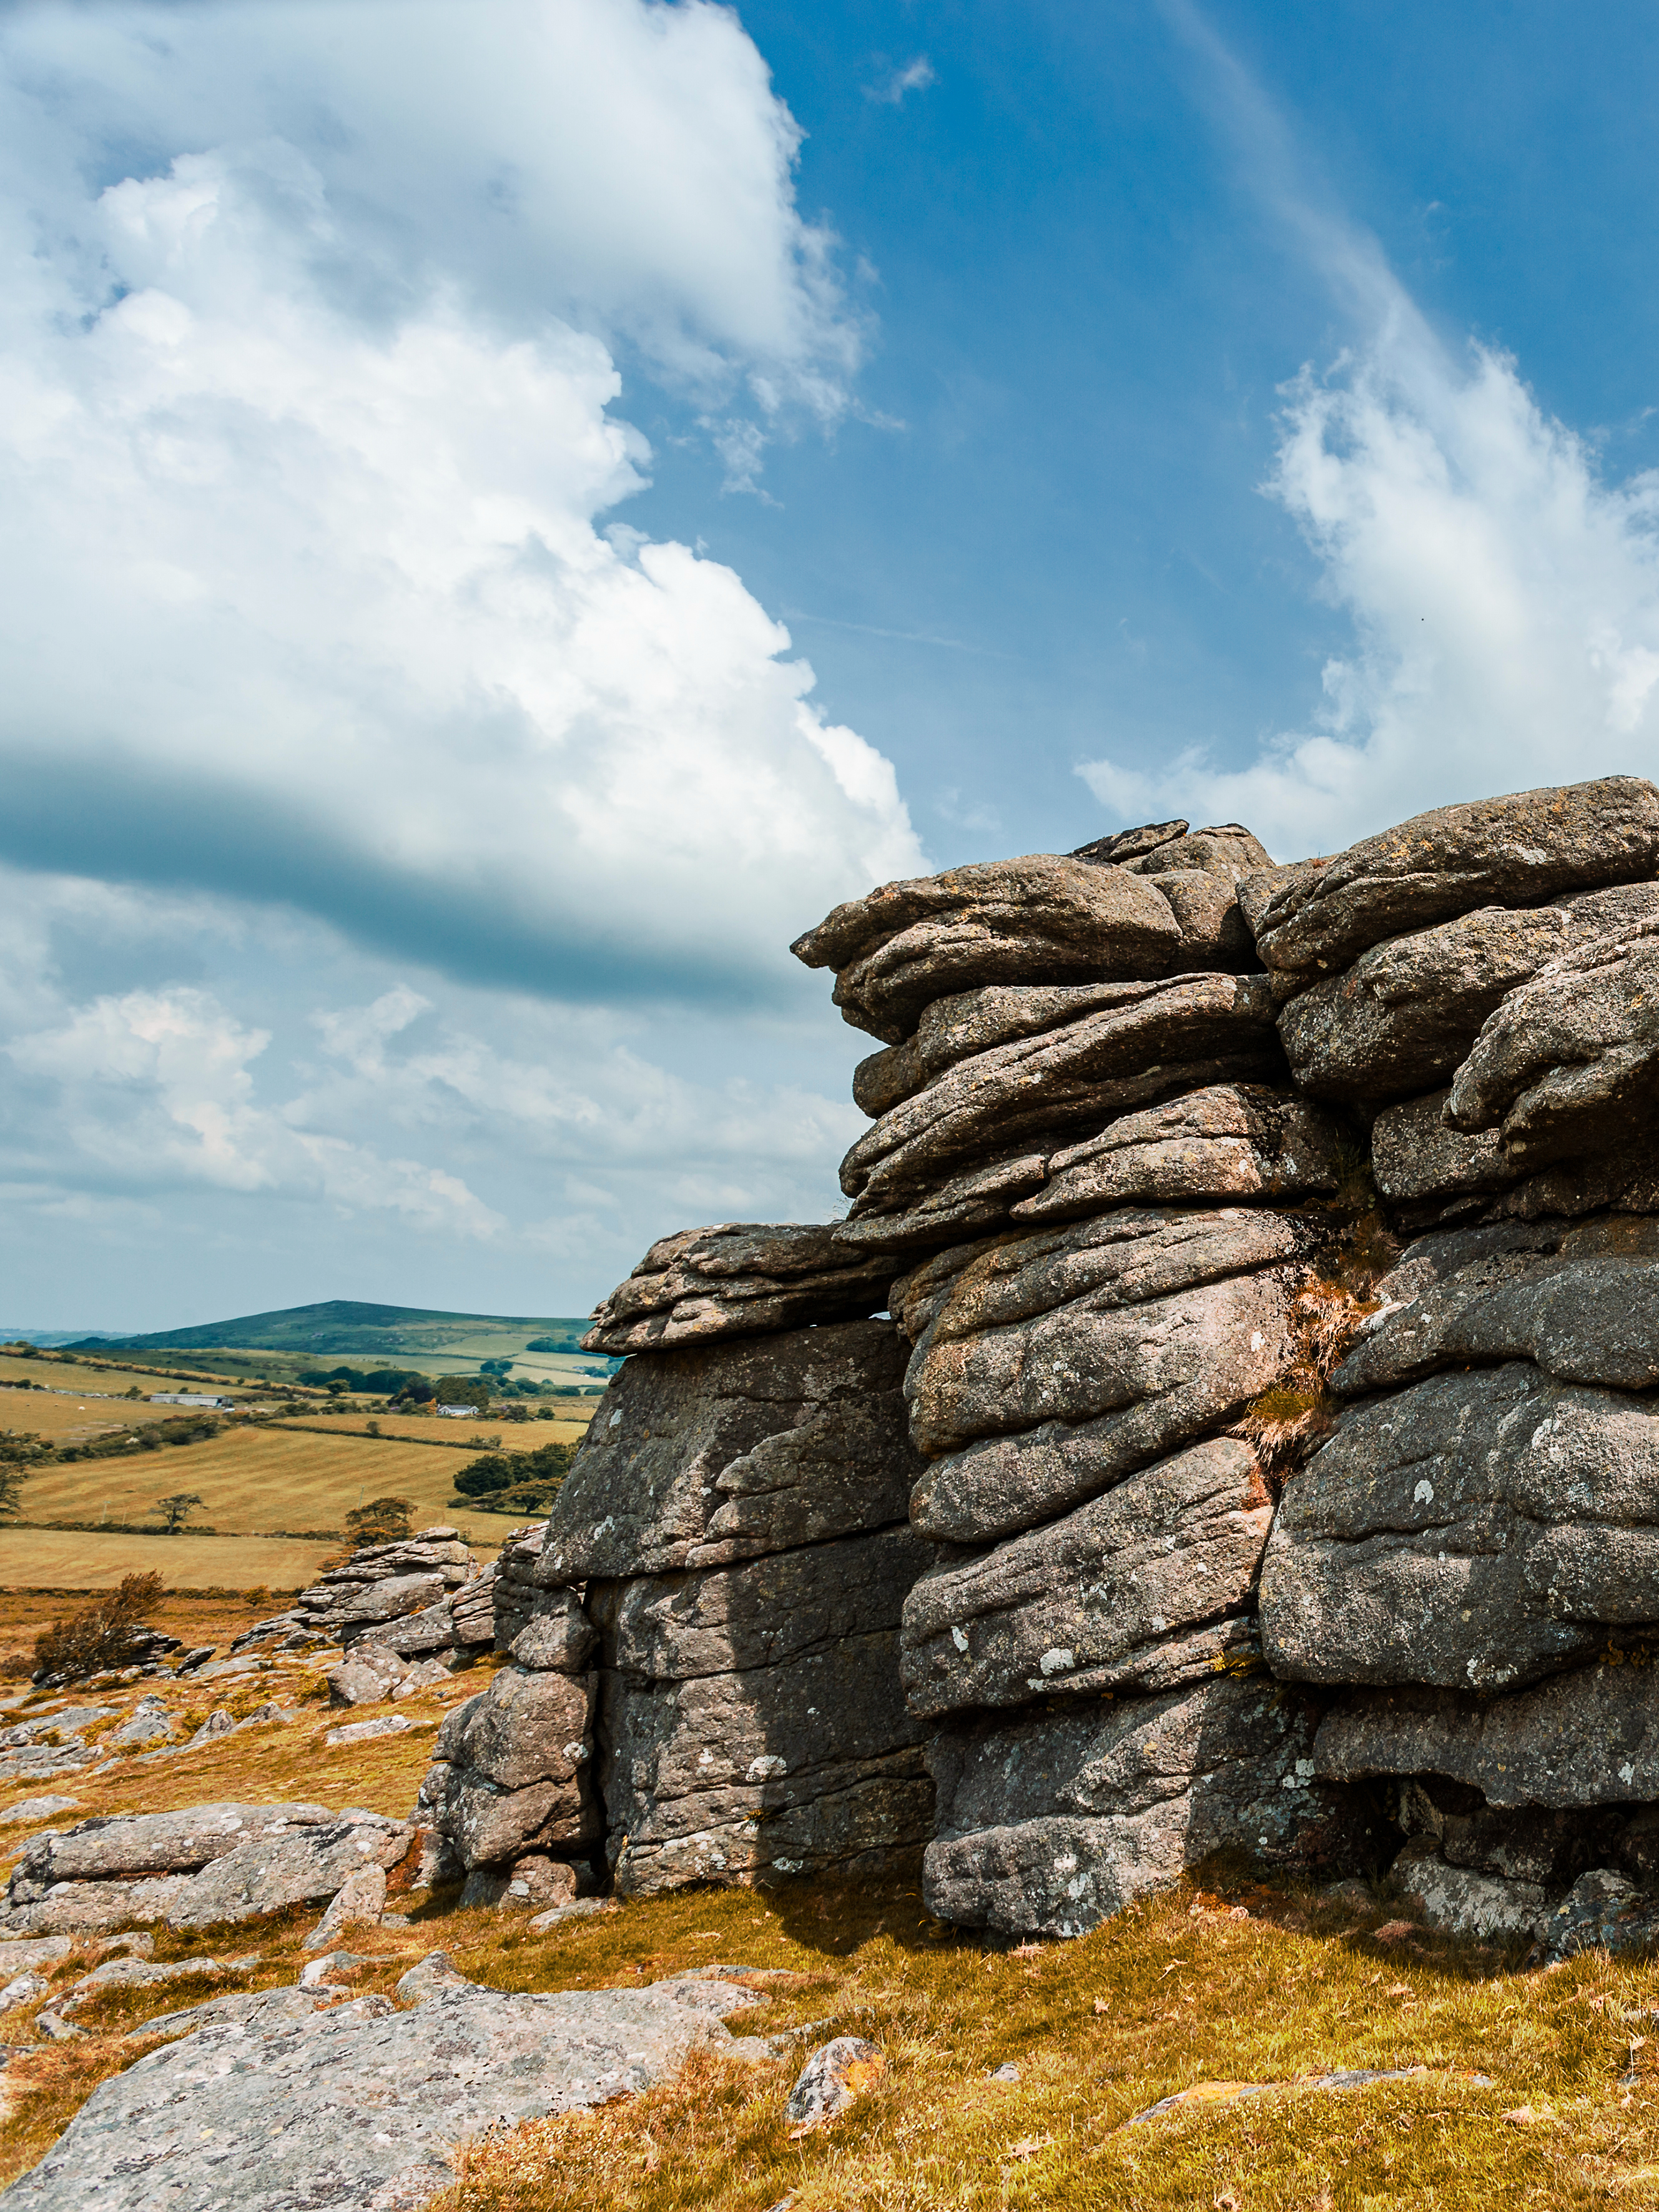
Shooting RAW files will give you the most flexibility when it comes to processing your summer pictures. It will allow you to fine-tune the exposure and bring back more from the shadows and highlights in RAW software like Affinity Photo 2.
Boosting the sky in Affinity Photo 2
The sky can make or break a landscape photograph. Sometimes we’re treated to glorious cloud formations and vibrant colours, while in others, things can be frustratingly dull. But even when the heavens oblige, the photo may initially lack the ‘wow’ factor you expect.
Sometimes this is down to the disparity in brightness between land and sky – skies are usually much brighter than the land below, so if we expose for the land then the sky can look a little over-exposed and washed out. The problem is exacerbated at sunrise or sunset because the foreground will be very dim, perhaps even in silhouette.
Moreover, if you shoot in RAW then this can also result in more muted colours than you might expect. The flatness of the image is intentional on the part of camera manufacturers, though, as they expect raw shooters to want to make their own enhancements.
Thankfully, there are some tricks we can employ to make our skies soar to greater heights – here, we’ll look at six techniques for enhancing skies in Affinity Photo 2. Each trick can be used either in combination with others or individually, depending on your needs.
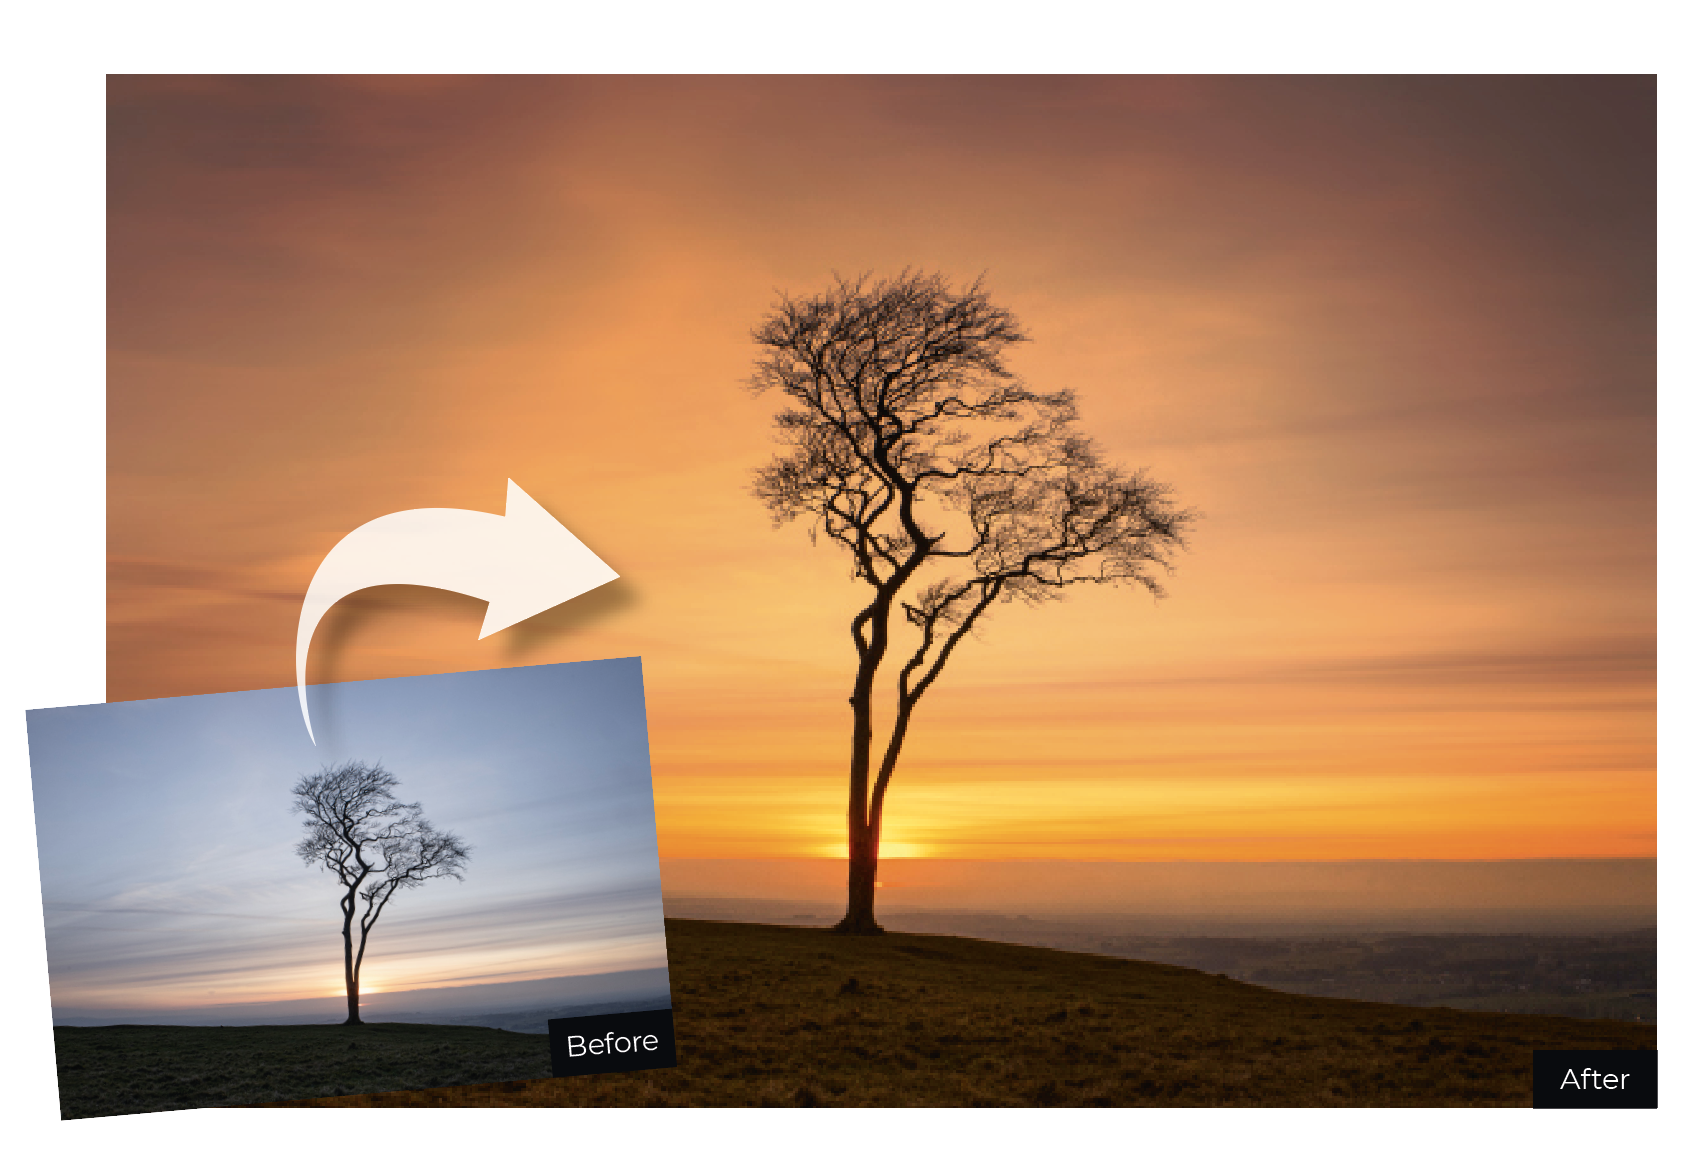
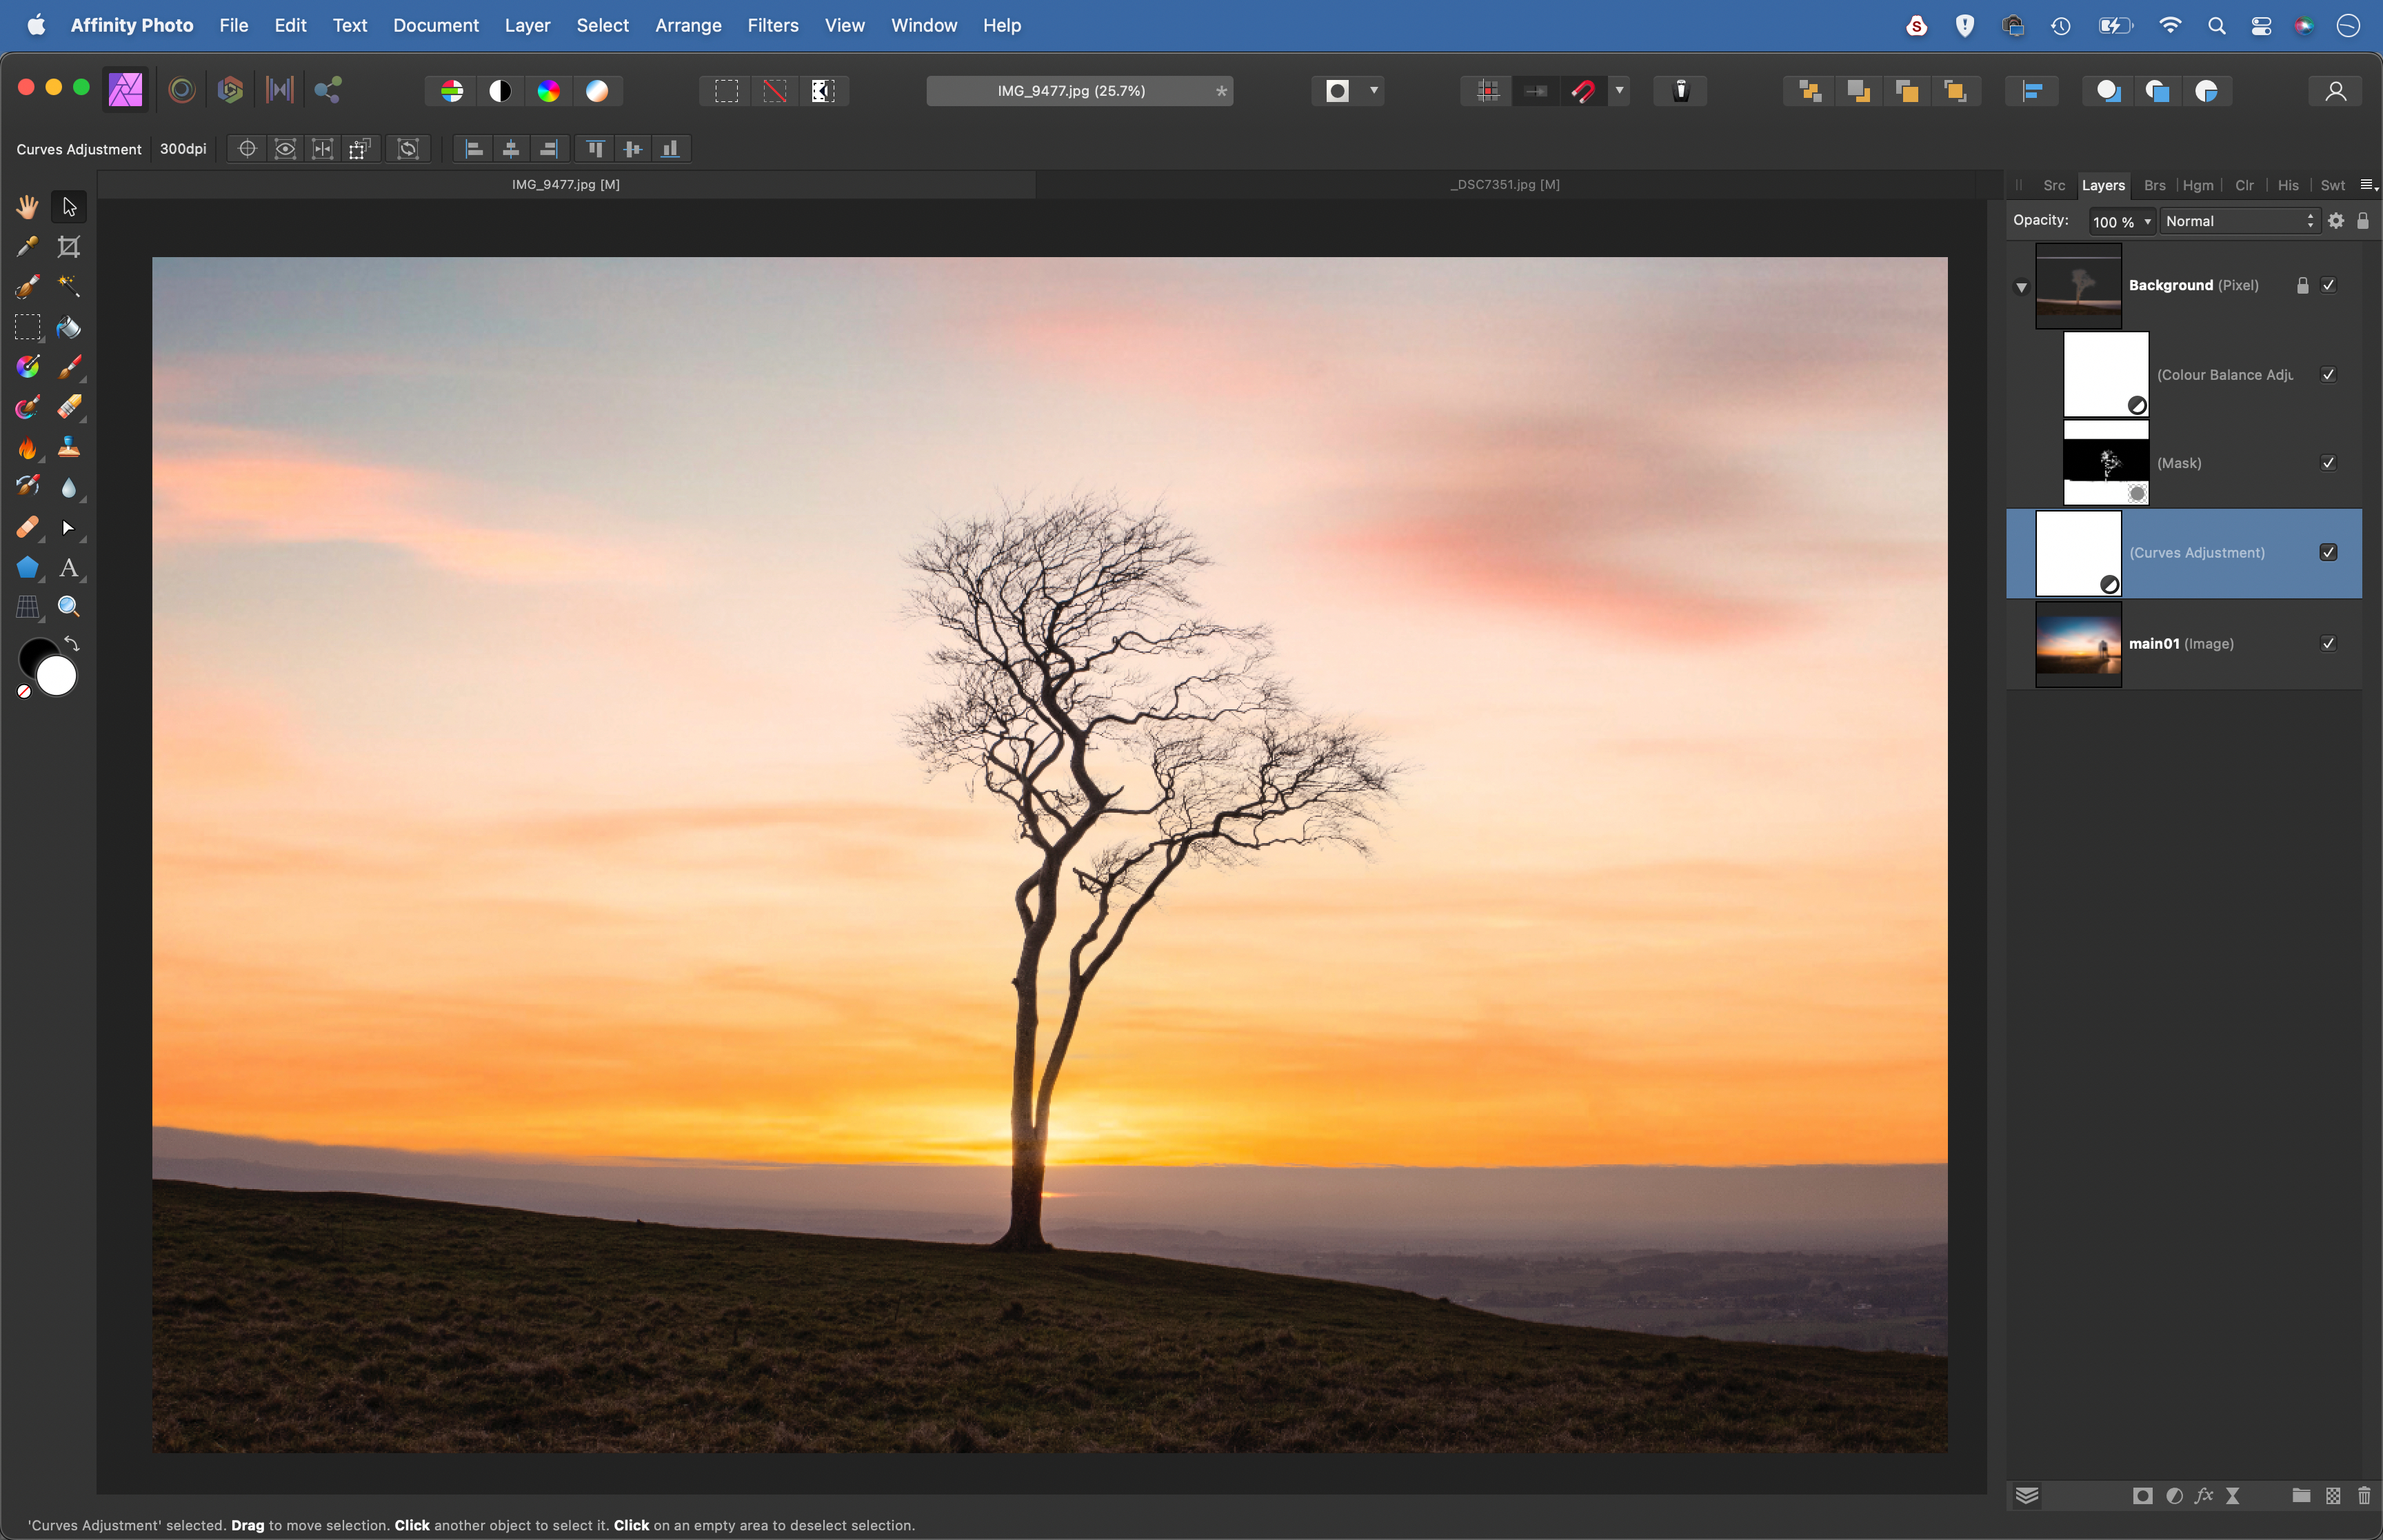
This is a simple task in Affinity Photo 2. Grab the Selection Brush tool, check Snap to Edges in the tool options at the top and paint over the sky to select it (or if easier, paint over the land, then go to Select > Invert Pixel Selection). Once done, click Refine to improve the selection (paint with the Matte brush over trees like this for a better result), then hold Alt and click the mask icon to add a mask that hides the sky. Next, copy in a new sky image, drag it below the land layer and position it to fit.
1) Deepen the blues
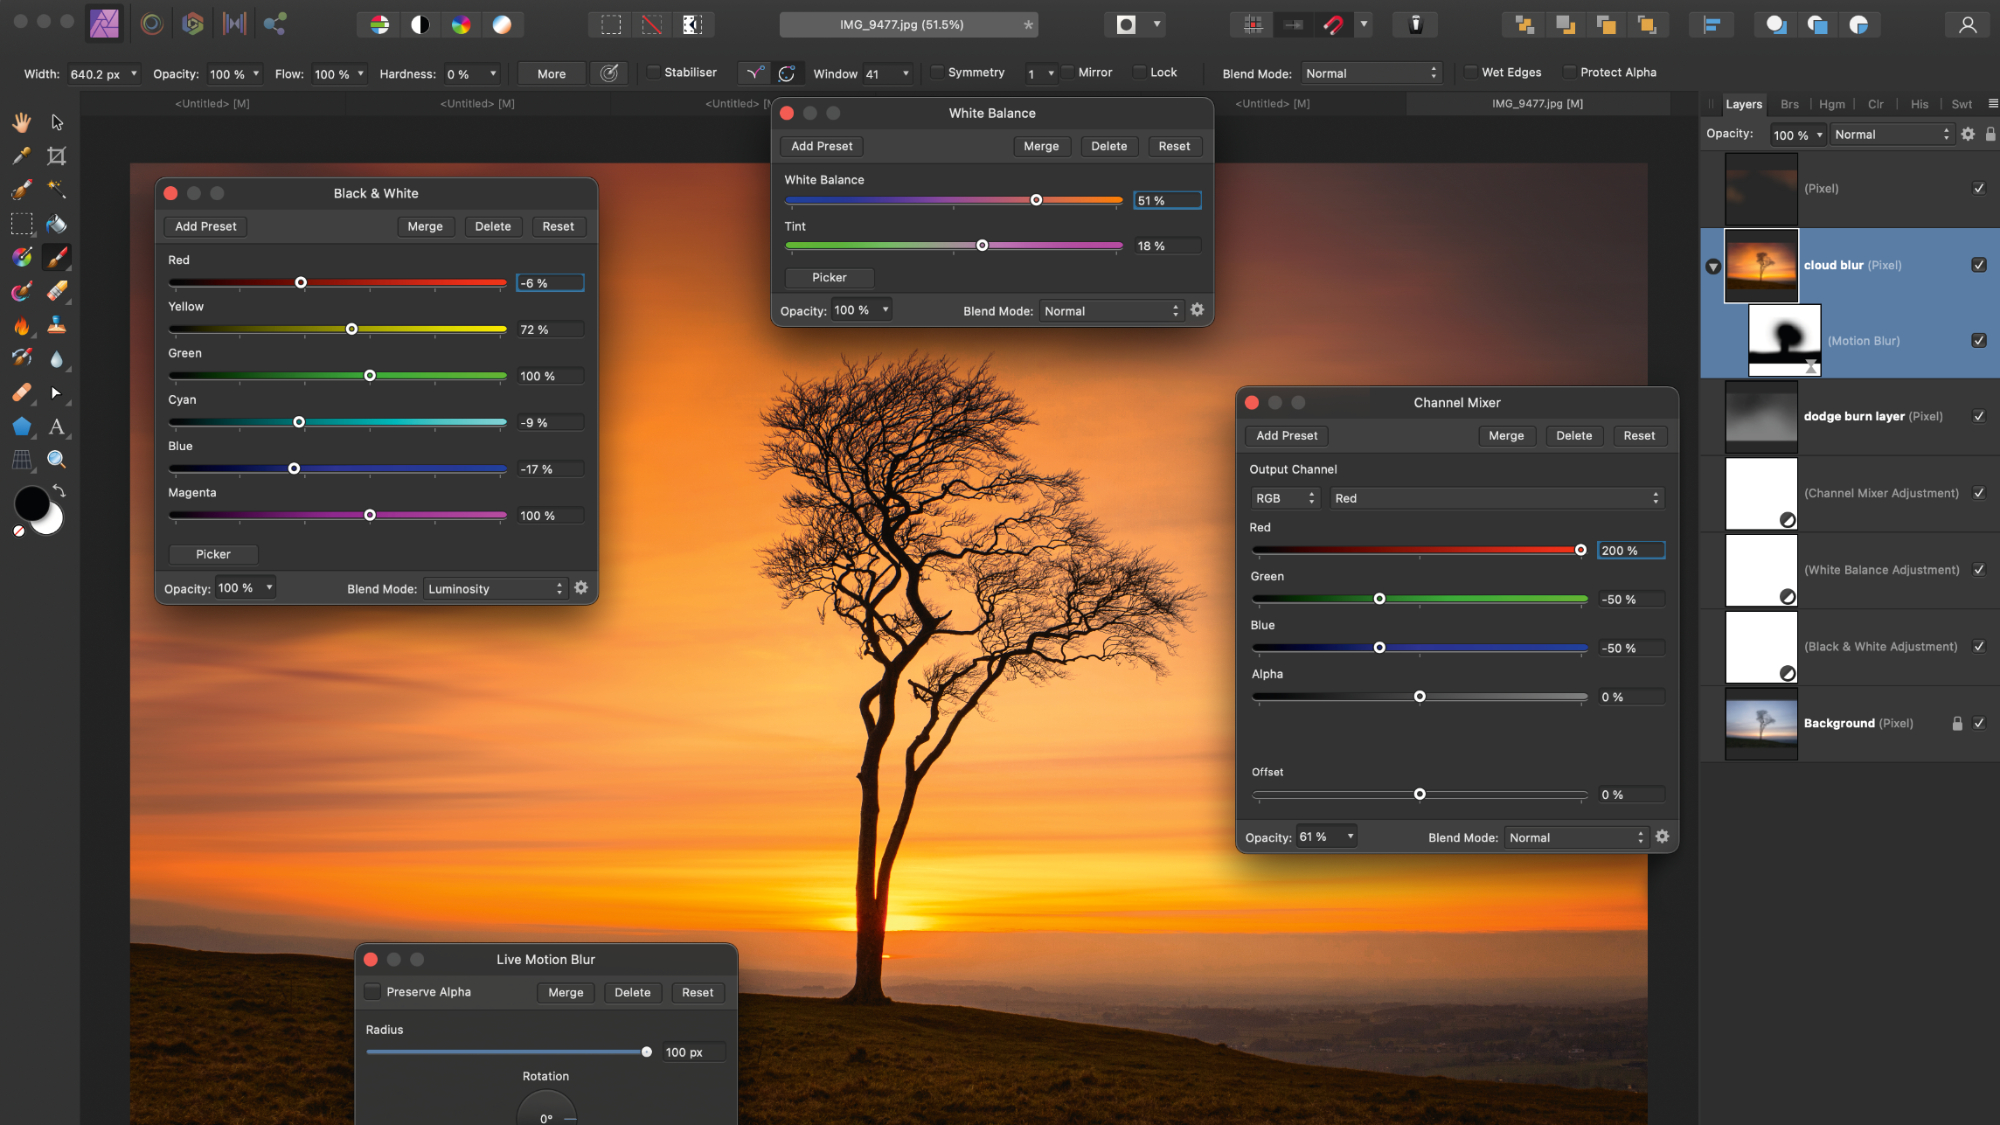
Skies can benefit from darker blues, as this intensifies the colours and creates greater contrast between it and clouds. A black-and-white layer can change the brightness of colour ranges. Click the Adjustment icon in Layers, choose Black and White, click the Blend Mode dropdown and choose Luminosity. Drag the blues and cyans down to darken the sky
2) Skew the white balance
There isn’t only one ‘correct’ white balance setting. By making creative white balance shifts we can enhance the sunset mood of a scene. There are a couple of options: if processing a raw, you can set white balance in the Develop Persona. You can also shift white balance with an Adjustment layer in the Photo Persona. White balance can also be dialled in when shooting.
3) Channel mixer
Here’s a trick with the Channel Mixer that produces rich sunset hues. Click the Adjustment icon in the Layers panel and choose Channel Mixer. With the Output Channel set to Red, type in Red +200%, Greens -50%, Blues -50%. Set the Output Channel to Blue and input Red -50%, Green -50%, Blue +200%. It will probably look too strong at first, so adjust the opacity of the layer to tone down the effect until you’re happy.
4) Make a Dodge Burn layer
Sunset skies can use lightening and darkening with a 50% grey layer. Make a new layer then go to Edit > Fill. Click the colour box, choose HSL sliders and set H 0, S 0, L 50. Set Blend Mode to Overlay. This makes it invisible – now we can paint to lighten or darken. Grab Brush, hit D to set colours to black and white and press 1 for 10% brush opacity. Paint black to darken areas and white to lighten.
5) Add motion blur
One way to add drama to skies is by blurring clouds. This is best done while shooting by using an ND filter to stretch your shutter speed to a minute or more. But you can also mimic the effect. Merge a copy of the layers with Cmd/Ctrl+Shift+Alt+E. Go to Layer > New Live Filter Layer > Blur > Motion Blur and set a blur strength. Highlight the live filter mask thumbnail and paint it black to hide the effect over the land.
6) Paint to boost colours
Sunset colours will look most intense around the setting sun, but further afield the colours can be more muted. To boost them, make a new layer and set the Blend Mode to Overlay. Grab the Brush, set Hardness to 0, brush opacity to 20%, hold Alt and click to sample a bold colour. Paint to add the colour effect. If it’s too strong, adjust the layer opacity.
The best camera deals, reviews, product advice, and unmissable photography news, direct to your inbox!
Digital Camera World is one of the leading authorities on camera and photography news, reviews, techniques, tutorials, comparisons, deals and industry analysis. The site doesn't just specialize in cameras, but all aspects of photography, videography and imaging – including camera phones, gimbals, lenses, lighting, editing software, filters, tripods, laptops, printers, photo books, desks, binoculars and more.
Whether you're using, looking to buy or trying to get the most out of a compact camera, action camera, camera drone, cinema camera, beginner camera or professional camera, Digital Camera World has a roster of experts with combined experience of over 100 years when it comes to cameras, photography and imaging.
