Make the most of Looks, Layers and Masks in Luminar
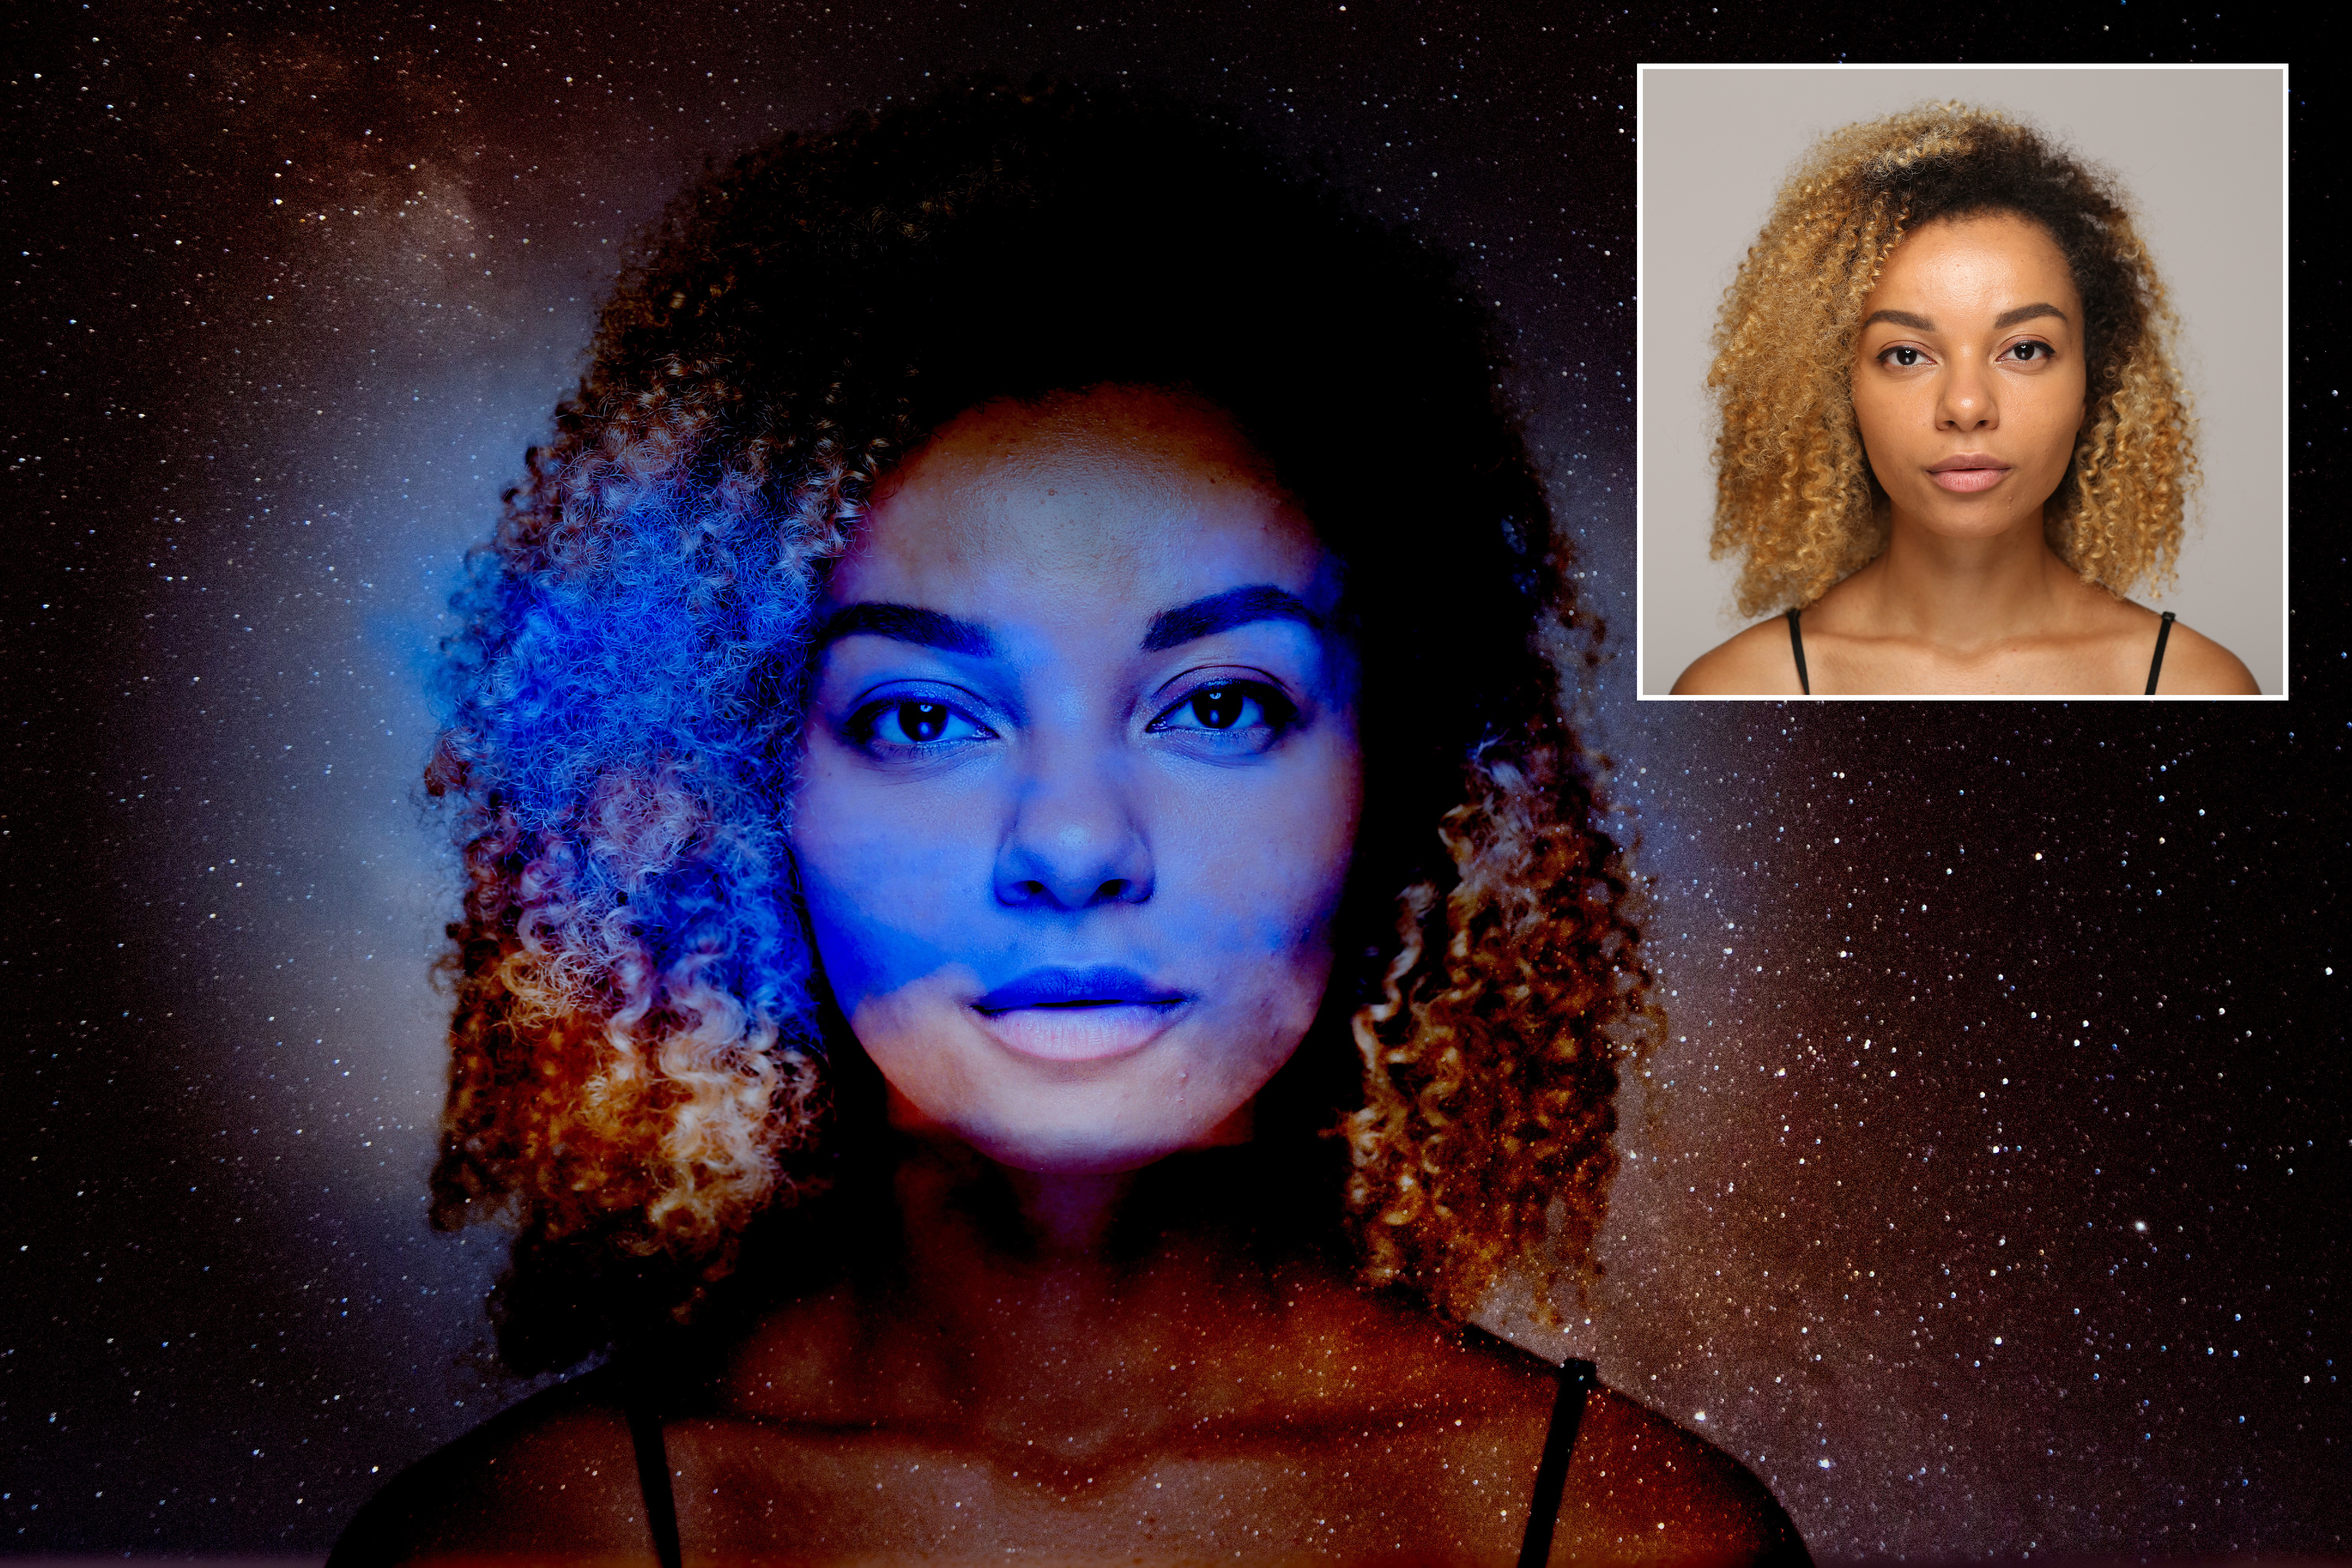
Luminar 4 has a wide range of pre-designed Looks you can apply to your photo with a single mouse click. Each of these is made by combining individual filters you can modify, add to or remove at will. It’s a wonderfully flexible way of creating and customizing an almost limitless array of effects.
It doesn’t stop there. Luminar also supports Layers – and not just Adjustment Layers for combining effects, but actual Image Layers, for creating multiple exposures and composite images.
Layers and Looks are powerful on their own, but they can work together to offer even more possibilities. For example, you might think you can only apply a Luminar filter to an image once… but if you create an Adjustment Layer on top of the original image, you can use the filter again to double its effect.
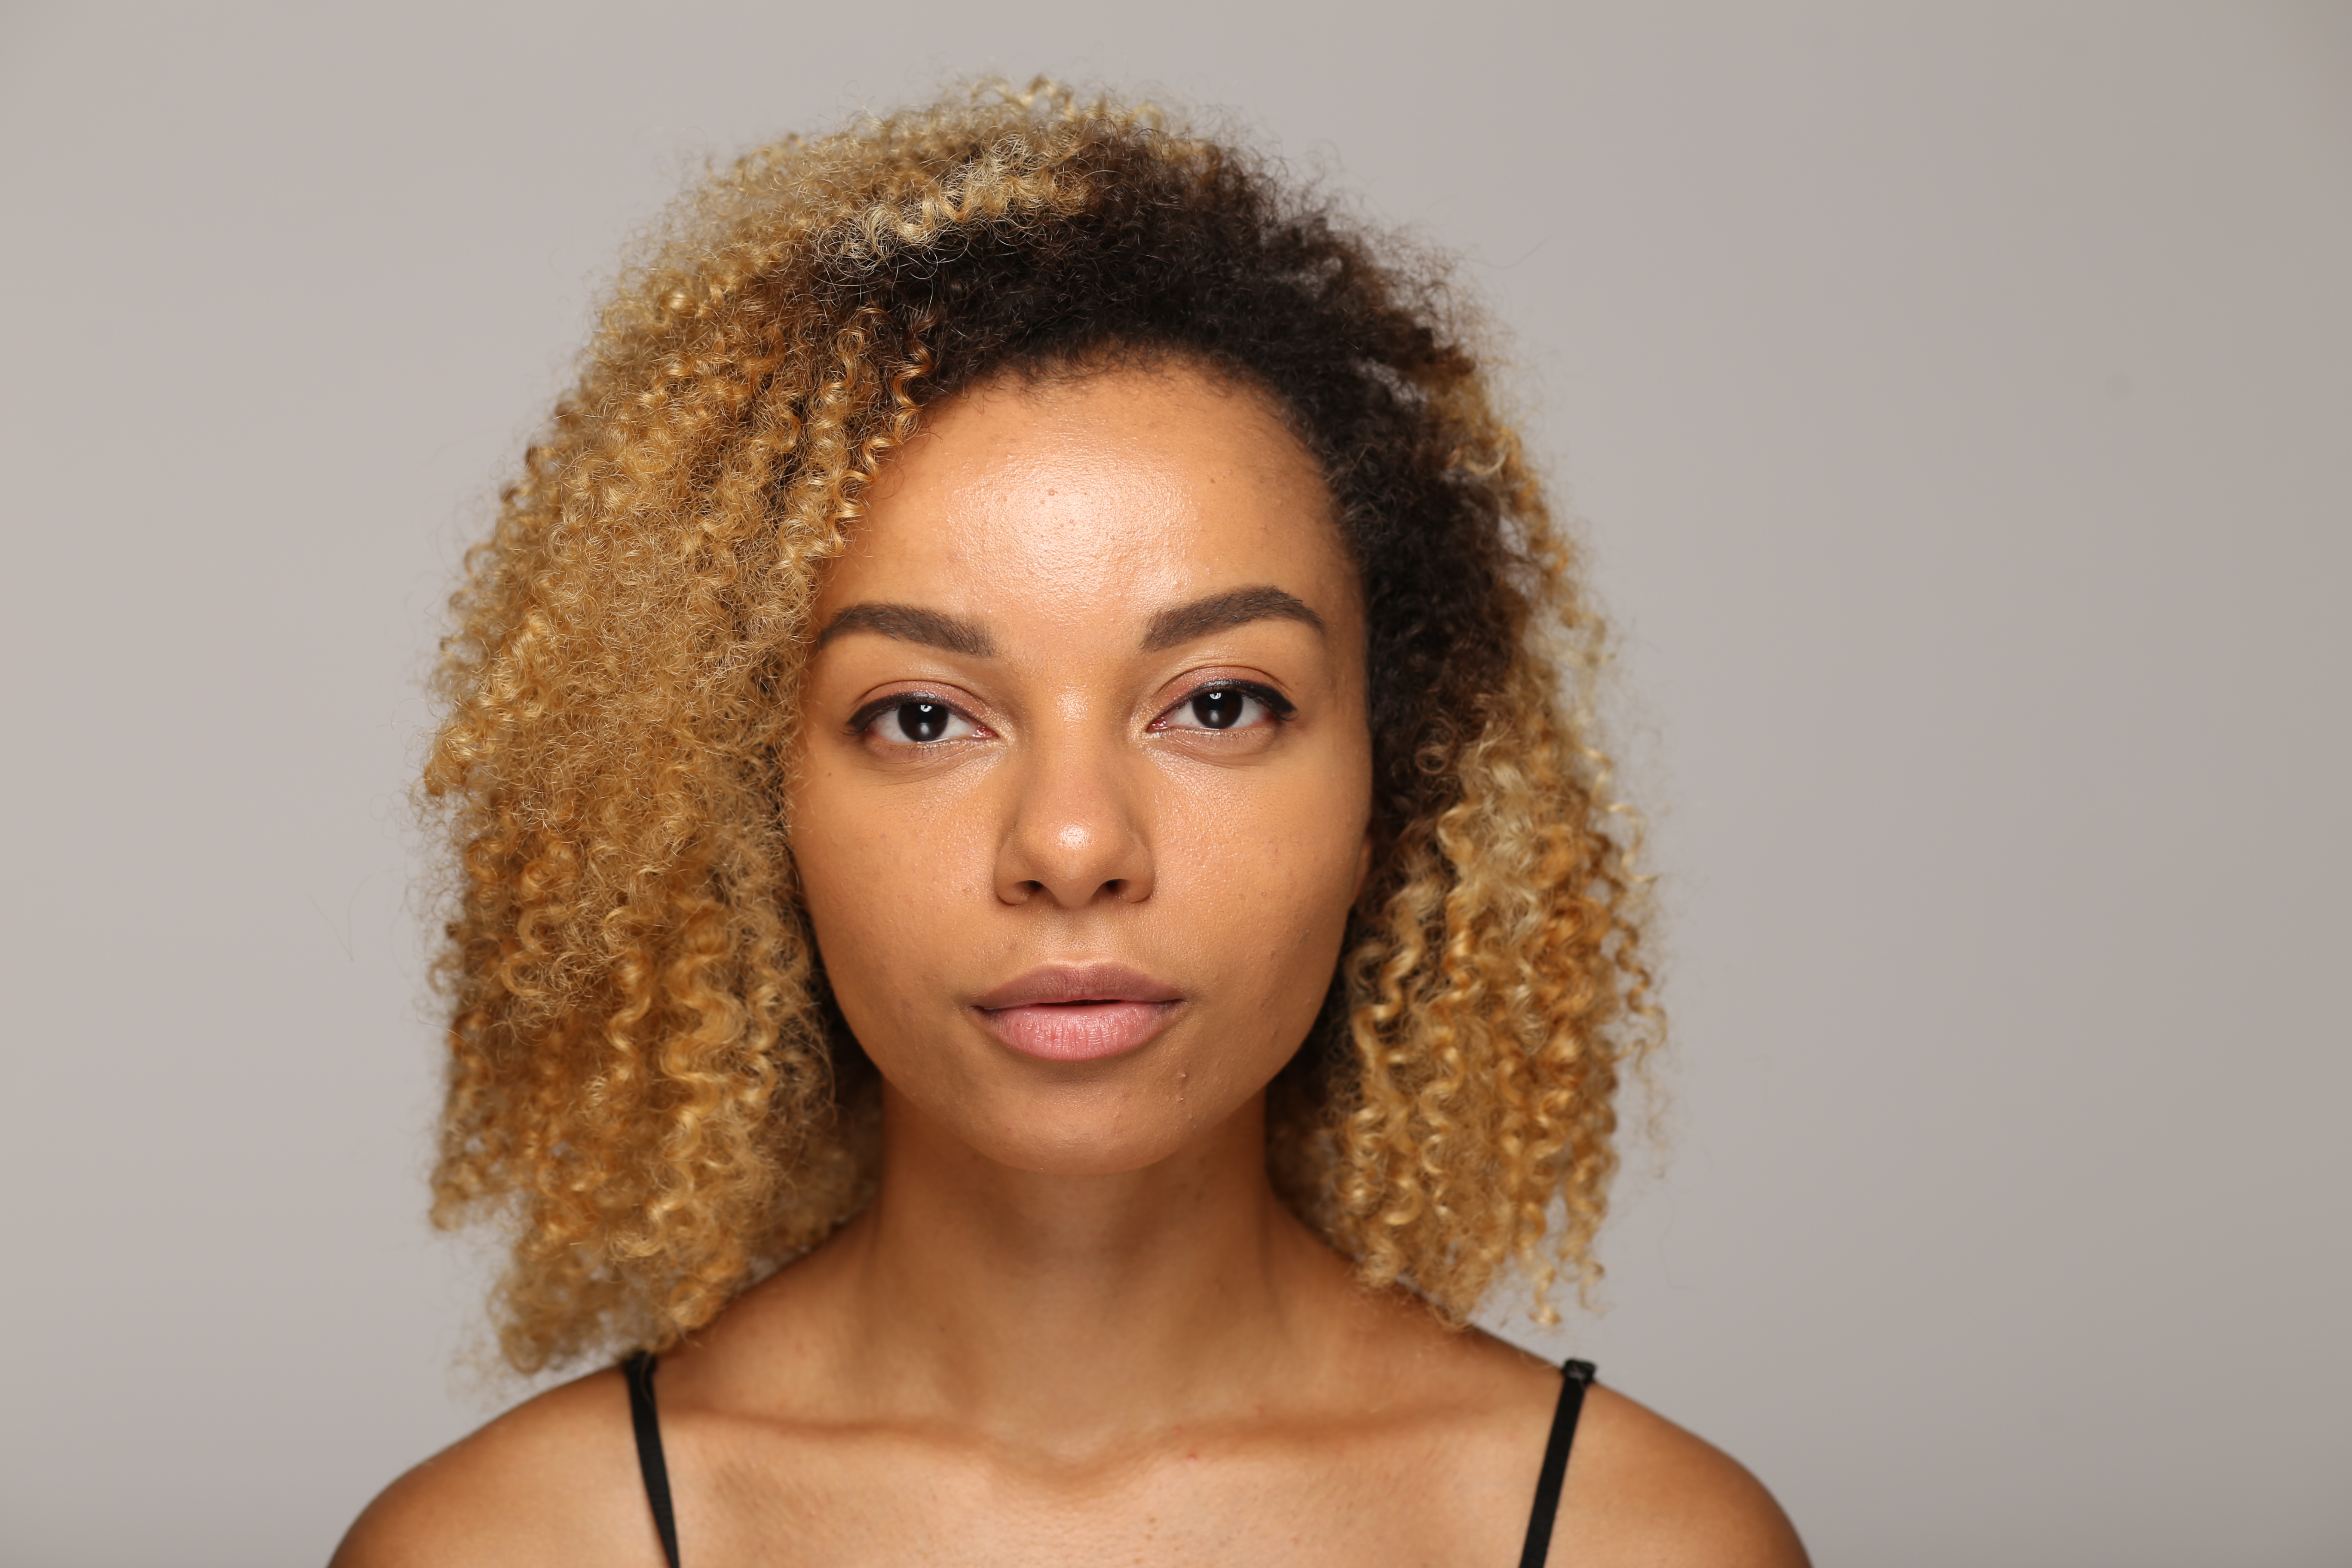
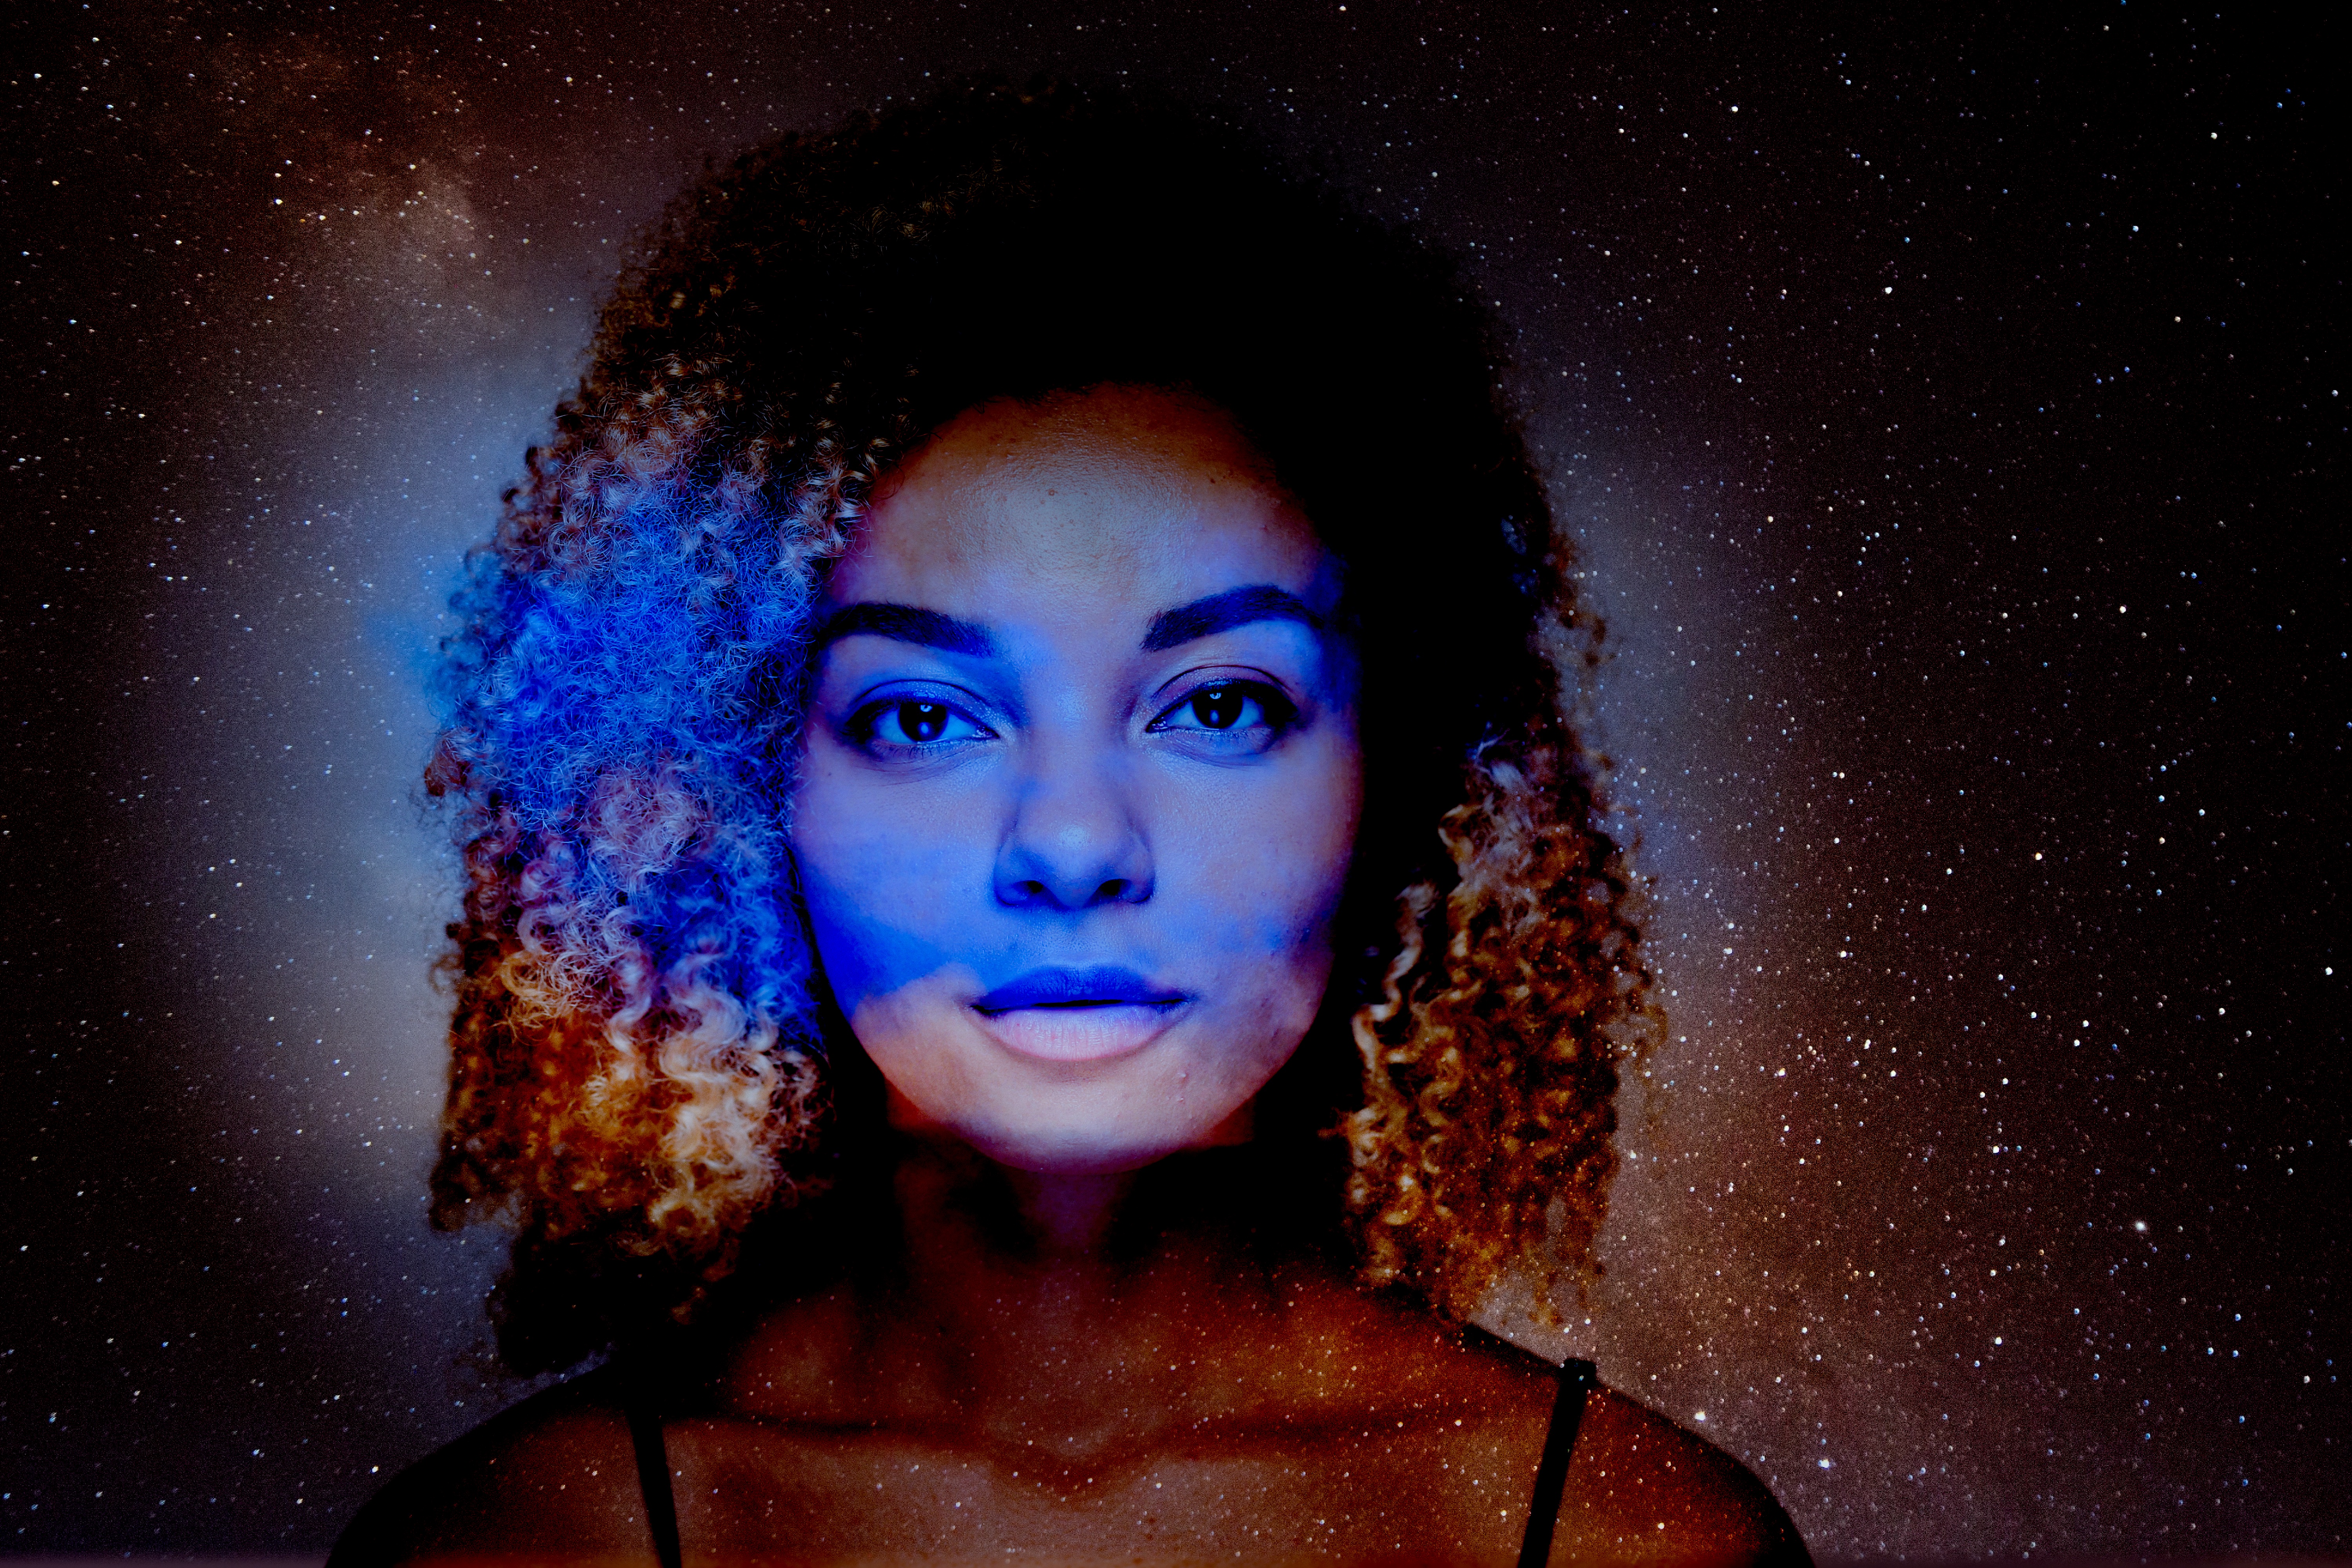
Adjustment Layers also let you combine different Looks. Normally, you might choose a single Look for your image and modify it to suit your tastes – but you can add another Look with a new Adjustment Layer and blend it with the first, either using a different Blending Mode, changing its opacity or using a Mask.
Masks are where the real fun begins! Luminar offers Brush, Radial and Gradient Masks, which together provide a set of simple and efficient tools for blending images and adjustments together.
Our tutorial will show you some of the things you can do, the way Luminar’s Looks and Layers work, and how you can achieve a multitude of different effects when you combine them with Masks.
Layers, Masks and Blending Modes in action
Make a sci-fi portrait in minutes with three key tools
1. Create the backdrop
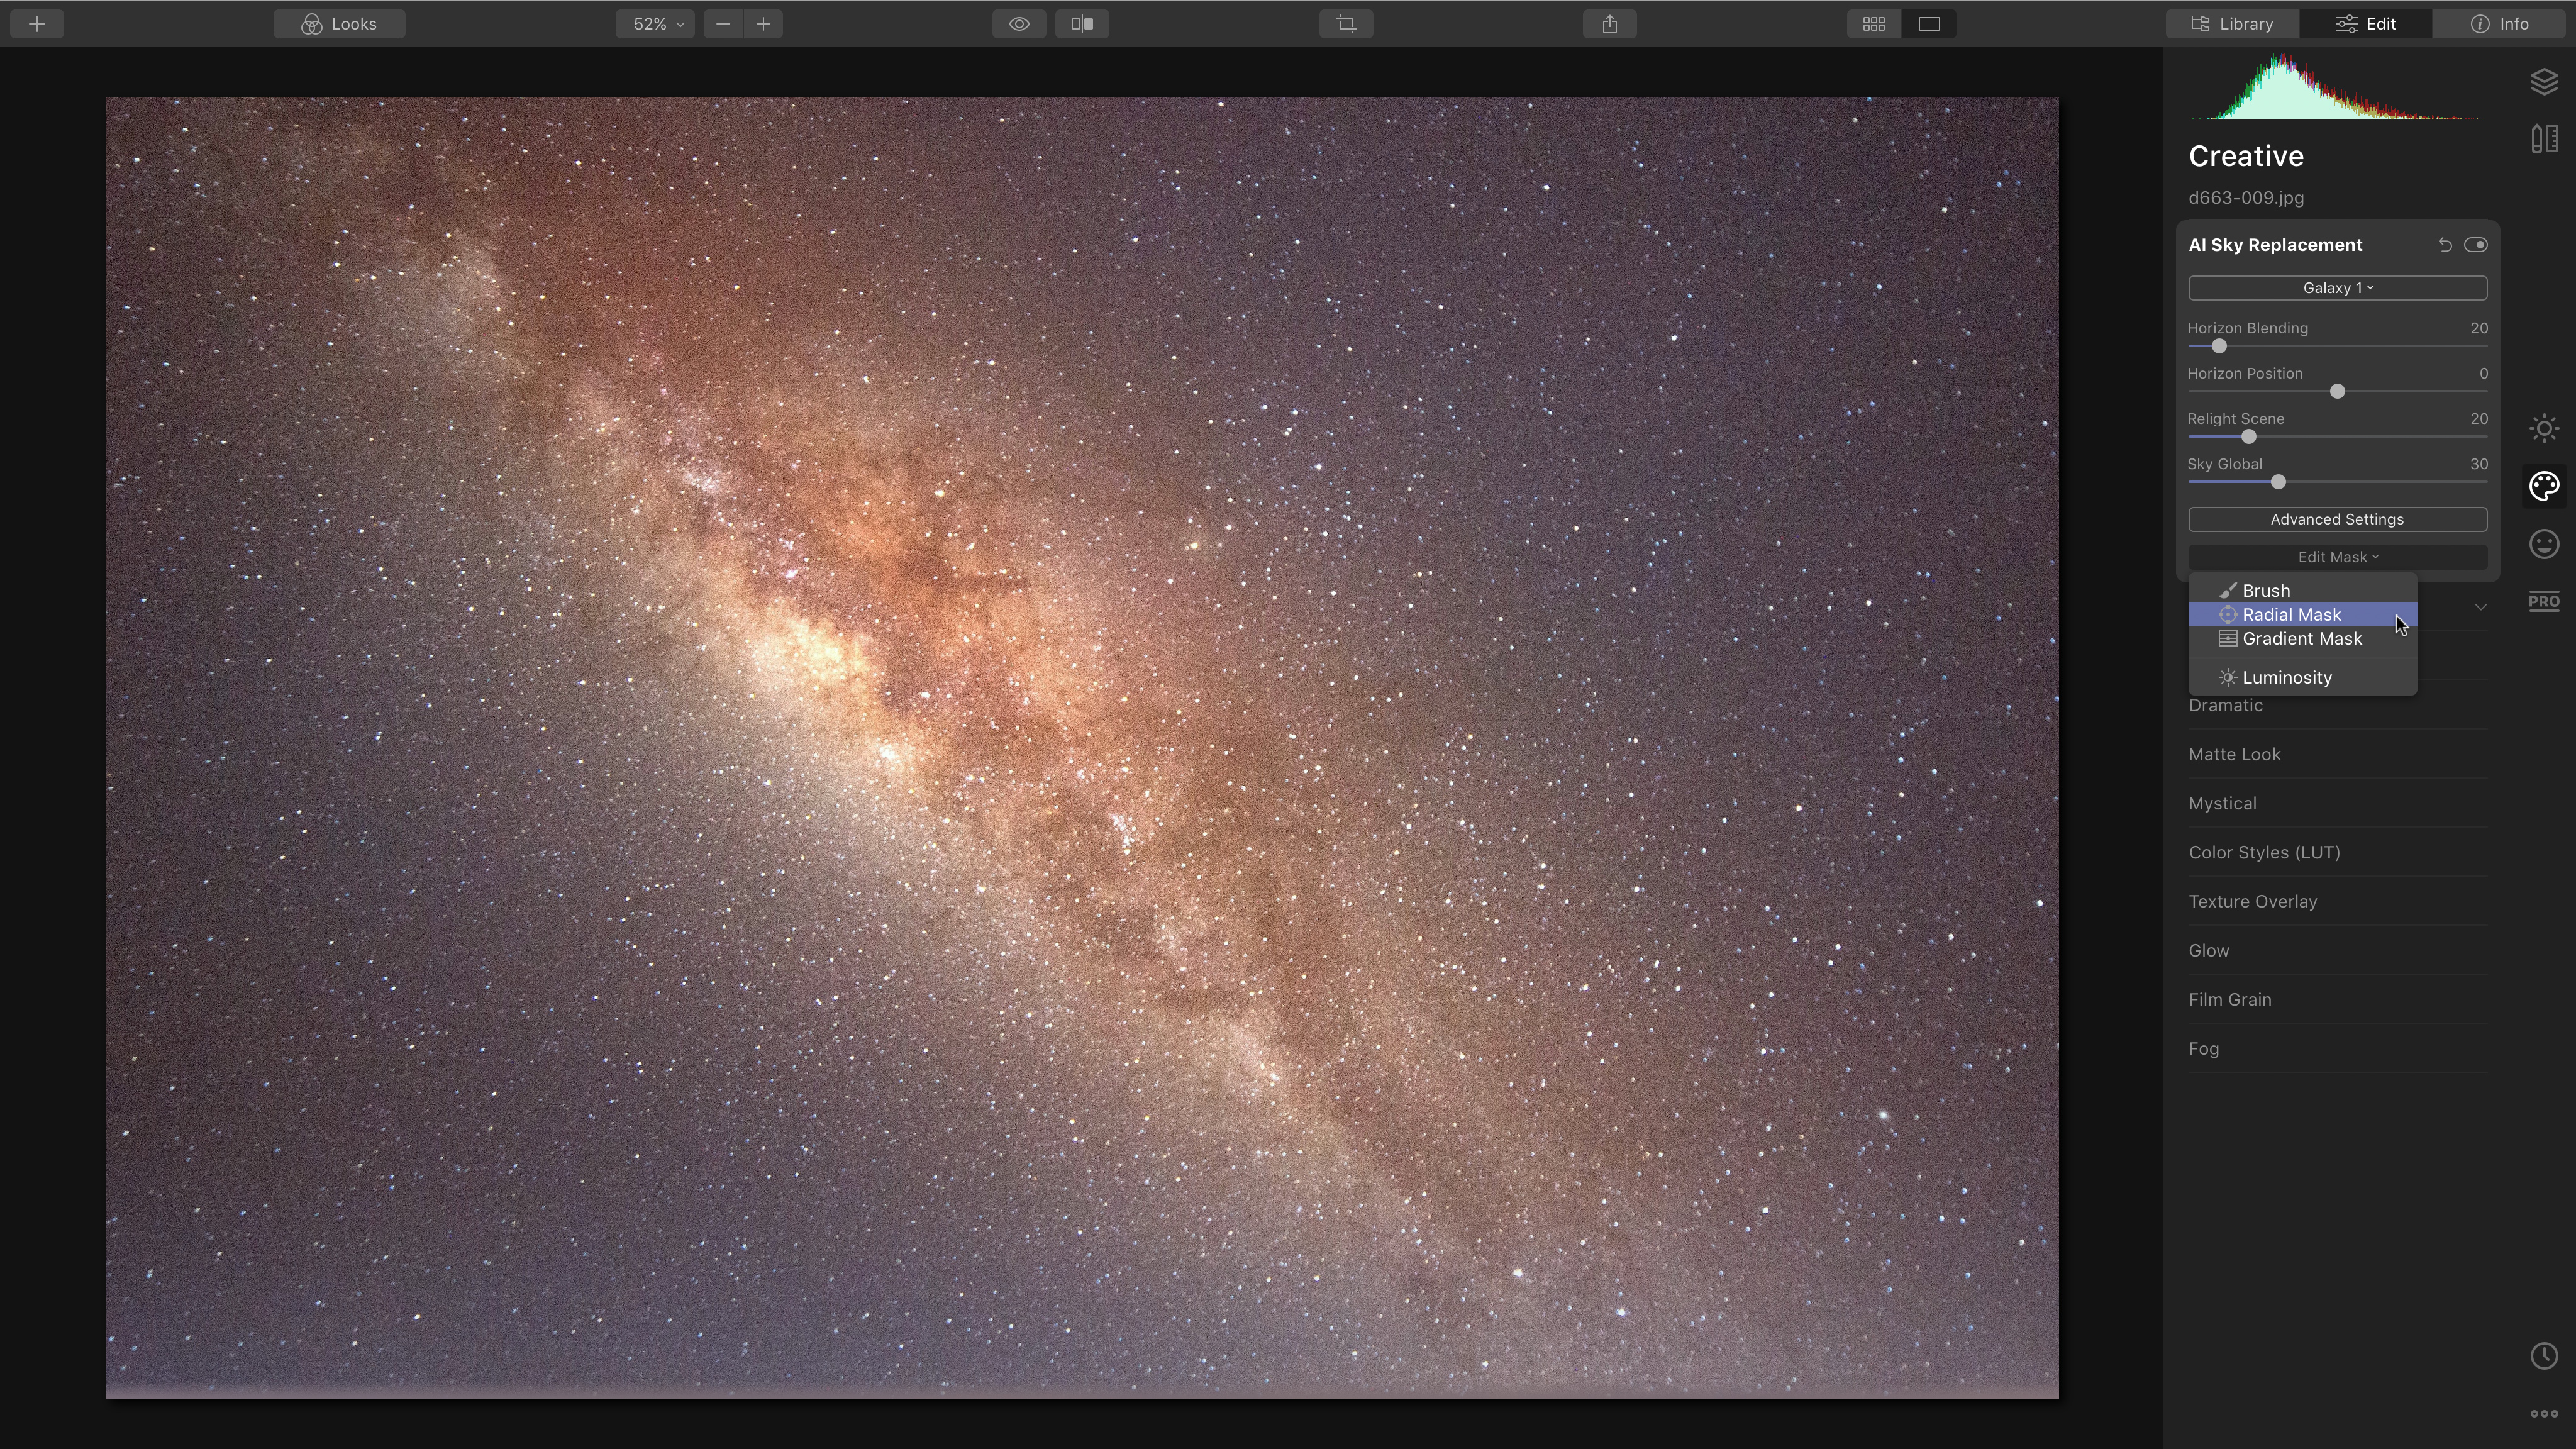
When you work with Layers, it’s most intuitive to start with the background. We opened a sky photo and applied the AI Sky Replacement tool with one of Luminar’s pre-installed ‘Galaxy’ images. The tool has replaced the entire sky area, but we want some of our original sky to show through, so we need the filter’s drop-down Edit Mask menu and a Radial Mask…
2. Mask a filter
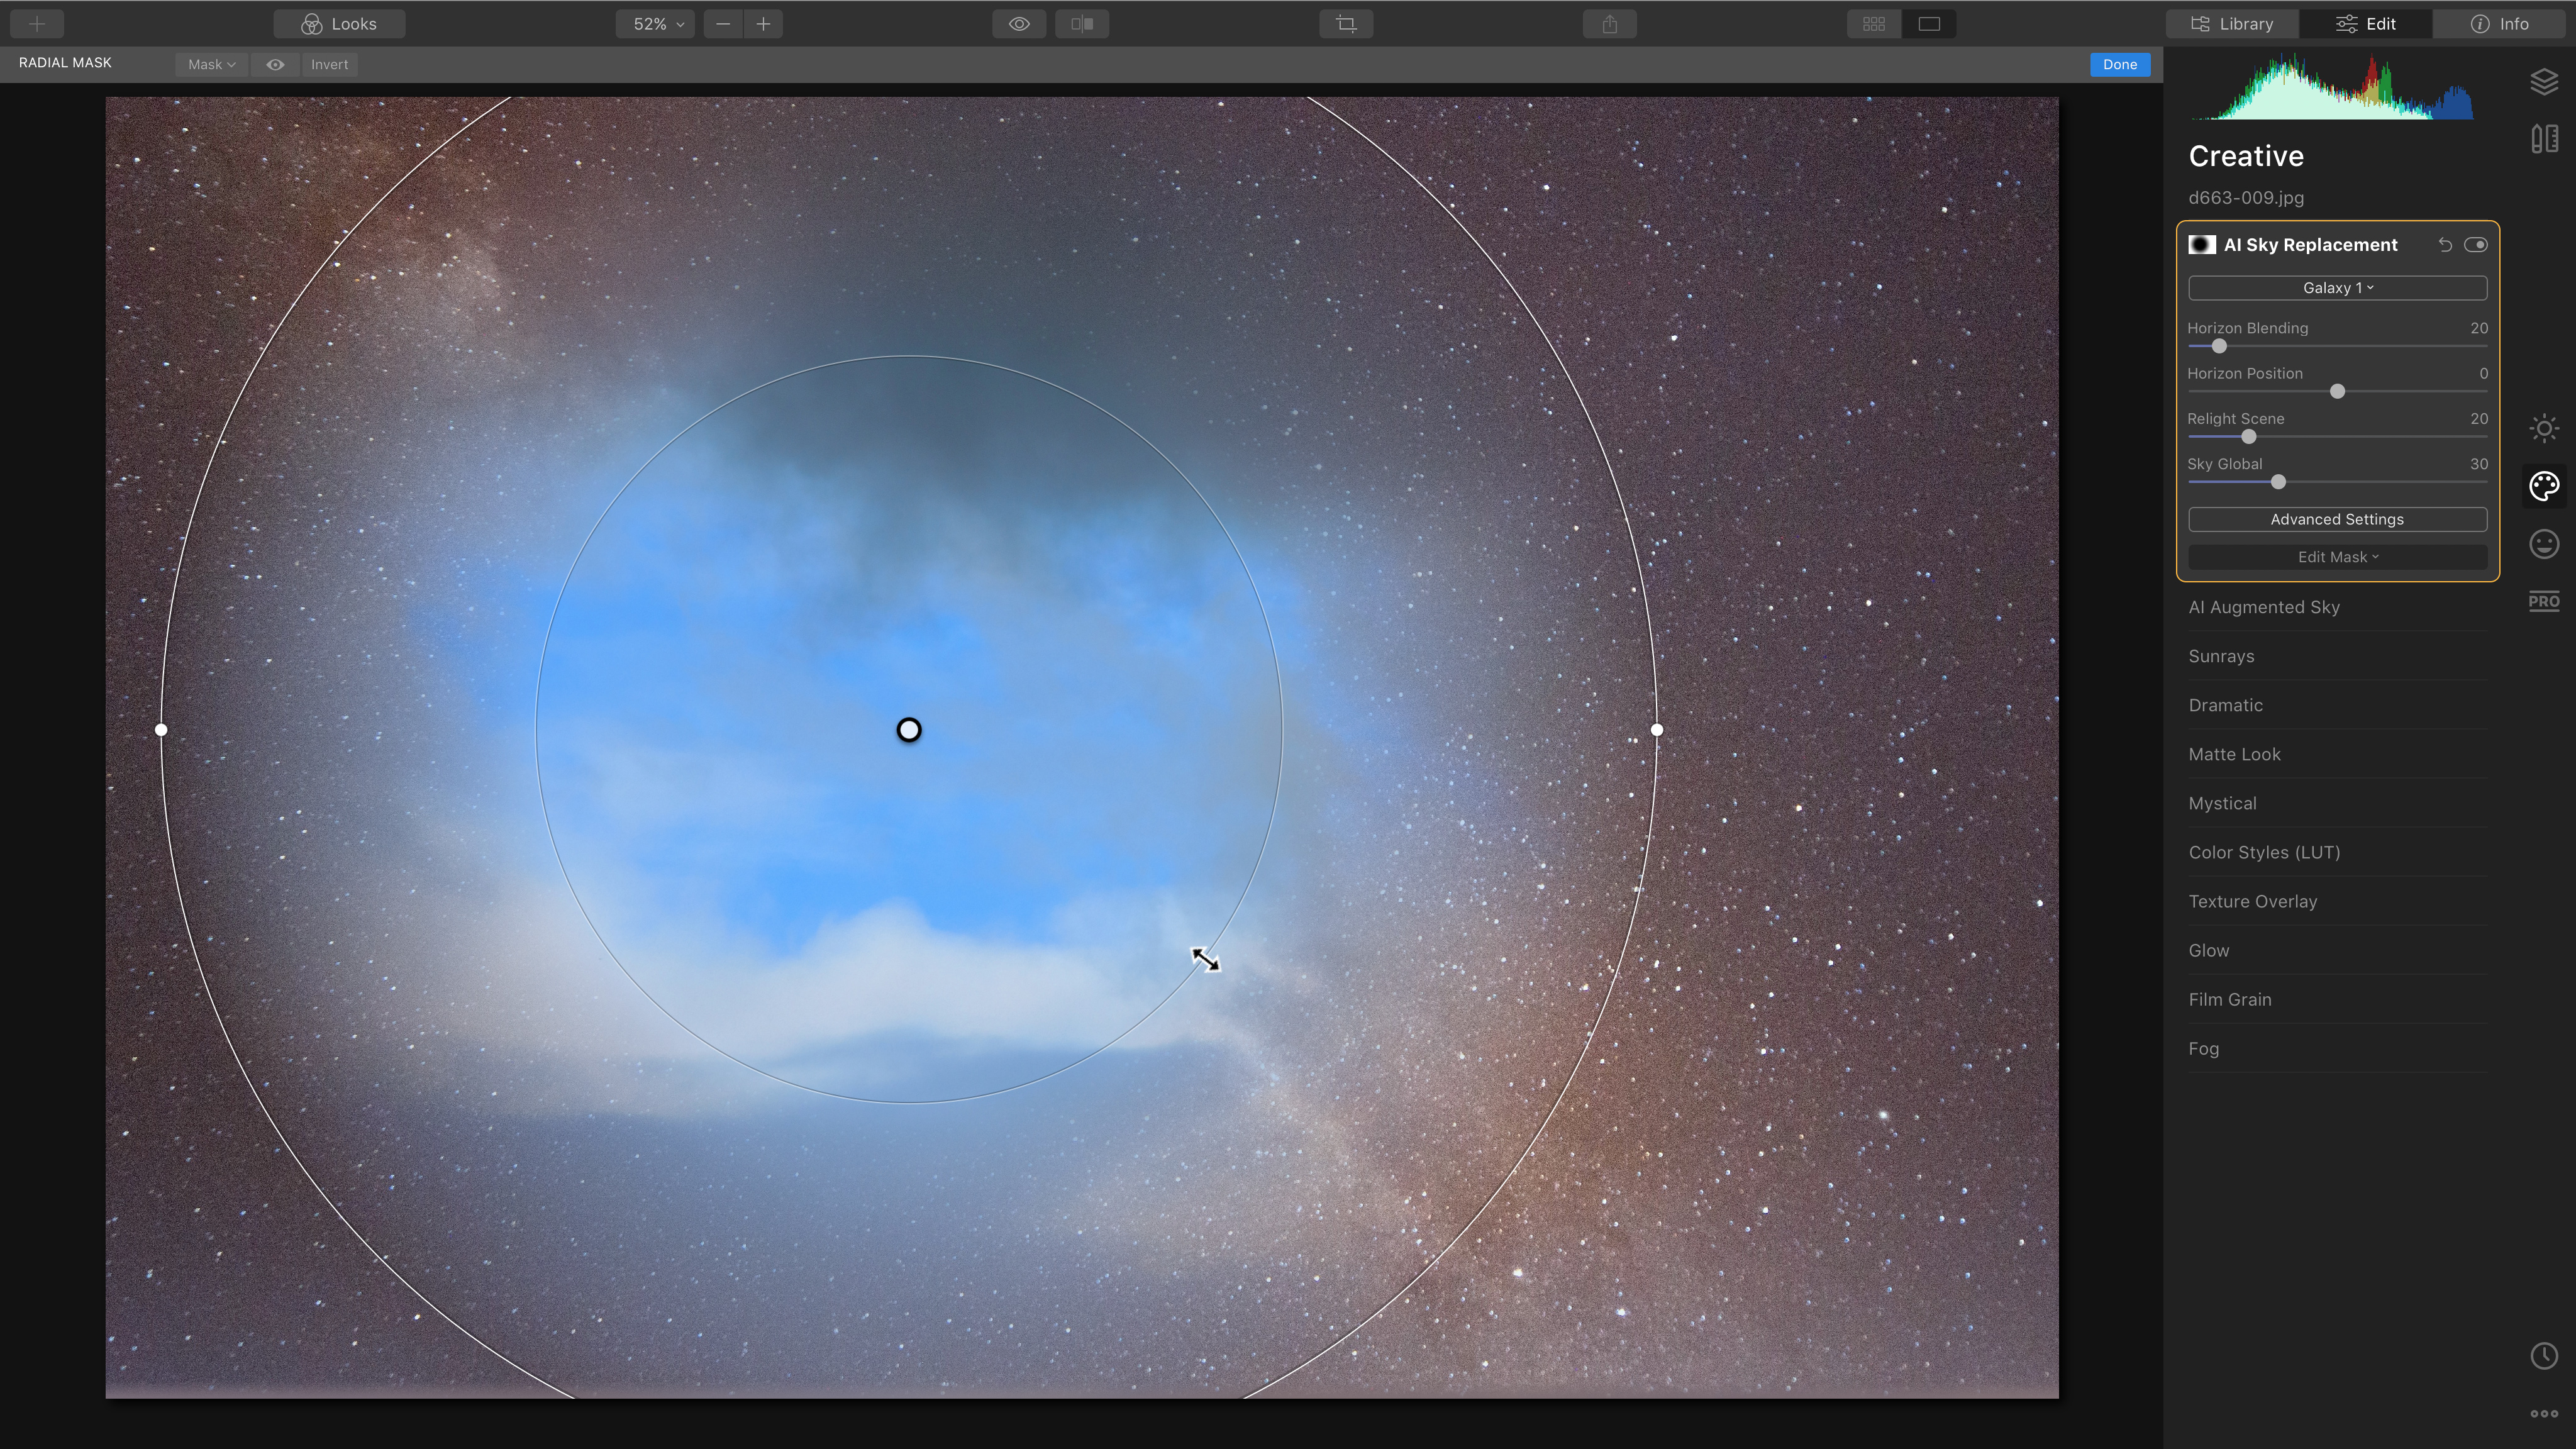
With a Radial Mask active, we can drag out a circular mask in the centre of our picture to reveal our original sky image below. You can change the shape and position of the Radial Mask before you click the Done button. If you ever find the Mask is masking the wrong thing, like the outside of the subject rather than the inside, click Invert in the top toolbar.
3. Add a Layer
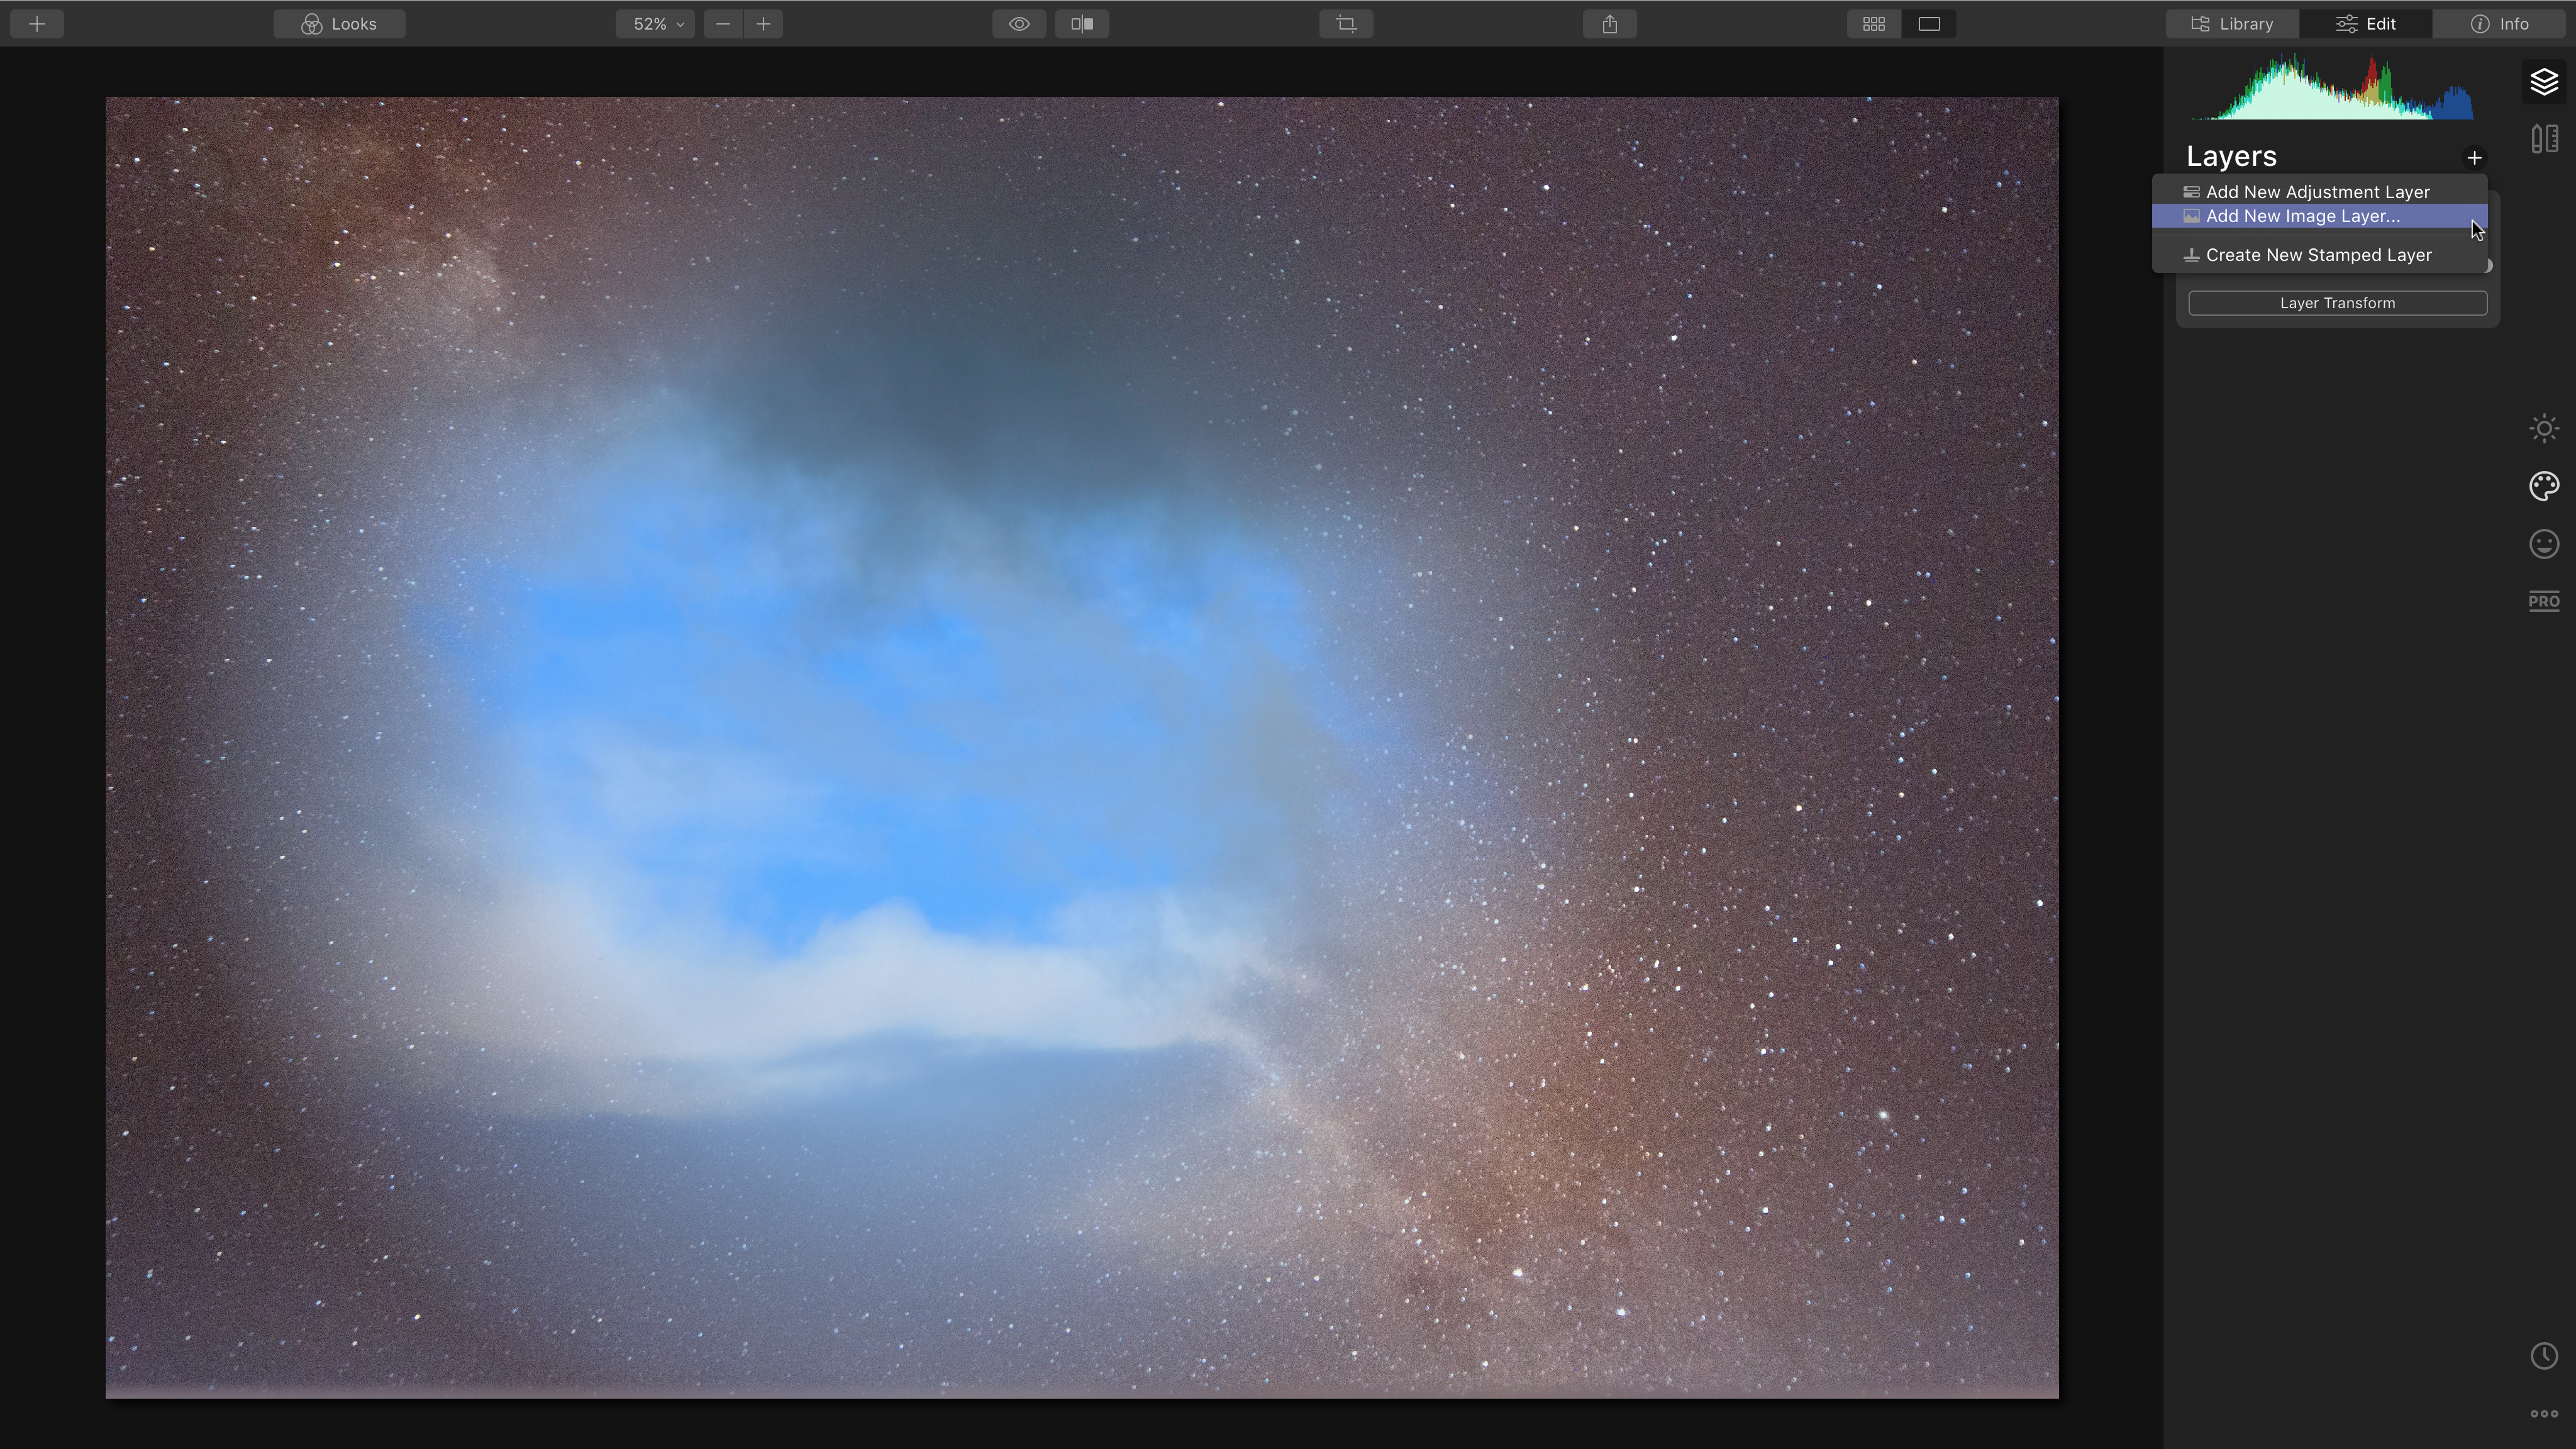
Now we can add our portrait subject on a new Layer. To add a Layer, click the Layers button at the top right of the Luminar window, then click the ‘+’ button and choose the Layer type. Stamped Layers combine existing layers to make repairs; we don’t need that option, and we’ll look at Adjustment Layers overleaf. We want the Add New Image Layer option.
4. Image Layers
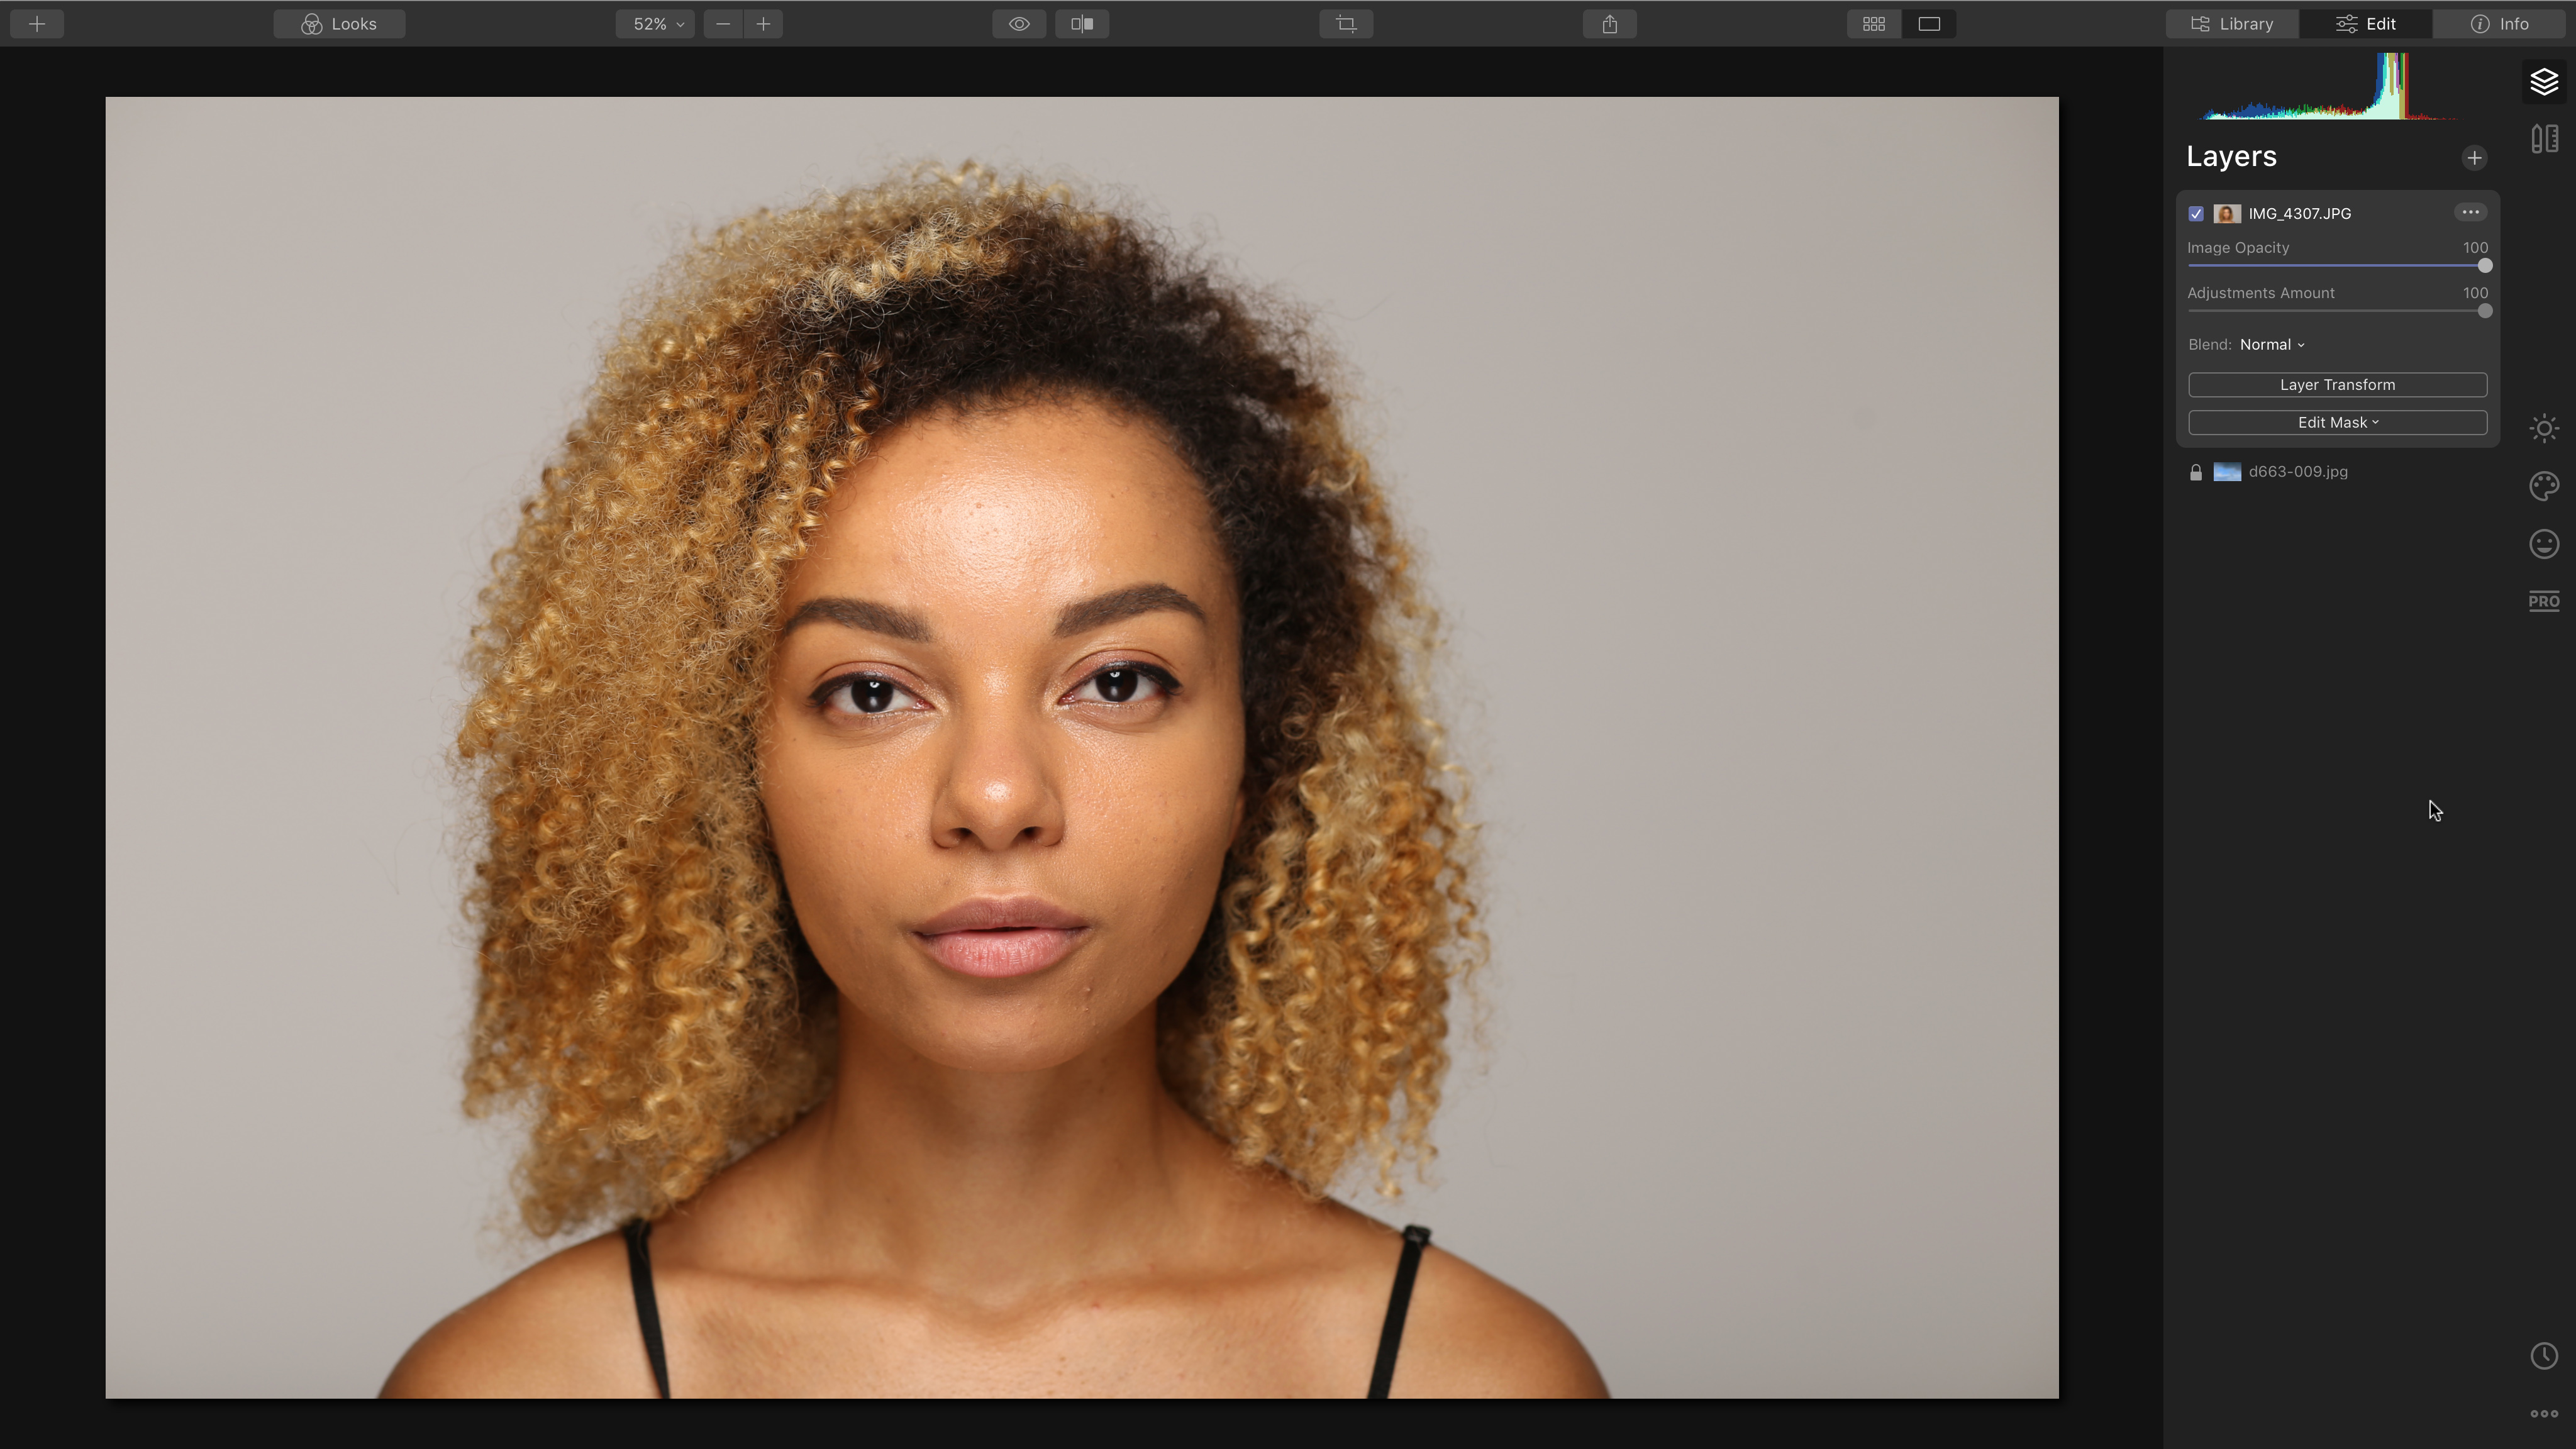
Luminar prompts you to choose an image on your computer, and adds it as a new Layer. You don’t need to worry about resizing a new image to fit the current background: Luminar does this for you. By default, any new Image Layer will completely cover up the Layers below, so what we see right now is just our imported portrait image.
5. Try different Blending Modes
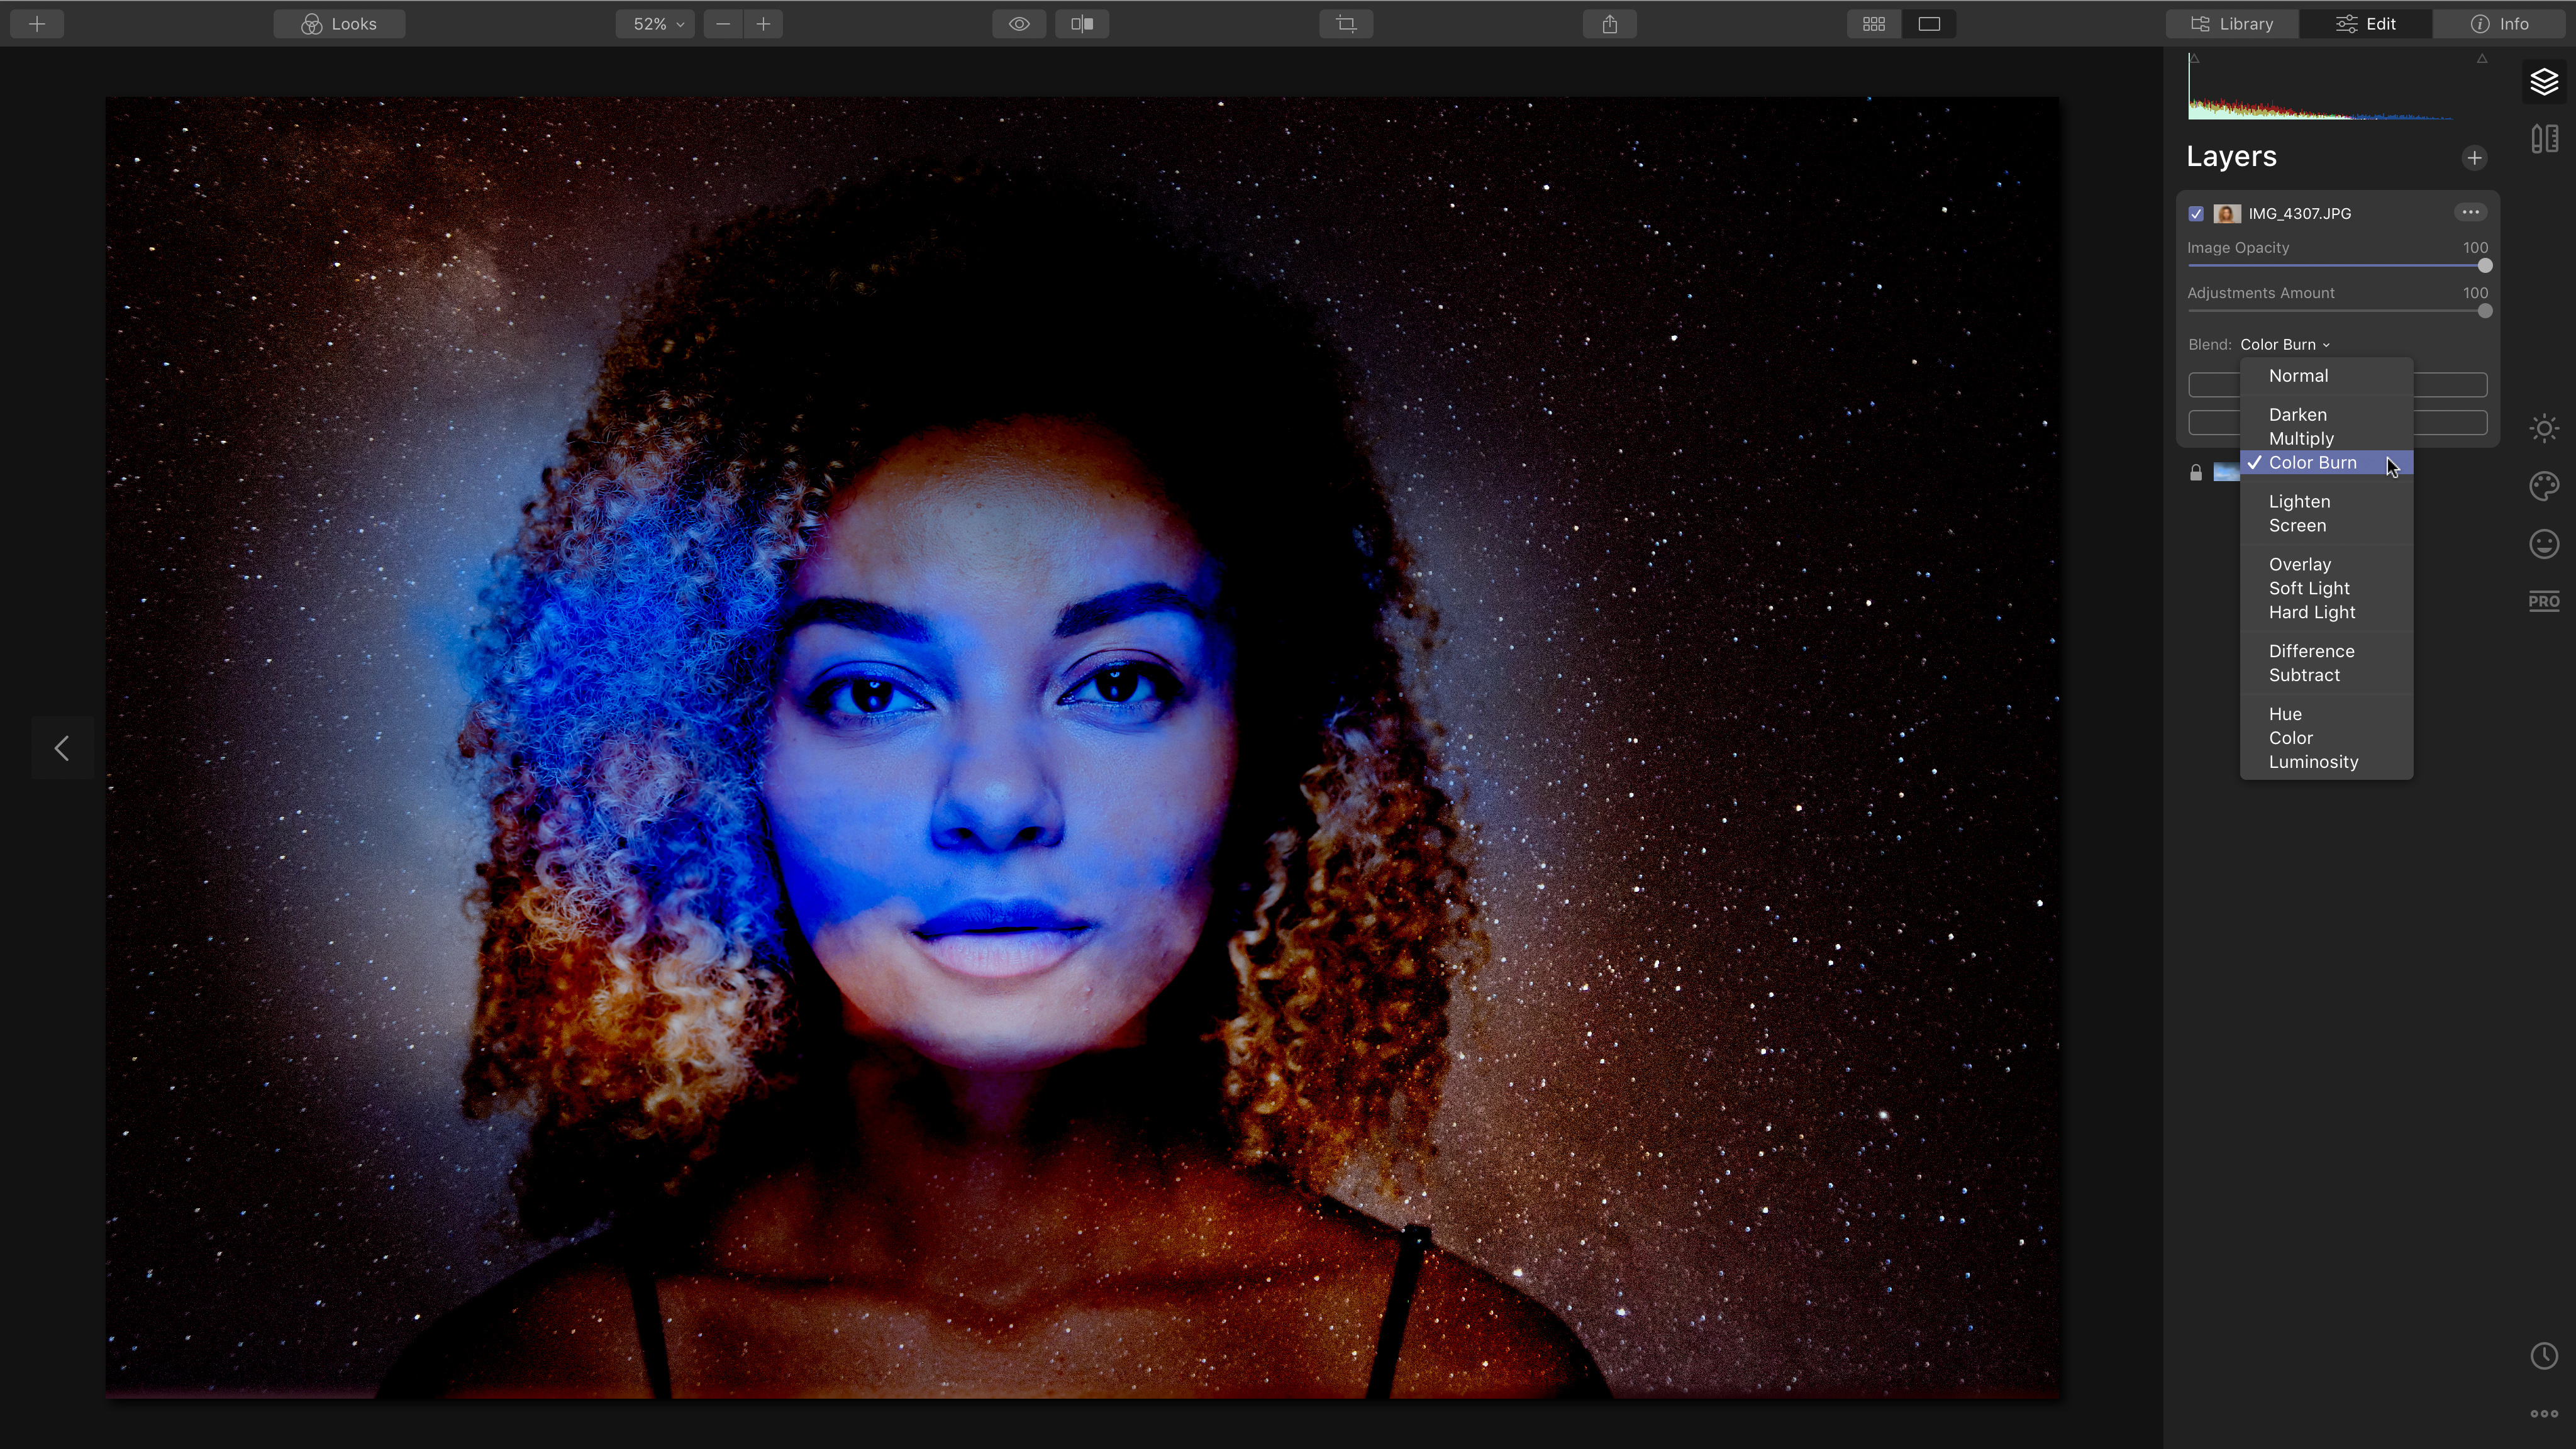
You can mask Layers in just the same way you can filters, but for now all we’re going to do is open the Blend menu and choose Color Burn. Blending Modes change the way the pixels in the image Layer interact with those in the Layer below, and you’ll find them in just about any photo editing program that offers Layers. The Color Burn mode in Luminar is one of the strongest, and gives our picture just the effect we’re looking for.

Explained: Adjustment Layers and Looks
Combine more than one Look to create original effects easily
Luminar’s Looks are like ready-made sets of adjustments. You can edit the filters individually, but if you use them on Adjustment Layers you open up even more opportunities.
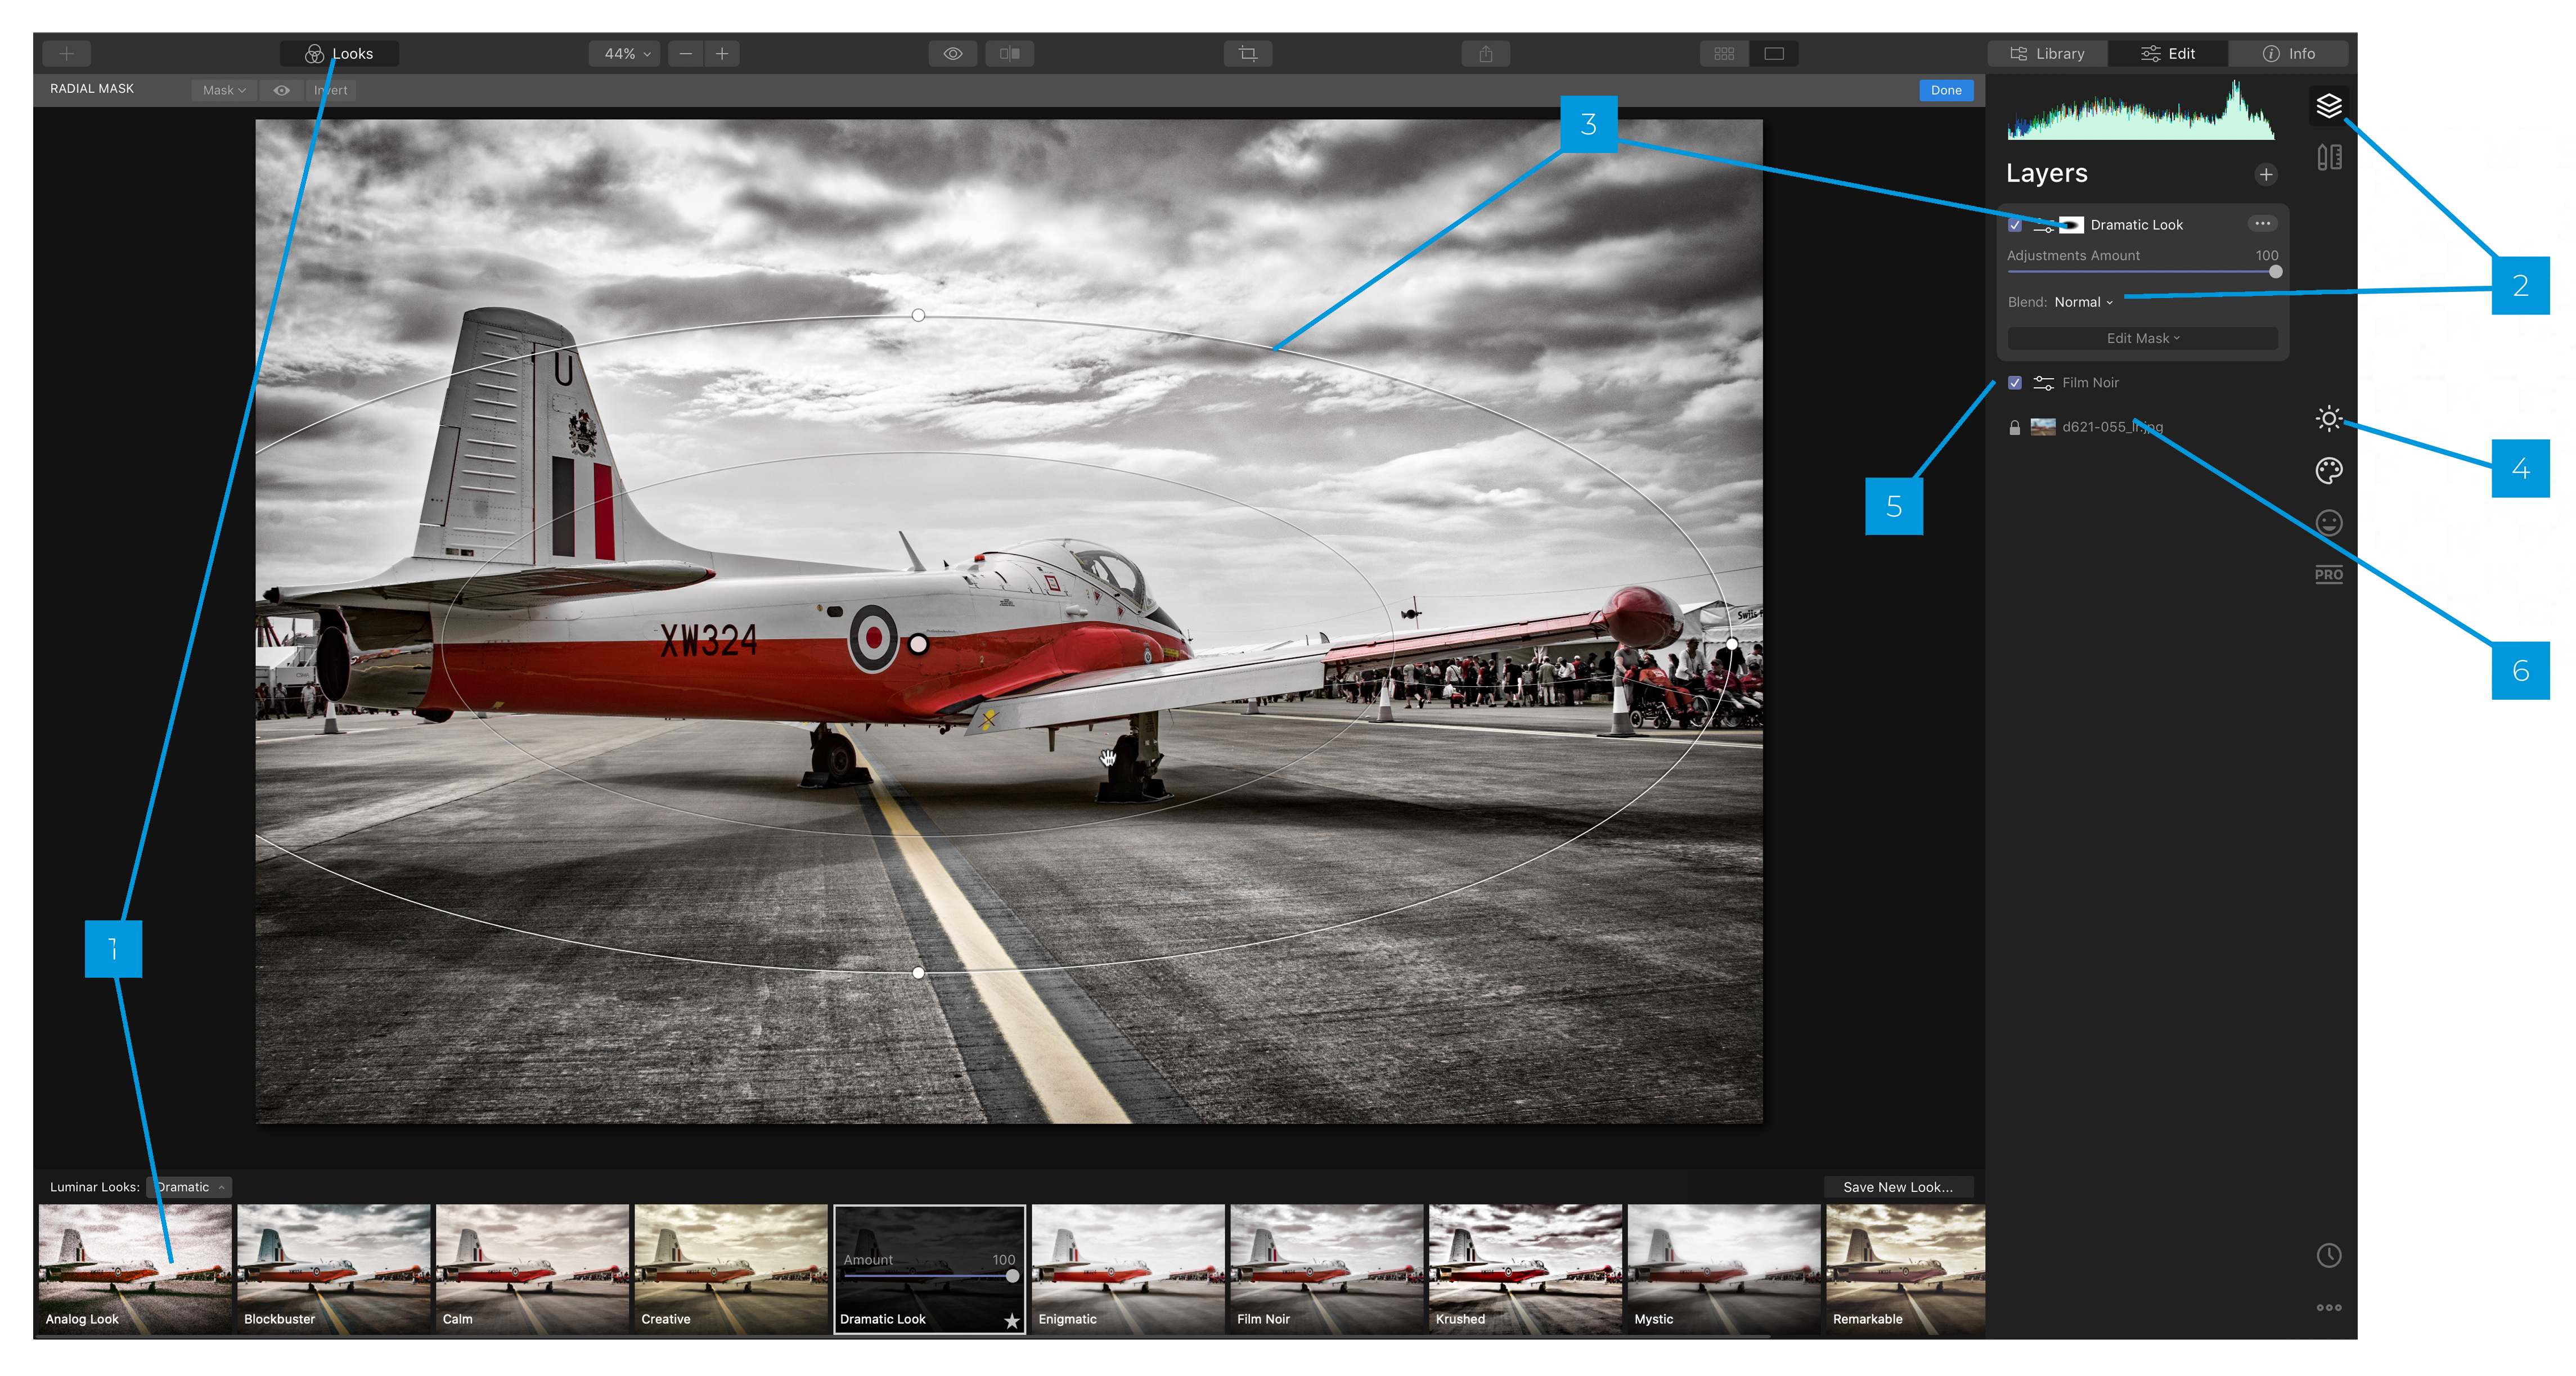
1. Looks button
Luminar’s Looks are organized into categories. Just click on a Look to apply it to your image.
2. Apply a Look
Here, we’ve applied a Look to an Adjustment Layer to give ourselves more control. Click the Layers button, top right, to show the Layers panel.
3. Add a Mask
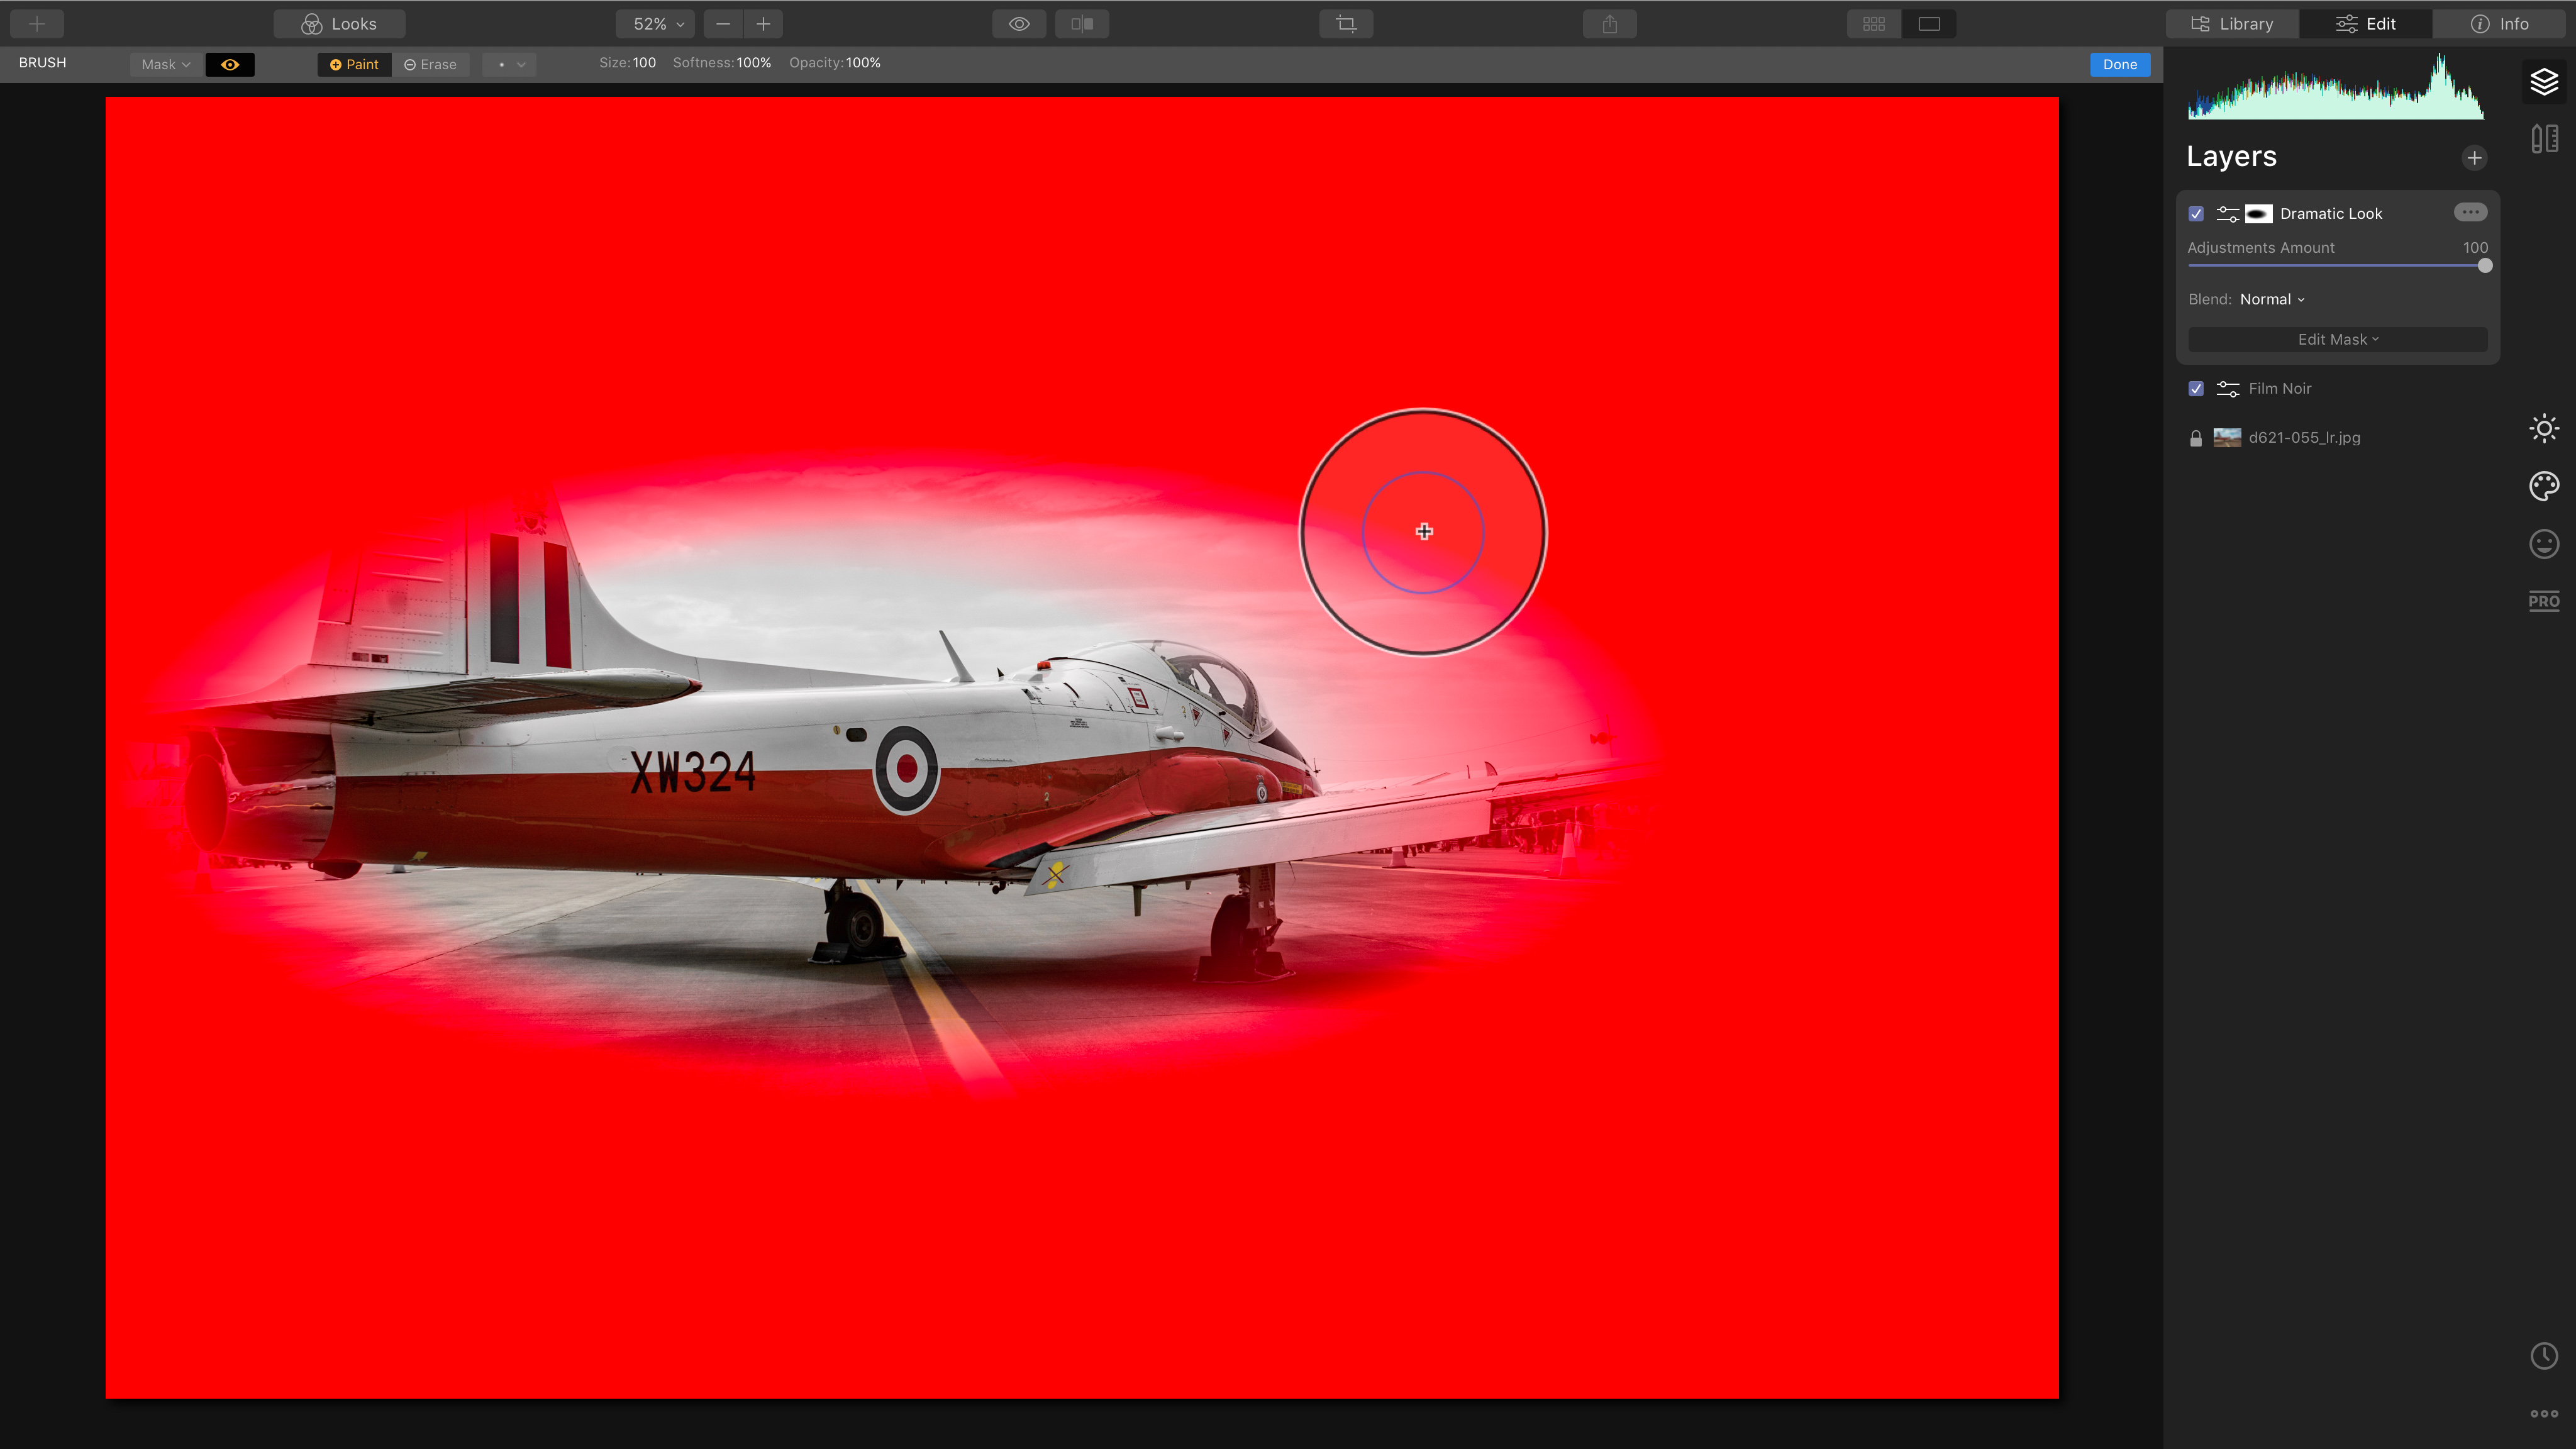
When you add a Look to an Adjustment Layer, you can then use the blending and masking options. Here, we’ve used a Radial Mask to suppress the Dramatic Look Layer in the centre of the image.
4. Adjust a Look
When you add a Look as an Adjustment Layer, you can edit all the filters and settings used to create that Look in the usual way if you need to.
5. Stack Looks
Our effect uses two Looks stacked on top of each other as two Adjustment Layers. You can rename Layers to remember what they do.
6. Base Layer
Our original photo is on the base Layer. You can apply Looks directly to this Layer, but we’ve used Adjustment Layers for greater flexibility.

Three great effects with layered Looks
Here are more images we’ve created with Layers and Looks
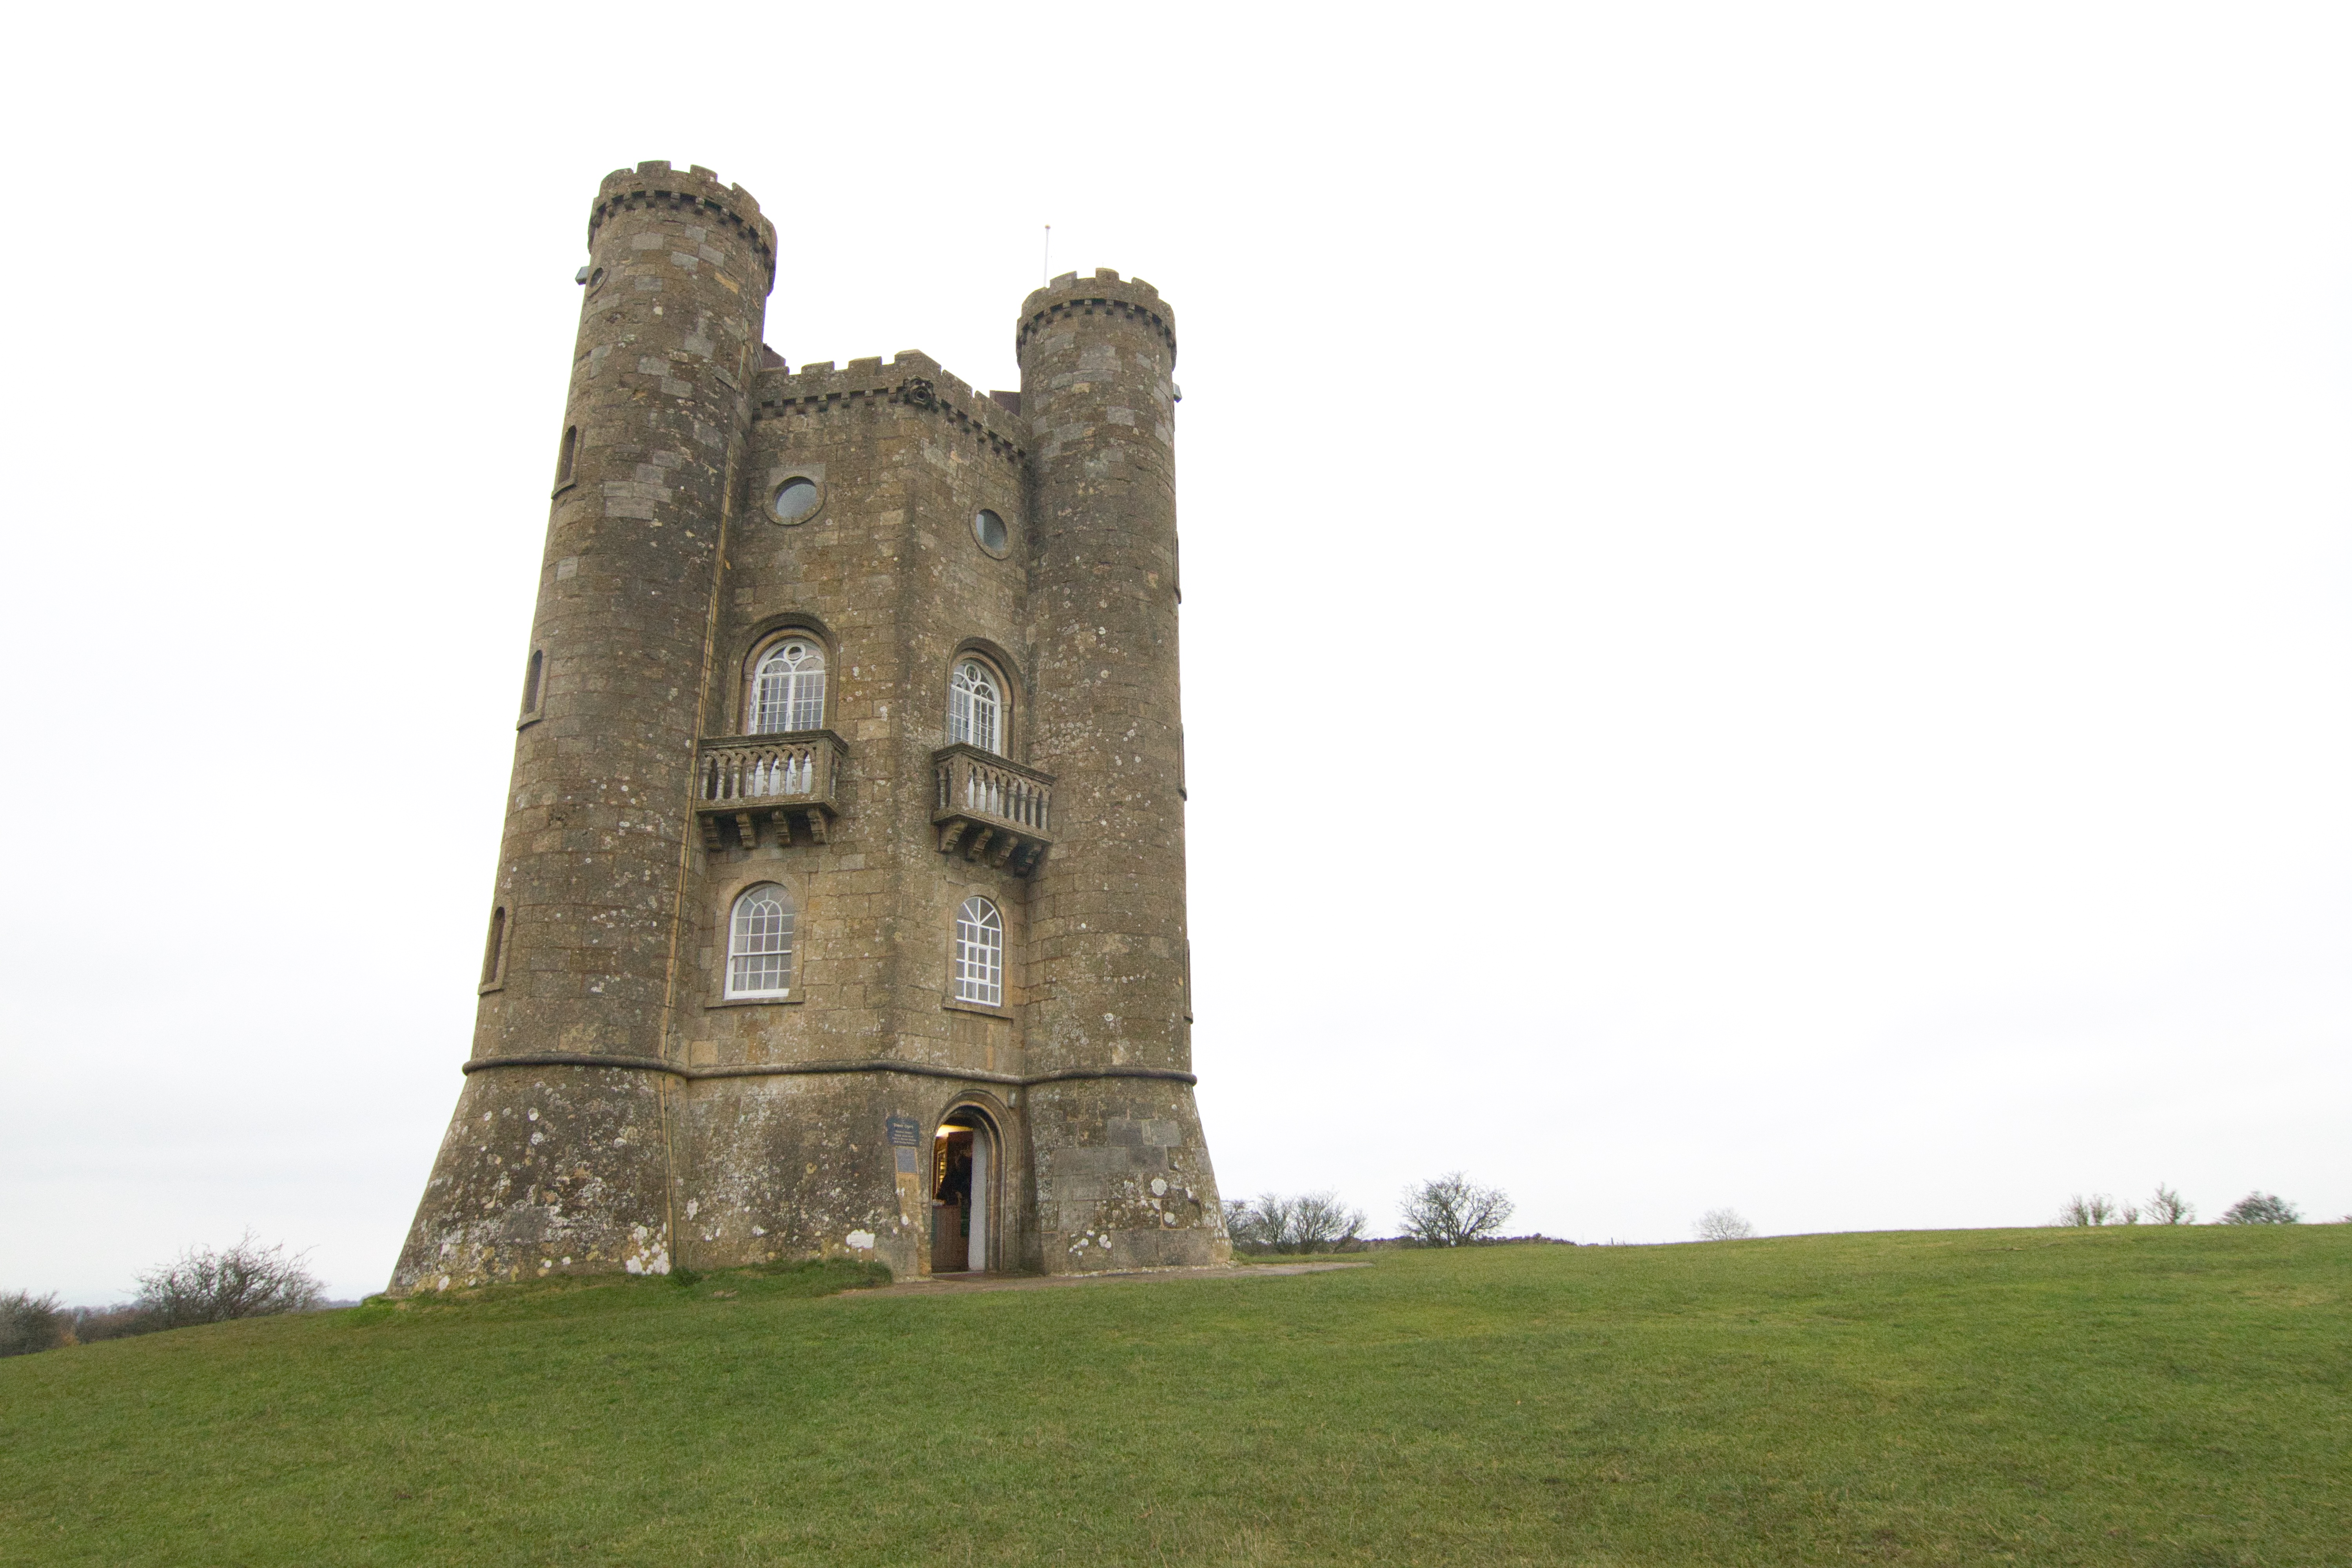
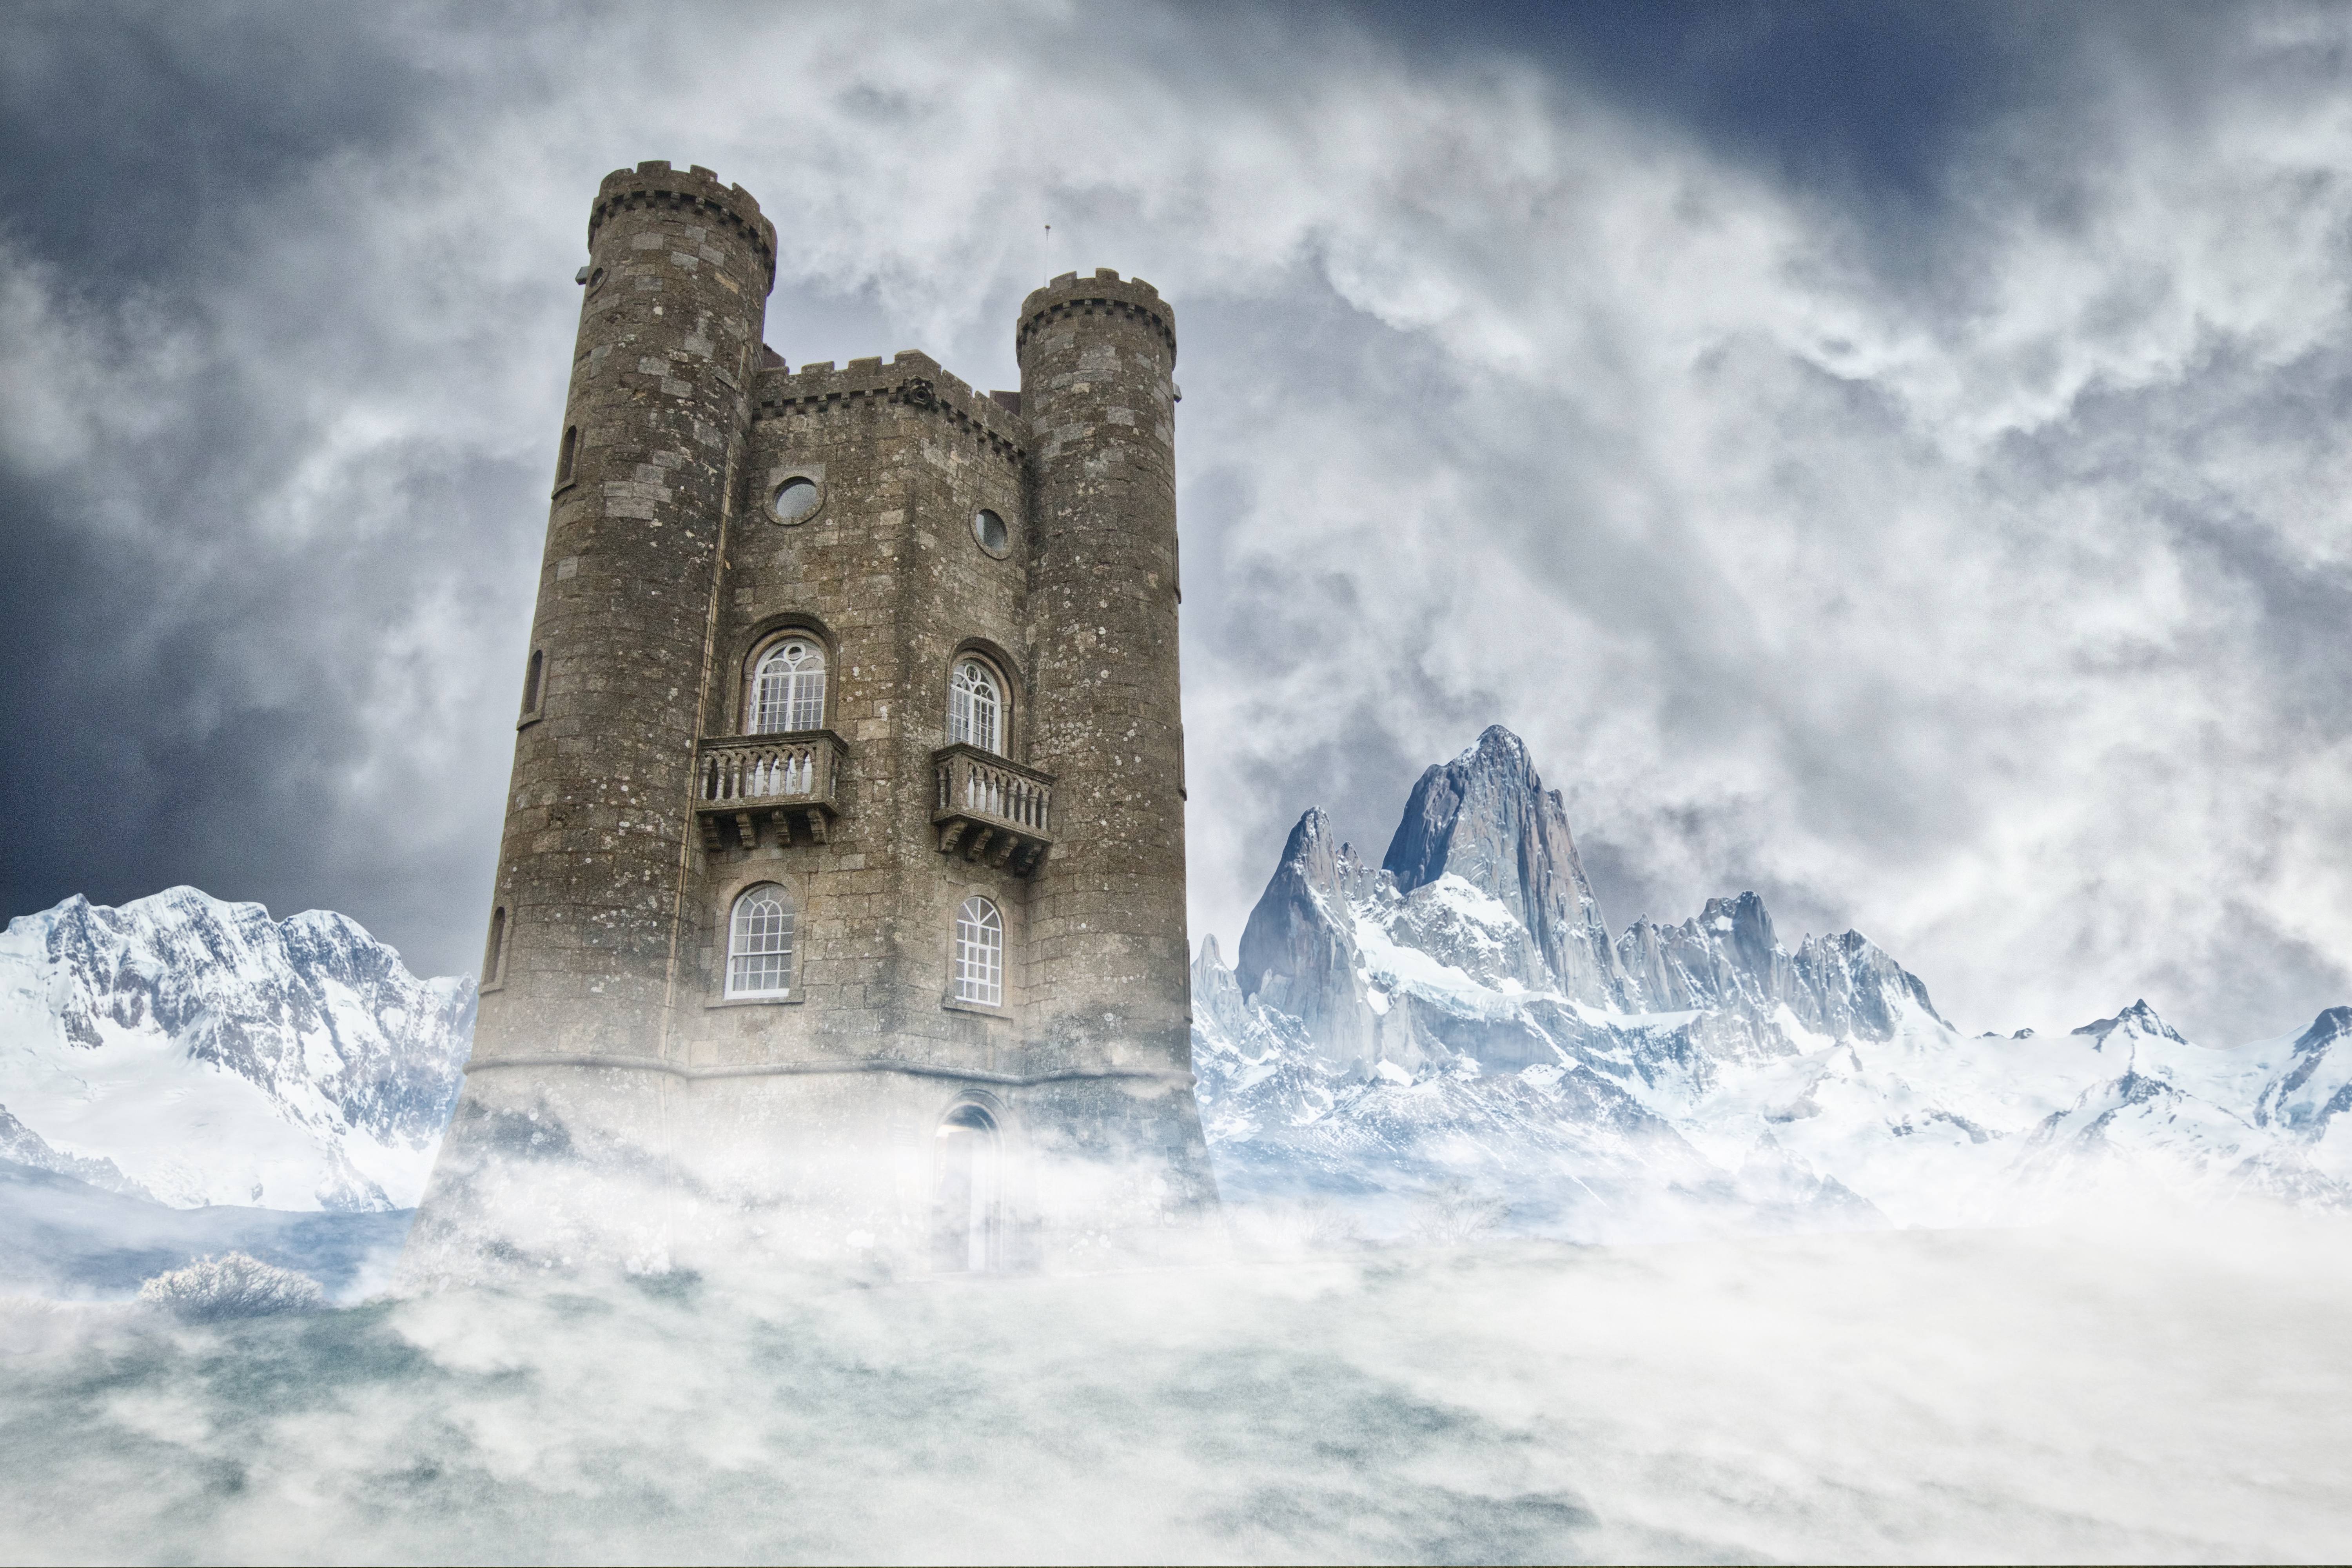
Surreal snow scene
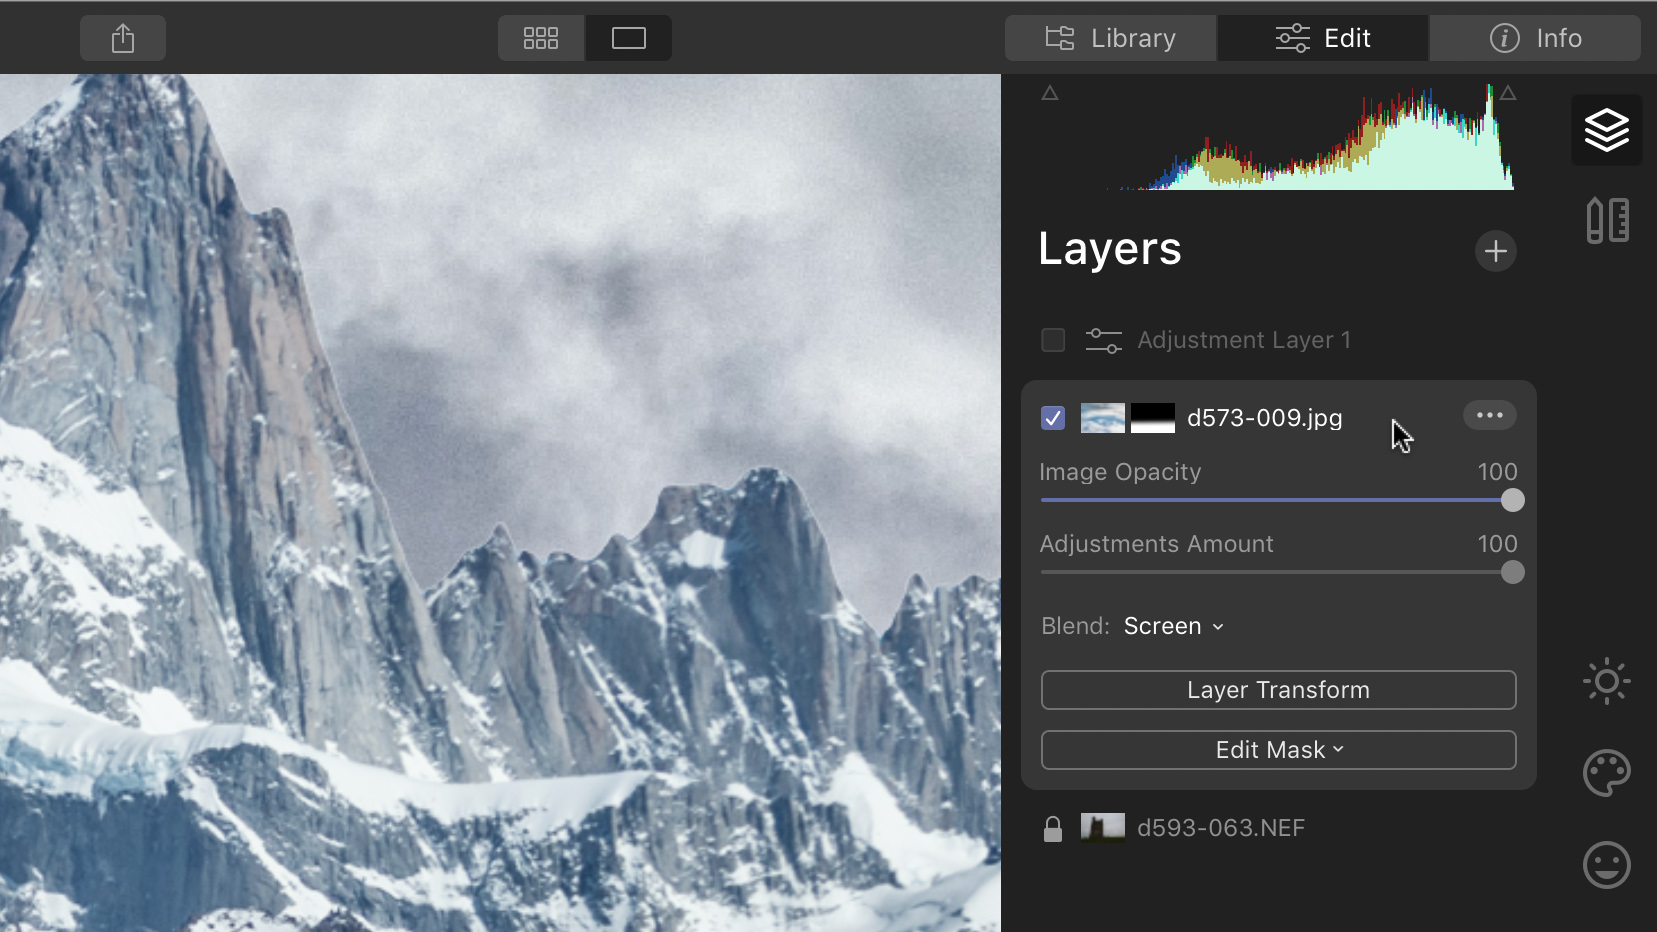
This surreal scene was created by adding mountains and a new sky with the AI Augmented Sky tool and the AI Sky Replacement tools, then adding a new sky as an Image Layer. This was blended in using the Screen mode to create a misty overlay. Finally, a Gradient Mask restricted this to the base of the picture.


Stormy sky
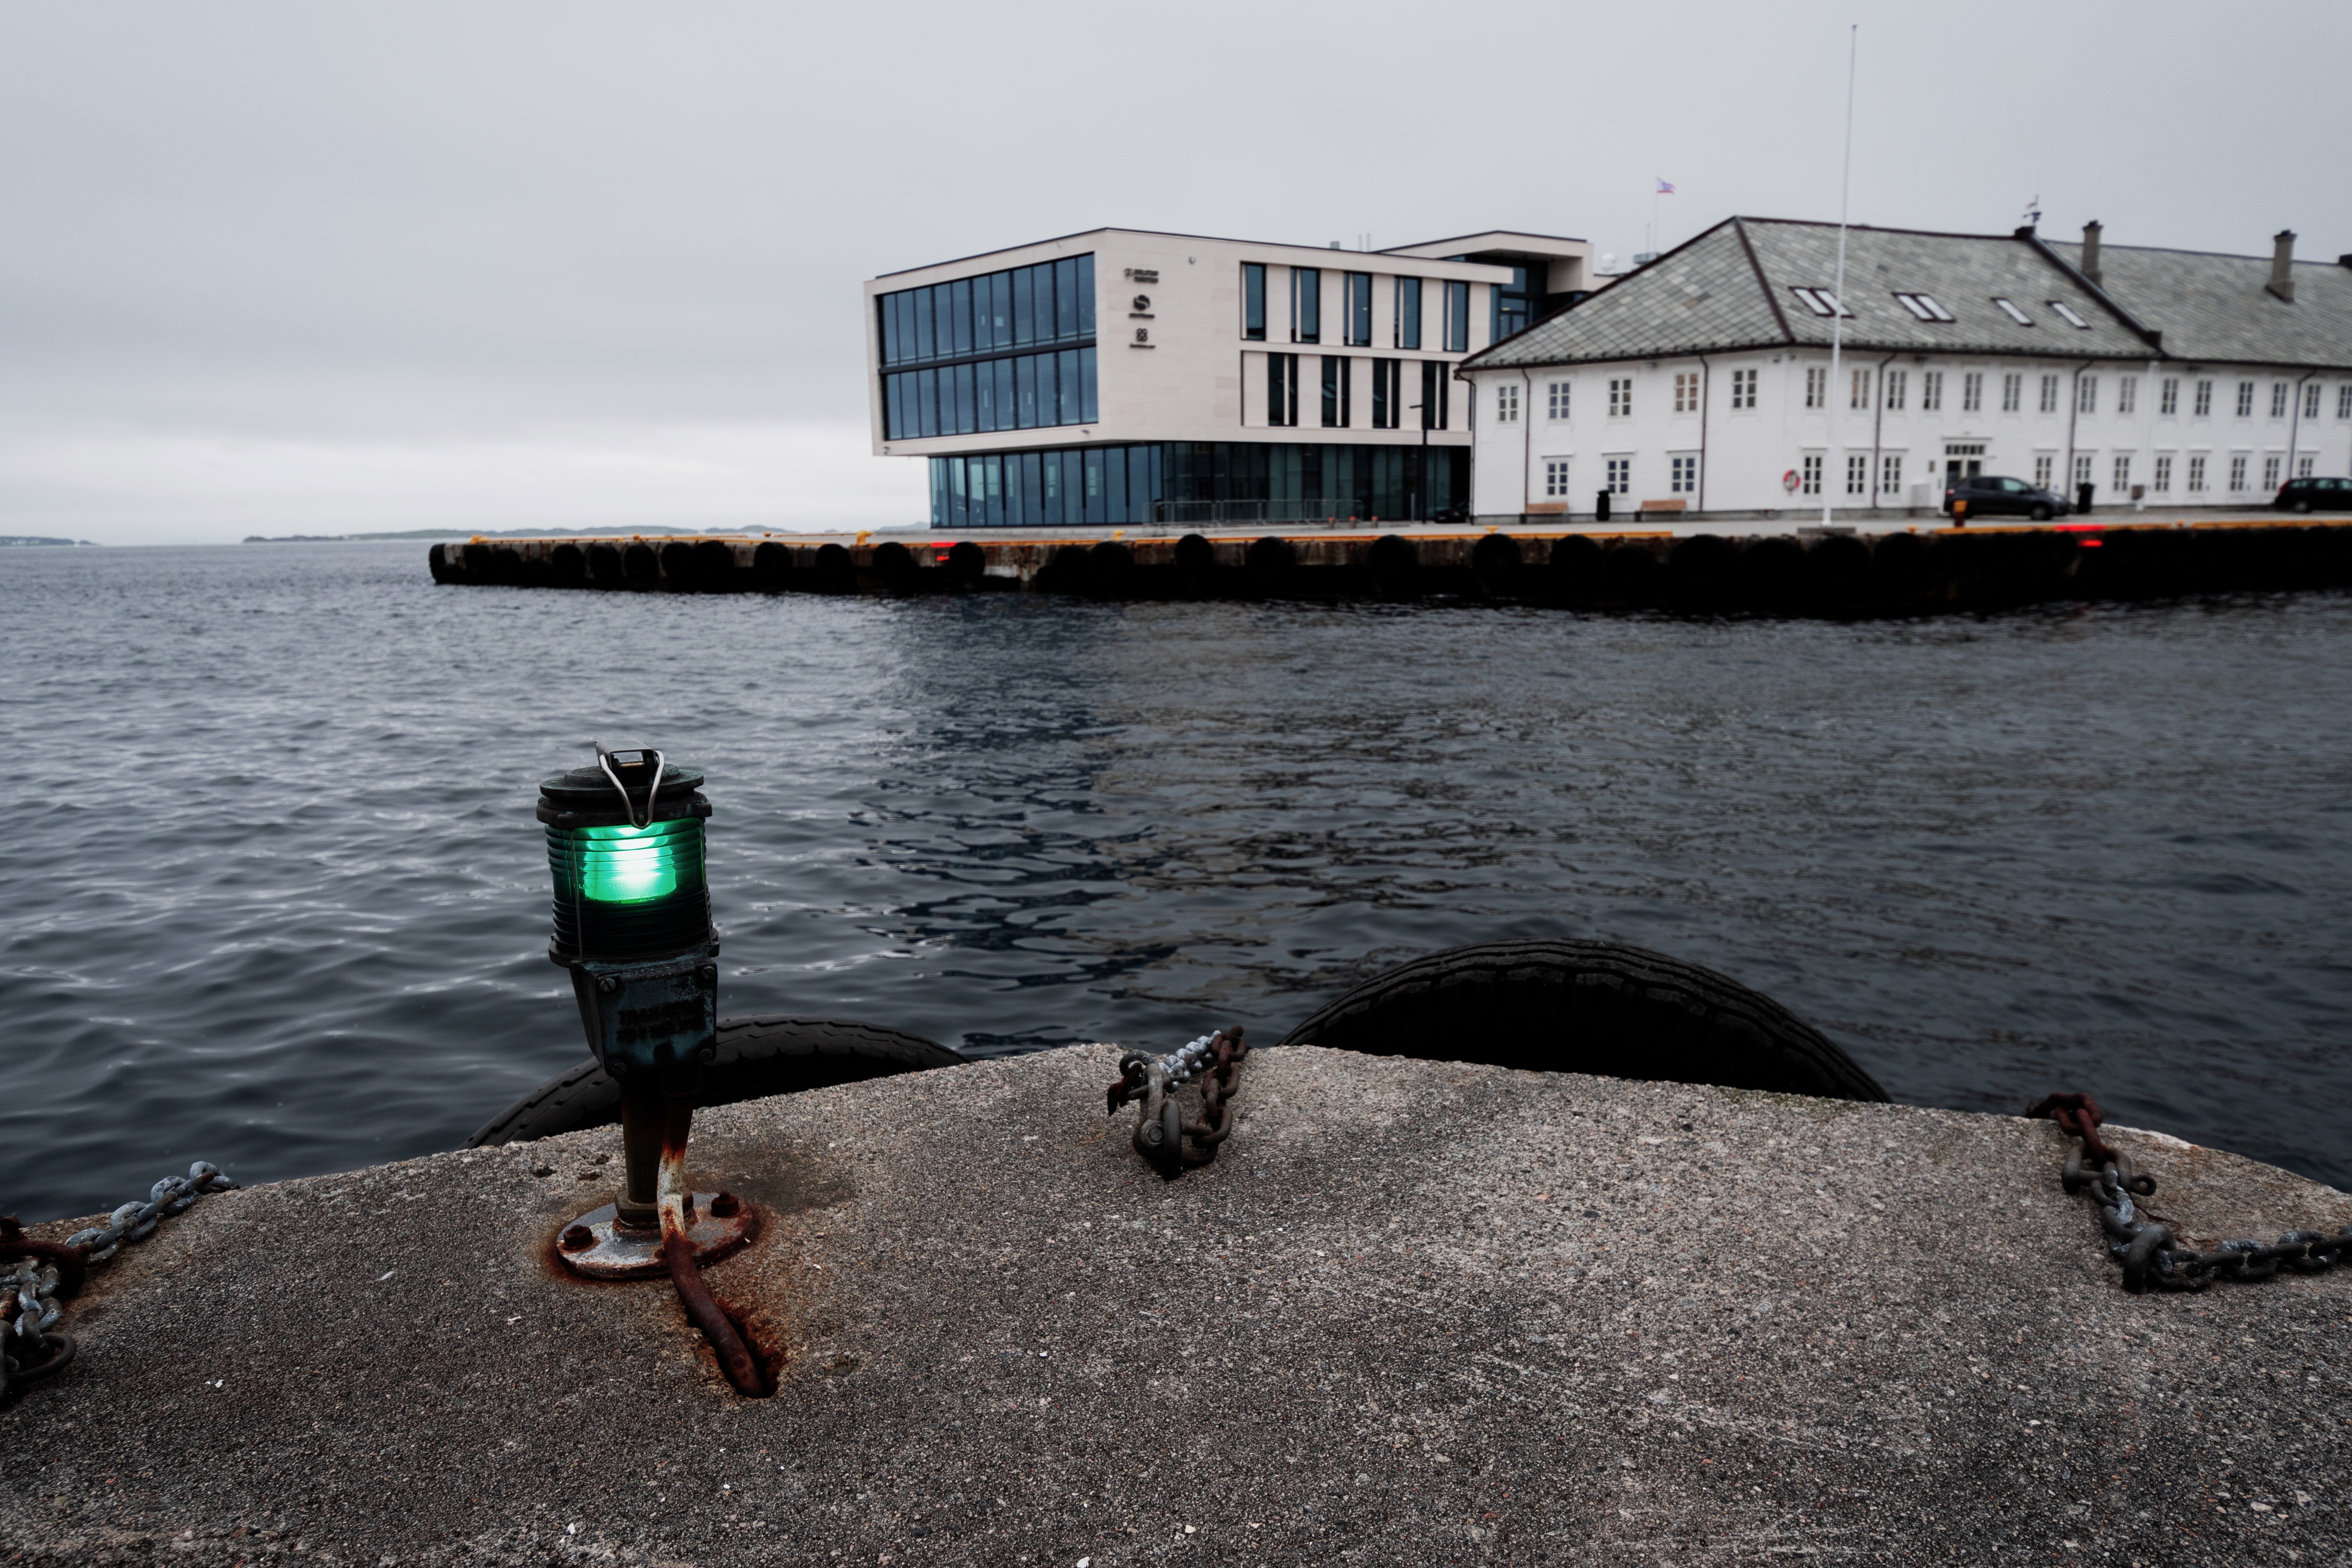
Looks and Layers can be used in more straightforward ways, too. Using Luminar’s Dramatic Look on an Adjustment Layer was a good start, but setting this Layer’s Blending Mode to Multiply gave the sky a really stormy look. Adding a Graduated Mask hid this effect from the foreground to keep it well-exposed.
Night from day
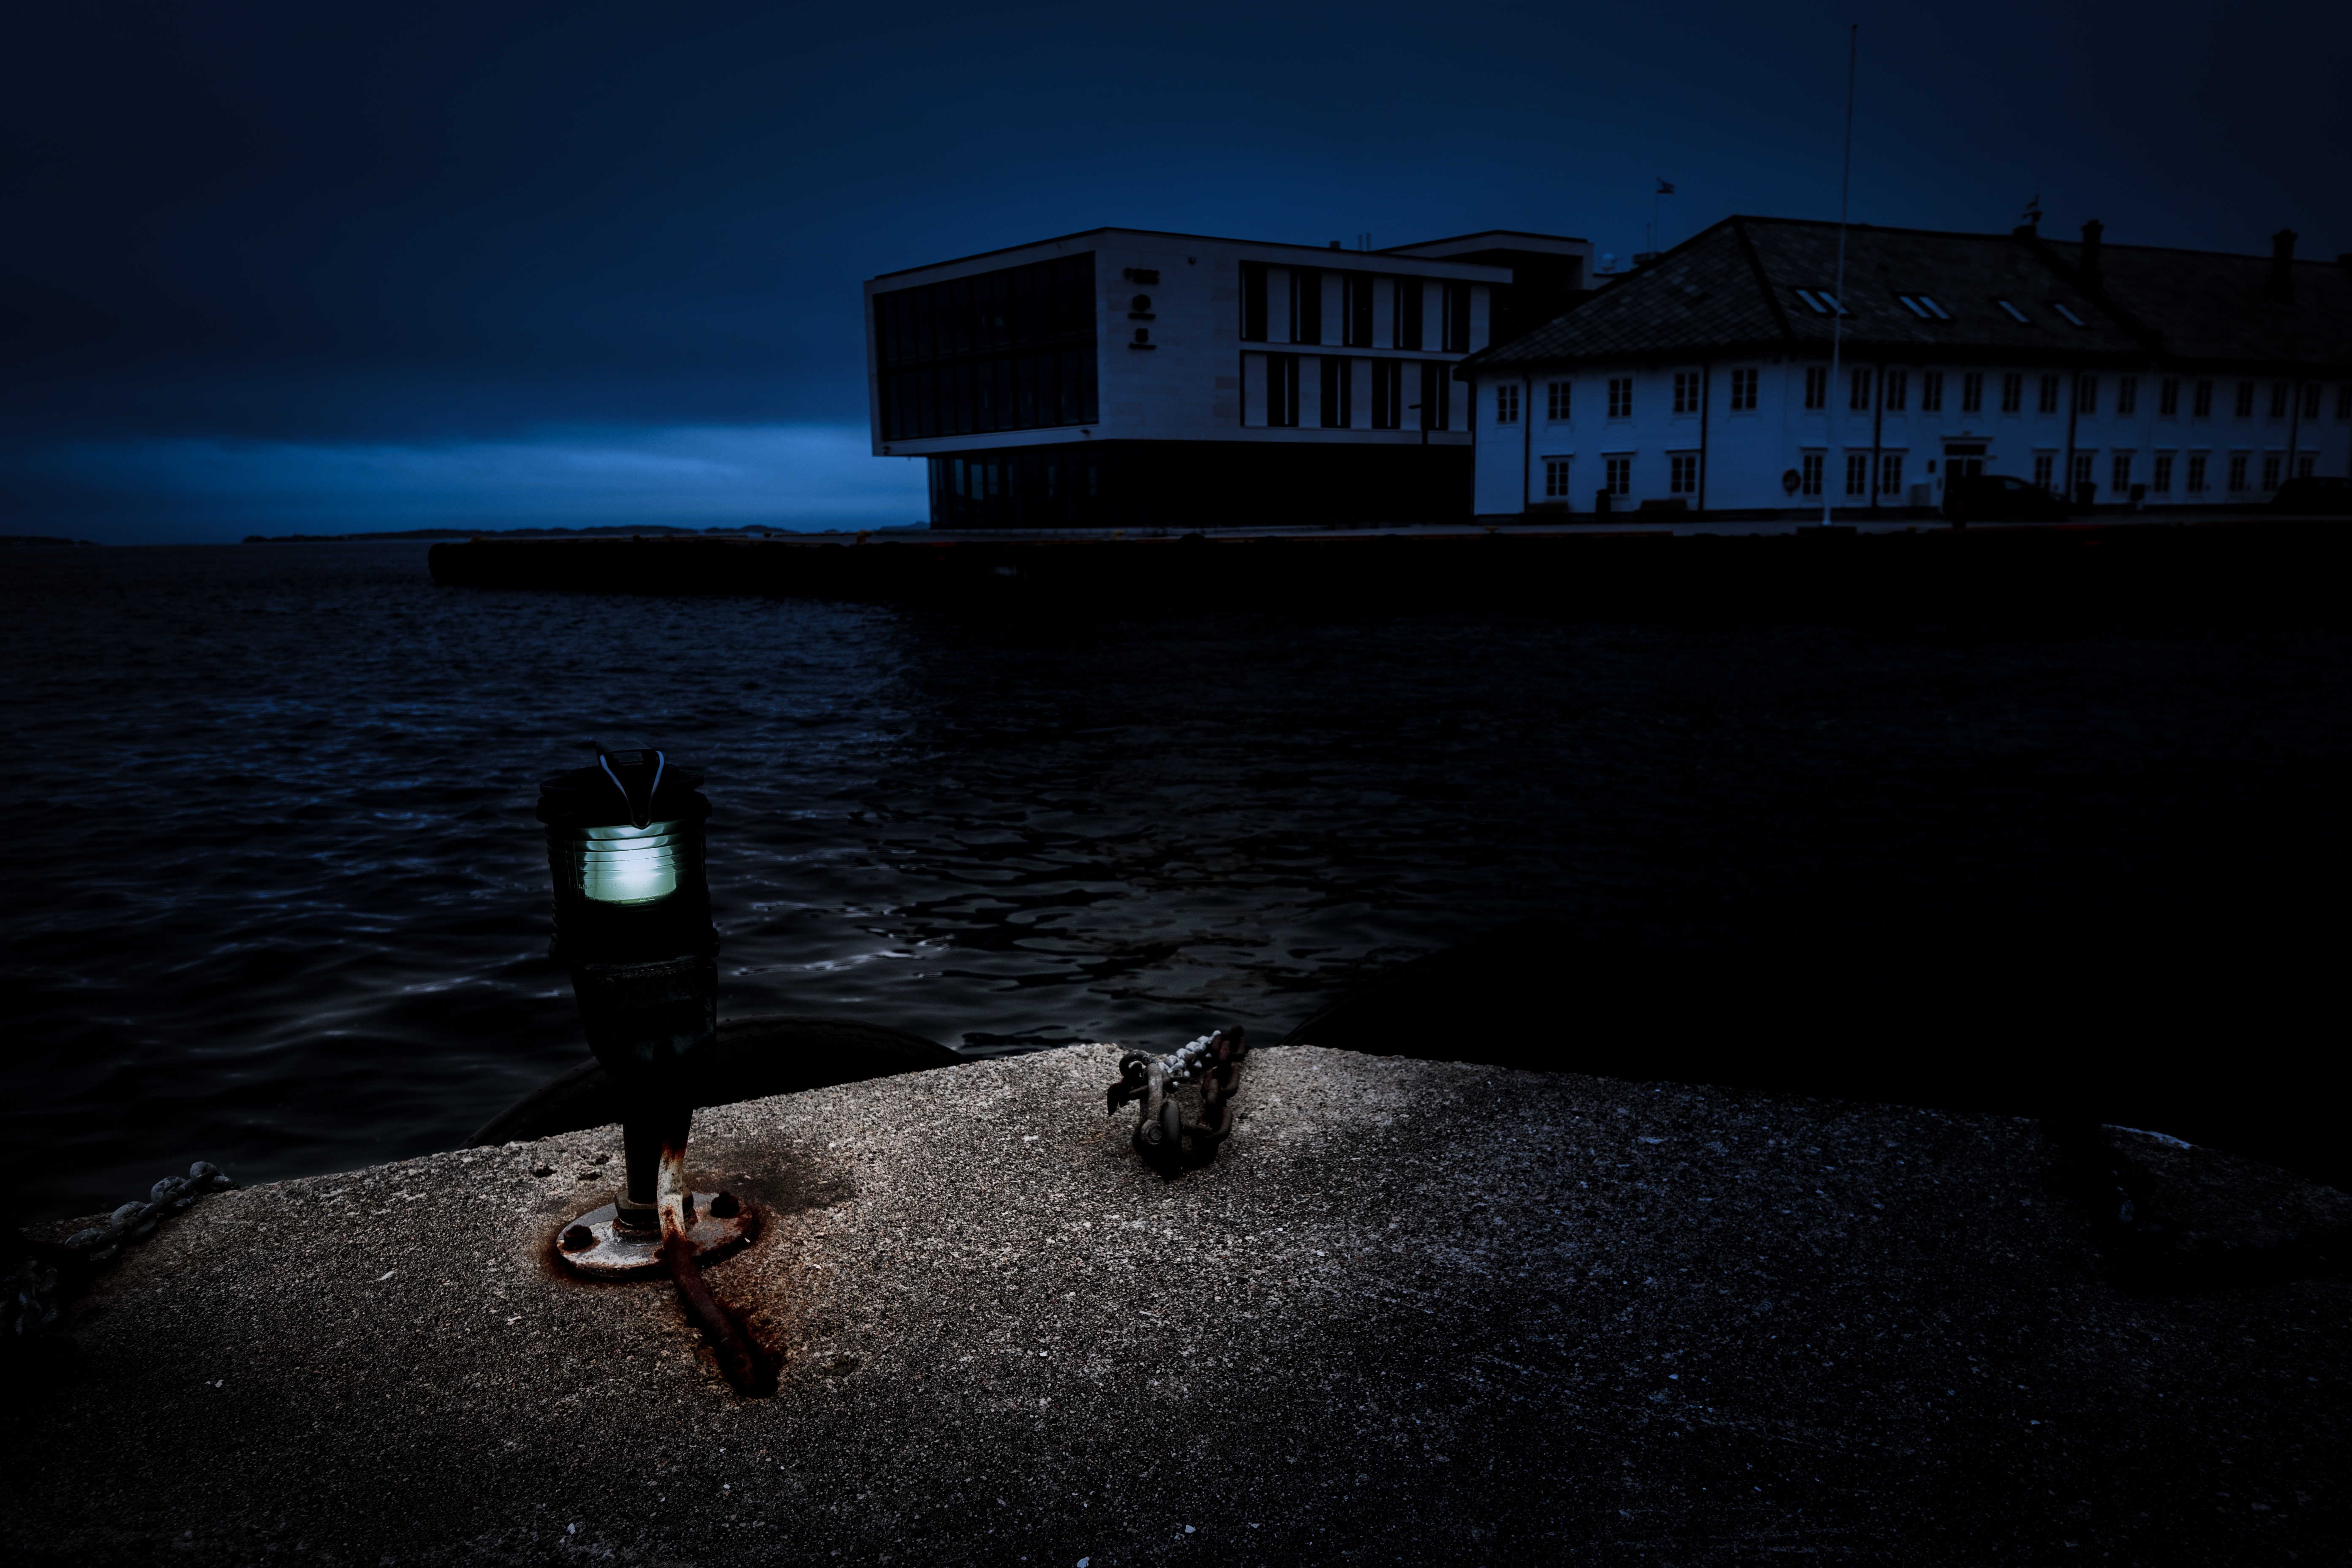
This picture was taken near dusk, but there was still too much ambient light. We used the Dark Moon Look on a new Adjustment Layer, then reduced the exposure and shifted the white balance. We used the Mask Brush to create a pool of light around the lamp in the foreground.

5 great tips for Looks and Layers
Luminar’s Looks, Layers and Masks offer all sorts of creative possibilities – so many, in fact, that sometimes it takes a little while to explore what they can do, or just to figure out what’s happening!
Here are some tips and pointers to help you get started with these powerful features in Luminar 4, and to learn how some of these options work in a little more depth. It’s also a chance to highlight some extra features that wouldn’t quite fit into our main guide, but can be very useful to know!
1. Be bold with Blending Modes
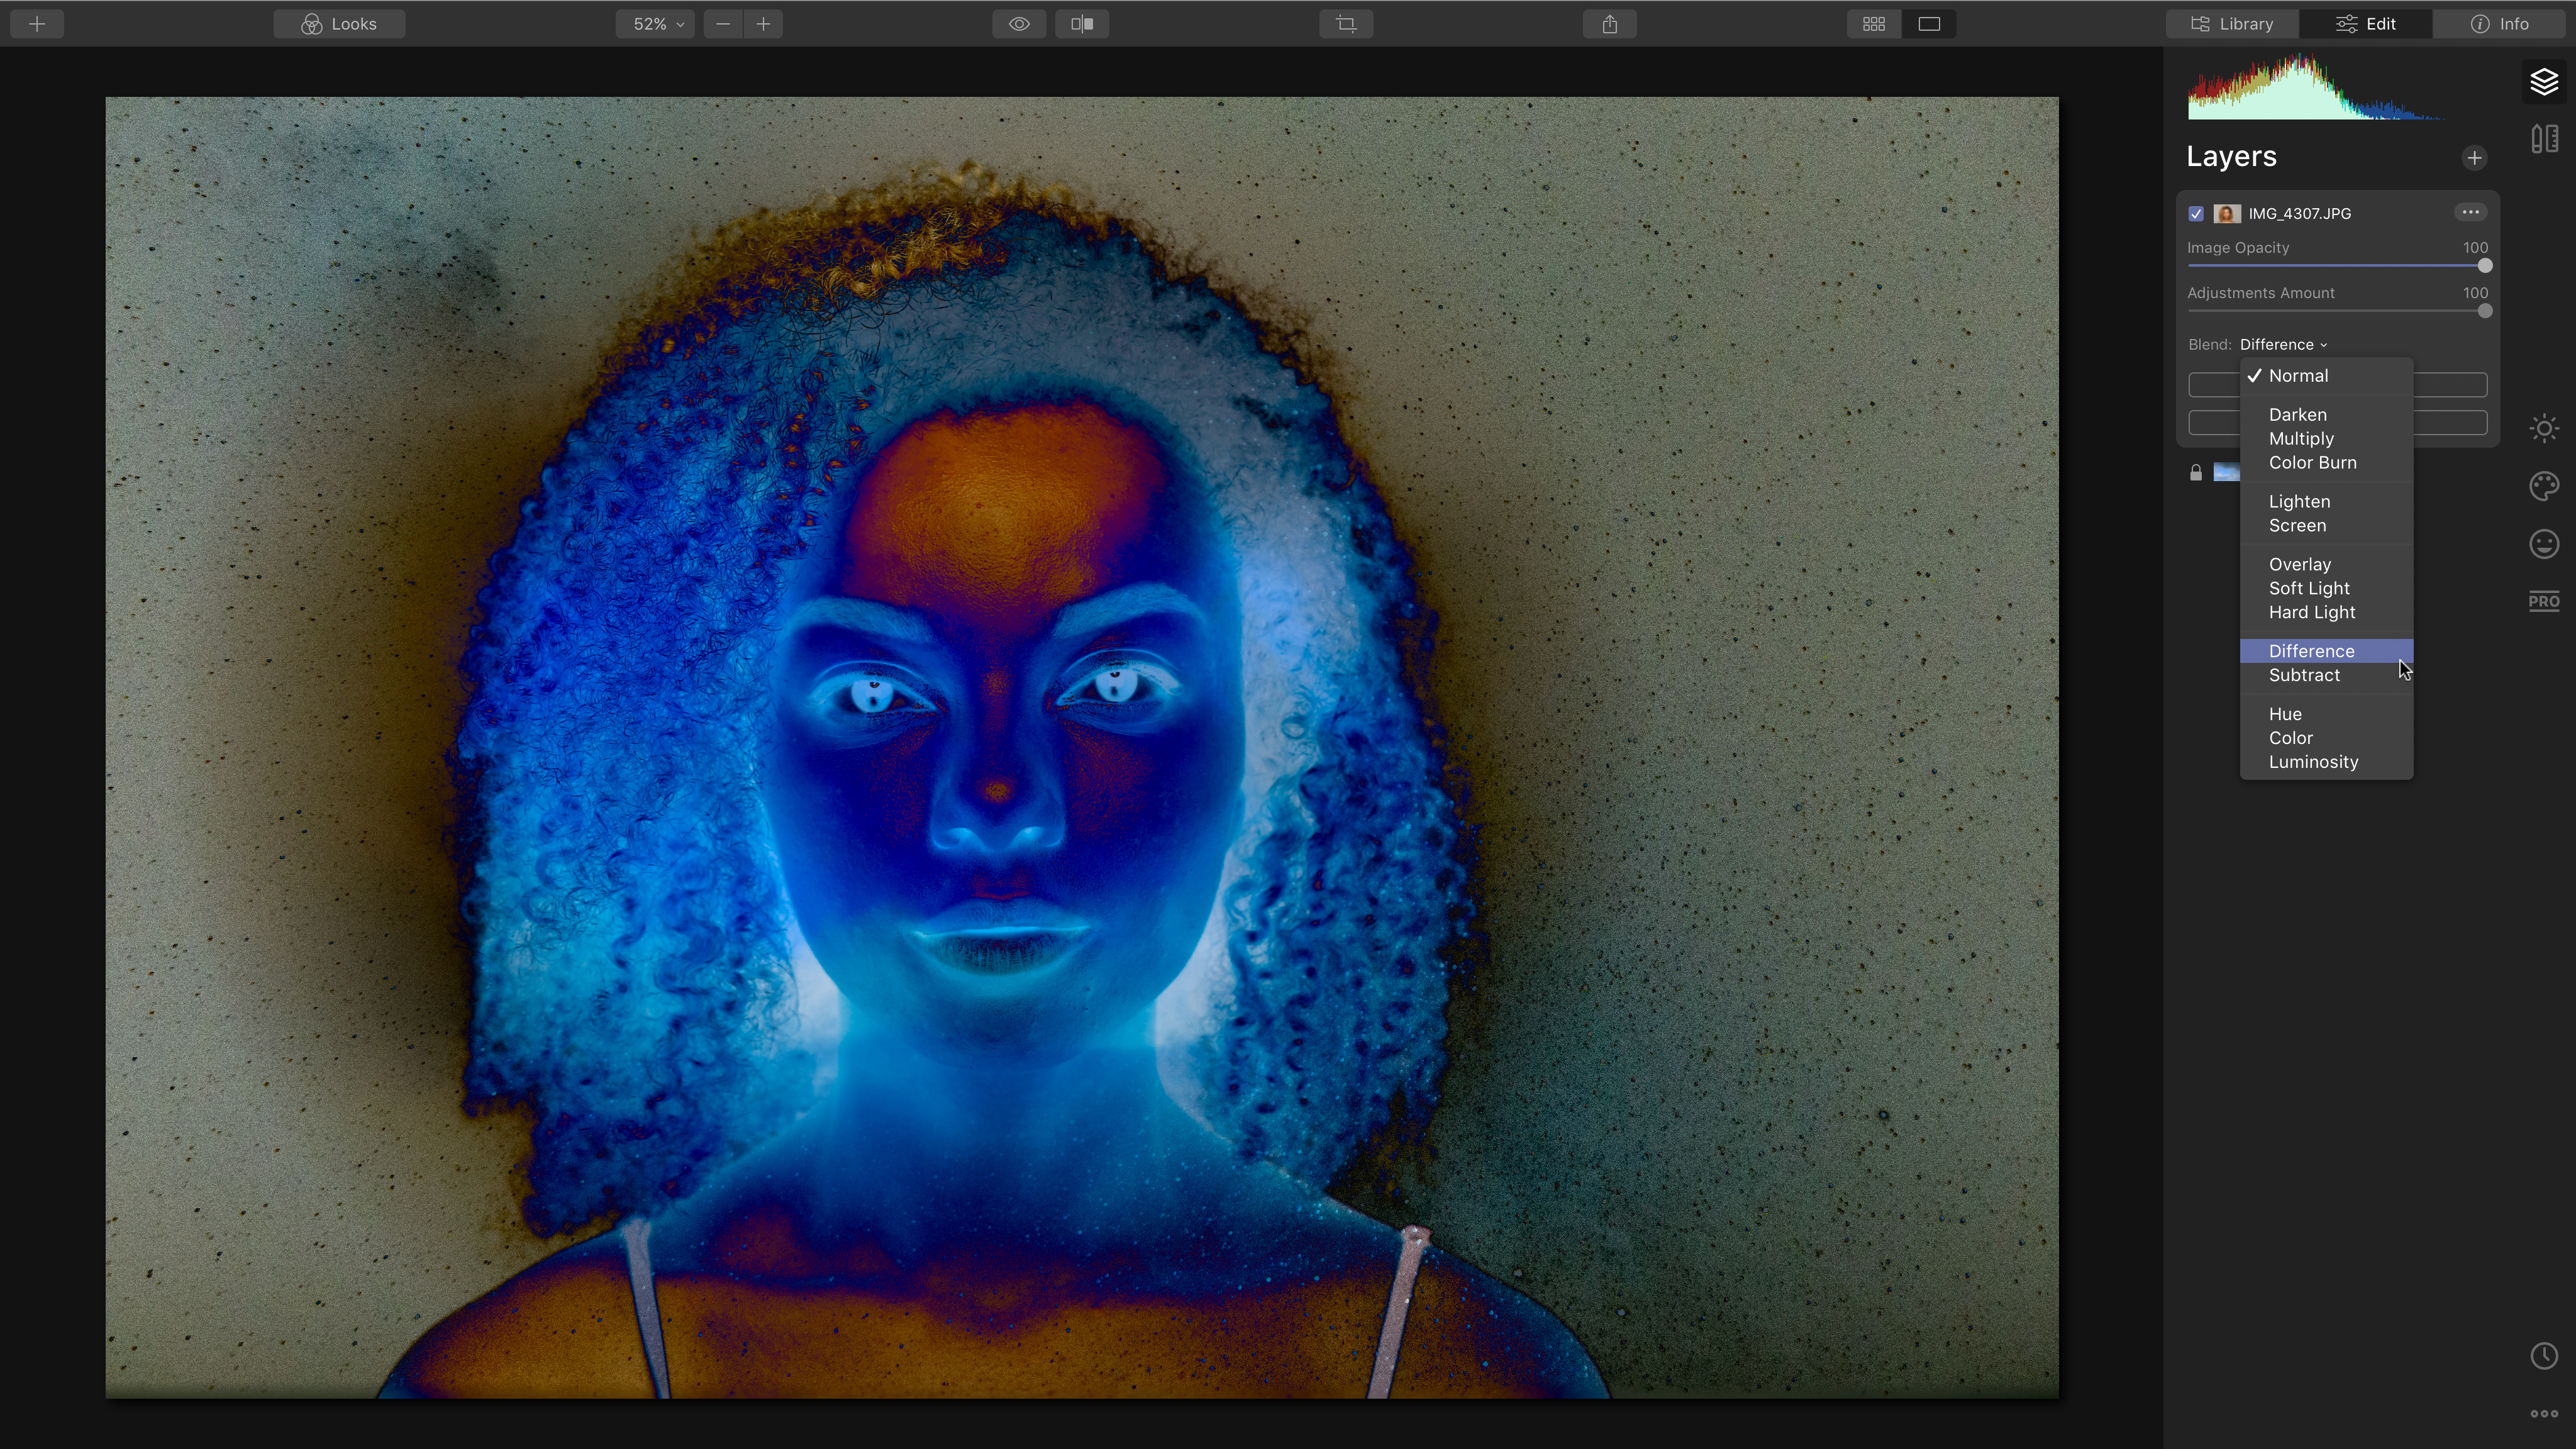
Some Blending Modes are predictable, but some, like Difference and Subtract, are pretty wild. You can always tone them down with the Layer’s Opacity setting or with Masks.
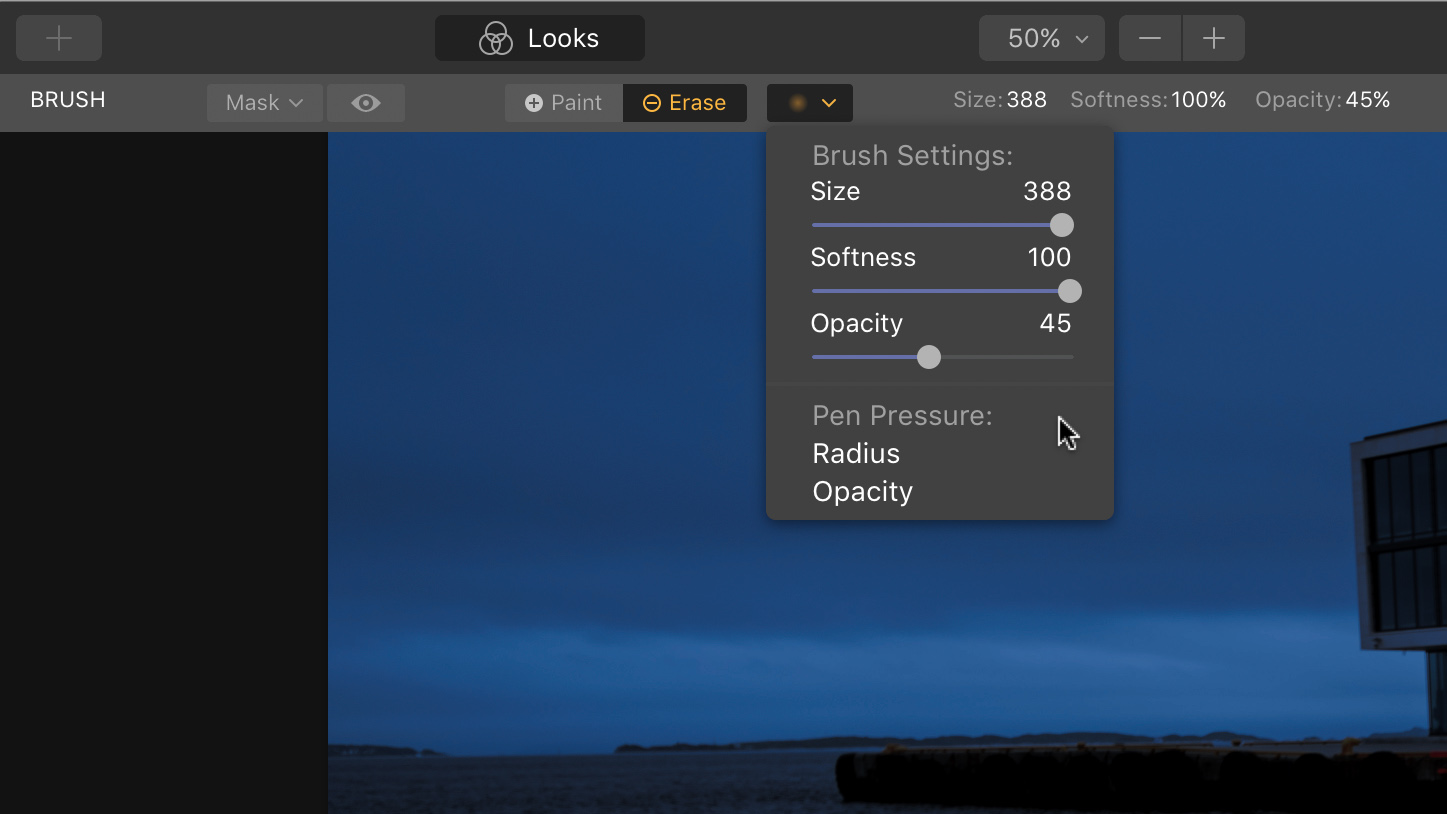
2. Mask Brush settings
Luminar’s Mask Brush enables you to apply careful manual blending. Use this drop-down menu in the masking mode to choose the brush size, softness and opacity, which is useful for building up a subtle effect.
3. Edit lower Layers
You can always re-edit any Layer in Luminar. If you select a Layer further down the stack, the Layers above it will be disabled while you work. When you’ve finished what you need to do, re-enable any hidden Layers.
5. Layer menu
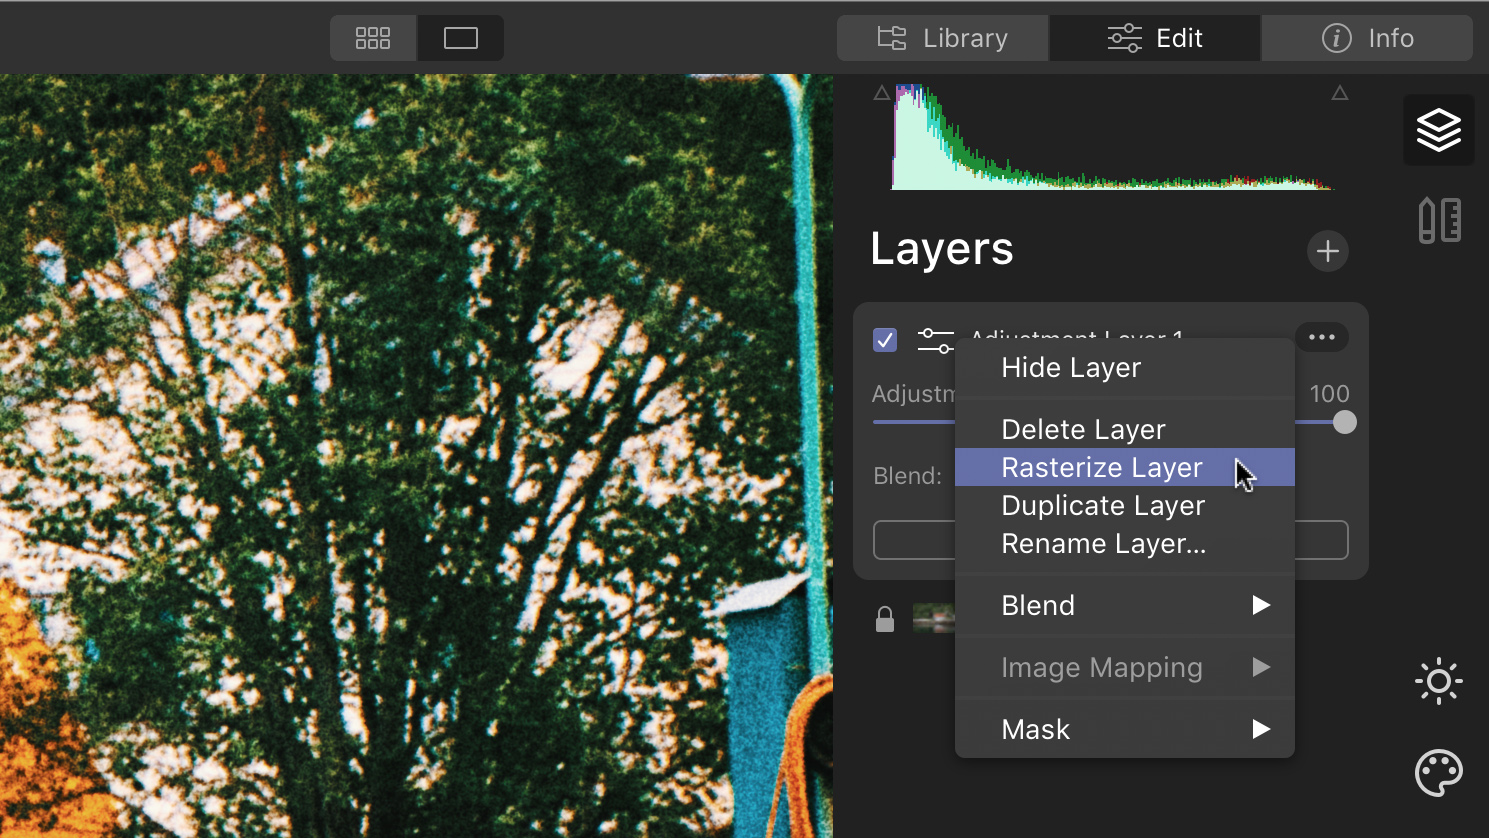
There’s a ‘three-dot’ menu button to the right of every Layer, which has some useful options. For example, you can duplicate an Image Layer to blend a normal version with one that uses a Blending Mode.
5. See your Masks
When you’re in Mask editing mode, the ‘eye’ icon in the top toolbar can display your Mask as a red overlay. This can be useful for spotting any areas that might need
a bit of touching up.

How to get a copy of Skylum Luminar 4
If you don’t have Luminar 4 already, you can download a free 7-day trial from the Skylum website. It’s available in both macOS and Windows versions and as all the features are fully functional, you can follow this tutorial yourself. If you decide to go ahead and buy Luminar 4, you can use the exclusive discount code DCW20 to save £10 / $10 on the full purchase price.
Visit skylum.com to learn more.
The best camera deals, reviews, product advice, and unmissable photography news, direct to your inbox!
Digital Camera World is one of the leading authorities on camera and photography news, reviews, techniques, tutorials, comparisons, deals and industry analysis. The site doesn't just specialize in cameras, but all aspects of photography, videography and imaging – including camera phones, gimbals, lenses, lighting, editing software, filters, tripods, laptops, printers, photo books, desks, binoculars and more.
Whether you're using, looking to buy or trying to get the most out of a compact camera, action camera, camera drone, cinema camera, beginner camera or professional camera, Digital Camera World has a roster of experts with combined experience of over 100 years when it comes to cameras, photography and imaging.
